
Project Git 'er done!: Stages 1, 2…now 3.
- Thread starter supraguy@aol
- Start date
You are using an out of date browser. It may not display this or other websites correctly.
You should upgrade or use an alternative browser.
You should upgrade or use an alternative browser.
Not much going on here. I've been out of town for the past few days.
Just decided on a place for my vac resevoir, and mounted it:
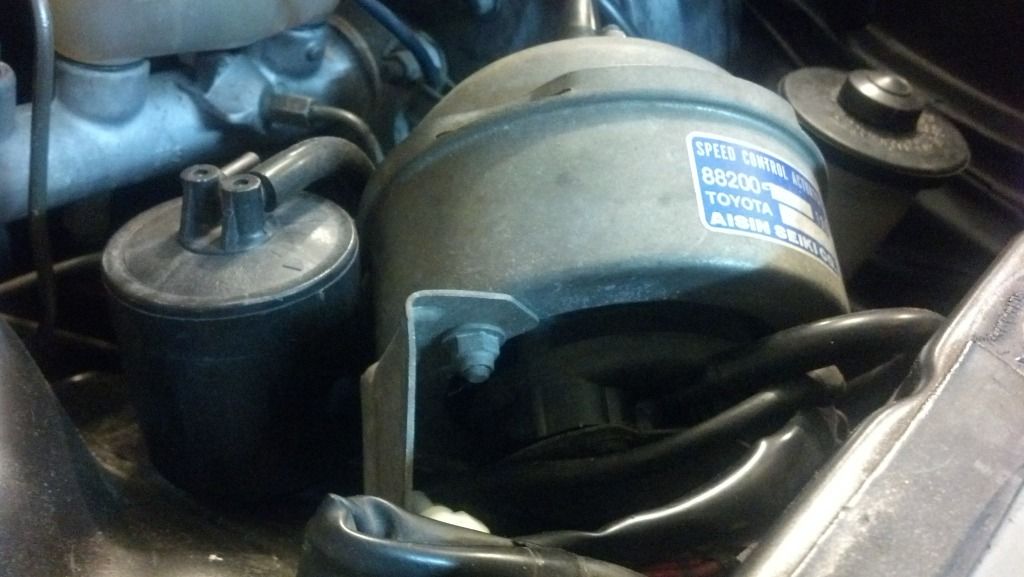
This will be used to assure proper vac pressure to the cruise control and HVAC valve.
The car was originally na, so it doesn't have the wiring to run the turbo cruise control vac pump.
Also, I used to notice that when I went into boost, the heater would get colder. Made me realize that the vac source to the heater valve wasn't good.
Just decided on a place for my vac resevoir, and mounted it:
This will be used to assure proper vac pressure to the cruise control and HVAC valve.
The car was originally na, so it doesn't have the wiring to run the turbo cruise control vac pump.
Also, I used to notice that when I went into boost, the heater would get colder. Made me realize that the vac source to the heater valve wasn't good.
My NA had the pump and a Reservoir stock..
Reservoir was bolted to the block under the intake and I kept it when I went Turbo.
Reservoir was bolted to the block under the intake and I kept it when I went Turbo.
FINALLY, a Supra hits the pull-a-part.
It was an '87 maroon na/auto with a grey interior.
Amazingly original car, too. Had all the factory parts, from the air filter and under belly pan, to the bolt-on chrome exhaust tips on the Futaba muffler.
Now, I've got to do some more cutting, then welding.
It was an '87 maroon na/auto with a grey interior.
Amazingly original car, too. Had all the factory parts, from the air filter and under belly pan, to the bolt-on chrome exhaust tips on the Futaba muffler.
Now, I've got to do some more cutting, then welding.
Thanks.
Got around to cutting out the original today. I marked about 1.5 inches lower on each and cut at that point.
At this point, the new one is in, and tacked every two inches. Problem is, I ran out of shielding gas, and the store is closed till monday, so...
Got around to cutting out the original today. I marked about 1.5 inches lower on each and cut at that point.
At this point, the new one is in, and tacked every two inches. Problem is, I ran out of shielding gas, and the store is closed till monday, so...
Well, it's ok. I was trying to get by using argon on mild steel, and it was causing crappy welds.
At least this forces me to get some proper CO2 or Co2 mix.
At least this forces me to get some proper CO2 or Co2 mix.
Didn't get time to do much today.
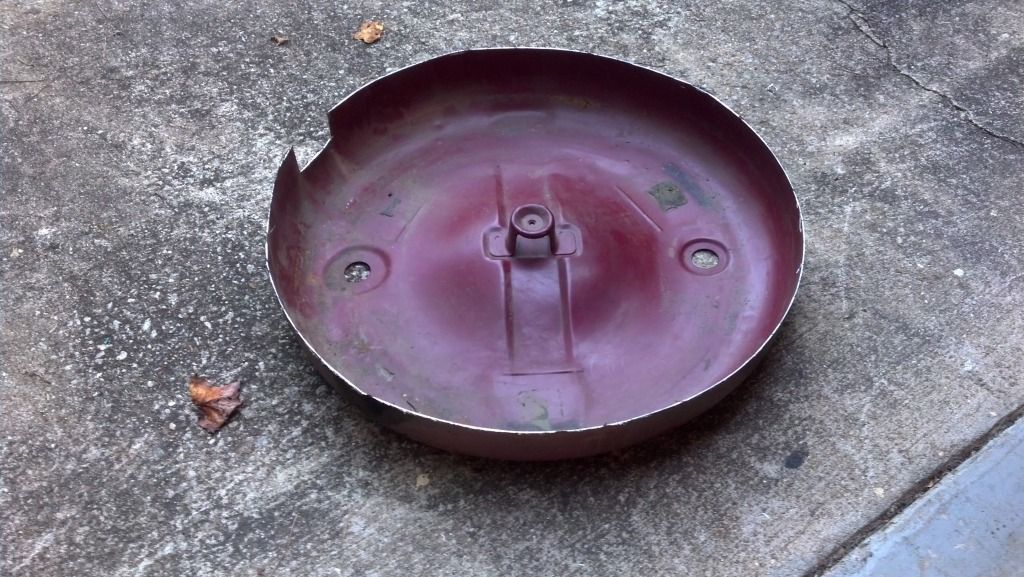
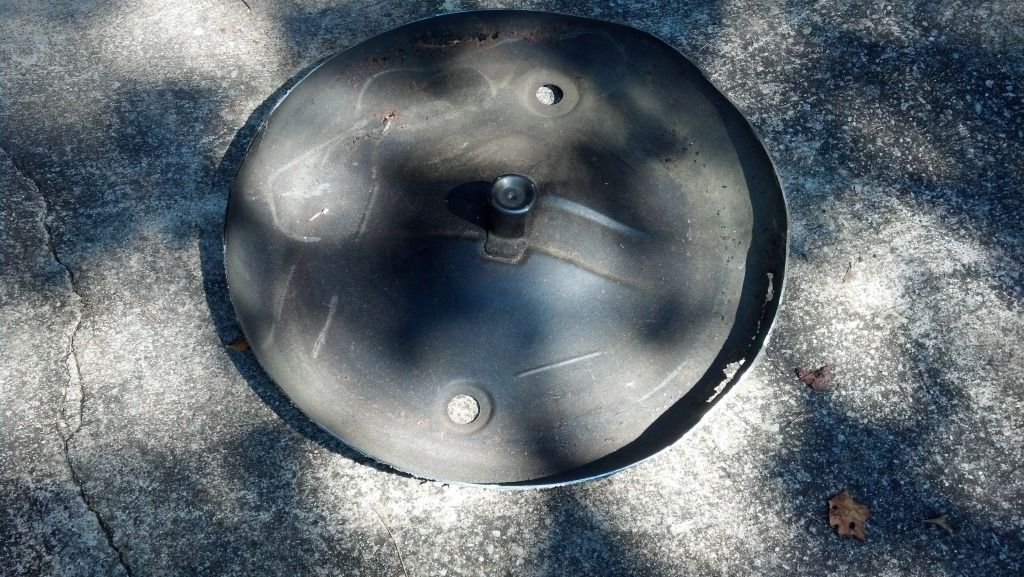
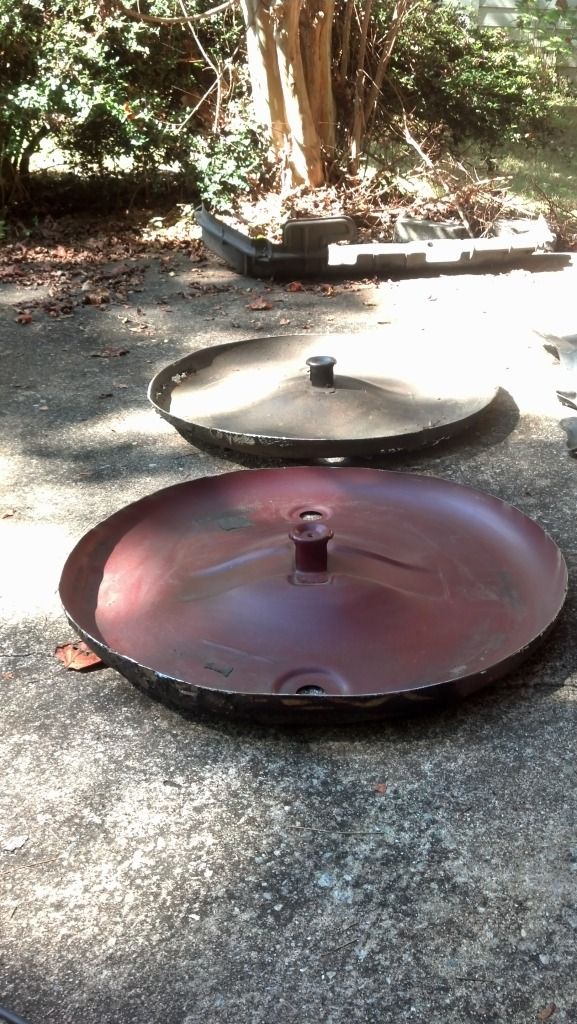
Helped a friend redo all his calipers/rotors/pads on a subaru. All I got done was a quick trip to Pull-a-Part to grab a fueltank shield,
and paint it with bed liner. Mine had a busted mount. Tomorrow, I will get some CO2, and finish welding the tire well.
Helped a friend redo all his calipers/rotors/pads on a subaru. All I got done was a quick trip to Pull-a-Part to grab a fueltank shield,
and paint it with bed liner. Mine had a busted mount. Tomorrow, I will get some CO2, and finish welding the tire well.
Well, I did the majority of welding yesterday, then today I ground them down, skim-coated them, and painted with bed liner.
There is a lip around the perimeter, but I don't mind much; as long as it's not rusty. Tomorrow, I have to re-coat the underside of the hatch area.

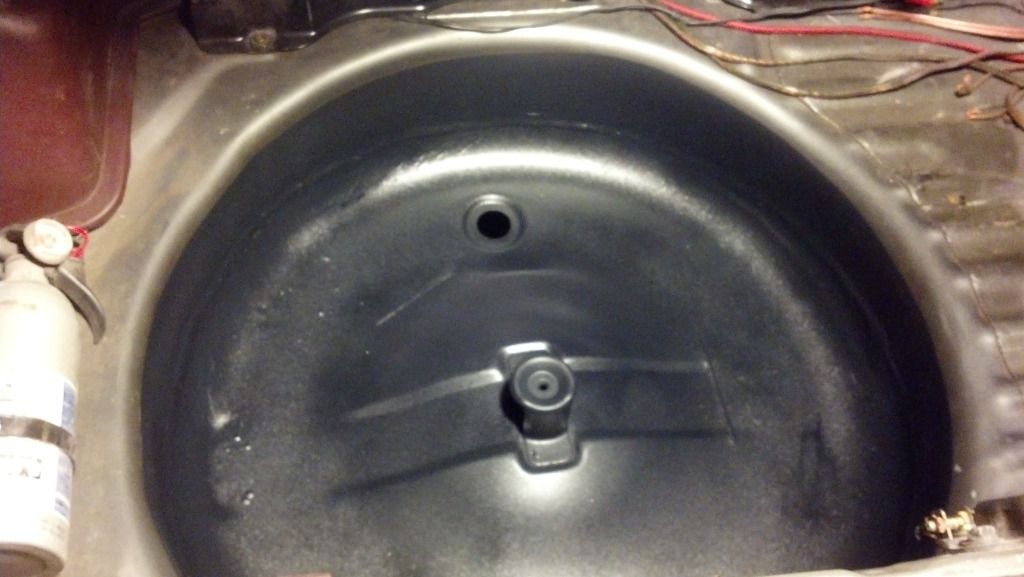
There is a lip around the perimeter, but I don't mind much; as long as it's not rusty. Tomorrow, I have to re-coat the underside of the hatch area.
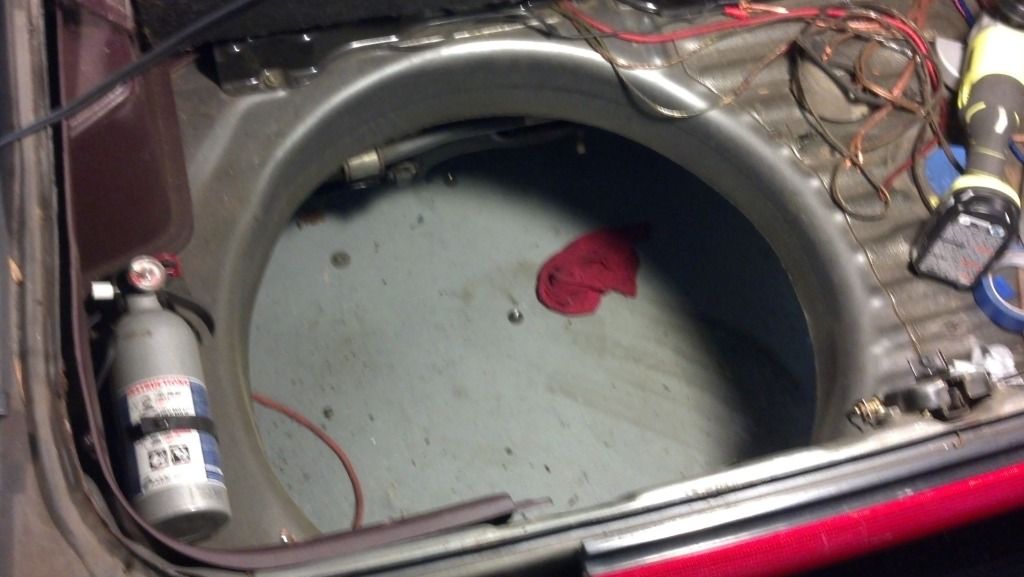
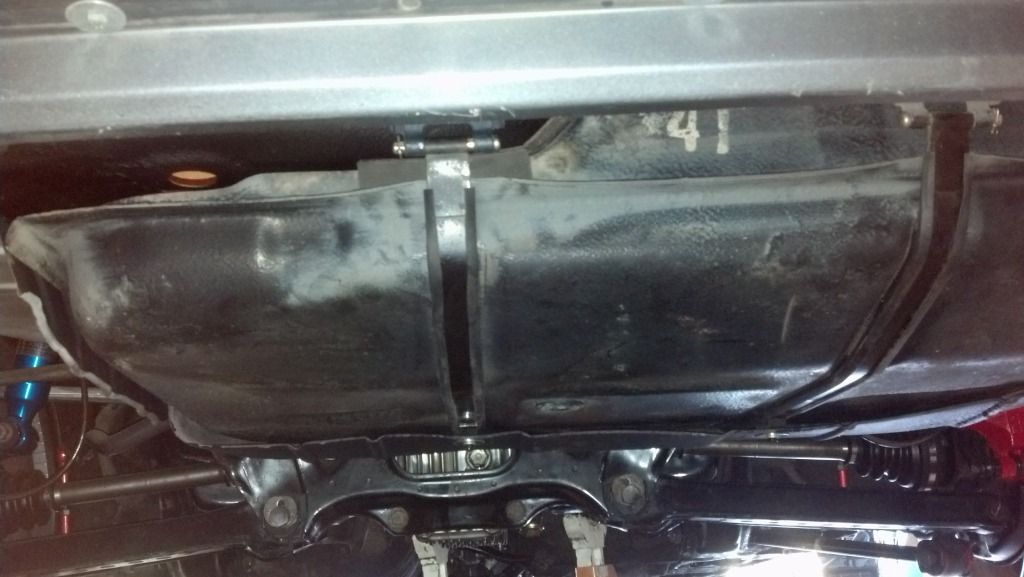
Today was reassembly day on the back end.
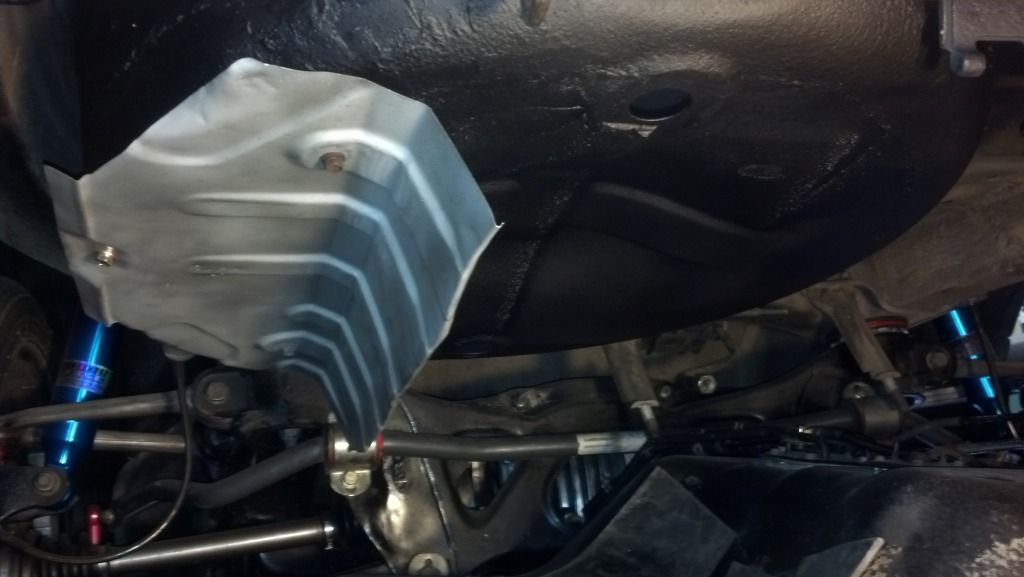
Got the underside cleaned and undercoated, then reinstalled the tank.
Undercoated, muffler shield back in.
New fuel filter installed.
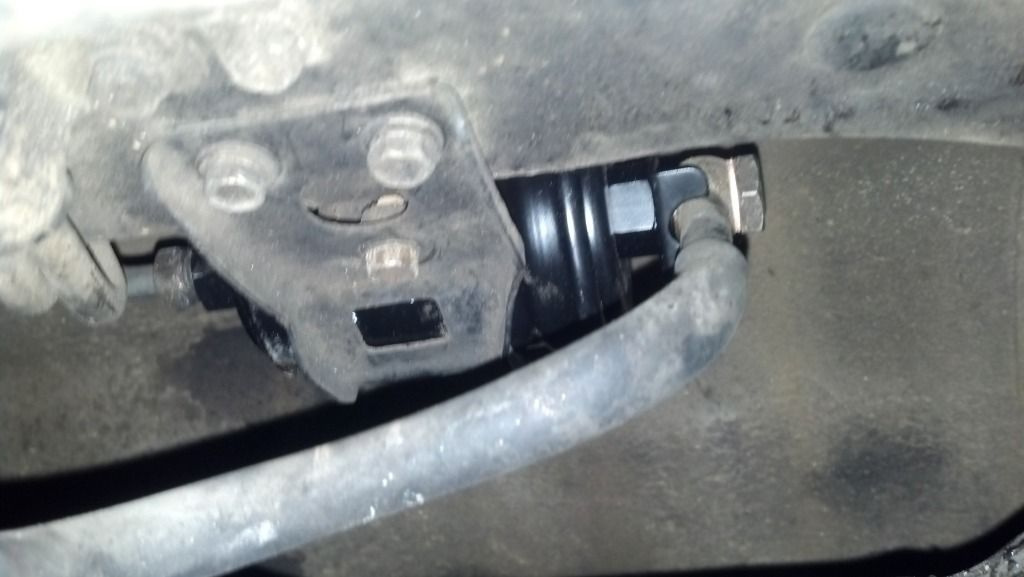
Tank installed.
Wires set up. Still need to run the main power line to the hatch, and then just mount the relay.

Also, received a few wastegate lines that I was waiting for, so next, I will install those. Then I have to install the exhaust again, to map out the support hangars, then remove the system to weld them on. Then the exhaust can be installed for the last time. I will temporarily install the ecu and MAFT pro systems, in order to start the engine. I want to make sure that any leaks or issues are discovered now, rather than after all the body panels are in place. It'll be alot easier to chase down issues in it's current state of disassembly.
Got the underside cleaned and undercoated, then reinstalled the tank.
Undercoated, muffler shield back in.
New fuel filter installed.
Tank installed.
Wires set up. Still need to run the main power line to the hatch, and then just mount the relay.
Also, received a few wastegate lines that I was waiting for, so next, I will install those. Then I have to install the exhaust again, to map out the support hangars, then remove the system to weld them on. Then the exhaust can be installed for the last time. I will temporarily install the ecu and MAFT pro systems, in order to start the engine. I want to make sure that any leaks or issues are discovered now, rather than after all the body panels are in place. It'll be alot easier to chase down issues in it's current state of disassembly.
Original straps. They weren't rusty, so I just cleaned and painted them, and scrubbed down the rubber insulators on them.Still have to polish and wax the fuel tank...
just kidding.
But no, I really have to polish the fuel tank soon...
just kidding.
But no, I really have to polish the fuel tank soon...
Not sure if serious about trying to make the fuel tank look better or not.. but I dropped my tank and repaired it recently since it had some bad rust spots and peeling undercoat plus I put in a bigger FP. I used Eastwood chassis black on it, I'm using it on all chassis parts. Its hard as nails and has a nice gloss to it. I would also recommend the tank sealer, I did that as well, but it would involve dropping the tank again.
Nah, i was kind of joking, but i will clean the last of the grime off of it next time i'm under there.
I like Eastwood products, though. I use them for powdercoat.
I like Eastwood products, though. I use them for powdercoat.
I thought sealer (internal) was no longer available for car gas tanks. I wanted to deal mine a couple years back and they told me that wasn't done using their sealer because today's gas eats it. Don't know if that's the case but the one I wanted I couldn't use even though the web advert said it could.
Dunno, but my tank looked pretty much brand new on the inside.
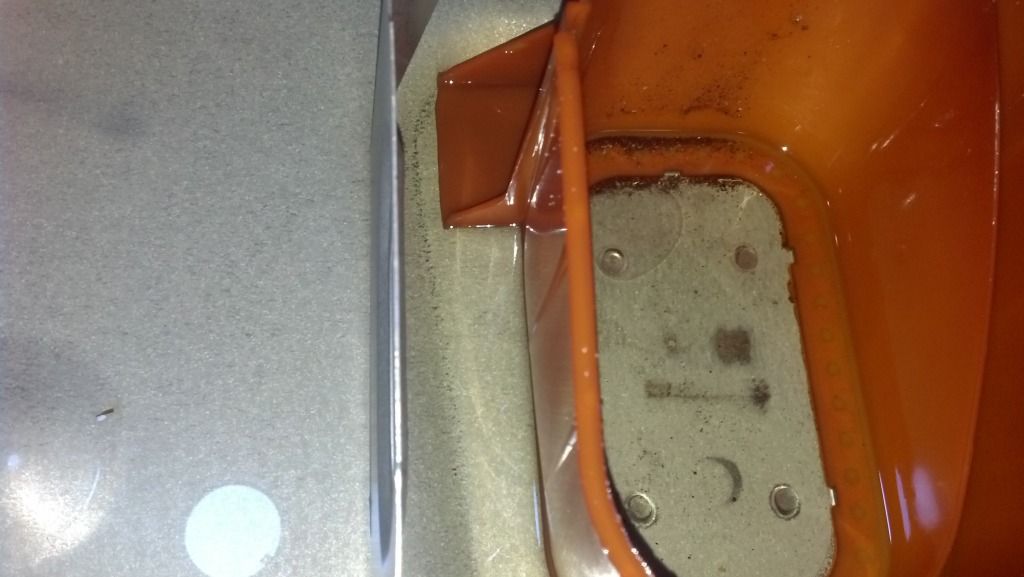
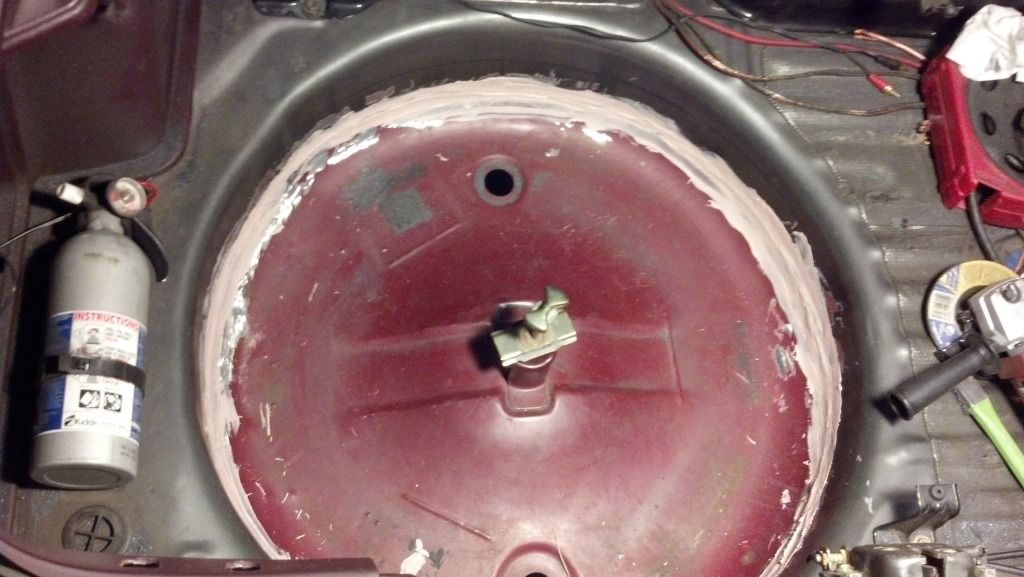
You'll notice a bit of sediment around the inside base of the orange pump resevoir, but i cleaned that out prior to reinstallation. Aside from that, you can see the metal looks perfect.
You'll notice a bit of sediment around the inside base of the orange pump resevoir, but i cleaned that out prior to reinstallation. Aside from that, you can see the metal looks perfect.
Grandavi;1968194 said:I thought sealer (internal) was no longer available for car gas tanks. I wanted to deal mine a couple years back and they told me that wasn't done using their sealer because today's gas eats it. Don't know if that's the case but the one I wanted I couldn't use even though the web advert said it could.
From what I was told it would hold up to any fuel I put in there, being gas, e85, or diesel. But I guess I'll find out eventually haha.
Not much done lately.
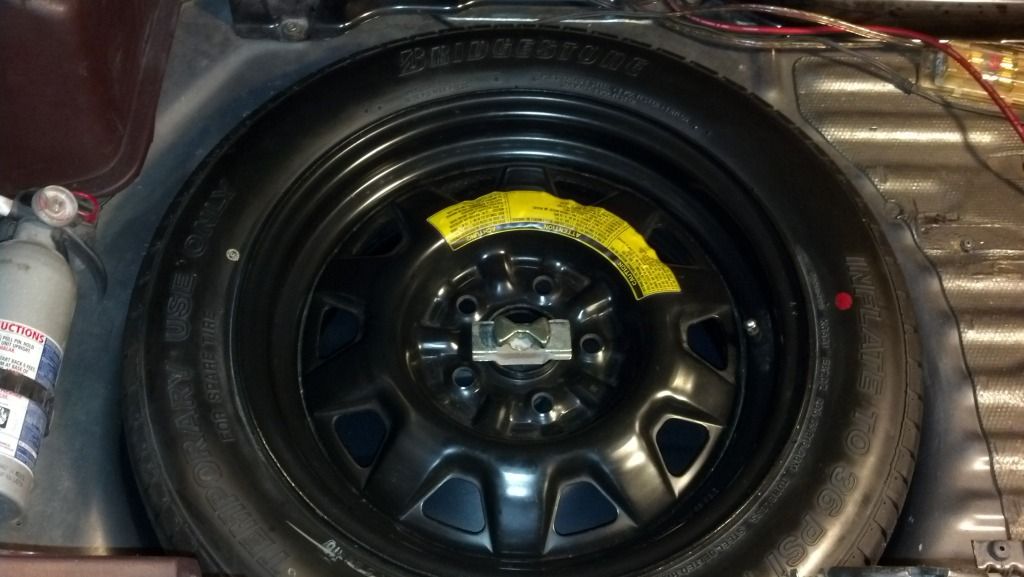
I received some grommets in the mail today for the spare tire well. I'm not even sure if grommets came stock there, or if Toyota just put two rubber pads down over them. Regardless, the holes are 1 3/8", so I ordered two grommets for it.
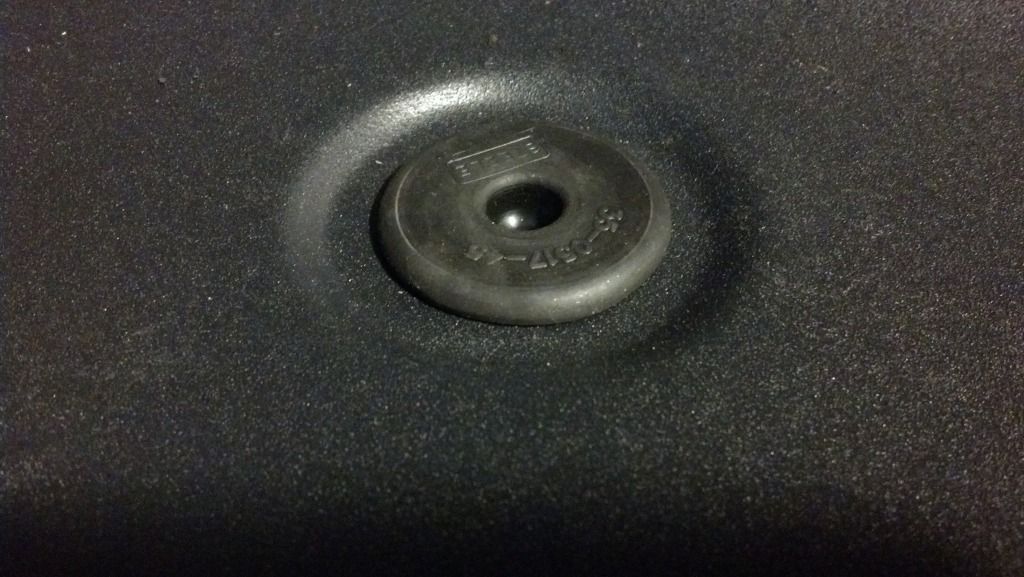
To my understanding, these were originally made for the rocker panels on a 1947 Cadillac, but they work, so there. Then I reinstalled the spare tire.
Looks good enough for me.
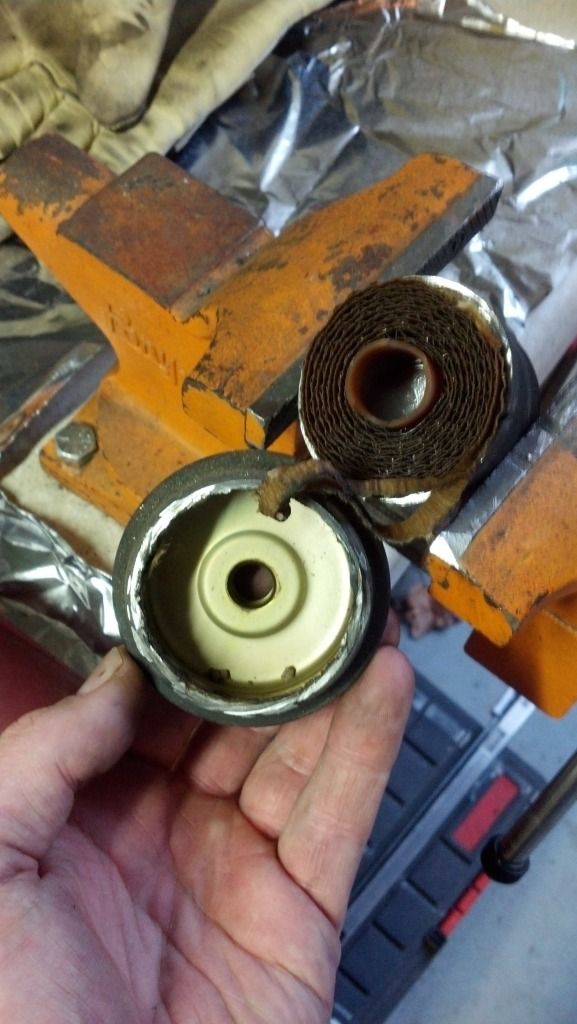
Then I decided to cut open my old fuel filter. There's always been alot of debate as to how long these can last, so I just wanted to see how mine was doing.
Here's where I cut off the top. The paper element is a long 6-ish inch wide strip, that is folded over before it's rolled into the filter housing.
Here it is, laid out, about 4 feet of it:
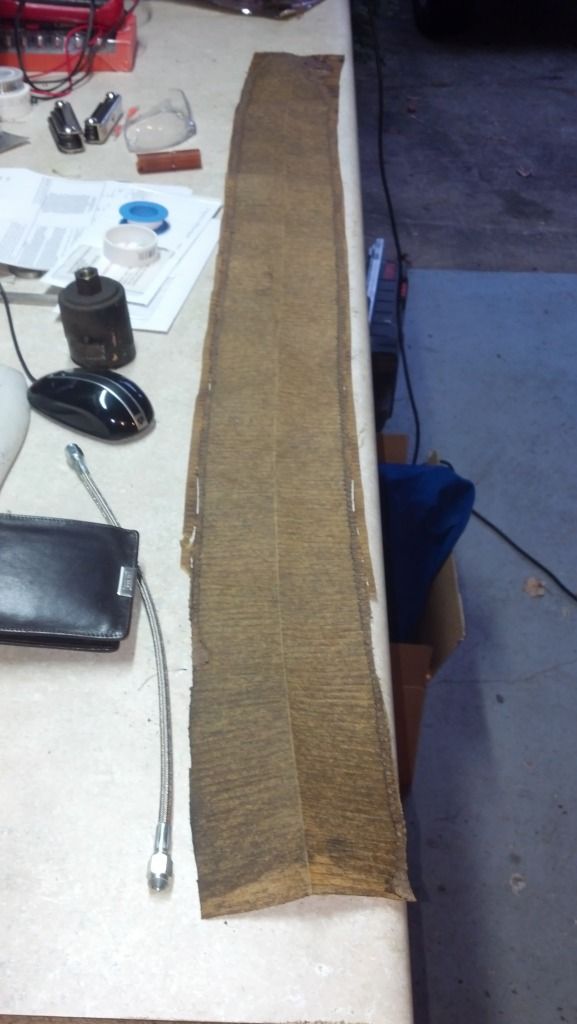
Does it look dirty to you? Just so you know, that lighter shaded area in the center, is dirt. In fact, there were areas, where caked dirt just fell out as I unrolled it.
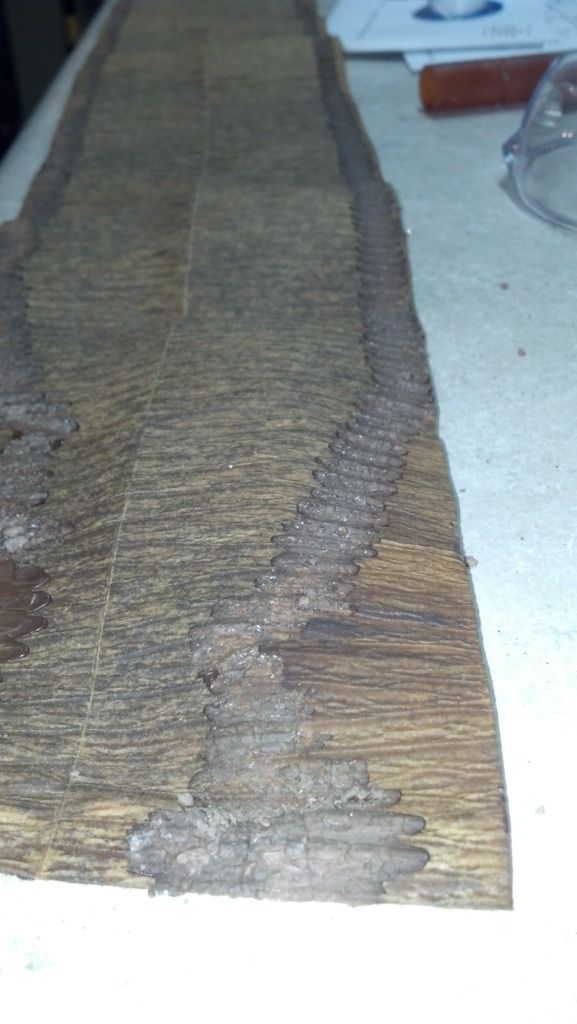
Here's a better look as seen with backlighting:
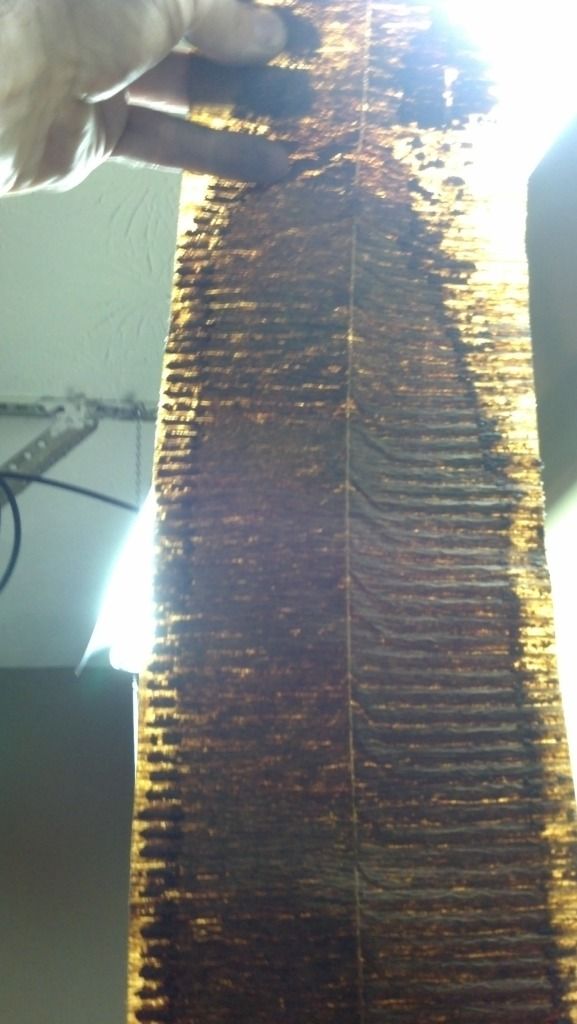
This filter went on the car, probably not long after I bought it, around maybe 150,000 miles. I have since then, put another 180,000 miles of fuel through this filter.
I would say that I reached the limit of THIS filter's endurance.

I received some grommets in the mail today for the spare tire well. I'm not even sure if grommets came stock there, or if Toyota just put two rubber pads down over them. Regardless, the holes are 1 3/8", so I ordered two grommets for it.
To my understanding, these were originally made for the rocker panels on a 1947 Cadillac, but they work, so there. Then I reinstalled the spare tire.
Looks good enough for me.
Then I decided to cut open my old fuel filter. There's always been alot of debate as to how long these can last, so I just wanted to see how mine was doing.
Here's where I cut off the top. The paper element is a long 6-ish inch wide strip, that is folded over before it's rolled into the filter housing.
Here it is, laid out, about 4 feet of it:
Does it look dirty to you? Just so you know, that lighter shaded area in the center, is dirt. In fact, there were areas, where caked dirt just fell out as I unrolled it.
Here's a better look as seen with backlighting:
This filter went on the car, probably not long after I bought it, around maybe 150,000 miles. I have since then, put another 180,000 miles of fuel through this filter.
I would say that I reached the limit of THIS filter's endurance.