more pics of the black 7m mkii
- Thread starter williamb82
- Start date
You are using an out of date browser. It may not display this or other websites correctly.
You should upgrade or use an alternative browser.
You should upgrade or use an alternative browser.
cleaned the block good, then rattle can engine primer, then rattle can gray base for the duplicolor metalcast paint, then red duplicolor metalcast from a spray can. just have to prep it good and take your time and it will come out good.
i pulled a 7mgte at the pick and pull the other weekend and the r154 as it seemed good too. car was bone stock, still had all brackets and stock airbox, paper filter, stock exhaust etc and was wrecked. dont know the miles. cluster was already gone. anyway, checked valve clearance and they were all perfect. checked the #2 rod bearing as it looked like a lil heat on that rod throw and perfect. so heres to hoping its perfect. lol. i changed it this past weekend. almost done. it rained all day sat and i was working outside or it would be done.
got the head off the old 7m. took a few hrs longer then expected cause it was raining and also i couldnt find my deepwell 14mm 12 point socket to remove the head studs. went ot 2 diff autoparts stores, only sold 6 point. ended up going all the way to sears for it. anyway, got the head off, the mhg is fine. but as i suspected the #1 piston was melted badly, in 2 places. the head however is fine. heres the pics. lol.


well, helicoiled all the exhaust studs. new 90deg coolant hoses. new coolant bypass hose so no tb or isc cooling. or heating rather. lol. new vac lines. disconected all the bs vac crap i dont need. got rid of the egr, new plugs, etc...
the new engine after installing the mhg and arp head studs and the valve covers with ss allen head bolts.

the w58 i took out with the old engine.

the r154 i got with the new 7mgte that im putting in

drilled and tapped the back of the head and installed a 3/8ths npt pipe plug with red locktite to block the egr.

same thing on the intake. no need for block off plates.

another view. you can also see my pte 780cc/min injectors and note i removed the fuel pulsation dampener and installed a 6an fitting for the fuel feed. same on the fuel filter. so ran a 6an ss line from the filter to the rail.

heres most of the missing aluminum from my #1 pistons. it was in the bottom of the pan. (yes i learned how to use the macro setting. lol)

and this is how the car sits right now. not done but should be able to button it up tomarow or the next day and go for a test drive to the has station as the fuel light is on. lol.


got the head off the old 7m. took a few hrs longer then expected cause it was raining and also i couldnt find my deepwell 14mm 12 point socket to remove the head studs. went ot 2 diff autoparts stores, only sold 6 point. ended up going all the way to sears for it. anyway, got the head off, the mhg is fine. but as i suspected the #1 piston was melted badly, in 2 places. the head however is fine. heres the pics. lol.
well, helicoiled all the exhaust studs. new 90deg coolant hoses. new coolant bypass hose so no tb or isc cooling. or heating rather. lol. new vac lines. disconected all the bs vac crap i dont need. got rid of the egr, new plugs, etc...
the new engine after installing the mhg and arp head studs and the valve covers with ss allen head bolts.
the w58 i took out with the old engine.
the r154 i got with the new 7mgte that im putting in
drilled and tapped the back of the head and installed a 3/8ths npt pipe plug with red locktite to block the egr.
same thing on the intake. no need for block off plates.
another view. you can also see my pte 780cc/min injectors and note i removed the fuel pulsation dampener and installed a 6an fitting for the fuel feed. same on the fuel filter. so ran a 6an ss line from the filter to the rail.
heres most of the missing aluminum from my #1 pistons. it was in the bottom of the pan. (yes i learned how to use the macro setting. lol)
and this is how the car sits right now. not done but should be able to button it up tomarow or the next day and go for a test drive to the has station as the fuel light is on. lol.
update. got it running last night. runs smooth and even compression on all cylinders. no blowby from the pcv vents on the valve covers. sounds fucking AWESOME!!!!!!1 way deeper and smoother then any other 7mgte ive had in the car. anyway, got to fix the oil press gauge. its pegged full even when the engine is off so thinking i knocked the wire off the sender when i put the lower i/c pipe on. also the slave i put on took a shit the first pedal press so havent gotten to drive it yet. and i need to put my timing light on it and lock it in at 10deg btdc. other then that i got 1 heater hose im gonna change. it feels soft. dont see how i didnt catch that when the engine was out but oh well. its an easy one. also, before i start driving it opn a reg basis im gonna install my wideband a/f gauge and my autometer oil press and water temp gauges as well. im just happy its running and not knocking or smoking. lol. ill take some pics after i get to wash the greasy handprints off of everything.
oh it was fun before it blew up. lol. i got 780cc/min pte injectors and a maft with 3in gm maf. once i have my wideband in im gonna turn my 57 trim ct up to 20psi and take it to the track once i have the afr's safe all the way across. lol. ive got some 275/50/15 nittos on some 15x7 are mesh wheels so it should be able to hook good. lol. im hopin for 11's. cant wait till i get my ffi done so i can install my garrett gt4082, 24x12x3 fmic, ms2, etc...
well, the oil pressure is actually LOWER then a stock 5m even though i shimmed it. lol. and yes, 20w-50 castrol gtx oil. got the oil press gauge working, replaced a heater hose that was soft. put hte other slave cyl in but it needs bled again. pedal is a lil squishy, and set the timing to 10deg btdc. its fine up to about 10psi then feels funny. im gonna install my wideband before driving it on the norm and readust the settings in the maft to get a good afr all the way across. all in due time. runs good and feels great. man i miss boost. lol. hit it hard in first from a roll and even the drag radials wouldnt hook on the street. lol. shifted to 2nd hard and smoked em all the way to 3rd then let off.
anyway, its still dirty as hel but took a bunch of pics tonight so here they are. they show my new air filter i got from autozone, the plastic inlet tube from the maf to the turbo, also apc autozone pieces. lol. work great. look good in there too i think. also my 6an line to feed the fuel rail from the fuel filter, line lock, mk3 power booster and master cyl, dual ford contour v6 electric fans, greddy type s bov with the top powdercoated candy apple red with gold flake, blah blah blah. lol. also the oil filter location mount isnt permanent. im gonna buy some 8an ss lines to replace the rubber push lock that came with the kit and mount it underneath so its hidden but still accessable. lol. just laid it up there as the lines arnt long enough to do what i wanted.


anyway, its still dirty as hel but took a bunch of pics tonight so here they are. they show my new air filter i got from autozone, the plastic inlet tube from the maf to the turbo, also apc autozone pieces. lol. work great. look good in there too i think. also my 6an line to feed the fuel rail from the fuel filter, line lock, mk3 power booster and master cyl, dual ford contour v6 electric fans, greddy type s bov with the top powdercoated candy apple red with gold flake, blah blah blah. lol. also the oil filter location mount isnt permanent. im gonna buy some 8an ss lines to replace the rubber push lock that came with the kit and mount it underneath so its hidden but still accessable. lol. just laid it up there as the lines arnt long enough to do what i wanted.
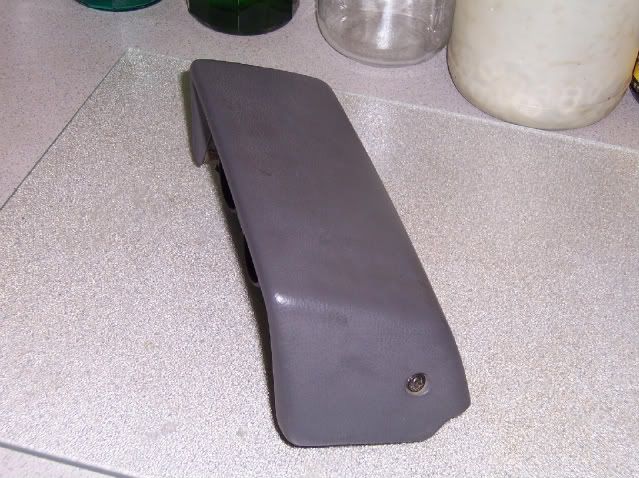
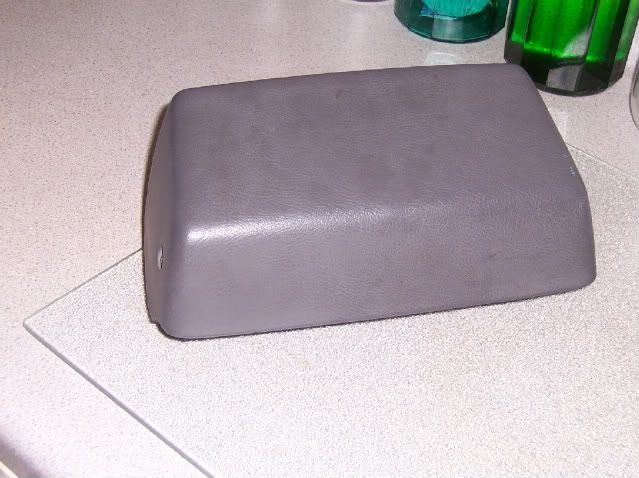
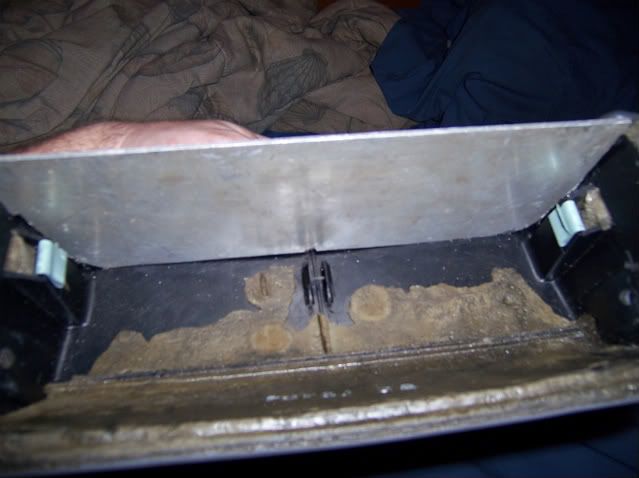
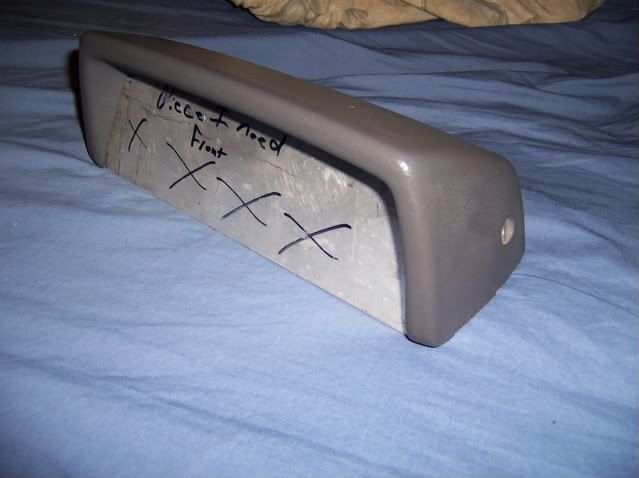
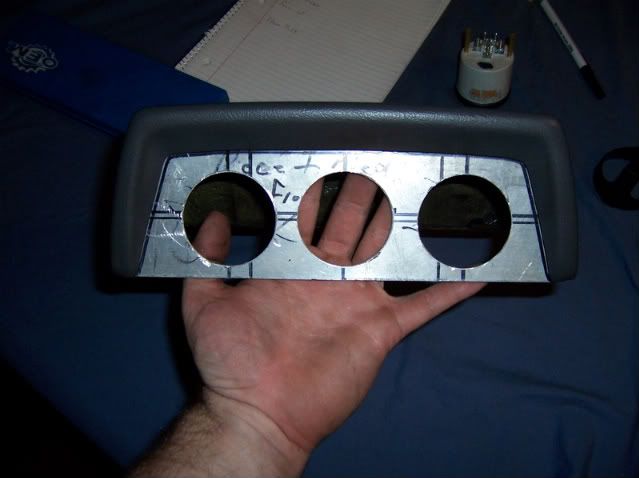
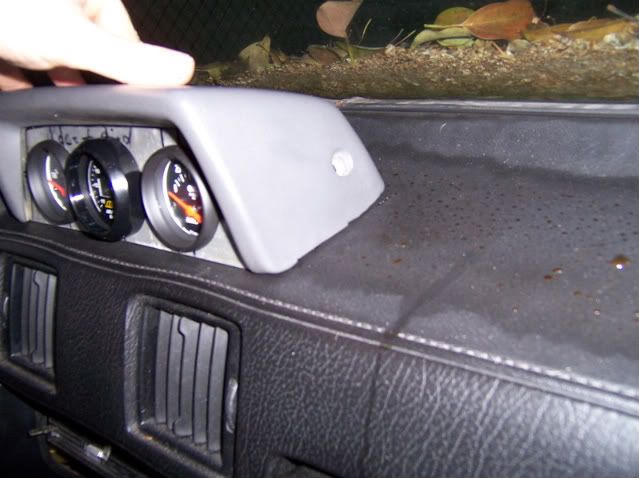
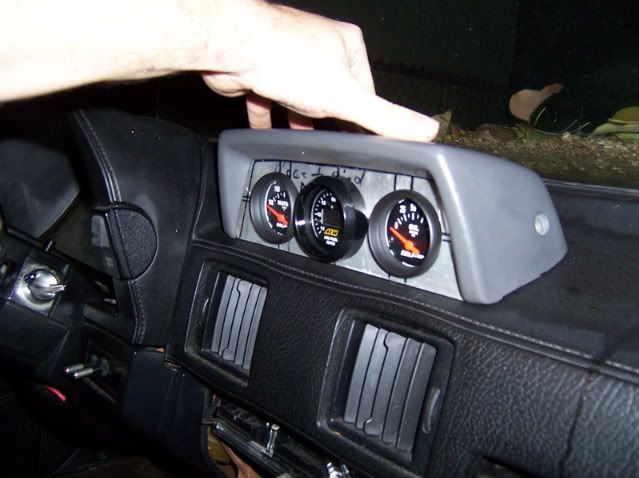
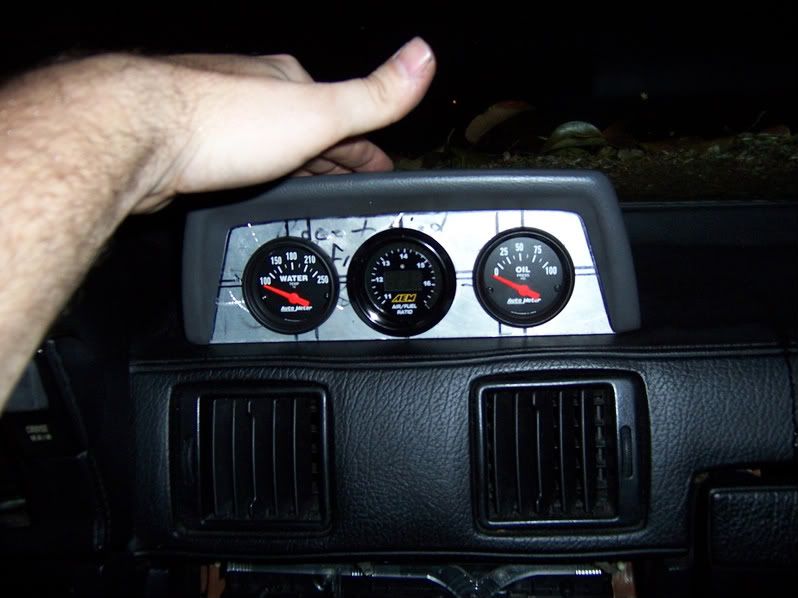
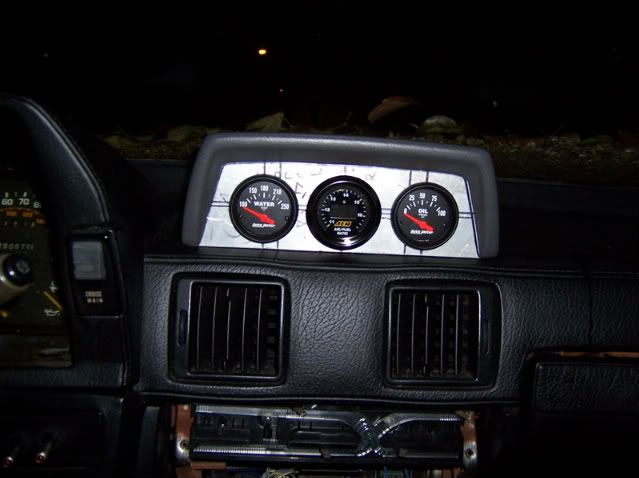
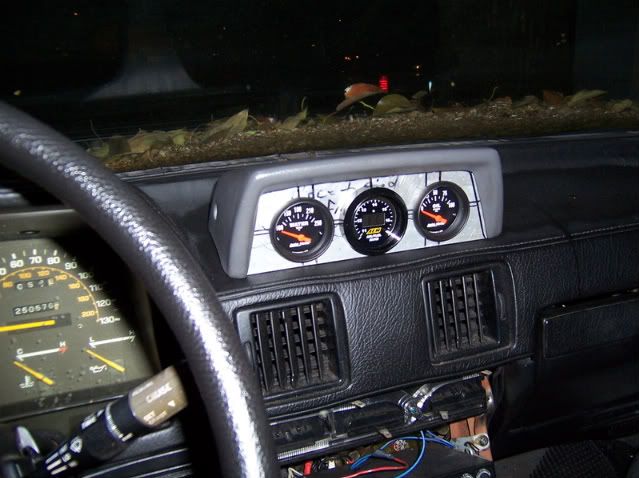
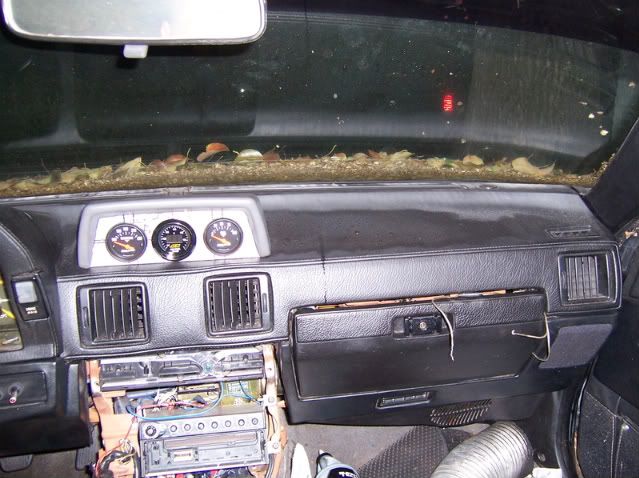
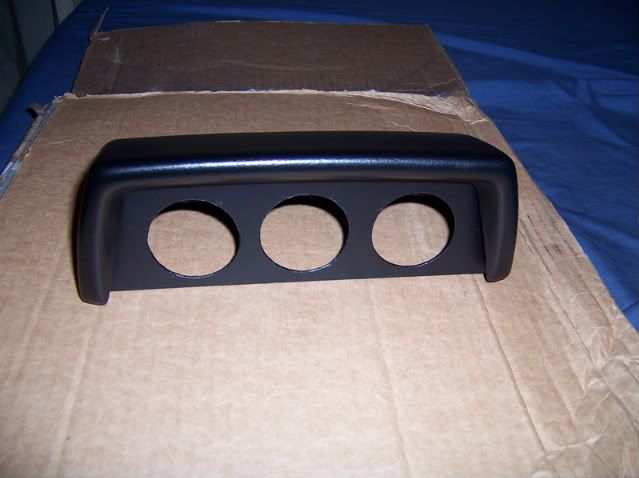
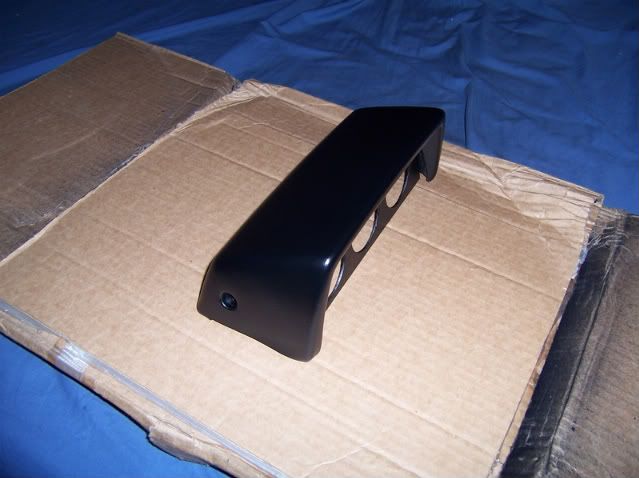
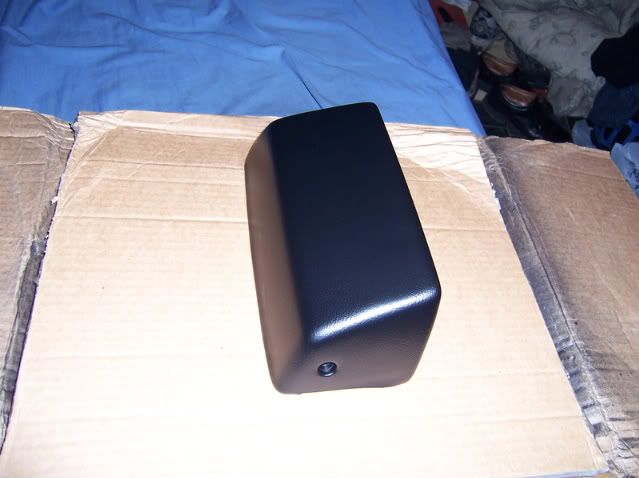
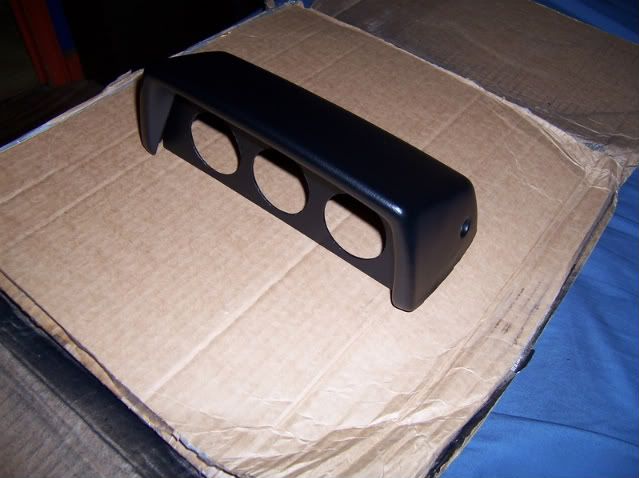
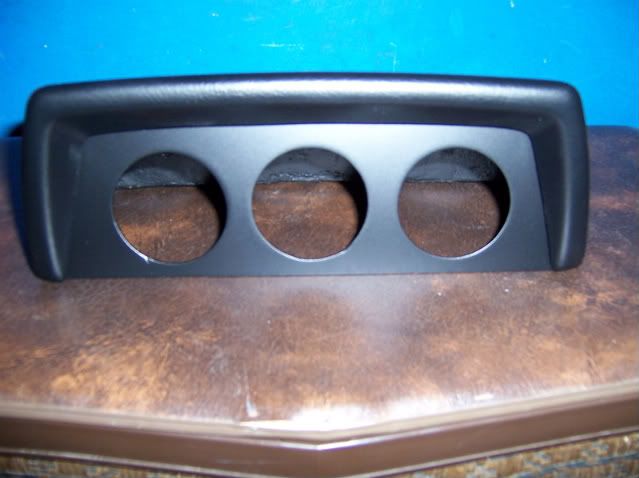
ok, grabbed my gauge hood out. i mocked it previously with cardboard and 3 gauges i had laying around. if you look at the side view you can see it comes up in the back so wont sit flush on the dash. i have fixed this. i used an exacto knife and trimmed the edges from front to back to be straight. surprisingly it was easier then i though. the hard plastic isnt the same shape as the outer part and what needed trimmed was just hard foam and the outer covering that looks like vynil and is actually more like a plastic. i messed up a lil on the side toward the drivers side. it wont be noticavle once its mounted lukily. but i may try to have an apulstry shop recover it in black vynil if they can do it properly. idk. for now ill just dye it black to match the dash. may dye the dash too so they are the same shade black. mine is a lil faded from the florida sun.
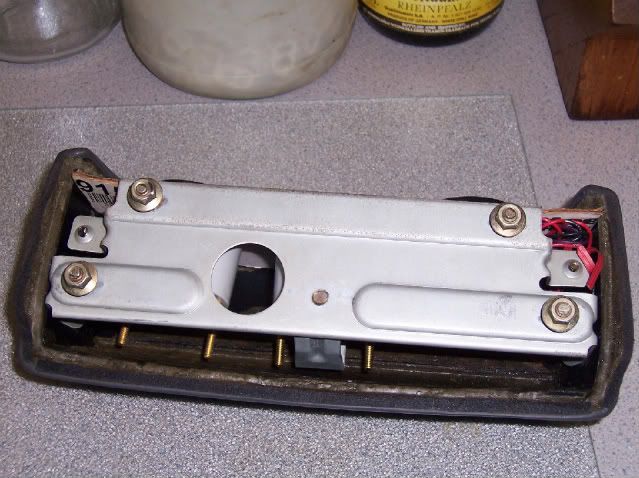
also, since its been trimmed, the metal mounting bracket needs modded a lil to hold it down flush. just got to bend the 2 mounting tabs that attach the hood a lil and once the hood is pressed down where it needs to go, then mark the brackets with a sharpie through the holes and then pull the hood and drill pilot holes for the screws to hold it down properly.
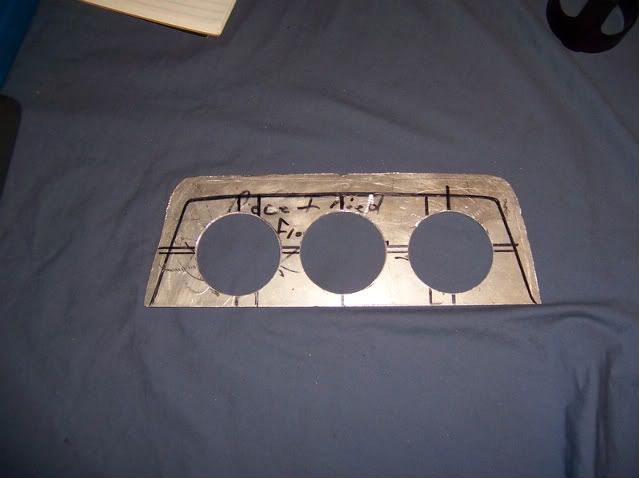
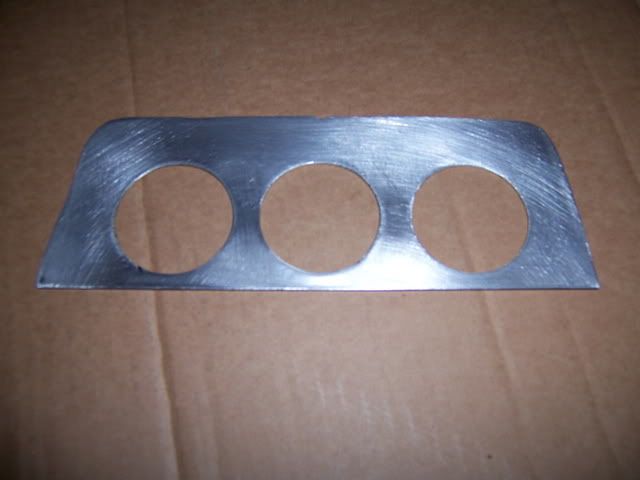
also, i need to trace the cardboard template onto some aluminum sheet i have and then cut it out and center punch where the gauges go and break out the hole saw, low gloss black engine paint and jb weld. lol
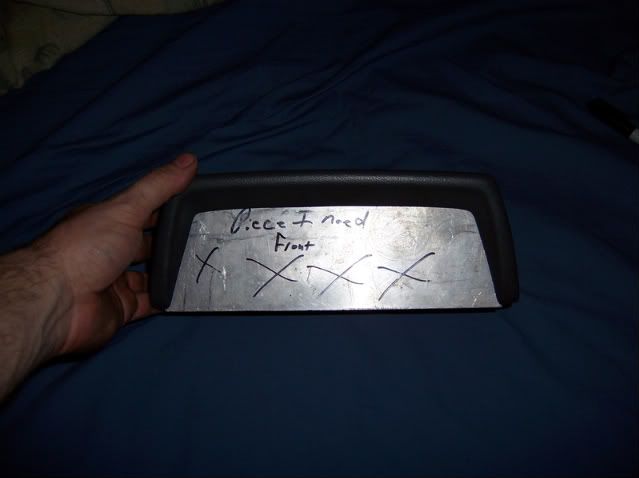
i will post more pics as this progresses so people can see how it is attached. also if anyone finds another one of these and would like to sell it lmk. this one was from a 4 runner and had the inclometer in it. i dont need the inclometer. just the hood and mounting bracket.
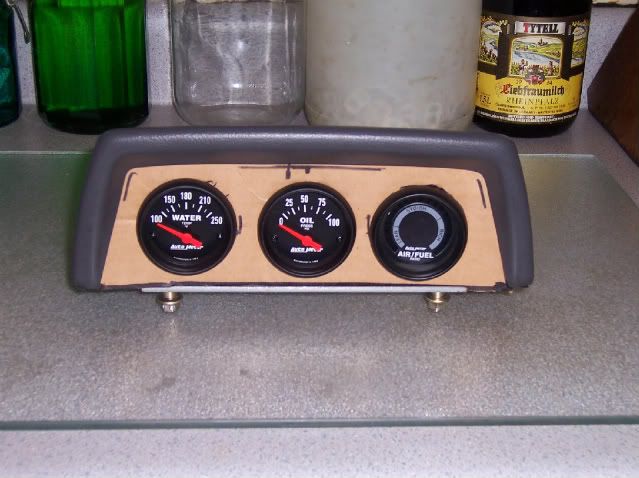
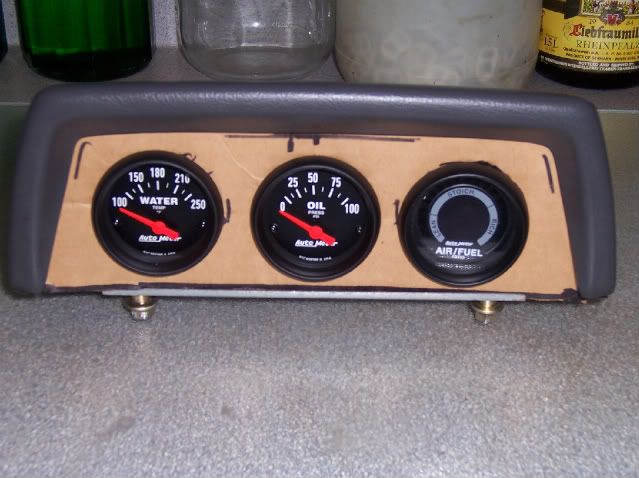
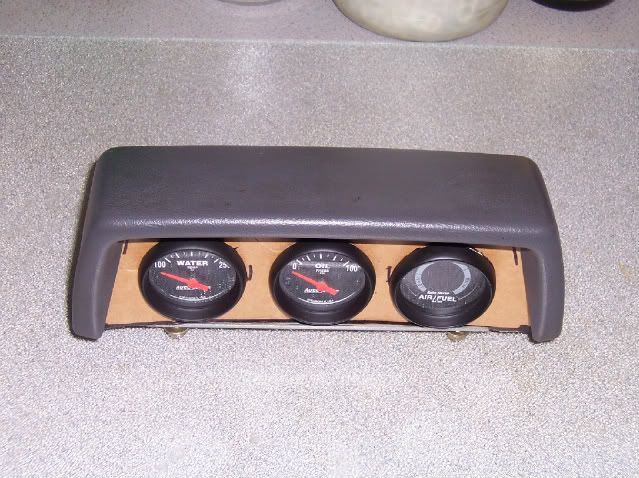
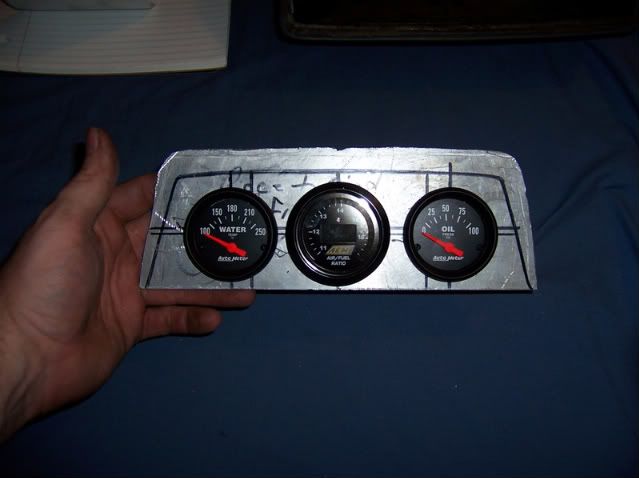
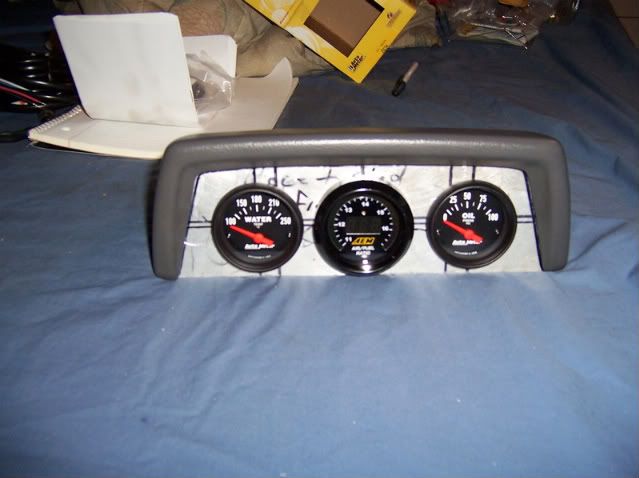
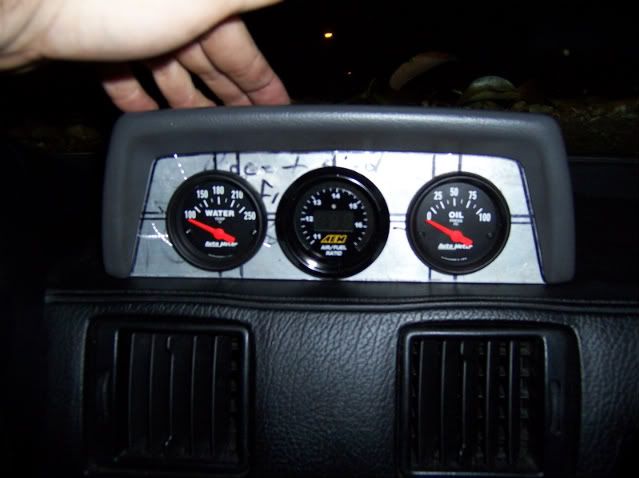
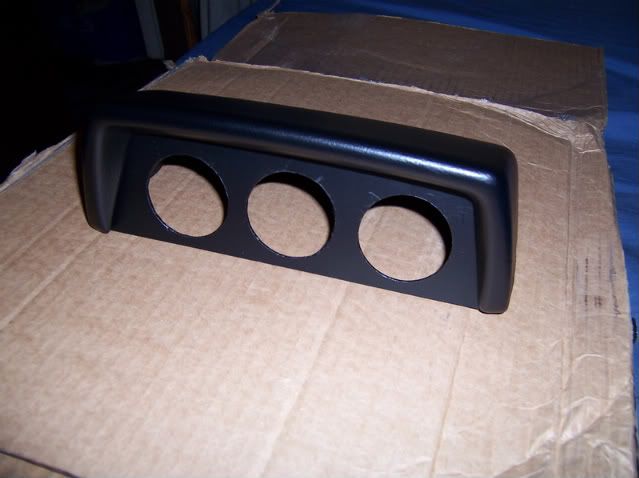
goal is to come out clean like this, but with three 2_1/16th gauges

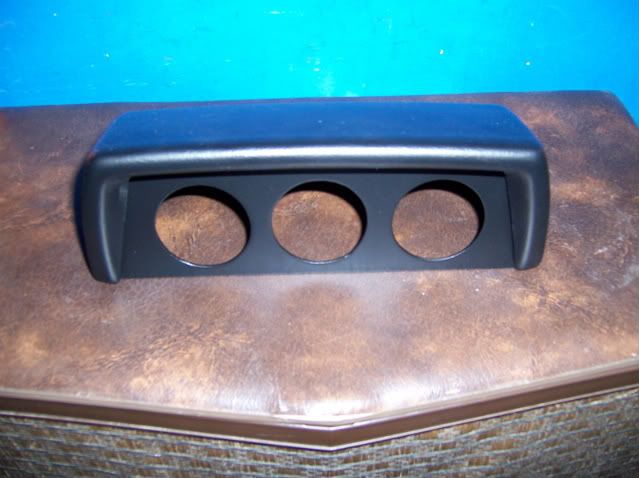
heres some update pics. got the rough piece cut to mount the gauges in. got to trim the outer curve a bit so it fits all the way in the way it should then i can mark and center punch it to use the holesaw to cut the gauge holes. then ill paint it black, dye the hood black and then jb weld the aluminum plate into it. also i got pics of the side showing how i trimmed it to fit the dash flush.
also, since its been trimmed, the metal mounting bracket needs modded a lil to hold it down flush. just got to bend the 2 mounting tabs that attach the hood a lil and once the hood is pressed down where it needs to go, then mark the brackets with a sharpie through the holes and then pull the hood and drill pilot holes for the screws to hold it down properly.
also, i need to trace the cardboard template onto some aluminum sheet i have and then cut it out and center punch where the gauges go and break out the hole saw, low gloss black engine paint and jb weld. lol
i will post more pics as this progresses so people can see how it is attached. also if anyone finds another one of these and would like to sell it lmk. this one was from a 4 runner and had the inclometer in it. i dont need the inclometer. just the hood and mounting bracket.
goal is to come out clean like this, but with three 2_1/16th gauges
heres some update pics. got the rough piece cut to mount the gauges in. got to trim the outer curve a bit so it fits all the way in the way it should then i can mark and center punch it to use the holesaw to cut the gauge holes. then ill paint it black, dye the hood black and then jb weld the aluminum plate into it. also i got pics of the side showing how i trimmed it to fit the dash flush.

got some more work done to it today. still got to paint the panel black, dye the hood black then jb weld the plate to the hood inside. or figure out another way to mount it so it can be removed. im gonna try the later first. hers the pics. measured a bunch of times before drilling any holes and got the piece fitting in thee first before measuring.

well, bought some duplicolor vinyl dye today and dyed the hood. this shit works awesome. i apparetnyly didnt get 2 lil spots perfectly clean so they didnt dye properly, scrubbed it with soap and water again and none of the dye came off at all. i was amazed. only had dried like 5-10min. anyway, touched it up and it looks good. now just got to sand the face of the aluminum piece and repaint it so it looks cleaner and then jbweld it from the inside then im ready to mount it to the dash and install the gauges.
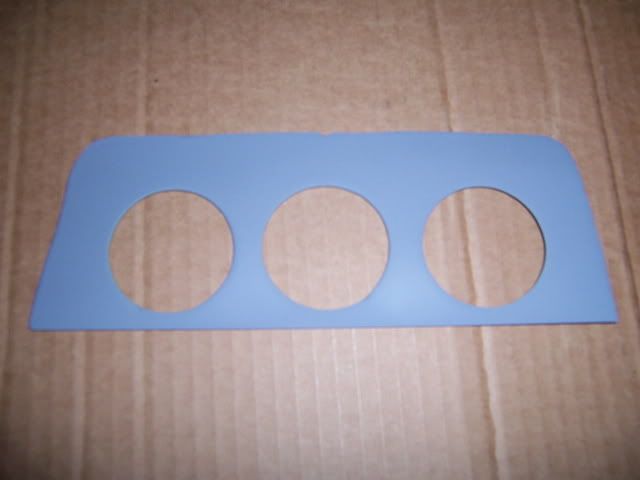
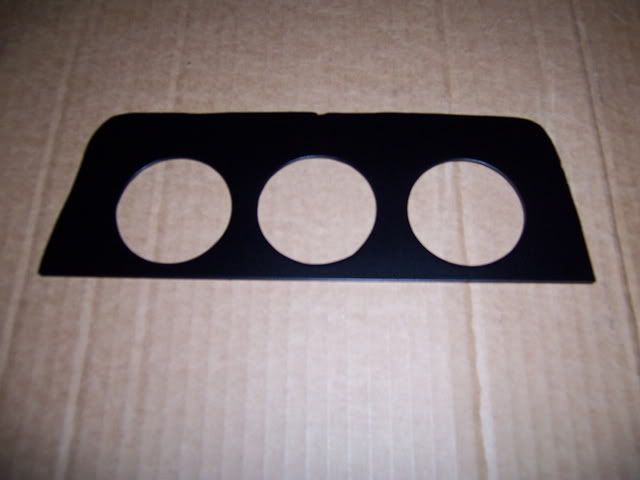
well, last week i sanded all the nic's out of the gauge panel, painted it with engine primer then the low gloss black engine paint. came out pretty damn good i think.
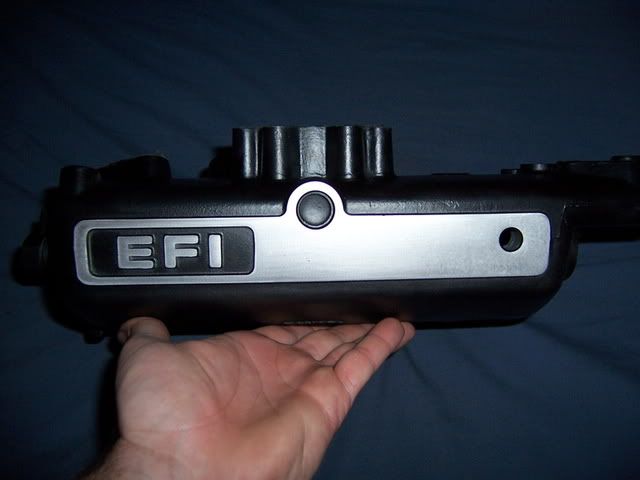
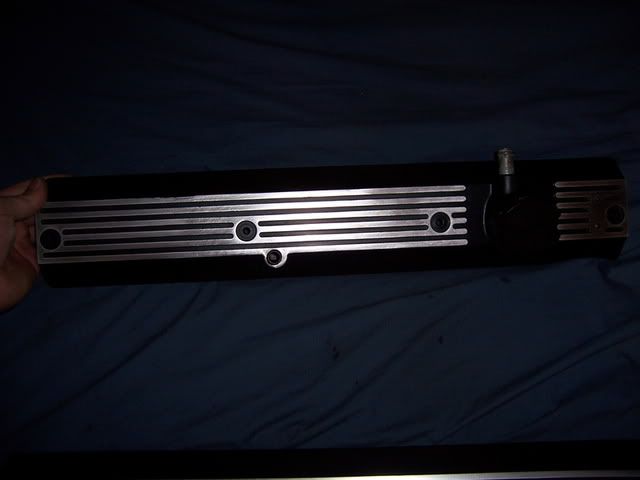
well got bored so finally cleaned up and painted the intake manifold, throttle body, and valve covers for my 86 mk2. heres the link with all the pics and as couple of the finished pics. got to touch up a couple spots on the lower intake but other then that its done.
http://www.cardomain.com/ride/2965297/3
http://www.cardomain.com/ride/2965297/3
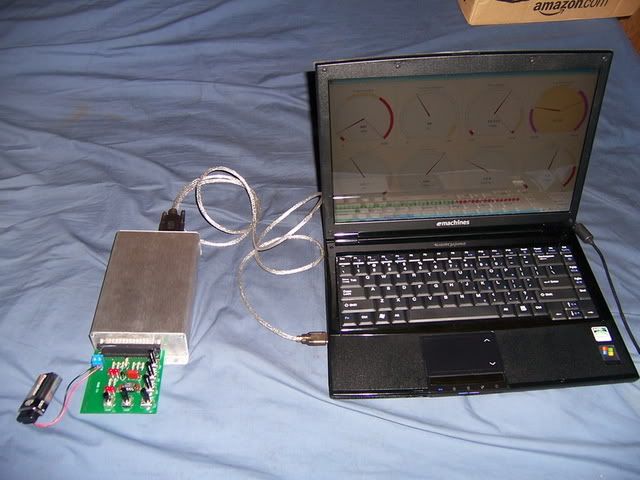
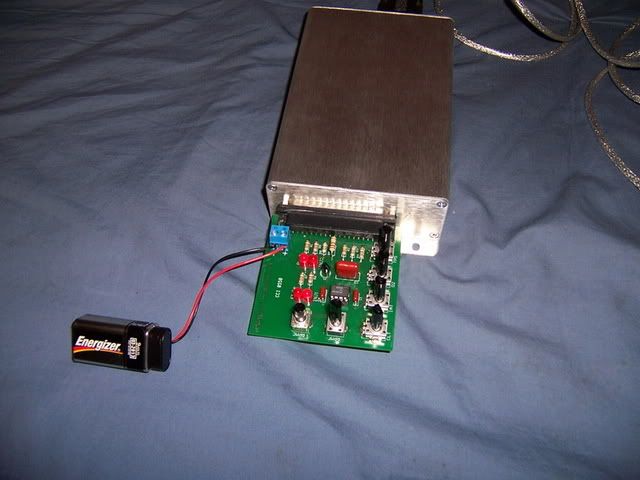
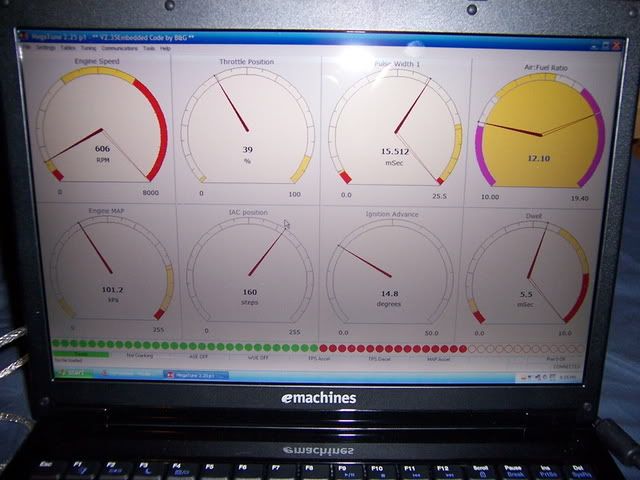
im going megasquirt 2, so yeah, the wiring will be cleaned up ALOT when i make the new engine harness for it. getting rid of all the non needed stuff from under the hood. im keeping my a/c and power steering etc.. though. lol.
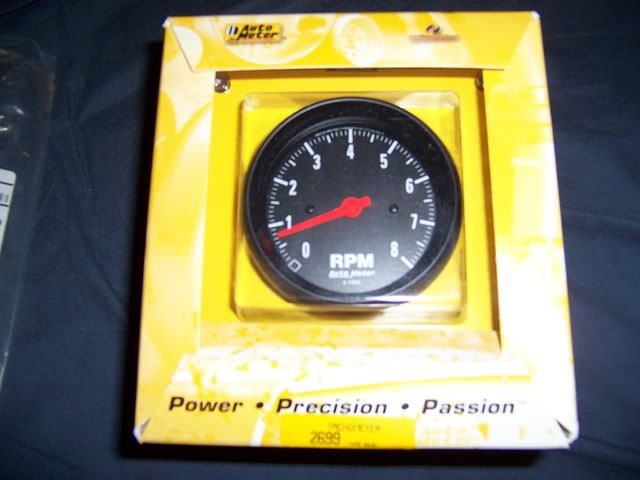
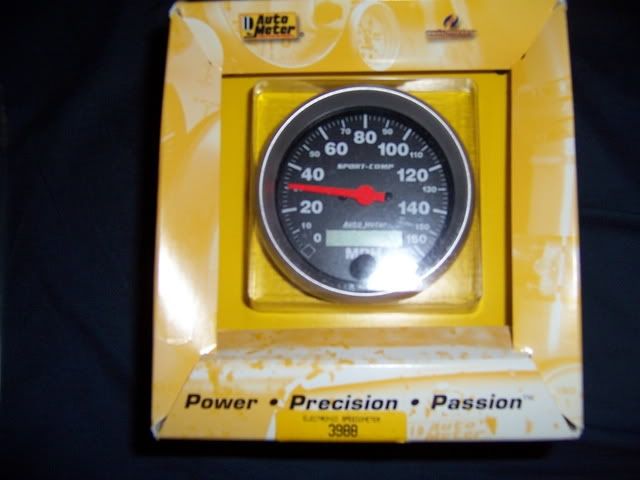
well, my tax releif was in my acct today so i ordered the autometer 8k rpm tach and electronic 160mph speedo i want for my gauge cluster, the 25ft 3/8ths steel fuel line, the 6an tube ends for it, 6an ss braided line, hose ends, ss line cutting tool, insulated clamps, 3/8ths npt weld in bung for my air temp sensor. 3an fitting for my boost gauge so i can replace the nylon tubing with 3an ss line. also the flang for my 75mm ford tb and the plate to weld to the runners so i can get started on my front facing 7m intake. still need to buy the tube but ill do that later. ah. its amazing how quickly money disappears when you have a car to spend it on. lol
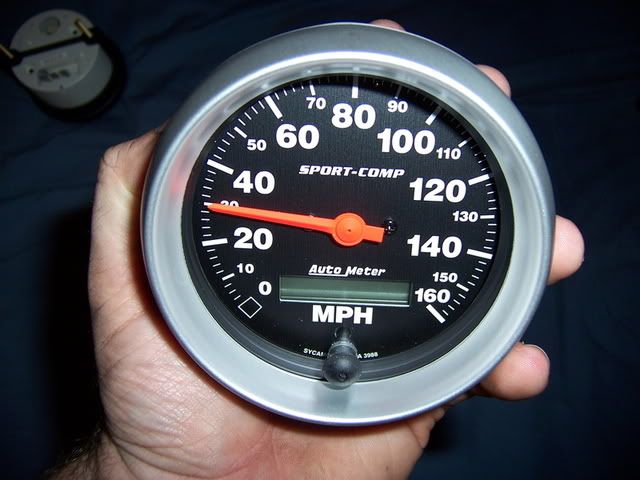
speedo(ill mail it to autometer to have a black bezel installed later)
http://store.summitracing.com/partdetail.asp?autofilter=1&part=ATM%2D3988&N=700+0&autoview=sku
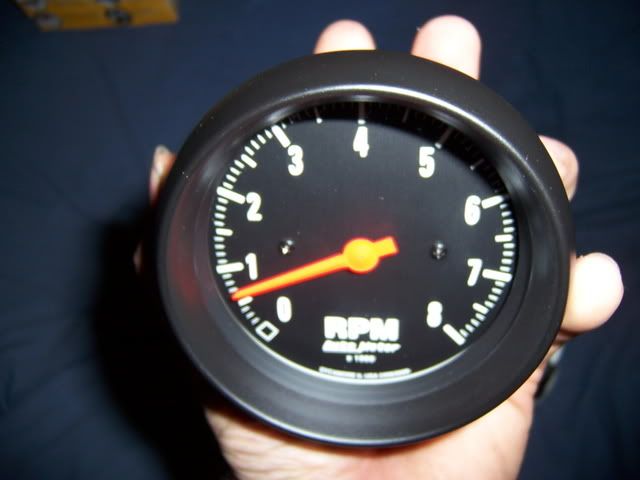
tach
http://store.summitracing.com/partdetail.asp?autofilter=1&part=ATM-2699&N=700+0&autoview=sku
tb flange
http://www.rossmachineracing.com/75mmmusttbadapt.html
speedo(ill mail it to autometer to have a black bezel installed later)
http://store.summitracing.com/partdetail.asp?autofilter=1&part=ATM%2D3988&N=700+0&autoview=sku
tach
http://store.summitracing.com/partdetail.asp?autofilter=1&part=ATM-2699&N=700+0&autoview=sku
tb flange
http://www.rossmachineracing.com/75mmmusttbadapt.html
Last edited:
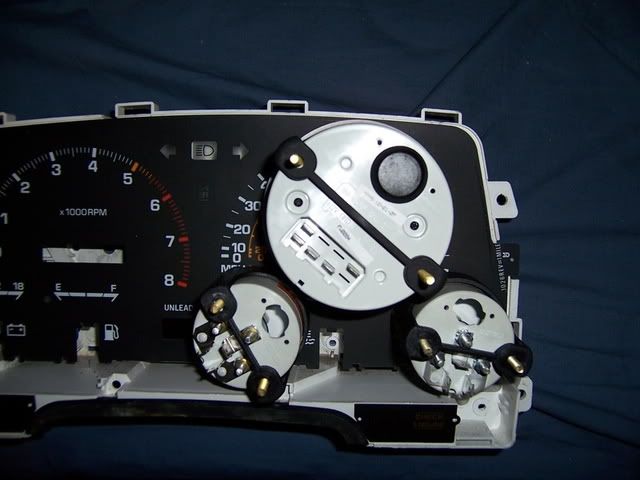
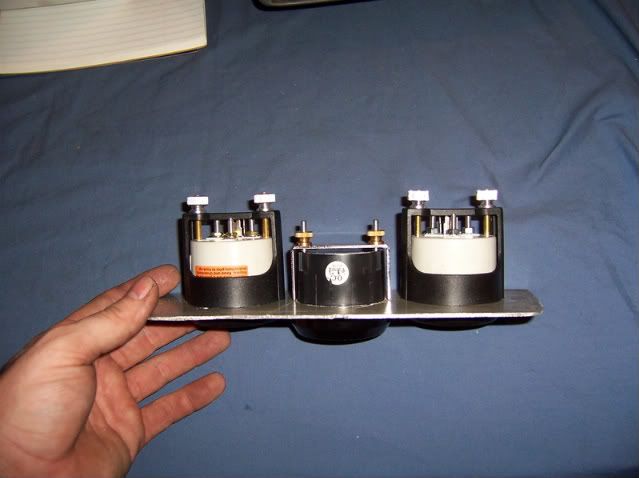
well, grabbed a gauge cluster from a celica at the junkyard today to cut apart for my autometer gauges. the plan is to run a 3 and 3/8ths 160mph electronic speedo and 8k rpm tach. and then 2 and 1/16th electric oil pressure, water temp, voltage, and fuel level gauges and all are z seires except the speedo, it is a sport comp. ill be sending it to autometer to have the silver bexel changed to a black one so itll match the autometer gauges perfectly. i had origonally planned to put a fuel pressure gauge where the clock is but after some closer measurements it looks like i can keep the factory clock in tact. i may try to put the fuel pressure gauge up higher in the cluster. i wont know if it would fit until my box from summit containing the tach and speedo get here. anyway, too kthe cluster apart and heres the pics so far. and btw, i plan to replace the blinker and bright indicator with led's which are also on the way. they are 3mm led's.
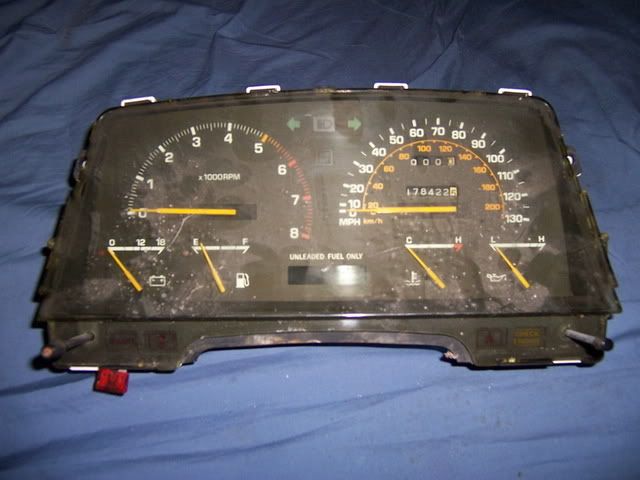
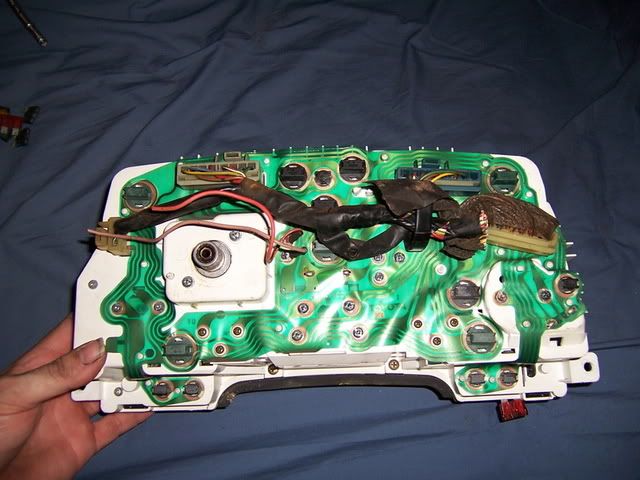
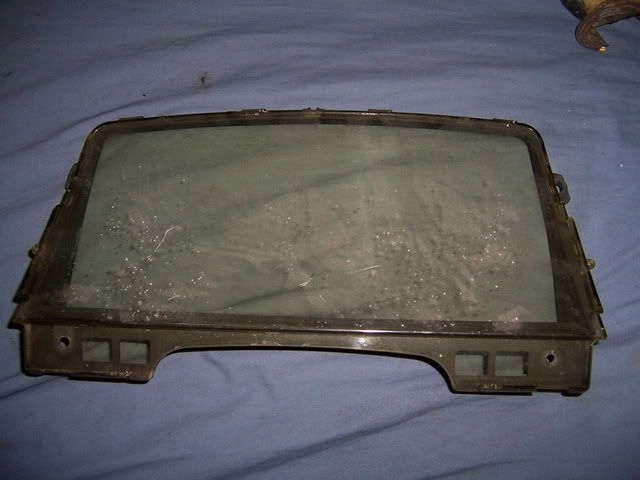

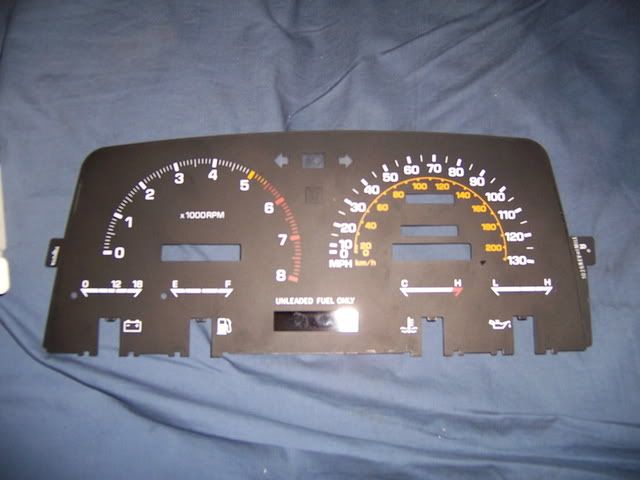
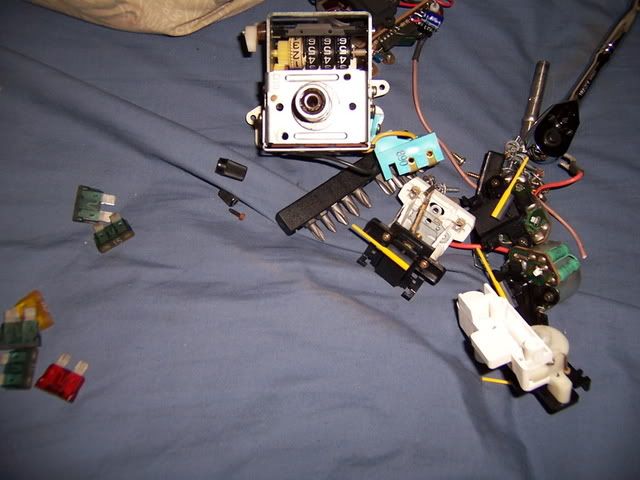
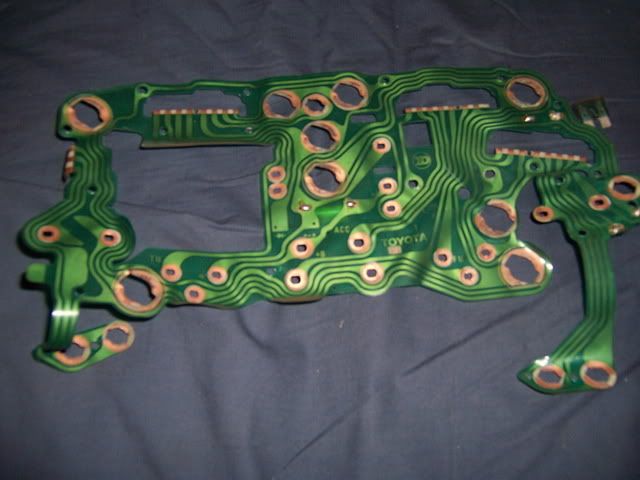
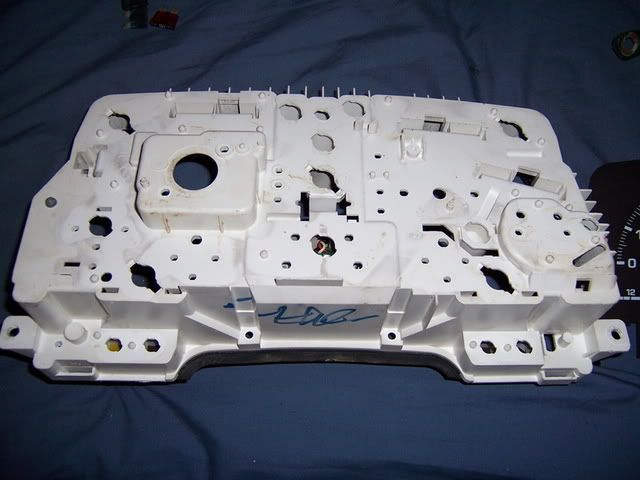
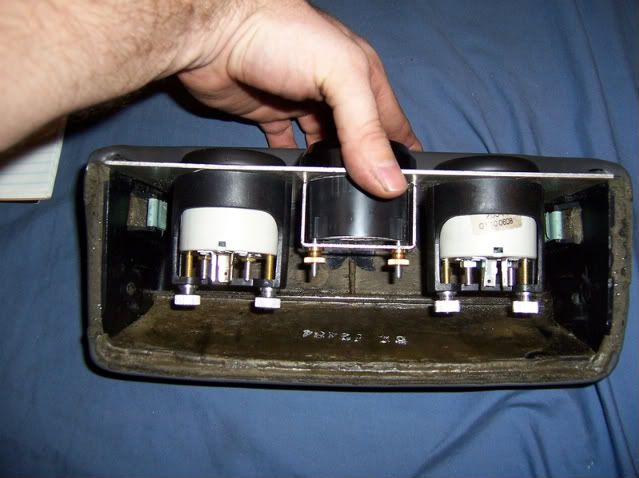
fedex finally showed up. anyway, heres more pics. looks like the clock has to go. lol. oh well. should all fit nice and i will have room for the fuel pressure gauge should i choose to add it to the cluster. anyhow. i need to find a piece of lexan or something to trace the stock cluster plate onto and get it cut out perfect then mark it and get the holes for the gauges cut. i doubt the clear cover will fit over the gauges but if it does ill leave it stock. if not ill cut out the front to leave it open but that way itll fill in the sides of the dash properly.