
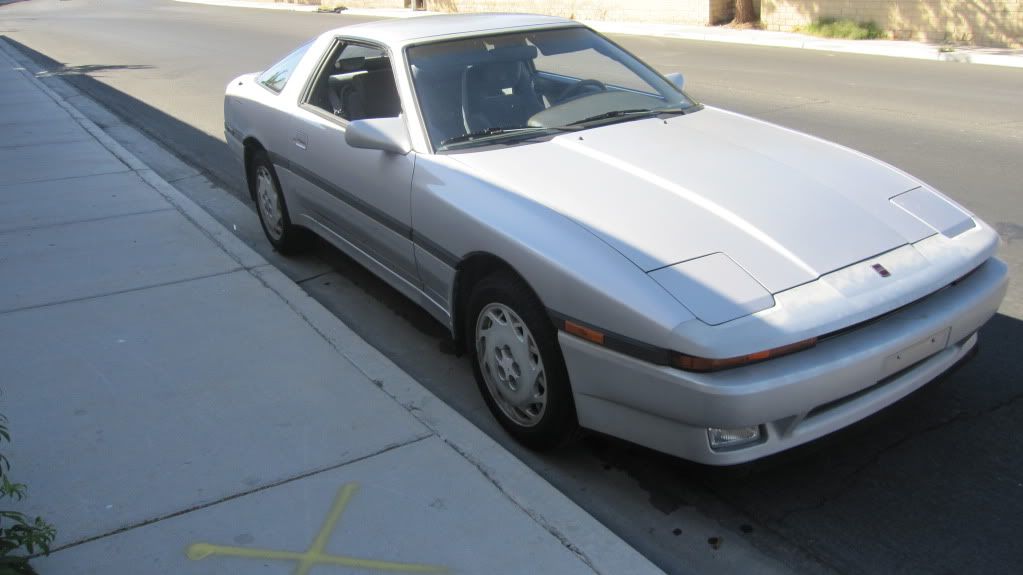
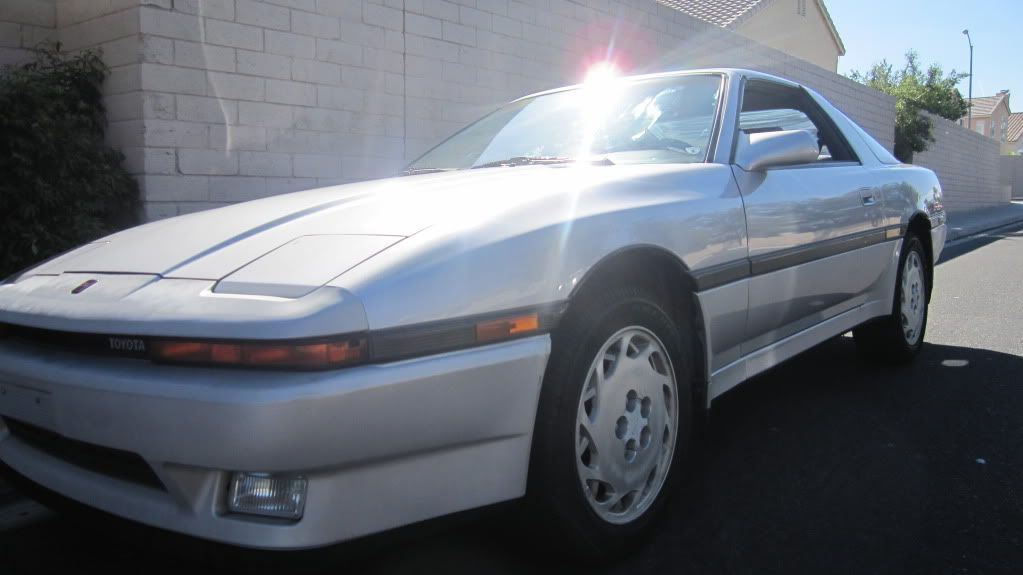
88 Supra Rebuild (Trans swap 1/18/11)
- Thread starter Devin LeBlanc
- Start date
You are using an out of date browser. It may not display this or other websites correctly.
You should upgrade or use an alternative browser.
You should upgrade or use an alternative browser.
They are torqued to 85ft Lb's right now so I am not going to re torque them. I mainly torqued them to 85fllb's to prevent future BHG problems. The fan clutch is free, Although I have a spare in the shed I might try. Its N/A and probably staying N/A I might end up selling it after school is over and getting a 89+ turbo 5 speed, or do a swap into this one.
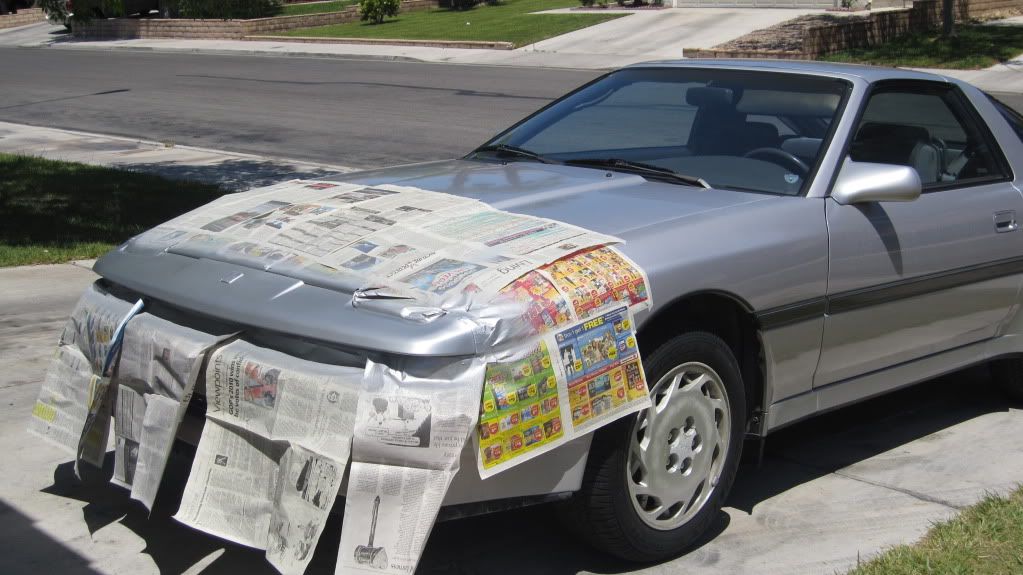
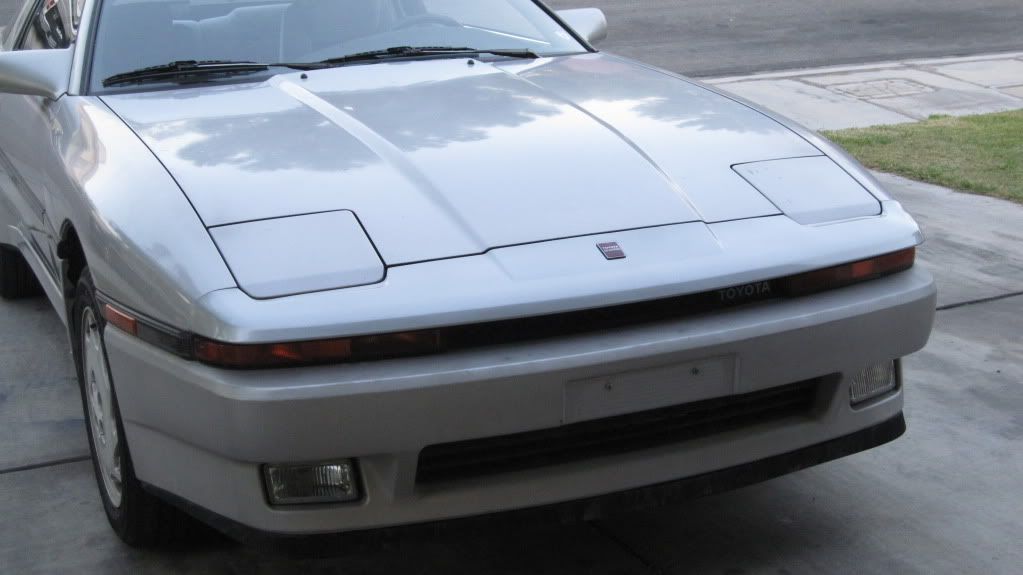
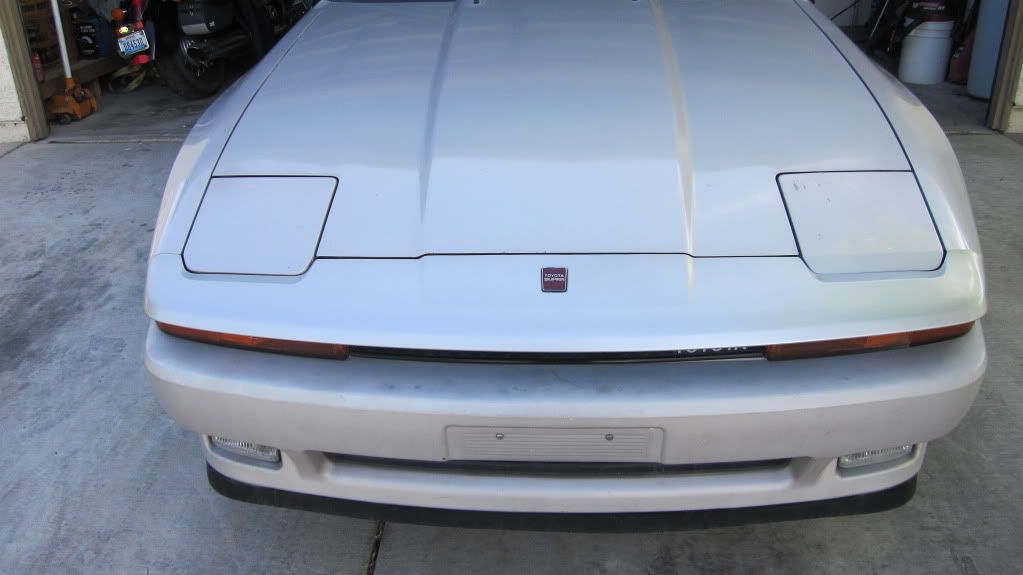
Small update time, Washed the supra today, went over some random spots with liquid luster polisher and restored a shine.. This week going to do all new brake pads and turn the rotors. Car is running great, not loosing any coolant, oil is very clean, smooth running engine etc. About to break 100 miles since I have had the car. Planning on hitting the junk yard to find a newer style toyota radio that will clear the front radio bezel so I don't have to do any modifications to the front trim piece. Going to also re paint the rims the stock color (silver) or as close to it as I can find. Soon to tackle the front and rear bumper, but that will come later! Pics once progress is made!
Thanks,
Devin
Thanks,
Devin
Well, I started today off wet sanding the top lip of the bumper, I decided to try just the top section to see if I was going to be wasting my time painting the whole thing. Here are the results.. I have yet to put on the clear coat so will see how it looks tomorrow.
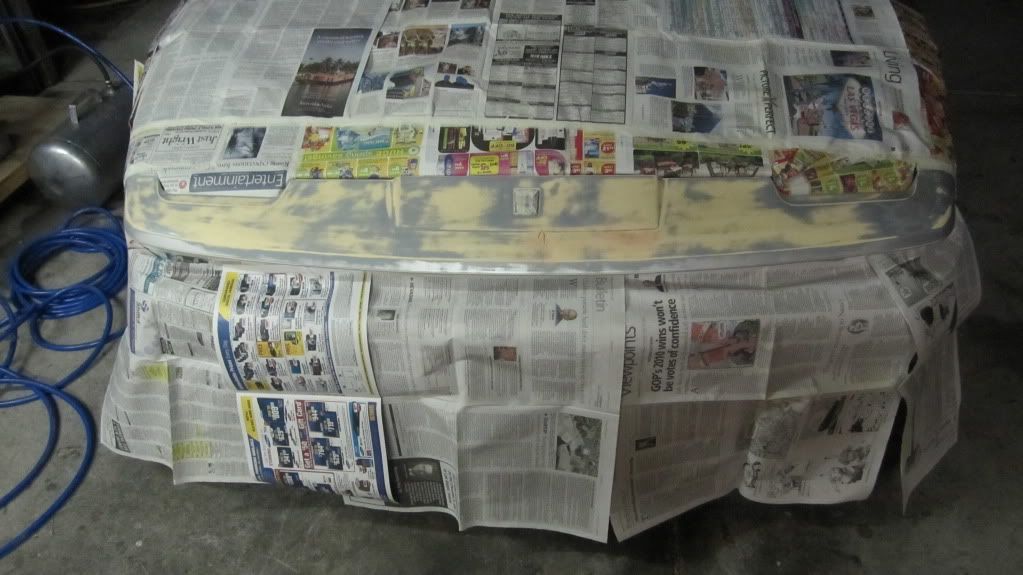
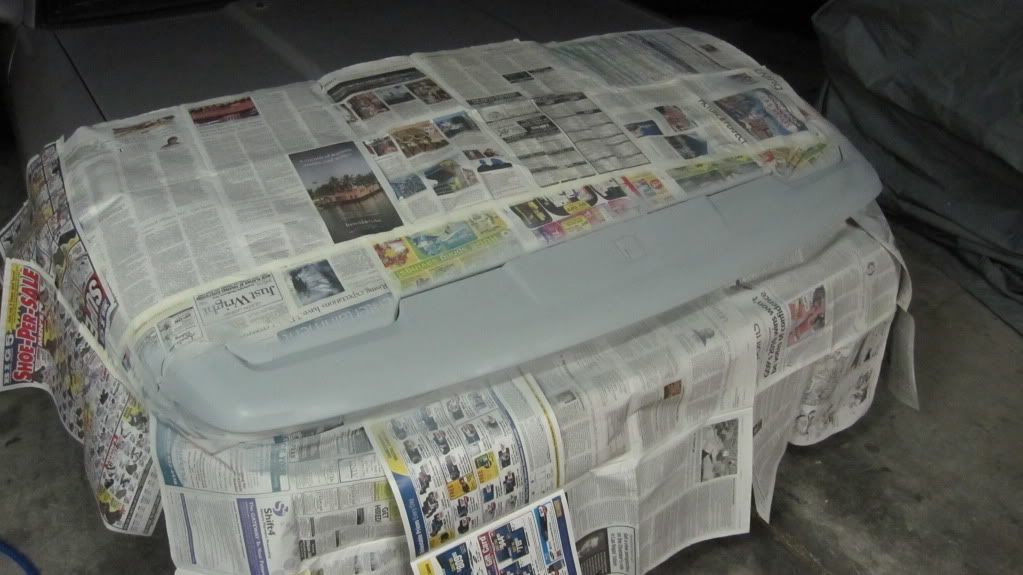
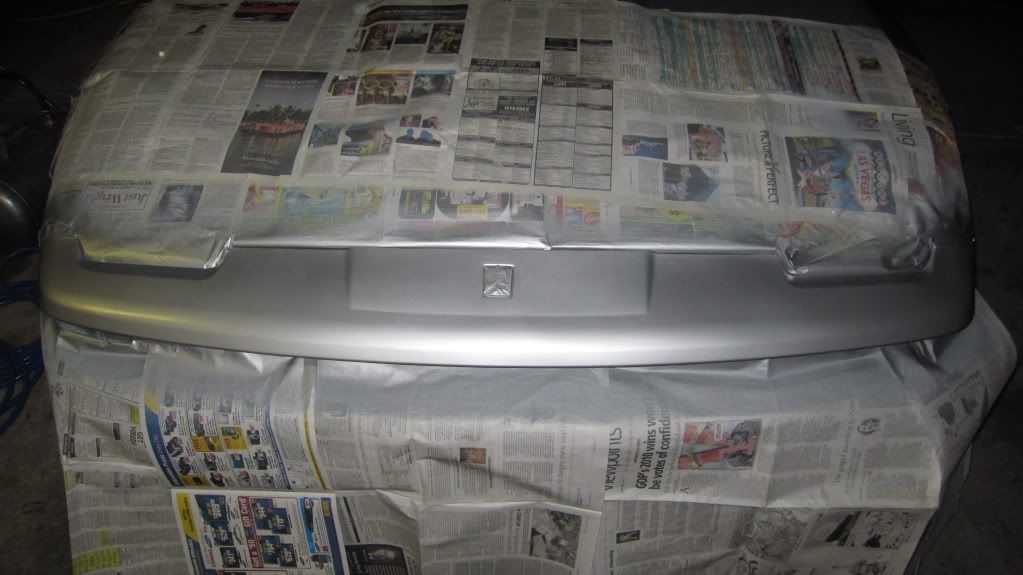
Quick update, Just got home from school and was surprised to see the paint in the day light and how good it came out! Can't wait to see what it looks like with the clear coat on but it matches pretty good I think so far.
Final layer of clear coat is on.. Came out looking really good, Going to let it dry another hour then pull the masking off, let it dry a day and then wet sand and polish.
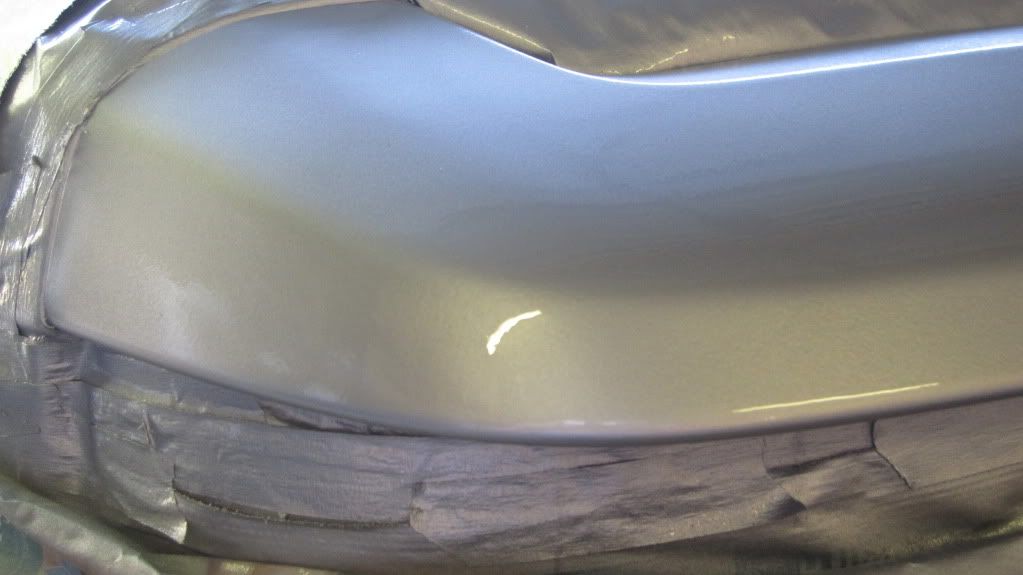
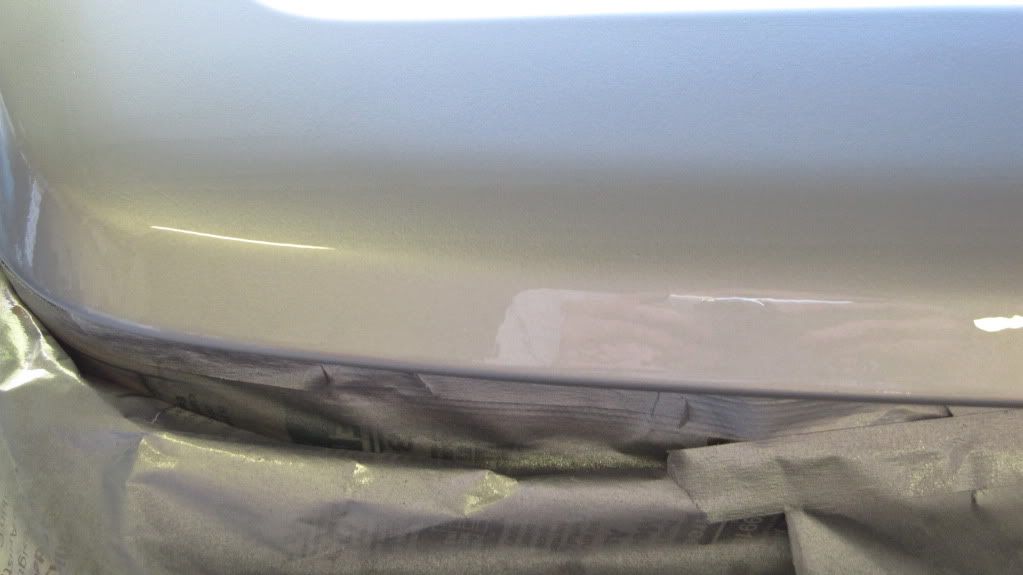
Here is the finished product, I haven't buffed it yet, going to wait until the paint fully cures. Hows that for a spray paint match? ")
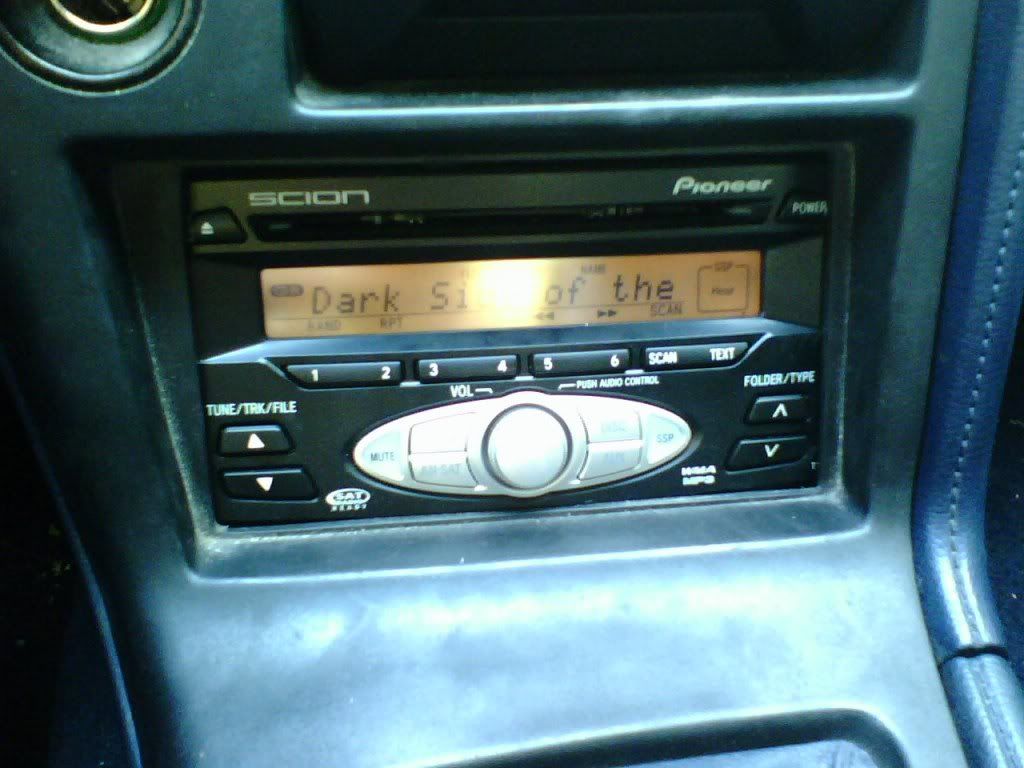
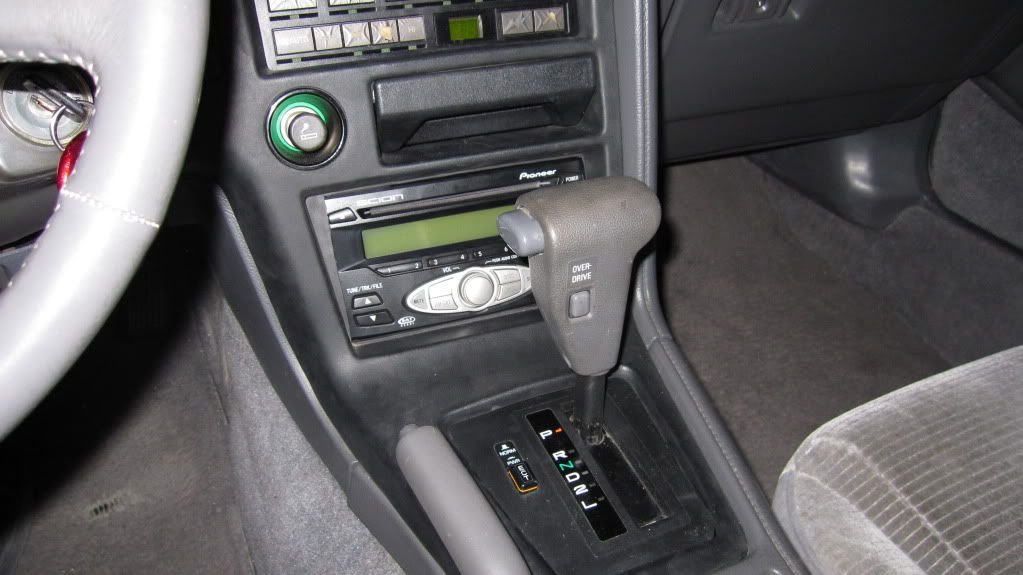
Well not much update, But I got a 06 Scion XB OEM radio for free. Has MP3 Capabilities, color changing back light etc. Going to be installing it in place of the stock radio. Just seeing if I can get an extra radio bezel so I can trim it to fit around the power and CD eject buttons. Would rather keep the original intact. Heres a previous picture I found in a post of what it looks like installed in the mk3 .
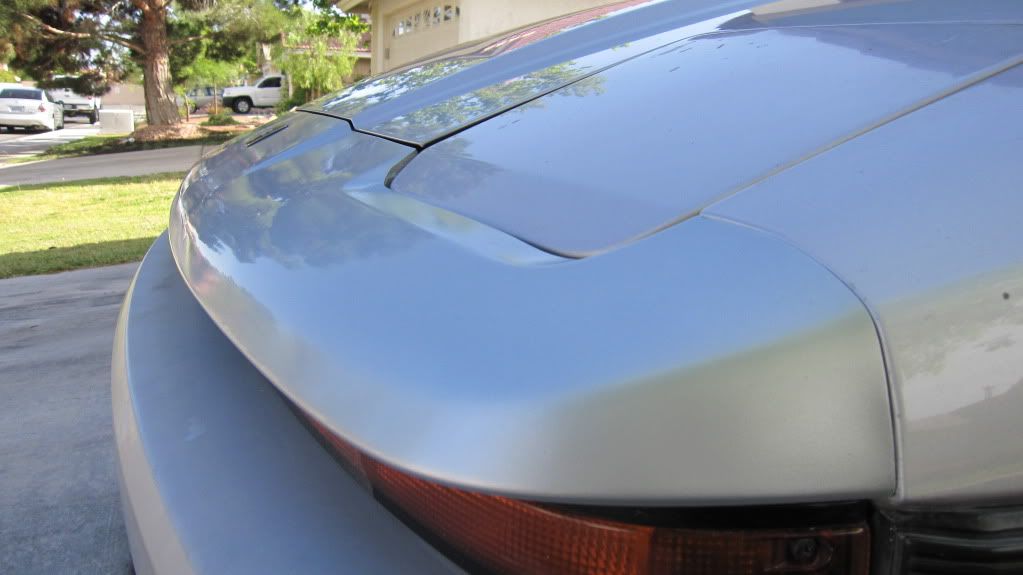
Im pretty pleased with the results.. I wet sanded and buffed out the top bumper section by hand today! Heres how it came out! All materials used are available at autozone.. Paint and all!
^ Damn! Nice job on the paint match, I'm shocked that you got it to match that well haha. It actually looks original, right on the money. Good stuff!
Thanks, I used Dupli-Color Ford Silver Metallic spray paint, and rustoleum Clear coat.. It came out GREAT, Time to do the rear and front bumpers now!
Well I recently did the Scion T1807 Pioneer radio install. Here is a link to my how to I wrote up on it: http://www.supramania.com/forums/sh...1806-T1808-Installation&p=1571393#post1571393
I kind of put painting the bumpers on hold as I want to remove them from the car before I paint them, So I don't have to mask everything off. I decided to fix the cracking rear window trim. I will have more updates as I go but I got them off and also without breaking any of the clips :icon_razz Going to strip them down and either paint them with satin black or black plasti-dip spray. I saw this done before and it came out looking original. So we'll see. Progress so far.
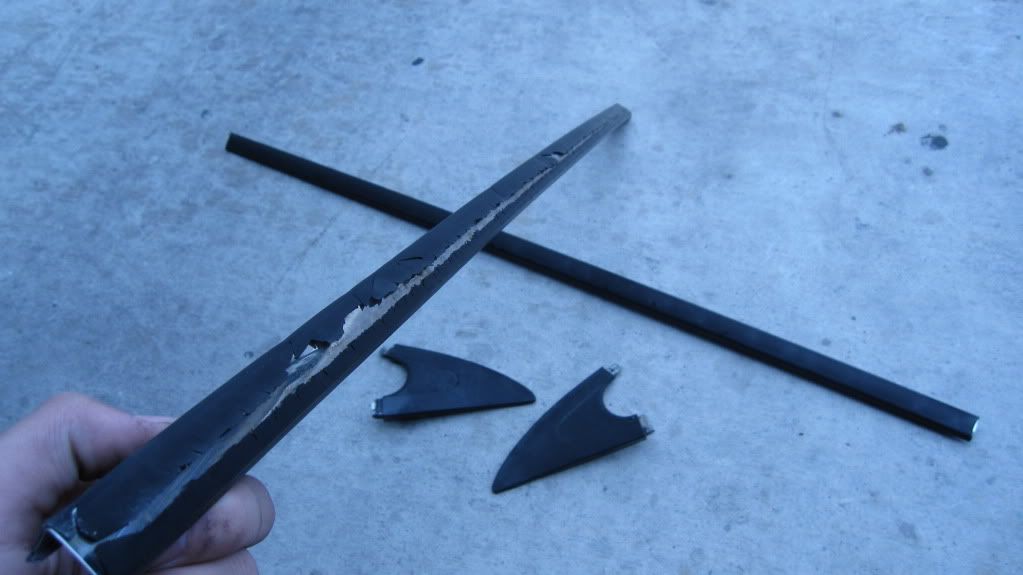
I kind of put painting the bumpers on hold as I want to remove them from the car before I paint them, So I don't have to mask everything off. I decided to fix the cracking rear window trim. I will have more updates as I go but I got them off and also without breaking any of the clips :icon_razz Going to strip them down and either paint them with satin black or black plasti-dip spray. I saw this done before and it came out looking original. So we'll see. Progress so far.
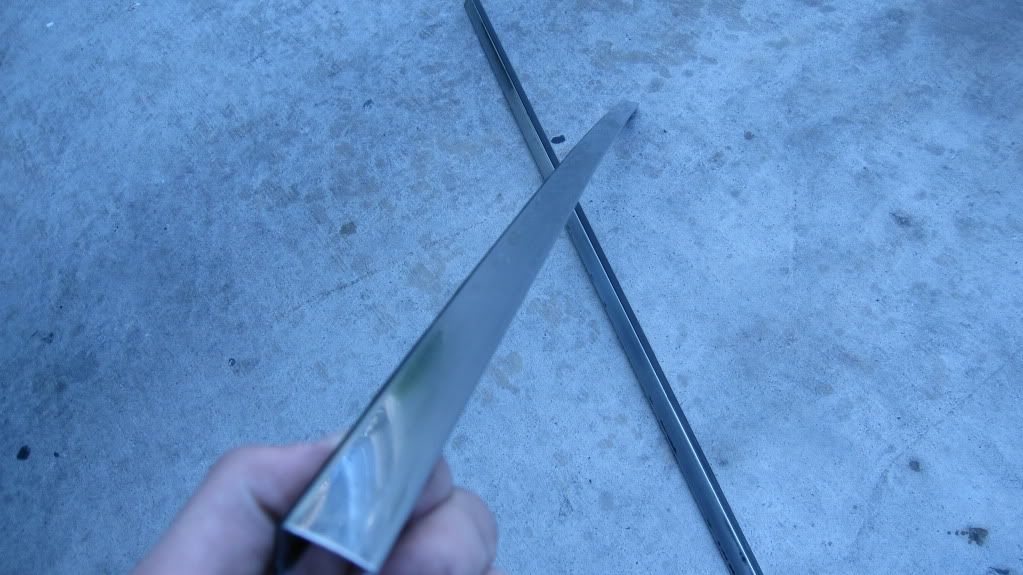
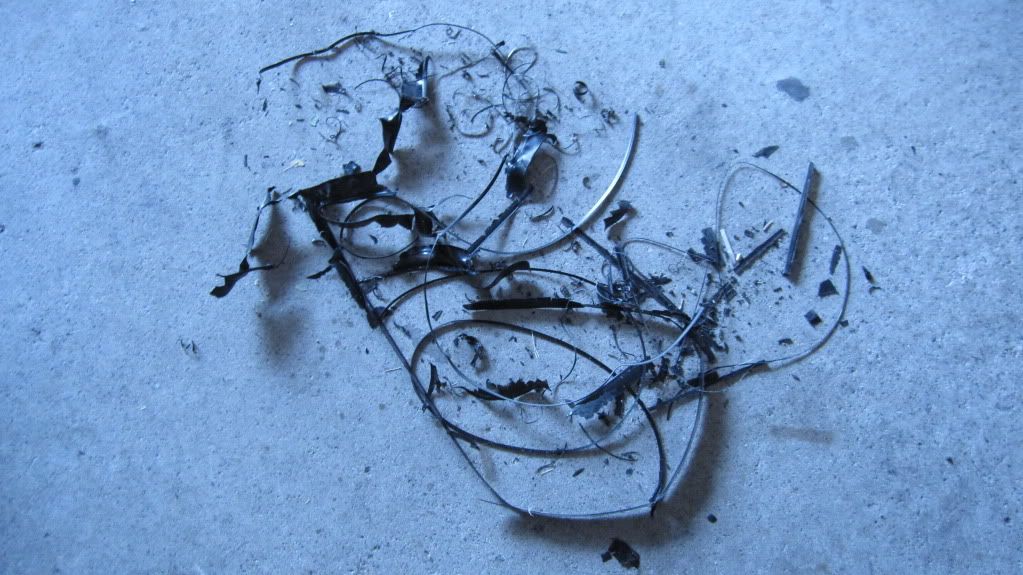
Well got all the old plastic off the window trim. About an hour with a heat gun and razor blade did the trick. I then wet sanded them to get all the other little stuff off so it would have a nice surface to stick to.. Going to run to the store to see if they have black plasti-dip if not Ill just get some satin black rustoleum.
I have in the plans a 5 speed swap.. Im probably going to get another supra once I build up some more cash after school is over and Im working all the time. It will definitely be a 89+ 5 speed turbo targa. This is just my daily driver for now so I can use it to get back and forth from home to school/work etc. Maybe ill do a GTE 5spd swap into this, don't know yet.
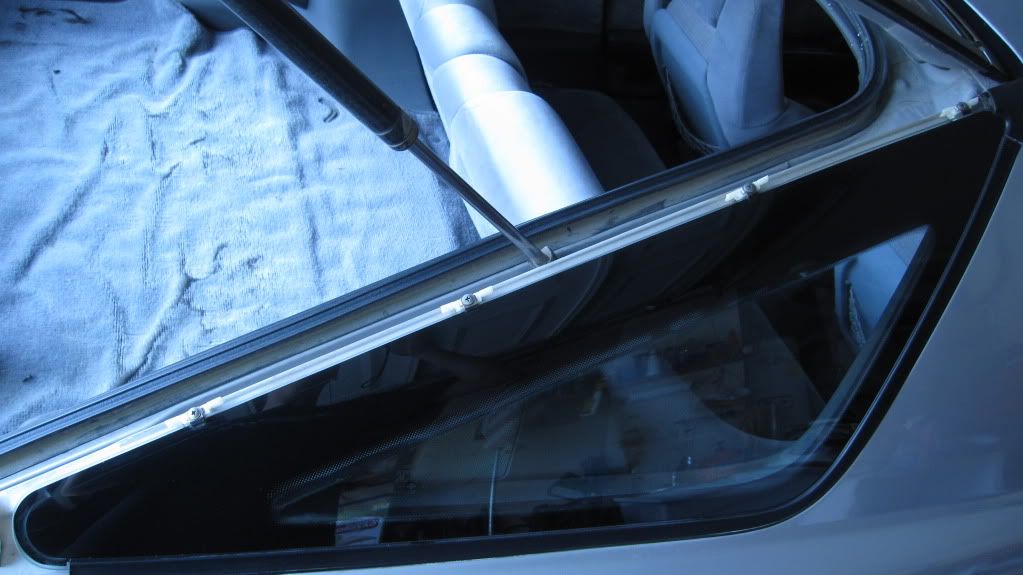
Anyways, I got the side trim pieces painted with satin black. And I removed the cracking splitting plastic from the piece above the rear window as well.. Wet sanded to remove all the rust and then painted it satin black. Everything came out really good.. About 2 hours and 2.97 at walmart for paint. It looks pretty damn good!
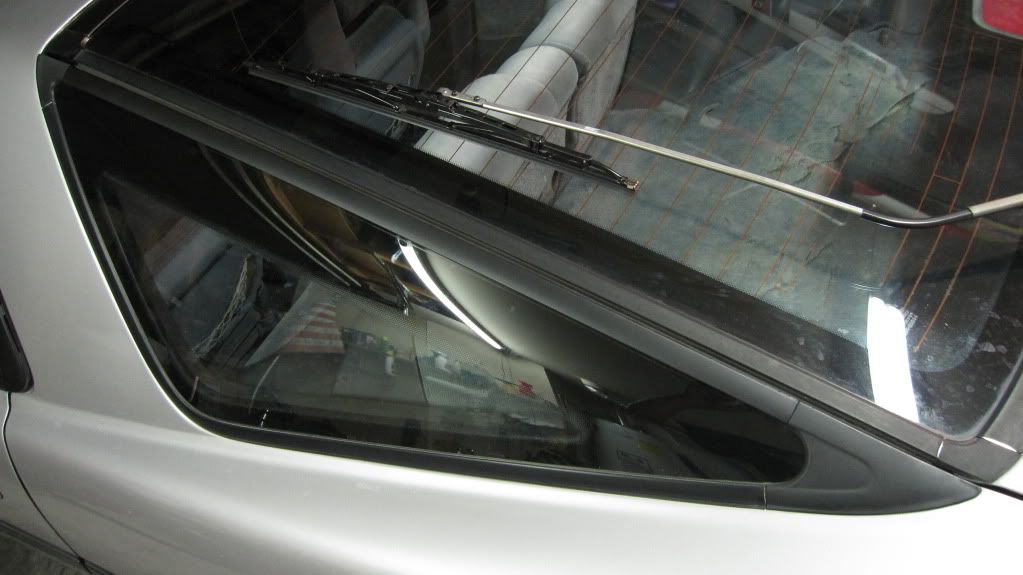
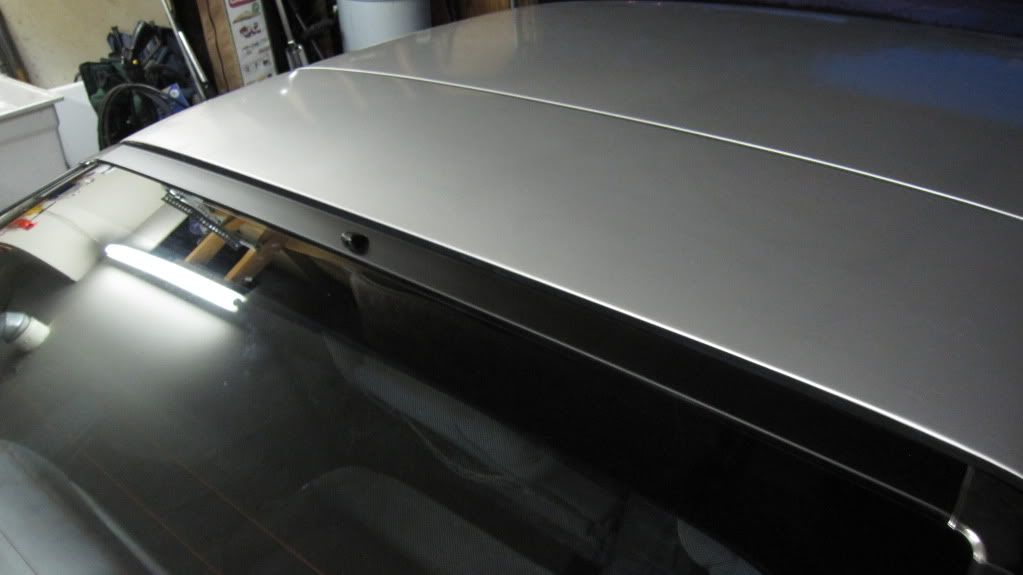
Anyways, I got the side trim pieces painted with satin black. And I removed the cracking splitting plastic from the piece above the rear window as well.. Wet sanded to remove all the rust and then painted it satin black. Everything came out really good.. About 2 hours and 2.97 at walmart for paint. It looks pretty damn good!
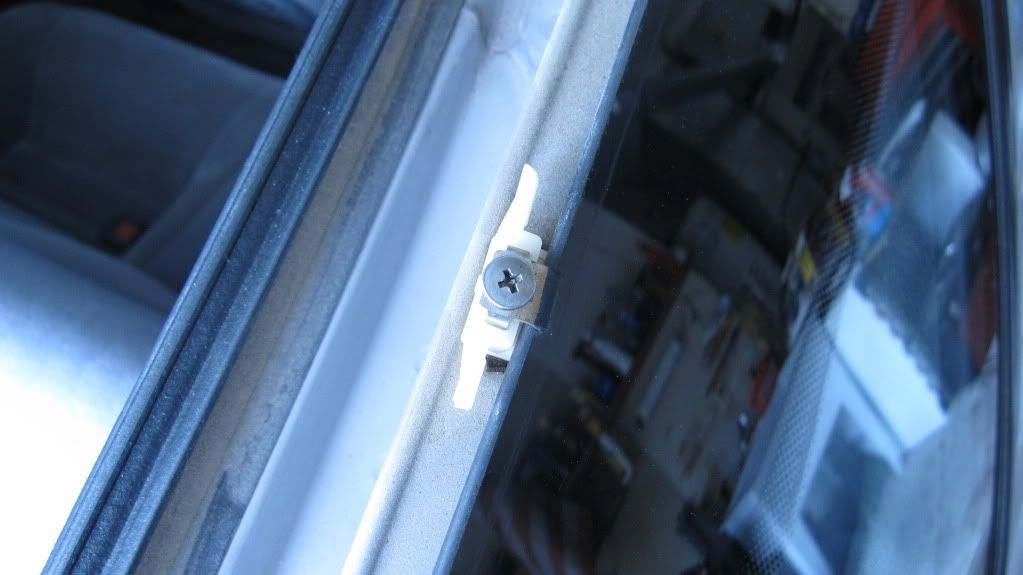
Nice! I definately need to do that. Is it pretty hard to get off without breaking them or the clips?
well, The trick I used was first remove the bottom trim piece. If you open up the hatch The screw is in the inside. That piece has two little tabs on it that slide under the two window trim pieces. I just wiggled it and pulled on it a bit and it came out. Once you removed that, From outside the car put your fingers on the inside of the hatch where the upper trim piece is and gently pull up to break any dirt loose. Then from the bottom pull down so it slides down some off the tab at the top of the trim piece. After that I just gently and evenly pulled up on the trim and it un-clipped. Its not that tricky its just doing it the right way. Mine came out great so I think its worth it to do it in the long run. Satin black matches perfect and looks like the original pieces that haven't cracked on the car.