
Project Lex (aka: Teh Bean) '92 SC300
- Thread starter Halon
- Start date
You are using an out of date browser. It may not display this or other websites correctly.
You should upgrade or use an alternative browser.
You should upgrade or use an alternative browser.
Drilled the oil filter union bolt to accept a 1/8npt fitting for my oil feed. You can either buy one for an IS300 for like $25 and it's already tapped, or just drill the stocker. And well, considering I already had a 1/8npt tap, and access to free drill bits and a drill press, that was an easy choice ")
Lots o lube:

Pilot drilled:

Hole drilled using "R" size drill bit, and de-burred:

Tapped for 1/8npt. Wish I coulda tapped further but it was getting HARD. That look good enough to you guys?:


1/8npt to -3AN fitting installed. Used some liquid pipe thread sealing compound on it:

OFH installed back on the car, badda bing:

Also installed the drain fitting. Need a gasket for that thing yet...

Lots o lube:
Pilot drilled:
Hole drilled using "R" size drill bit, and de-burred:
Tapped for 1/8npt. Wish I coulda tapped further but it was getting HARD. That look good enough to you guys?:
1/8npt to -3AN fitting installed. Used some liquid pipe thread sealing compound on it:
OFH installed back on the car, badda bing:
Also installed the drain fitting. Need a gasket for that thing yet...
Got the oil pan installed. Went to put the Felpro gasket on and it's the complete wrong shape. Come to find out there's a couple different oil pan designs, and of course the gasket was for the other one. Somabich. The gasket did come with 4 bottles of RTV however, so I just RTV'd it and hopefully that will suffice. We shall see...
Once I was done with that, I just grabbed some gasket material I had laying around and made a gasket for the oil drain flange. Gave it a coat of copper spray for good measure. So that should be done.
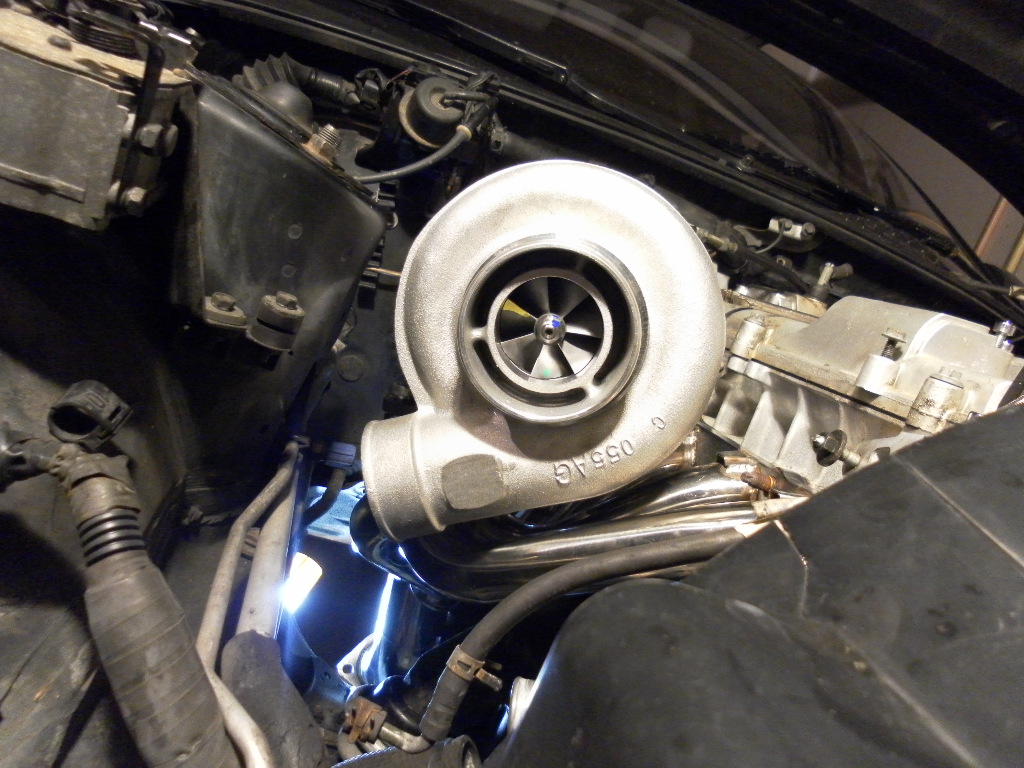
Installed the oil feed fitting into the turbo. Again I used a little bit of liquid pipe thread sealer.

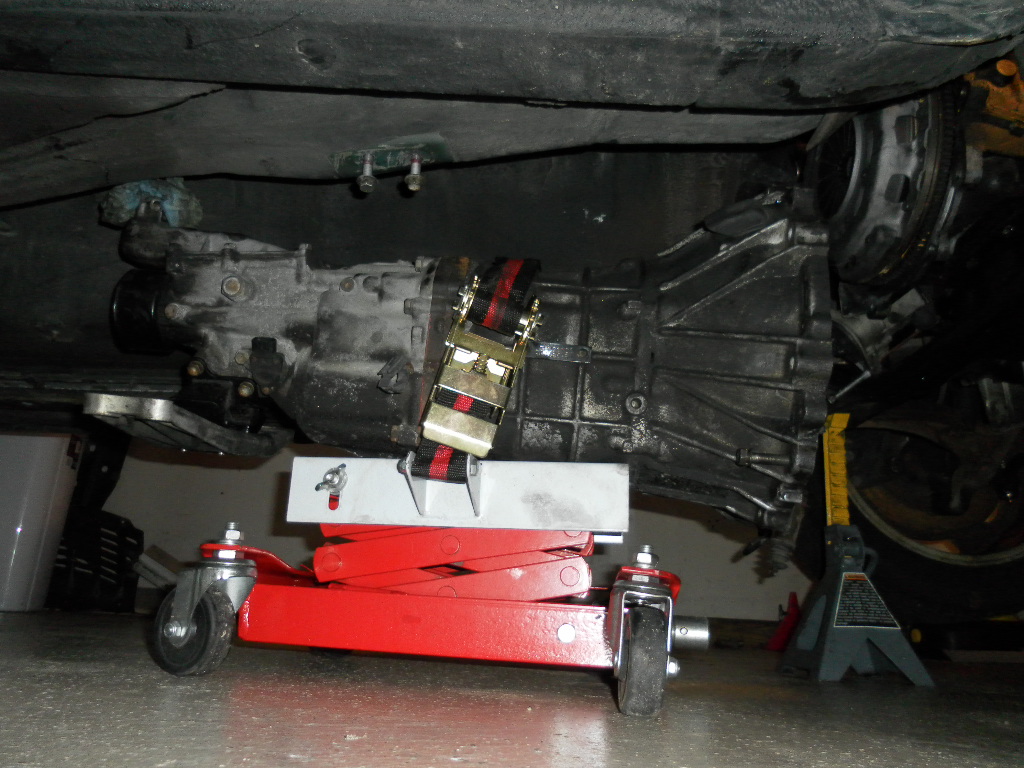
Decided to try and tackle the tranny. First I had to remove the rest of the exhaust. Once I got that off, I removed the driveshaft.

Then started at the Tranny. I got all the motor to tranny bolts off. Slave Cylinder off, Starter off. Took 2 of the 4 tranny mount bolts off. Took the reverse light plug off. And that's where it sits.

What's left is I need to find the speedometer cable and remove it. Then I have to figure out how to unhook the damn shifter in the car. I took the 4 bolts off that hold it to the tunnel. Looking online people say the shifter should just lift off? Mine doesn't budge. Dumb little thing I'm sure, just gotta figure it out. Then just remove those last two bolts on the tranny mount and she should be on the floor.

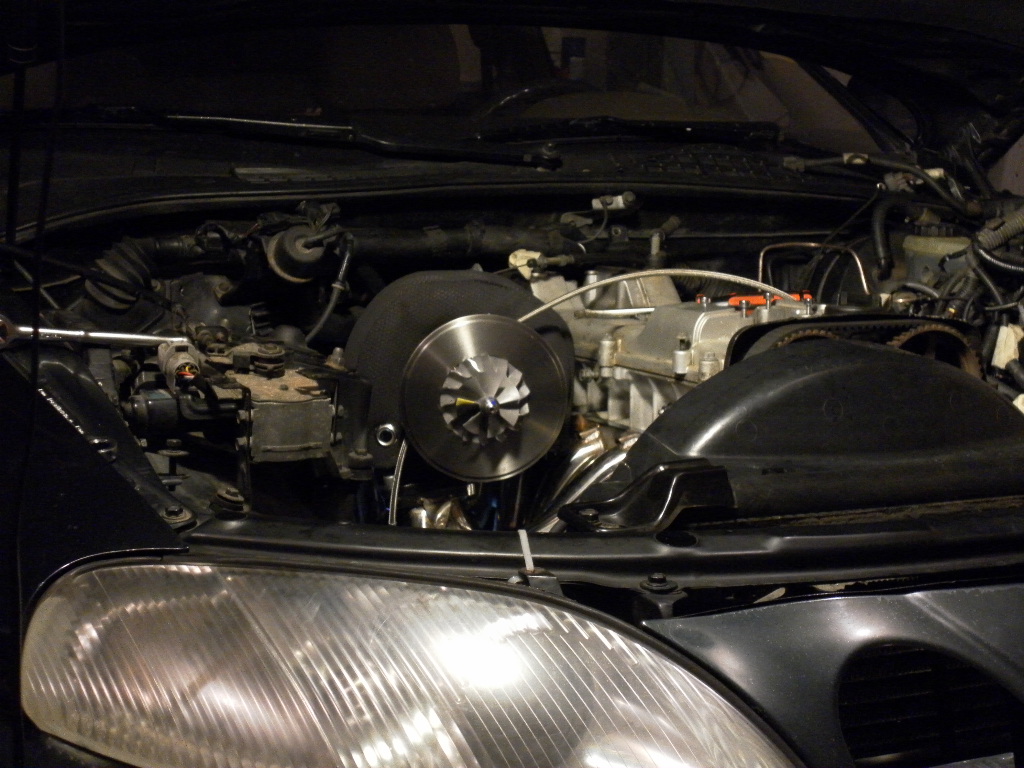
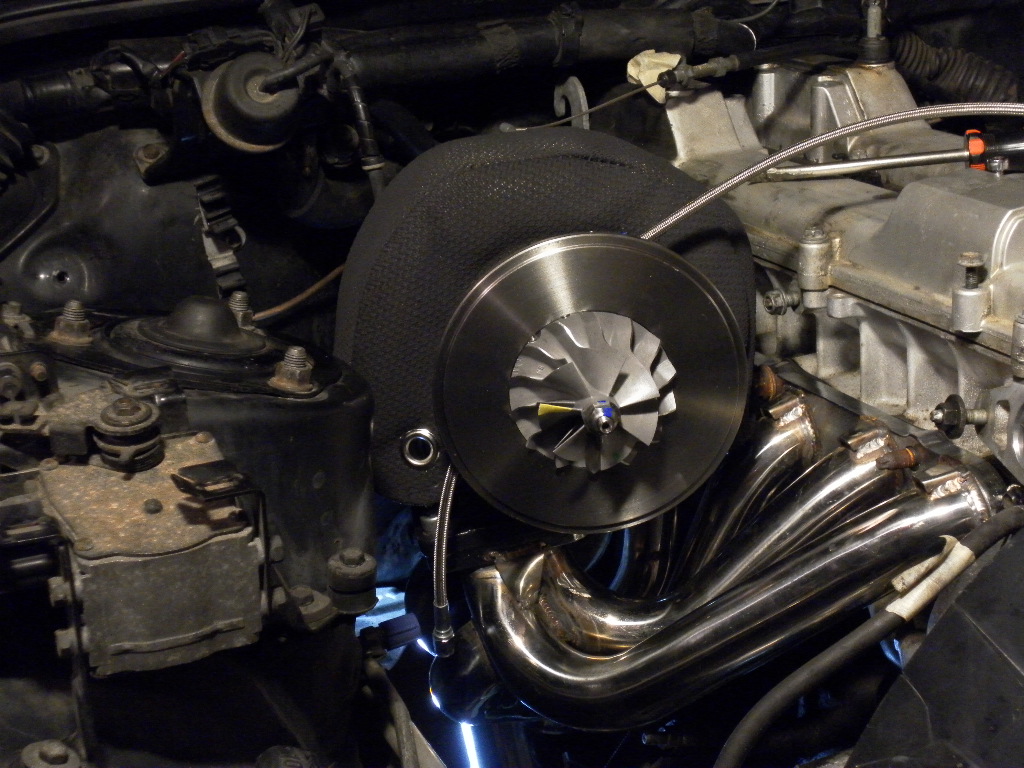
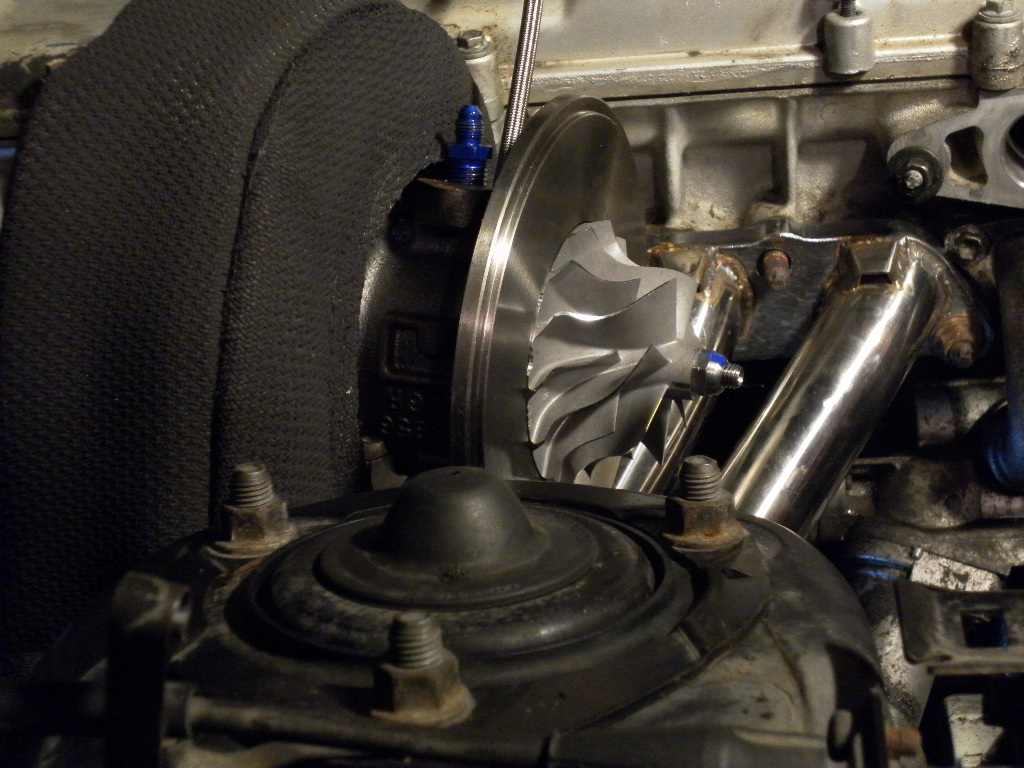
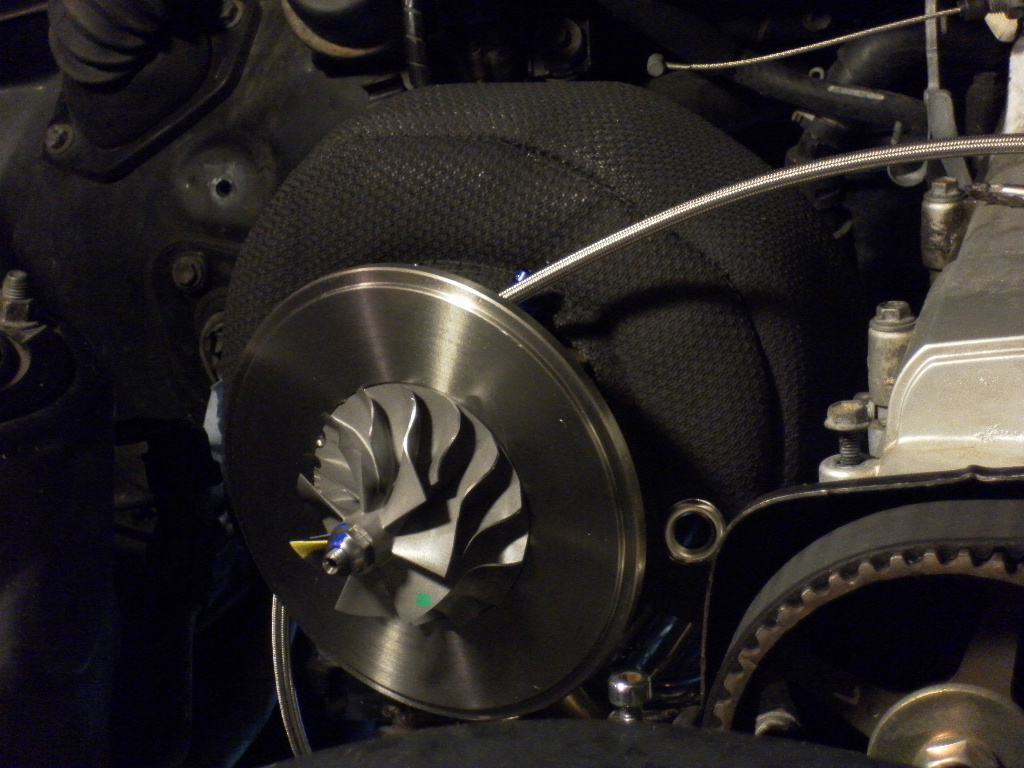
Also pics of the sweet turbo blanket


Once I was done with that, I just grabbed some gasket material I had laying around and made a gasket for the oil drain flange. Gave it a coat of copper spray for good measure. So that should be done.
Installed the oil feed fitting into the turbo. Again I used a little bit of liquid pipe thread sealer.
Decided to try and tackle the tranny. First I had to remove the rest of the exhaust. Once I got that off, I removed the driveshaft.
Then started at the Tranny. I got all the motor to tranny bolts off. Slave Cylinder off, Starter off. Took 2 of the 4 tranny mount bolts off. Took the reverse light plug off. And that's where it sits.
What's left is I need to find the speedometer cable and remove it. Then I have to figure out how to unhook the damn shifter in the car. I took the 4 bolts off that hold it to the tunnel. Looking online people say the shifter should just lift off? Mine doesn't budge. Dumb little thing I'm sure, just gotta figure it out. Then just remove those last two bolts on the tranny mount and she should be on the floor.
Also pics of the sweet turbo blanket
PP torqued to 14lb/ft. Tranny is back in, woo woo. Driveshaft and all that stuff is back in. Thanks for letting me borrow the tranny jack Aaron. I don't think I coulda done this job without it.
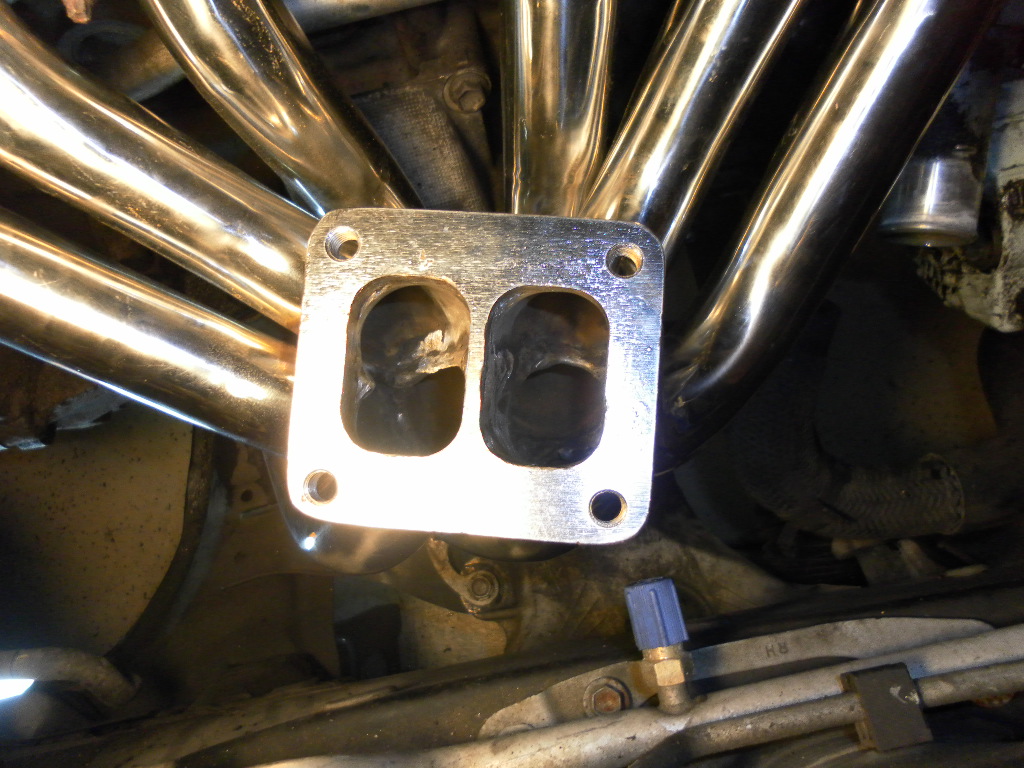
SO with that being done, what's next? Manifold. Thanks again to Andy at Elite for chopping off the old WG flange and tacking my new one in place.
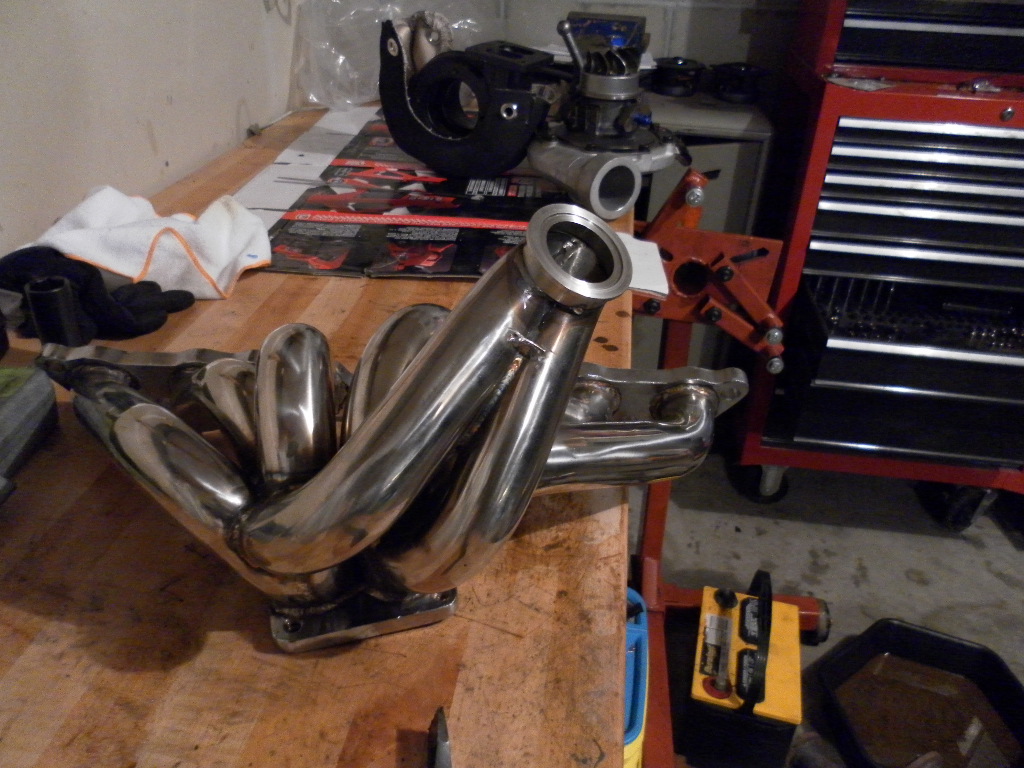
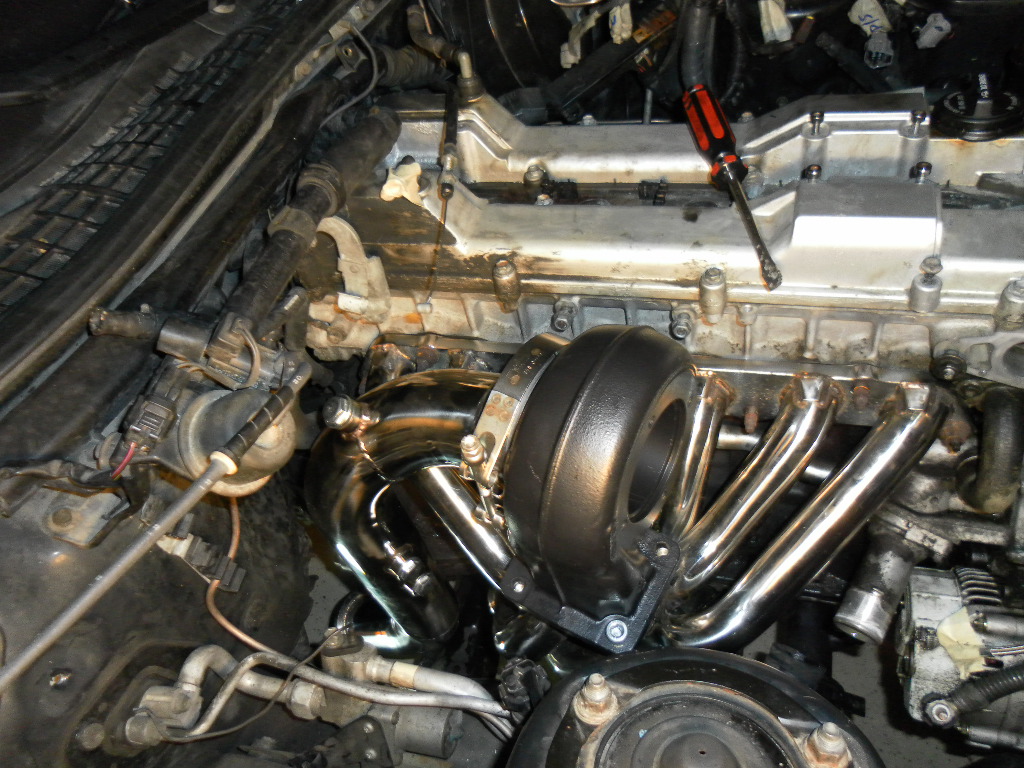
Test fitting everything up. Brand new exh. mani gaskets Going to chop the end off the comp housing and get a 90* welded on that. Mo lemme know when you got your welder all setup!!
Onto the pics!
Collector. Seen better, but seen worse. It'll do just fine for me
Exh. Housing on, and downpipe halfass installed just for me to see how it lines up.
More test fitting:
Extended Tip Son!!

SO with that being done, what's next? Manifold. Thanks again to Andy at Elite for chopping off the old WG flange and tacking my new one in place.
Test fitting everything up. Brand new exh. mani gaskets
Going to chop the end off the comp housing and get a 90* welded on that. Mo lemme know when you got your welder all setup!!Onto the pics!
Collector. Seen better, but seen worse. It'll do just fine for me
Exh. Housing on, and downpipe halfass installed just for me to see how it lines up.
More test fitting:
Extended Tip Son!!
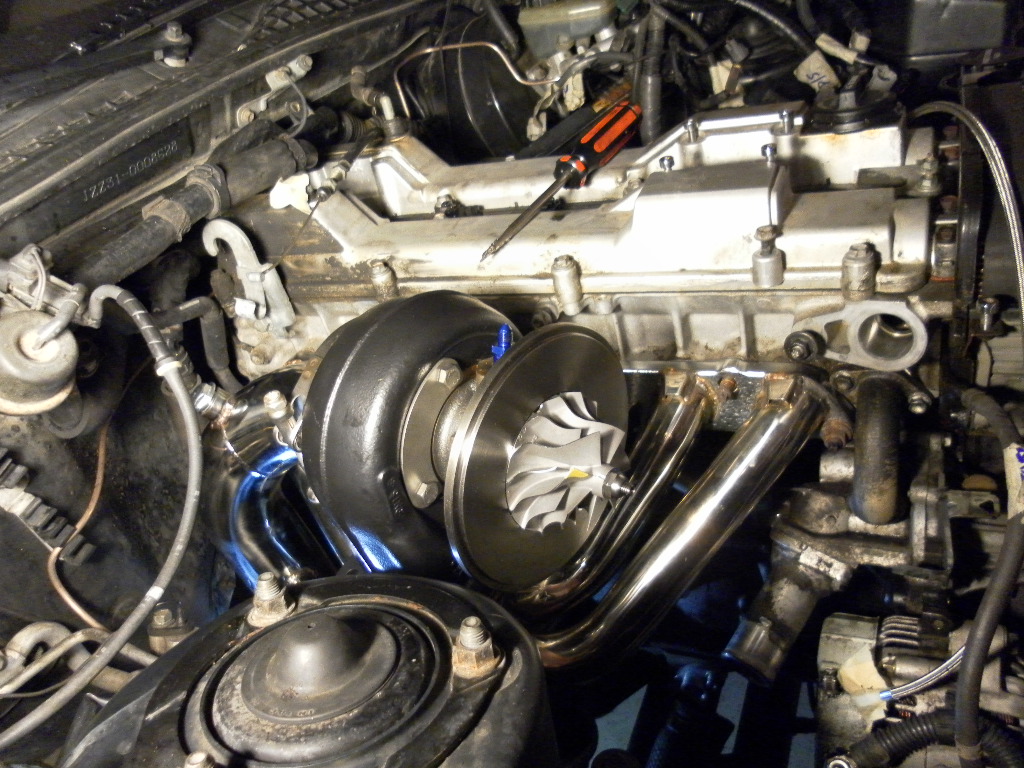
Getting closer...that IC piping looks great where it is; looks like the 90 will put it right where it needs to be, and it'll sit way out of the way. I don't know if it's the SC300 chassis or the way your exhaust mani is designed, but the turbo just seems to sit low in the bay for being so big. Which isn't a bad thing, I think it looks super clean that way.
On a side note, that canister (think it might be a charcoal filter?) in the last pic seems like it might be in the way of your piping. Might just be the angle, though.
On a side note, that canister (think it might be a charcoal filter?) in the last pic seems like it might be in the way of your piping. Might just be the angle, though.
Wow. Very clean! Looks good! Keep up the good work! Can't wait for the next video! I wish empera SC was that clean too
Decided to go a slightly different route with the IC piping. I have half of the Compressor side piping done and taped together ready for welding. Also have half of the TB side of the piping fabbed up as well. The bend coming out of the FMIC is kinda ugly, very sharp turn. Not ideal by any means, but it allows me to route it the way I want to, and plus that side will be changed once I switch to a FFIM setup in the future anyway so it's only temporary.
Here's pics of the compressor side piping I've mocked up so far.


Installed the braided replacement PS line. I don't think the old one was leaking anymore, but f-it I bought this thing so might as well put it on:

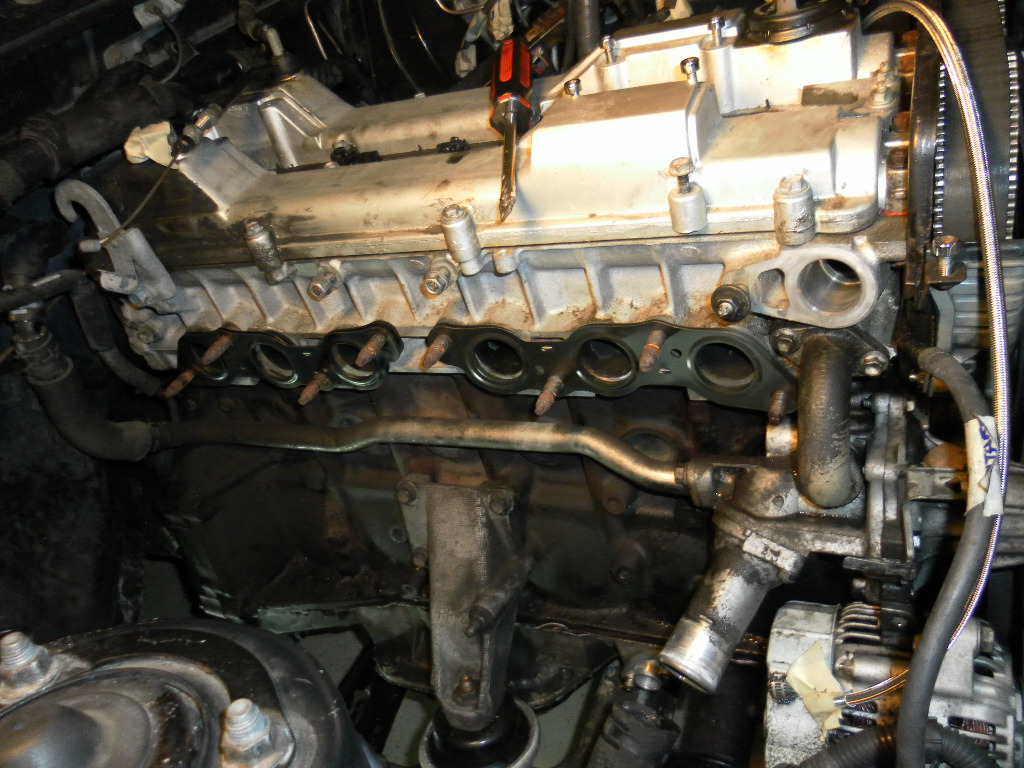
Decided next to start plugging stuff back in and putting the intake mani on. First I decided to make an EGR Block-off plate out of some scrap aluminum stock I had:

Putting the intake back on. Nice new intake gasket

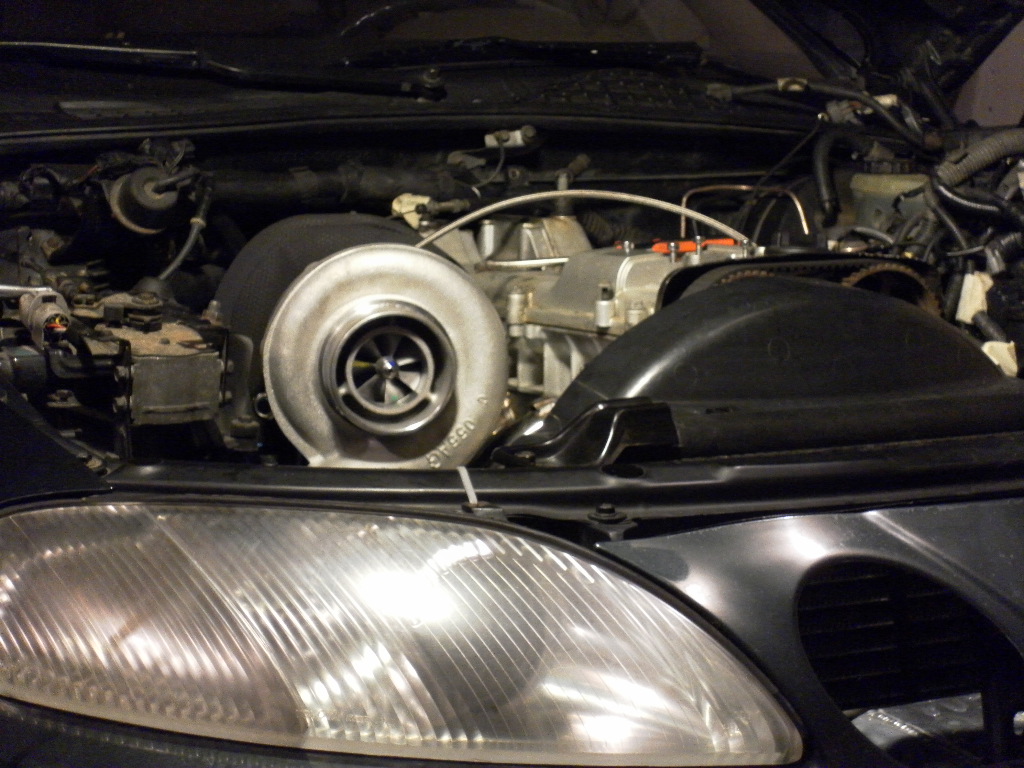
As she sits right now

Here's pics of the compressor side piping I've mocked up so far.
Installed the braided replacement PS line. I don't think the old one was leaking anymore, but f-it I bought this thing so might as well put it on:
Decided next to start plugging stuff back in and putting the intake mani on. First I decided to make an EGR Block-off plate out of some scrap aluminum stock I had:
Putting the intake back on. Nice new intake gasket
As she sits right now
Awesome build thread! I also am working on a project SC haha. Cant wait to see the final product
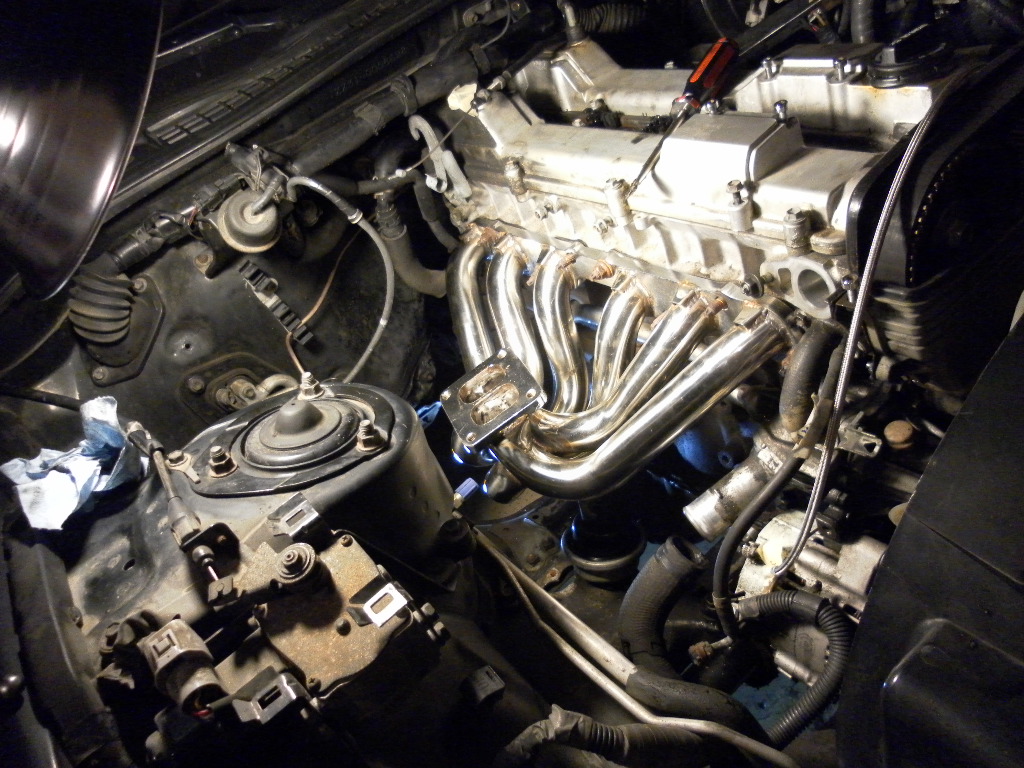
Put the plenum on the runners. Nice new gasket

Also I kinked the fuel rail feed line, so I've decided to just replace it and the stock fuel dampener with a direct -6AN push-lock setup. TNT had all the parts ready to rock for me!
Since I have some extra hose, I may make a couple more to sell if anyone else is interested in bypassing the stock dampener and replace it with a direct line.


Got some 1/2NPT x 5/8" barbed fittings for the Turbo Oil Drain setup. Figured this will keep it a cheap and simple drain setup.

Here's how she looks right now.

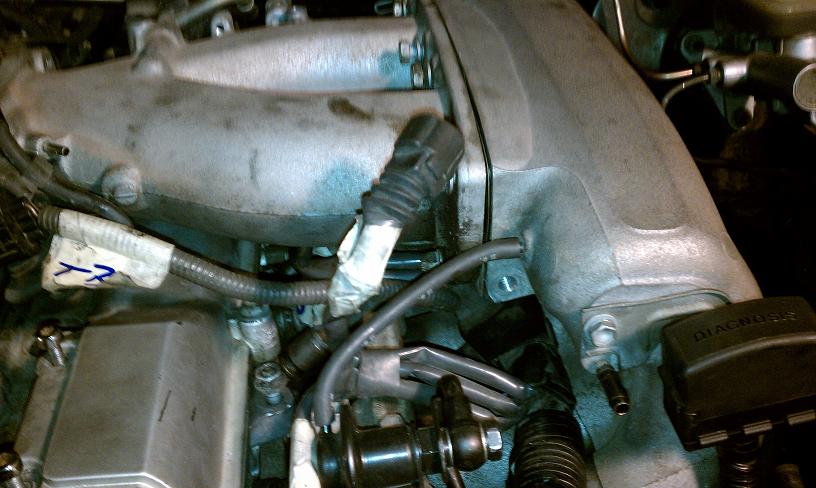
Anyone know where this electrical plug goes to in the middle of the pic? I had it marked as going to the Intake Manifold, but I don't see anywhere to plug it into.
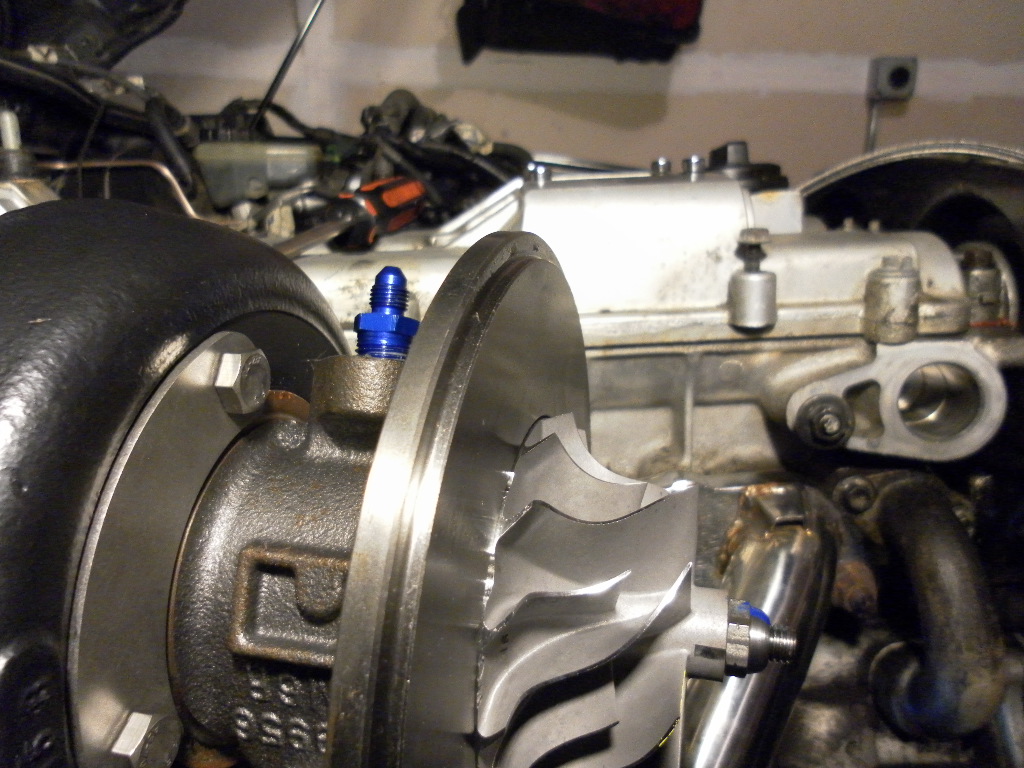
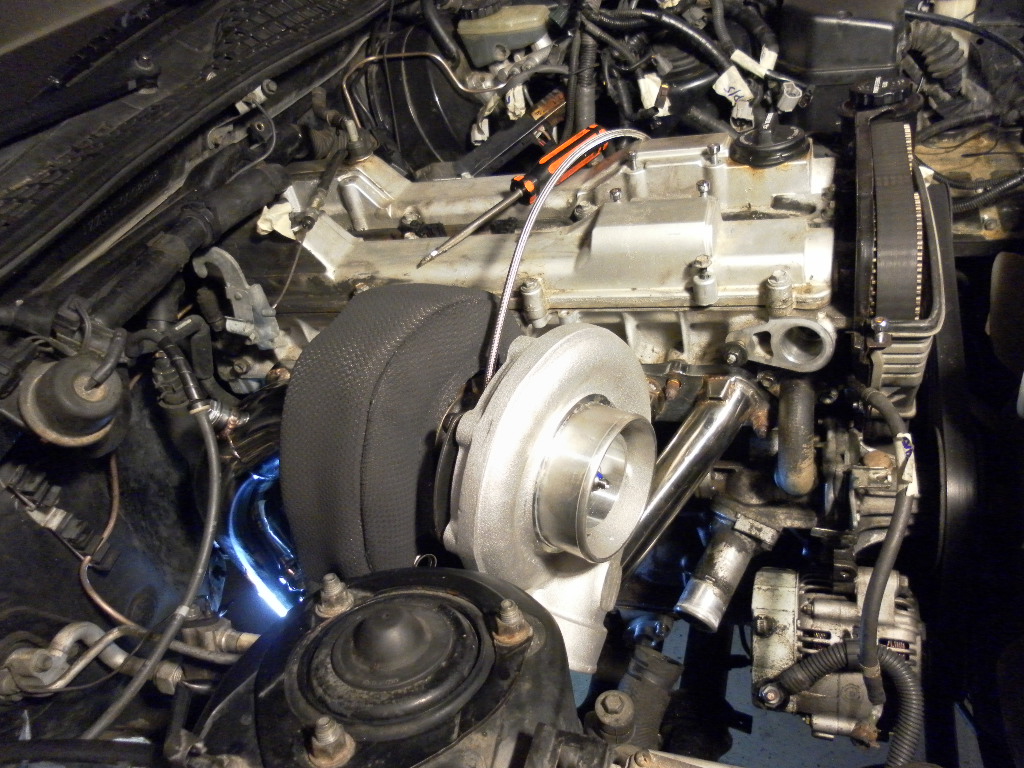
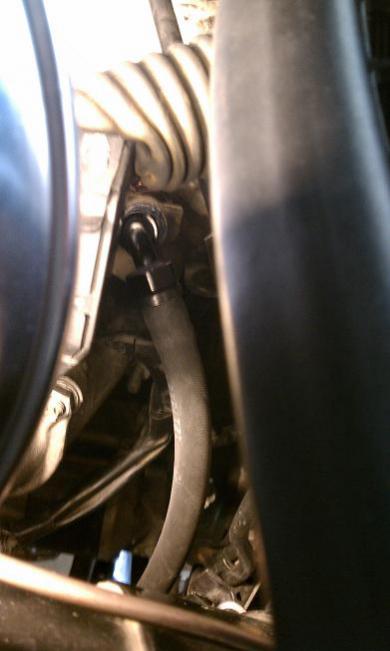
Turbo clearance blows:

Also I kinked the fuel rail feed line, so I've decided to just replace it and the stock fuel dampener with a direct -6AN push-lock setup. TNT had all the parts ready to rock for me!
Since I have some extra hose, I may make a couple more to sell if anyone else is interested in bypassing the stock dampener and replace it with a direct line.
Got some 1/2NPT x 5/8" barbed fittings for the Turbo Oil Drain setup. Figured this will keep it a cheap and simple drain setup.
Here's how she looks right now.
Anyone know where this electrical plug goes to in the middle of the pic? I had it marked as going to the Intake Manifold, but I don't see anywhere to plug it into.
Turbo clearance blows:
Made the new Fuel Feedline which will bypass the stock fuel damper. Used -6AN black Aeroquip Push-Lock hose (my favorite push-lock hose) with black push-lock hose ends. I don't like the blingy SS Braided stuff. I like clean and subtle, so this is perfect. Plus it's way easier to assemble than SS Braided. The adapter fittings are blue because I simply could not find them in black, oh well.

I will be making a couple more of these if anyone is interested in one, since I have a ton of left over fuel line.
Fitting installed in Fuel Rail:

Fuel line installed:


Underneath the car where it attaches to the stock line near the firewall


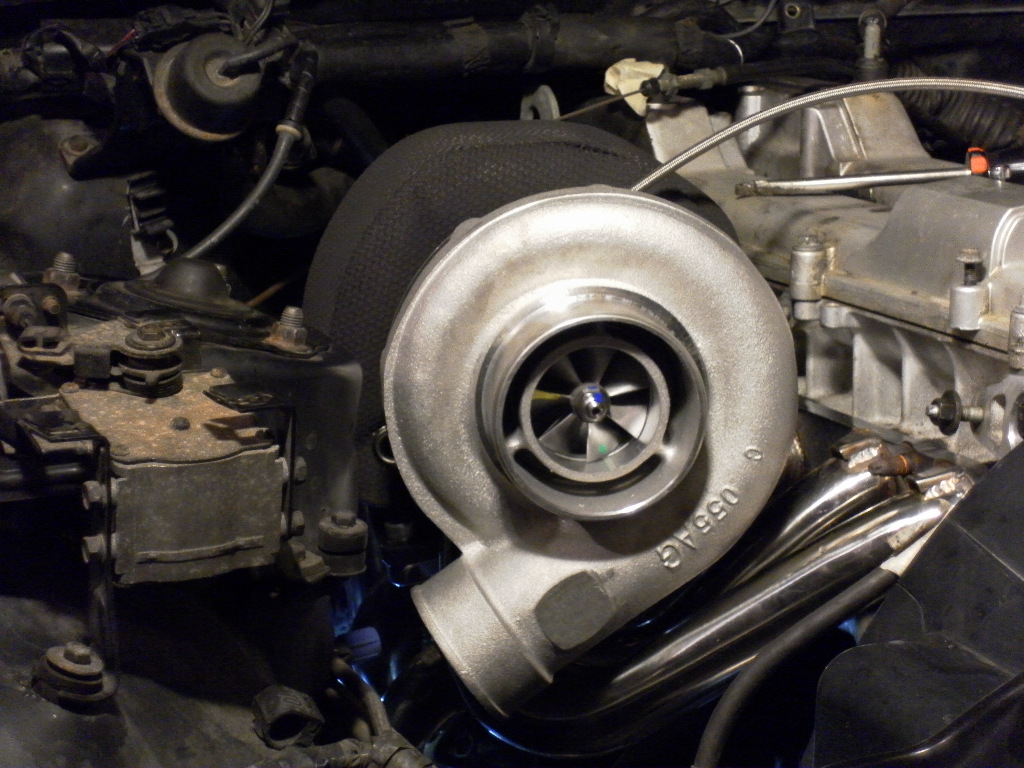
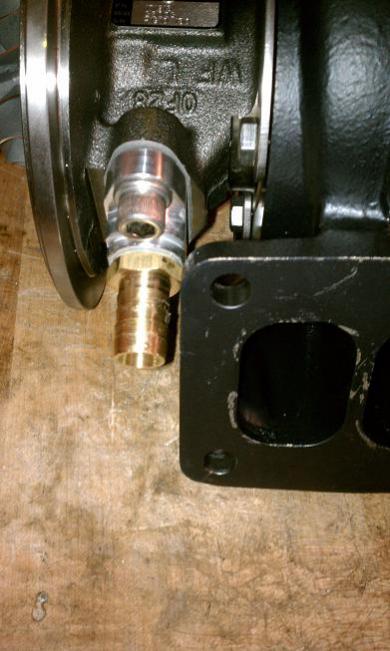
Got the Oil Drain Flange mounted on the turbo. That's another tight squeeze, so I think for now I'll just run a -10AN SS Braided drain line since it is so close to the turbo flange. Next year I may rethink the drain setup.
I will be making a couple more of these if anyone is interested in one, since I have a ton of left over fuel line.
Fitting installed in Fuel Rail:
Fuel line installed:
Underneath the car where it attaches to the stock line near the firewall
Got the Oil Drain Flange mounted on the turbo. That's another tight squeeze, so I think for now I'll just run a -10AN SS Braided drain line since it is so close to the turbo flange. Next year I may rethink the drain setup.
Have you used Syncromesh before? Tons of guys swear by it and it's really popular in the Honda crowd, but I had a bad experience with it. My experience with Redline, on the other hand, I could say good things about that all day.
I used it once a very long time ago. Wasn't anything special in my experience. I pretty much always run a Redline MTL / MT-90 "cocktail". But I just grabbed some off the shelf stuff for this time, since I will hopefully be going with a different tranny in a year or so.
Got a little bit done today. Got the interior back buttoned up from the tranny removal/install.

Also made a little bracket to hold the oil dipstick steady since I removed the massive oem bracket that originally held it. Used some of that spare metal strapping stuff again, I'm starting to like this stuff!

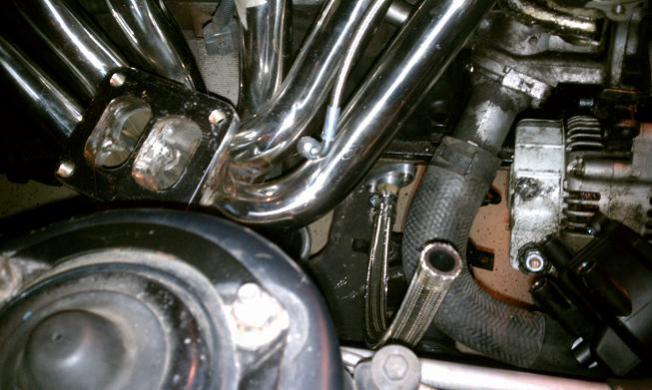
Also I went to TNT and picked up a 6' length of -10AN SS Braided hose for the drain. fits over the 5/8" barbed fittings perfectly.
Thanks to Andrew, he gave me this chunk of 2.5" stainless to use on my exhaust. I still need some more bends if anyone has any laying around hit me up!!

Here is how she sits currently. I found that the turbo flange on the exhaust mani is not flat at all. Not sure exactly how to fix that, but I plan on just taking it to work and pressing it against the belt sander for a few minutes. And hopefully the gasket seals it up the rest of the way.

Other than that, I'm pretty much getting to the point where piping (IC and exhaust) is all that's left. Getting close, woohoo
Also made a little bracket to hold the oil dipstick steady since I removed the massive oem bracket that originally held it. Used some of that spare metal strapping stuff again, I'm starting to like this stuff!
Also I went to TNT and picked up a 6' length of -10AN SS Braided hose for the drain. fits over the 5/8" barbed fittings perfectly.
Thanks to Andrew, he gave me this chunk of 2.5" stainless to use on my exhaust. I still need some more bends if anyone has any laying around hit me up!!
Here is how she sits currently. I found that the turbo flange on the exhaust mani is not flat at all. Not sure exactly how to fix that, but I plan on just taking it to work and pressing it against the belt sander for a few minutes. And hopefully the gasket seals it up the rest of the way.
Other than that, I'm pretty much getting to the point where piping (IC and exhaust) is all that's left. Getting close, woohoo