Project Lex (aka: Teh Bean) '92 SC300

Halon

New Member
Nov 25, 2010
98
0
0
Minnesota
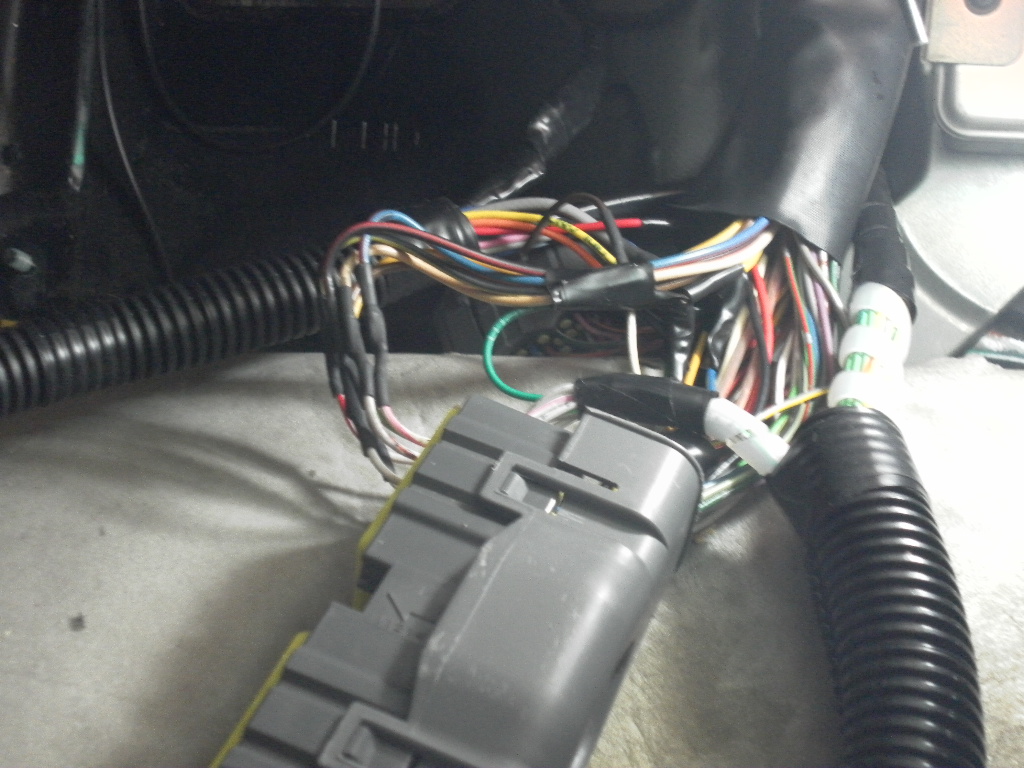
Started on Phase 2 of the MS3 install. The injectors and ignition are all wired up. I had to actually cut these wires, and solder and heat shrink them to the MS pigtail, since MS is taking over full control of them, stock ECU has no control of them anymore.

I need to run a vacuum line to it now for the MAP sensor, then get a base tune from Jordan @ Powersquirt, and another start-up video shall be made :D

attachment.php
 

SC61 MK3

New Member
Apr 4, 2005
316
0
0
55
FL
Good work man! Car looks so clean, I have been looking for one that clean for a new project
 

Halon

New Member
Nov 25, 2010
98
0
0
Minnesota
Been awhile since I've been able to get back to this thing. Been busy lately!

Got the turbo exhaust housing back from Primo Performance from being coated. Looks great thanks guys!

attachment.php

attachment.php

attachment.php

attachment.php


Started it up with the MS3 controlling fuel and ignition for the first time today also. Runs a little rough, but that's to be expected for the first start-up :) Again big thanks to Jordan (Shaodome) for the help!
http://www.youtube.com/watch?v=REOfz7GVyUg
 

Halon

New Member
Nov 25, 2010
98
0
0
Minnesota
Well today got a little bit done. The original vacuum source I was using wasn't very good (kPa value would freeze soon as the TB closed). So I found a different spot and tapped it from there.
attachment.php


Also decided to work on the sync issue as well. I was told to double check the base ignition timing on the car. So I looked up how to do it and went to it. Should be set to 10*. I found mine was sitting at about 12*. Clocked the dizzy and set it up right on 10. Here's a little how to if anyone ever needs to know how to set base timing on a 2JZGE.

-------------------------------------------------------------------------

SETTING BASE TIMING ON A 2JZGE (1992 SC300)

- Find the diagnostic port in the engine bay, and jumper terminals TE1 and E1 with a paperclip.
attachment.php

attachment.php


- Connect the timing light to the battery, and to plug wire #1
attachment.php

attachment.php


- The timing marks on the plastic cover will read | 10 | 0 (this is in increments of 5 so it read it as 15 10 5 0 ). With the pins jumpered, you want it set at 10.
attachment.php

attachment.php


- Point the timing light and look for the line on the crank. It should line up at 10. If it does not, there is a single 12mm nut you need to loosen on the distributor. Clock the dizzy until the mark lines up.
attachment.php


- When you're done, tighten the nut back up on the distributor, and check the timing one last time to ensure it didn't budge while tightening the distributor. Remove the jumper. With the jumper removed, you will notice the timing will advance a bit automatically which is normal.
 

Halon

New Member
Nov 25, 2010
98
0
0
Minnesota
Well it's been forever since I've updated this. Mainly because there has been nothing to update as life has been quite hectic since the beginning of the year.

Today I finally got some time to continue troubleshooting the sync problem. Put a scope to the Cam and Crank inputs as noise was suspected as being a possible cause of my sync/tach issue. Here's a nice vid. Looks clean to me. It's a 24 tooth (no missing tooth) crank signal, and I have just a single G2 cam signal coming in. You can see pretty clearly that they look pretty clean. You see the single Cam trigger, then 24 Crank signals. I'm no expert but it doesn't look like there's much noise on there at all.

What I do notice is how close the cam trigger is to the crank trigger. From what I understand, you do not want those to line up perfectly. The cam trigger should come in between two of the crank triggers. Maybe that is my issue?

If anyone has any advice, feel free to share! And big thanks to Shane at DB Performance for lending me the scope. Greatly appreciated!!

http://www.youtube.com/watch?v=gs2vCC5x3KY
 

Halon

New Member
Nov 25, 2010
98
0
0
Minnesota
OK did a little bit of playing today per the advice of some gurus. I played with the Zero Crossing pot, and with the different edge triggering options. See pics below.

BEFORE Adjusting Zero Crossing pot log.
file.php


AFTER Adjusting Zero Crossing pot log.
file.php


- Zoom to see where the cam trigger falls in comparison to the crank triggers. Ideally it should fall exactly between two of the crank pulses. I played with the different edge options. This pic shows the best combination I could get which is Falling Falling.
file.php


So the cam signal is much better now. But I'm still having the same problem. The cam pulse appears to be as steady as can be, so the crank signal has to be the cause of all this. Will continue this battle this weekend and hopefully get this thing working!!
 

Halon

New Member
Nov 25, 2010
98
0
0
Minnesota
Well my goal is basically to get the car running well first with the turbo setup, and run around on low boost for a season. So probably something around the 350-400hp mark. Then the next year get a tranny that can hold some power and aim for the 600-700hp mark.
 

Halon

New Member
Nov 25, 2010
98
0
0
Minnesota
Well one last glitch I've been trying to work out is cranking. Sometimes it starts a little rough. While troubleshooting last night, the car just shut off and wouldn't restart. Narrowed it down to loss of spark.
Shane was nice enough to lend me the coil and ignitor off his SC300. Turns out my ignitor died. New one from a parts store is 300-400 bucks :( So looks like I'll be checking the local junk yards :D
Big thanks to Shane for lending me the stuff!

Also, it looks like DB's dyno schedule is a bit busy, so I may opt to not get it tuned before doing the turbo, since it does seem to be running fairly well overall as-is. Bolted the turbo up to the mani today just to see if there is any clearance issues with the compressor housing hitting the manifold. It clears like this, so this is prolly how it will end up being aimed. I also put one picture showing it clocked to the point that it hits the #1 runner.

attachment.php

attachment.php

attachment.php

attachment.php

attachment.php
 

Halon

New Member
Nov 25, 2010
98
0
0
Minnesota
Well, the time has come... Turbo Time !!

I parked her in the driveway. Cleaned out the garage where she'll be parked for the next couple months. Jacked her up and gave her a good underbody cleaning/degreasing before starting work.

attachment.php

attachment.php


Parked and up on jack stands
attachment.php


The parts stash that I've been slowly accumulating over the past few months. Finally get to put them to use :)
attachment.php

attachment.php
 

Halon

New Member
Nov 25, 2010
98
0
0
Minnesota
Got to spend a couple hours on her this evening. Here's where she sits today. TB is almost off, but there's one coolant hose on the IM side still hooked to it that seems to be a little tricky...

attachment.php
 

Halon

New Member
Nov 25, 2010
98
0
0
Minnesota
Exhaust and Intake side are torn down as far as I think I'm going to go. There seem to be so many random sensors all over the place, I'm wondering if they are all needed at this point?

Pics of how it sits right now after tear down:
attachment.php

attachment.php

attachment.php

attachment.php

attachment.php


One of the piles of shit that came out. That intake manifold can go to hell.
attachment.php


Big thanks to brownman for helping for a little bit. Also we got an idea. Stock mani's upside down fit perfect, so decided to go a different route. Got a line on some SBR 50 trims, should be sick!
attachment.php
 

Halon

New Member
Nov 25, 2010
98
0
0
Minnesota
Didn't get a whole lot done. What I discovered is it appears to be impossible to completely remove the lower oil pan without either removing the engine, or removing this big arse cross-member. I needed about another 1/4" but couldn't jack the motor up any further to get that extra little bit. Oh well.

I was however able to just drop it as far as it will drop, and can slide some newspaper in there. You can see where I circled, that's where I need to drill for the oil drain line. So the newspaper should catch almost all of the metal flakes from getting into the lower oil pan.

Now just need to get a right angle drill, a Uni-bit, and that should take care of that.

attachment.php

attachment.php
 

Halon

New Member
Nov 25, 2010
98
0
0
Minnesota
Got home from Naw'lens today.
Went to MAPerformance and picked up a couple things as well. As always, thanks for the great prices guys!

Turbosmart Compgate 40mm:
attachment.php


Oil Feedline Kit:
attachment.php


Also had some parts waiting for me in the mail. Time to get some work done!!

Ebay Gasket kit:
attachment.php


2 used ignitors from Ebay (one to replaced my burnt one, and one for a spare):
attachment.php
 

iwannadie

New Member
Jul 28, 2006
981
0
0
gilbert, az
The coolant hose under the throttle body drove me insane the first time I removed the TB. The second time I removed it I added a metal hose splice and a foot of extra hose. With that setup I can slide the TB off and turn it over to get at the hose! It was that or replacing the studs that go into the Y pipe to support the TB with long bolts.