*EDIT* Here is a run down for the pics in this thread:
This page- FFIM, engine, exhaust, gauges.....
Page 3 (post #29)- More pics and info on the radiator
Page 7 (post #69)- Info and pics about the air box
Page 18 (post #174)- First pics of the exterior [before suspention and rims]
Page 19 (post #189)- Close up pics of the "vents"
Page 21 (post #208)- Fab up of the cat back
Page 22 (post #218)- Tein SS's
Page 23 (post #221 & 224)- A1 arms, car lowered
Page 24 (post #231)- Rims mounted
Page 27 (post #270)- HKS BOV and new Bumper
Page 30 (post #291)- A step back in time when the build actually started. Aluminum flywheel, RPS clutch, rebuilt turbo, new fuel line setup, FFIM fab up, start of the down pipe, 70mm TB, EGT install.
Page 31 (post #301)- Maft Pro (with speed density and boost control), Aeromotive AFPR, LIPP AFPR Install Kit, FP Gauge (for under the hood), Walbro 255, RC 550 Injectors & Clips
Page 34 (post #335-336)- Modded 00-03 Celica steering wheel
Page 36 (post #352)- New seats (Corbeau GTS II), Wale-tail mounted, Steering wheel installed.
--------------------------------------------------------------------------
Ok finally a build update for the SM crew. If you didn't see my last updates they can be found here: Previous updates
Any how, on with the show.
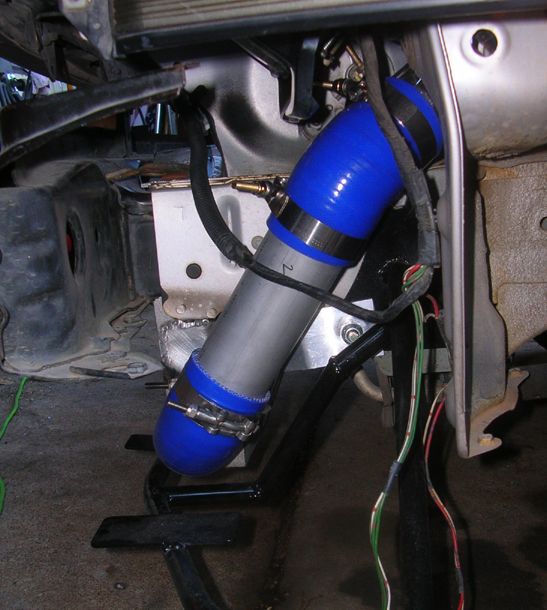
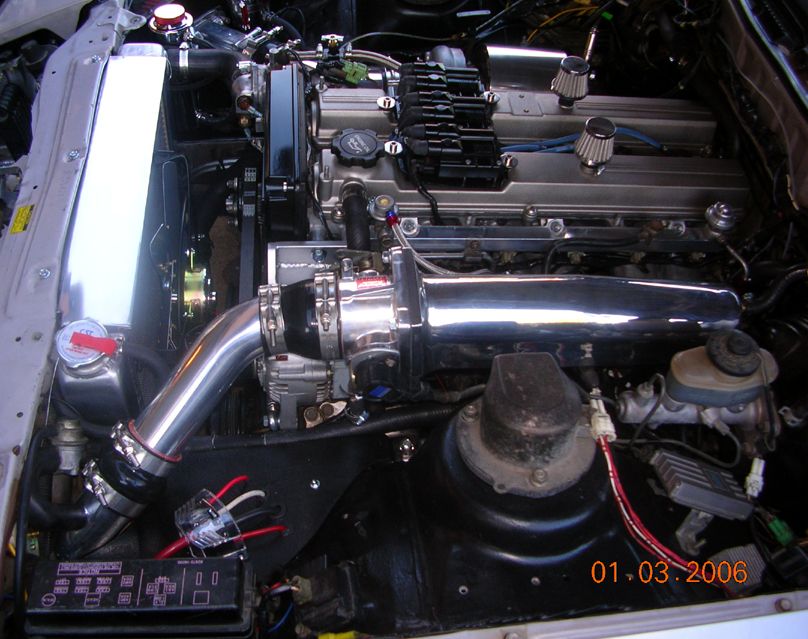
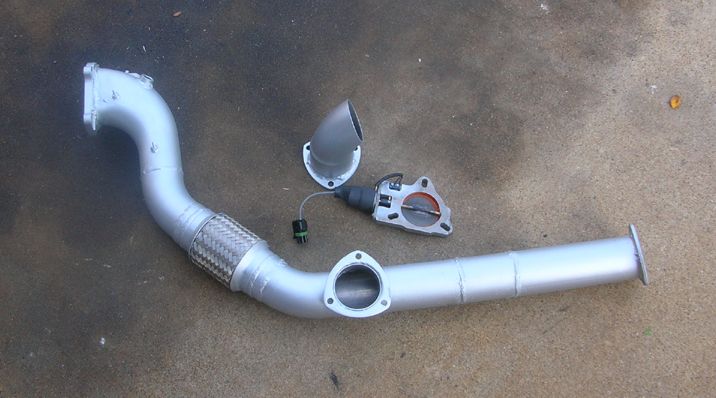
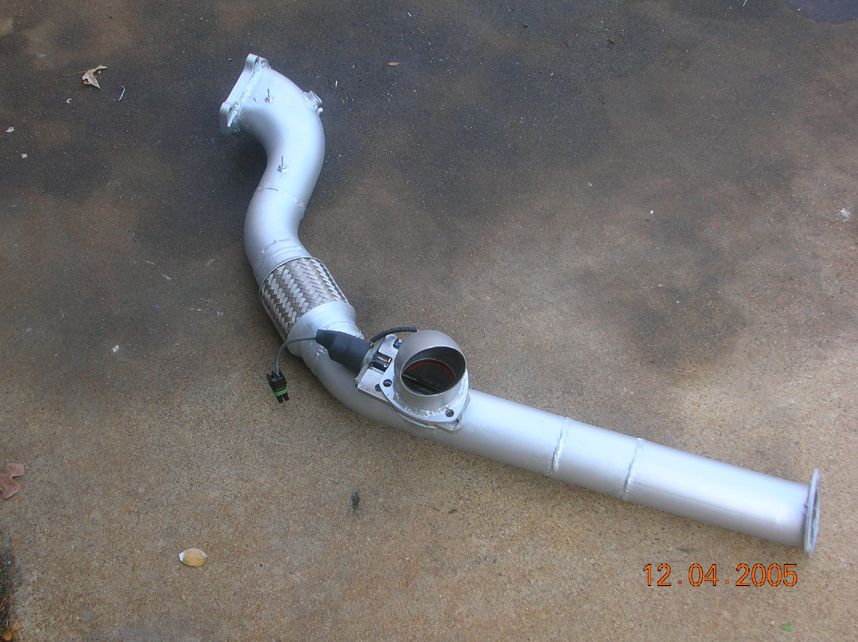
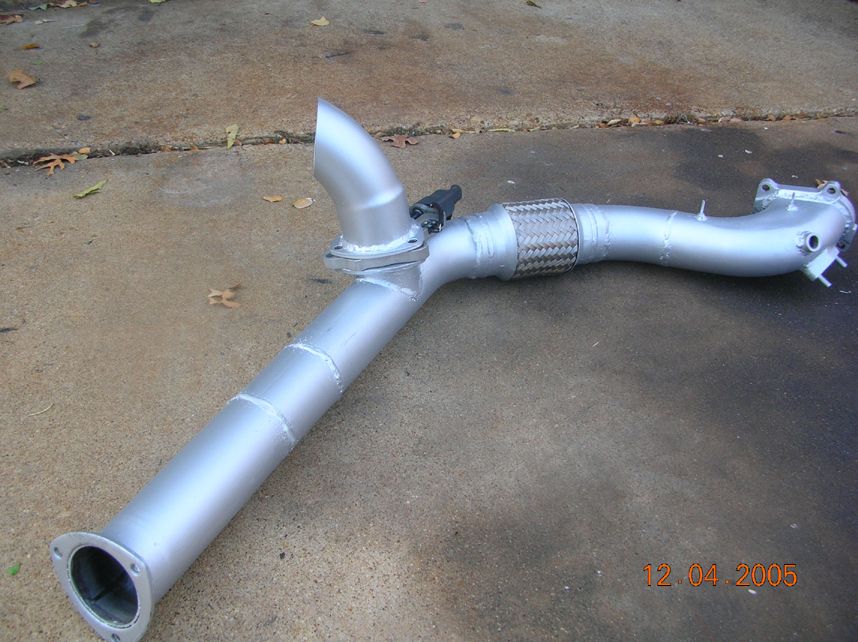
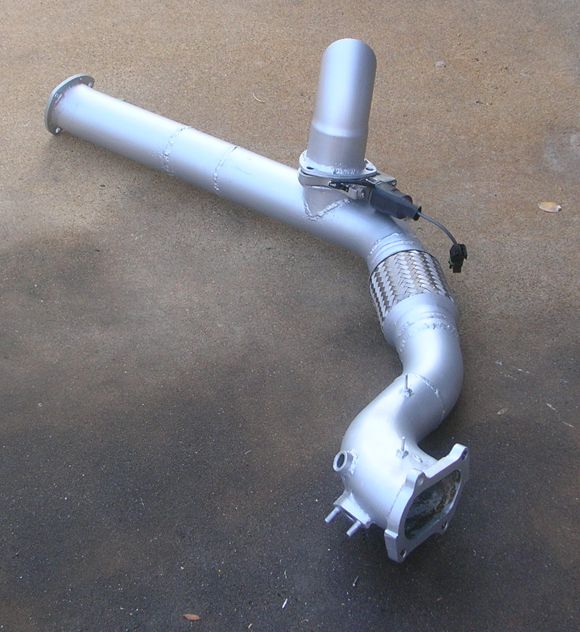
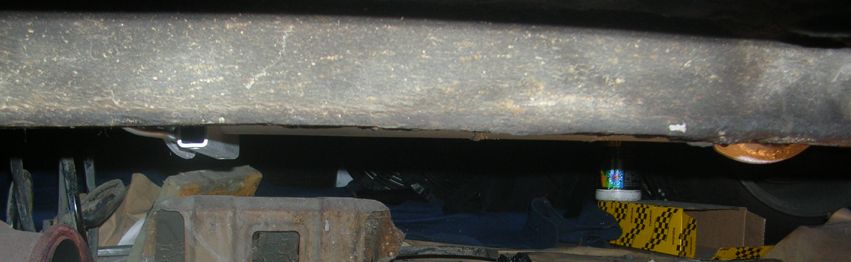
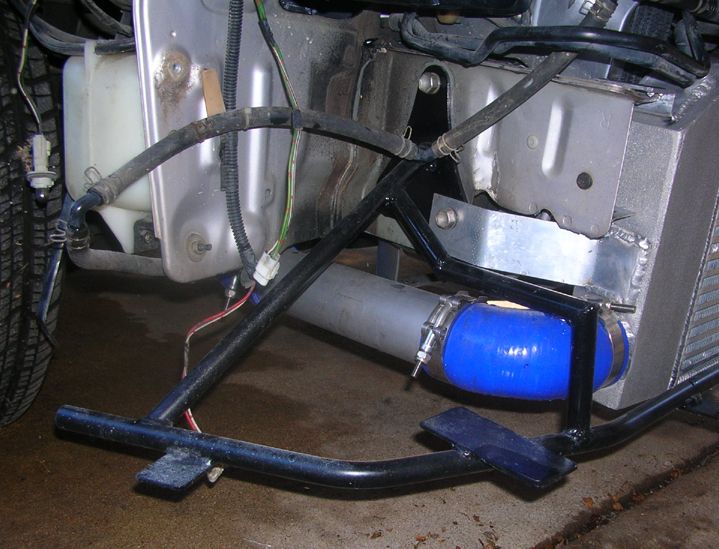
I got the DP done, w/electric dump installed. You can see in one of the pics how nicely it tucks under the car, (the turn down was not installed in the pic, it does stick down further than the pipe).
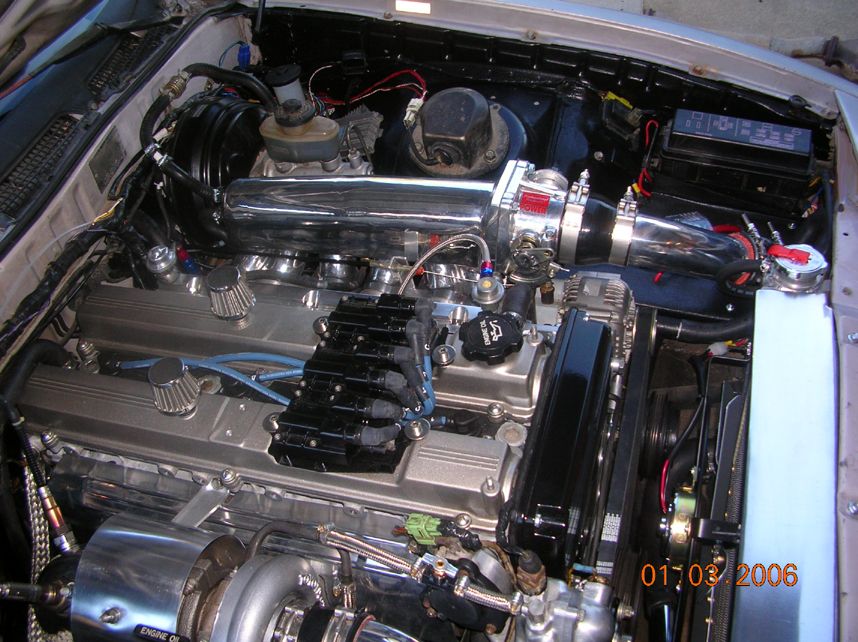
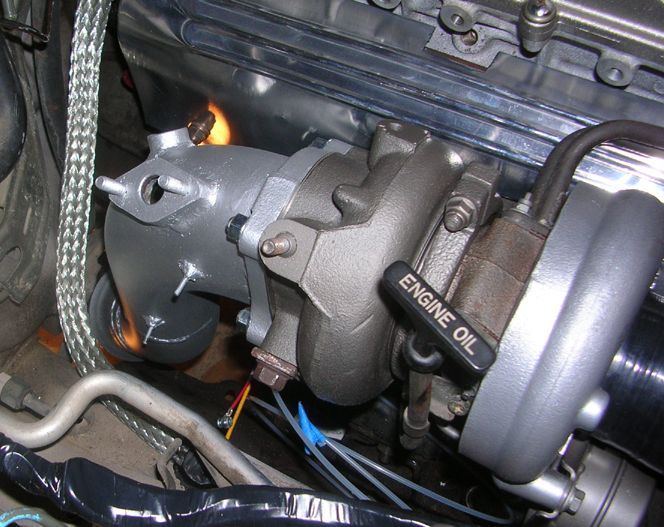
The heat shield for the DP is made from a 4", 90* aluminum IC elbow. The heat shield on the manifold is a sheet of aluminum that was bead rolled. (the stock manifold shield is also underneath).
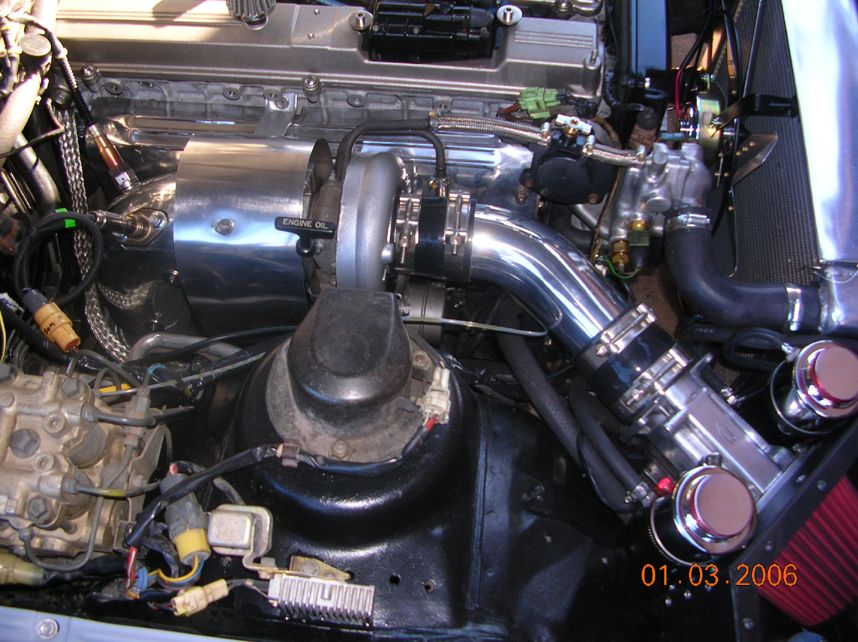
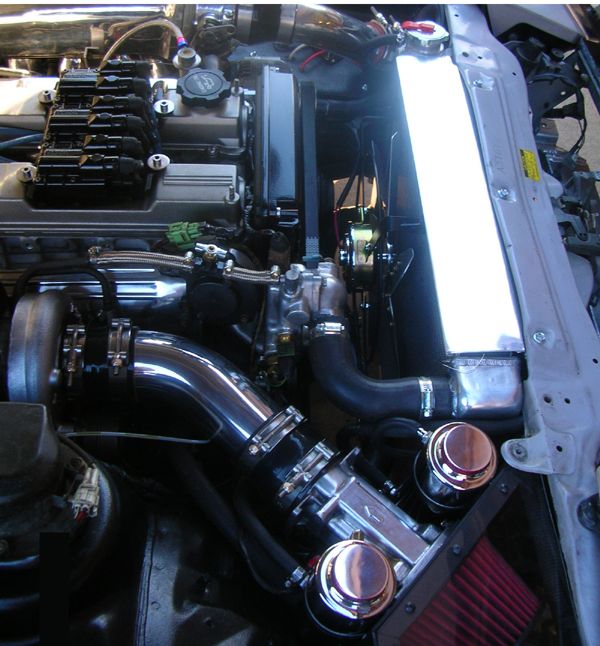
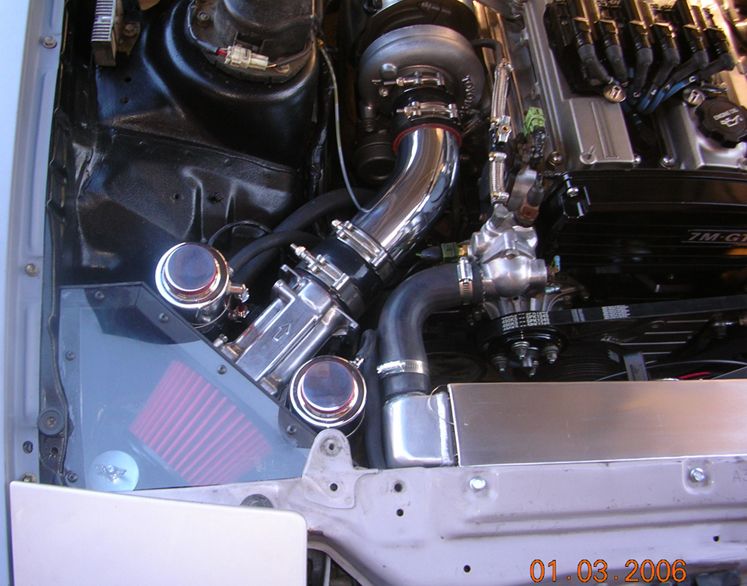
I fabbed up my own air box out of sheets of ABS w/ a LEXAN lid. (I'm running an APEXI filter). The AFM to turbo pipe is a 3", 45* aluminum elbow. So the power steering reservoir was moved (its the aluminum bottle closest to the fender, the other one is the coolant over flow).
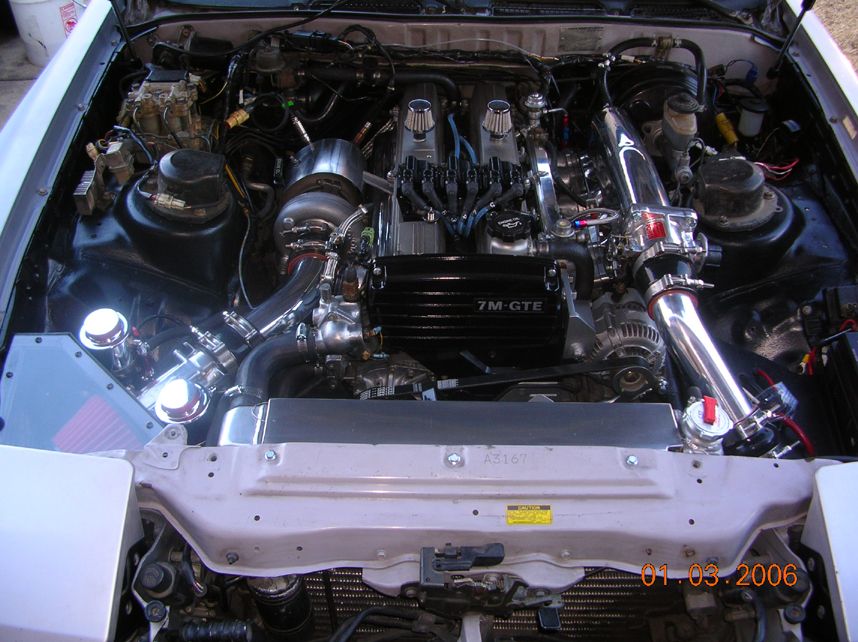
The radiator is an aluminum duel 1" core "mustang" radiator. The fan is a [strike]16" Perma-Cool High Performance[/strike] Electric Fan (is now a black magic fan). It takes some fab work to make it all fit, It's not a drop in, factory mounts had to be cut off and new ones fabbed up. The aluminum sheet on top is part of the upper tie down, there is an aluminum "L" channel under it to help. The stock T-stat housing was rotated to accommodate (I wanted that way, hence the "mustang" style rad). Two air bleeding spots were implemented to help get all the air out. One is a "system flush" adapter installed on the hose leading to the heater core valve. The second is located at the turbo coolant line, it is a 3 way adapter ( barb end + barb end + NPT) On the NPT, a petcock was installed. So all the high points of the system can be "burped".
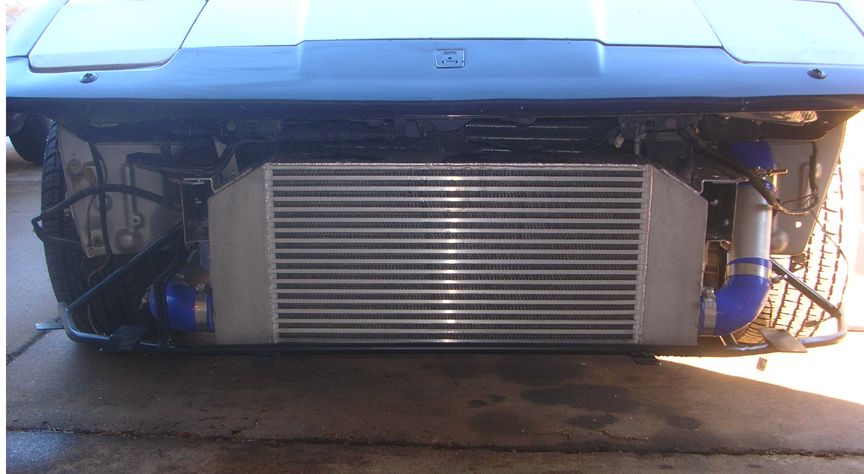
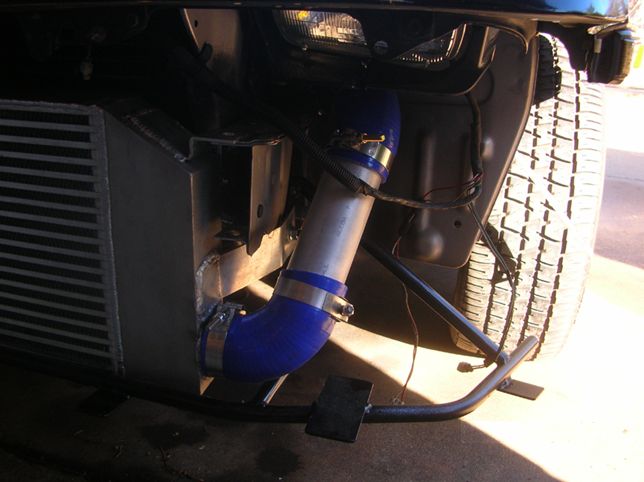
The IC is a SPEARCO bar and plate, with custom cast end tanks welded on. CORE size is 23 x 12 x 3. All IC pipes are 2.5". The length including couplers, along the center line: hot side is 36", cold side is 35". T-bolts were the clamp of choice.
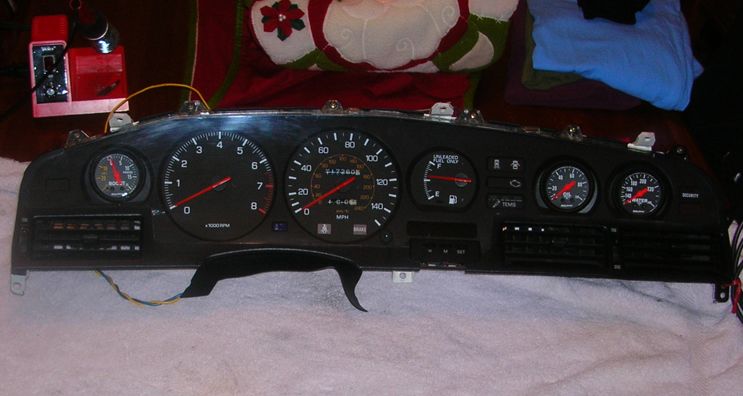
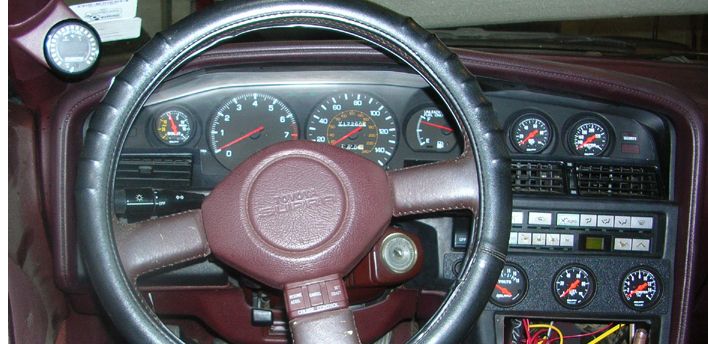
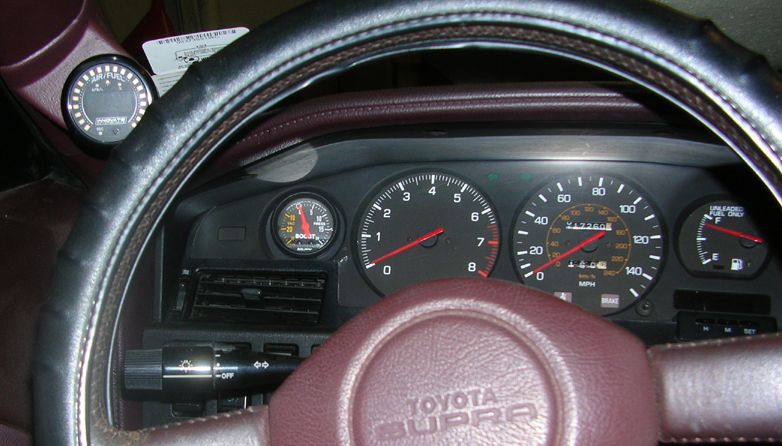
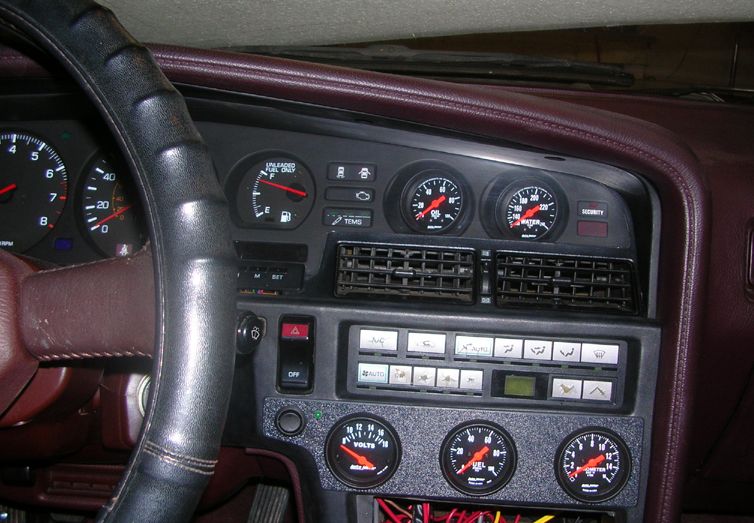
The instrument cluster was modified to accommodate the Auto Meter gauges, Sorry I did not take pics of the process. Also the ash tray was removed and made way for even more gauges. The switch controls the electric dump.
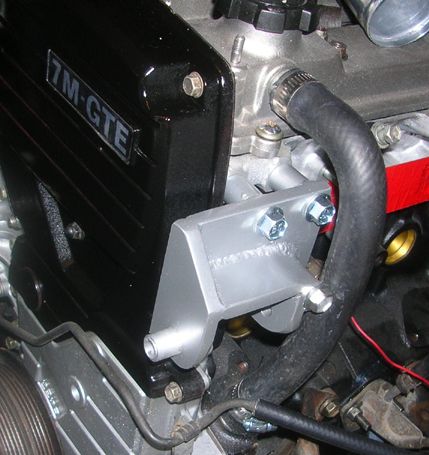
I got the alternator bracket done. And it totally replaces the stock one.
Well it's late, so thats all I can think of at the moment, there is a lot more to do to her. But at least she is breathing........
Down pipe tucked, no lower than frame rail, except for the bracket.....

MORE>>>>>
This page- FFIM, engine, exhaust, gauges.....
Page 3 (post #29)- More pics and info on the radiator
Page 7 (post #69)- Info and pics about the air box
Page 18 (post #174)- First pics of the exterior [before suspention and rims]
Page 19 (post #189)- Close up pics of the "vents"
Page 21 (post #208)- Fab up of the cat back
Page 22 (post #218)- Tein SS's
Page 23 (post #221 & 224)- A1 arms, car lowered
Page 24 (post #231)- Rims mounted
Page 27 (post #270)- HKS BOV and new Bumper
Page 30 (post #291)- A step back in time when the build actually started. Aluminum flywheel, RPS clutch, rebuilt turbo, new fuel line setup, FFIM fab up, start of the down pipe, 70mm TB, EGT install.
Page 31 (post #301)- Maft Pro (with speed density and boost control), Aeromotive AFPR, LIPP AFPR Install Kit, FP Gauge (for under the hood), Walbro 255, RC 550 Injectors & Clips
Page 34 (post #335-336)- Modded 00-03 Celica steering wheel
Page 36 (post #352)- New seats (Corbeau GTS II), Wale-tail mounted, Steering wheel installed.
--------------------------------------------------------------------------
Ok finally a build update for the SM crew. If you didn't see my last updates they can be found here: Previous updates
Any how, on with the show.
I got the DP done, w/electric dump installed. You can see in one of the pics how nicely it tucks under the car, (the turn down was not installed in the pic, it does stick down further than the pipe).
The heat shield for the DP is made from a 4", 90* aluminum IC elbow. The heat shield on the manifold is a sheet of aluminum that was bead rolled. (the stock manifold shield is also underneath).
I fabbed up my own air box out of sheets of ABS w/ a LEXAN lid. (I'm running an APEXI filter). The AFM to turbo pipe is a 3", 45* aluminum elbow. So the power steering reservoir was moved (its the aluminum bottle closest to the fender, the other one is the coolant over flow).
The radiator is an aluminum duel 1" core "mustang" radiator. The fan is a [strike]16" Perma-Cool High Performance[/strike] Electric Fan (is now a black magic fan). It takes some fab work to make it all fit, It's not a drop in, factory mounts had to be cut off and new ones fabbed up. The aluminum sheet on top is part of the upper tie down, there is an aluminum "L" channel under it to help. The stock T-stat housing was rotated to accommodate (I wanted that way, hence the "mustang" style rad). Two air bleeding spots were implemented to help get all the air out. One is a "system flush" adapter installed on the hose leading to the heater core valve. The second is located at the turbo coolant line, it is a 3 way adapter ( barb end + barb end + NPT) On the NPT, a petcock was installed. So all the high points of the system can be "burped".
The IC is a SPEARCO bar and plate, with custom cast end tanks welded on. CORE size is 23 x 12 x 3. All IC pipes are 2.5". The length including couplers, along the center line: hot side is 36", cold side is 35". T-bolts were the clamp of choice.
The instrument cluster was modified to accommodate the Auto Meter gauges, Sorry I did not take pics of the process. Also the ash tray was removed and made way for even more gauges. The switch controls the electric dump.
I got the alternator bracket done. And it totally replaces the stock one.
Well it's late, so thats all I can think of at the moment, there is a lot more to do to her. But at least she is breathing........
Down pipe tucked, no lower than frame rail, except for the bracket.....
MORE>>>>>
Last edited: