1990 Toyota Supra Turbo Buildup - Satans Little Helper...

What will happen when i turn the key?


  • Total voters
    19

Kai

That Limey Bastard
Staff member
Yep - although my fingers are SO sore, and my thumb is torn after grabbing the fuel pulsation damper and not realising the far side of it had a large sharp metal splinter sticking out of it. The intake side of things is all nice and clean, the fuel rail has come up a treat, and the injectors are going back in with lovely fresh O-rings. The cylinder head is still dribbling on the table outside, but i'll clean it tomorrow, measure all the valve clearances and do all the stem oil seals...oh god 24 valves is going to take AGES o_O

Here are some pictures for all:

IMG_2271.jpg


IMG_2273.jpg


IMG_2276.jpg
 

Kai

That Limey Bastard
Staff member
Been stripping and cleaning the Cylinder head today...the face of it is pretty good, no nicks or dinks out of it, and a green scourer and petrol brought it up nice and shiny, although i've yet to attack the combustion chambers with the brass wire brush on the drill of doom!

The cams are out, as well as the buckets AND the shims. Upon measuring the clearances and the shims, it looks like i'm going to need some 3+mm shims, as most of the clearances i measured were 0.40 and even .45mm!

Got to reaaaaaallly scrub the head with a toothbrush, and it's going to take...AGES. AARGH!
 

Mk3runner

Supramania Contributor
Nov 19, 2006
2,033
0
0
35
Nor Cal
glad you're kicking ass on it Kai! I had a feeling the exhaust mani was going to be a bitch but hey you'll get it done and be back on the road in no time.
 

Kai

That Limey Bastard
Staff member
Yeah some of the studs in there are new-ish, so no problems. The heatshield studs however, came out with the bolts, so new ones will go back in there. Kicking ass? More like it's kicking MY ass - my right arm is exhausted through over scrubbing - cleaning the cams til they come up near MIRROR finish on the lobes puts masturbating into 3rd place for arm cramp...

So, er...yeah, how about some pictures?

IMG_2277.jpg


IMG_2279.jpg


IMG_2280.jpg


IMG_2282.jpg


SHIM CITY! Just, none of them fit :(

I've decided that i'm going to source some shims from Ford instead (Zetec-E ones are direct fit, and 1/8th the price...and have the size etched onto them), but until i get them, i can't get anything done really, other than cleaning...

Yes, i realise that i have no EGR cooler...thats cause it's going in the BIN. Yep - EGR is GAWWWWN. I have blockoff plates, a non USDM ECU and 95 octane (91.5 for you) fuel and a death wish :p
 

Bri7man

"Yeah! Take the lemons.."
Jul 17, 2009
580
0
0
35
Torrance, CA
Great work Kai, keep it up. :)

That bench looks nice and long to lay everything out and work on comfortably.
 

Kai

That Limey Bastard
Staff member
I've cleaned the cylinder head about as much as i can physically manage without having it hot tanked. A pressure washer and dishsoap did wonders for removing a huge amount of built up, baked on oil deposits, and acetone on a toothbrush for the fiddly area's. However, there are areas of the head that still aren't clean, but i just can't get to it, and honestly can't be bothered to do. I know it's probably a bad thing to say, but there's only so much 'clean' you need, IMO. At least, on an almost stock, budget build.

Been cleaning off, grinding in the valves, and installing new oil seals.

I HATE COLLETS. That is all.
 

Kai

That Limey Bastard
Staff member
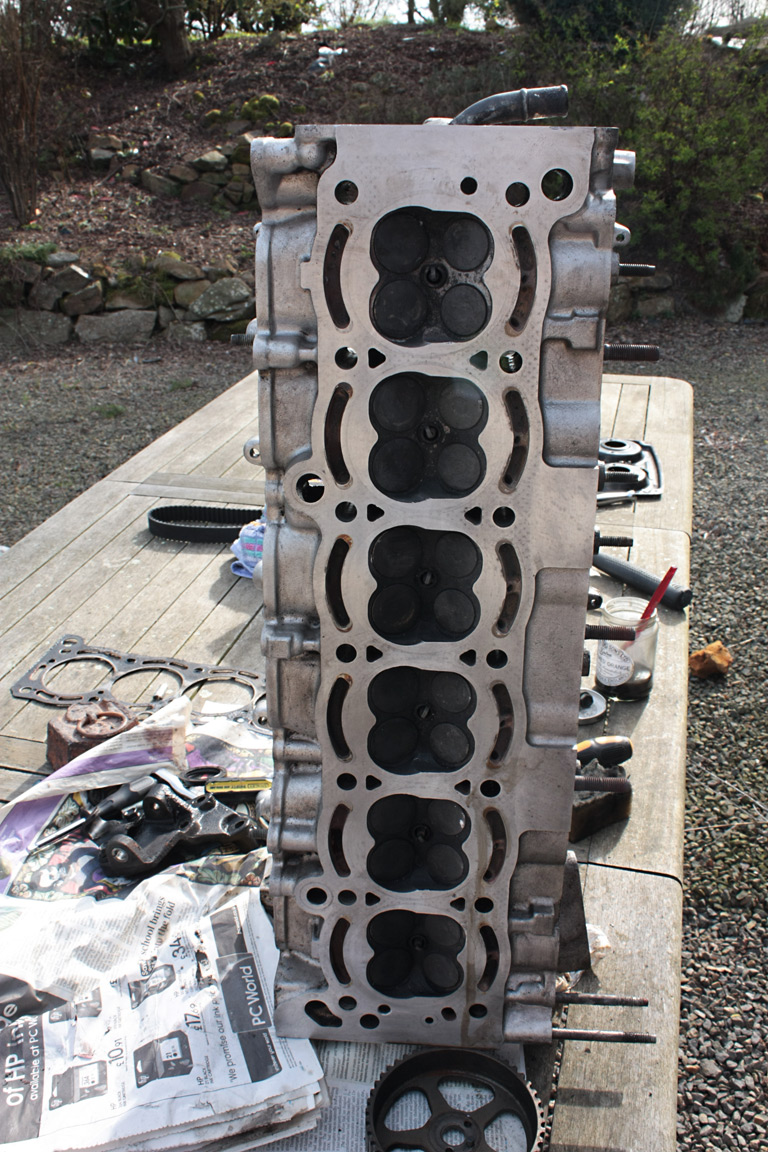
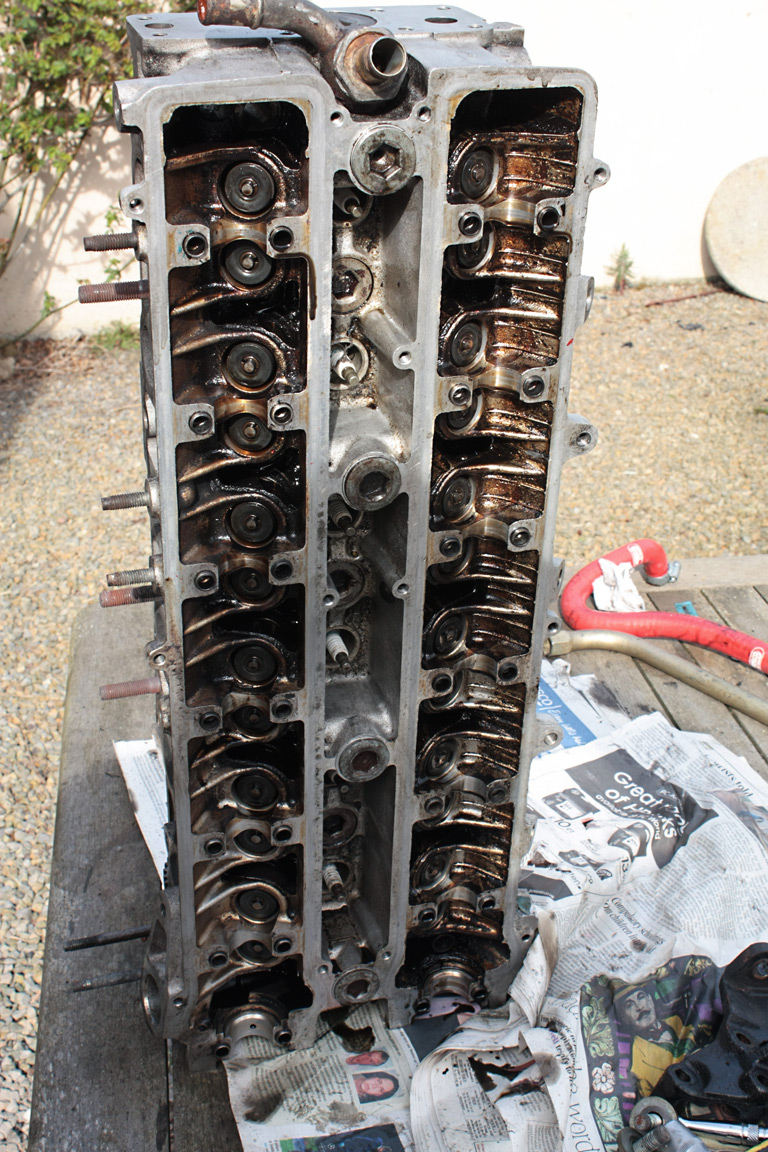
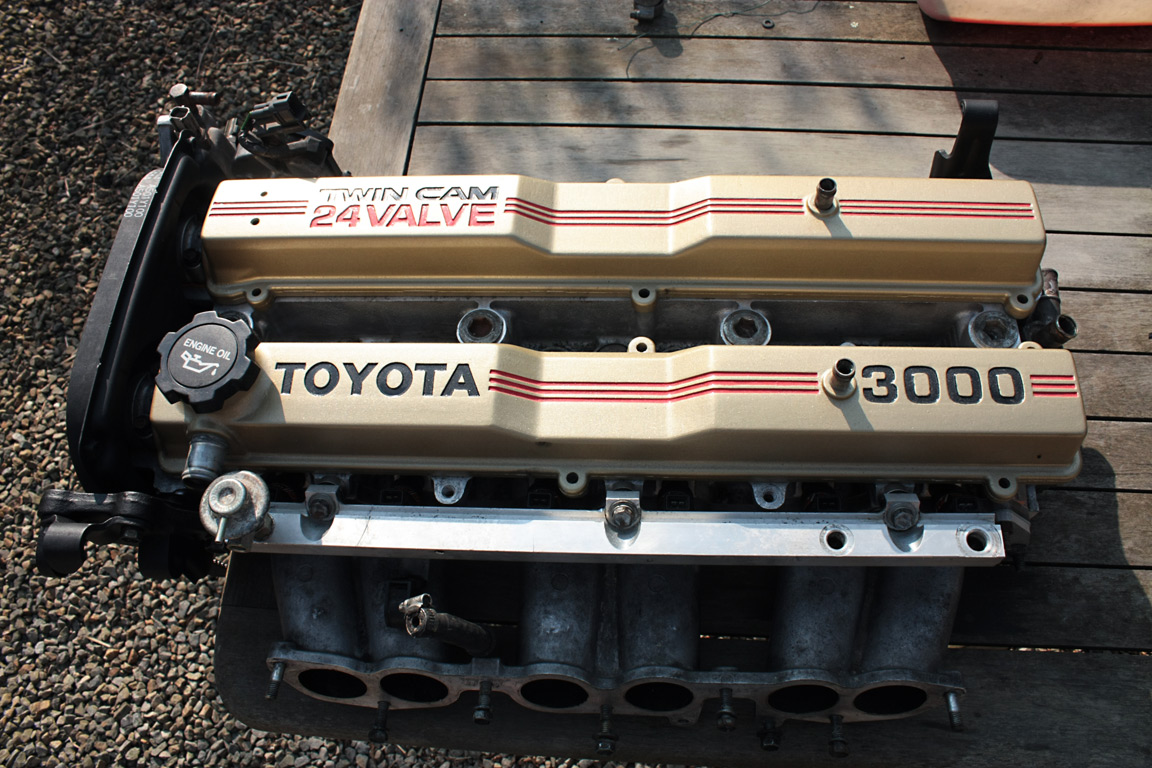
After much complaining, this is the end result, as far as the cylinder head is concerned:

IMG_2293.jpg


All of the intake and exhaust valves have been cleaned up and ground into the seats. New valve stem oil seals installed, and can i just say - I HATE COLLETS! >_<

So small and fiddly and annoying!

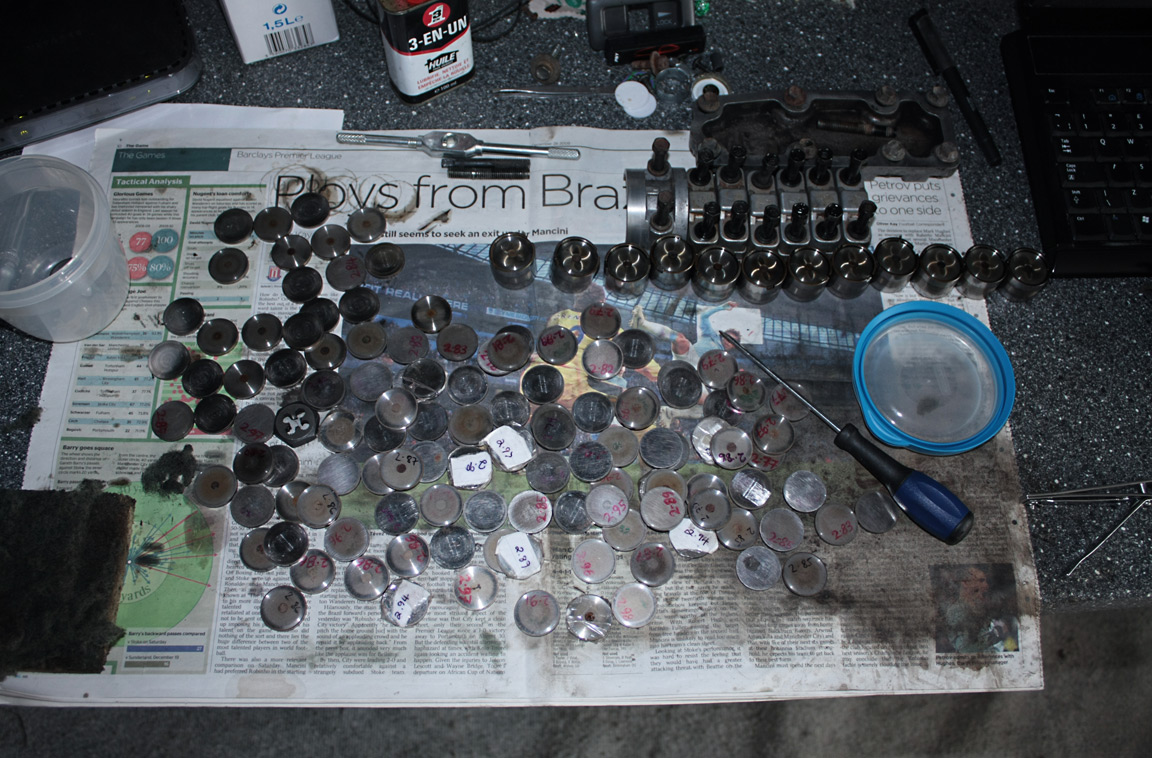
I still need some outsized shims, but, with a bit of luck, i'll get some 3mm+ Zetec-E ones from Ford for about £0.50 each, instead of £8.00 each from Toyota!

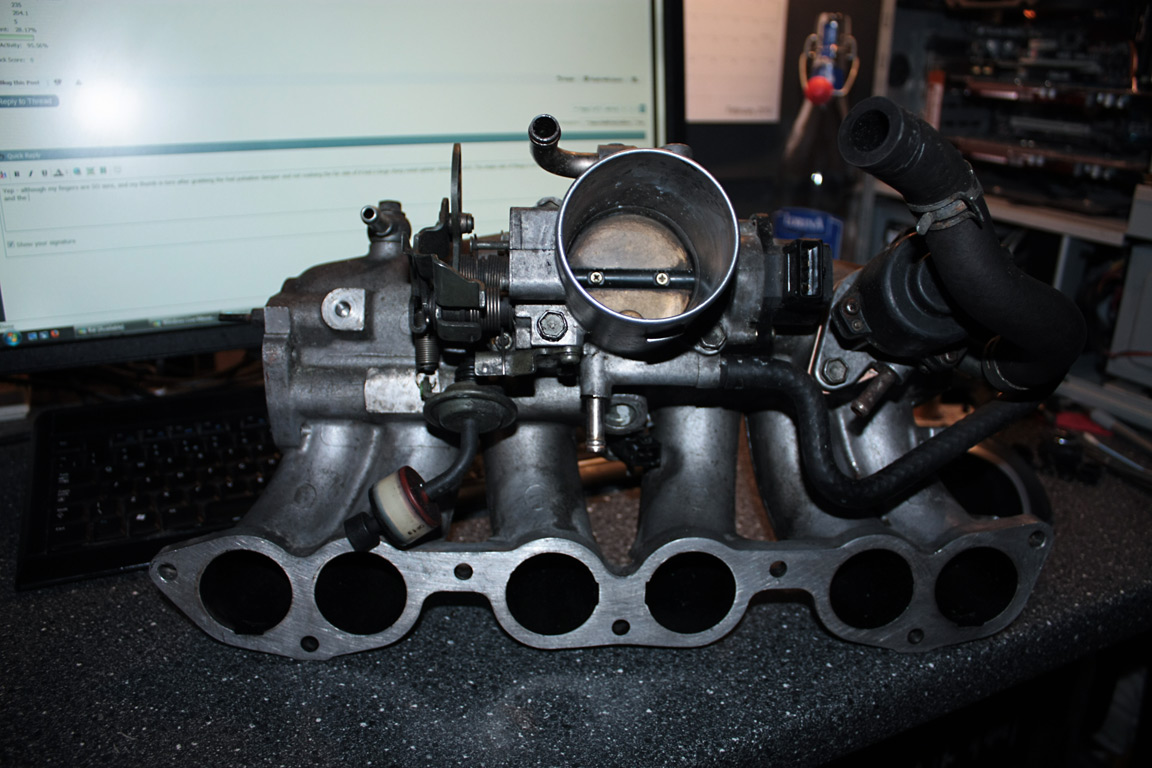
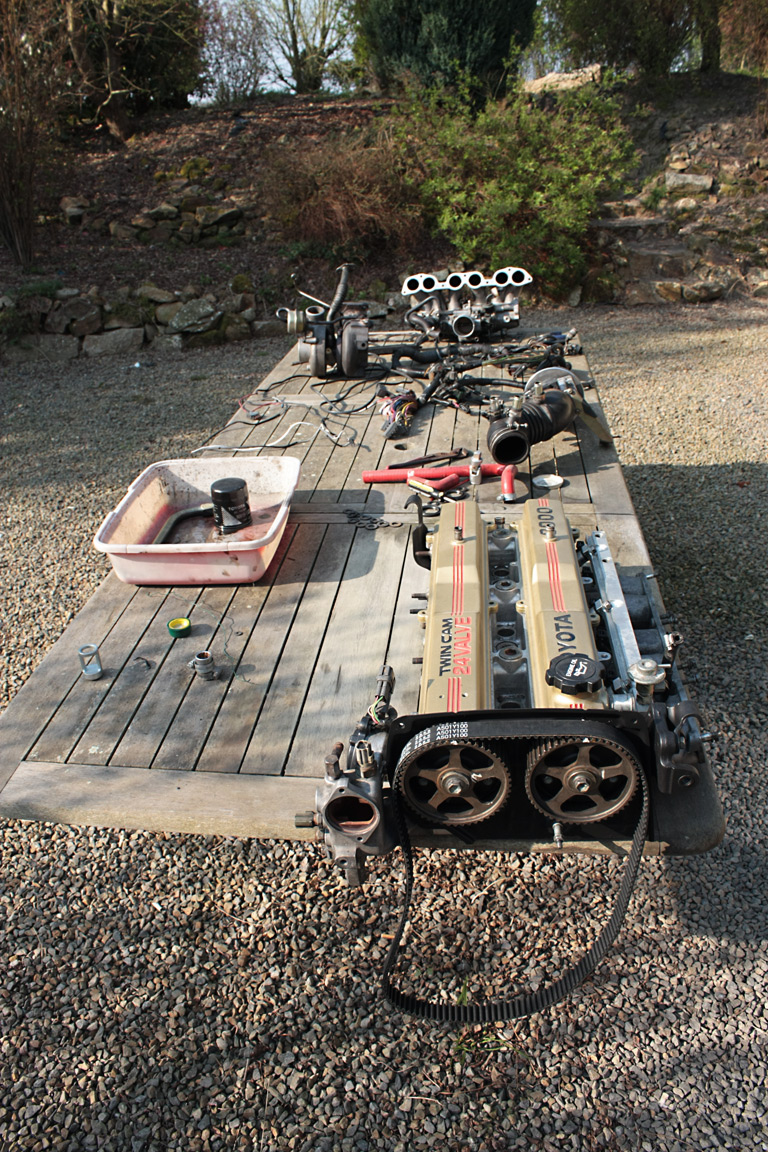
The fuel rail has been re-installed, but this time, with the set of 550cc RC Injectors, and to make sure i don't run pig rich, the Lexus AFM housing has had the Supra AFM electronics installed, and the accordion hose to turbo fitted (bastard of a job to do as you have to stretch the rubber over the larger opening).

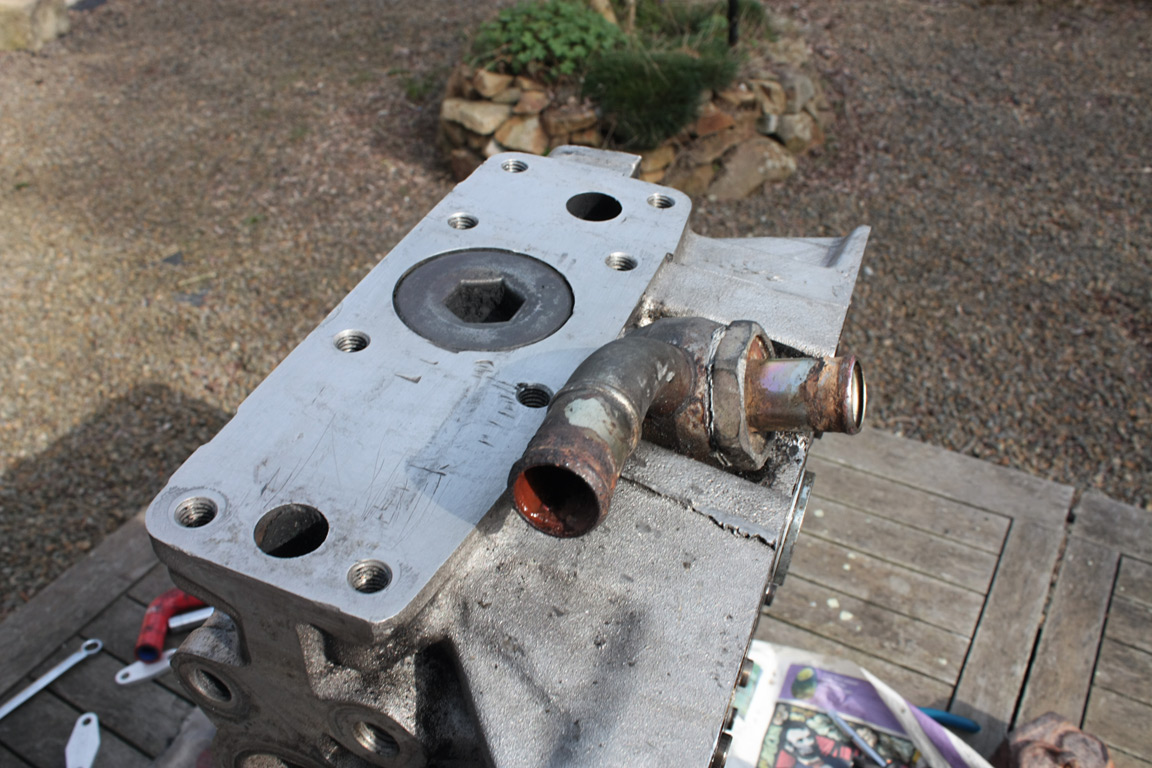
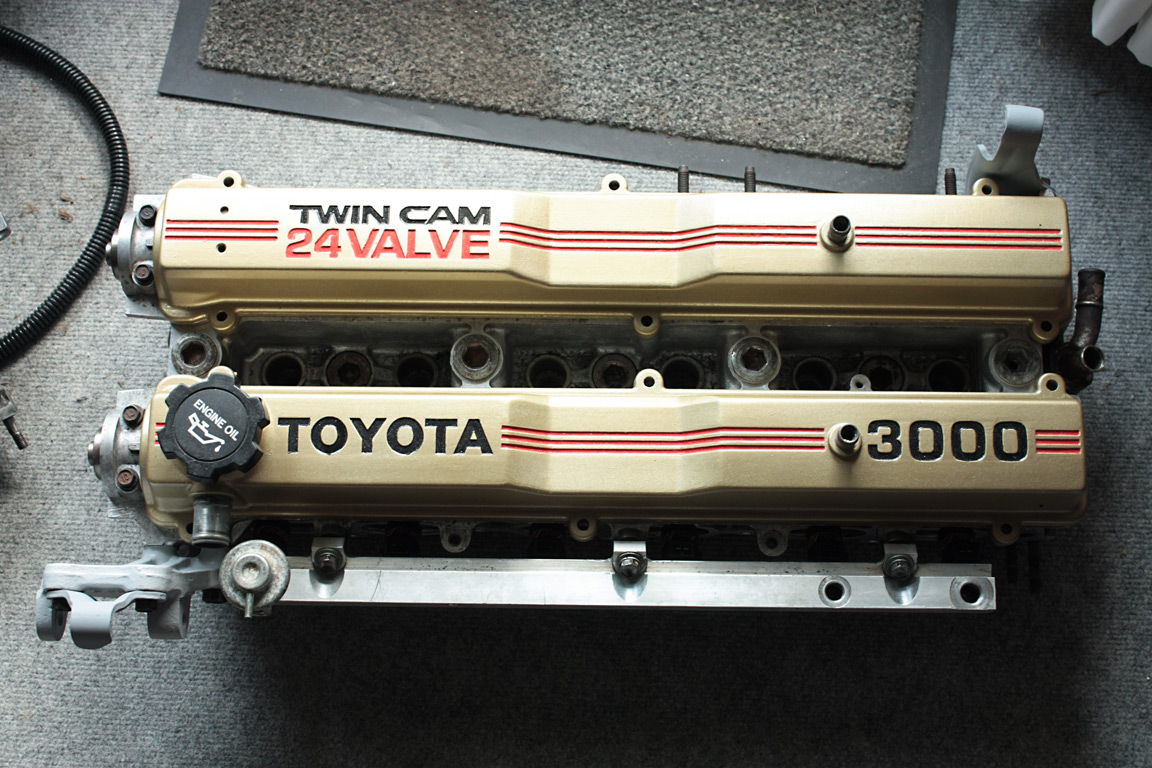
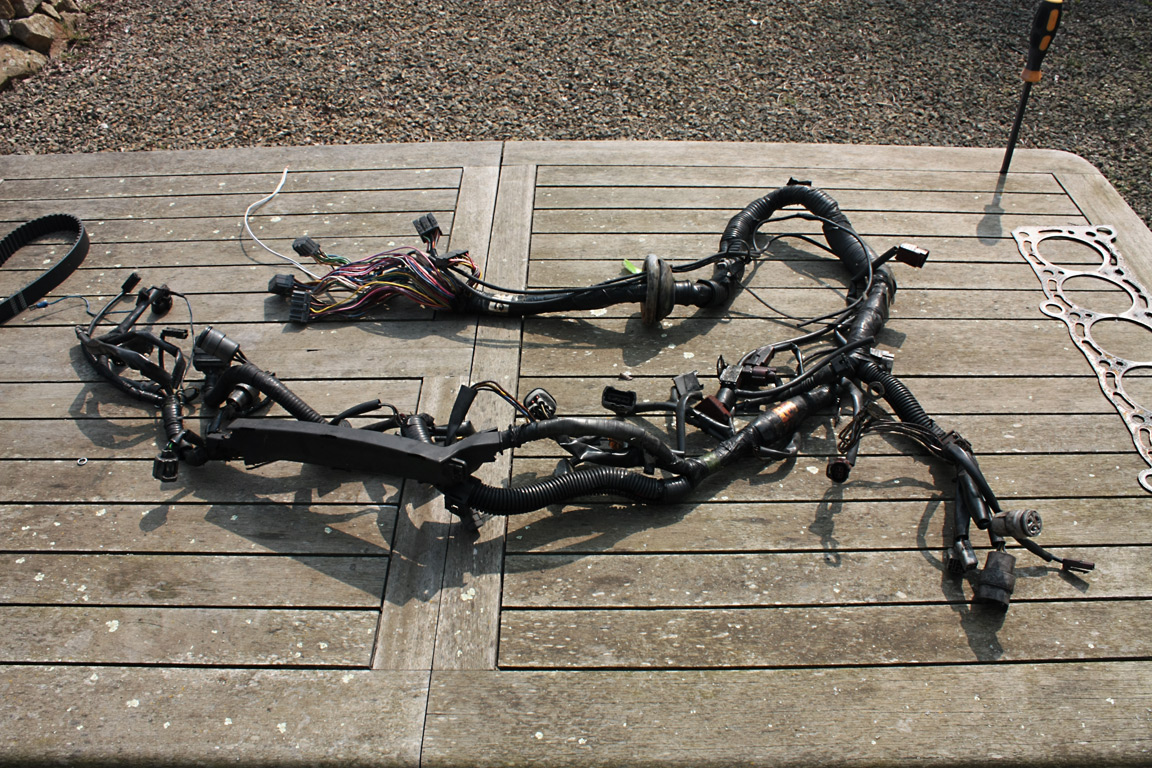
The lifting hooks got given a few coats of primer, ready for the high temperature black paint later on this month (i really, really have NO enthusiasm for that at the moment!). I'm *still* waiting for a set of ARP's to arrive, so in the interim, i've been cleaning as many parts as i can. Also cleaned, sanded down and sprayed up the 3000 pipe in primer - and i'll give it a few coats of Ford Solar Gold like the cam covers, and do the fine detail work on the embossed writing. The oil filter head has been removed, cleaned, treated to a new copper crush washer & bypass spring.

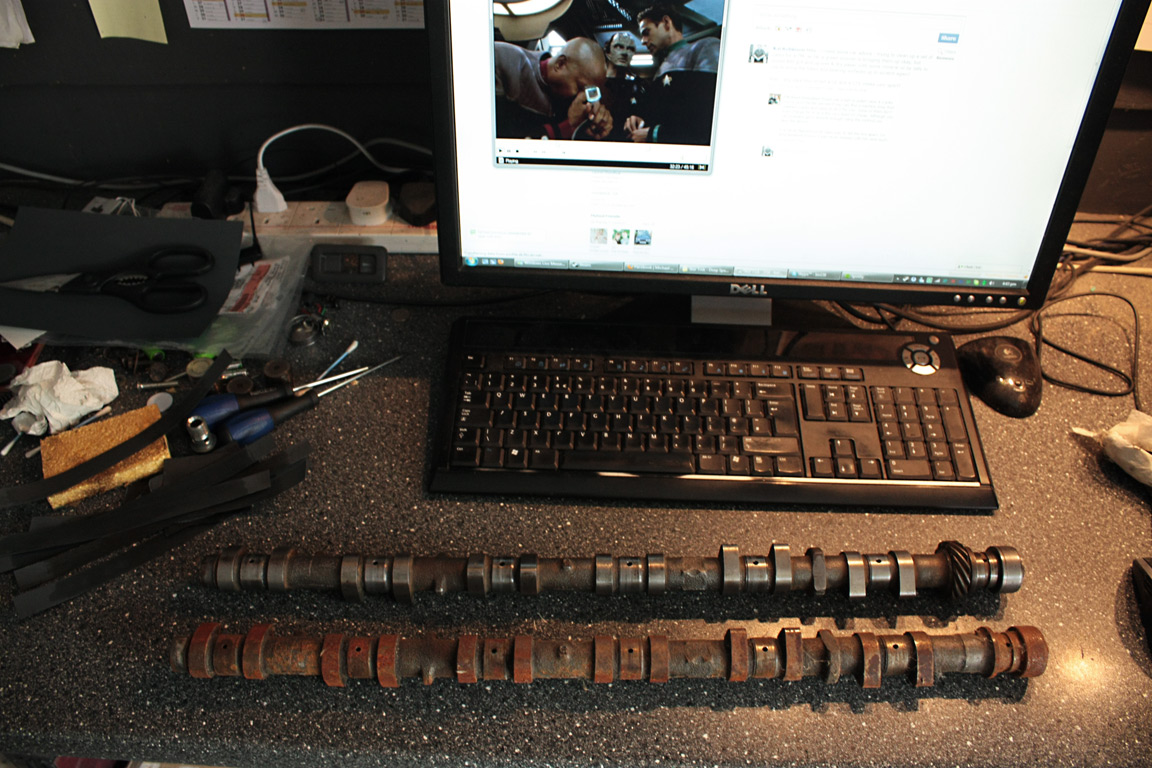
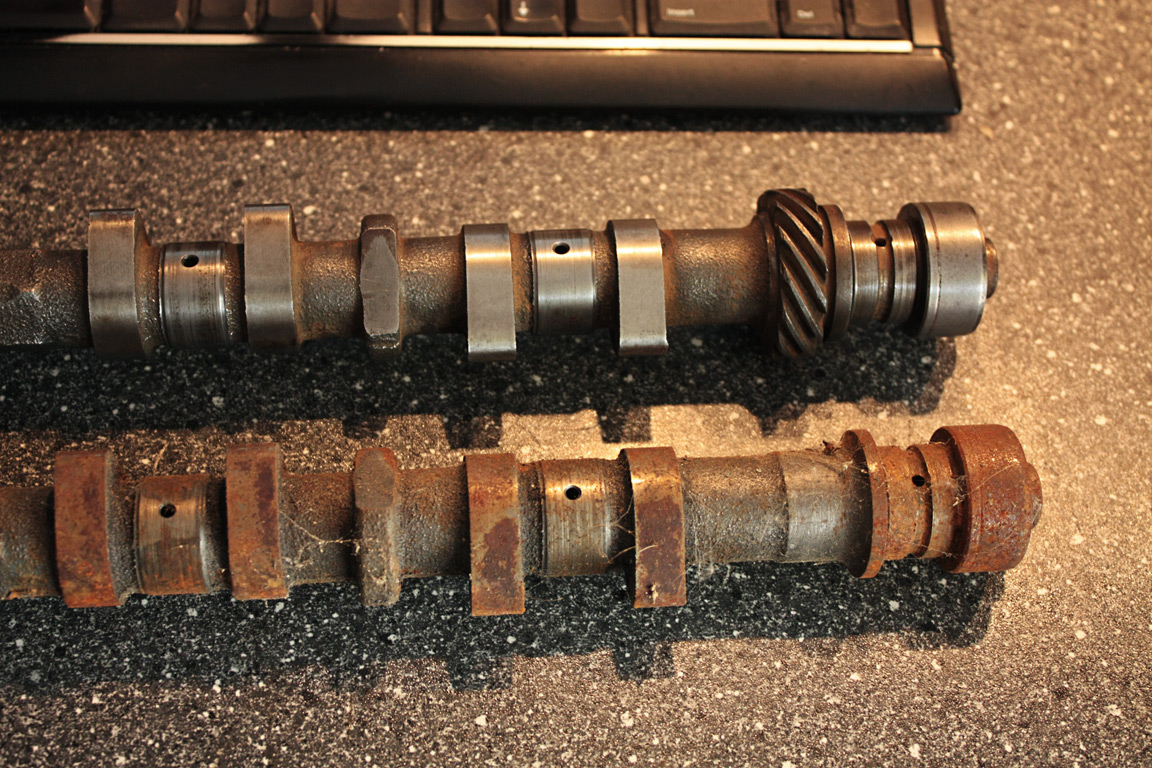
I'll take another picture later on of the assemblage of parts i have ready to go back on!

All systems go? Keep your fingers crossed!
 

Kai

That Limey Bastard
Staff member
Today - installed the lower intake manifold, and i'm most annoyed that i seem to have lost half the bolts that i took off, despite putting them in a magnetic tray. Well, i *have* bolts, but i didn't label where they're all for. Some are obvious (like the exhaust manifold bolts), but some are very generic. And the full engine gasket set does NOT include a gasket for the EGR to the upper intake, but the lower has been blocked off successfully, and i'm just going to order new bolts & gasket for the rear of the head (removing the EGR cooler) and new bolts & gasket for the plenum.

At the moment - the only thing holding me up, is needing a set of ARP's. I have a set in the UK, but trying to get my friend to actually GET them even 20 miles down the road to another friend of mine who can mail them to me, is seemingly impossible. GRRR.
 

Kai

That Limey Bastard
Staff member
Right! Some pictures for you :)

IMG_2312.jpg


Notice, new stocker on the left, blown stocker on the right. Cylinder #6 had a mangled fire ring, and the water passages were buckled on #1, #3, #5 & #6 on the exhaust side.

IMG_2318.jpg


How do you like your wiring harness? Crispy? I can do that! Yep - it's BAKED. The plastic bit that goes across the upper timing cover just crumbled away in my hands. Some fuckwit had decided to rewire the knock sensors with DOORBELL WIRE. With SCOTCH TAPE.

See here for more carnage:

IMG_2319.jpg


Ooooh - nasty, as Treguard from Knightmare would say.

IMG_2320.jpg


The CPS side of things looks really, REALLY manky :/

Oh, and just for shits & giggles, i opened up the ECU so you can have a look inside - look at that 25 year old 8-bit goodness ;)

IMG_2324.jpg


The harness is off to the UK to be reworked, along with a few spare connectors (thankfully, i have a spare, albeit hacked up, harness).
 

eraezer

Member
Nov 6, 2008
849
9
18
Stockholm, Sweden
Enraged;1549995 said:
I don't suppose you have the part numbers and/or engine model that the shims come from? I need to buy 22 new shims....

Here is some of the answer:
Kai;1544863 said:
...I've decided that i'm going to source some shims from Ford instead (Zetec-E ones are direct fit, and 1/8th the price...and have the size etched onto them), but until i get them, i can't get anything done really, other than cleaning...

Wikipedia (http://en.wikipedia.org/wiki/Ford_Zetec_engine) says Zetec/Zetec-E 1992-2004. But in the text there is this: "After small changes in 1995 to fix this problem the engine was known as the Zetec-E" and "The Zetec had another redesign in 1998. This version, the Zetec-R"

So are the shims from a model between 1995 and 1998?
 

Kai

That Limey Bastard
Staff member
Updates!

The head is now FINISHED. Cam caps are all torqued down to 20NM and the #1 caps have been sealed with FIPG (using Loctite Copper FIPG instead of the Toyota stuff thats...silly money). CPS has been loosely installed, but i'm pretty sure it's about as bang on as i can get by eye. Front cam gear plate has been installed after being painted at around 6am, and all the lifting hooks have been installed as well. I toyed with the idea of spraying up the 3000 pipe as well, but i don't have enough Ford Solar Gold to do the job properly - so that'll wait, i think.

PICTARS TIEM! :D

IMG_2342.jpg


IMG_2343.jpg


Just waiting for the ARP's and then the head? Yeah, it's GOING AWWWWN :D
 

Enraged

A HG job took HOW long??
Mar 30, 2005
1,844
21
38
Victoria, BC, Canada
Do you have a part number? It would be a HUGE help. I tried with the local dealership, and the parts guy can't find them. Tried the Focus and Escort with a Zetec, 98-04
 

Kai

That Limey Bastard
Staff member
Sorry - don't use part numbers here - i just went in and said i needed shims for a '98 Mondeo 1.8, gave him the sizes, he went out the back, and got them. Don't forget - engine ranges in the US and Europe differ greatly. What you call an escort, doesn't resemble anything we ever had.
 

Kai

That Limey Bastard
Staff member
Today!

Cleaned the block surface - and look, it's come up a treat! What did i use? Twisted wire brush on an angle grinder, then a green scourer, then 400/800/1200 grit wet & dry with 3-in-1 oil.

The waterways look a little 'oogly', a bit pitted, but thats sort of to be expected i guess. The rest of the surface is fine, no pitting anywhere near the sealing rings. Yes, i know the turbo side of the block still needs to be cleaned - i'm going to take off the pipework that runs around the block, and give that a good clean on tuesday, when i have some more kerosene, and then toothbrush & kerosene to clean the block. Then it's just a case of wait for the ARP's and the head can go on :)

IMG_2377.jpg
 

Kai

That Limey Bastard
Staff member
Waiting on parts to arrive in about 2 weeks to get any further in the build. But for now, i've dug out a set of 7M cams that were in my shed - covered in crap, cobwebs & no doubt home to some creepy crawlies. After 2 hours with a green scourer, some fuel, a toothbrush and some 800 & 1500 grit sandpaper, one of the cams looks almost usable again!

Here's a kind of before/after shot for you:

IMG_2447.jpg


And a closeup:

IMG_2448.jpg


Aaaand even closer on the cleaned camshafts bearing:

IMG_2450.jpg


Now i dont really *need* these cams, but, i figured i might as well keep them in a good condition as spares. Problem is, is the intake cam a GE or a GTE? How can you tell?