
Supradupra.com 2.5TT Aero Limited JDM refurb (yUK)
- Thread starter Supradupra.com
- Start date
You are using an out of date browser. It may not display this or other websites correctly.
You should upgrade or use an alternative browser.
You should upgrade or use an alternative browser.
Update: 23-02-2011
Upgrade wise has been mainly tweakage here & there. After a particularly cold, wet & miserable winters day, instead of reaching for knives & self harming I decided to treat myself instead so, after finishing the prezzie shopping I purchased some spangly new super spark coils to replace my 20 year old stockers.
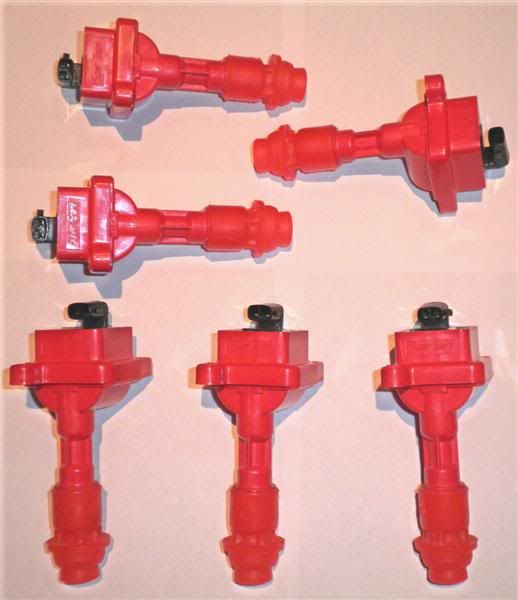
As you can see they are pretty & red, here they are all fitted & promtly covered up by the galley trim")
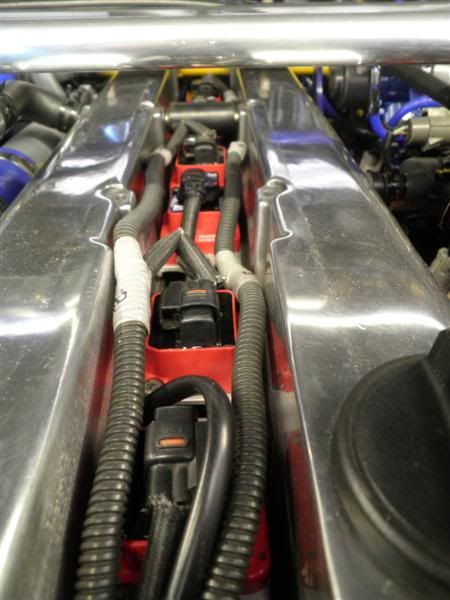
They have made a definite improvement to running., the car is much more "zingy" now. Coils on an average modern turd last around 6 years so, I figured replacing 20 year old ones would be a most definite improvement! As these upgraded ones were only £50 more than stock replacements & they drop direct in there was no real arguments.
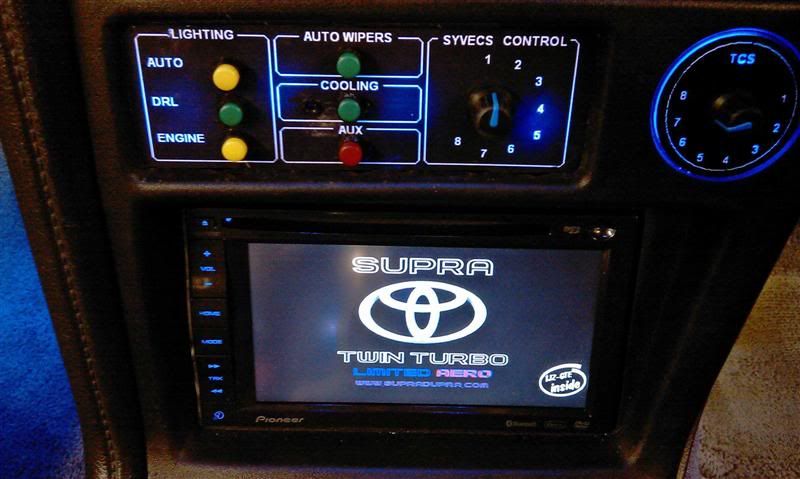
The next little treat was something I kept promising myself, that being Pioneers latest flagship Navgate unit. I have really missed the slick interface of Pioneers equipment & more than anything, the sound quality!
No point in listing what this thing does because it does the lot bar dispense hot drinks. very impressive bit of kit & managed to get it for about half price brand new, whoraa! A real good thing as they are quite obsurdly expensive otherwise!
Best bit is you can customise the start up screen, fitting in perfectly with my aim of factory fit in this car. I am also lucky enough to have am immaculate, non hacked up stereo fascia, a very rare thing indeed.
Next up, I kept finding TEMS control to be in the stupidest place there in the centre console & with the yUKs incredibly expensive to use yet inexcusably appallingly maintained roads & inexplicably stupid layouts, I find it's a system I constantly want to adjust to meet the conditions.
This mainly involves selecting soft when coming to the latest row of speed humps, discovering yet another patchwork of repairs carried out by paraplegic, blind work men on horse back using only spoons & out of date custard or having the car shaken to pieces by a road surface worse than the 15th century track that pre-dated it....
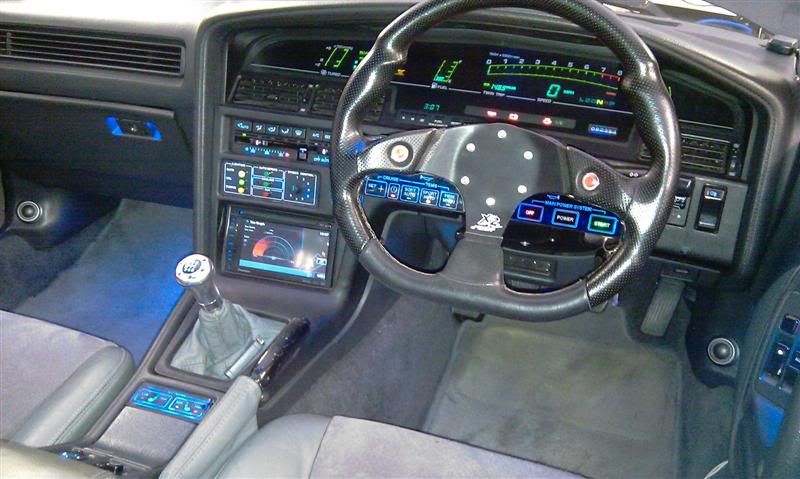
I digress. After having a little think ( about a second) I decided the best place by far for TEMS control was the steering wheel, so..
Cue steering wheel panel V2.4..
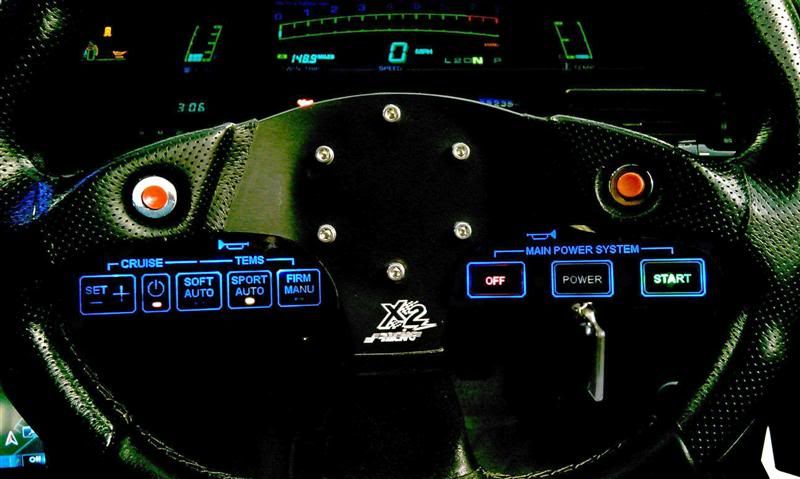
This also allowed me to ditch the centre console mounted TEMS making way for the system Toyota should have fitted to Aeros as standard in the first place - heated seats.
I made up the control panel with standalone control box which handles the power switching. The max load of both seats is around 8 amps.
I am yet t rip the seats apart to install the heater mats. I will face unto this probably around respray time when the interior gets stripped completely.
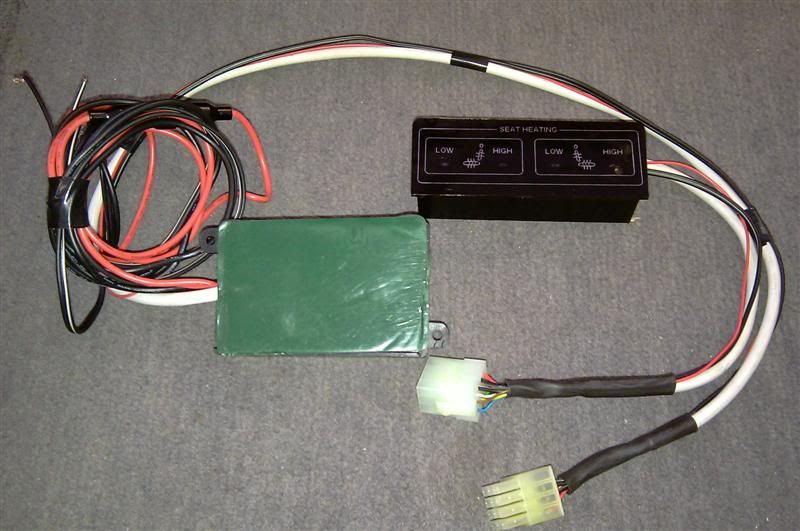
This obviously fits where the factory heated seat panel would be. I tried to base the look of the panel on the factory switches.
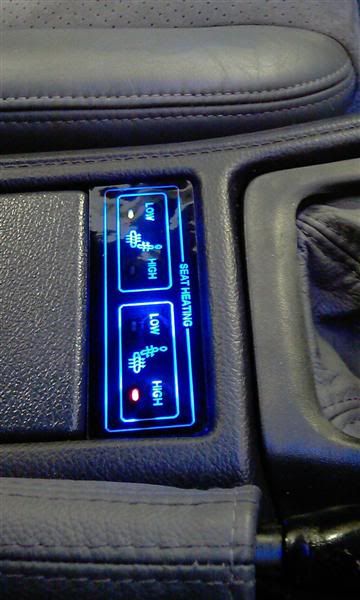
All the panels are currently in trial formats with temporary overlays. I am going to make these up properly after testing them for a while. They will be screen printed on a matt plastic as you'd expect to find on membrane keypads.
Screen printing will also put an end to the light bleed, I'll also diffuse them properly to give perfect illumination, although the digital cameras really act up with blue making it look patchy.
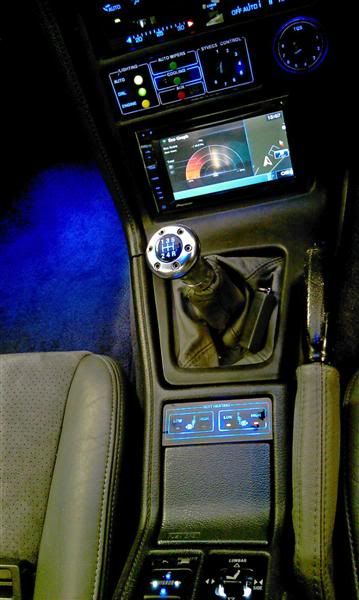
Unlike my previous galactic class Supra, things here are somewhat calmer & integrated, again, aiming for a more factory feel.
Next up the interior lighting saw an upgrade. Although I have been using LEDs exclusively for over a decade on these cars, diode technology constantly moves on. Rite now we have reached a point where there has been a marked improvement over previous components & technology so, it was time to update them again.
I don;t tend to use off shelf replacement bulbs as I find they are too restrictive, give out poor light patterns, cost too much & just ain't as fun as designing your own bespoke luminares.
The additional rear courtesy lights installed each side of the rear seat are now powered using 6 SMD 3258 LEDs. Far crisper, far brighter than the previous units which used arrays of 5mm LEDs.
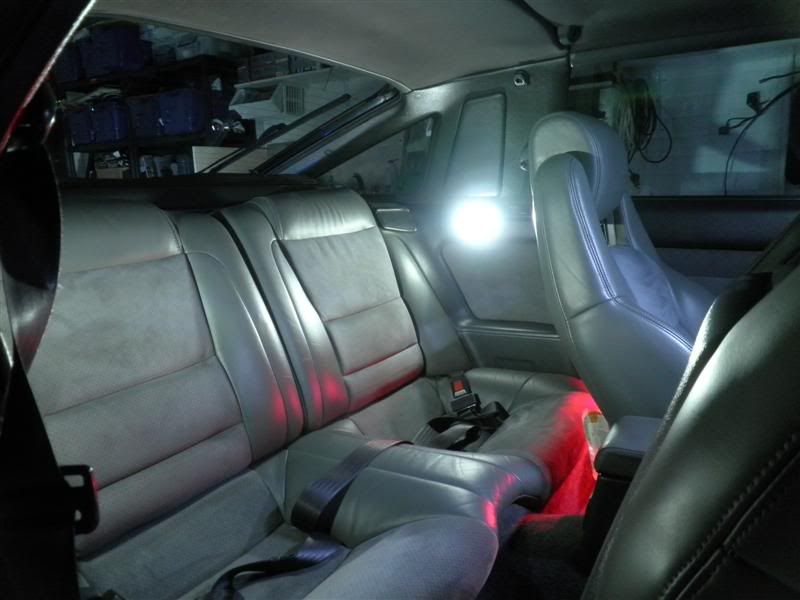
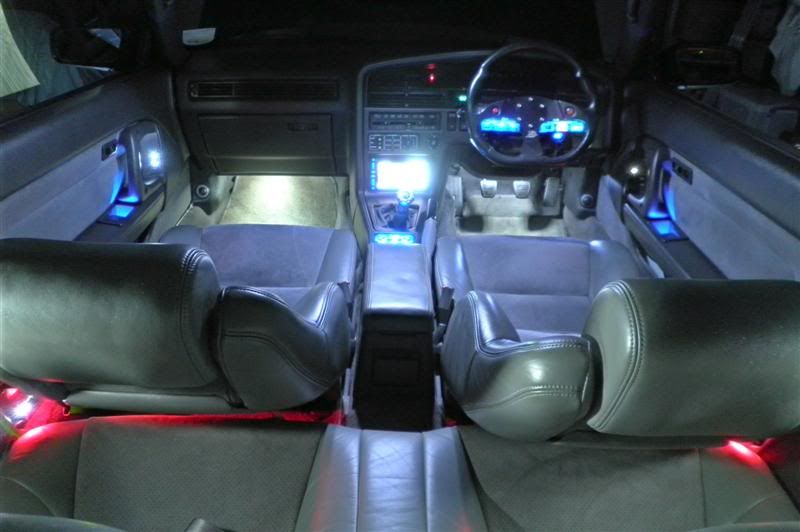
The same has been applied to the additional front foot well courtesy lighting, this time each fitting required just 3 SMD 3258 sources. All built into proper light housing, no stuff just stuck to trim here!
After installing the feeds about 2 years ago, I also finally got round to fitting exterior wing mirror courtesy lights. These are powered by a couple of Piranha Superflux modules. Completely concealed & hidden. Mounting requires a single 5mm hole!
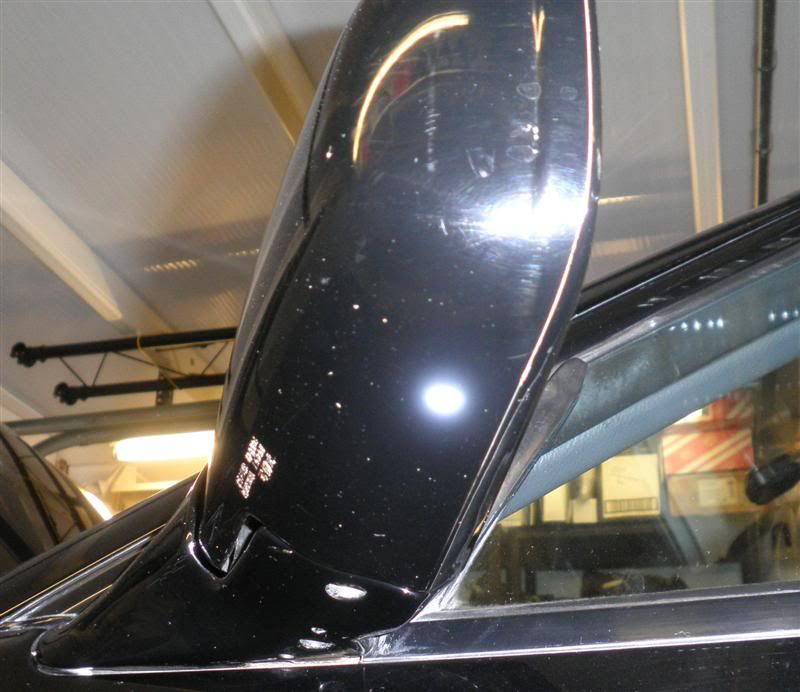
Result, exterior illumination in the darkest of places, particularly useful around here & where I park at the other half place where it's pitch black.

All the interior lighting & exterior courtesy lighting works on a staggered dimming system.
All lights fade up when the doors unlock, ignition is killed after driving or obviously the doors opened!
The lights delay after door shut for approx 20 seconds. After this they slowly & smoothly dim down in stages over a 30 second period.
The interior rear seat lights & main dome go first.
Next up the front foot wells dim down to 0.
The red door markers dim down next.
Finally, the puddle lights mounted in the bottom of the front doors slowly fade out completely along with the wing mirror lights.
If the engine starts the whole process is sped up & the lights all start to dim out as soon as the doors are closed.
Hard to put into words I know but, it's a real neat little trick implemented by use of a central voltage follower control & the correct set up of the LED arrays within each light fitting allowing me to set which group of lights fades to 0 first & how gradually they do this. Looks pretty classy too!
Now, a little thing has been bothering me for some time when dropping the other half off home on a Sunday evening.
The road is lit using 3 dead glo sticks & the council feel a curb drop of 8 inches is quite acceptable, while the camber of the road & pavements resemble a Mott & bailey castle so, when opening any car door more than half way it grounds out on the pavement, I couldn't help but get irritated not being able to see where my rear wheels were in relationship to the curb of doom.
I felt this was a problem that could be solved with good lighting - preferably of the road however, this being less likely than me giving birth I decided maybe I should be the one providing the good lighting...can you see where this is going yet?
The trims around the rear wheels of the supra are built in such a way there is a small area of dead space in each corner.
After a quick trial I decided this area could be utilised in an unusual way to solve my issue & make night time rear wheel Vs obnoxious curbs a little easier.
Obviously I secreted a high power Piranha Superflux LED in the space & sealed it all up with liquid PVC.
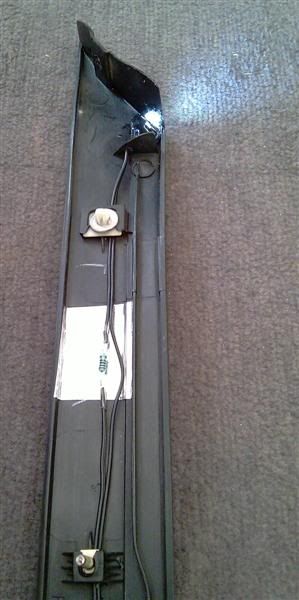
I then install some cable outlets behind the trims & ran some feeds back to the reversing lights.
The LEDs are obviously virtually undetectable, completely hidden.

This is the result which I will patent & call "hindsight" Good eh??
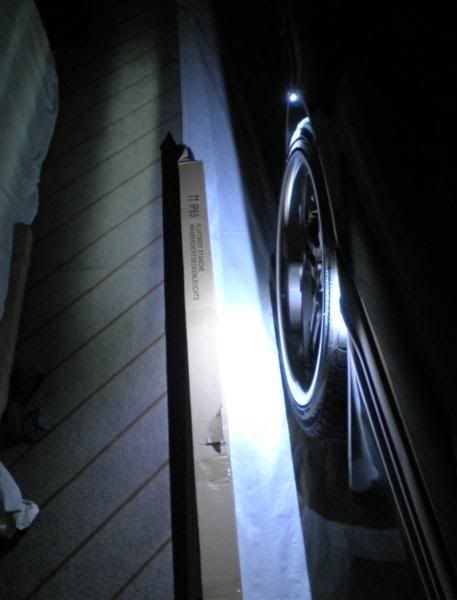
Perfect lighting of the area by the back wheels. The LED rear conversion providing plenty of rear visibility behind the car as ever.

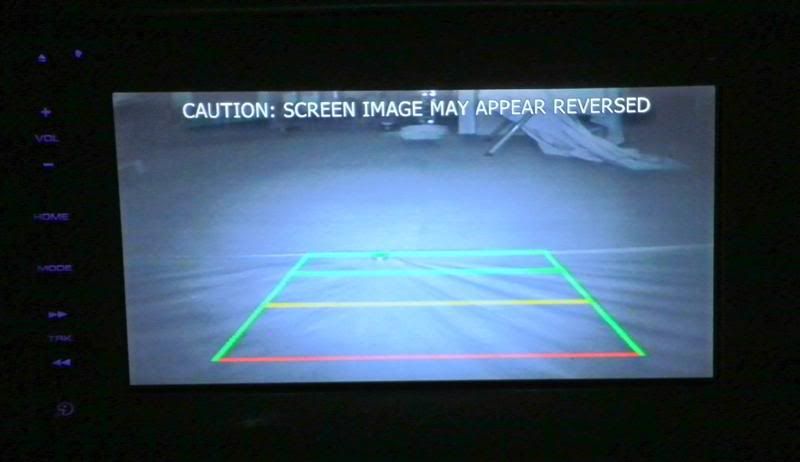
Combined with the Pioneers reversing display...
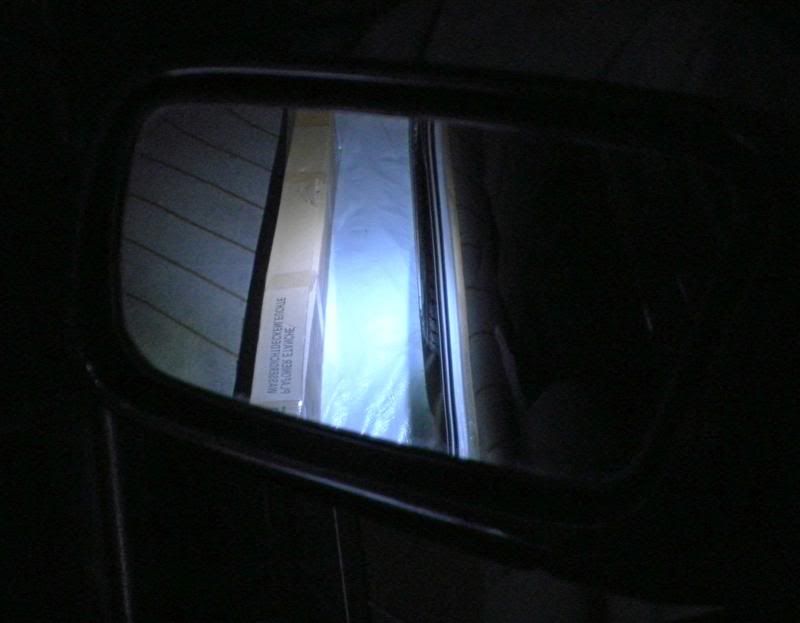
Finally, what I now see in my wing mirror in absolute pitch black situations.
All problems can be solved with good lighting, if they are not solved then you'll at least feel more relaxed!
Pointless rubbish I know but, hey.
Upgrade wise has been mainly tweakage here & there. After a particularly cold, wet & miserable winters day, instead of reaching for knives & self harming I decided to treat myself instead so, after finishing the prezzie shopping I purchased some spangly new super spark coils to replace my 20 year old stockers.
As you can see they are pretty & red, here they are all fitted & promtly covered up by the galley trim
They have made a definite improvement to running., the car is much more "zingy" now. Coils on an average modern turd last around 6 years so, I figured replacing 20 year old ones would be a most definite improvement! As these upgraded ones were only £50 more than stock replacements & they drop direct in there was no real arguments.
The next little treat was something I kept promising myself, that being Pioneers latest flagship Navgate unit. I have really missed the slick interface of Pioneers equipment & more than anything, the sound quality!
No point in listing what this thing does because it does the lot bar dispense hot drinks. very impressive bit of kit & managed to get it for about half price brand new, whoraa! A real good thing as they are quite obsurdly expensive otherwise!
Best bit is you can customise the start up screen, fitting in perfectly with my aim of factory fit in this car. I am also lucky enough to have am immaculate, non hacked up stereo fascia, a very rare thing indeed.
Next up, I kept finding TEMS control to be in the stupidest place there in the centre console & with the yUKs incredibly expensive to use yet inexcusably appallingly maintained roads & inexplicably stupid layouts, I find it's a system I constantly want to adjust to meet the conditions.
This mainly involves selecting soft when coming to the latest row of speed humps, discovering yet another patchwork of repairs carried out by paraplegic, blind work men on horse back using only spoons & out of date custard or having the car shaken to pieces by a road surface worse than the 15th century track that pre-dated it....
I digress. After having a little think ( about a second) I decided the best place by far for TEMS control was the steering wheel, so..
Cue steering wheel panel V2.4..
This also allowed me to ditch the centre console mounted TEMS making way for the system Toyota should have fitted to Aeros as standard in the first place - heated seats.
I made up the control panel with standalone control box which handles the power switching. The max load of both seats is around 8 amps.
I am yet t rip the seats apart to install the heater mats. I will face unto this probably around respray time when the interior gets stripped completely.
This obviously fits where the factory heated seat panel would be. I tried to base the look of the panel on the factory switches.
All the panels are currently in trial formats with temporary overlays. I am going to make these up properly after testing them for a while. They will be screen printed on a matt plastic as you'd expect to find on membrane keypads.
Screen printing will also put an end to the light bleed, I'll also diffuse them properly to give perfect illumination, although the digital cameras really act up with blue making it look patchy.
Unlike my previous galactic class Supra, things here are somewhat calmer & integrated, again, aiming for a more factory feel.
Next up the interior lighting saw an upgrade. Although I have been using LEDs exclusively for over a decade on these cars, diode technology constantly moves on. Rite now we have reached a point where there has been a marked improvement over previous components & technology so, it was time to update them again.
I don;t tend to use off shelf replacement bulbs as I find they are too restrictive, give out poor light patterns, cost too much & just ain't as fun as designing your own bespoke luminares.
The additional rear courtesy lights installed each side of the rear seat are now powered using 6 SMD 3258 LEDs. Far crisper, far brighter than the previous units which used arrays of 5mm LEDs.
The same has been applied to the additional front foot well courtesy lighting, this time each fitting required just 3 SMD 3258 sources. All built into proper light housing, no stuff just stuck to trim here!
After installing the feeds about 2 years ago, I also finally got round to fitting exterior wing mirror courtesy lights. These are powered by a couple of Piranha Superflux modules. Completely concealed & hidden. Mounting requires a single 5mm hole!
Result, exterior illumination in the darkest of places, particularly useful around here & where I park at the other half place where it's pitch black.
All the interior lighting & exterior courtesy lighting works on a staggered dimming system.
All lights fade up when the doors unlock, ignition is killed after driving or obviously the doors opened!
The lights delay after door shut for approx 20 seconds. After this they slowly & smoothly dim down in stages over a 30 second period.
The interior rear seat lights & main dome go first.
Next up the front foot wells dim down to 0.
The red door markers dim down next.
Finally, the puddle lights mounted in the bottom of the front doors slowly fade out completely along with the wing mirror lights.
If the engine starts the whole process is sped up & the lights all start to dim out as soon as the doors are closed.
Hard to put into words I know but, it's a real neat little trick implemented by use of a central voltage follower control & the correct set up of the LED arrays within each light fitting allowing me to set which group of lights fades to 0 first & how gradually they do this. Looks pretty classy too!
Now, a little thing has been bothering me for some time when dropping the other half off home on a Sunday evening.
The road is lit using 3 dead glo sticks & the council feel a curb drop of 8 inches is quite acceptable, while the camber of the road & pavements resemble a Mott & bailey castle so, when opening any car door more than half way it grounds out on the pavement, I couldn't help but get irritated not being able to see where my rear wheels were in relationship to the curb of doom.
I felt this was a problem that could be solved with good lighting - preferably of the road however, this being less likely than me giving birth I decided maybe I should be the one providing the good lighting...can you see where this is going yet?
The trims around the rear wheels of the supra are built in such a way there is a small area of dead space in each corner.
After a quick trial I decided this area could be utilised in an unusual way to solve my issue & make night time rear wheel Vs obnoxious curbs a little easier.
Obviously I secreted a high power Piranha Superflux LED in the space & sealed it all up with liquid PVC.
I then install some cable outlets behind the trims & ran some feeds back to the reversing lights.
The LEDs are obviously virtually undetectable, completely hidden.
This is the result which I will patent & call "hindsight" Good eh??
Perfect lighting of the area by the back wheels. The LED rear conversion providing plenty of rear visibility behind the car as ever.
Combined with the Pioneers reversing display...
Finally, what I now see in my wing mirror in absolute pitch black situations.
All problems can be solved with good lighting, if they are not solved then you'll at least feel more relaxed!
Pointless rubbish I know but, hey.
Wow! Its like your whole car is one big example of what all you can do! Amazing work with the electronics!
Amazing work!!! You have done MANY things I like. I hope you don't patent this anytime soon 'cause I would like to do some of those things to my car!!! Great job!
Oh. My. Gosh.... I want!! i just finished putting all LEDs in my climate control and SMDs in my gauges
It hasn't been said yet enough, so: WOWWWWWWWWWW
Holy eff man you truly have put a seemingly inconceivable amount of love into this baby. Inspiration is an understatement.
Holy eff man you truly have put a seemingly inconceivable amount of love into this baby. Inspiration is an understatement.