
I've been lurking around here for awhile, and this place seems a lot more friendly then some "other" forums, so figured I'd put up my build thread over here. I already have this build up elsewhere, so I'm just going to copy and paste from the beginning to where it sits today in here.
Enjoy")
______________________________________________
Hi there. I'm a former DSM guy. Built and raced a 1991 Talon AWD over the last 5 years. Made a best of 628awhp and ran a best time of 10.93 @ 137 in it. But finally decided I wanted a more "mature" toy car. So it got parted out and sold. Vids of that car can be seen in my sig if you are at all interested
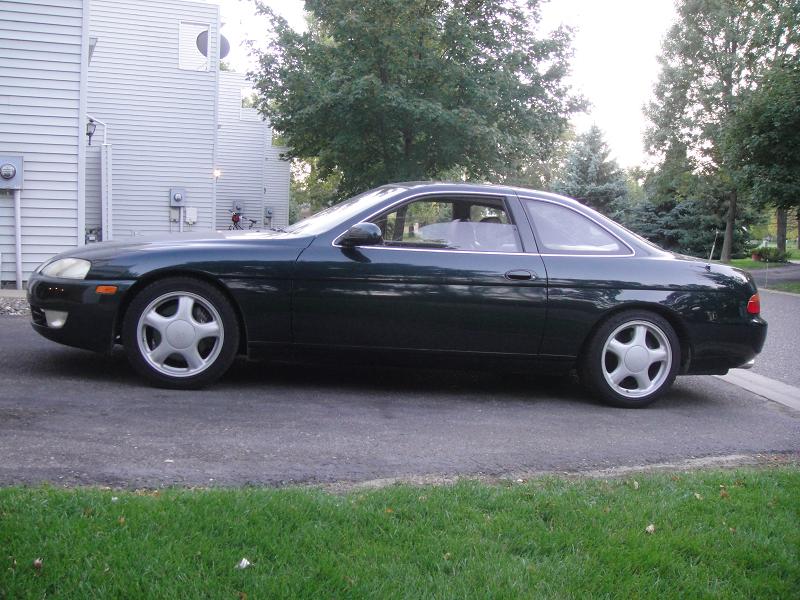
So today I received my "new to me" 1992 Lexus SC300. Had it shipped from Normal, IL. Here's the actual ebay add that I won
http://cgi.ebay.com/ebaymotors/ws/e...20662011920&ssPageName=ADME:X:AAQ:MOTORS:1123
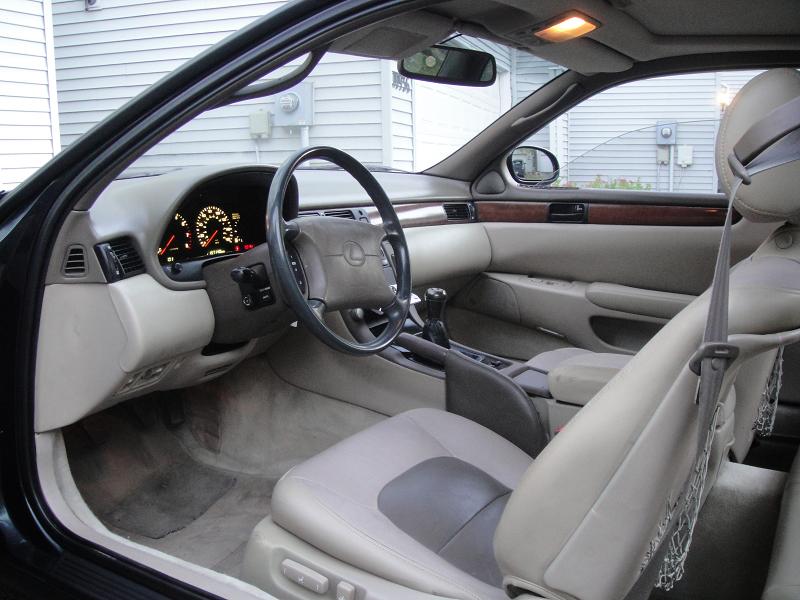
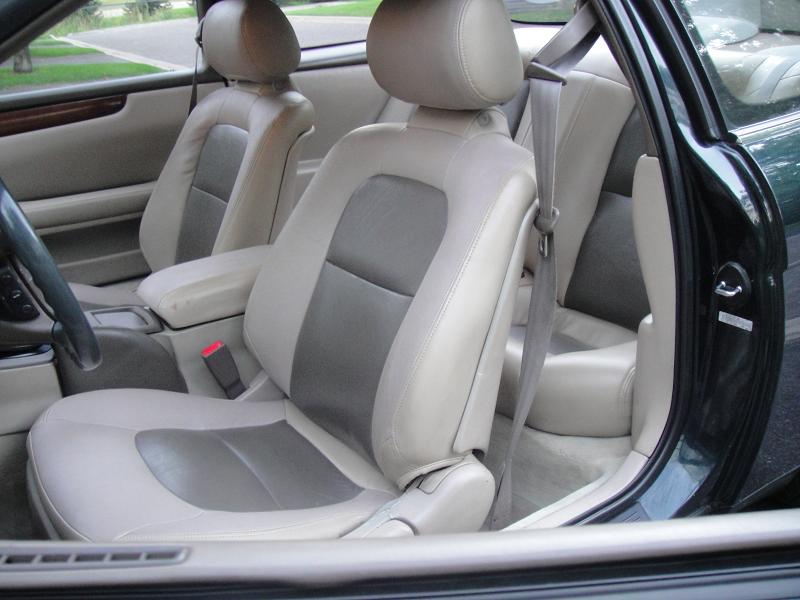
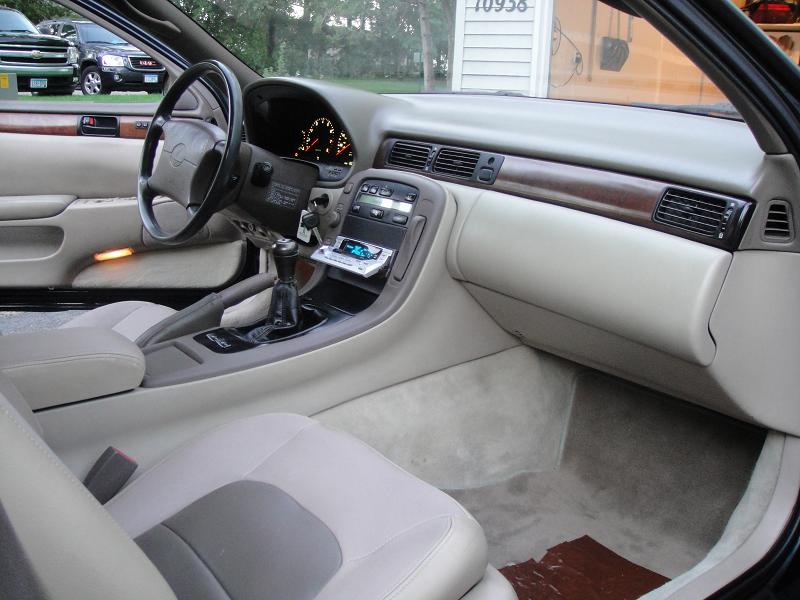
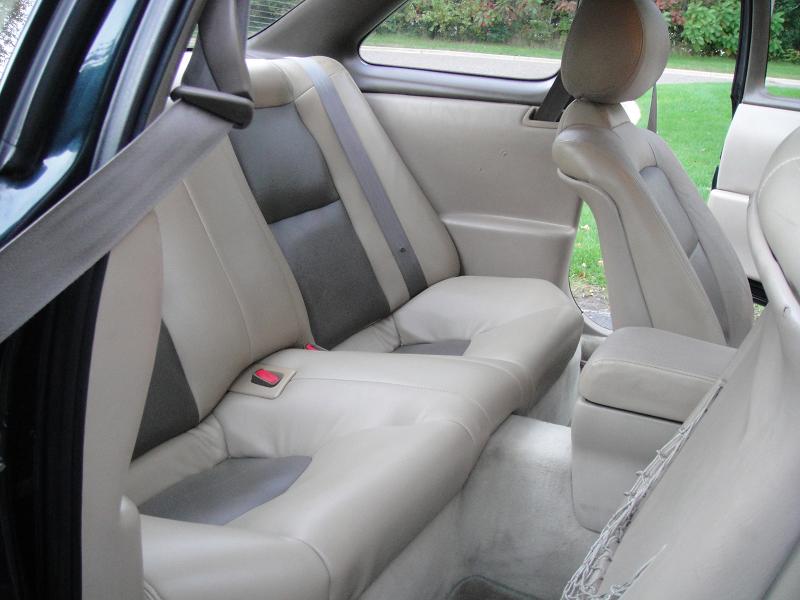
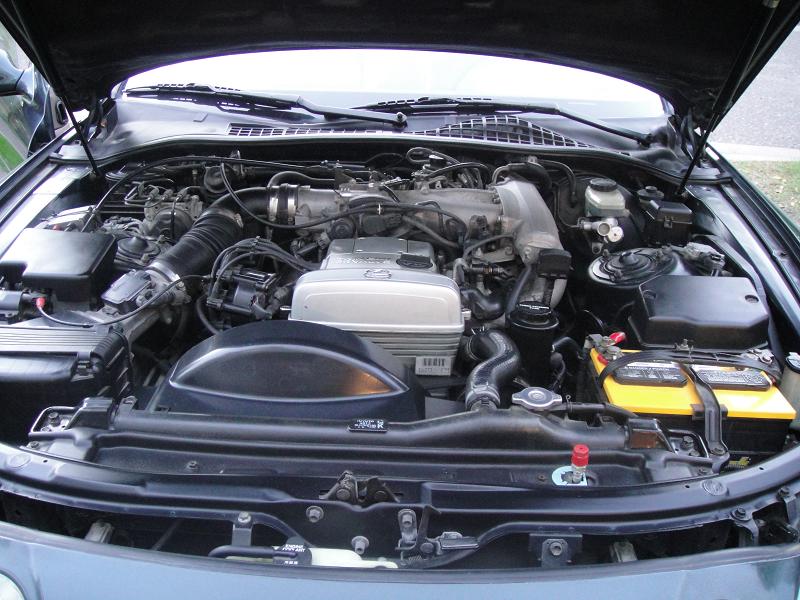
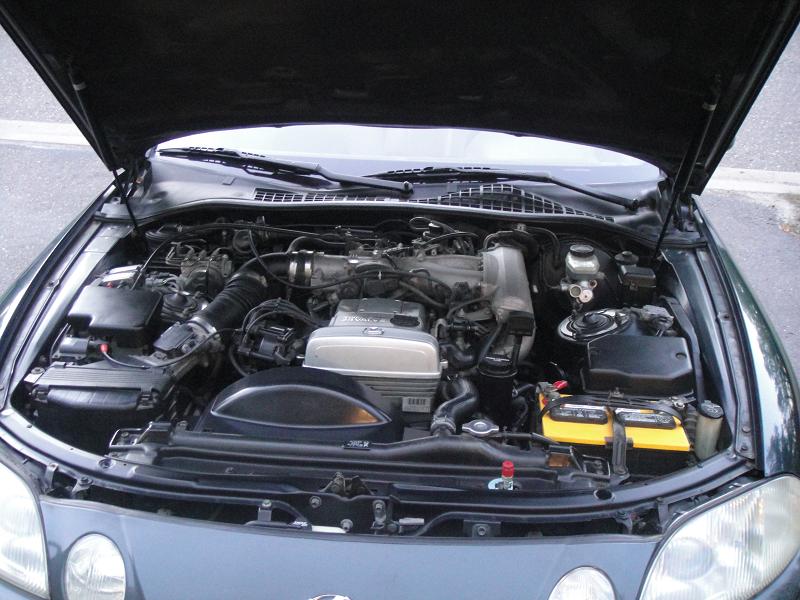
Just driving it home, I already love it. I didn't feel every single crack/pot hole in the road like I did in the talon, the engine just seems smooth and has a nice tone to it. The engine looks like it was recently detailed, it's clean enough to eat off of. There's a couple door dings, and a small amount of sun/paint fade on the front bumper, and a very very small amount of surface rust underneath the car here and there, but overall I was surprised with how clean it was! I think this is going to be a perfect fit for what I was looking for, and was well within my price range. The leather must be recently re-covered also because it's in brand new condition (which ever other one I've looked at usually atleast the drivers seat is worn).
Some basic info of the car:
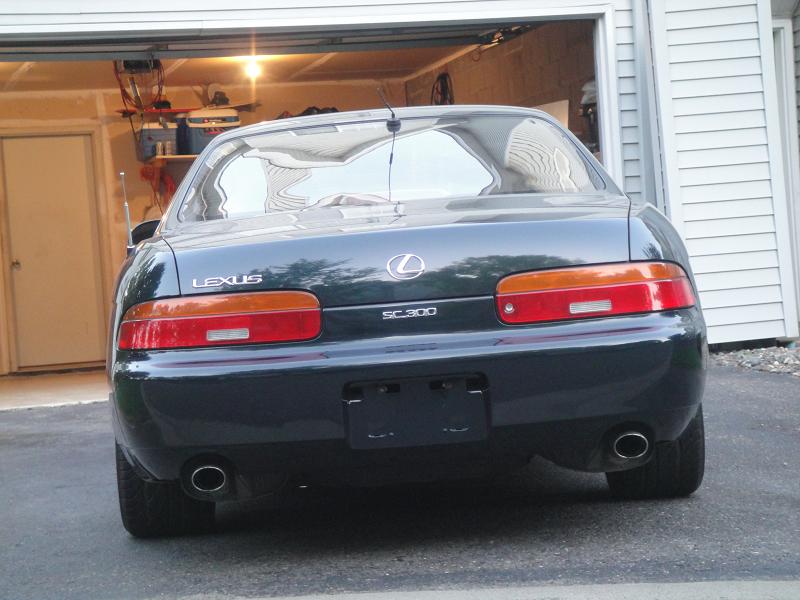
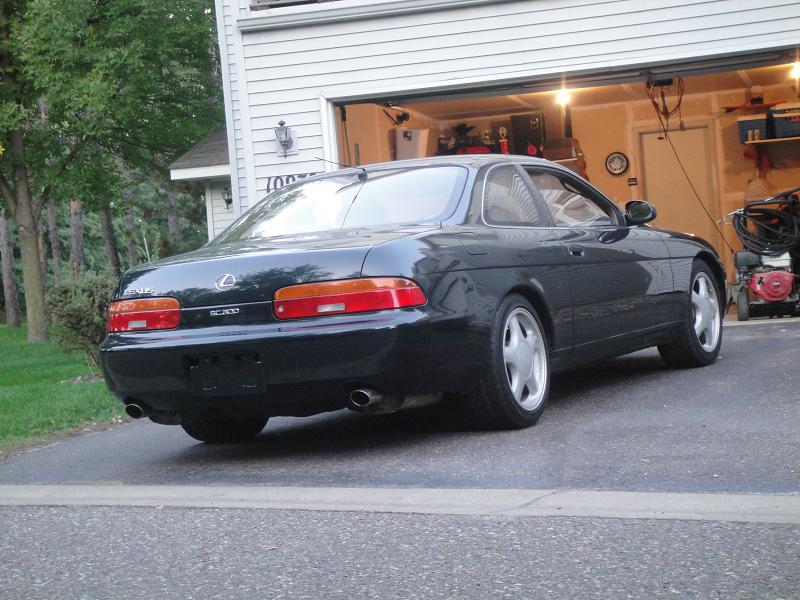
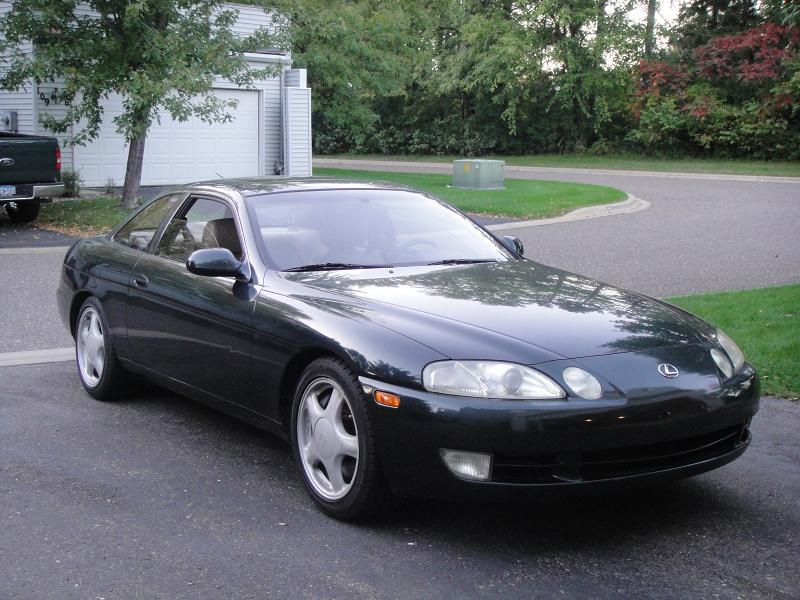
1992 Lexus SC300
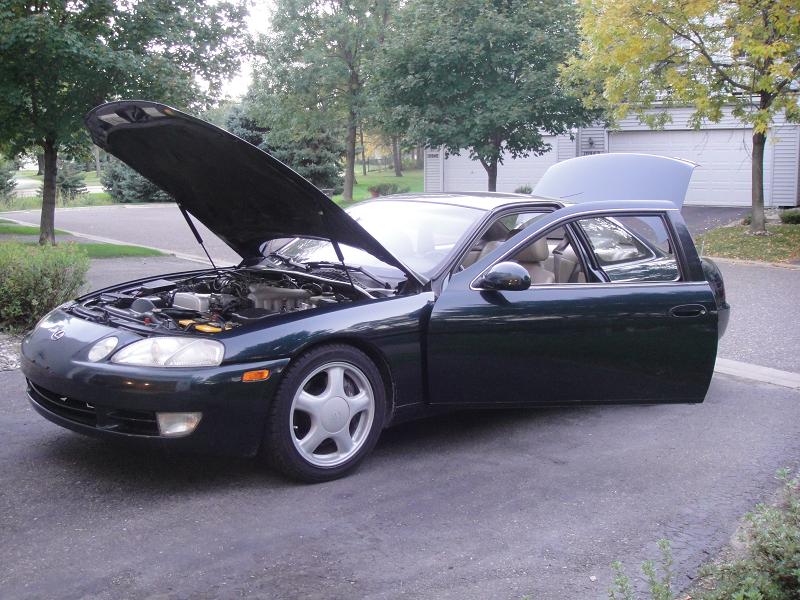
Exterior: Royal Jade (hence the cars nickname The Green Bean, or Teh Bean for short )
Factory 5-Speed
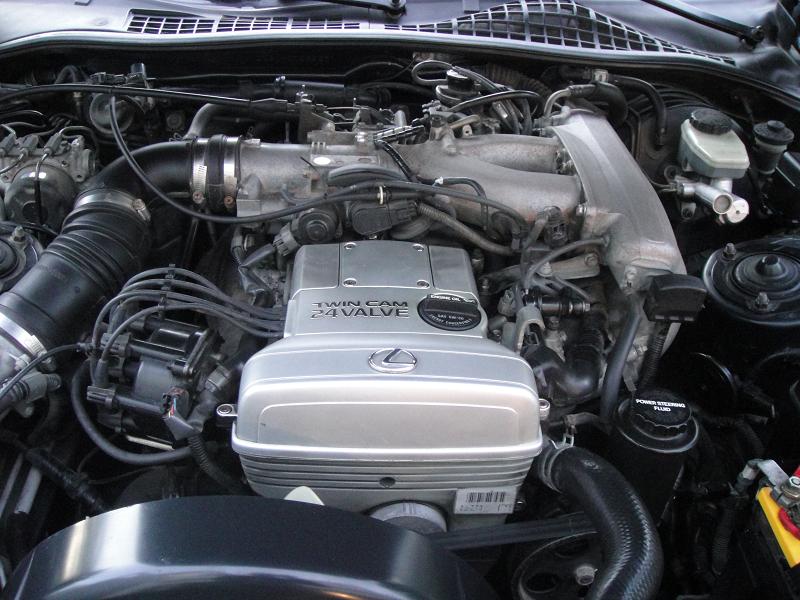
2JZ-GE stock Inline 6
Leather Seats
Memory seating
Only Mods are:
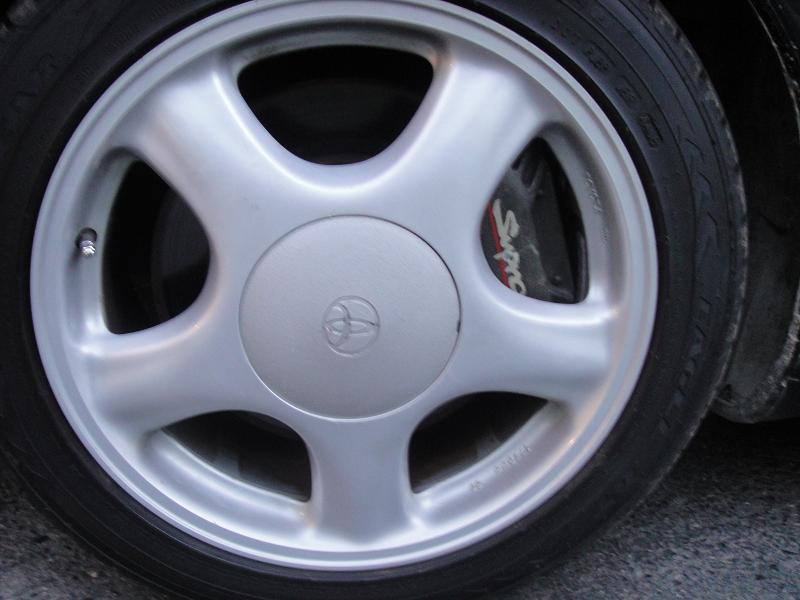
- Supra brakes
- Supra rims
- Eibach Pro-Kit w/ Supra struts/shocks
- Pionner CD-Deck
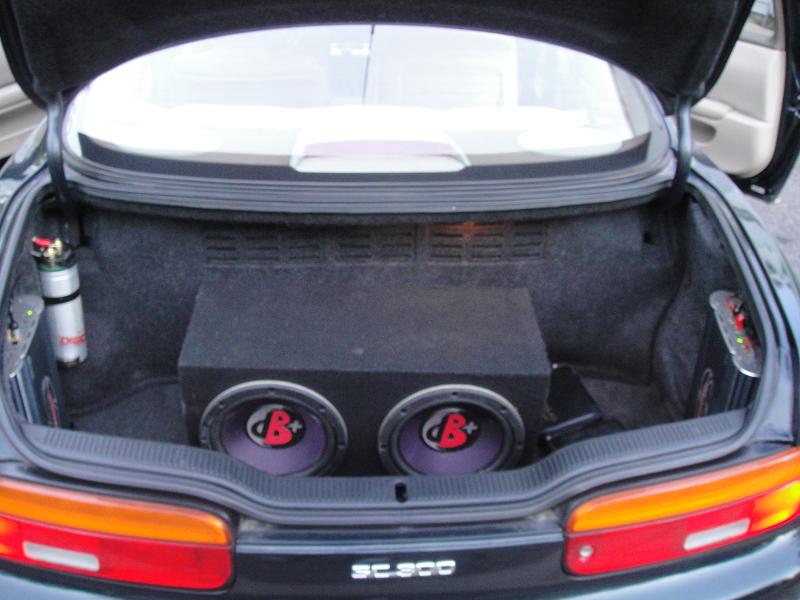
- 2 Kenwood amps
- 2 10" Kenwood subs
- Capacitor
- 8K HID's
Other than that, pretty much stock. The bads of the car are:
- A/C doesn't work
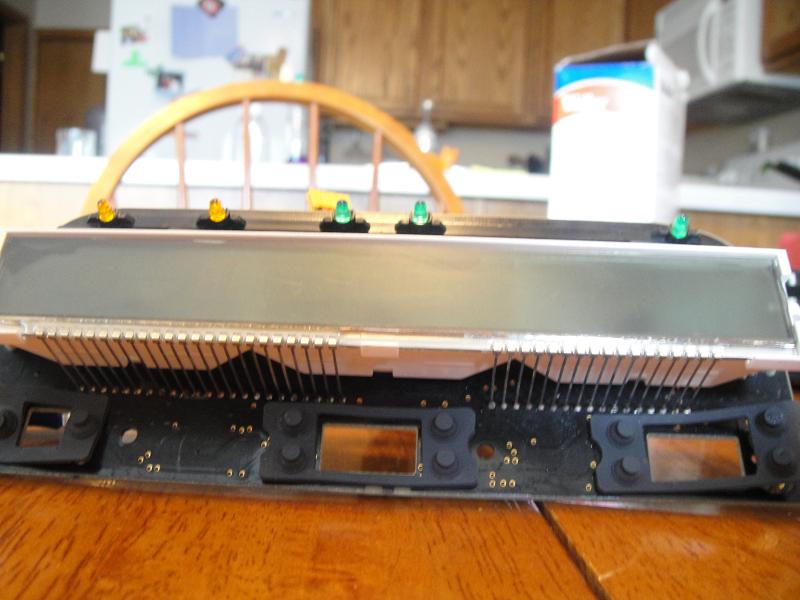
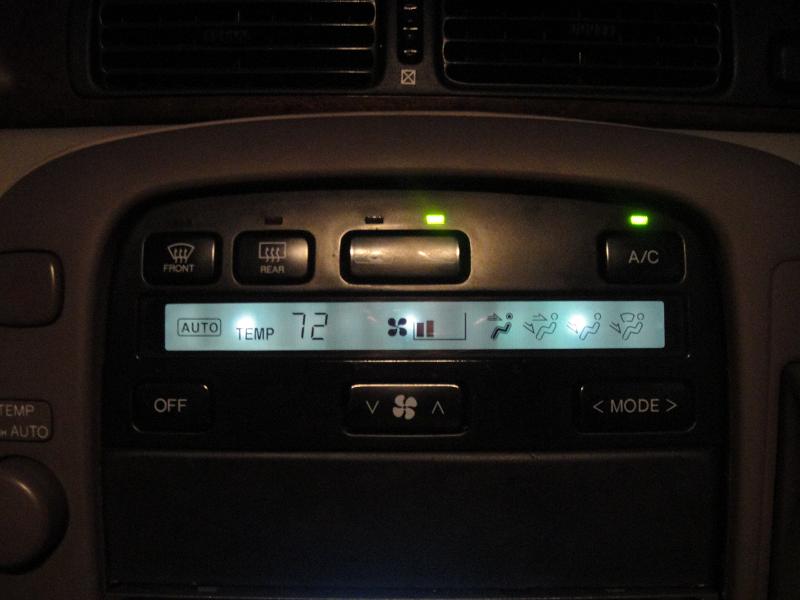
- LCD Climate Control screen is bad (replacement screen already in my garage waiting to be installed)
- Brakes feel warped
- A few minor cosmetic things that will be dealt with over time
The basic plans for the car are
- Replace 8K HID bulbs with something more normal (probably 4300)
- Rip out ghetto bass, sell on CL, and put a new cleaner stereo setup in
- SC400 front lip
- Borg Warner S300sx 84/75 (.91A/R Divided T4)
- Standalone (probably AEM but still considering all options)
- Tranny situation is still up in the air (6-spd vs. Auto)
- E85
- Stock Motor, Stock Comp Ratio
- MAP Ultimate Duty L19 Headstuds
- Whatever else is needed to support that turbo setup and my power goals mentioned below.
My goals are to first just make sure all necessary maintenance is done, and the car is running in as tip-top of shape as it can be. Once that is done, make it a comfy street car, but with enough power that it can still get some occasional street ownage, and the occasional drag strip visit. We have a couple different dynos here, but in the DynoJet world I'm aiming for 650-700hp at the wheels.
I plan on trying to take my time, not rush this project, and get it done over a period of time (not happening over night). Sometimes on the Talon, I feel like I rushed certain things, but on this one I want to make sure I take the extra time to do things as good as I can.
It's kind of interesting because I'm starting on a new platform that I knew nothing about 3 months ago. I've been reading up a ton, and it's tough starting over as a complete newb again. Pretty sure I've already annoyed the hell out of a few locals. But I just want to say a big thanks to those guys for listening to my questions. I'll be reading and learning as much as possible on here as I progress.
Anyhow, enough rambling, on to some pics. Enjoy

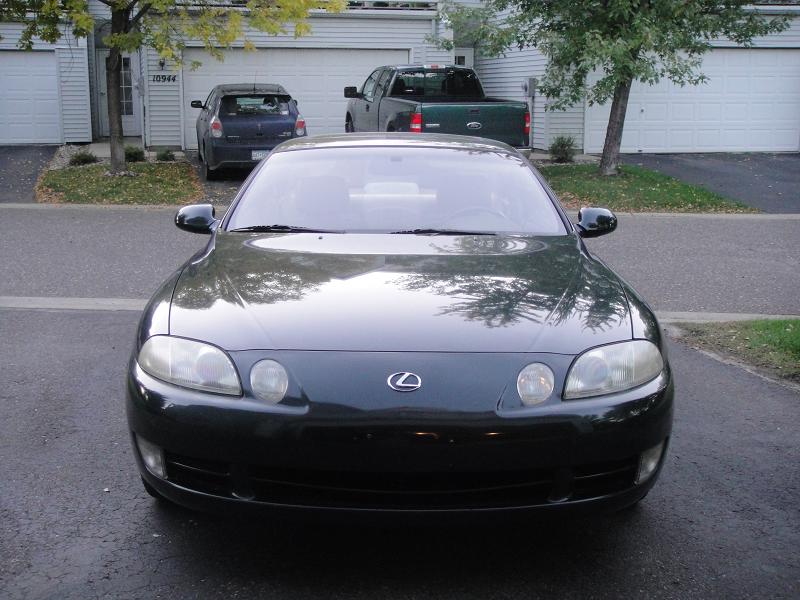
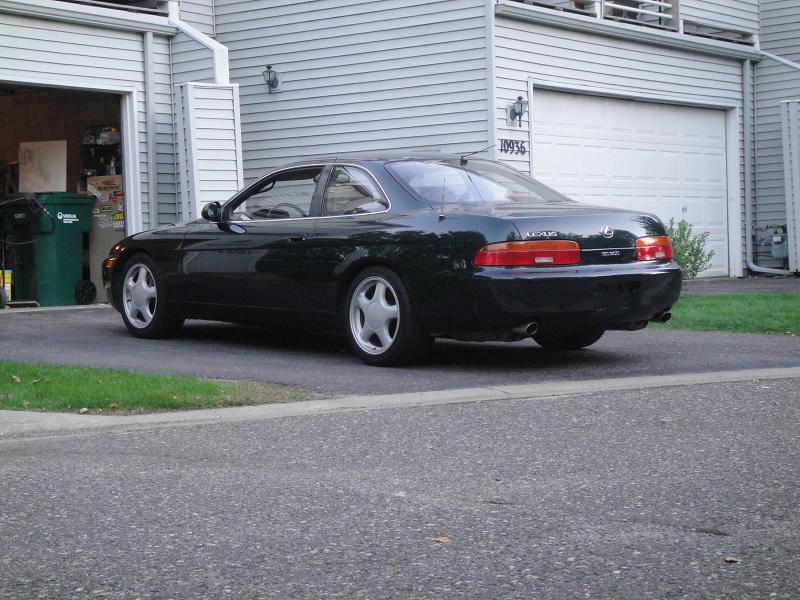
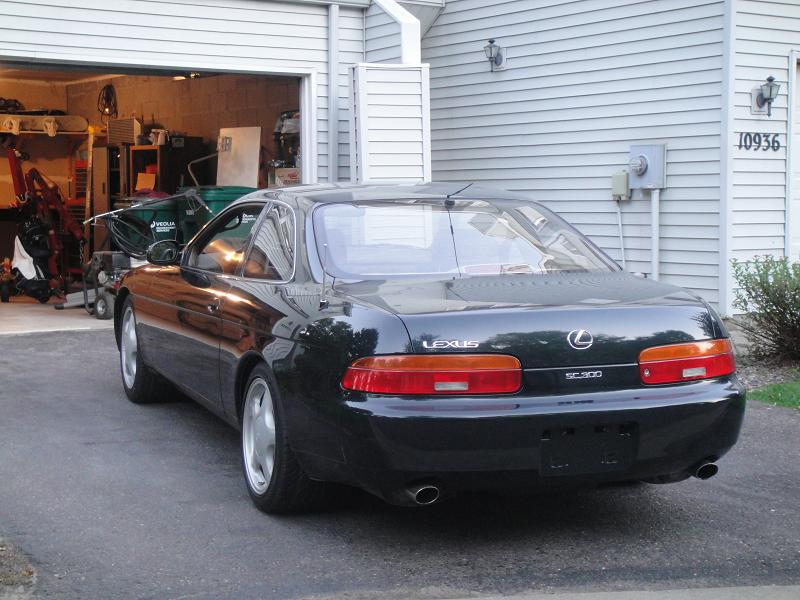
And some more pics:
---------- Post added at 11:37 PM ---------- Previous post was at 11:35 PM ----------
I havnen't really been keeping this thread updated over here, but figured I would give an update.
Replaced the broken LCD climate control screen:
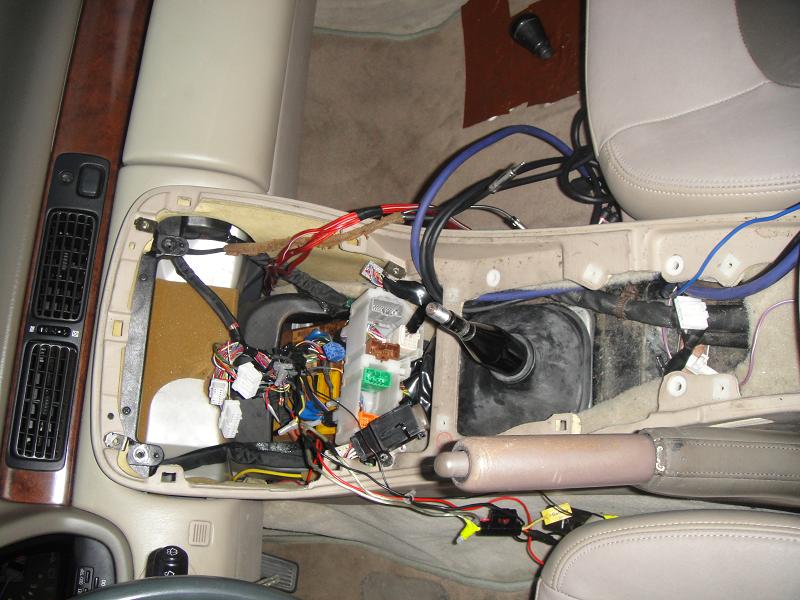
Reworked the stereo as the previous owner had it pretty rigged. The head unit was ugly, i didn't care for the hardcore ghetto bass. So that all came out. And had to do a bunch of wiring crap as like I said, it seemed pretty rigged before.
Installed my much more subtle sub setup. Just nice clean bass, nothing gangster:


Bought a double-din DVD/NAV unit off China-bay. So far I'm loving it.

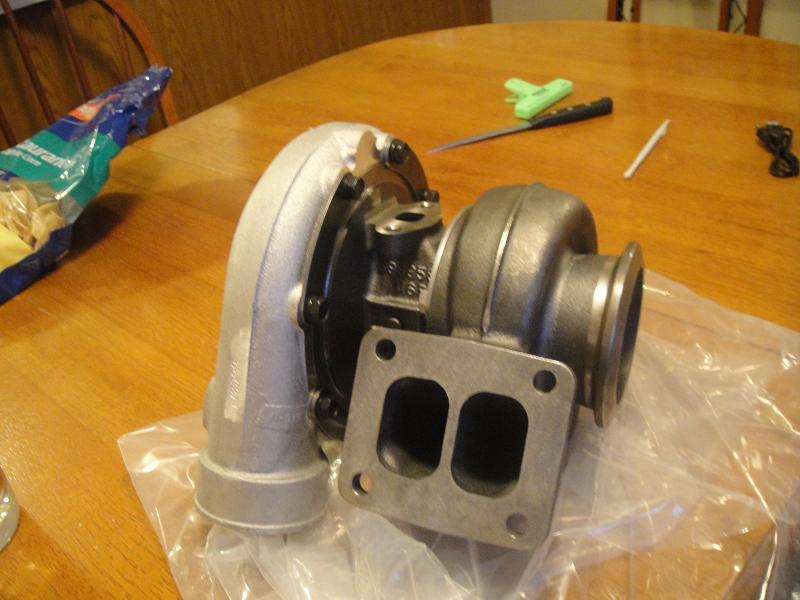
Picked up a turbo from Full Race. It's a BW S300sx 84-75. Divided T4 .91 AR
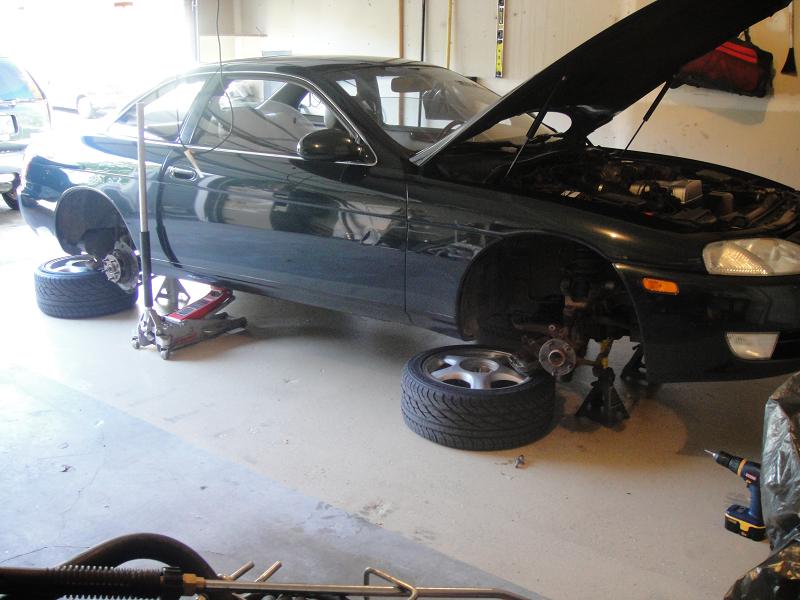
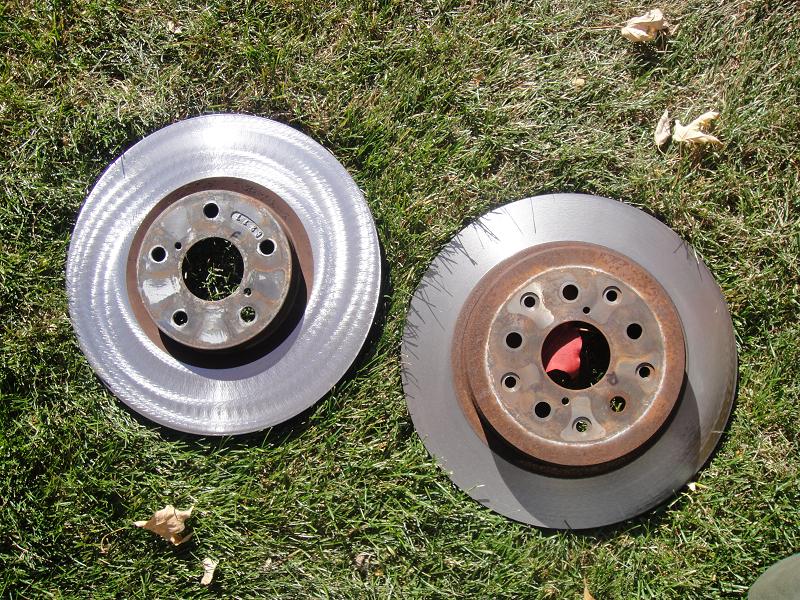
The car already has Supra brakes on it which is a nice upgrade. But they were pulsating really badly. So I went and got the rotors turned just to check and make sure they were the problem, and the car stops much smoother now. Two different shops turned the rotors, so you can see the difference between the shops machining results between the fronts and rears.
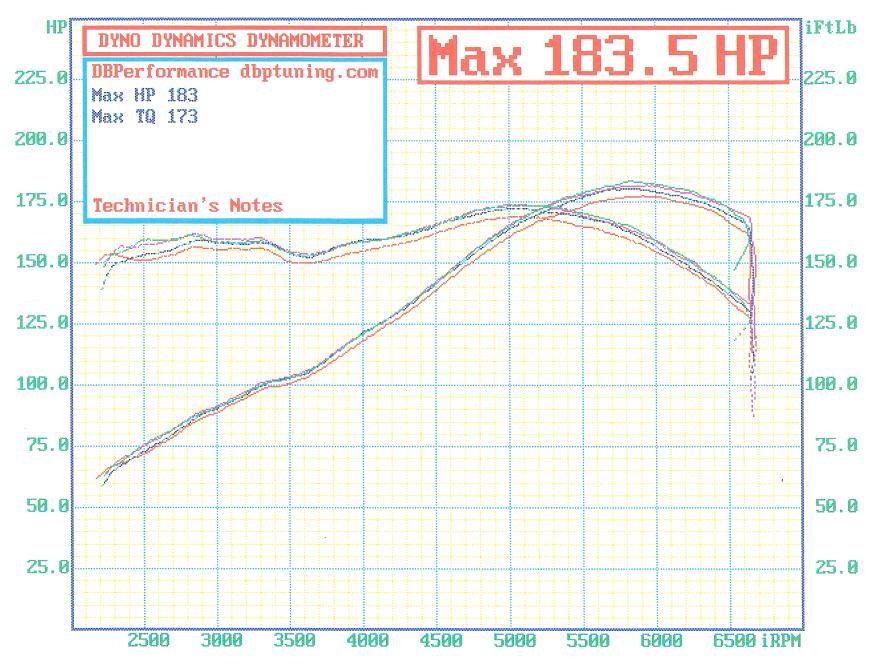
Took it to the local dyno for just a baseline pull to see how it's doing while it's still pretty stock. 183hp/173tq. Right about what I expected so it would seem the motor is still fairly healthy/
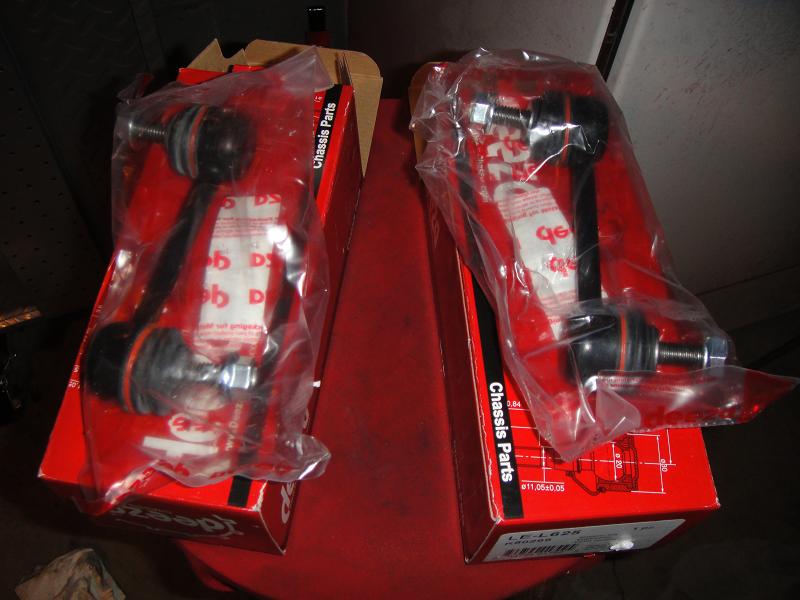
Replaced the front sway bar end-links with these from Rock Auto:
Yes I later tightened them down.
---------- Post added at 11:37 PM ---------- Previous post was at 11:37 PM ----------
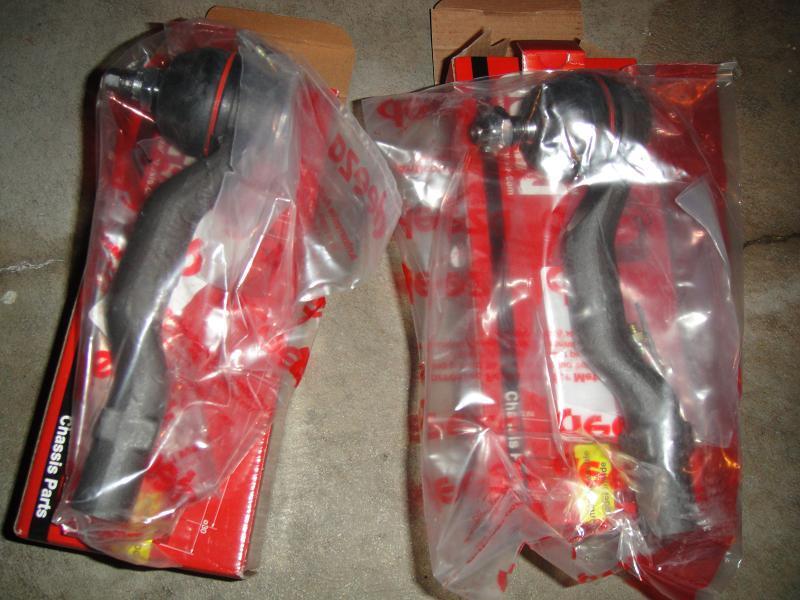
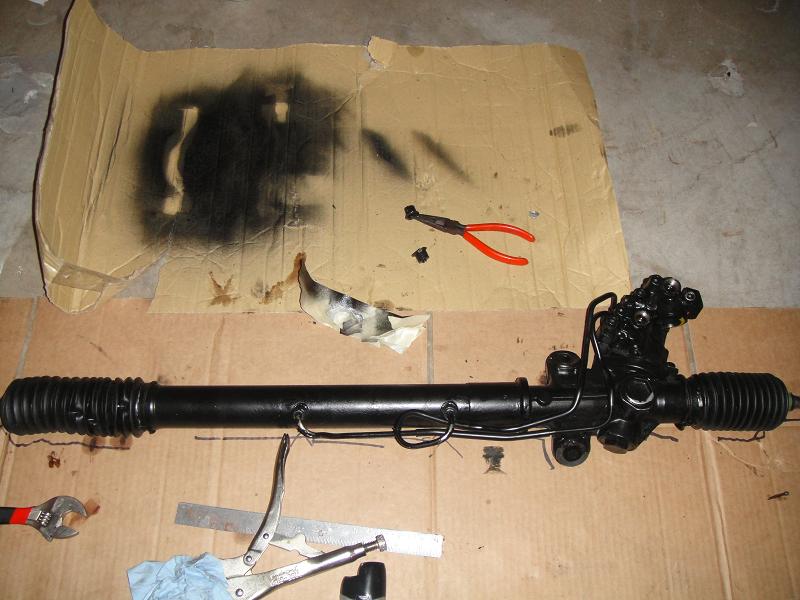
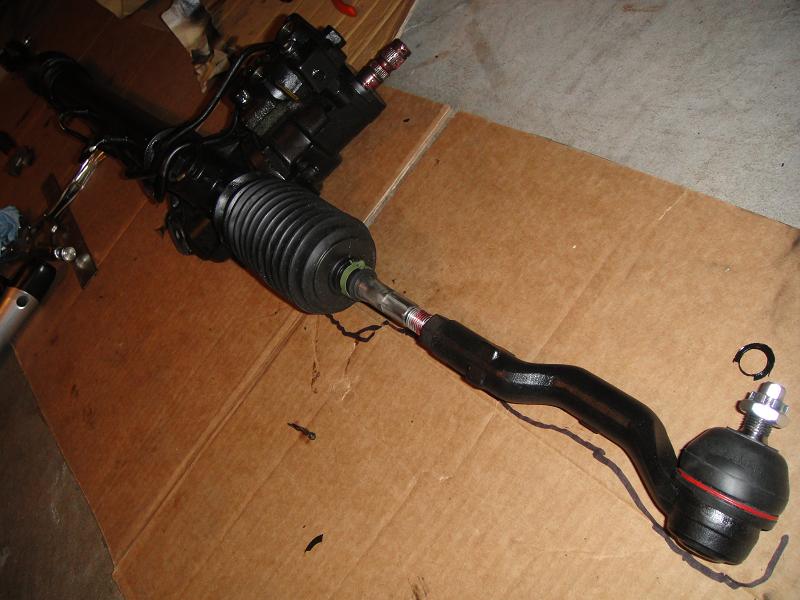
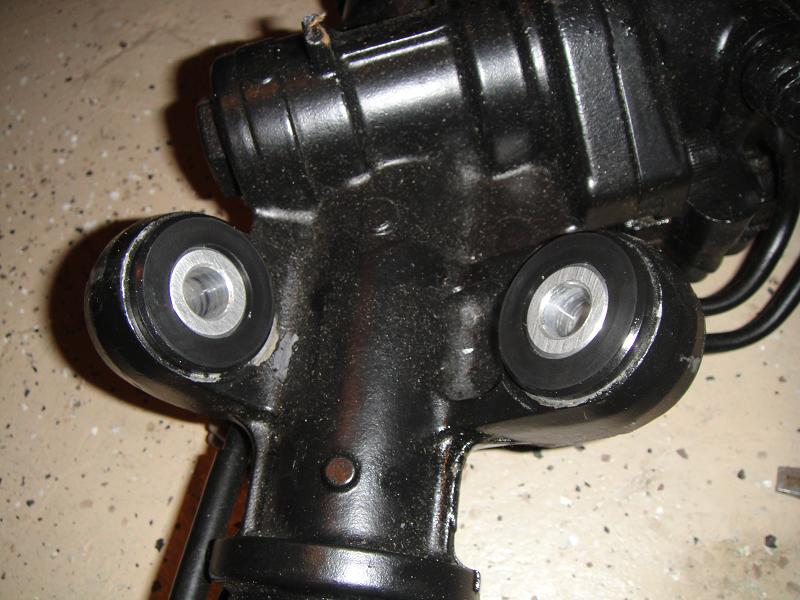
Replaced the steering rack with one from Vatozone w/ lifetime warranty. Also installed new tie rod ends on it from Rock Auto. And also installed Poly bushings for the rack that I bought from TME.
More turbo goodies. I'm still in pre-mod "maintenance" for now, but am just slowly acquiring the turbo parts and putting them on the shelf for now.
Replaced both front motor mounts, and the rear (tranny) mount with OEM Supra N/A pieces from Carson Toyota:
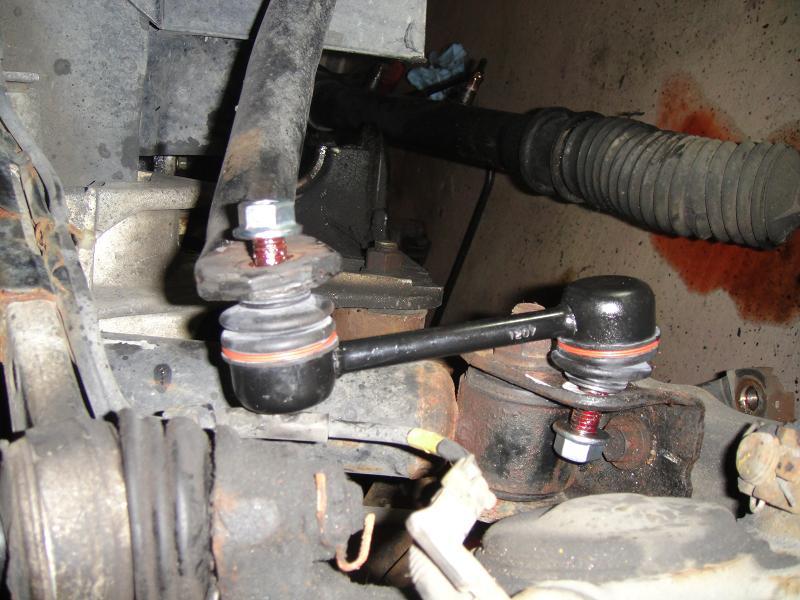
Installed new rear sway bar end links
Car feels much smoother now thanks to the new engine mounts all around. Also it handles much nimbler. I think the sway bar end links helped, but I think the majority of that is thanks to the poly steering rack bushings from TME. It was immediately noticable how much better it steers now. Probably even more so than normal since my stock bushings were completely trashed.
OK that's it for now, hope to get more of this maintenance done so I can park it for the winter and start doing the fun stuff
---------- Post added at 11:38 PM ---------- Previous post was at 11:37 PM ----------
Spoke with my buddy Ricer Pete a little bit today, and will hopefully be having him getting this thing aligned sooner or later
Also got some more stuff today!
- SS Braided Power Steering line from Drift Motion (to replace my possible leaking 160k mile stocker). My question however for anyone that's installed this, something seems odd. The stock unit has a couple vacuum lines comming off the assembly, and this doesn't have any ports for vacuum lines. Anyone know what the deal is there?
- Tial 40mm wastegate I got used off the ECMLink forums. This is what the manifold is flanged for, so that's what I'll be running!
- AEM AFPR w/ Turbosmart liquid filled gauge. Great price from the folks at MAPerformance, and they had it all in stock
- Two Walbro 255hp pumps. Once again, thanks to the guys over at MAP, had it all in stock
As the maintenance stuff is winding down, I'm starting to focus on mods I can start to do. As you can tell, I've decided to start tackling the fuel system. Plan is basically to run a dual 255hp intank setup just like I had in my DSM. Worm clamp them to the stock hanger assembly and set em up in parallel.
I'm unsure what the stock fpr can handle, so just for good measure I decided to grab this AEM AFPR from MAP that they have priced very nicely. And I like the fact it's black, and not bling bling anodized red/purple. Haven't figured out where to mount it or line size or anything yet, but that's ok this is still just the acquisition of parts phase.
---------- Post added at 11:39 PM ---------- Previous post was at 11:38 PM ----------
China-bay special FMIC showed up today Looks decent, definitely can't complain considering what it cost!
Core measures 12 x 24 x 4. That's 1152ci for those who measure in that way now a days

A quick peak at the MAP Ultimate Duty Headstuds (same material as A1 or ARP L19) that I picked up, and will be one of the "test subjects" for so to speak. What's unique about these are the dog point tips on them, that seats the stud in the block and preloads the fastener for a more accurate and repeatable torque sequence.
http://www.maperformance.com/map-ultimate-duty-h11-head-studs-2jzge-2jzgte-2jz-udhs.html
Here is quick diagram showing the theory behind why these are superior to other ones that do not bottom out, but rather stop because the non-threaded shoulder reaches the surface of the block.

---------- Post added at 11:39 PM ---------- Previous post was at 11:39 PM ----------
I'm still waiting on an EMS setup so I've decided to start doing some 'non-intrusive' mods that won't affect the current drivability of the car. So....
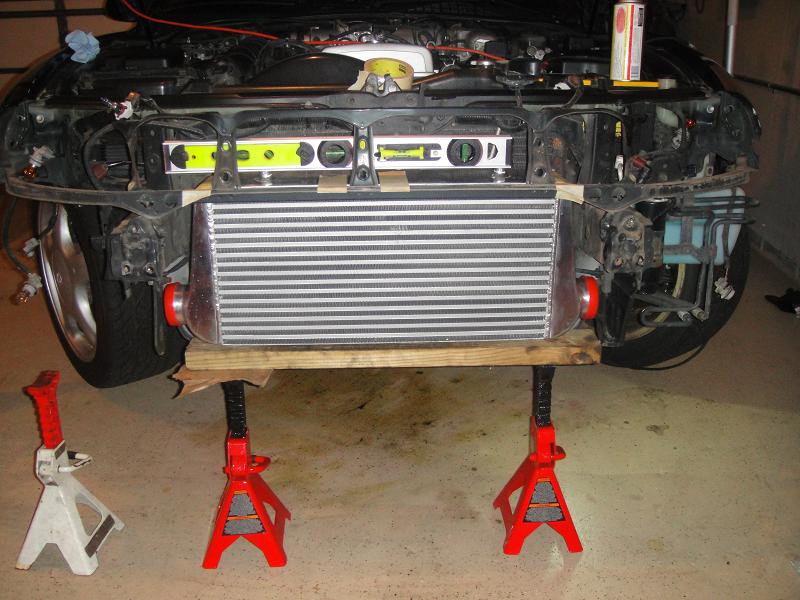
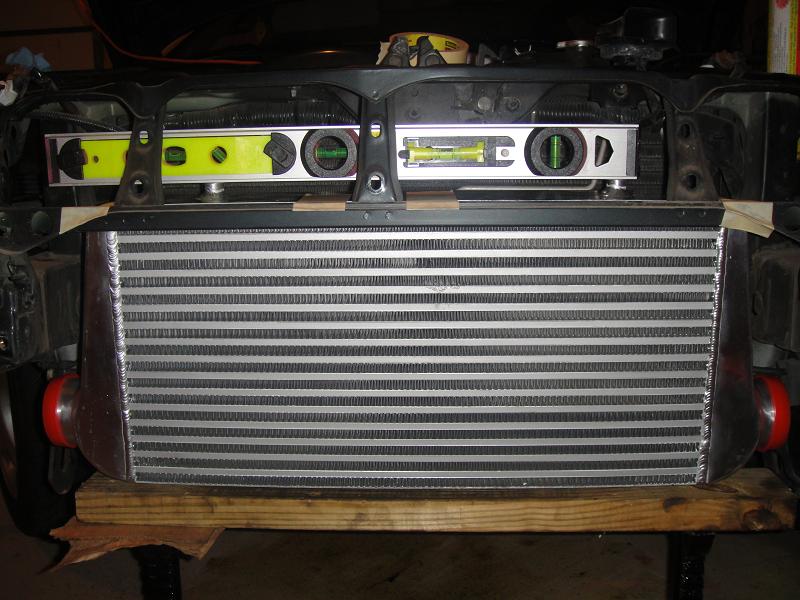
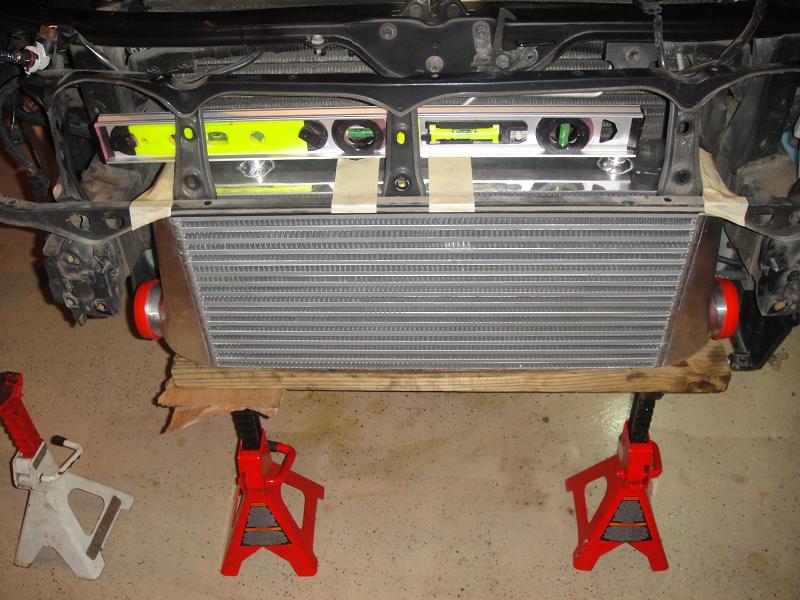
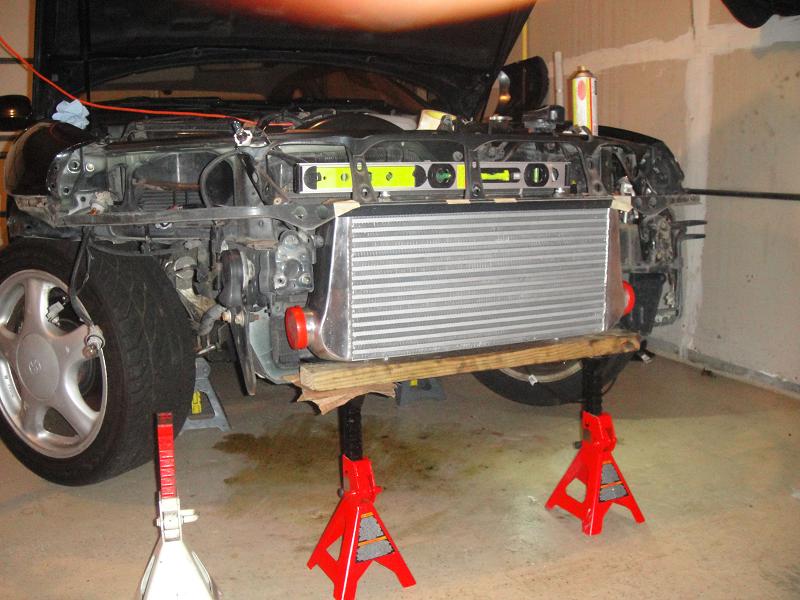
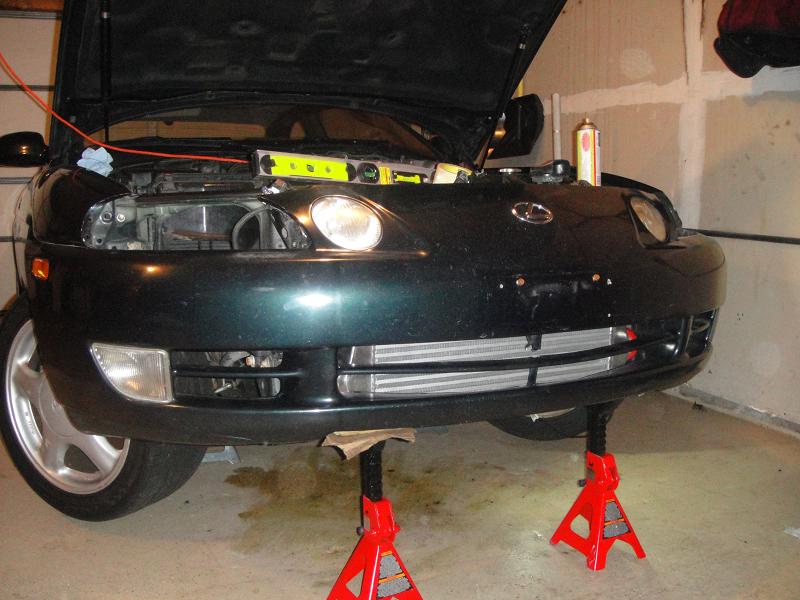
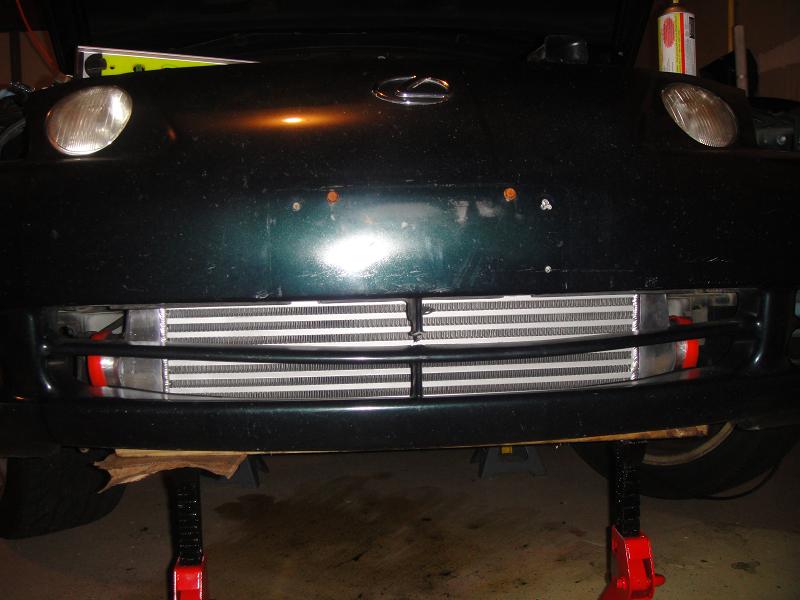
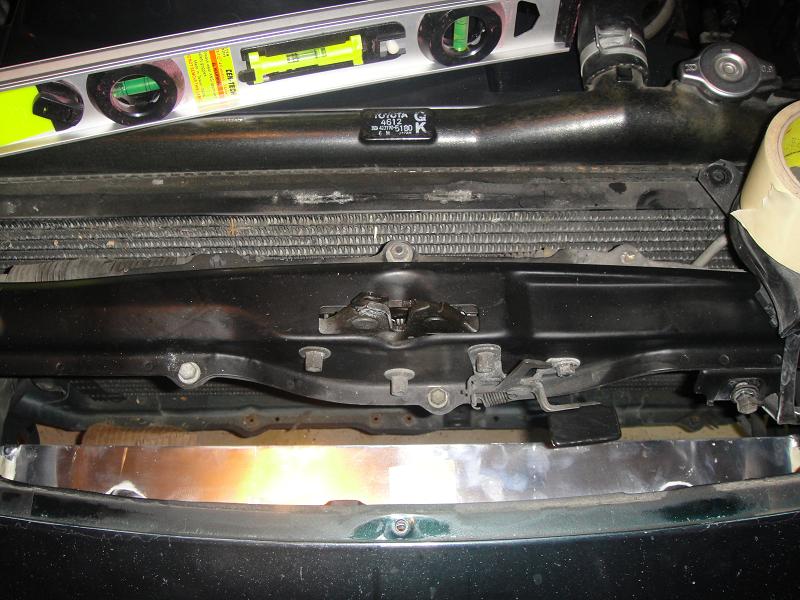
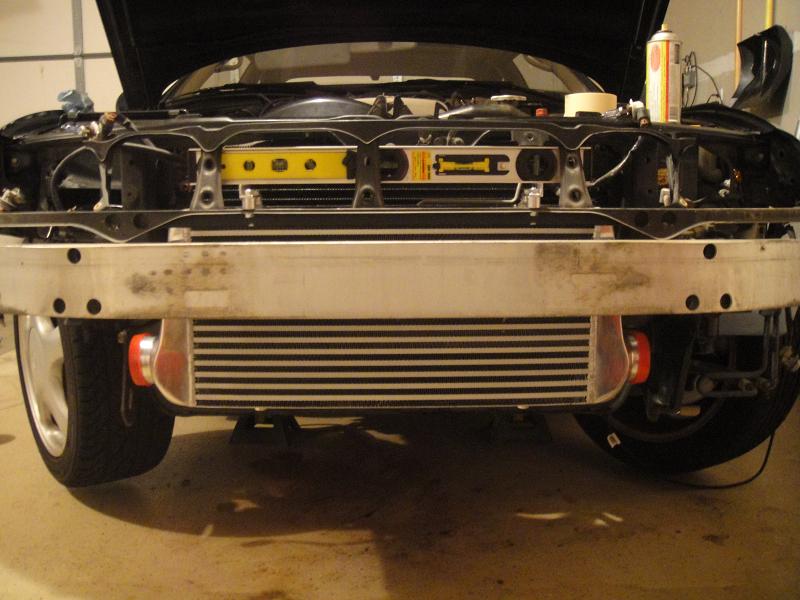
Initial mock-up of the FMIC is done. Couple notes are that there is a TON of room in here to fit this thing. 4" thick intercooler, and zero trimming of the bumper will be needed. Also I ensured to put it high enough so that the bottom of the FMIC will not be hanging below the bottom of the front bumper, which I made sure of because I've seen quite a few other ones setup like that and it looks weird IMO. I got it perfectly level at the moment (made sure the car was level first). Also I took a picture to show the gap between the FMIC and the A/C Condenser. Lots of room in between there. I would have pushed the core back further but the A/C lines would then be blocking one of the inlets of the FMIC, so that is why it is placed exactly where it is. If I could have tucked it back further, I may have been able to retain the factory coolant reservoir but nope, so I'll just be using the old reservoir from my Talon. There's 2 horns. I remounted one a little more out of the way, and the other I will either remount, or just remove as I don't feel like I really need 2. It alsoit looks like I will be able to retain the stock crash beam, but for weight reasons I may just leave the sucker off, we'll see And lastly, doing this made me notice part of my bumper is broken (you can see in the very center the plastic grill piece is broken in the center) ghey, but whatever because eventually (probably not unilt next year) I plan on switching out the the 97+ bumpers so not a huge deal.
OK so here's some pics. Probably be making a trip to Lowe's later for some lengts of aluminum angle to mount this in place.


---------- Post added at 11:40 PM ---------- Previous post was at 11:39 PM ----------
---------- Post added at 11:42 PM ---------- Previous post was at 11:40 PM ----------
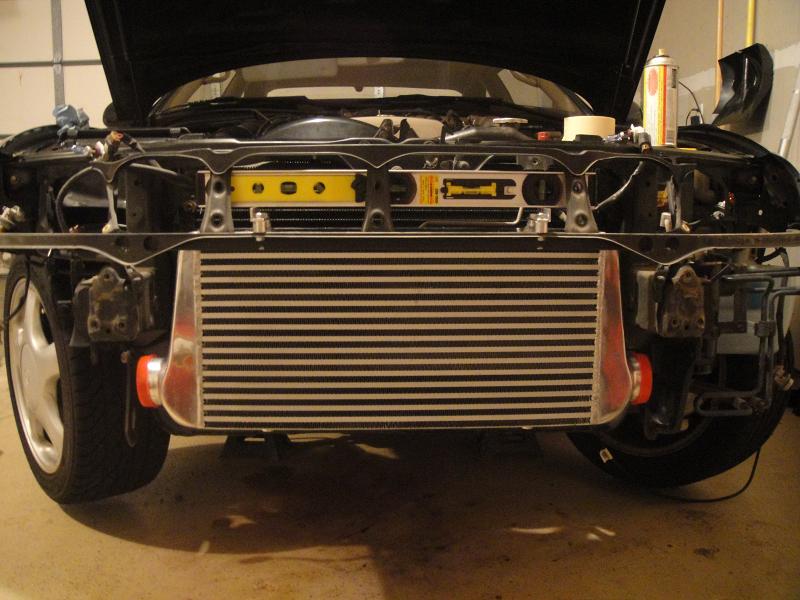
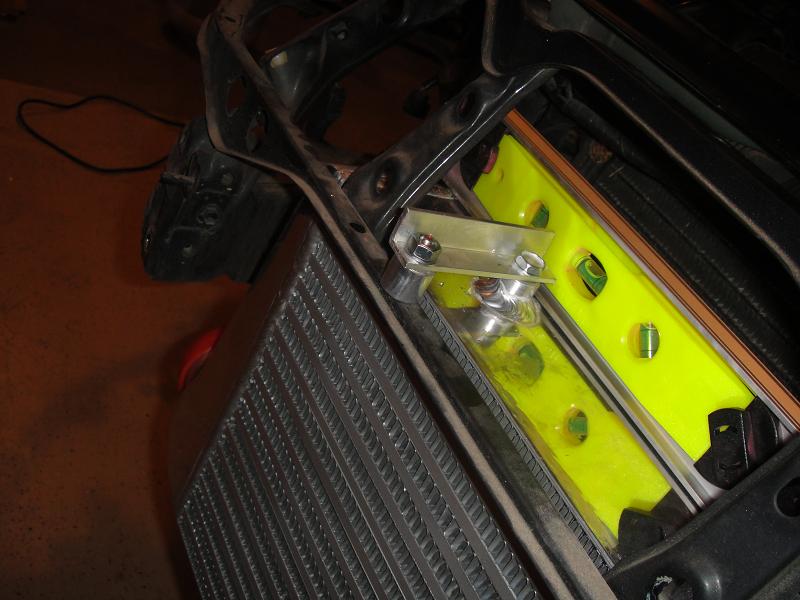
And she's mounted. Used some Aluminum Angle up top to hold it up and in place. It stayed up and in place real well with just those 2 brackets, but since it's thinner metal up there it could swing a little bit if you pushed on it.
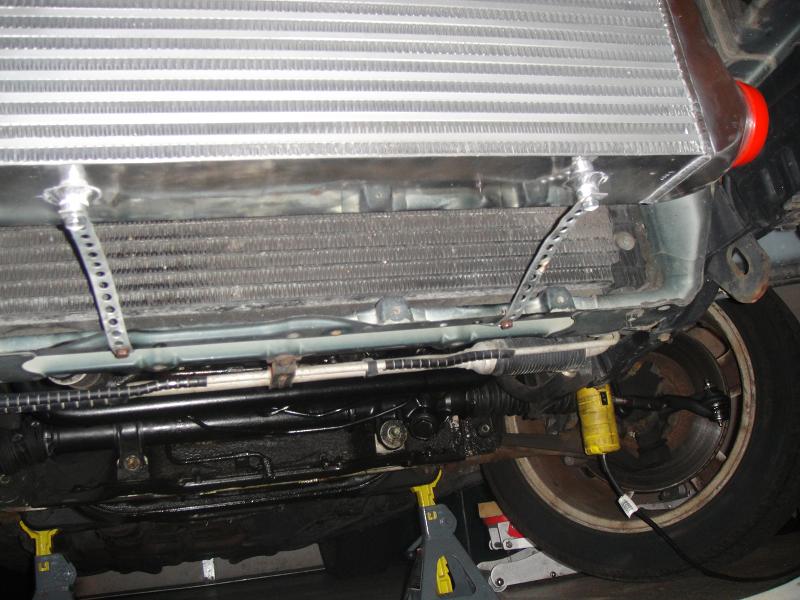
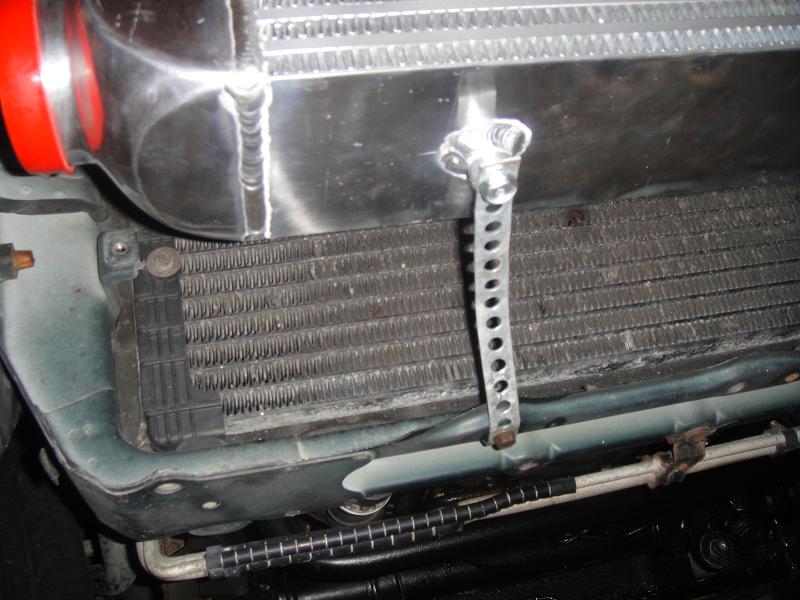
So... dug in the trash can where I've been putting everything I've ripped out of the car. Found some left over steel strapping from the ghetto bass system the original owner had installed, which I ripped out. Dug in my can of misc bolts and found 2 small matching bolts that threaded right into the chassis. Can't say I'm a huge fan of using this strapping stuff as it isn't the cleanest looking way to mount stuff, but all I needed was something to prevent swaying and it really worked perfect in this case. Pretty happy with how it turned out in the end.
OK more pics


Also just ordered some more chinese CXRacing goodness Can't go too long without getting something off China-bay, or I start going through withdrawal Just a universal 2.5" piping kit for the FMIC piping. I decided on 2.5" instead of 3" as the smaller piping will simply be easier to plumb/route. And I only ever had 2.5" on my Talon and made 628awhp. If in the future when I'm running high amounts of boost, if I feel 2.5" is hindering me then I will maybe consider changing it out then. But for now, 2.5" is my choice.
http://cgi.ebay.com/ebaymotors/ws/eBayISAPI.dll?ViewItem&item=330491362847
And picked up a 6-pack of reducer couplers as those will be needed to transition from 3" inlets and the 2.5" piping.
http://www.cxracing.com/mm5/merchan...de=CXR&Product_Code=SH006C&Category_Code=HSCM
---------- Post added at 11:43 PM ---------- Previous post was at 11:42 PM ----------
Just ordered up some gauges, great prices I may be running more than 30psi in a couple years, but since Megasquirt will have it's own internal MAP sensor, the gauge will just be a "guesstimater" beyond 30 and I'll be able to log the actual PSI in Megasquirt!
Pro Sport Boost Gauge (30-0-30):
http://www.maperformance.com/prosport-52mm-mechanical-boost-gauge-blue-performance.html
Depo Wideband Gauge/kit. Helluva price, never seen a WBO2 kit (w/ gauge) for this cheap before. And the gauge is a perfect match to the Pro Sports:
http://www.maperformance.com/depo-racing-52mm-wideband-controller-w-gauge-depo-52772led.html
Now to figure out where the hell to mount these, ha
---------- Post added at 11:44 PM ---------- Previous post was at 11:43 PM ----------
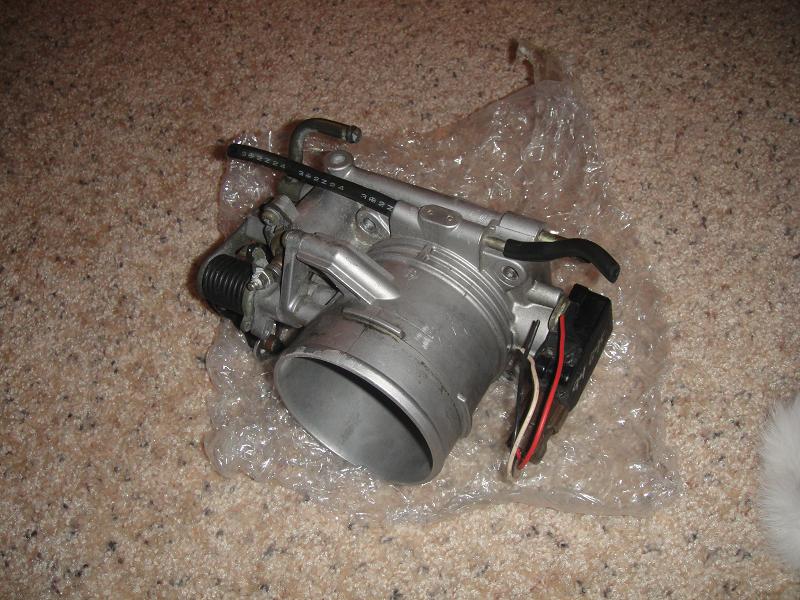
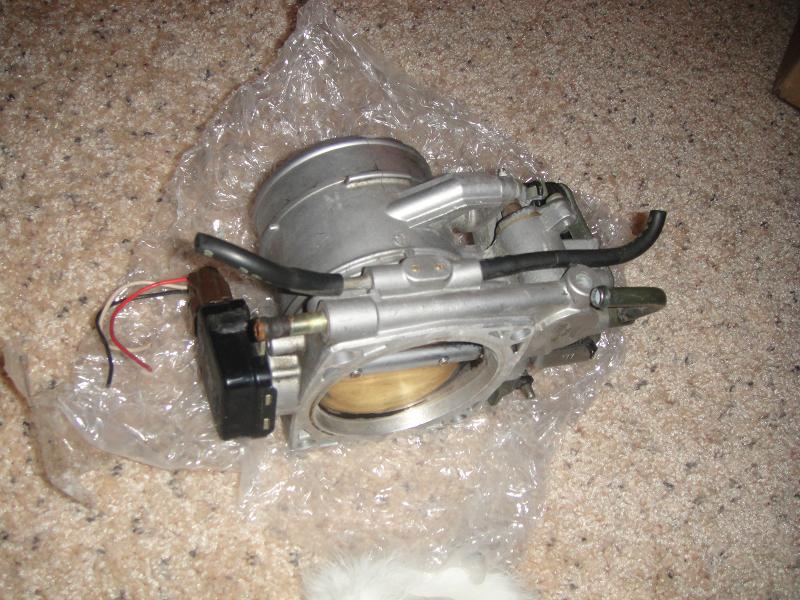
TB showed up in the mail today. Very clean, pretty happy with it's condition!
Also after quite a few conversations back n forth with Shane, decided I will be ordering up some injectors from them over at DBPerformance (DBPTuning.com) here shortly. So thanks to him for taking time to help me choose some suitable, yet affordable, injectors that should work for my goals.
What we decided on were the 900cc High-Z EV14 injectors that FIC is selling for a bit less than the other High-Z ones. They claim that they flow the same as "other companies 1000cc" injectors. So I'm assuming they are referring to the ID1000's. We shall see. I will end up pushing these pretty far, but they should work for my setup and goal. If they start to run out of room, I can always just look into a Fuel Pump setup that allows me to run higher base fuel pressure.
Here's a link to the injectors:
http://www.fuelinjectorclinic.com/cgi-local/commerce.cgi?preadd=action&key=IS145-0900H
Also been speaking more with Shaodome about the Megasquirt setup. Big thanks to him for talking to me and helping me get this figured out. I will be running MS3 w/ the MS3X expansion. Just need to order it all up. Once it gets here, get it wired up with some helpful guidance from him. Then take the car, still in stock form, to get tuned on the dyno and running well in stock form. Reason for that is I want to take as much of a "1 by 1" approach with this car. I don't want to change everything at once, then when it's time to start up and there's a handful of qwirks, you spend forever trying to figure out which of the 30 things you did are the root cause. This way I know I have a car that is 100% working/driving/idling as it's still stock and running great. That way when the MS3 is installed, and the idle is jumpy or whatever, we know for a fact it's something in the MS3, and not something else like a vacuum leak or something induced by other mods that were done at the same time.
---------- Post added at 11:45 PM ---------- Previous post was at 11:44 PM ----------
Just ordered the Megasquirt from DIYAT. Almost decided to get the parts and build it myself to save $200, but just decided to spend the extra to have it assembled and tested by them to alleviate any chance of me screwing something up during assembly.
Also realised they sell 18" pigtails for a little cheaper than the 12' harnesses I originally linked. So that saved me about $40 also.
Big thank you to Shaodome for helping me through this!
---------- Post added at 11:45 PM ---------- Previous post was at 11:45 PM ----------
Got a little bit done today.
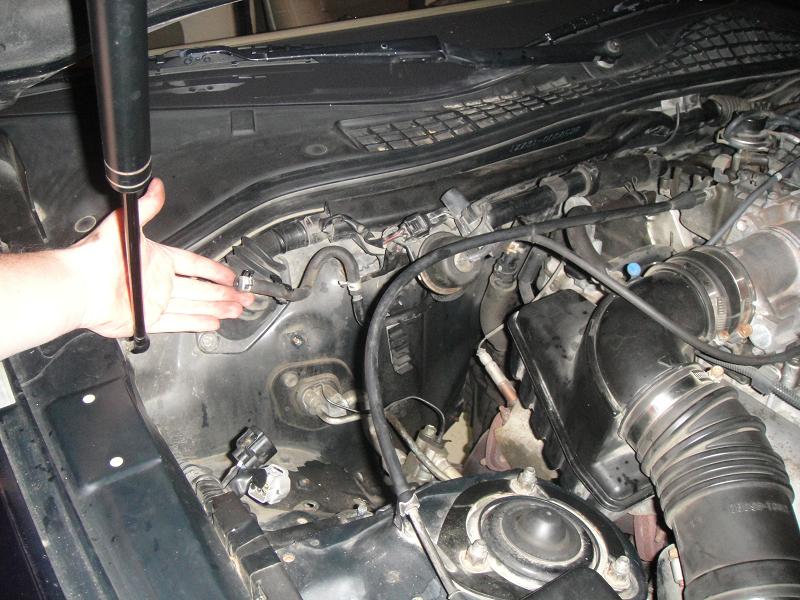
This is the fuel tank evap line that went into the charcoal canister which is now under my workbench never to be installed again. I cut this line back so it ends underneath the car. May do something more with that later but it's fine for now.
So here you can see that evap line that I removed. Also that is where the stock ABS and charcoal canister used to be, so I have a nice big empty corner there now
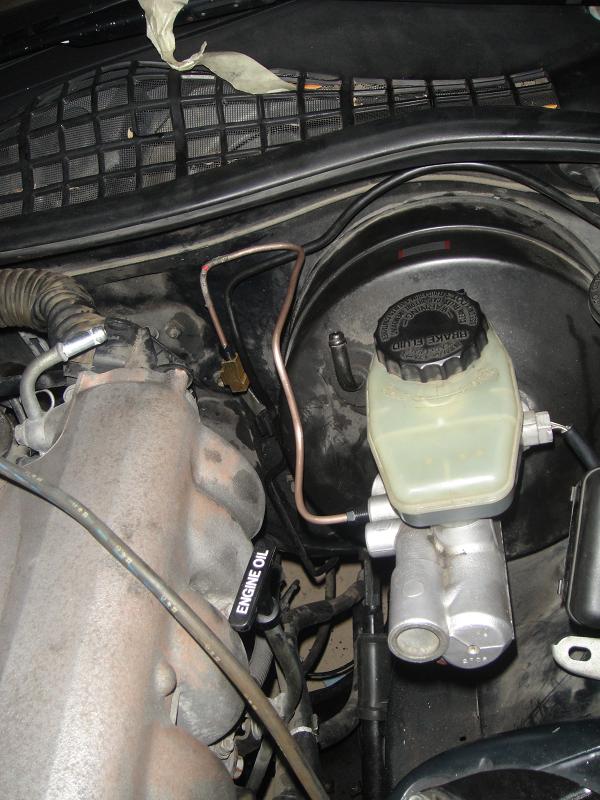
Picked up a Tee Fitting (3/8-24) from Vatozone. So on the Tee side they will be standard fittings, but on the car components they will still be metric to mate up to their respective components. Bought two lengths of 3/16" line from Vatozone as well. This is some sort of copper alloy which is nice to use as it's easy to bend. I still have to flare one end of it but you can basically see how it is routed here. This is the Tee for the front brakes. So it will just leave the master cylinder, go into the Tee and from there two lines will come out (1 for pass side and 1 for drv side). So that is the only line I've made so far, but I consider it a success as I worked slow to try and make it as nice as possible, and it was the first line I've ever made before so it's not perfect, but not bad for the first time
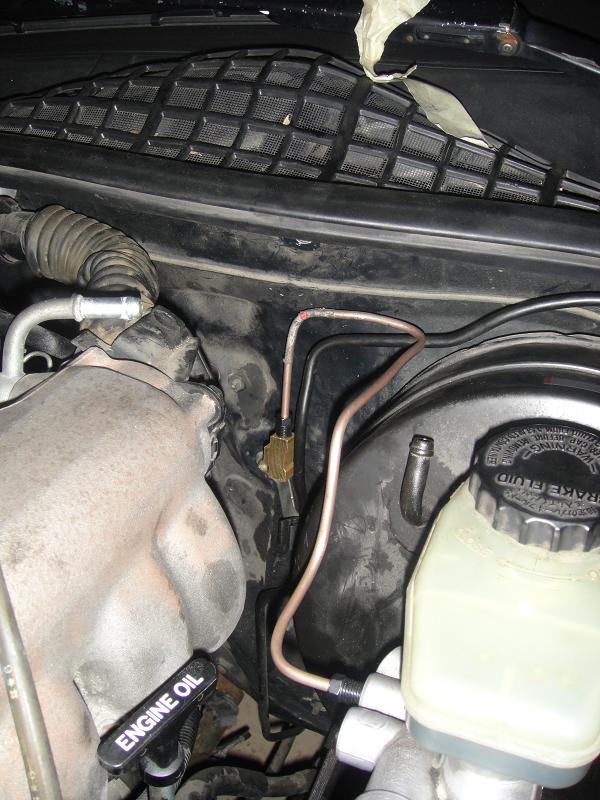
So 1 line down. Figure I can slowly just work on and aim for 1 line a day, and then the brakes should be done.
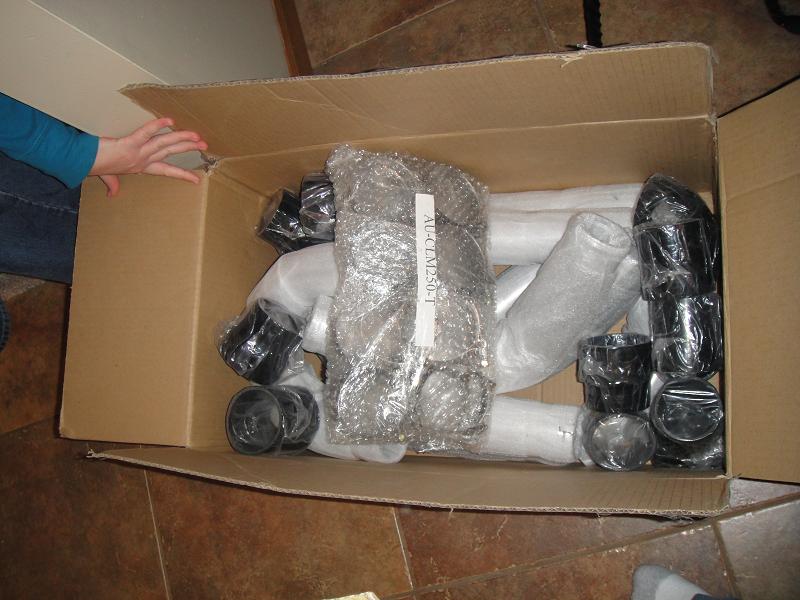
IC Piping and all the couplers showed up
Enjoy
______________________________________________
Hi there. I'm a former DSM guy. Built and raced a 1991 Talon AWD over the last 5 years. Made a best of 628awhp and ran a best time of 10.93 @ 137 in it. But finally decided I wanted a more "mature" toy car. So it got parted out and sold. Vids of that car can be seen in my sig if you are at all interested
So today I received my "new to me" 1992 Lexus SC300. Had it shipped from Normal, IL. Here's the actual ebay add that I won
http://cgi.ebay.com/ebaymotors/ws/e...20662011920&ssPageName=ADME:X:AAQ:MOTORS:1123
Just driving it home, I already love it. I didn't feel every single crack/pot hole in the road like I did in the talon, the engine just seems smooth and has a nice tone to it. The engine looks like it was recently detailed, it's clean enough to eat off of. There's a couple door dings, and a small amount of sun/paint fade on the front bumper, and a very very small amount of surface rust underneath the car here and there, but overall I was surprised with how clean it was! I think this is going to be a perfect fit for what I was looking for, and was well within my price range. The leather must be recently re-covered also because it's in brand new condition (which ever other one I've looked at usually atleast the drivers seat is worn).
Some basic info of the car:
1992 Lexus SC300
Exterior: Royal Jade (hence the cars nickname The Green Bean, or Teh Bean for short
)Factory 5-Speed
2JZ-GE stock Inline 6
Leather Seats
Memory seating
Only Mods are:
- Supra brakes
- Supra rims
- Eibach Pro-Kit w/ Supra struts/shocks
- Pionner CD-Deck
- 2 Kenwood amps
- 2 10" Kenwood subs
- Capacitor
- 8K HID's
Other than that, pretty much stock. The bads of the car are:
- A/C doesn't work
- LCD Climate Control screen is bad (replacement screen already in my garage waiting to be installed)
- Brakes feel warped
- A few minor cosmetic things that will be dealt with over time
The basic plans for the car are
- Replace 8K HID bulbs with something more normal (probably 4300)
- Rip out ghetto bass, sell on CL, and put a new cleaner stereo setup in
- SC400 front lip
- Borg Warner S300sx 84/75 (.91A/R Divided T4)
- Standalone (probably AEM but still considering all options)
- Tranny situation is still up in the air (6-spd vs. Auto)
- E85
- Stock Motor, Stock Comp Ratio
- MAP Ultimate Duty L19 Headstuds
- Whatever else is needed to support that turbo setup and my power goals mentioned below.
My goals are to first just make sure all necessary maintenance is done, and the car is running in as tip-top of shape as it can be. Once that is done, make it a comfy street car, but with enough power that it can still get some occasional street ownage, and the occasional drag strip visit. We have a couple different dynos here, but in the DynoJet world I'm aiming for 650-700hp at the wheels.
I plan on trying to take my time, not rush this project, and get it done over a period of time (not happening over night). Sometimes on the Talon, I feel like I rushed certain things, but on this one I want to make sure I take the extra time to do things as good as I can.
It's kind of interesting because I'm starting on a new platform that I knew nothing about 3 months ago. I've been reading up a ton, and it's tough starting over as a complete newb again. Pretty sure I've already annoyed the hell out of a few locals. But I just want to say a big thanks to those guys for listening to my questions. I'll be reading and learning as much as possible on here as I progress.
Anyhow, enough rambling, on to some pics. Enjoy
And some more pics:
---------- Post added at 11:37 PM ---------- Previous post was at 11:35 PM ----------
I havnen't really been keeping this thread updated over here, but figured I would give an update.
Replaced the broken LCD climate control screen:
Reworked the stereo as the previous owner had it pretty rigged. The head unit was ugly, i didn't care for the hardcore ghetto bass. So that all came out. And had to do a bunch of wiring crap as like I said, it seemed pretty rigged before.
Installed my much more subtle sub setup. Just nice clean bass, nothing gangster:
Bought a double-din DVD/NAV unit off China-bay. So far I'm loving it.
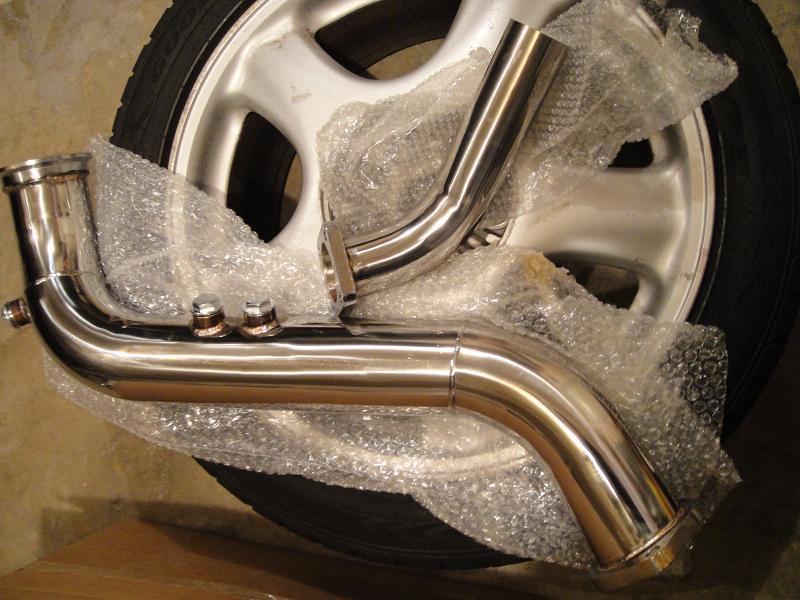
Picked up a turbo from Full Race. It's a BW S300sx 84-75. Divided T4 .91 AR
The car already has Supra brakes on it which is a nice upgrade. But they were pulsating really badly. So I went and got the rotors turned just to check and make sure they were the problem, and the car stops much smoother now. Two different shops turned the rotors, so you can see the difference between the shops machining results between the fronts and rears.
Took it to the local dyno for just a baseline pull to see how it's doing while it's still pretty stock. 183hp/173tq. Right about what I expected so it would seem the motor is still fairly healthy/
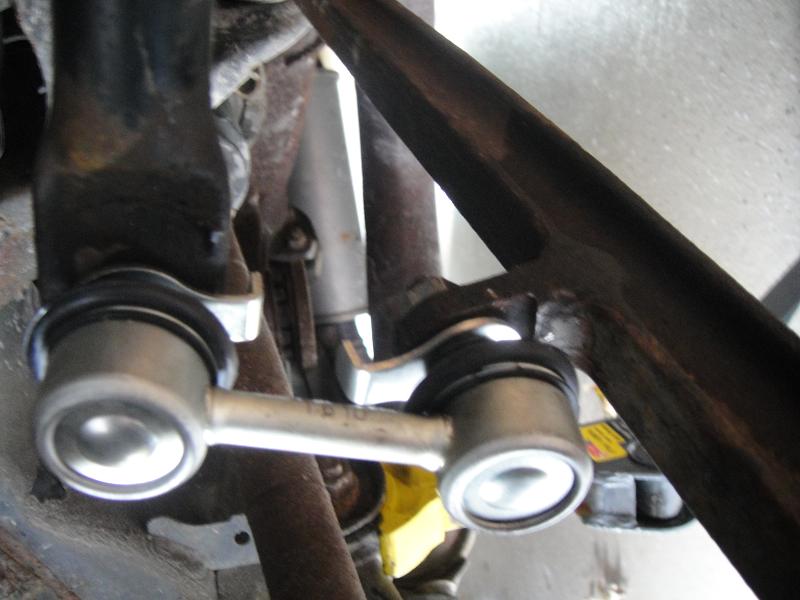
Replaced the front sway bar end-links with these from Rock Auto:
Yes I later tightened them down.
---------- Post added at 11:37 PM ---------- Previous post was at 11:37 PM ----------
Replaced the steering rack with one from Vatozone w/ lifetime warranty. Also installed new tie rod ends on it from Rock Auto. And also installed Poly bushings for the rack that I bought from TME.
More turbo goodies. I'm still in pre-mod "maintenance" for now, but am just slowly acquiring the turbo parts and putting them on the shelf for now.
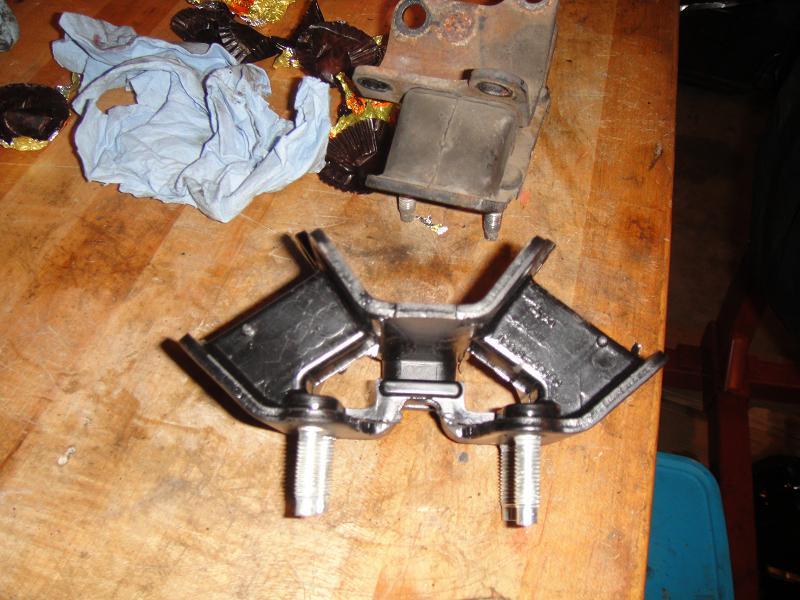
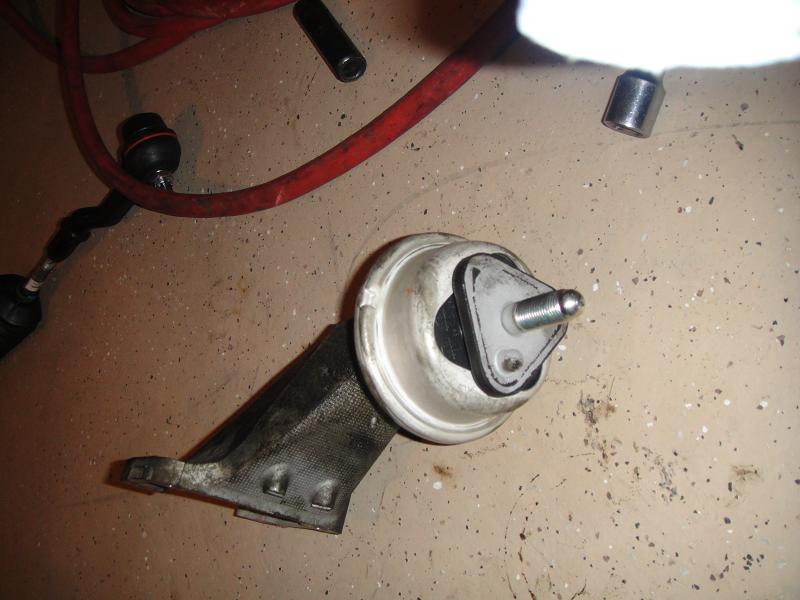
Replaced both front motor mounts, and the rear (tranny) mount with OEM Supra N/A pieces from Carson Toyota:
Installed new rear sway bar end links
Car feels much smoother now thanks to the new engine mounts all around. Also it handles much nimbler. I think the sway bar end links helped, but I think the majority of that is thanks to the poly steering rack bushings from TME. It was immediately noticable how much better it steers now. Probably even more so than normal since my stock bushings were completely trashed.
OK that's it for now, hope to get more of this maintenance done so I can park it for the winter and start doing the fun stuff
---------- Post added at 11:38 PM ---------- Previous post was at 11:37 PM ----------
Spoke with my buddy Ricer Pete a little bit today, and will hopefully be having him getting this thing aligned sooner or later
Also got some more stuff today!
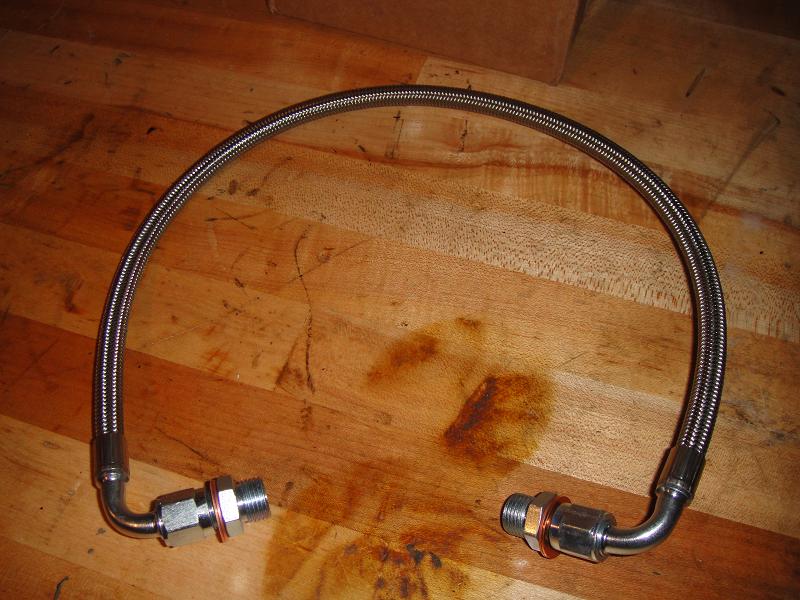
- SS Braided Power Steering line from Drift Motion (to replace my possible leaking 160k mile stocker). My question however for anyone that's installed this, something seems odd. The stock unit has a couple vacuum lines comming off the assembly, and this doesn't have any ports for vacuum lines. Anyone know what the deal is there?
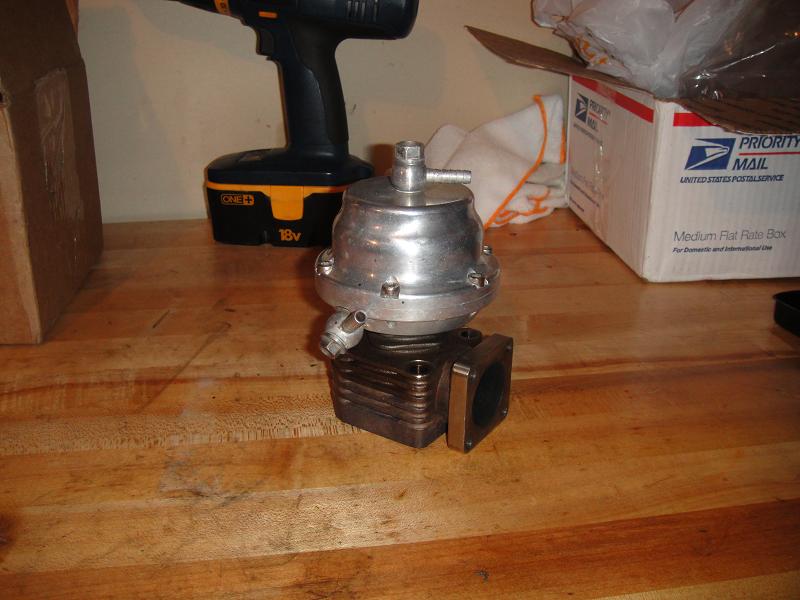
- Tial 40mm wastegate I got used off the ECMLink forums. This is what the manifold is flanged for, so that's what I'll be running!
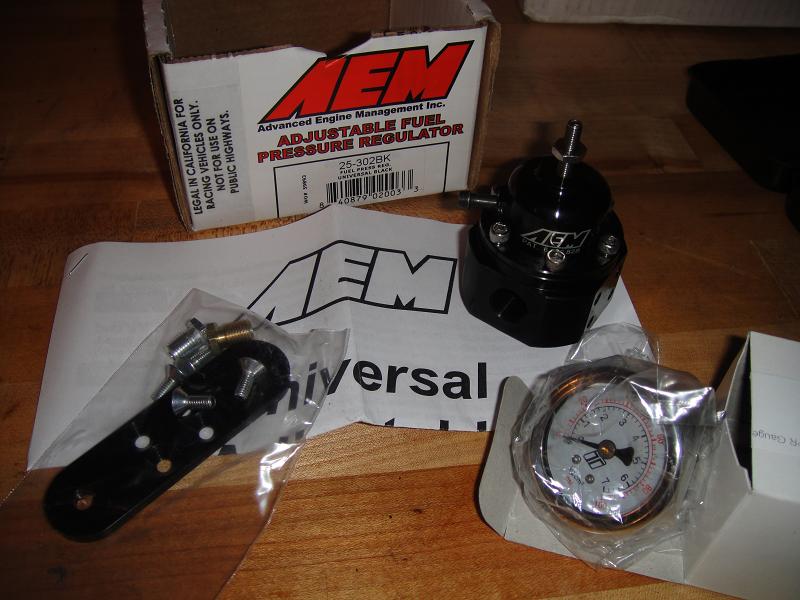
- AEM AFPR w/ Turbosmart liquid filled gauge. Great price from the folks at MAPerformance, and they had it all in stock
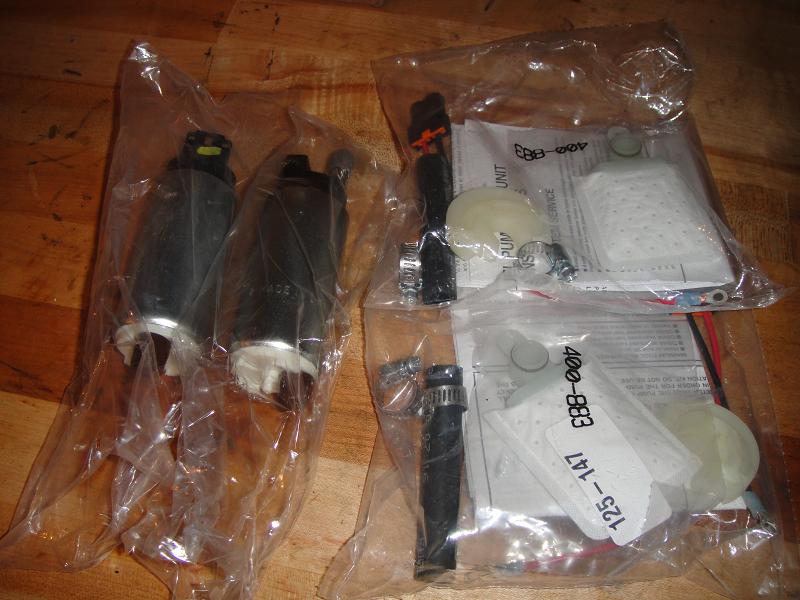
- Two Walbro 255hp pumps. Once again, thanks to the guys over at MAP, had it all in stock
As the maintenance stuff is winding down, I'm starting to focus on mods I can start to do. As you can tell, I've decided to start tackling the fuel system. Plan is basically to run a dual 255hp intank setup just like I had in my DSM. Worm clamp them to the stock hanger assembly and set em up in parallel.
I'm unsure what the stock fpr can handle, so just for good measure I decided to grab this AEM AFPR from MAP that they have priced very nicely. And I like the fact it's black, and not bling bling anodized red/purple. Haven't figured out where to mount it or line size or anything yet, but that's ok this is still just the acquisition of parts phase.
---------- Post added at 11:39 PM ---------- Previous post was at 11:38 PM ----------
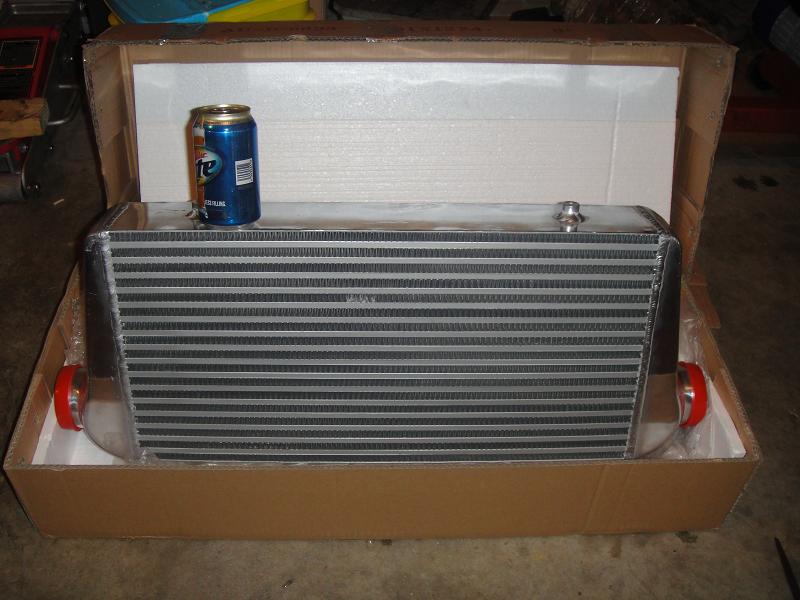
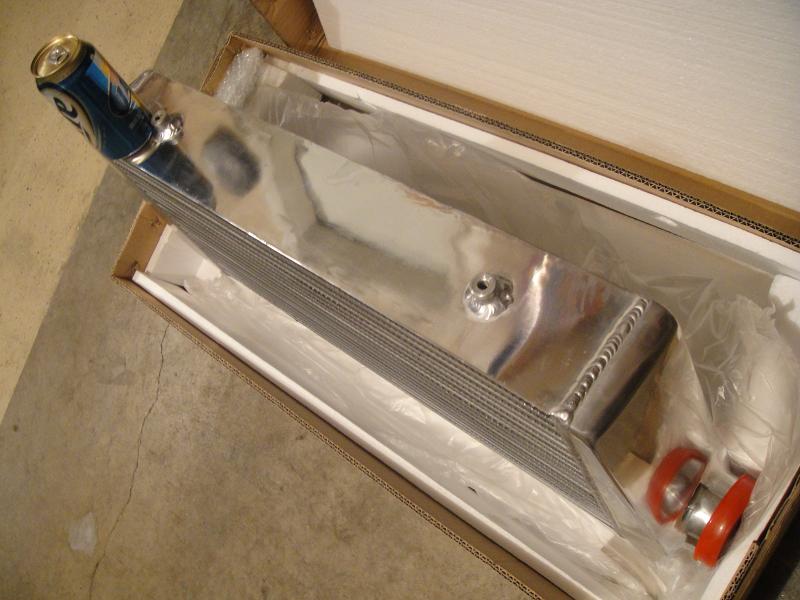
China-bay special FMIC showed up today
Looks decent, definitely can't complain considering what it cost! Core measures 12 x 24 x 4. That's 1152ci for those who measure in that way now a days
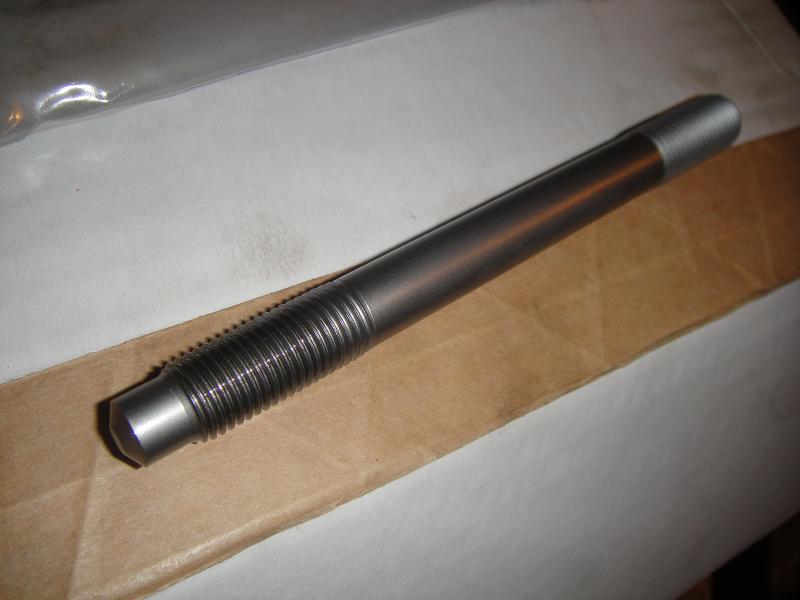
A quick peak at the MAP Ultimate Duty Headstuds (same material as A1 or ARP L19) that I picked up, and will be one of the "test subjects" for so to speak. What's unique about these are the dog point tips on them, that seats the stud in the block and preloads the fastener for a more accurate and repeatable torque sequence.
http://www.maperformance.com/map-ultimate-duty-h11-head-studs-2jzge-2jzgte-2jz-udhs.html
Here is quick diagram showing the theory behind why these are superior to other ones that do not bottom out, but rather stop because the non-threaded shoulder reaches the surface of the block.
---------- Post added at 11:39 PM ---------- Previous post was at 11:39 PM ----------
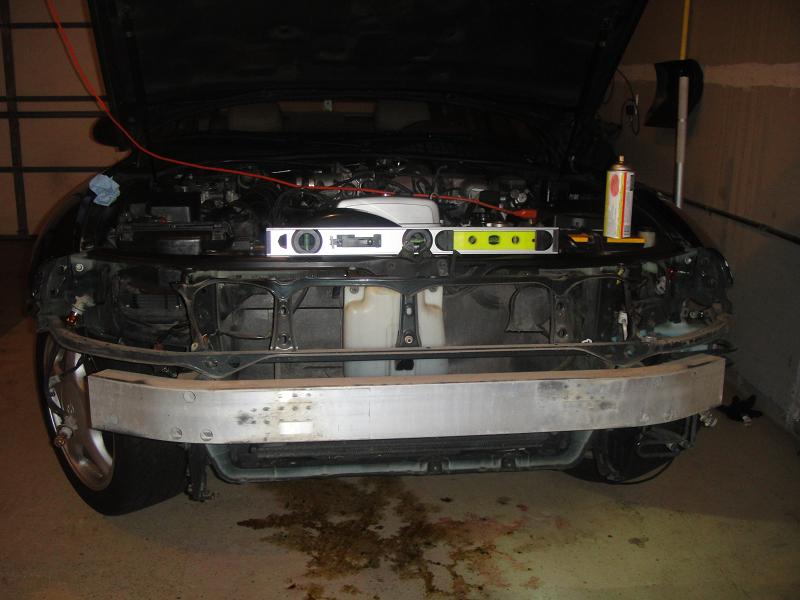
I'm still waiting on an EMS setup so I've decided to start doing some 'non-intrusive' mods that won't affect the current drivability of the car. So....
Initial mock-up of the FMIC is done. Couple notes are that there is a TON of room in here to fit this thing. 4" thick intercooler, and zero trimming of the bumper will be needed. Also I ensured to put it high enough so that the bottom of the FMIC will not be hanging below the bottom of the front bumper, which I made sure of because I've seen quite a few other ones setup like that and it looks weird IMO. I got it perfectly level at the moment (made sure the car was level first). Also I took a picture to show the gap between the FMIC and the A/C Condenser. Lots of room in between there. I would have pushed the core back further but the A/C lines would then be blocking one of the inlets of the FMIC, so that is why it is placed exactly where it is. If I could have tucked it back further, I may have been able to retain the factory coolant reservoir but nope, so I'll just be using the old reservoir from my Talon. There's 2 horns. I remounted one a little more out of the way, and the other I will either remount, or just remove as I don't feel like I really need 2. It alsoit looks like I will be able to retain the stock crash beam, but for weight reasons I may just leave the sucker off, we'll see
And lastly, doing this made me notice part of my bumper is broken (you can see in the very center the plastic grill piece is broken in the center) ghey, but whatever because eventually (probably not unilt next year) I plan on switching out the the 97+ bumpers so not a huge deal.OK so here's some pics. Probably be making a trip to Lowe's later for some lengts of aluminum angle to mount this in place.
---------- Post added at 11:40 PM ---------- Previous post was at 11:39 PM ----------
---------- Post added at 11:42 PM ---------- Previous post was at 11:40 PM ----------
And she's mounted. Used some Aluminum Angle up top to hold it up and in place. It stayed up and in place real well with just those 2 brackets, but since it's thinner metal up there it could swing a little bit if you pushed on it.
So... dug in the trash can where I've been putting everything I've ripped out of the car. Found some left over steel strapping from the ghetto bass system the original owner had installed, which I ripped out. Dug in my can of misc bolts and found 2 small matching bolts that threaded right into the chassis. Can't say I'm a huge fan of using this strapping stuff as it isn't the cleanest looking way to mount stuff, but all I needed was something to prevent swaying and it really worked perfect in this case. Pretty happy with how it turned out in the end.
OK more pics
Also just ordered some more chinese CXRacing goodness
Can't go too long without getting something off China-bay, or I start going through withdrawal Just a universal 2.5" piping kit for the FMIC piping. I decided on 2.5" instead of 3" as the smaller piping will simply be easier to plumb/route. And I only ever had 2.5" on my Talon and made 628awhp. If in the future when I'm running high amounts of boost, if I feel 2.5" is hindering me then I will maybe consider changing it out then. But for now, 2.5" is my choice.http://cgi.ebay.com/ebaymotors/ws/eBayISAPI.dll?ViewItem&item=330491362847
And picked up a 6-pack of reducer couplers as those will be needed to transition from 3" inlets and the 2.5" piping.
http://www.cxracing.com/mm5/merchan...de=CXR&Product_Code=SH006C&Category_Code=HSCM
---------- Post added at 11:43 PM ---------- Previous post was at 11:42 PM ----------
Just ordered up some gauges, great prices
I may be running more than 30psi in a couple years, but since Megasquirt will have it's own internal MAP sensor, the gauge will just be a "guesstimater" beyond 30 and I'll be able to log the actual PSI in Megasquirt!Pro Sport Boost Gauge (30-0-30):
http://www.maperformance.com/prosport-52mm-mechanical-boost-gauge-blue-performance.html
Depo Wideband Gauge/kit. Helluva price, never seen a WBO2 kit (w/ gauge) for this cheap before. And the gauge is a perfect match to the Pro Sports:
http://www.maperformance.com/depo-racing-52mm-wideband-controller-w-gauge-depo-52772led.html
Now to figure out where the hell to mount these, ha
---------- Post added at 11:44 PM ---------- Previous post was at 11:43 PM ----------
TB showed up in the mail today. Very clean, pretty happy with it's condition!
Also after quite a few conversations back n forth with Shane, decided I will be ordering up some injectors from them over at DBPerformance (DBPTuning.com) here shortly. So thanks to him for taking time to help me choose some suitable, yet affordable, injectors that should work for my goals.
What we decided on were the 900cc High-Z EV14 injectors that FIC is selling for a bit less than the other High-Z ones. They claim that they flow the same as "other companies 1000cc" injectors. So I'm assuming they are referring to the ID1000's. We shall see. I will end up pushing these pretty far, but they should work for my setup and goal. If they start to run out of room, I can always just look into a Fuel Pump setup that allows me to run higher base fuel pressure.
Here's a link to the injectors:
http://www.fuelinjectorclinic.com/cgi-local/commerce.cgi?preadd=action&key=IS145-0900H
Also been speaking more with Shaodome about the Megasquirt setup. Big thanks to him for talking to me and helping me get this figured out. I will be running MS3 w/ the MS3X expansion. Just need to order it all up. Once it gets here, get it wired up with some helpful guidance from him. Then take the car, still in stock form, to get tuned on the dyno and running well in stock form. Reason for that is I want to take as much of a "1 by 1" approach with this car. I don't want to change everything at once, then when it's time to start up and there's a handful of qwirks, you spend forever trying to figure out which of the 30 things you did are the root cause. This way I know I have a car that is 100% working/driving/idling as it's still stock and running great. That way when the MS3 is installed, and the idle is jumpy or whatever, we know for a fact it's something in the MS3, and not something else like a vacuum leak or something induced by other mods that were done at the same time.
---------- Post added at 11:45 PM ---------- Previous post was at 11:44 PM ----------
Just ordered the Megasquirt from DIYAT. Almost decided to get the parts and build it myself to save $200, but just decided to spend the extra to have it assembled and tested by them to alleviate any chance of me screwing something up during assembly.
Also realised they sell 18" pigtails for a little cheaper than the 12' harnesses I originally linked. So that saved me about $40 also.
Big thank you to Shaodome for helping me through this!
---------- Post added at 11:45 PM ---------- Previous post was at 11:45 PM ----------
Got a little bit done today.
This is the fuel tank evap line that went into the charcoal canister which is now under my workbench never to be installed again. I cut this line back so it ends underneath the car. May do something more with that later but it's fine for now.
So here you can see that evap line that I removed. Also that is where the stock ABS and charcoal canister used to be, so I have a nice big empty corner there now
Picked up a Tee Fitting (3/8-24) from Vatozone. So on the Tee side they will be standard fittings, but on the car components they will still be metric to mate up to their respective components. Bought two lengths of 3/16" line from Vatozone as well. This is some sort of copper alloy which is nice to use as it's easy to bend. I still have to flare one end of it but you can basically see how it is routed here. This is the Tee for the front brakes. So it will just leave the master cylinder, go into the Tee and from there two lines will come out (1 for pass side and 1 for drv side). So that is the only line I've made so far, but I consider it a success as I worked slow to try and make it as nice as possible, and it was the first line I've ever made before so it's not perfect, but not bad for the first time
So 1 line down. Figure I can slowly just work on and aim for 1 line a day, and then the brakes should be done.
IC Piping and all the couplers showed up
Last edited:
