
Hey guys,
I decided to do a bearing swap writeup with pictures, simply because I hadn't seen one.
To begin with, I should say, that I didn't really notice any vibrations while driving the car before beginning this. It was simply a logical
repair to do while the driveshaft was out for clutch repair, as I had noticeable freeplay in the old bearing(~3/4").
I found the process to be ridiculously simple, and fast. The tools you will need:
Replacement bearing. I got mine from http://www.driveshaftparts.com/
14mm wrench
14mm socket ratchet, or 2nd 14mm wrench
paint or marker pen
hammer
small chisel, or flat head screwdriver that you don't mind bruising a bit.
1/2" drive breaker bar/ torque wrench, or 1/2" impact gun(I used an electric one)
24mm socket for above
So, the one thing I read about doing a bearing swap, was to mark the two halves so that you don't reassemble it out of phase.
Otherwise you could get some weird vibrations. So, I started by marking the two halves of the driveshaft with white paint, on the U-joints, as well as the flanges.
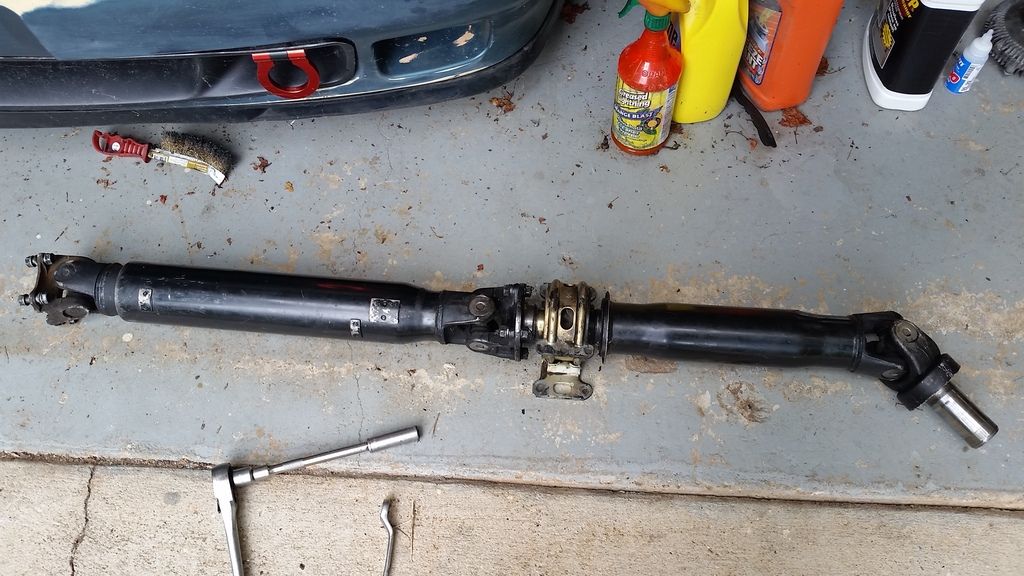
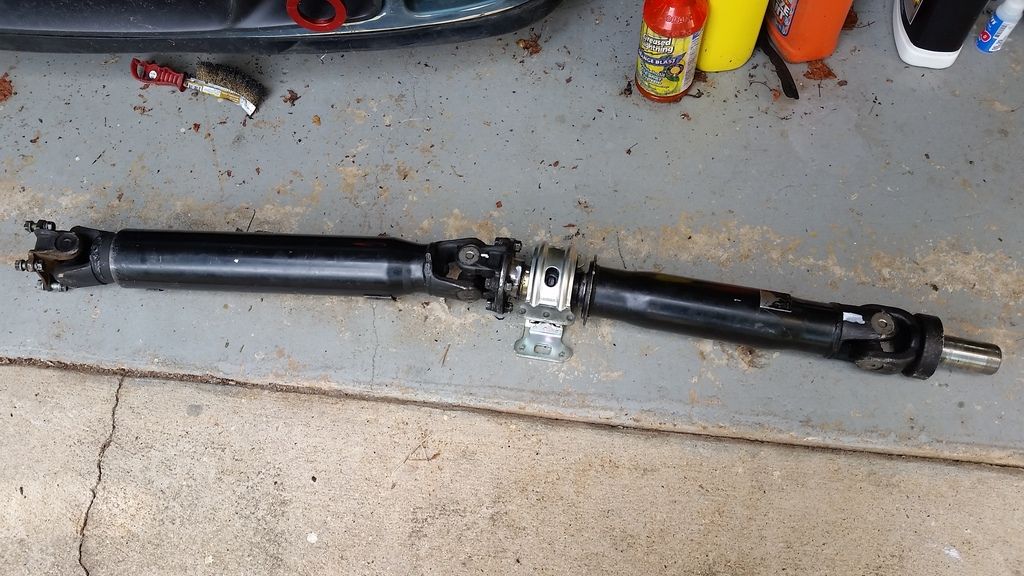
This is my DS before disassembly, and prior to paint marks. But I later found pre-existing paint marks on the opposite side of where I marked it.
After I marked it, I unbolted the two halves using a 14mm wrench and a 14mm socket.
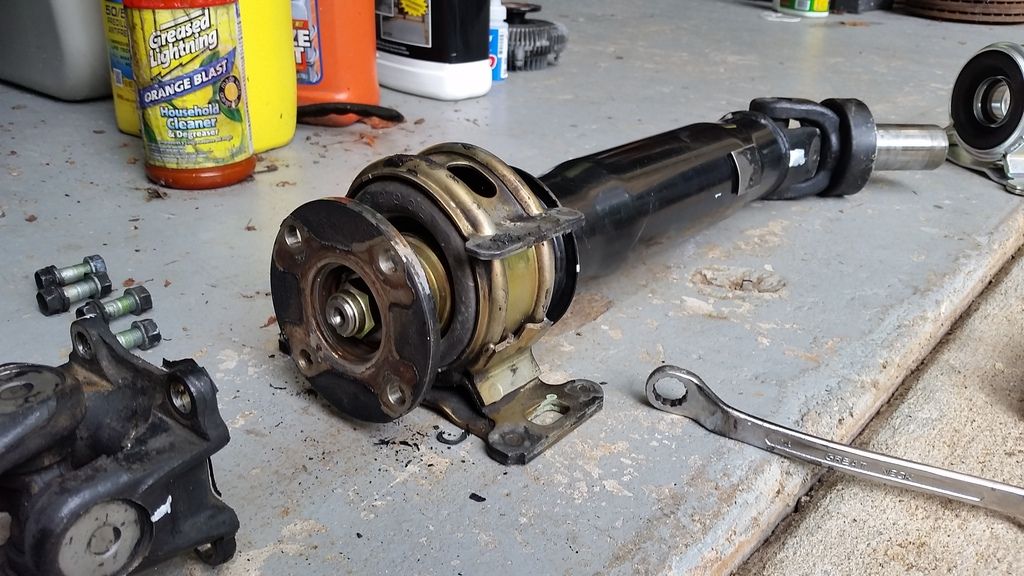
Here, you can see the flange bolt that is hidden inside, as well as some of my paint marks:
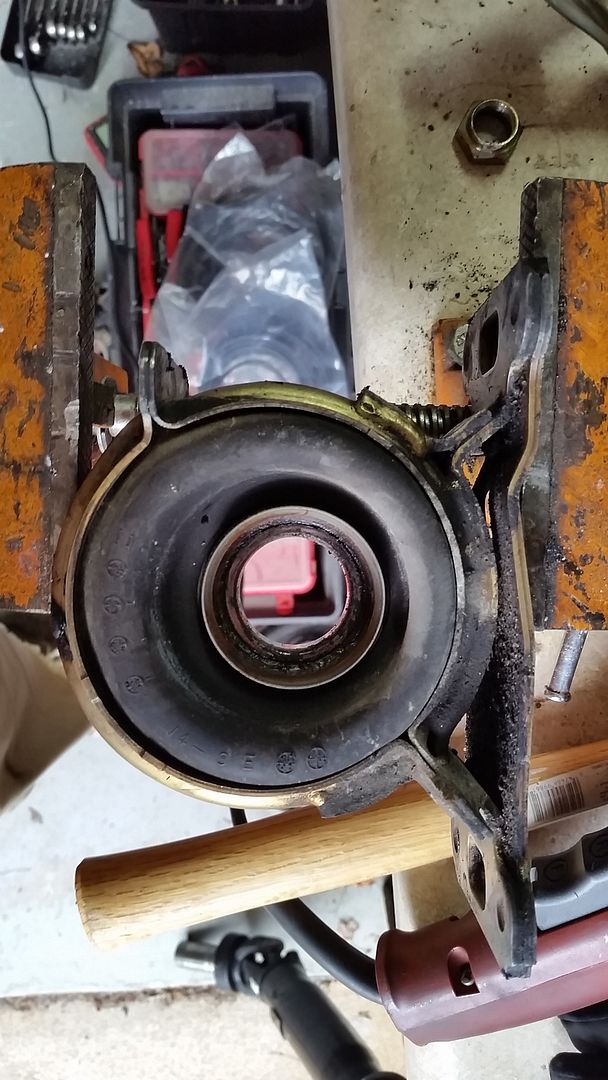
Next, I locked the old bearing casing into my bench vise, and used an old screwdriver and hammer, to unbend the top edge of the locknut.
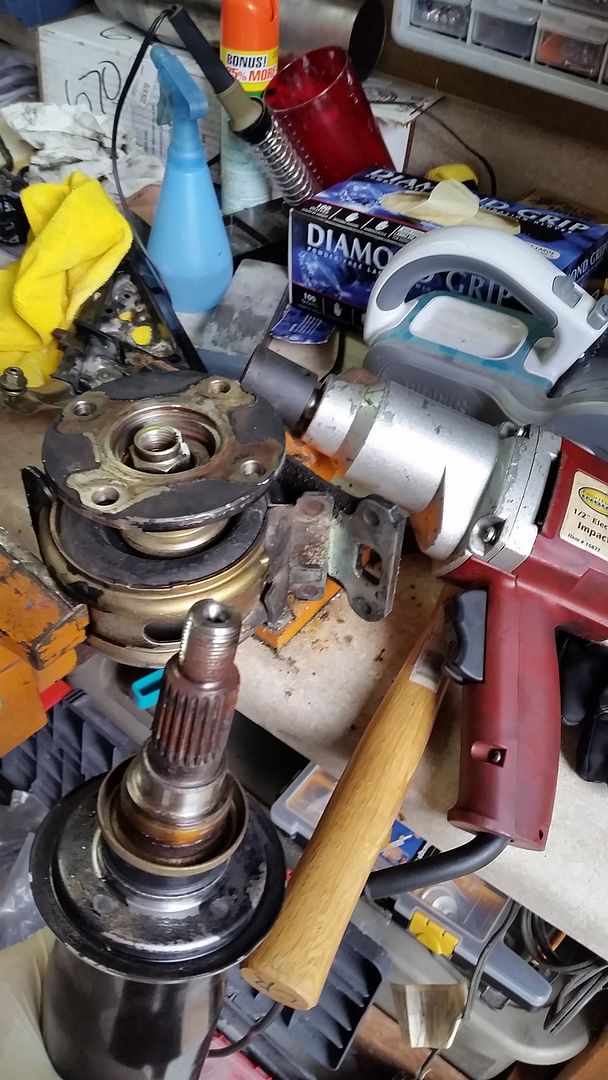
Then, I used an electric impact gun with a 24mm socket, to remove the locknut:
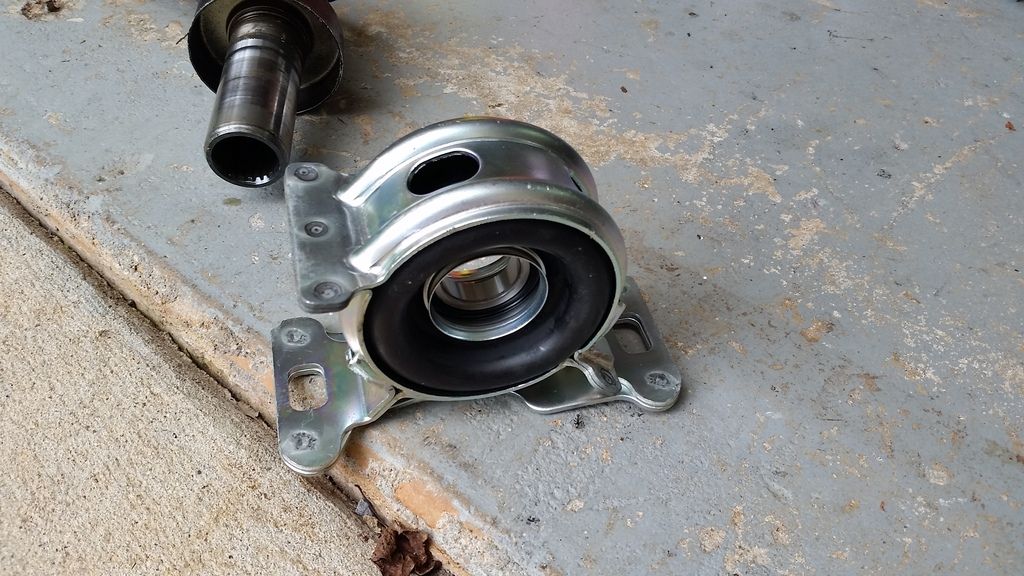
Here is the new bearing, and notice how far off-center the old bearing sits:
I was thinking that once the flange was removed, I would need to use a puller tool to get the bearing off. Nope. the back half of the shaft fell right out.
There are two washers that go on the nose of the shaft; first the bearing, next goes a thin washer, then flange, then the thick washer goes under the locknut. Sorry I don't have a pic of that.
I was careful to realign the flange with the marks on the lower driveshaft.
After threading the locknut back on, I again used the impact gun, to tighten the nut back to its original position, and re-bent the top edge into the recess.
After that, all that was left was to realign the two halves of the driveshaft, and reinstall the 4 bolts that hold it together. That's it.
Start to finish took about 25 minutes. This of course, Doesn't include the ~20 minutes it might take to remove the driveshaft from the car.
I won't have a chance to drive the car for at least a couple of days, so I'll have to report back if there is any vibration.
Hope this helps someone who was thinking of tackling this project.
I decided to do a bearing swap writeup with pictures, simply because I hadn't seen one.
To begin with, I should say, that I didn't really notice any vibrations while driving the car before beginning this. It was simply a logical
repair to do while the driveshaft was out for clutch repair, as I had noticeable freeplay in the old bearing(~3/4").
I found the process to be ridiculously simple, and fast. The tools you will need:
Replacement bearing. I got mine from http://www.driveshaftparts.com/
14mm wrench
14mm socket ratchet, or 2nd 14mm wrench
paint or marker pen
hammer
small chisel, or flat head screwdriver that you don't mind bruising a bit.
1/2" drive breaker bar/ torque wrench, or 1/2" impact gun(I used an electric one)
24mm socket for above
So, the one thing I read about doing a bearing swap, was to mark the two halves so that you don't reassemble it out of phase.
Otherwise you could get some weird vibrations. So, I started by marking the two halves of the driveshaft with white paint, on the U-joints, as well as the flanges.
This is my DS before disassembly, and prior to paint marks. But I later found pre-existing paint marks on the opposite side of where I marked it.
After I marked it, I unbolted the two halves using a 14mm wrench and a 14mm socket.
Here, you can see the flange bolt that is hidden inside, as well as some of my paint marks:
Next, I locked the old bearing casing into my bench vise, and used an old screwdriver and hammer, to unbend the top edge of the locknut.
Then, I used an electric impact gun with a 24mm socket, to remove the locknut:
Here is the new bearing, and notice how far off-center the old bearing sits:
I was thinking that once the flange was removed, I would need to use a puller tool to get the bearing off. Nope. the back half of the shaft fell right out.
There are two washers that go on the nose of the shaft; first the bearing, next goes a thin washer, then flange, then the thick washer goes under the locknut. Sorry I don't have a pic of that.
I was careful to realign the flange with the marks on the lower driveshaft.
After threading the locknut back on, I again used the impact gun, to tighten the nut back to its original position, and re-bent the top edge into the recess.
After that, all that was left was to realign the two halves of the driveshaft, and reinstall the 4 bolts that hold it together. That's it.
Start to finish took about 25 minutes. This of course, Doesn't include the ~20 minutes it might take to remove the driveshaft from the car.
I won't have a chance to drive the car for at least a couple of days, so I'll have to report back if there is any vibration.
Hope this helps someone who was thinking of tackling this project.