eraezer - Supra MK3 -89 -Swedish Build

eraezer

Member
Nov 6, 2008
849
9
18
Stockholm, Sweden
hey man, nice to see you here, welcome.

haha lol, don't know about any HX52....maybe one of those HX55 that are lying around in school ;)

The 7M uses a cam pos. system, so I will mount something on the crank.

As soon as your system is ready to be installed in cars I will install it in both of my cars ;) (since the third is a carby.).
 

eraezer

Member
Nov 6, 2008
849
9
18
Stockholm, Sweden
Hello,
it's soon time to start clicking on those buy buttons in the webshops.
But since I'm new with 7M-GTE and the whole supra scene I would really appreciate if you guys could give me some help.

I currently don't have the money to do an engine build right now, but there are some things I need to fix with the engine.

I need to order new bushings for both front and rear and I think I'm going for Energy Suspension poly bushings.
But I also need to change the rear subframe bushings and the idea is to make them in the lathe in school,
does anyone have messurements for these?

I need to change the valve cover gaskets and re-seal the oil pan so I will take out the engine and do some cleaning.
What else should I be doing while the engine is out?
The HG has been changed in a shop by a previous owner, but I doubt it's MHG and I don't think they used ARP hardware.
Should I change to ARP head studs now? MHG now or wait?

I have been reading on forums to gain some info on how to treat this car, but there are still some question marks.
For ex. there are many companys out there makin stainless braided brake lines, but is one better than the other?

Regarding the gaskets, should I just buy a headgasket kit to get all the other gaskets? if so which one?

It would be great if you could help me with the question marks.

I will be ordering these parts from webshops in the USA to save some money so it will take about two weeks before
I get all the stuff and it would be nice if I at that point don't realize that I'm missing something.


What I know I need to change:
bushings, front and rear: Energy Suspension
Brakelines: ?
Sparkplugs: NGK BCPR7ES from ebay
Ignition wires: ?
Valvecover gaskets. ?
center valley gasket.
Seal for the oil pan.
vacuum lines.
Timing belt. Gates
Gearbox oil. Redline MT-90
Diff oil. Redline?
Hood struts. 935 Motorsport 2* $19.99
Heavy Duty Shifter Sockets. Marlin Crawler
Heavy Duty Shifter Seats. Marlin Crawler

Thank you in advance.
 

toy fanatic78

addicted to toy's
Oct 17, 2008
689
0
0
Elkhart,IN
Seem to have a good start on your list.Might want to think about getting a full gasket kit,sucks to not replace one and have it leak.Are you planning to get/already have a metal head gasket?
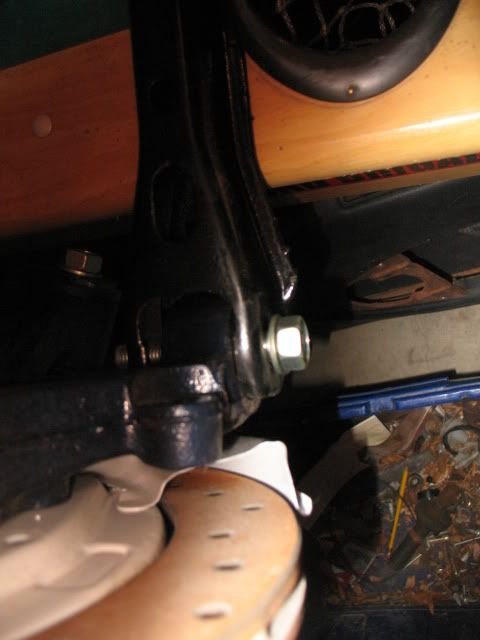
And,on your bushings,be aware the energy's come with all but two bushings,these two on the rear arm to spindle,the one there is a ball and socket,instead of a standard bushings.This is the bushing here.
p1241364_1.jpg
 

eraezer

Member
Nov 6, 2008
849
9
18
Stockholm, Sweden
hi, thanks for your reply :)
then I have a follow up question, does it mather which gasket set I go with or are they all the same? Felpro, stone, toyota oem...

I'm not shure on what to do regarding the HG :S
As I said it has been changed, but probably not with a MHG.
Let's say that there is no problem with the current HG, can I then change just clean the surfaces and install a MHG? or do I still need to redo the surfaces?

Can I buy those bushings separate?
 

DIYEFIorg

New Member
Jan 31, 2009
2
0
0
11 thousand miles from home!
My advice : Don't open the engine until you plan to do everything at once, just drive it.
Secondly : Don't take it off the road to do that, get another 7m and take your time building it up in your garage while you drive and enjoy the car.

As for the CAS vs crank thing, I'm still keen to know what they have in them stock. Chances are it's the same as all other toyota engines and the F2T but it may not be.

I'll find the subscribe button now so I don't forget.

Fred.
 

toy fanatic78

addicted to toy's
Oct 17, 2008
689
0
0
Elkhart,IN
eraezer;1241422 said:
hi, thanks for your reply :)
then I have a follow up question, does it mather which gasket set I go with or are they all the same? Felpro, stone, toyota oem...

I'm not shure on what to do regarding the HG :S
As I said it has been changed, but probably not with a MHG.
Let's say that there is no problem with the current HG, can I then change just clean the surfaces and install a MHG? or do I still need to redo the surfaces?

Can I buy those bushings separate?

The Toyota oem set is the best,but pricey.Heard a lot of good about the Stone set,and personally have had good luck with the Fel-pro.
In order to use the mhg you have to have the block(w/timing cover) and head machined to a finer finish.
The bushings are available separately from toyota,~$35 each.
 

eraezer

Member
Nov 6, 2008
849
9
18
Stockholm, Sweden
toy_fanatic78: then I will wait with that bushing.
Fred: I will follow your advice, but not completly :) Since I'm replacing the VC gaskets I will check the valve clearance and re-torque the head bolts.

Updated buy list:
bushings, front and rear: Energy Suspension from Zankoku, $120 total
Brakelines: Techna Fit +PCV Smoke from horsepowerfreaks.com $125
Sparkplugs: NGK BCPR7ES from ebay OR NGK Iridium BCPR7EIX from 935motorsports.com $49 ??
Ignition wires: NGK Wire set from 935motorsports.com $69 OR MSD 8.5mm set from 935motorsports.com $80 ??
Head Gasket Set: Stone from 935motorsports.com $149
Spark Plug Cover: LIPP from Horsepowerfreaks.com $35
Timing belt: Gates from Driftmotion.com $75
Heavy Duty Shifter Seats. Marlin Crawler From driftmotion.com $12
Heavy Duty Shifter Socket. Marlin Crawler From driftmotion.com $6.50
Shifter gasket: Toyota from Horsepowerfreaks.com $0.97
CT26 Rebuild kit: From driftmotion.com $79.99
Bimetallic valve: From driftmotion.com $49.99


Oil setup:
Oil cooler: B&M SuperCooler BMM-70272 8"x11"x1.5" from Summit $109.95
Fittings: -8 AN from summit
Oil filter adapter: Canton CTR-22-595 from summit $59.95
 

eraezer

Member
Nov 6, 2008
849
9
18
Stockholm, Sweden
any more ideas about the list? ...I have an update to post if you do ;)
Now it's not that long til I can work on my supra again. I'm having an exam on thuesday and directly after that I will fix the balljoint on the dd volvo out in the cold. Then I will race to the garage and get some work done :p
 

eraezer

Member
Nov 6, 2008
849
9
18
Stockholm, Sweden
-:|Update - 2008-02-02|:-

Got started with the welding in the left rear wheelhouse :)
There is still some work left before the inner part of the wheelhouse is done.
There is no more an opening for the stock antenna ;)
I also did some more welding on the subframe. When thats done I will grind down and add
reinforcement plates there so I don't have to do that Later on in the project.

Pictures:

Done!...or maybe not
26149040.jpg


Welded atleast :)
26149041.jpg


Left rear wheelhouse
26149042.jpg


26149043.jpg


26149044.jpg


No more stock antenna
26149045.jpg


Still need to do some work around the diff
26149047.jpg
 

casgallo

Not a lurker :)
Apr 3, 2005
68
0
6
New York
hey man great job on all of the work. I redid my supra the exact same way you are. mines still not quite done but its getting there. you know how it is, all of that rust repair takes its toll on you. check out www.por15.com from what I've read it seems to be one of the best rust preventer you can buy.

Here are a few quick pics of mine:


pic
pic1
pic2
 
Last edited:

eraezer

Member
Nov 6, 2008
849
9
18
Stockholm, Sweden
Hey, thank you :)
So what did you decide on what to do with the arches?
Do you have a project thread somewhere?

I have seen por15, but I have never tried it myself. I have tried Hagmans epoxi primer. It's 2-comp. and I like it alot. On one of my cars I have a couple of places where I have painted with this paint and there is nothing ontop of it....no rust! and I painted it on during the summer in 2006. Since then I have painted almost everything with it.
The only problem with it is that it's yellow and my other car is white :) So it's white with yellow spots.
So I think I will continue with this primer since I like it and it's easy to buy.
 

eraezer

Member
Nov 6, 2008
849
9
18
Stockholm, Sweden
-:|Update - 2008-02-14|:-

I couldnt stay away from my supra anyomore, I had to visit it :p
The car I'm using has a bad C.V. joint and I can't repair it until I have
written the exam on thuesday. Luckily a friend who I share the garage with gave me a ride.

I continued working the undercarriage with the wire wheel and found some more rust that
I need to cut away. But to get to it I had to remove the fuel and brake lines.

Does anyone know the thickness of the beams that now are open on my car?
I forgot to take messurements while I was there.

While removing those I found that the replacing of the brake lines by the shop was not done
properly. They had spliced the line right after the engine bay.
When it's time to install the fuel and brake lines I will install brand new ones.

Later when I was tired and it was time to go home I tripped over a jackstand which jumped up
and hit the side skirt on my friends car :(
It was an accident but I will take care of it.


Pictures:

Found even more rust
26167988.jpg


26167989.jpg


Removed the fuel and brake lines
26167990.jpg


26167994.jpg


26167995.jpg


Finally managed to removed the elbow
26167991.jpg


26167992.jpg


Removed the ignition coils
26167993.jpg


Did some damage on my friends car by accident :(
26167996.jpg
 

eraezer

Member
Nov 6, 2008
849
9
18
Stockholm, Sweden
-:|Update - 2008-02-16|:-

Since I'm not made of money and enjoy fabrication I will fabricate as much as possible.

BUT! Im not here to compete with the vendors here, I'm only doing this for my own plessure.
If there is anyone on this side of the sea I might be able to an extra for you so that you
save money on shipping.


As you could see in my previous update, I removed the stock elbow.
Today I brought it to school where I made a copy of it with a copier which sent the image
to my mail. After I had downloaded it I opend it in Solid Edge and started making a virtual flange.
So far I have only done the outlines which you can see in dark blue.
When the drawing is done I will fabricate it in school out of mild steel.

I have also started with an modell of the engine in GT-Power.
No values are correct in it yet and there are some stuff missing.

I have not yet decided on what to do regarding subframe bushings.
There are 4 options:
1: Let the stock bushings sit and fabricate new spacers in aluminum
2: Fabricate solid bushings with built in spacers in aluminum
3: Fabricate soild bushings in aluminum and spacers in nylon or polyurethan
4: Facebicate a bushing where one half is in aluminum and the other in nylon or polyurethan
Any ideas?
This will be more of an track car that will be used alot on the streets, so maybe 90-95% race.
The bushings in the a-arms will be from Energy suspension since they are cheap and will have to do for now.


Pictures:

Stock elbow
26239680.jpg


Making a new turbo flange in Solid Edge
26239681.jpg


A virtual 7M-GTE with a disconnected IC, no turbo and no exhaust
26239679.jpg
 

eraezer

Member
Nov 6, 2008
849
9
18
Stockholm, Sweden
-:|Update - 2009-02-20|:-

AC/DC was playing today...and like other times when great bands are playing, I don't have tickets :(
But a couple of hours with the mill made me happy :)
I worked on the flange between the turbo and the DP, it's not done, but I'm getting there.
But I had some problems so I'm not sur if I'll use it.
The pen I used to do some markings with didnt work with the cutting fluid, so the cuttings are a bit of.
I might be able to use it since I will make a DDP... we'll see.

I forgot to take pictures :-/
 

eraezer

Member
Nov 6, 2008
849
9
18
Stockholm, Sweden
-:|Update - 2009-02-21|:-

Today I got tired on waiting for a decision (by me) regarding the fender edge,
so I bought a universal edge off a friend and started cutting/welding :)
It's not perfect, but the rust is gone ;)

The garage that my car is in, is called the Pokemon garage since there are only cars from
Japan in it. A garage friend who is a car painter did some paintings.
One with a pokemon on a turbo on the wall in the relax room and a pokemon logo on the bar counter.

Pictures:

Pokemon garage (pictures painted by BamBam)
26304470.jpg


26304471.jpg


The stock fender edge is gone
26304472.jpg


Did some welding
26304473.jpg


My new fender edge
26304474.jpg


Welded
26304475.jpg


26304512.jpg


26304513.jpg


26304514.jpg


I'm done welding around the diff
26304515.jpg


Who got the most empty energy drink cans on their roof? ;)
26304516.jpg


Some more pictures on the fender edge, can't see much
26304517.jpg


26304519.jpg
 

eraezer

Member
Nov 6, 2008
849
9
18
Stockholm, Sweden
-:|Update - 2009-03-02|:-

Bought some (read 18kg) aluminum today that will become my new front and rear
subframe bushings :)
I started right away with the smallest piece and did the upper bushings for the
front subframe. I will make the edgeds nicer later.


Pictures:

Bought some aluminum (the plate is for KTH Racing)
26471192.jpg


An idol pic
26471193.jpg


The upper bushings for the front subframe
26471194.jpg


26471195.jpg
 

eraezer

Member
Nov 6, 2008
849
9
18
Stockholm, Sweden
-:|Update - 2009-03-03|:-

Continued with the work on the bushings in the lathe today.
Since I'm not dead yet = still learning, the work did go a bit slow.
But I learned some stuff so the next ones will be a bit easier.
The radius is supposed to be 6mm, but I could only find 8mm, does anyone
know if it will work anyway? I don't have the front subframe off of the car
yet so I can't check on my own.


Pictures:

One of the lower bushings for the front subframe
26471612.jpg


26471613.jpg


26471614.jpg