Diff rebuild by "pro" not going well

Bru

Member
Feb 28, 2013
50
29
18
Tampa Bay Area
Here is a link to a very educational website on YouTube run by Weber State University. This old guy reminds me of my high school auto shop teachers.

Click here to go there.

I too used a solid spacer with shims. You can go back and forth until you get the pinion preload right, and then in the final assembly put in the oil seal.
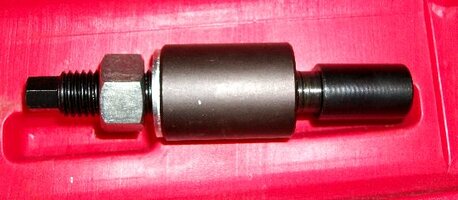
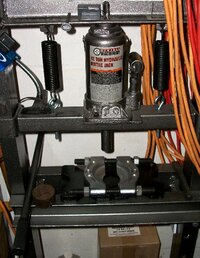
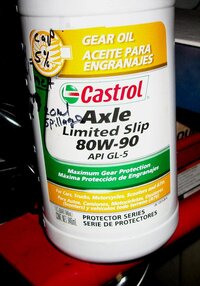
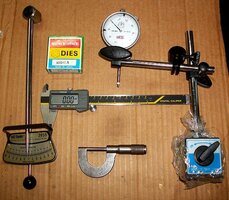
You will need a press (Harbor Freight) and I was lucky enough to have a set of Northern Tool pullers from the past that included just the right pinion gear tool. I took parts from 2 differentials to make 1 good one and ended up purchasing shims from the dealership to get the side gears adjusted to specification. The procedure is detailed in the online manual. Here is a link to the manual. It goes on and on for both type differentials so make sure you look it all over. I didn't have Toyota specialty tools so I had to improvise. I made a companion flange holder for tightening down the nut by modifying a holder I got on eBay by drilling holes in it to fit my flange. Harbor Freight also has a screw type transmission jack that works well to raise and lower the differential. I also got a dial indicator and a magnetic base from Harbor Freight. A vernier caliper comes in handy to measure clutch pack stack height. A 1 inch micrometer is another tool to have. Castrol 80W-90 already has the limited slip agent, 1.4 L fills it. It's easy to mess up the threads on the pinion when un-staking the nut. A metric M20 x 1.5 die will clean up the threads and I also used a feather edge file. The nut should spin on effortlessly.
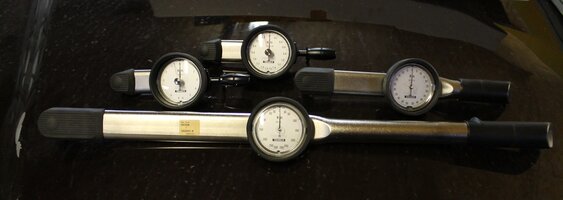
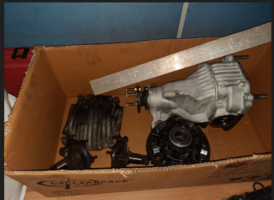
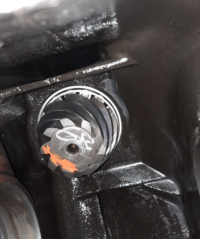
1660751022067.jpeg 1660751057060.jpeg1660751145574.jpeg
1660751185691.jpeg1660751202948.jpeg

A 20 ton press might have been a better choice.
1660754899398.jpeg
 
Last edited:
  • Like
Reactions: alcyon

Asterix

Lurker of Power
Mar 31, 2005
460
30
28
Vienna, VA
That's all great stuff, @Bru , but I don't think there's Harbor Freight in Malaysia where the OP lives.

Getting the inner race off the pinion 30 years after it was put on took all the 20 tons my press had to offer. It made quite a bang.
 
  • Like
Reactions: Piratetip

Bru

Member
Feb 28, 2013
50
29
18
Tampa Bay Area
I posted this for community knowledge. it may help someone.
That bang experience was the same one with me when my buddy used his 20 ton to pull the first pinion gear apart that came from a differential from eBay that had a bad noise. There is a shim that lives under the bearing to adjust the in and out position of the pinion gear in relation to the ring gear. It turned out that I reused my old pinion and ring gear with the original shim. The ring gear contact pattern was acceptable although a little bit oblong after 280K miles. The backlash was on the high side on some teeth, but I went with it anyway. 23K miles later still running without unusual noises. The whole thing was an ordeal which I don't wish to repeat *unless I have to". I don't plan on buying any other car from here on out.
 
  • Like
Reactions: alcyon and Asterix

alcyon

Active Member
Jun 15, 2017
161
35
28
Kuala Lumpur
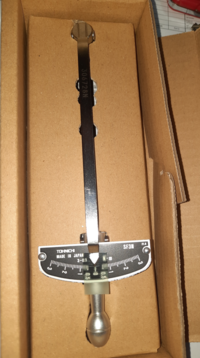
Thank You Bru. I made my own flange holding tool. I just received my beam torque wrench
1660787608238.png
I did some testing not on some bolts, and found that the force required to get the needle to even go to 1Nm is quite noticable.
According to TSRM 2.2 Nm is the maximum total preload allowed so the max allowed on this wrench is 3Nm, just perfect.
One thing I dont get from TSRM though, is to measure the preload with this, is it the break away torque or constant turning torque ?
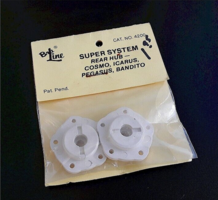
By the way, your username reminded me of this US brand of RC car parts from the 80's, Bru-Line
1660788149325.png
 
Last edited:

Bru

Member
Feb 28, 2013
50
29
18
Tampa Bay Area
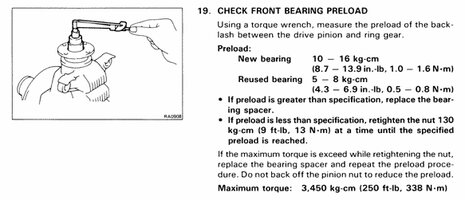
The torque spec is for constant turning not break away. 1.0 N meter is equivalent to 8.9 Inch pounds. Here is a photo from the Supra manual giving the specs. Bear in mind this is with the side shafts removed that could cause additional drag. It's hard to do on the car because you only have less than 180° to turn it for total preload. It's hard to get a reading for pinion preload alone when the carrier assembly is installed because it's such such a short movement for backlash. After you have the pinion preload and have installed the carrier you can get the total which has a range also. Subtract the pinion preload from the total preload to get the carrier preload. That's the range shown in the 2nd picture which is the preload contribution of the carrier bearings. It's adjusted using shims outside the carrier bearings.

I didn't know about the RC car parts brand. Bru is a contraction of my last name that was given to me at work by "Bone" Thompson. I did a search online and came up with the following. I can see where the Bru in Bru-Line came from.
Prop Shop Hobbies, Inc. was established by founder Thomas J. Brubaker, Sr. October 23, 1975.


1660869453770.jpeg
1660871414236.jpeg
 
Last edited:

alcyon

Active Member
Jun 15, 2017
161
35
28
Kuala Lumpur
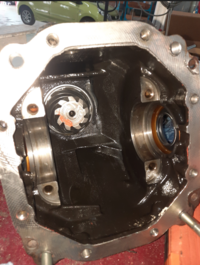
I brought the diff to my workplace and things aint going well. First, for the life of me, I cannot get a proper backlash reading. I tried and tried for an hour and still couldnt get a consistent reading. I have a feeling I am not putting it at the correct angle. So I just removed the carrier, and measured the shims.
Left shim is 2.58mm, right shim 3.1mm. I noticed a tiny amount of side to side movement, indicating the carrier isnt preloaded. When i measure preload (before remove carrier), i got 0.5Nm, which is wayyy too low for total assembly, the pinion and carrier both have no preload.
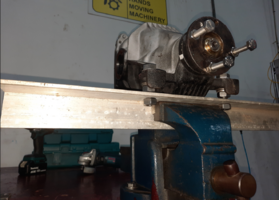
One major issue I ran into is the diff housing could not go into the vice, it was simply too big to clamp. So i came up with a simple angle bar jig with 2 holes which I will mount to the 2 front holes on diff housing and clamp this angle bar to the vise, giving me 4 possible orientation. My companion flange jig is also not ready so I couldnt remove the pinion.
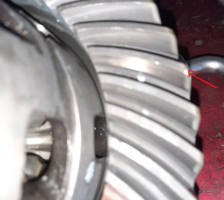
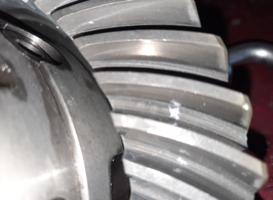
The crown gear looks ok overall with one tooth having a tiny chip off the leading edge.
Pics below, the angle bar is the jig to hold the housing, need two 20mm holes drilled.
1661009840292.png
Cant remove pinion yet
1661009922465.png
1661009965211.png
Tiny chip on leading edge of one tooth
1661010046963.png
1661010075297.png
 
Last edited:

Piratetip

Far From Maddening Crowds
Staff member
Super Moderator
Dec 30, 2005
1,177
69
48
38
MKE, WI
You have to set pinion preload before measuring backlash on the ring.
Otherwise the dial indicator zero point wanders around as the pinion isn't holding still.

Or you build a jig or fixture to hold the pinion from moving at all while checking backlash.

Sounds like you have multiple problems from the get go.
Calculating the side shim thickness you need on the carrier is going to be the fun part:
1- Set proper backlash
2-Set carrier preload

Follow the TSRM, it's rebuild sequence is correct.
 

alcyon

Active Member
Jun 15, 2017
161
35
28
Kuala Lumpur
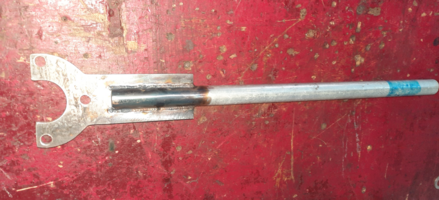
Update. Got my tool so I could remove the pinion. Costs me about 20 USD to make.
1661437471739.png
The jig I made out scrap angle aluminum i found around the factory.
1661437552695.png

I tried removing the front seal but found it difficult. any tips ? also what is this metal washer in front of the seal ?
How do i remove it without damaging the seal ?
1661437651893.png
Does the pinion look ok? It seems a little shiny on the tooth. Not sure of the bearing race condition, I am bringing my torch light to have a better look tomorrow. I hope the bearing is ok and hopefully the head shim is ok too. would hate to push out the inner bearing if I dont have to.
1661437765412.png
Gonna swap out that crush sleeve with the Weir one.
1661437795131.png
I will be setting the preload tomorrow and over the weekend, then deciding on the side shims needed. I will be ordering 3 pairs of side shims just in case.
 
  • Like
Reactions: trofimovich

Piratetip

Far From Maddening Crowds
Staff member
Super Moderator
Dec 30, 2005
1,177
69
48
38
MKE, WI
You pry the seal out or use a slide hammer.
Flat washer under the seal is the oil slinger, goes in front of the outer pinion bearing.

Can't tell pinion condition with that photo.
Needs to be clearer / closer.
 
  • Like
Reactions: alcyon

Nick M

Black Rifles Matter
Sep 9, 2005
8,871
37
48
U.S.
www.ebay.com

So the rebuild by the so called pro did not go well, idiot re used crush sleeve and it made a terrible hum on accel and decel.
Crush collars are used again without noise on many applications. It sets pre-load on the bearing. It might not be your noise.
I know it is awfully high for you 7M guys, but 1G engine is mated to a 4.3 for MT
So is the 7MGE.
 

alcyon

Active Member
Jun 15, 2017
161
35
28
Kuala Lumpur
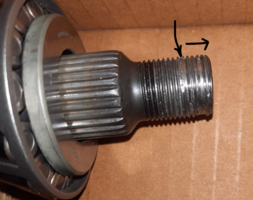
I worked 3 hours on the diff and struggled to get the preload, it was either too much or no preload, or not enough. I was down to 0.71mm on the shims, and was about to try to get 0.65mm, then the old nut jammed up as I was trying to remove it.
It chewed up the threads on the pinion from the stake slot onwards. I will try to salvage the thread by cleaning it up with a M20x1.5 die. I think the pinion is still usable as the threads after the stake slot is still perfectly Intact, and those are the threads that matters. I also plan to buy three standard M20x1.5 nuts from my local shop just for setup purposes, and use a new toyota nut for final locking.
1661609027302.png
I also faced a problem where the pinion bearings do not feel consistent, like there are tight spots. I tried knocking on the left , top and right side of the housing (pinion side) with a large rubber mallet, and while it helped smoothen out the bearing movement, it's still a little inconsistent, and I cant figure out why. While the bearing shell does have some marks/lines but it feels smooth to the touch. I am also fitting the pinion horizontally . Am I supposed to do it vertically or it really doesnt matter, cause it looks like the bearing isn't really centered in the shell, it could be just an illusion as the visibility from the upper side of the bearing is much better than the lower side. Should I put some oil on the bearing to make it smoother?
I found a thread by turbostreetguy :
1661611025397.png
 
Last edited:

Piratetip

Far From Maddening Crowds
Staff member
Super Moderator
Dec 30, 2005
1,177
69
48
38
MKE, WI
Looks like you are using the nut to pull the pinion together to check preload.
DO NOT DO THIS, you have to press the pinion into the outer bearing.
Then tighten the nut to check preload while ALL the nut threads are engaged.

The only other thing that can cause this kind of damage is if you do not punch out the stake nut where it was previously staked.
(If you are re-using the old nut)

There could be bits of metal floating around inside the bearing cages, since you have already shown missing pieces of the ring gear.
Clean everything throughly in a parts washer, and restart.
This could be why you are feeling the pinion hanging up on rotation.

Example:
This nut has not been un-staked, can't be used for a setup process until that section is punched out or ground away.
It WILL gall the threads of either the nut or pinion or both eventually.
 
  • Like
Reactions: alcyon

alcyon

Active Member
Jun 15, 2017
161
35
28
Kuala Lumpur
Piratetip, the problem is the staked nut for sure. I have managed to fix the thread front the best I can and the new standard nut I used for setup only rolls on easily without snagging.
I also very lightly oiled the bearings, so now it does not catch anymore. I only oiled them once, I never added any more oil on subsequent attempts.

I am facing a major obstacle now. It seems the preload is extremely sensitive to even 0.01 to 0.04mm difference of shims. Let me explain
The crushed crush sleeve is 47.4mm long. The weir spacer is 46.85mm. The difference is 0.55mm.
Now I tried like 10 tries and finally got it down to 2 best possible combinations. I made a chart :
1661911193516.png

I listed every possible shim combination to give me the 0.55mm difference, and the closest I got is 0.53mm and 0.57mm. So How do I know 0.55mm is Ideal ?
With 0.53mm, the preload is too much, almost jammed up. At 0.57mm, the preload is not enough, its not even 0.5Nm, (4.4in.lb). However , the pinion flange is not loose at all, there is no slop.
I tightened down the large nut to 196Nm (145ft.lb).
So now I have two choices. I was thinking off asking my machinist to cut down the weir spacer by 0.05mm or 0.15mm.
If you see the right side, that would give a total difference of 0.7mm. I could get combinations of 0.7, 0.69 and 0.71mm shims.
But the risk is, if he screws up even by a little, I am screwed again.
The other choice is, I go for 0.57mm, and call it a day, even with reduced preload, at least I know for sure The nut is down really tight and won't back off.
In the meantime I will ask if my machinist could make such a shim, OD38 ID30.2, three thicknesses, 0.54mm, 0.55mm and 0.56mm, in singular pieces each. But If such shims cannot be made, what then..
Let me know what you guys think.
 

Piratetip

Far From Maddening Crowds
Staff member
Super Moderator
Dec 30, 2005
1,177
69
48
38
MKE, WI
Fun right?
I regularly change shim stacks by .0005" or sometimes less.
To get changes that, small I use the difference in manufacturing between shim tolerances.
Example- a shim is supposed to be .010".
- I go through my stack of these and pull out ones anywhere from .0094 to .011

Unfortunately you only have a limited amount of shims available.
And Weir does not send enough different sizes in my opinion.
Ive collected many more from other places, maybe 300-400 of them now.

Take your shim stacks that gives you 3-4in/lbs of preload.
You could either run with the preload a bit low (not recommended)
Hand sand the solid spacer to take off .0002-.0004". ( I have done this multiple times)
Piece of fine grit paper adhered to a granite slab.
Do it again if still not there.
Or
Put a breaker bar on the nut and take it to 250-280ft/lbs, as this will jump your preload another 3-6in/lbs
But with your thread issue I would be careful.

I personally wouldn't machine it, too easy to overshoot.

Takes many many hours to set one of these up correctly.
Take your time and do it right.

If I actually ran the numbers on what I charge in labor vs. how many hours I have to spend setting one of these up...
Probably only making minimum wage

Ah well it's still fun to work on these in what little free time I have.

Good luck!
Keep at it.

You are going to have a fun time when you get to setting backlash and carrier preload.
Who knows maybe you will get lucky and buy the optimal shim thickness for that step.
 
Last edited:
  • Like
Reactions: eraezer and alcyon

alcyon

Active Member
Jun 15, 2017
161
35
28
Kuala Lumpur
Fun right?
I regularly change shim stacks by .0005" or sometimes less.
To get changes that, small I use the difference in manufacturing between shim tolerances.
Example- a shim is supposed to be .010".
- I go through my stack of these and pull out ones anywhere from .0094 to .011

Unfortunately you only have a limited amount of shims available.
And Weir does not send enough different sizes in my opinion.
Ive collected many more from other places, maybe 300-400 of them now.

Take your shim stacks that gives you 3-4in/lbs of preload.
You could either run with the preload a bit low (not recommended)
Hand sand the solid spacer to take off .0002-.0004". ( I have done this multiple times)
Piece of fine grit paper adhered to a granite slab.
Do it again if still not there.
Or
Put a breaker bar on the nut and take it to 250-280ft/lbs, as this will jump your preload another 3-6in/lbs
But with your thread issue I would be careful.

I personally wouldn't machine it, too easy to overshoot.

Takes many many hours to set one of these up correctly.
Take your time and do it right.

If I actually ran the numbers on what I charge in labor vs. how many hours I have to spend setting one of these up...
Probably only making minimum wage

Ah well it's still fun to work on these in what little free time I have.

Good luck!
Keep at it.

You are going to have a fun time when you get to setting backlash and carrier preload.
Who knows maybe you will get lucky and buy the optimal shim thickness for that step.
Guess I would have to sand the spacer then. For the carrier preload and backlash, I plan to buy at least 3 combinations of which I will pre calculate based on the current carrier shims and make an educated estimate. No wonder the shop guys here will simply not get this right, they are too damn lazy, and this is VERY Tedious.
 
Last edited:

Piratetip

Far From Maddening Crowds
Staff member
Super Moderator
Dec 30, 2005
1,177
69
48
38
MKE, WI
Just be sure to maintain the solid spacer parallel trueness.
The bearings need to run straight in their bore, solid spacer maintains this.

It's not just there, hardly any shops here know how to set up a diff properly.
Most only know how to swap out bad parts and that's it.
Time is money and they have no time, paitence, or desire to really learn this skill.
Setting up diffs / trans is like you said, tedious.
Have to be the right kind of person to take the notes, keep track, keep working toward a well setup component.
 
  • Love
Reactions: alcyon

alcyon

Active Member
Jun 15, 2017
161
35
28
Kuala Lumpur
Piratetip, I followed your method of sanding the weir spacer back end on a granite table and I got the preload down. I had to do it three times, but I finally got it feeling tight enough, it is on the lower end of the scale, probably 4in.lb only, The starting torque to get it moving is quite noticable, but once it moves it rotates consistently throughout the full range without snagging. I will just settle for this reading and not go higher. Shim combination is 0.57mm of course. I think i must have cut down 0.01 to 0.02mm, giving a total of either 0.56 or 0.55mm
I then inserted the carrier with bearings and shims. The side shims went in a bit easy, needed some light knocking. I surmised this isnt enough preload, as it felt too easy to turn, and once spun with the beam wrench, indeed there was no resistance from the carrier bearings.
I think this is caused by the skyline guy cutting the left side washer down by 0.005 to 0.006mm. He did tell me he did that. The left washer measures 2.52mm now. I strongly believed it was 2.58mm stock, since it was the thinnest toyota ever offered.
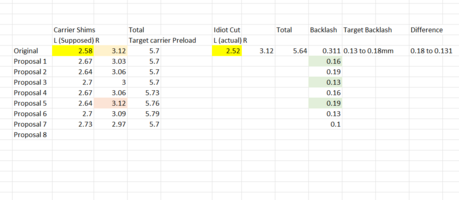
The right shim is 3.12mm. So 2.58 + 3.12 is 5.7mm. But now its 2.52 + 3.12 is 5.64mm. 0.06mm is missing now. My guess is if the shim total is 5.7mm, the preload should be correct.
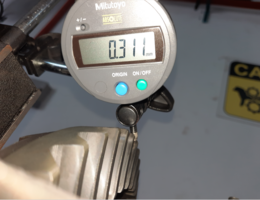
I also managed to get a clear backlash reading now, since the pinion is now "stuck" in place. it's 0.311mm
1661945293236.png
I have done some calculation and made this table :
1661945367077.png
So the shims I must order are : 2.61, 2.64, 2.67, 2.7, 3, 3.03,3.06, 3.09 and 2.97
Notice on some combinations i went over 5.7mm total, just in case 5.7mm is not enough preload. Hopefully I would be able to get 0.14 to 0.17mm of backlash with these combinations.
After I get the shims, hopefully the pattern and depth is correct, I really dont want to pull out the inner bearing.
Also, we are now only talking about the ring and pinion, do I have to worry about the spider gears backlash or it doens't really matter ?
 
Last edited: