
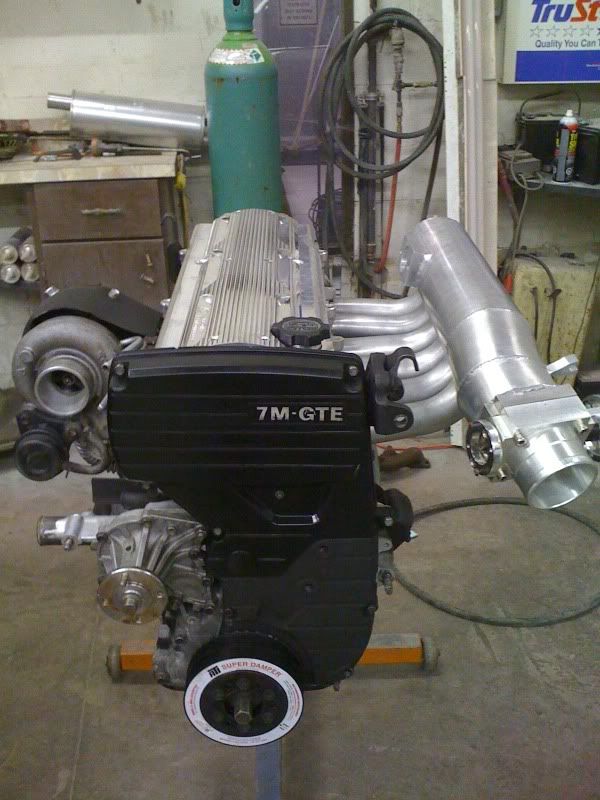
Im getting ready to install this sucker on my 7m. Damn how the hell do I get it on there so tight help please?
ATI custom damper
- Thread starter Tireburner
- Start date
You are using an out of date browser. It may not display this or other websites correctly.
You should upgrade or use an alternative browser.
You should upgrade or use an alternative browser.
put the hub in boiling water for 30 minutes, it will expand. Much easier that way, but its still a tight fit
and I recommend putting anti seize on the crank snout as well or you will catch hell trying to get it back off
and I recommend putting anti seize on the crank snout as well or you will catch hell trying to get it back off
Im a noob so I have to take it apart? or put the whole damper in boiling water? is that what you mean. You say hub im assuming that means center section mine came assembled as one piece ?
Sorry bare with me my first aftermarket damper. Thanks for the help
Sorry bare with me my first aftermarket damper. Thanks for the help
Tireburner;1622368 said:Im a noob so I have to take it apart? or put the whole damper in boiling water? is that what you mean. You say hub im assuming that means center section mine came assembled as one piece ?
Sorry bare with me my first aftermarket damper. Thanks for the help
so it's one piece? ATI uses a two piece hub/damper exclusively, never heard of a one piece ATI. Not saying you're wrong, just that it would be a surprise to me....
No sorry it looks to be two pieces. I was just saying it came assembled. I have no specs to retorque the bolts either I didnt get any instructions with this damper. So if I take it apart boil the hub then install then find specs torque down the rest of it ? I should be good to go? Thanks again
I recently installed my ATI damper and it came in two pieces: the damper assembly and the third belt pulley for the A/C. After I installed the damper I then installed the outside A/C pulley. To install, I did exactly what Rakkasan says: I boiled the damper for approx 30 minutes, put anti seize on the crank and pushed it on as far as it went. One other thing I did was to lightly sand the crank and key so that the surface was smooth. I used a fine sandpaper and really just took off any surface rust or crud. I'd say that I got it on about 1/4 of the way by hand. Then I took a rubber mallet and tapped it on some more...I'd say another 1/4 it went. Then I screwed in the crank pulley bolt (I purchased a new one) and tightened it all the way to spec. That seated the pulley fully. Remember that you have to have the crank bolt turned down a bit so it fits the ATI. I took mine to a machine shop and they modified the bolt.
Yeah, it's a TIGHT fit but it's supposed to be that way. I had my radiator out so that helped my maneuvering a bit. ATI has instructions here: http://www.atiracing.com/products/dampers/damper-instructions.htm
The instructions don't say what torque value the A/C pulley needs to be - I called them up and they told me. Unfortunately I can't remember what it was.
Also, here's a thread that discusses the damper: http://www.supramania.com/forums/showthread.php?28804-ATI-Damper-Installed&highlight=install
Boiling the whole damper wouldn't that peel off the sticker. If I remove the bolts that hold the hub to damper do I have to press out the hub ?
Good thing this thread popped up as i'm in the same dilemma. Someone mentioned to hone the ati damper. Any of you knowledgeable agree with honing it? or just do the boil technique?
I'd just do the boiling technique. I think the damper is balanced and specifically made to fit extremely tightly. Any honing may negate some of the design benefits. It really wasn't that bad to install, especially when you use the crank bolt to help get it on the rest of the way.
Ok well its on just boiled water and rubber mallet worked like a charm and it is a very tight fit.
---------- Post added at 11:04 PM ---------- Previous post was at 10:57 PM ----------
 So far so good
---------- Post added at 11:04 PM ---------- Previous post was at 10:57 PM ----------
What about timing marks? I read jdubs thread and he mentioned there is no timing marks on the ATI pulley. Did they add them or is everyone filling their own marks?
iwannadie;1622694 said:What about timing marks? I read jdubs thread and he mentioned there is no timing marks on the ATI pulley. Did they add them or is everyone filling their own marks?
Mine had 360 degree marks
I took mine apart and placed it in the oven. I don't like the mallet idea that the OP did on the crank either. I would not recommend it.
Duane
Duane
Tireburner;1622650 said:Ok well its on just boiled water and rubber mallet worked like a charm and it is a very tight fit.
---------- Post added at 11:04 PM ---------- Previous post was at 10:57 PM ----------
So far so good
So you have an ATI dampener, an FFIM, and an ARZ valley cover... and a ct26? :biglaugh:
Just giving you a bit of shit, just seems out of place. I think Duane makes a good point though, about the mallet. I can't imagine that being a very good thing to be hitting the nose of the crank...