5 years in the making 2JZ GE-T START-UP VID @ POST 34

85celicasupra

spokane supra owner
Mar 9, 2008
256
0
0
spokane,wa
forums.celicasupra.com
veedubin;1812608 said:
I'm starting to see more and more 2J's (GE) popping up lately. Craigslist, eBay, and junkyards too. Most are around $400-$500 but I have seen a few as low as $200...

Picked my low low mileage one up outta a sc300 at the local U-pull yard...
$152 for entire engine, harness, all accessories (had new starter and alt) and exhaust manifold...
Early SC's are old enough to start showing up at some u-pull yards making this swap more cost effective.
 

kakanator

New Member
Apr 25, 2010
400
0
0
38
Fresno, California, United States
I have a friend that did the same thing and now I'm hooked I love the 7m but if I can go to the yard and get a sc300 motor for 180 why not and just make a intake and get a t4 manni and turbo build the internals and use my 7m harness and then make a beast and it will look stock as hell to people. For the price of building a 7m for power you can spend the same on a na 2j why spend 2200 on a 2j gte stock its a sweet motor but I am poor and work part time.

p1828419_1.jpg


p1828419_2.jpg


p1828419_3.jpg
 

veedubin

Official SM Decals
peste noire;1828296 said:
pretty clean set up man.
Thanks, It's not a show car by any means, but it'll get there eventually.

On to the updates from last nights ventures:

Got the last of the fuel system hooked up. Made the fuel feed to rail line, painted and installed the bracket for the AFPR, installed return lines
sm_photo_missing.jpg


Got the entire underside of the car buttoned up; slave bolted in, driveshaft, exhaust, etc...

Started to make the wire harness for the alternator and find suitable routing for it.

fabbed an adapter to mount my LC-1 into the factory o2 location - still need to fix it a little bit. But for those that are into custom fabbed and saving money, this was a really easy trick. Took a block off plate from the 7M (the one right behinf the oil filter, has the letter "M" engraved on the top) Notched the existing holes and made them fit the o2 sensor mounting holes. Cut about 5/16" off of the bung that is supplied with the LC-1. Drilled large hole into center of the plate and then welded the bung onto the plate... viola it fits. I still need to grind some of the weld to allow for the nuts to sit flush. As a side thought, After making this adapter, I found out I have an M18x1.5 tap - you know the exact size for the wideband sensor.... I could have just tapped the factory elbow for the sensor. But since I made this cool little plate, i'm gunna use it.


Found a suitable location for the LC-1 controller - need to fab some sort of brackets to actually hold it in place.
sm_photo_missing.jpg


Other than that, didn't get too much done. Progress is going super slow on this build due to work and family schedule.

I do need to pick up pace some how as I need to give my wife her car back. :3d_frown:

Also put the CPS in the head and tried to get it timed properly.... I'm not 100% sold on how it's in there though. Please offer some inpout as to your thoughts. Pics below will explain better. As it is now, I don't have a lot of room to turn the CPS counterclockwise (timing retarded IIRC) but I do have a good amount of swing going clockwise (advancing timing IIRC) The pictures show the CPS at both extremes of timing, full CCW and Full CW Does that seem like enough rotation or should I try to slot the hole out some more?

sm_photo_missing.jpg

sm_photo_missing.jpg


As it sits from leaving the shop at 2:00am

sm_photo_missing.jpg
 

IBoughtASupra

New Member
Mar 10, 2009
4,455
0
0
Queens, NY
Wouldn't you want to set it as close as possible to how you would if it was on the 7M since you are on 7M electronics? I would assume so. Just a theory.
 

veedubin

Official SM Decals
IBoughtASupra;1828810 said:
Wouldn't you want to set it close to how you would as it it was on the 7M since you are on 7M electronics? I would assume so. Just a theory.

Yes it will be set just as if it were a 7M. My concern is with the amount of adjustment I have right now. Is it enough or will I need to adjust further? There is not a lot of material left to slot the CPS much further.

Sent from my LG-P504 using Tapatalk 2
 

veedubin

Official SM Decals
Thanks. The swap is actually very straight forward. I'm going a little beyond the necessary basics with this build. Nothing too wild, just want a reliable Supra... if that actually exists. LOL :D

Sent from my LG-P504 using Tapatalk 2
 

veedubin

Official SM Decals
Updates........ It still isn't finished...... :nono:

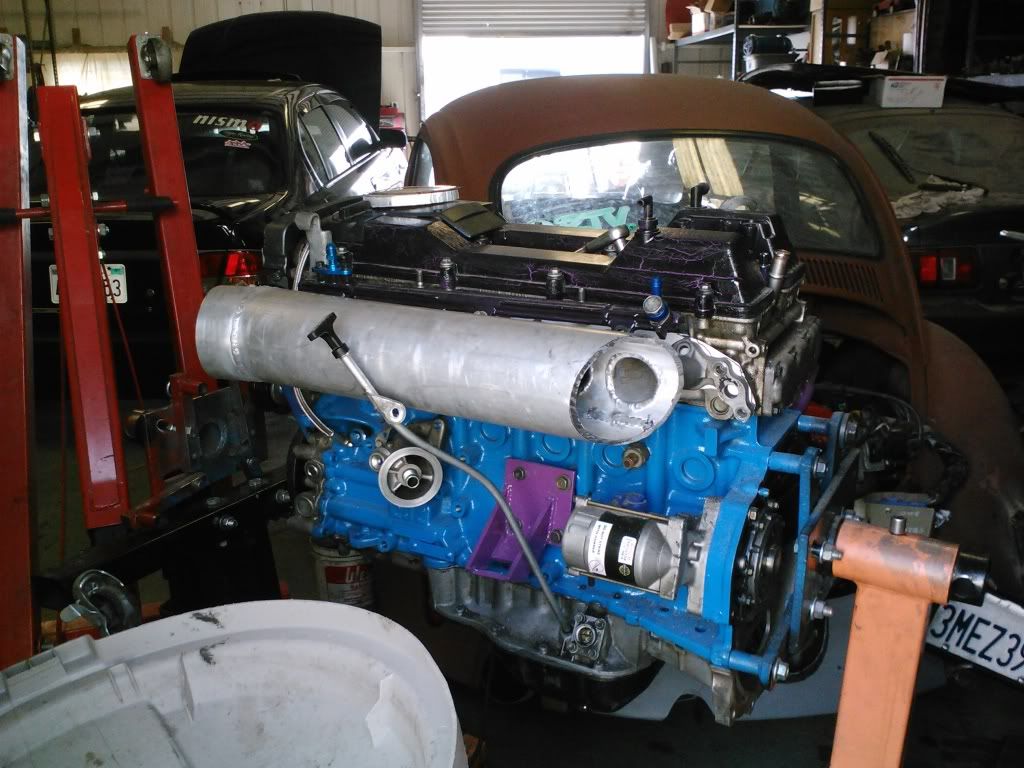
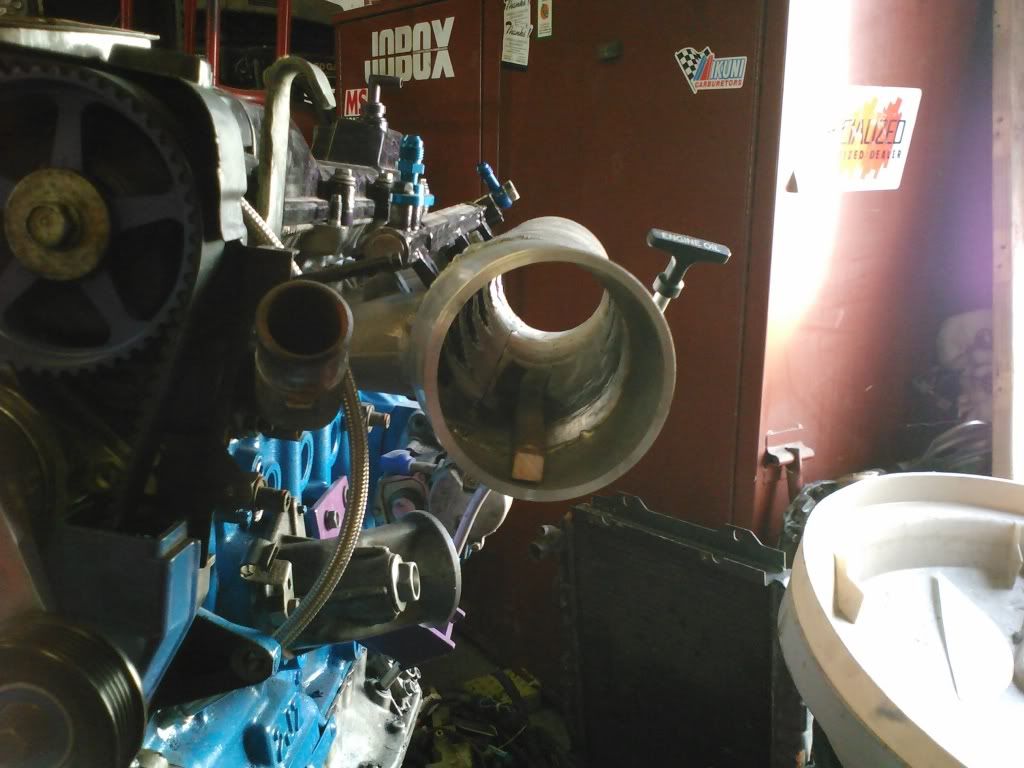
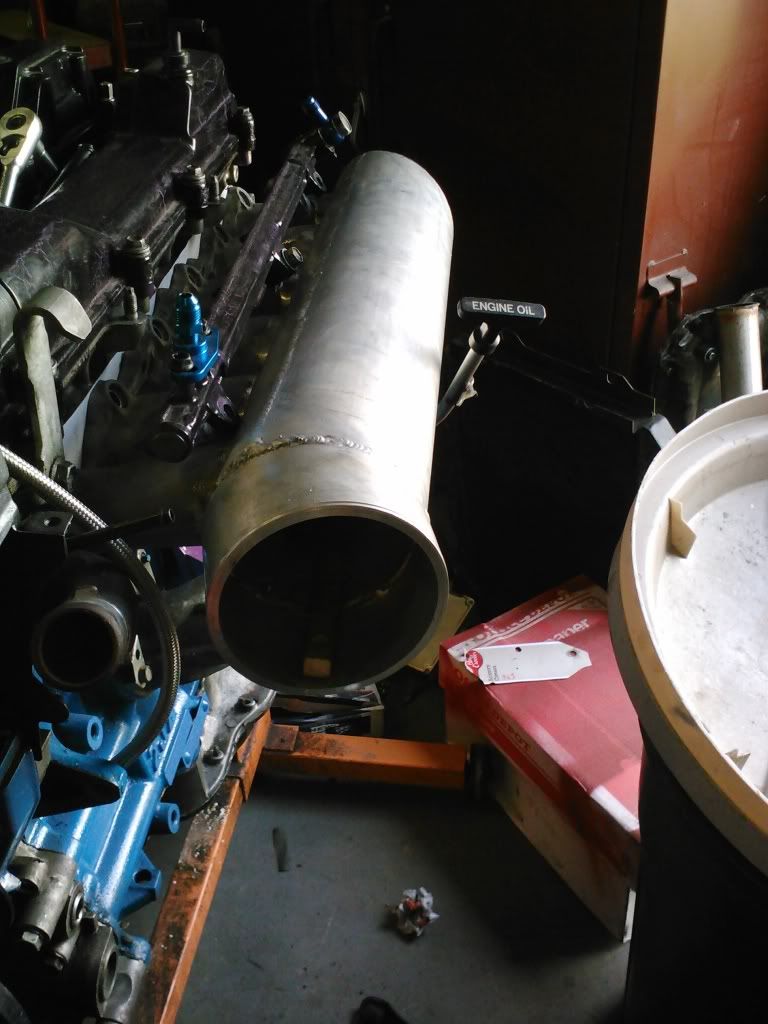
Anyways, with work, the business, and a family, progress is at a snails pace right now. But, I can see the little ray of light gleaming at the end of this tunnel. Finally got the manifold all fabbed and mocked up. I took it into work today to finish fully welding it and making it look decent. I am using this manifold as a proto-type. I have 2 designs in my head that I intend to start fabbing up once the car is on the road again. The new manifold will be stainless steel instead of mild steel though. During the initial mock up, I couldn't get the turbo to sit properly without resting on the strut tower (see pics a few posts above.) After a lot of cutting and grinding I was able to get this for clearance:

sm_photo_missing.jpg


While this may have been enough, I really don't want to risk smacking the compressor housing off the strut tower during some spirited romps on the accelerator pedal. So some more cutting and grinding and we now have this for clearance:

sm_photo_missing.jpg


I will be remaking the down pipe due to the upper cat resting a little to close to the floorpan/firewall. Other than that, the factor heat shield even fits - will be modifying the shield a little bit to make it look cleaner.

sm_photo_missing.jpg


I will post better pictures of the manifold once I get it finished at work. Probably wil not be coating it as this will only be a temporary setup while I fab the new design/permanent manifold.

Also got the P/S sorted out. I have the factory 2JGE pressure hose, but I really don't care for its routing. So I went to the local ag supply stoe and picked up this stuff:

sm_photo_missing.jpg


1 metric adapter to pipe thread to go in where the factory banjo bolt was on the pump
1 metric adapter to pipe thread to go in to the steering rack pressure side
1 45* pipe thread to -6 fitting
1 90* pipe thread to -6 fitting
1/4" ID hydraulic hose with -6 fittings 18" long


Total cost of this project was less than $20 plus the added bonus of going to the hardware store :biglaugh:

Installed pics:

sm_photo_missing.jpg

sm_photo_missing.jpg


Also finished the underhood wiring, and most of the interior wiring. I won't be able to completely finish the interior wiring until the engine bay is done and I have a battery dropped in.

Still need to work out an upper IC pipe - I have something in the works, but won't be touching that until the manifold is finished up.
Also need to finish the throttle cable assembly,find a 2J TPS connector, fabricate a downpipe, and various other minor projects. And on top of that, try to start it with a basically untuned MAFT Pro..... Should I just kick my self in the testicles and get it over with? LOL

Also started this little project:

sm_photo_missing.jpg

Obviously not finished yet, but you get the idea...

I want a truely factory look to this swap, so I started searching out 2J underhood decals. While it would work to just slap the factory decal on and call it a day, I have decided to remake the factory decal to my specifications. I will be printing these on proffesional grade vinyl using an over-laminate to protect it - just like the factory ones. After this is done, I'm going to look into reproducing the rest of the underhood decals for this swap.
 

veedubin

Official SM Decals
suprakidd;1836530 said:
willing to sell decals just like that for other mk3 2jzge-ter's?

swaps looking great my friend. im swaping a 2jzget into my mk3 atm, just progress is slow..

Absolutely will!
I'm trying to get my business webpage up and running so that I can apply for a vendor position here on the forums. My wife and I do all sorts of vinyl graphics and apperal stuffs.
Once I get the decal finished, I would probably even be able to do fully custom ones per car. The one shown above is my exact diagram, and may differ slightly (or greatly) from someone else's swap.

BTW, I know what you mean about slow progress. Hang in there though.... It gets better; i think LOL
 

veedubin

Official SM Decals
IT RUNS!!!!!!!


So I've been slowly working on this as time allots, and due to that schedule things have been very very slow. But I went to the shop yesterday with the intents on at least getting it to crank under it's own power. Still missing a battery, wiring still left to do, etc... I hit up the local advance auto parts gather a few little bits and peices for the PCV system and other little stuffs that needed finished. I didn't want to , or even have the extra money for a battery ($90 at my commercial discount level for the "el-cheapo" model) So I started scouring the used battery shelf. Found a used Optima Red top sitting there. Long story short, the battery is less than a year old, and after testing it, it was in perfect working order..... $40.00 for the optima and it's mine :biglaugh:

Anyways I'll post up pictures in a little, but I had my borther down with me last night. He was my motivation to be able to stay awake and get it started.

He was also nice enough to take a vid of the initial start up procedure.... and post my ugly mug to youtube. So yea, the vid is like 10 minutes long but, it's the video of my car's first start up.

I am still not sure why or even how it started, ON THE FIRST TRY, but it did, and I can't be happier. I think I almost cried last night over it.

The CPS was put in "close enough," the TPS is not adjusted, the MAFT Pro is a used unit from another member and I have no idea what for tune is on it. So all in all, the car should not have started without a lot of "fiddling" with things, but it did!


Youtube Video

[video=youtube_share;-oPXzNFuGKs]http://youtu.be/-oPXzNFuGKs[/video]

Another issue I thought I was going to have was with the BOV. It's the knock off Tial 50mm. I was really concerned that it would not function properly without insane boost. The only vehicles I've seen them on were pushing huge numbers. That, and the srping inside that thing is the size of a coil spring for a yugo :aigo: But it works :naughty:


For more reference materials:

Throttle cable setup that works the best for this application - 1993 Corolla 4cyl. $12.xx from rock auto. The factory 7M cable is only 15" long from bolting base to end of threaded stud. The Corolla is 20" as you can see in the pictures, it works wonderfully.

IMG744.jpg
IMG715.jpg
 
Last edited:

veedubin

Official SM Decals
sweet man looks good I am excited to get my 2j na-t going I may have to get some pointers off you.

Thanks! I'd be more than happy to give pointers and info if you need it!

BTW - start and/or finish the swap.... even with a crap tune at idle sounds better than my 7M's :D

Sent from my LG-P504 using Tapatalk 2
 

realwheeldrive

New Member
Feb 25, 2008
25
0
0
Miami
looks good. im trying to get mine running but im having trouble trying to fit my driveshaft in the r1 tail :/...

it wont budge! yea i know noob problem but its more complicated then you think. but ill figure it out...

but other then that waiting on my turbo to get rebuilt and ill be rollin like you!

good job!
 

veedubin

Official SM Decals
Update on this swap:

I have not been able to drive the car much since pulling it out of the shop a few weeks ago. There were lots of little issues that just never let it run right.
First off, I was never able to get the car to idle properly (running @ 1200rpms with good AFR's or 600rpm with whacked out timing and rich AFR's)
I finally took it for a drive weekend before last and had some major temperature concerns - 210* on the highway. 180* at idle and on stop and go type stuff.
During all of this I could not for the life of me get the MAFT Pro to actually do anything productive. I mean it would do what it's supposed to do and all, but just wasn't right.
VF signal was always pegged at 0.00V no matter how far I smoothed the VE table..


So long story short I just got done fixing it's issues (less temperature) During the whole process I had 4.5XV at idle on the TPS, I knew it wasn't right, but I couln't figure out why. I finally got sick of it and dived in head first tonight. I am using the 2J TPS sensor, and am lax of a plug for it. So I just have the terminals plugged into the TPS (I have one now, and I'll solder it in tomorrow as it's too late to work right now) Somewhere along the line, I switched the wires up majorly. That gave me a reversed TPS Voltage. So the computer was thinking I was at WOT with the IDL contact engaged. This caused the pegged VF voltage and due to that, the MAFT Pro really couldn't do what it is supposed to do.

I finally got the TPS wires right, and reset the timing. I was able to smooth the VE table to obtain 2.XXV VF at idle and took it for a gentle cruise. The difference is night and day.

The temperature issues, thanks to a bunch of members on here, are normal-ish. The 210 on the highway is a bit high, but I have a strategy to fix this problem....
I will, against most members thoughts, be using 2 10" electric fans for cooling. I am ditching the 7M clutch fan. This I'm going to chalk to personaly prefference. I will also be aquiring many missing "air blockers" either used or possible dealership. These are all those little plastic and rubber pieces that fit around the radiator, as well as the undertray (thank you IJ, and 3p for the science lesson :biglaugh: )

Well thats it for tonight... I'll be driving her to work tomorrow and attemp to log that drive. Tune some more over lunch and fab some diversion panels after work. Hopefully I can get this thing finished soon!

Thank you to all that have complimented,commented, and assisted in this venture!

I'll post a bunch more pics up later in the week.
 

veedubin

Official SM Decals
IBoughtASupra;1850451 said:
Is your radiator good, not clogged? Is the 7M clutch good?

The voltage for the TPS is still high, it should be around .5V at idle.

Rad is good. Flows freely. Clutch is still in great shape and blades are mint. Missing shroud though.

TPS voltage after fixing the wiring is within TSRM spec. It actually dropped a bit when I fixed it.

Sent from my LG-P504 using Tapatalk 2