
Yeah so I was gonna make a guide on how to rebuild a steering rack, but I didn’t take enough pics and only got a few good ones. And also someone stole the oring stretcher sleeve and clamper thing from my school’s tool room, so I kinda had to hillbilly some stuff. But here goes my ghetto rebuild.
I bought a steering rack seal kit from rock auto for 75 by the way. I let the seals soak up in atf before I started pulling apart the rack.
There are some missing steps here, I can’t remember everything we did, please look here too http://www.cygnusx1.net/supra/library/TSRM/mk3/manual.aspx?Section=SR&P=76
That has basically everything you need to know. Actually, it has everything. Idk why im writing this lol.
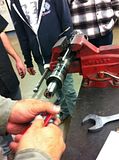
1. Pull the Rack. It’s not too hard, it’s easy to see where its attached to, the only bolt that’s kinda hard to find is the one underneath of the frame. For cars without the damper bracket on the tie rod end, idk if you’d find it easier removing the tie rod ends first then removing the rack. It was kinda hard removing the tie rod ends with the rack off.
2. lightly clamp down the rack to your bench
3. Take off tie rod ends with wrench, (forgot what size it was lol). If your car was a turbo car and the tie rod end has a bracket for the damper, you are going to have to use a massive wrench (I think the massive one was 1.125 but I definitely could be wrong) and a smaller wrench to break off the passenger tie rod end, if your’s was na, you could just use a inner tie rod remover (rented from pep boys) for free before you pull the rack.
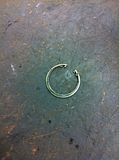
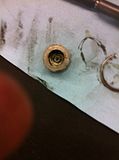
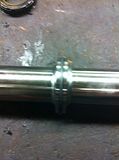
4. Use snap ring pliers to take out that clip from the right side of the rack.
this is what it looks like when its out
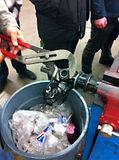
5. Next crack off this preloaded lock nut (which adjusts how hard your steering is, when you assemble it back together make sure it is about as tight as you have it now, you can always go back and adjust it if needed) with a unnecessarily large pliers thingy like the one I have.
The nut should come out pretty easily.
6. Take out the bearing. I used a pair of thin needlenoses and applied outward force to take it out.
7. Do the same to the other lock nut thingy.
The actual nut is kinda hard to get out, its much tighter than the first one we cracked off. I used a nut and stuck it into the hole, then used a wrench to take it off.
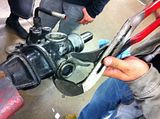
8. Take off the two 14 mm on the control valve housing
Slides off like this

Forgot why I took this picture.
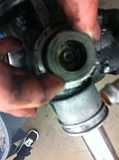
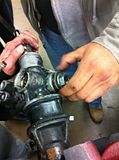
9. The control valve.
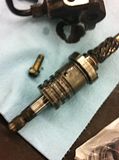
Theres a bearing and an oil seal underneath the valve. Take those suckas out.
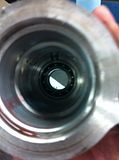
10. dunno why I took this picture
11. I think this thing was still in the shaft, ease it out with a hook tool or something.
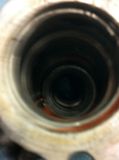
12. Tap out the rack using a brass bar and hammer, don’t have any pics of this step unfortunately. The side with the teeth goes into the rack housing thing .
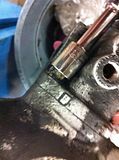
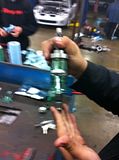
13. Theres a oil seal and spacer inside the rack housing. http://www.cygnusx1.net/supra/library/TSRM/mk3/manual.aspx?S=SR&P=80 see step 16. I used a long extension attatched to this hook tool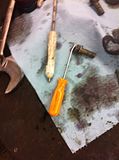 We used this hook tool to stretch o-rings unfortunately lol.
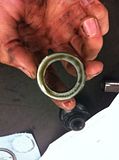
14. Replace this guy
15. Replace the three rings on that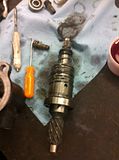
16. Couldn’t figure out a way to take out that bearing.
17. You know what. This rebuild guide is failing. There are o rings to replace that I didn’t take photos of, and I cant remember where they were. All I know is that I followed tsrm. So yeah. Im ending it here.
18. Theres one last hillybilly idea I shall impart with you guys. Basically since we didn’t have the tool to compress o rings, we cut a water bottle, wrapped it around the oring, and clamped it down
may the force be with you
i hope it helps those of you without sst.
I bought a steering rack seal kit from rock auto for 75 by the way. I let the seals soak up in atf before I started pulling apart the rack.
There are some missing steps here, I can’t remember everything we did, please look here too http://www.cygnusx1.net/supra/library/TSRM/mk3/manual.aspx?Section=SR&P=76
That has basically everything you need to know. Actually, it has everything. Idk why im writing this lol.
1. Pull the Rack. It’s not too hard, it’s easy to see where its attached to, the only bolt that’s kinda hard to find is the one underneath of the frame. For cars without the damper bracket on the tie rod end, idk if you’d find it easier removing the tie rod ends first then removing the rack. It was kinda hard removing the tie rod ends with the rack off.
2. lightly clamp down the rack to your bench
3. Take off tie rod ends with wrench, (forgot what size it was lol). If your car was a turbo car and the tie rod end has a bracket for the damper, you are going to have to use a massive wrench (I think the massive one was 1.125 but I definitely could be wrong) and a smaller wrench to break off the passenger tie rod end, if your’s was na, you could just use a inner tie rod remover (rented from pep boys) for free before you pull the rack.
4. Use snap ring pliers to take out that clip from the right side of the rack.

this is what it looks like when its out

5. Next crack off this preloaded lock nut (which adjusts how hard your steering is, when you assemble it back together make sure it is about as tight as you have it now, you can always go back and adjust it if needed) with a unnecessarily large pliers thingy like the one I have.

The nut should come out pretty easily.
6. Take out the bearing. I used a pair of thin needlenoses and applied outward force to take it out.


7. Do the same to the other lock nut thingy.

The actual nut is kinda hard to get out, its much tighter than the first one we cracked off. I used a nut and stuck it into the hole, then used a wrench to take it off.

8. Take off the two 14 mm on the control valve housing

Slides off like this

Forgot why I took this picture.

9. The control valve.

Theres a bearing and an oil seal underneath the valve. Take those suckas out.
10. dunno why I took this picture

11. I think this thing was still in the shaft, ease it out with a hook tool or something.

12. Tap out the rack using a brass bar and hammer, don’t have any pics of this step unfortunately. The side with the teeth goes into the rack housing thing .
13. Theres a oil seal and spacer inside the rack housing. http://www.cygnusx1.net/supra/library/TSRM/mk3/manual.aspx?S=SR&P=80 see step 16. I used a long extension attatched to this hook tool
 We used this hook tool to stretch o-rings unfortunately lol.
14. Replace this guy

15. Replace the three rings on that

16. Couldn’t figure out a way to take out that bearing.

17. You know what. This rebuild guide is failing. There are o rings to replace that I didn’t take photos of, and I cant remember where they were. All I know is that I followed tsrm. So yeah. Im ending it here.
18. Theres one last hillybilly idea I shall impart with you guys. Basically since we didn’t have the tool to compress o rings, we cut a water bottle, wrapped it around the oring, and clamped it down

may the force be with you
i hope it helps those of you without sst.