
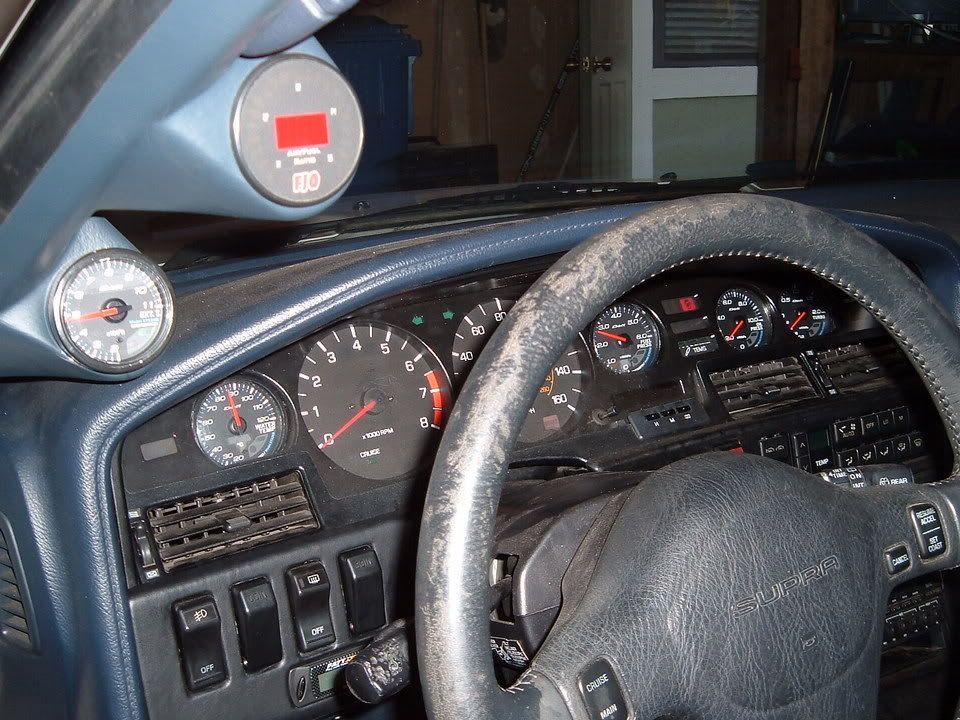
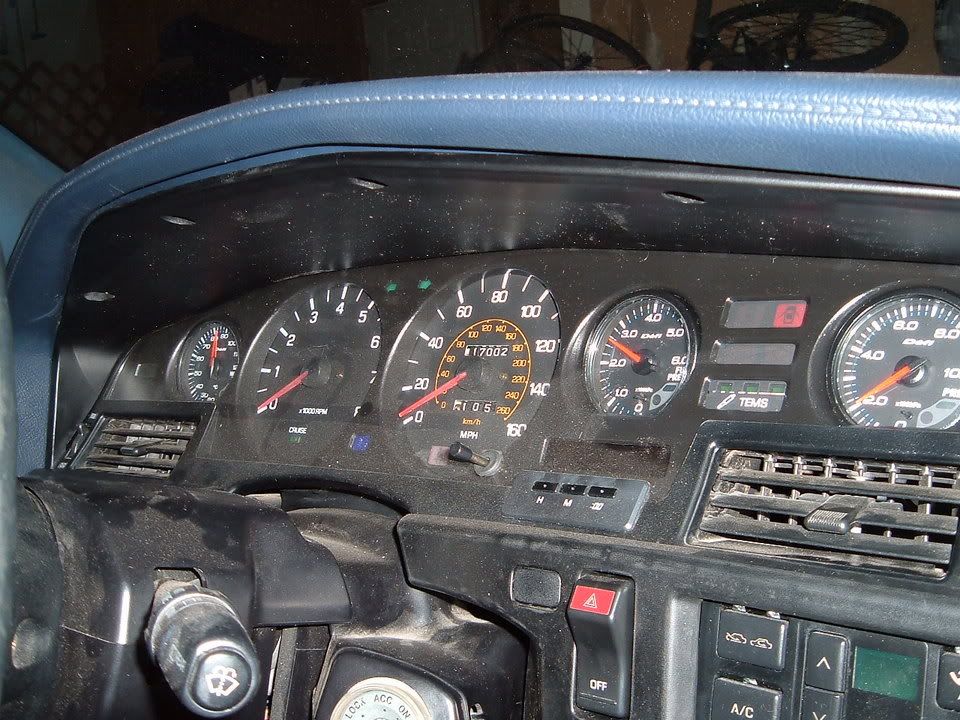
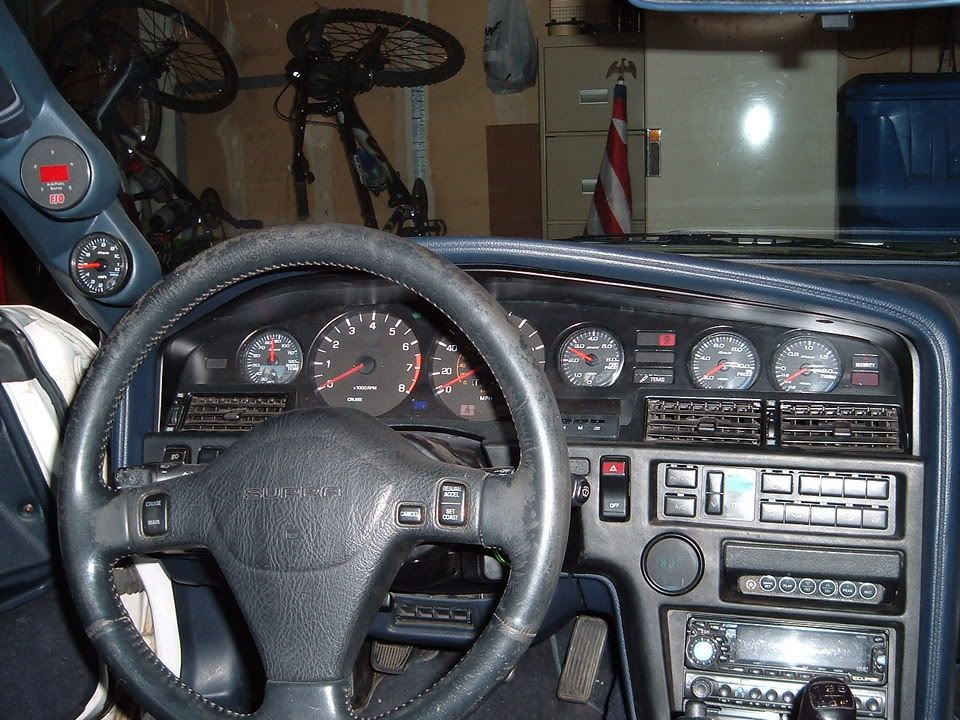
So, as a few of you know, i've replaced the factory Toyota Boost, Oil Pressure, Fuel Level, and Coolant with aftermarket Defi Link Series gauges. I've also incorporated an EGT, Fuel Pressure, and FJO Wideband.
This is how i went about completeing the task. I don't have pics of the steps of the process but i can clarify if it needs to more understanding.
STEP 1:
Acquire a second gauge cluster. You're going to need something to practice on, unless you're VERY! good with a Dremel. Remove the platic cover and black cluster holder.
STEP 2:
Remove all the gauges that you plan on replacing. This will give you a good indication on how much room you will have to work with. The gauges that are in the stock location are 60mm. I liked the size of those, but 52mm would fit MUCH easier.
STEP 3:
These gauges are going to need to sit as flat as possible to insure a good look. In order to do this you're going to have to Dremel out a LOT of the white plastic piece of the gauge cluster. Be sure not to remove anything that is holding down the indicator lights. If these are removed you will have no way to light up your gauges. Also, the green circut board on the back if VERY fragle. If that is damaged you will not be able to light up everything. Be careful to not have the gauges touching the circuit board also. This could cause problems.
STEP 4:
After the gauges are sitting as low as possible and as flush as possible, then it's time to get to work on the black piece. This is the really tricky part. If you're using 60mm gauges then you will need to cut out and enlarge the black piece gauge holes. Since the black piece has indentations on the rear, those will need to be removed and then the gauges will need to fit Firmly in the new cut openings.
You're trying to make the gauges as snug, and flush as possible to give it the "stock" look.
STEP 5:
For my Defi's I had to cut holes in the rear of the white platic piece to make room for the Defi Link wires. Again, be careful of the circuit board.
STEP 6:
Once the gauges fit securely in the black piece, then get some black silicone and place it around the gauges to secure the gauges, but also to insure that no light comes from the original cluster Out of the stock holes you just enlarged.
That should cover the big pieces. If you have any questions, you know where to find me. Good Luck.
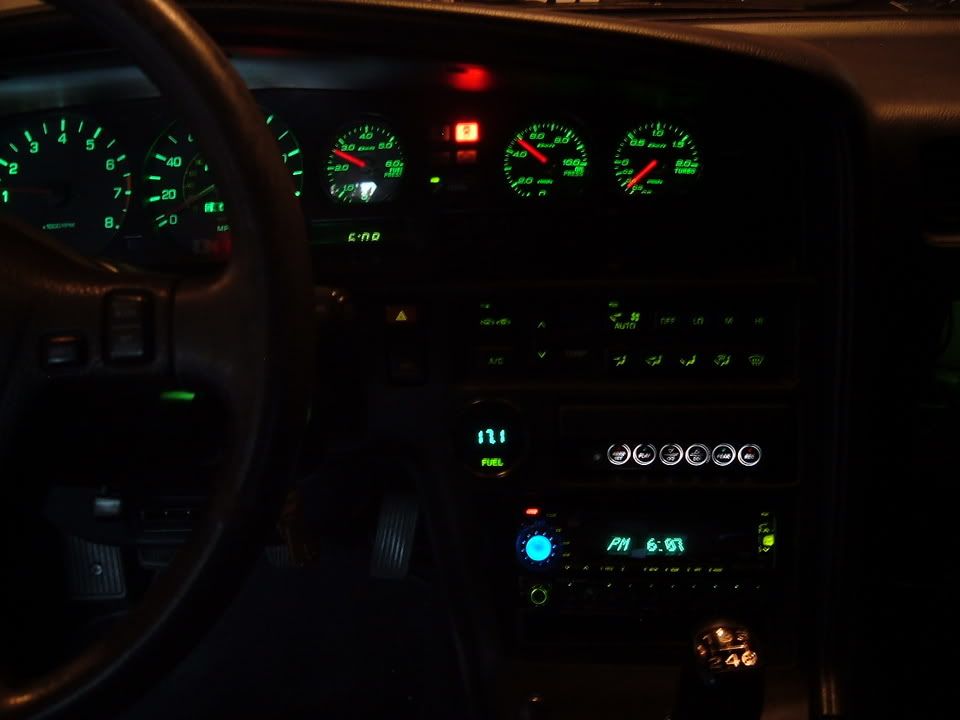
Oh, and sorry about the old steering wheel and the gauges being dusty. I've got more plans for this setup, so this is like the first installment. I accidently covered the gauge needles in too much paint so they don't light up very well AT ALL. But i won't have to worry about that much longer.
Enjoy,
Bryan
You can view all the questions and what not at http://www.supraforums.com/forum/showthread.php?t=322531&highlight=Defi+gauge
This is how i went about completeing the task. I don't have pics of the steps of the process but i can clarify if it needs to more understanding.
STEP 1:
Acquire a second gauge cluster. You're going to need something to practice on, unless you're VERY! good with a Dremel. Remove the platic cover and black cluster holder.
STEP 2:
Remove all the gauges that you plan on replacing. This will give you a good indication on how much room you will have to work with. The gauges that are in the stock location are 60mm. I liked the size of those, but 52mm would fit MUCH easier.
STEP 3:
These gauges are going to need to sit as flat as possible to insure a good look. In order to do this you're going to have to Dremel out a LOT of the white plastic piece of the gauge cluster. Be sure not to remove anything that is holding down the indicator lights. If these are removed you will have no way to light up your gauges. Also, the green circut board on the back if VERY fragle. If that is damaged you will not be able to light up everything. Be careful to not have the gauges touching the circuit board also. This could cause problems.
STEP 4:
After the gauges are sitting as low as possible and as flush as possible, then it's time to get to work on the black piece. This is the really tricky part. If you're using 60mm gauges then you will need to cut out and enlarge the black piece gauge holes. Since the black piece has indentations on the rear, those will need to be removed and then the gauges will need to fit Firmly in the new cut openings.
You're trying to make the gauges as snug, and flush as possible to give it the "stock" look.
STEP 5:
For my Defi's I had to cut holes in the rear of the white platic piece to make room for the Defi Link wires. Again, be careful of the circuit board.
STEP 6:
Once the gauges fit securely in the black piece, then get some black silicone and place it around the gauges to secure the gauges, but also to insure that no light comes from the original cluster Out of the stock holes you just enlarged.
That should cover the big pieces. If you have any questions, you know where to find me. Good Luck.
Oh, and sorry about the old steering wheel and the gauges being dusty. I've got more plans for this setup, so this is like the first installment. I accidently covered the gauge needles in too much paint so they don't light up very well AT ALL. But i won't have to worry about that much longer.
Enjoy,
Bryan
You can view all the questions and what not at http://www.supraforums.com/forum/showthread.php?t=322531&highlight=Defi+gauge