Some Questions on Doing HIDs the Right Way

Silver MK3

New Member
Jan 24, 2011
1,517
0
0
Madison, AL
OK, sorry about never getting some pictures up of the final product. I have a bunch in this post.

My driver's side ballast still doesn't light on the first try. I should be getting new ballasts around the 10th of December when they get the redesigned ones in.

The only thing that I have noticed is that the high beam indicator does not come on any more, and when I have the fog lights on and turn on the high beams the high beams will not turn off until the fog lights are turned off. I assume this is because there are no actual headlights plugged into the car. If anyone knows how to get around this please let me know.

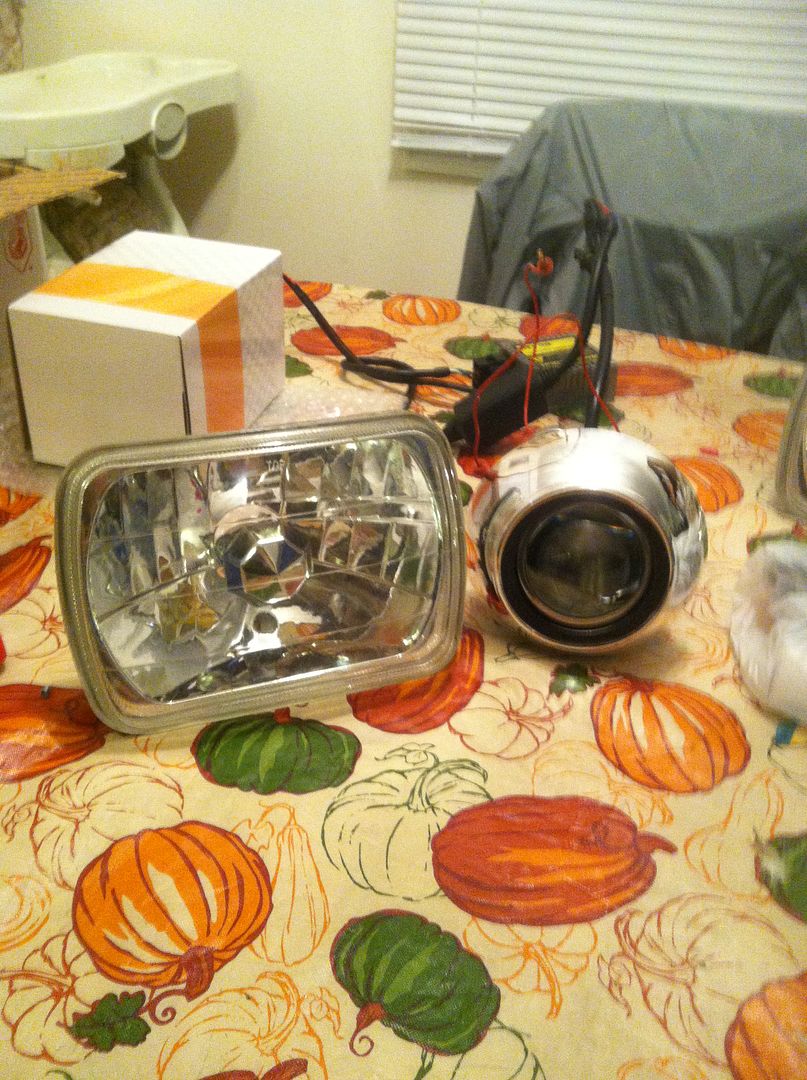
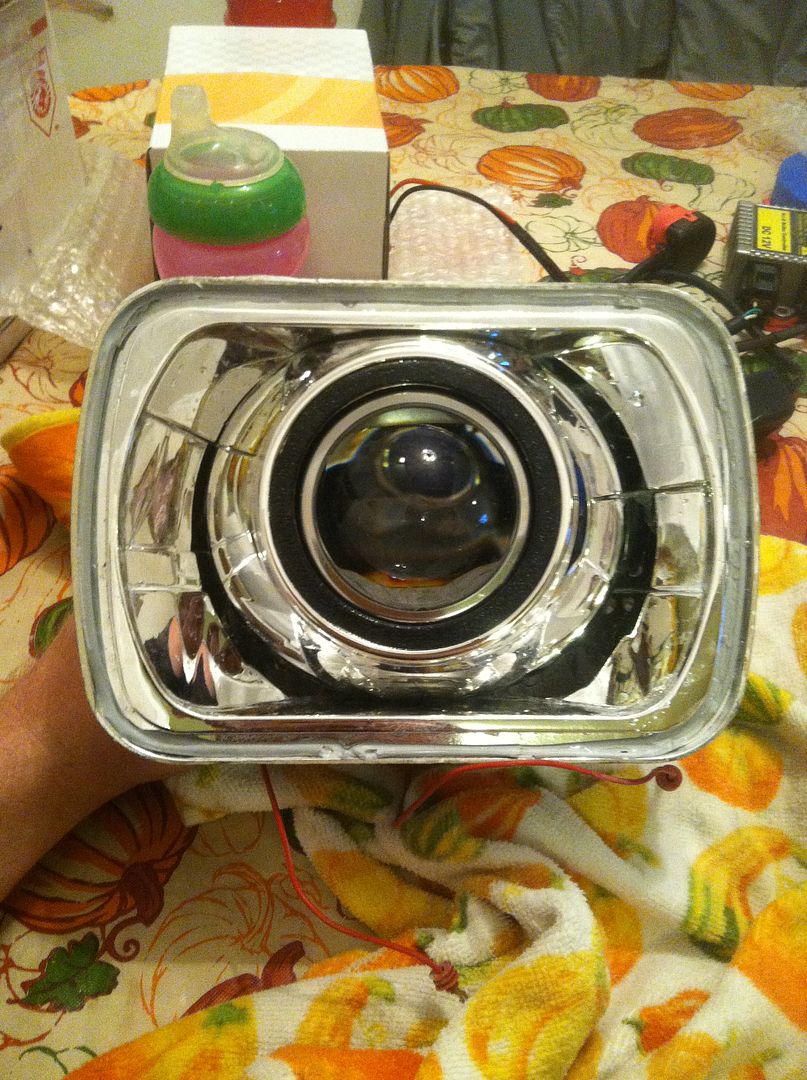
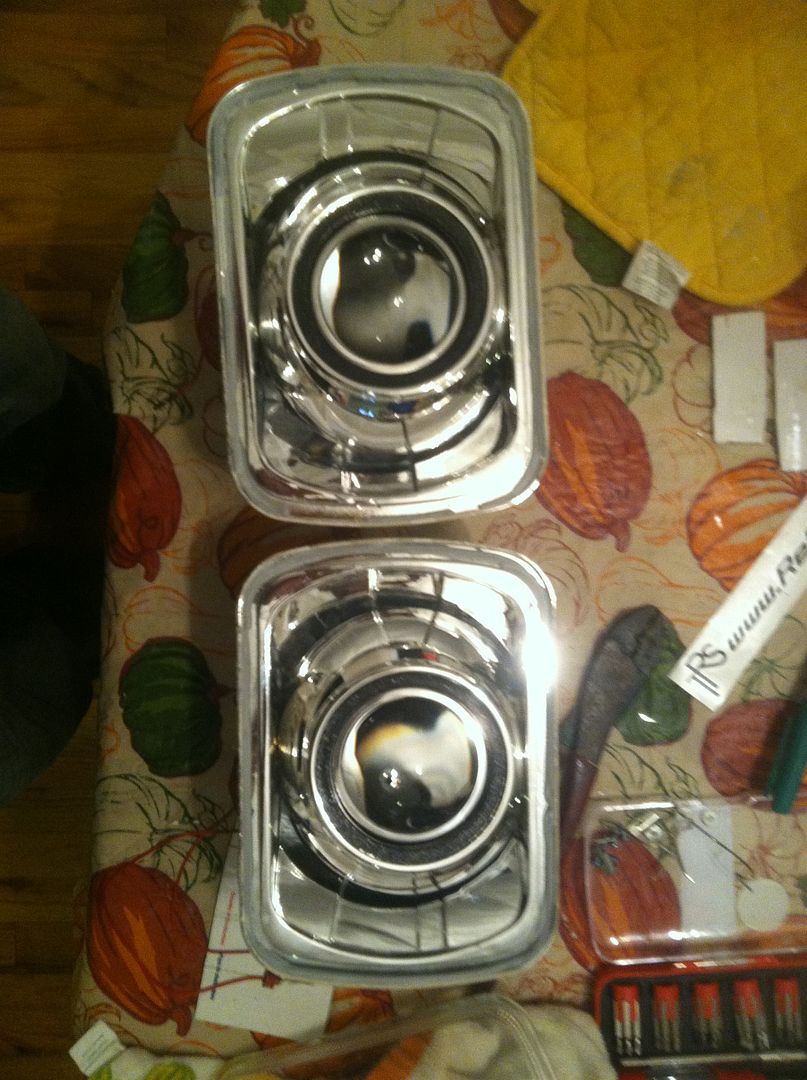
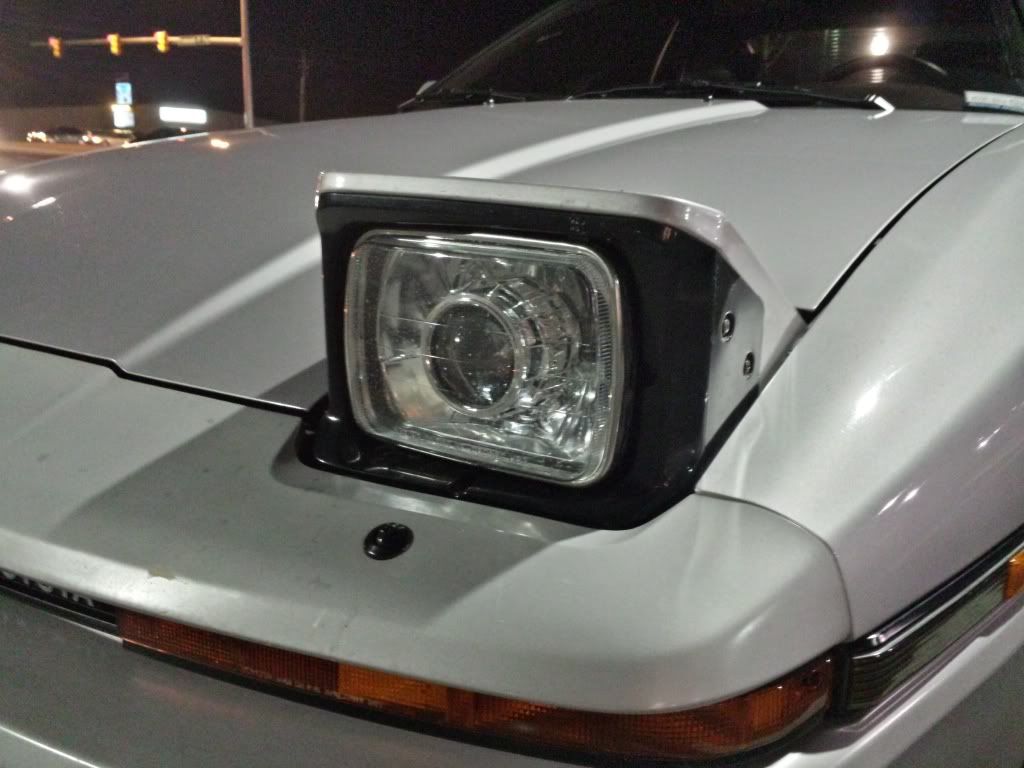
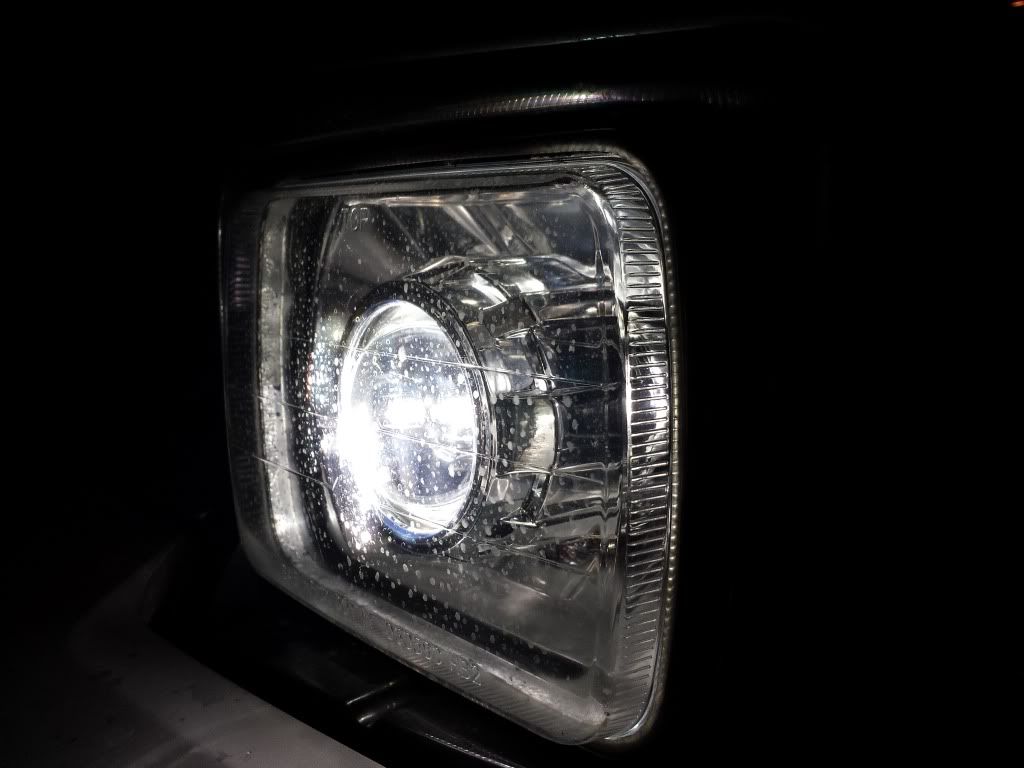
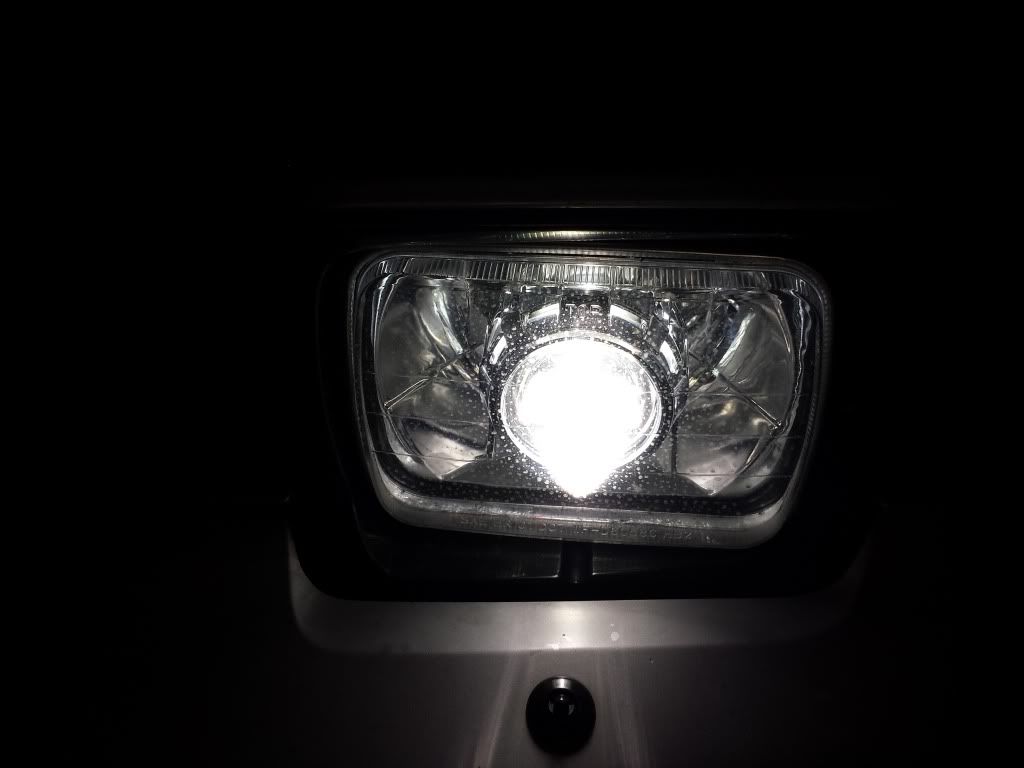
Here they are, there's a lot of them. (Sorry they aren't of the best quality) Sorry that the lenses are dirty, I drove the car in the rain the other day to make sure that the lights were water tight. The good thing is that they are water tight, I took three balloons on each side and cut the tops off and used them to make a sort of rubber cap on the back of each light. I do get a small amount of fogging in in the corners of the lights, but this doesn't bother me since they are pop up headlights.

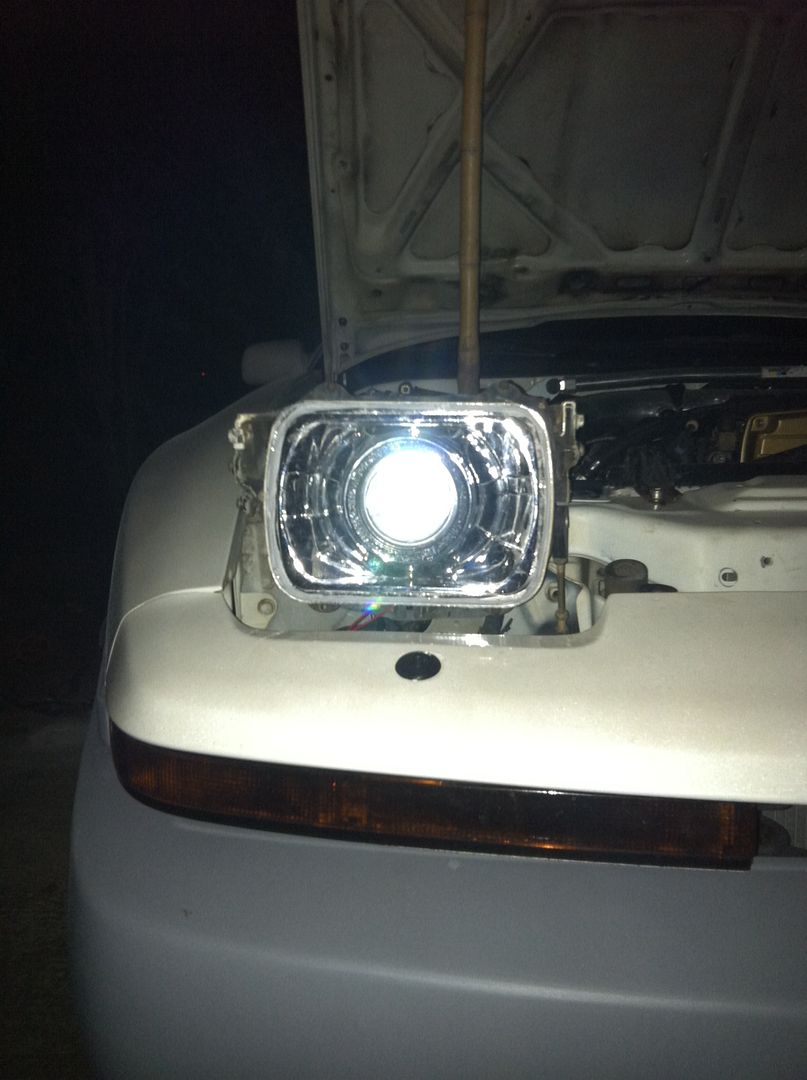
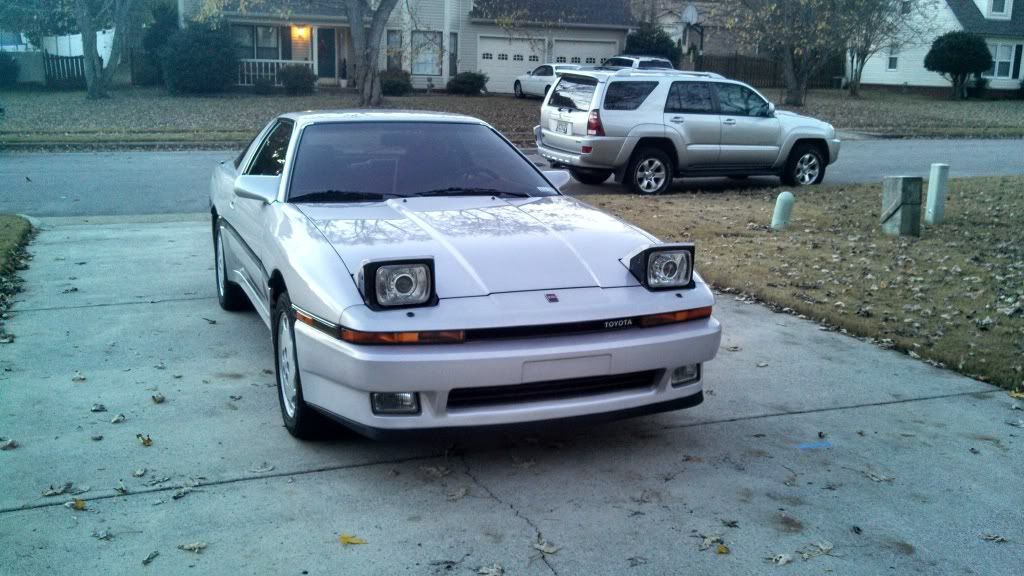
Here they are in the car.


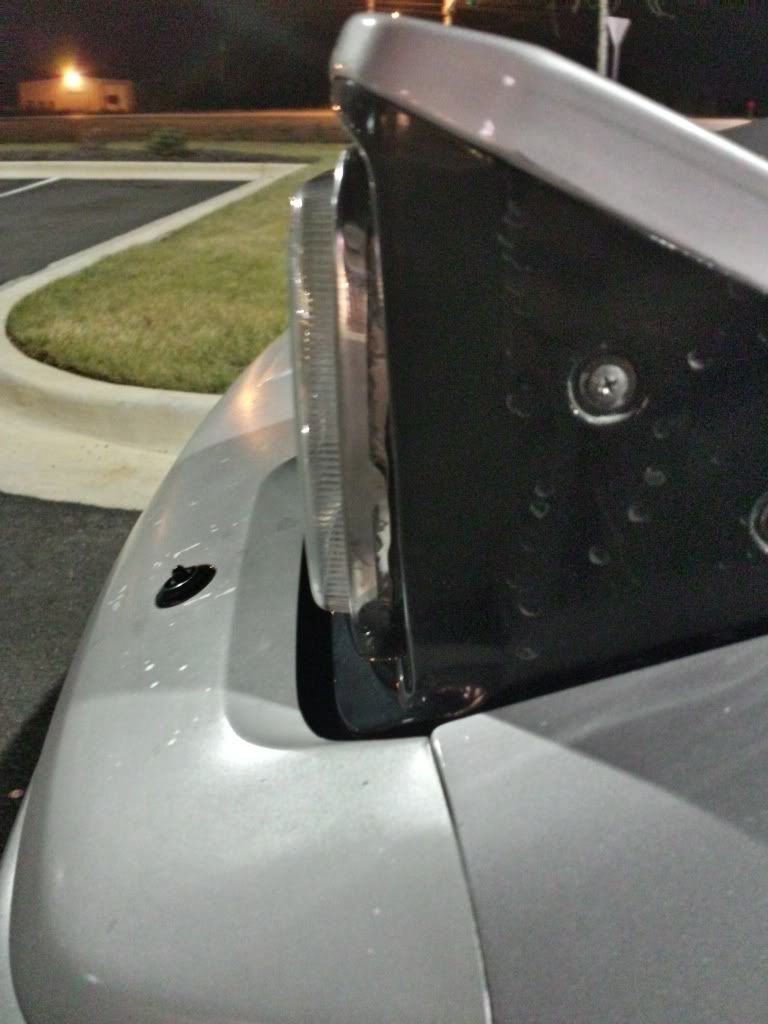
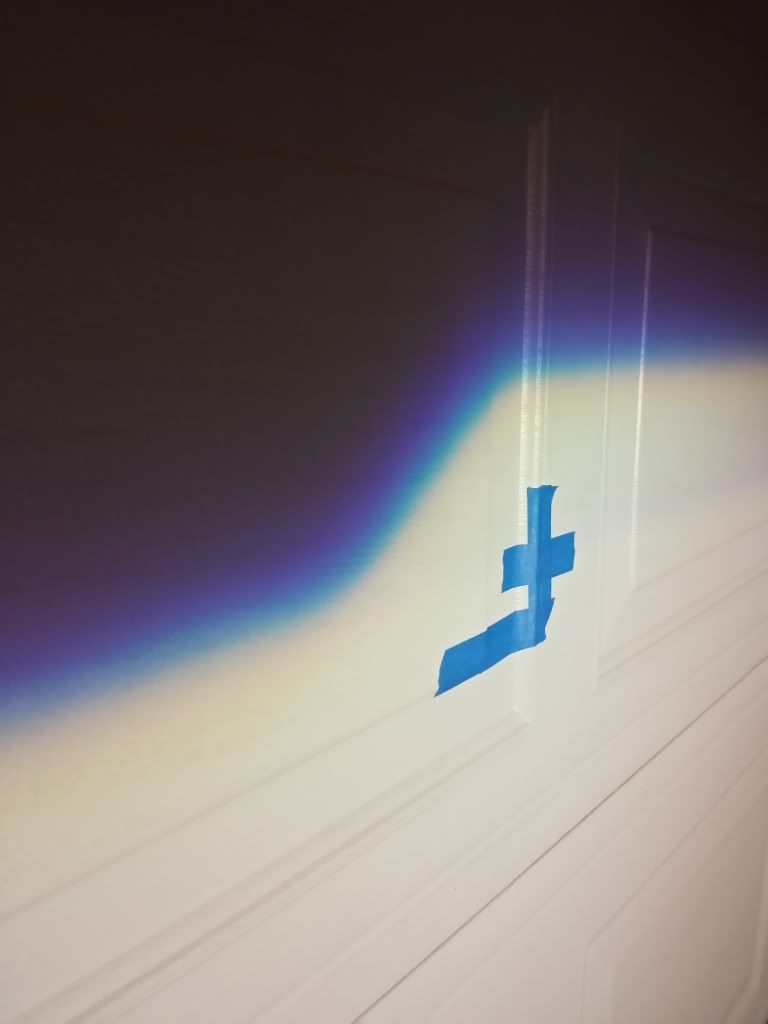
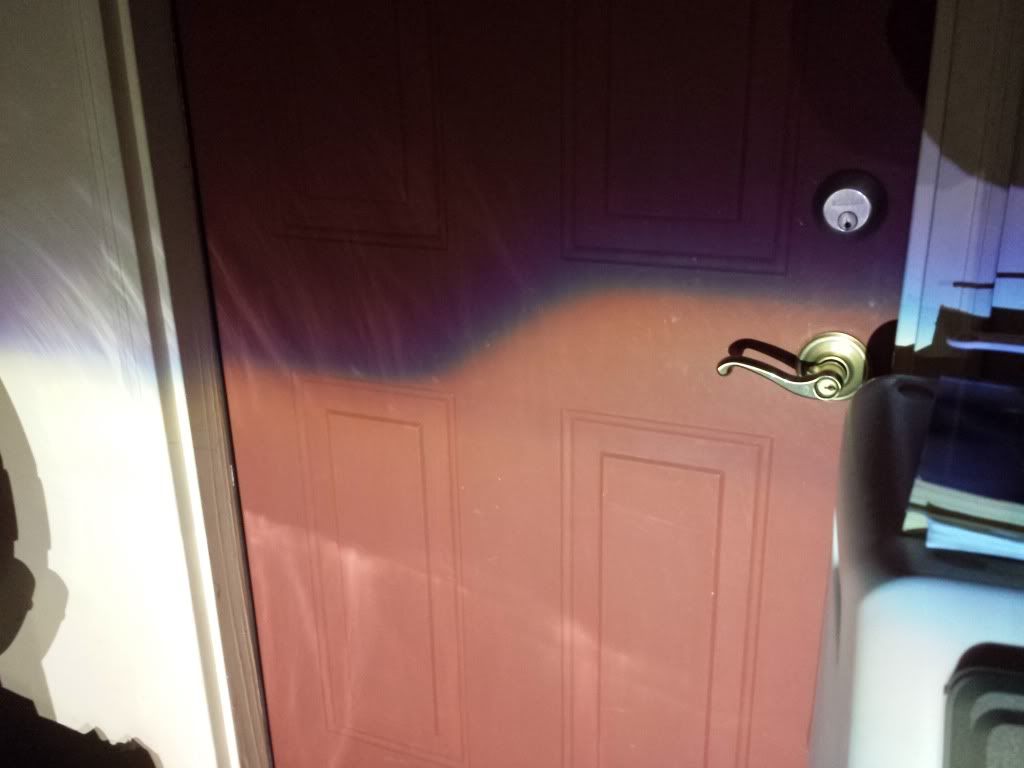
Here are a few pictures of the actual cutoff upclose. I think it looks really good.


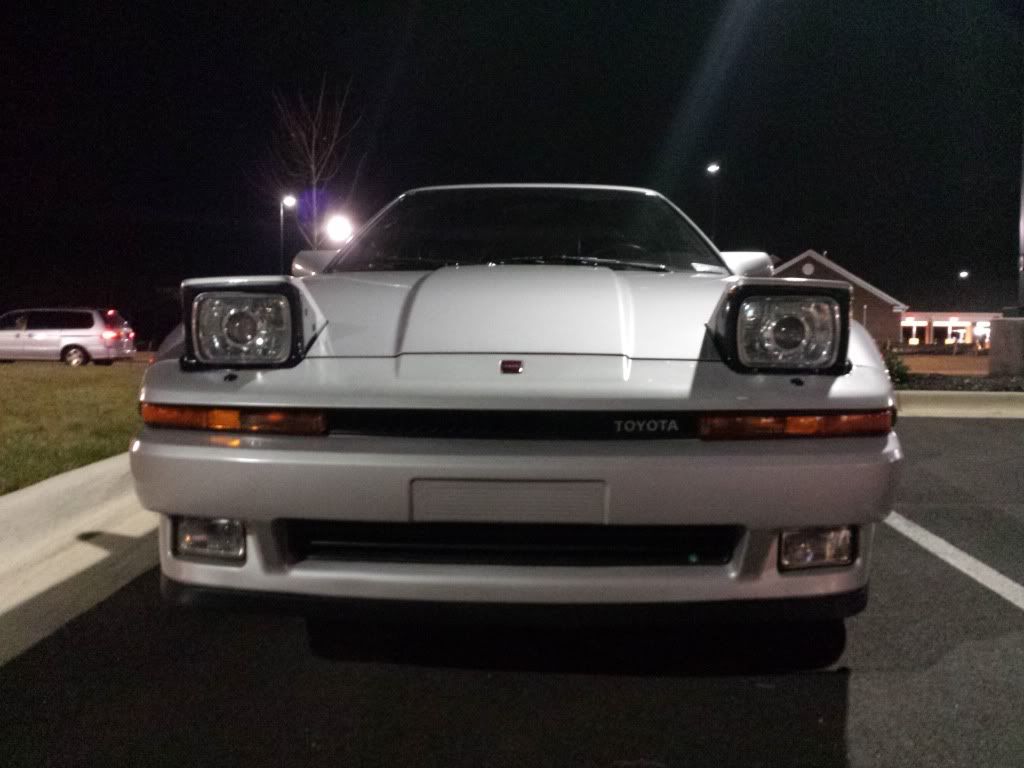
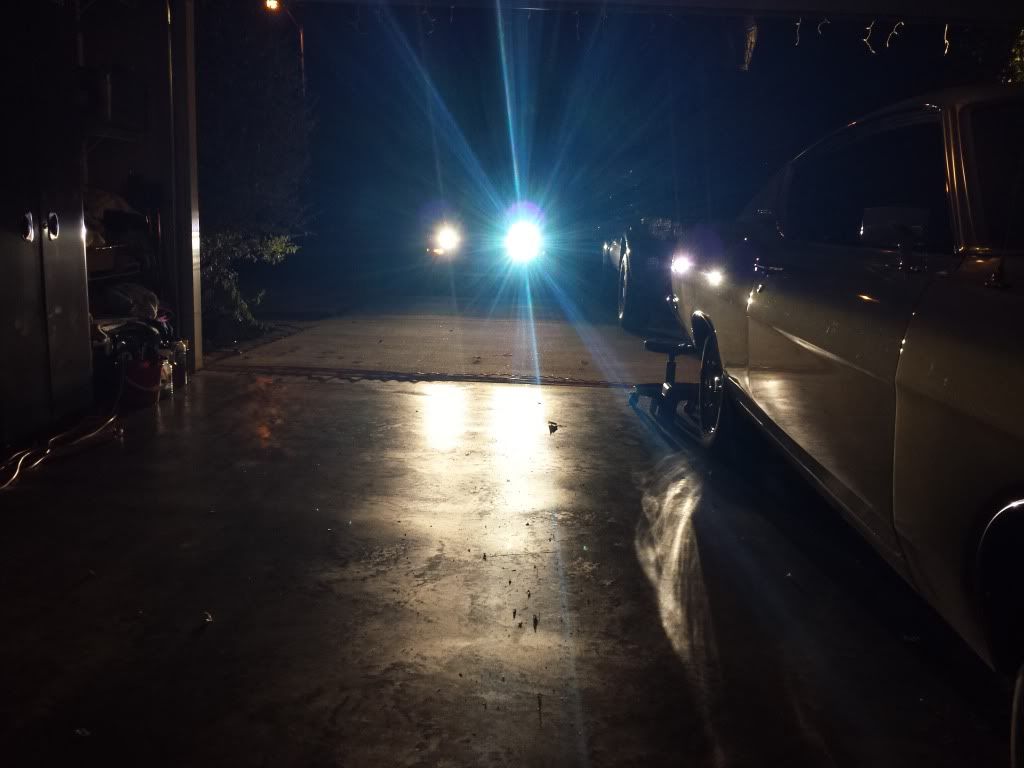
Some pictures of the lights or looking at the car.


Trying to get a picture of the color flicker.


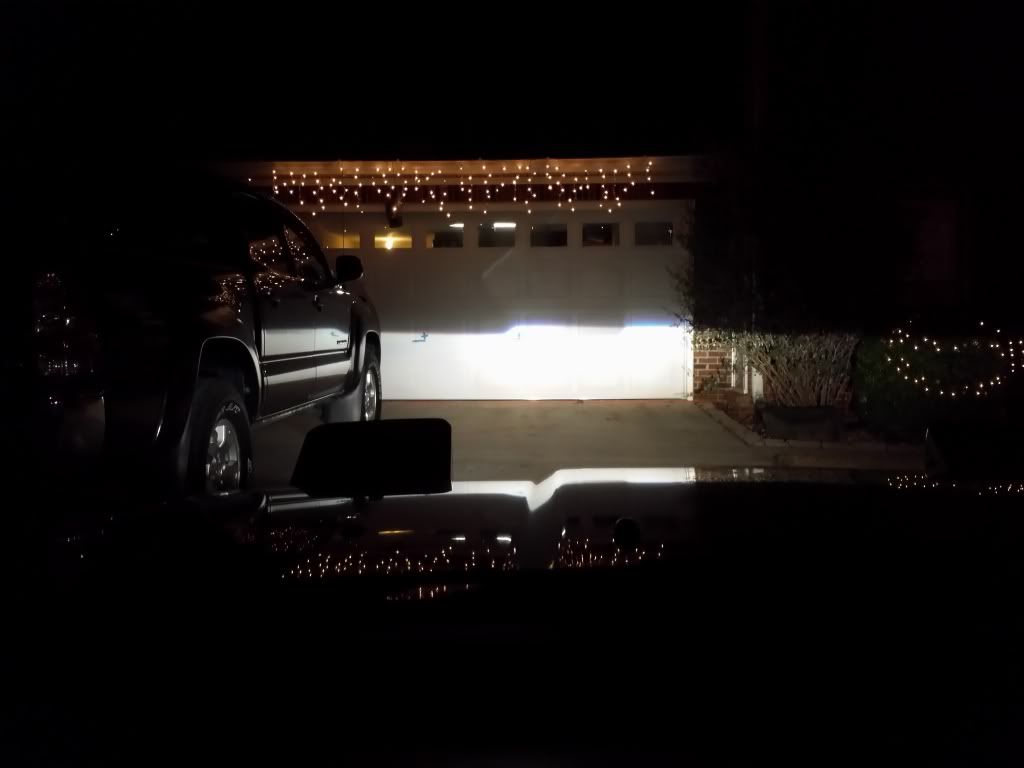
Some output pics looking at the garage. The lights arent crooked, it is the driveway and garage door.
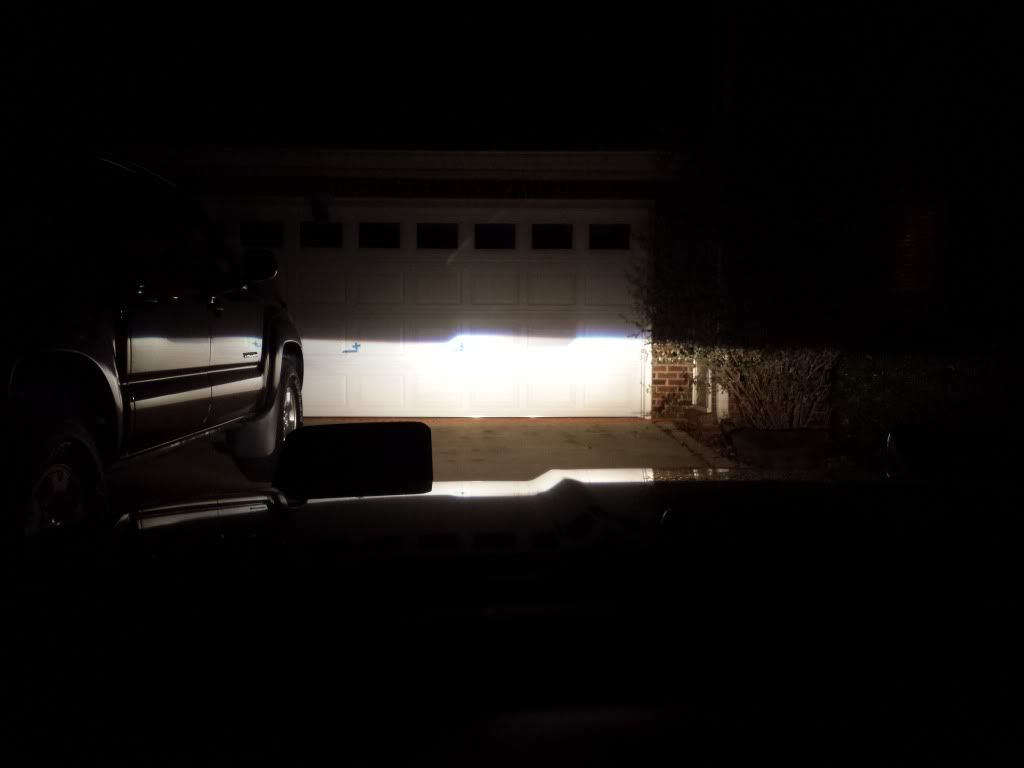
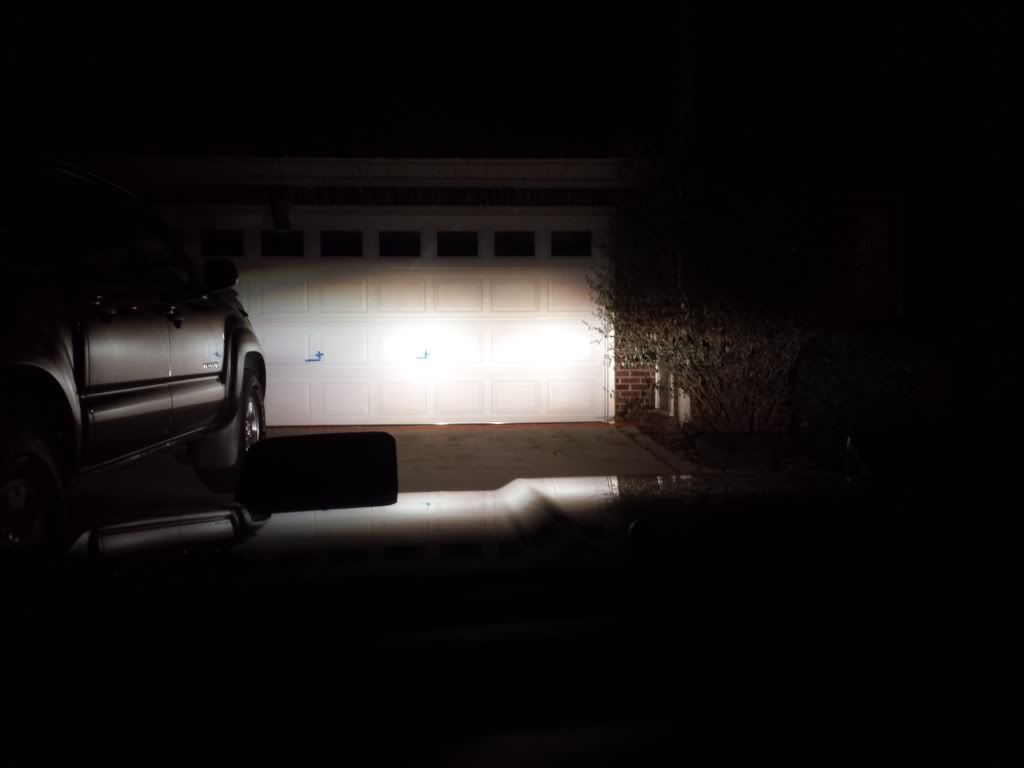


High beam pattern

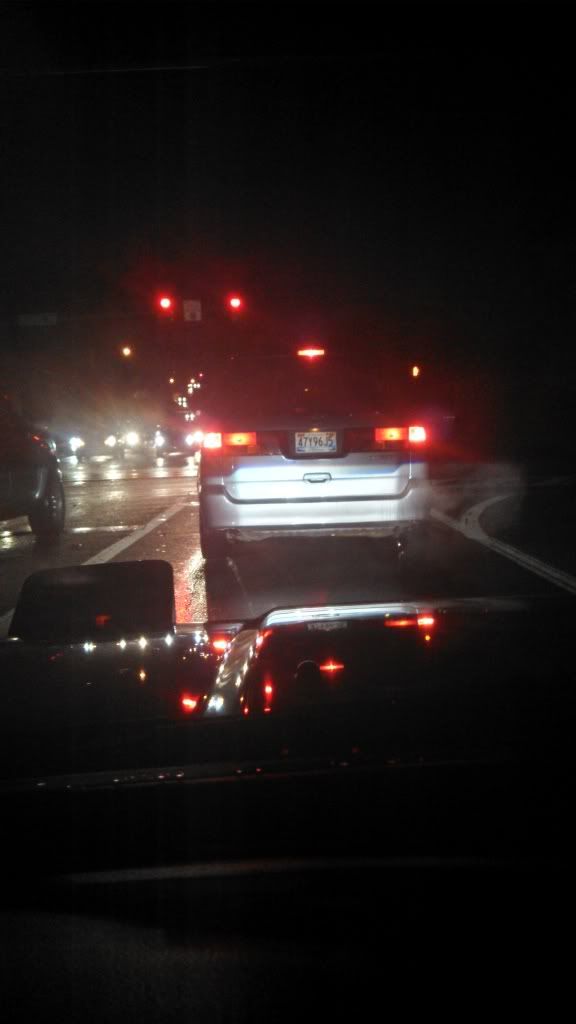
Looking at the back of a Honda Odyssey while waiting at a light that takes forever.


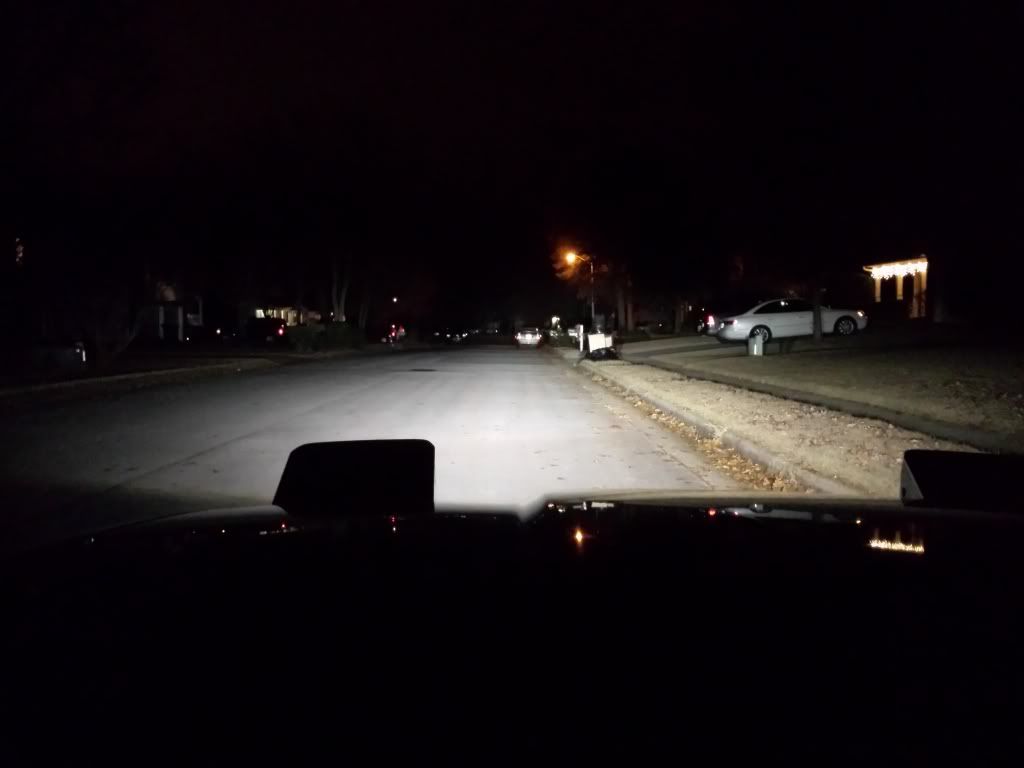
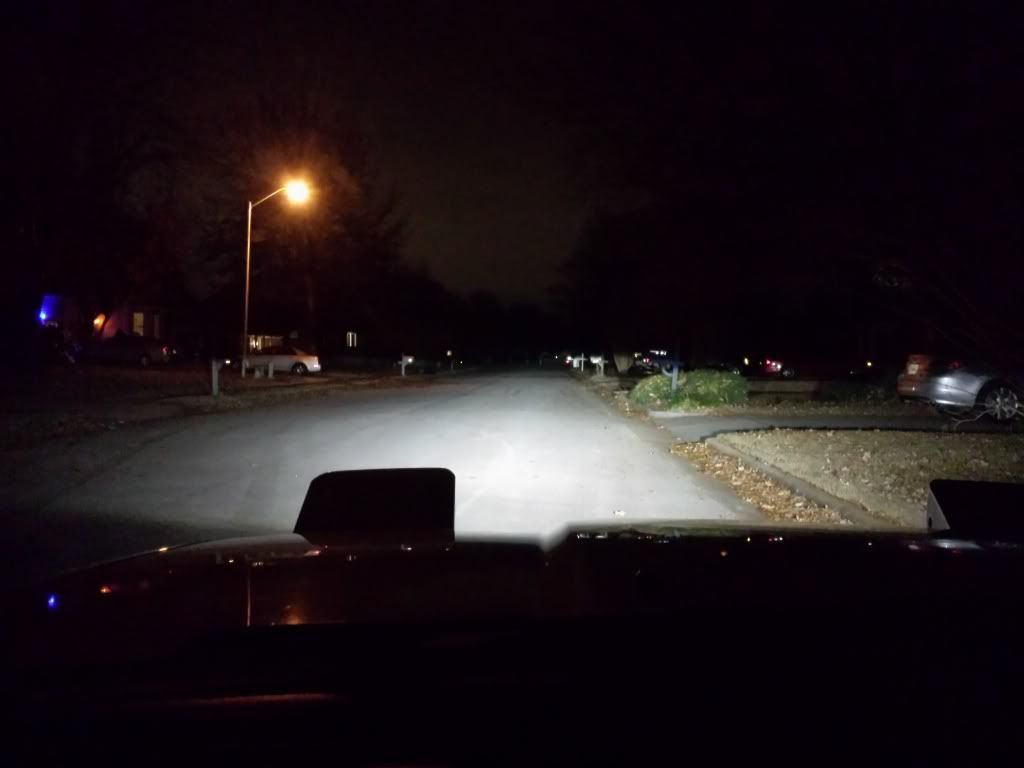
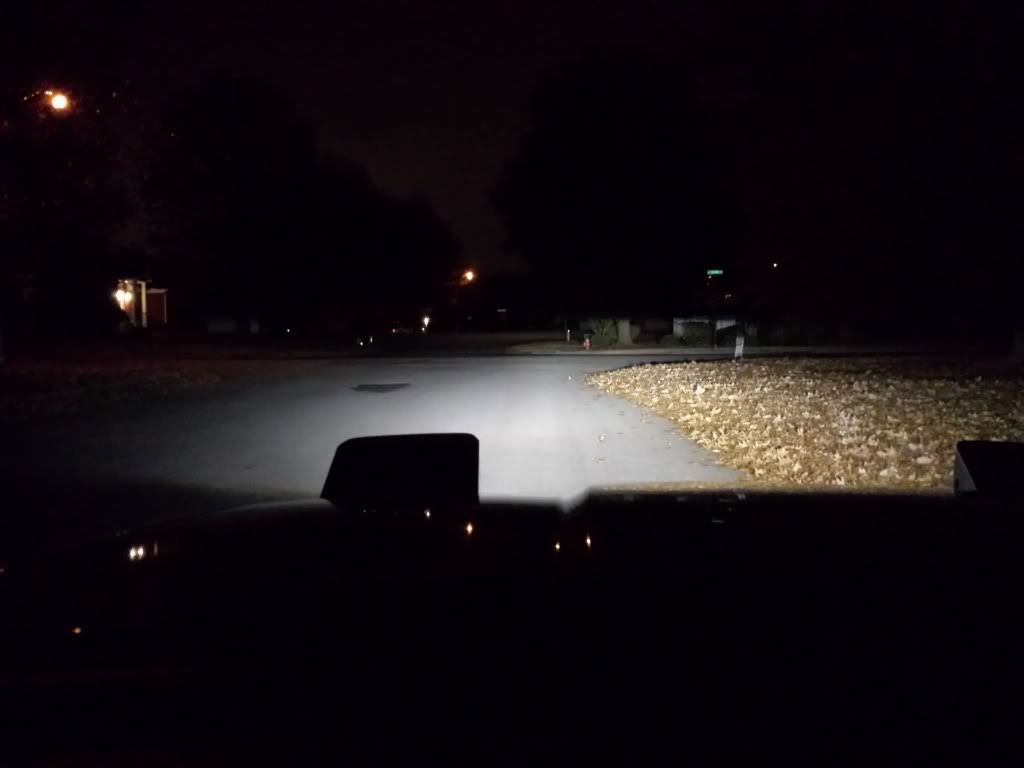
Here are a few from around the neighborhood. The pictures are in pairs, the top one is low beam with the bottom one in the pair being high beam.

The dot in the middle of the picture is a Lexus in someones driveway. In real life you can actually see the car with the low beams on was you come down the road. Just for a comparison even with my Hellas with the high beams on I could not see this Lexus.


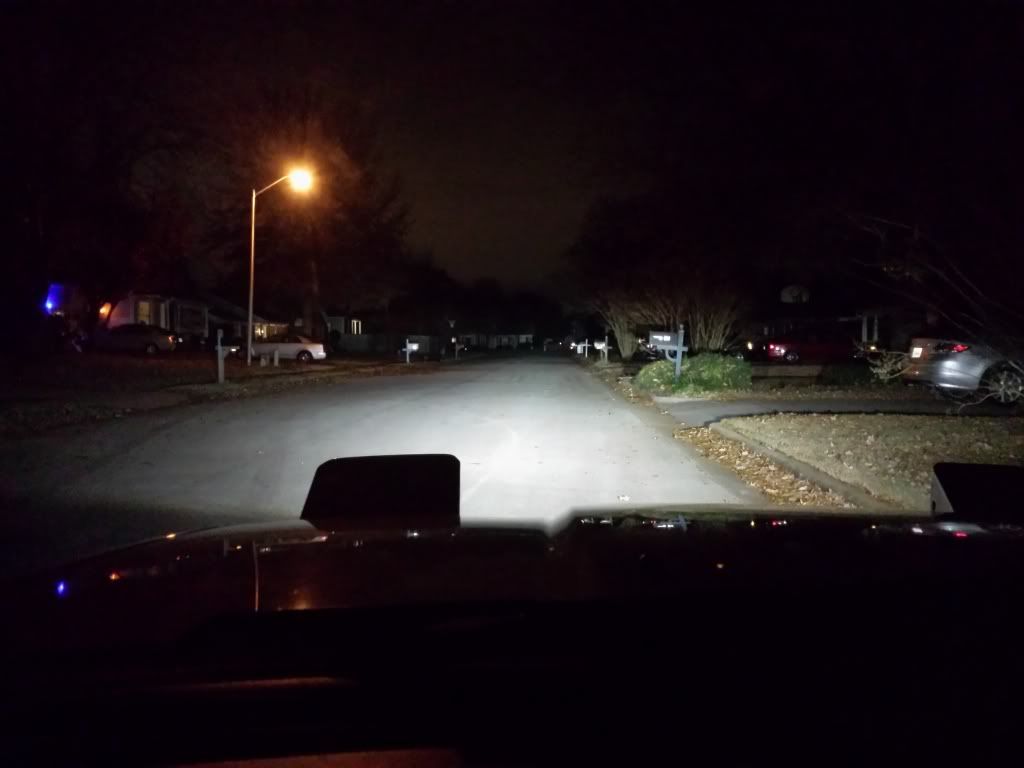
In this set you can really see the house at the end of the road with the high beams on.


I think this set came out the best. If you look at the big tree you can really see the difference in the high beams.

This is definitely one of the best things I have done to the car. This gives the performance of a modern headlight combined with the aesthetics of pop up headlights.

If anyone has any questions or comments feel free to post them.
 

akito

Keep Laughing.You're Next
Jul 31, 2006
1,568
0
0
Springfield/Va
This is sick! Can't compare to the tsx but still super great for what they are. My order should be here this week and hopefully i can run my set up next weekend. Thanks for the picture!
 

T3rril79

Member
Dec 10, 2010
246
0
16
Huntsville Alabama
akito;1978164 said:
This is sick! Can't compare to the tsx but still super great for what they are. My order should be here this week and hopefully i can run my set up next weekend. Thanks for the picture!

I got a chance to ride in the car after the hid upgrade. Seriously everything is vividly clear and we didn't get honked at for blinding people lol
 

Silver MK3

New Member
Jan 24, 2011
1,517
0
0
Madison, AL
scottiedawg66;1978139 said:
Looks like a huge improvement over stock!

Oh it definitely is. It is definilety on par or even better than most factory projector set ups and its in a car that is about to be 27 years old! :)

akito;1978164 said:
This is sick! Can't compare to the tsx but still super great for what they are. My order should be here this week and hopefully i can run my set up next weekend. Thanks for the picture!

No problem. I think this is probably the best option for Supra owners. Anything bigger or OEM would most likely require cutting the radiator support and all kinds of other stuff whereas this requires cutting nothing on the car. I don't like hacking into my car at all, I would be worried to permanently ruin something. If I wanted to I could have the stock headlights back in 30 minutes. Not that I would ever do that now. I don't think I could ever go back to halogens.

T3rril79;1978174 said:
I got a chance to ride in the car after the hid upgrade. Seriously everything is vividly clear and we didn't get honked at for blinding people lol

Thanks!
 

jessemkiiis

New Member
Sep 28, 2009
490
0
0
Childersburg AL,
Started tinkering with a set of FXR projectors, how did y'all build the lense spacers

p1978642_1.jpg


p1978642_2.jpg


p1978642_3.jpg


p1978642_4.jpg


Its still a work in progress everything is just mocked up. I'll be using macullah ballast with D2S 4300k bulbs
 

Silver MK3

New Member
Jan 24, 2011
1,517
0
0
Madison, AL
For the lens spacer I bought two of these.

http://www.lowes.com/pd_496353-205-...3&UserSearch=496353&productId=50019740&rpp=32

Then I took a builders square and drew a line half an inch from the side that is completely flat. Then I took a pair of tin snips and cut it very slowly and carefully as to not pinch the metal and mangle it. (there is probably a better way to do this if you have the tools.) Then I put the piece of metal into the recessed ridge on the lens(assuming your has one like mine did) and then cut it so there was about 2-3 inches of overlap. Now you can get the entire piece of metal into the ridge. Then I took some automotive high temp silicone and used that to seal the spacer metal to the lens. Then when everything was into the housing and I was ready to seal it up I used the rubber butyl that I bought from the retrofit source and laid that along the edge on the housing and pressed the metal spacer into it seal it up after I heated up the housing in the oven.

Just in-case you haven't heard or seen, but the FX-R projectors require a lot of modification to the car while the ones that I used don't require any. Here's a thread where another guy used them. He had to cut a lot of metal I believe.

http://www.supramania.com/forums/showthread.php?154057-New-Retrofitsource-FX-R-Projectors
 
Last edited:

Silver MK3

New Member
Jan 24, 2011
1,517
0
0
Madison, AL
scottiedawg66;1978271 said:
Would it be possible to get a summary of what parts you used, cost, and the "how to"?

I'll try and give a summary here. If I think of something that I forgot I'll edit the post or just post again. Hopefully others can understand this. :)

Parts:

Pilot Automotive 7x6 Housing on Amazon $30
Mini H1 kit From The retrofit source $300
I got the entire kit with projectors, ballasts, XB35 bulbs (can get Morimoto bulbs for $20 cheaper), shrouds, rubber butyl, and H4 wiring harness.
Pack of balloons $1-2
Industrial Strength Velcro (to secure ballasts to back of metal bumper) $5
8 Longer Screws to mount headlight to car (i believe they were M4 x 20 or 15) $2
I would just take a stock screw with you to lowes to confirm the size
2 2in PVC caps. $5
JB Weld $7
Zip ties to secure wires.
2 of the metal flashing pieces linked above $2

So total in parts is probably about:$350
But I probably have more than 25 hours or so into them including the testing time and all that.


1) Order Kit and Housings
2) Bake housings at about 225* for 6 minutes or so and pry the lenses off of the housings using a flat tip screw driver
3) You can do this now or later. Take a pair of needle nose pliers and peel the old sealant off of the housings and lenses. It will be unusable by the time you are done
4) Take a Dremel and cut out the center of the housing. Then using a file or something of the like smooth the surfaces out until you are getting close to coming through the other side of the housing (don't go through though) The projectors have notches on the sides so I had to take more material off of the housing on the sides to make it sit better. This step takes a while. Make sure you keep the projectors away from your work area as there will be a lot of dust and you don't want to get that inside of the projector.
5) Take the PVC caps and cut the open side off so that just a little sticks out past the hexagon part.
6) The caps will probably just a little to big to fit in so I mounted mine to my drill and spun it on the drill while I held a file up to it to take just a little material off the outside so it would fit.
7) Now take a (7/8" I believe, but you will want to check. The size of the hole should be just barely larger than the mounting shaft on the projector.) cutting bit thing(cant think of the name right now. You would normally use this to cut holes into wood) and cut a hole directly in the center of the PVC cap.
8) Now take the Dremel or a file and give the inside of the hole an angle(basically widen it but only in one direction) so that the projector will better sit in there.
9) Now you take a drill bit and drill another hole just bigger than the solenoid wires coming off the projector. Drill this hole as close to the "wall" on the PVC cap. The wires will run through here for the high beam solenoid.
10) Now you will JB Weld the PVC cap to the housing. I put some around the outside and some on the inside as well.
11) After the JB Weld has cured you take the projector and mount it in the hole. Use the smaller silicone washer they put in the kit on the inside of the housing so it backs up against the PVC cap.
12) Take the lock nut and tighten it down finger tight on the projector. Make sure the bulb holder will sit flush on the projector or the bulb will not sit right and throw off your cutoff.
13) make the spaced as I described above.
14) Mount the shroud onto the projector using the screws provided
15) make sure that you ran the wires through the hole before you tighten down the projector for the final time
16) make sure everything is in the housing and is like it is supposed to be and now you can seal the housing to the lens spacer. I described this above as well.
17) Run the wiring harness through the car. Make sure you have good grounds.
18) Mount the ballasts and the relay control box wherever you please. I put mine on the crash bumper up front using Velcro. I made it very secure using zip ties.
19) Test the wiring with the headlights. If everything works as it should you can put the balloons over the back of the housing. I took the end opposite the one you blow in and cut the tips off and stretched that around the PVC cap. I used three balloons on each side.
20) Now mount the headlights into the car using the longer screws. Park the car facing a while while you do this so you can adjust the rotation by contorting your hand into the space behind the headlight. Just grab the projector and slowly adjust it until it is perfect. You should check this before you completely seal it up using a flash light or so this way it is close to correct but it will require minor adjustments once in the car.
21) Once they are adjusted correctly aim the headlights so the bottom cutoff line so that it is about an inch or two below the height of the center of the projector. For me at stock ride height this was somewhere around 28" I believe.
22) Now you can put the black covers back on and you should be done.


I hope I covered everything, its been a while since I actually did the work for this. For pictures you can look through the thread and probably see most everything that you need to see. If you have any questions feel free to ask.
 

suprarx7nut

YotaMD.com author
Nov 10, 2006
3,811
1
38
Arizona
www.supramania.com
Silver MK3, nice work! That looks like a good cutoff.

QWIKSTRIKE;1972705 said:
http://www.rallylights.com/modular-headlamp-mounting-bracket.html http://www.rallylights.com/all/lights/headlamps.html?p=7 I ordered the 90mm frames and mounting adjusters ans welded them together, and painted them black.

http://www.rallylights.com/all/lights/headlamps.html?p=6 These are DOT street legal

QWIKSTRIKE;1972794 said:
Yes I have HID 8000k's but will probably change them to the 6000k's for a tad brighter light. They work excellent and you can see with the white primered hood the cool blues were installed. I forgot to mention that I had to cut and message the stock buckets to get these in, and did not need to cut the radiator support.

Pretty sure those are NOT DOT legal once you put the HID bulbs in there. Those are made for halogen bulbs, not HID. Can we see the cutoff?
 

Silver MK3

New Member
Jan 24, 2011
1,517
0
0
Madison, AL
suprarx7nut;1978712 said:
Silver MK3, nice work! That looks like a good cutoff.

Thanks!

I keep finding myself watching the cutoff along fences, and watching the speed limit signs turn blue and purple as them come in and out of the cutoff.
 

Silver MK3

New Member
Jan 24, 2011
1,517
0
0
Madison, AL
scottiedawg66;1978757 said:
Thanks for the parts list and write up. I will probably pester you with questions when i tackle this.

No problem, feel free to ask questions. It probably sounds a little strange or confusing now, but when you have the parts in your hands it will make more sense.
 

Silver MK3

New Member
Jan 24, 2011
1,517
0
0
Madison, AL
Here's a small update.

I got the redesigned ballasts in the mail with the stronger ignitor and installed them in the car. The first time I turned the lights on they flickered a whole lot and took forever to warm up. Then the second time the driver one did the same thing and the passenger side did not even fire. At this point I was about to get angry, but I didn't give up on the new ballasts just yet. After I did a little bit of searching I saw some people posting saying that the bulbs will have to get used to the new ballasts since they are digital ballasts and have a different design than the previous ones. It appears that these people were correct. After the first two initial starts with the new ballasts they have worked flawlessly. They start up every time on both sides, and don't flicker or anything like that. I think they even warm up faster than the old ones. With these ballasts it only takes a few seconds for them to warm up.
 

87v6bird

New Member
Jan 17, 2014
6
0
0
AL
I'm glad I ran into you at the car show on Sat. Seeing your lights convinced me to go ahead and take the plunge on the Firebird's headlights. They looked good!
 

Silver MK3

New Member
Jan 24, 2011
1,517
0
0
Madison, AL
87v6bird;1996205 said:
I'm glad I ran into you at the car show on Sat. Seeing your lights convinced me to go ahead and take the plunge on the Firebird's headlights. They looked good!

Thanks! I'd like to see the Firebird sometime. You definitely won't regret doing the headlights, it's one of the best things I've done to the car. It's great being able to see at night. It looks like the Firebird uses the same headlight as the MK3, so there shouldn't be too many differences. Let me know if you have any questions or need any help.
 

Silver MK3

New Member
Jan 24, 2011
1,517
0
0
Madison, AL
Pretty much any housing will work, brand doesn't really matter. Just don't use any with glass lenses, they will distort the projector output.