So I havent been on supramania in a long time, I have had no internet and no computer. But my projects have been in overdrive. I nee this car done for me, and to get my life straight. Im only 21 and am struggling to survive. But im dumping everything I have into this car. Heart and soul. Ive had the car for about three years and some change. Owned it , drove it turbo swap and blew the head gasket, replaced the gasket and then started it to only have the exhaust camshaft sieze up, snap the timing belt, and shear the crankshaft pulley key. Fried the head, cams, and crankshaft.
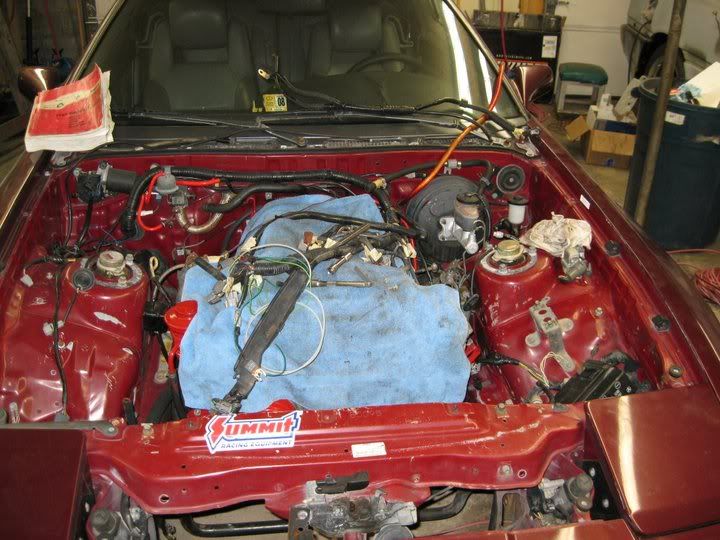
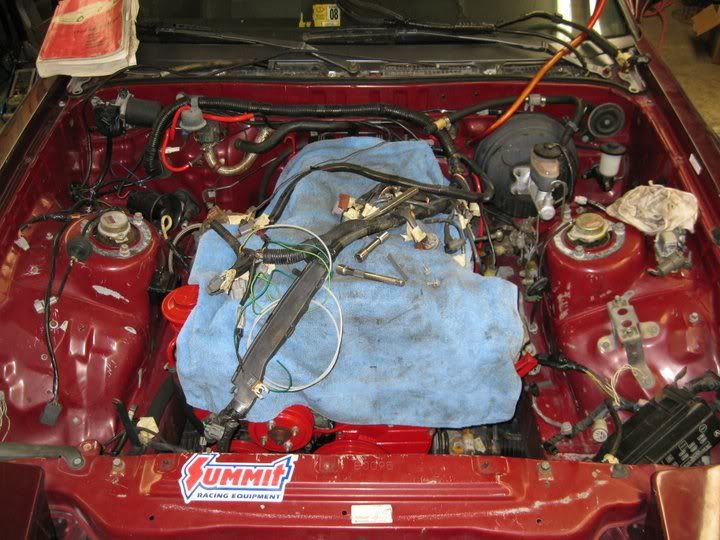
The car sat for a year or so until I had saved up a little money and until I had met a really great friend. Mark Eastep. So I had my car towed to his garage and we began work.
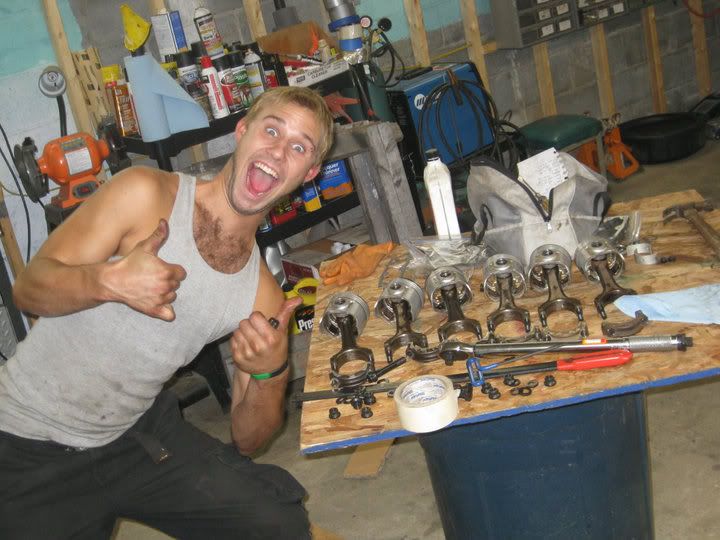
I couldn’t have done any of this and gotten to this point with the car and my life without Mark and his wife Dana. I owe everything to them for helping me and giving me the opportunity to build the car in this fashion and with such precision to detail. Thank you
Here are the old build threads for my car, from the day I got it till what you see now. My progress over the past years.
http://www.supramania.com/forums/showthread.php?82092-7M-BHG-repair-and-rebuild
and
http://www.supramania.com/forums/sh...te-rebuild-and-upgrades...........again/page2
here is the link for the photobucket album with all the build pics. They are not in order, i had trouble uploading them properly.
http://s56.photobucket.com/albums/g180/street_skater069/Final Motor Rebuilding and start/
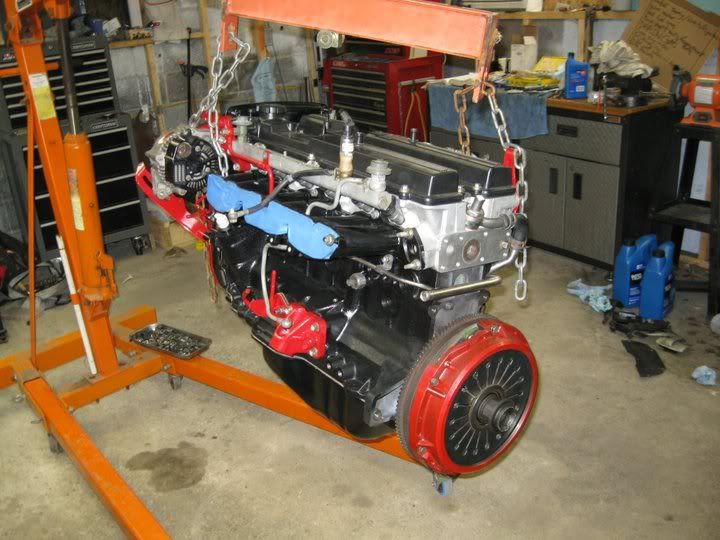
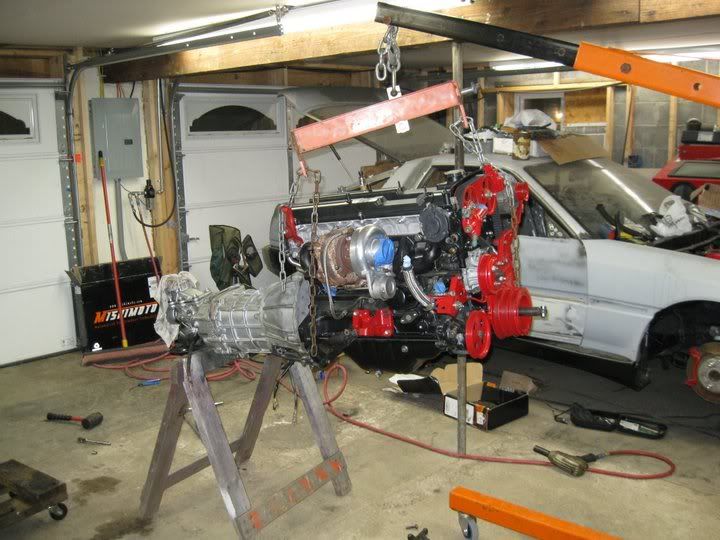
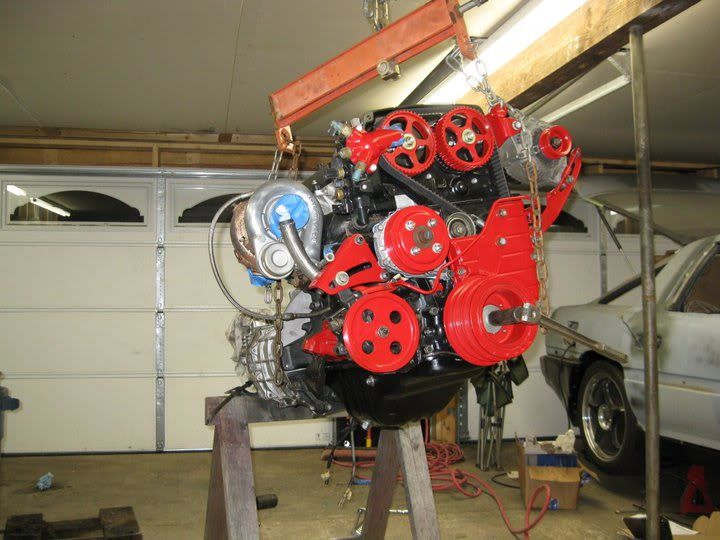
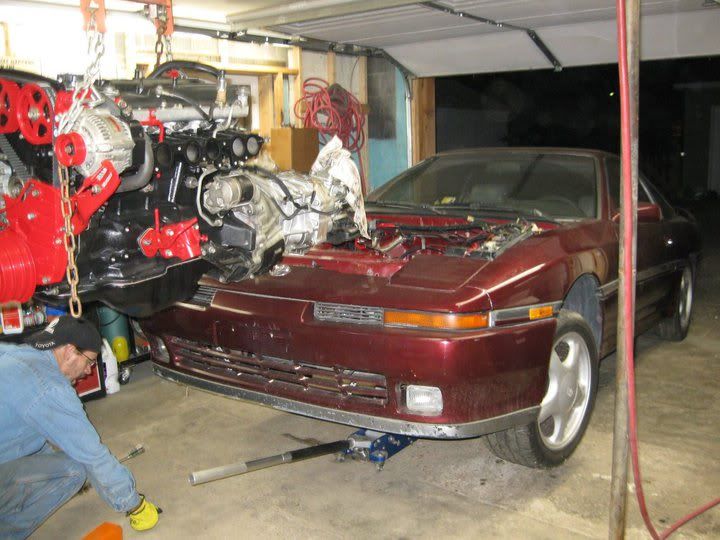
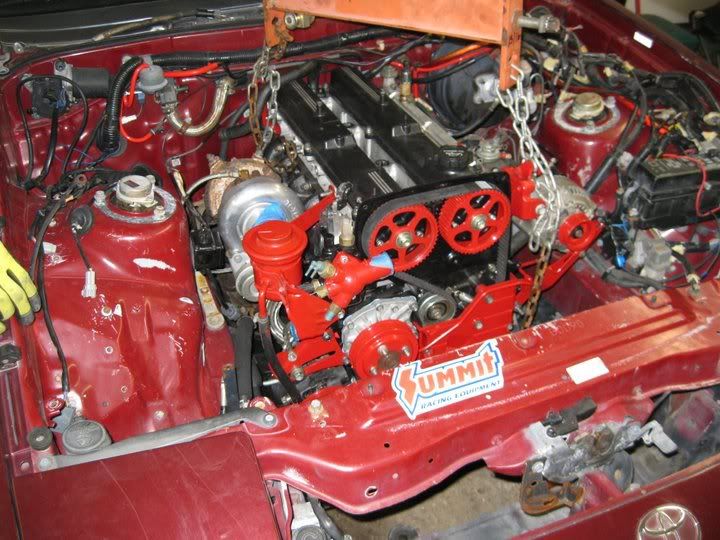
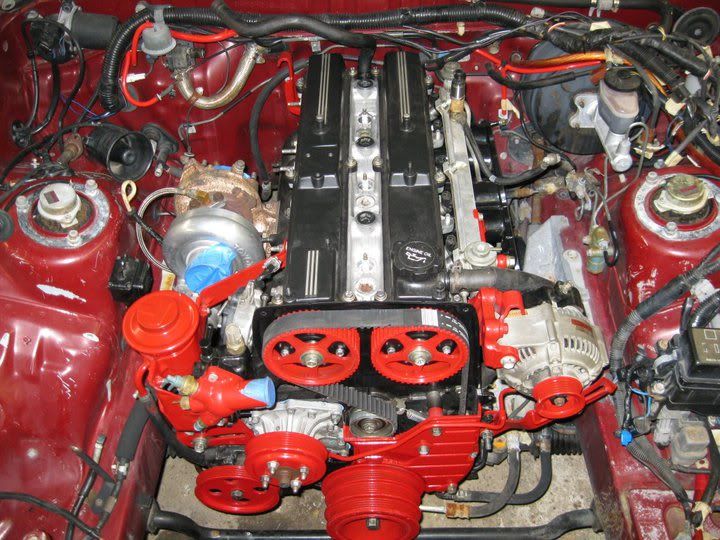
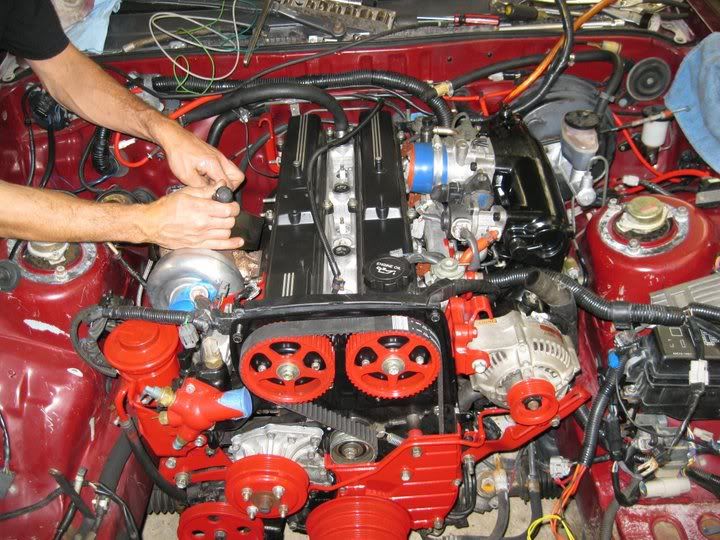
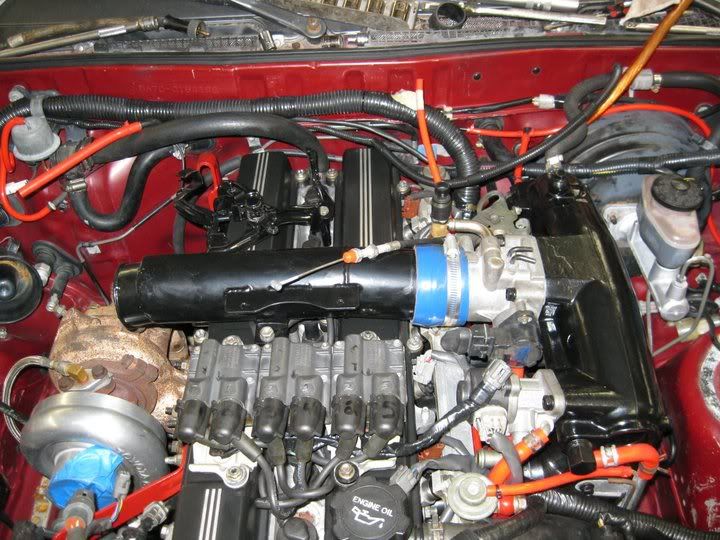
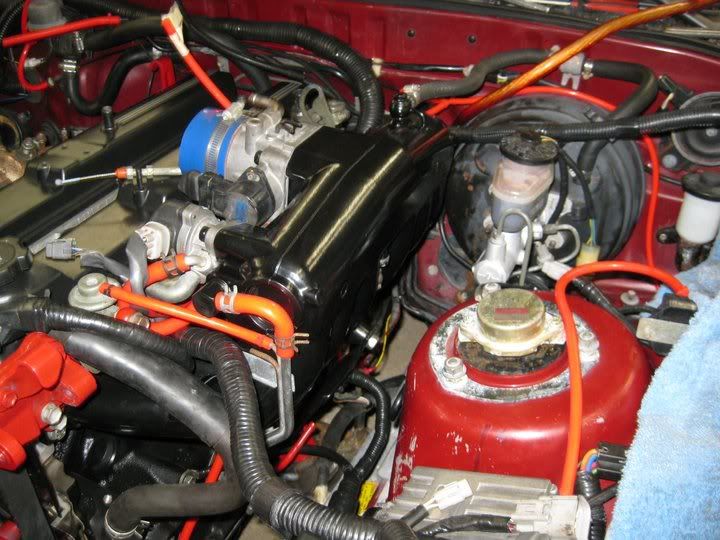
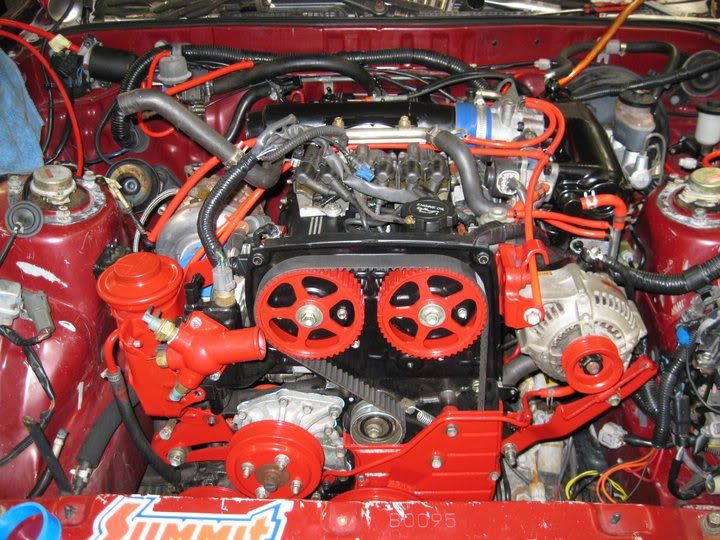
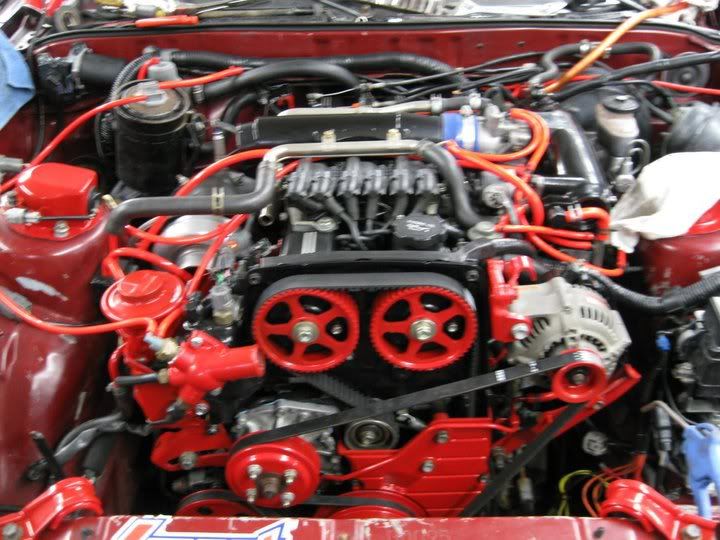
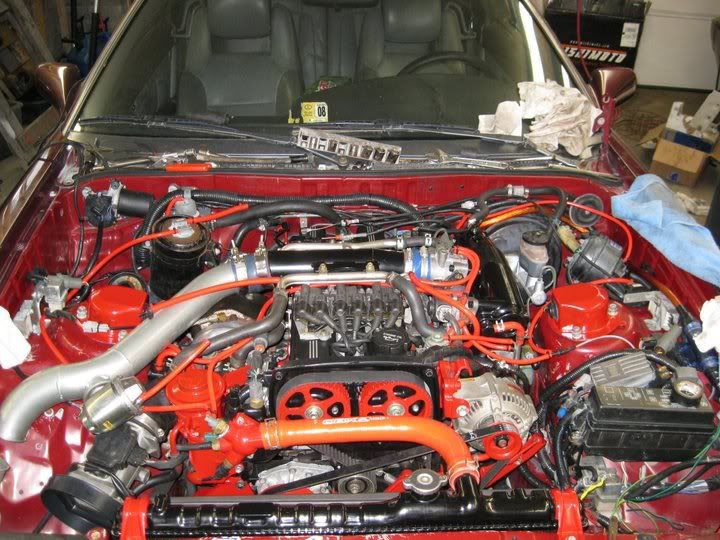
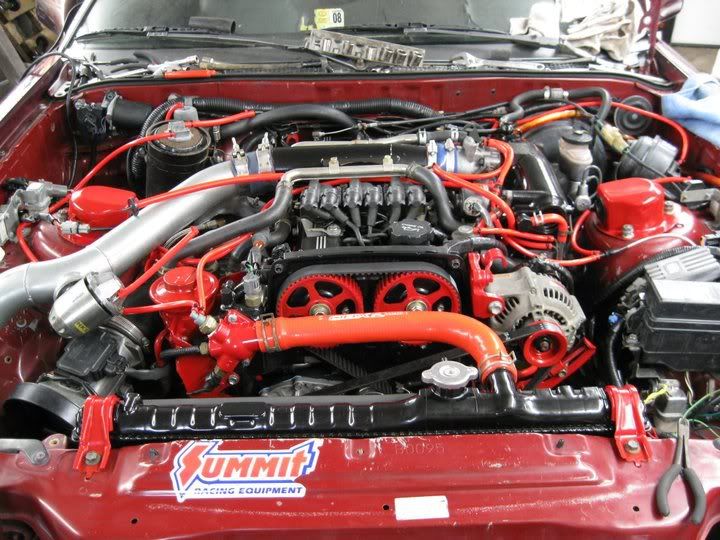
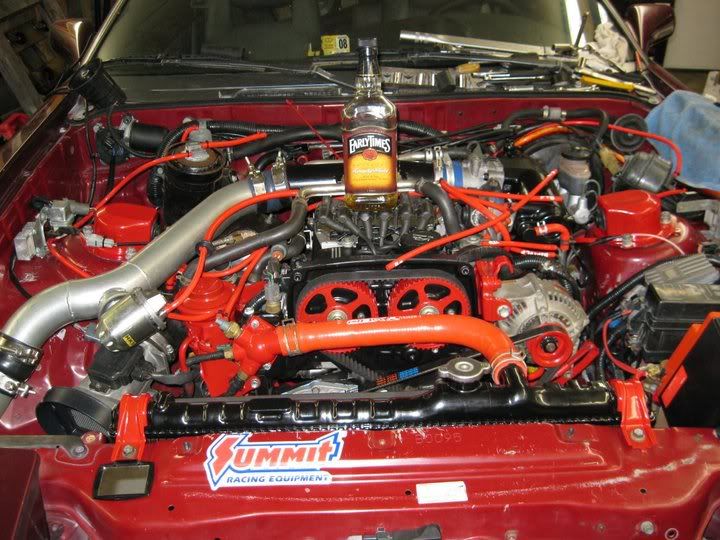
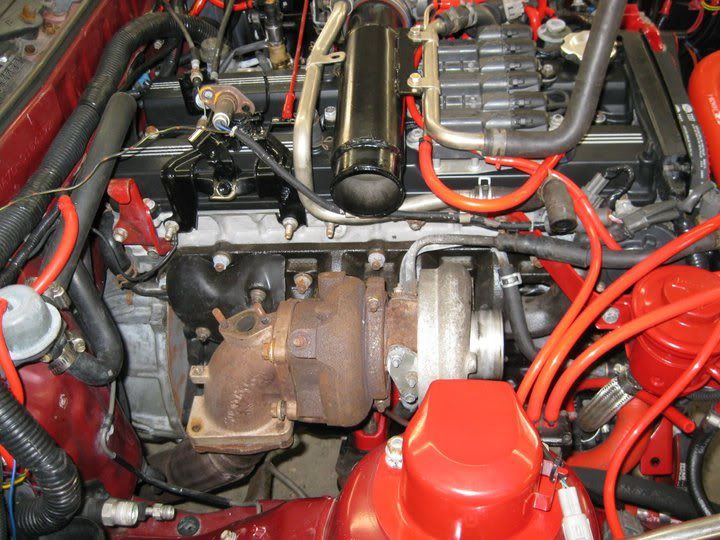
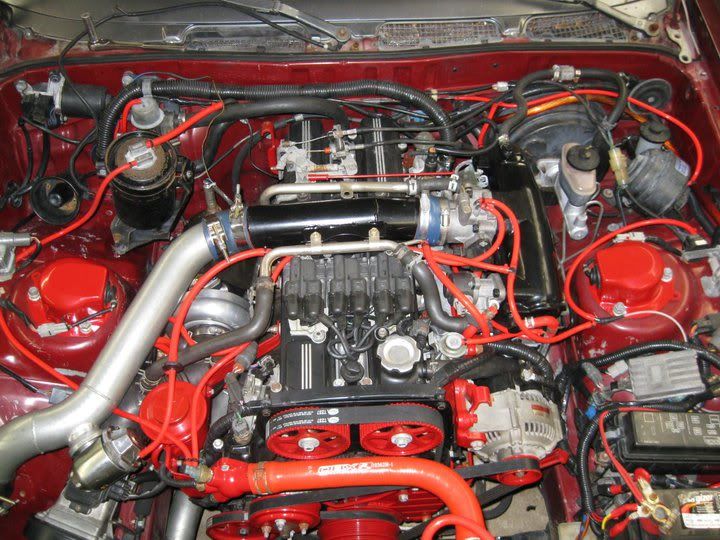
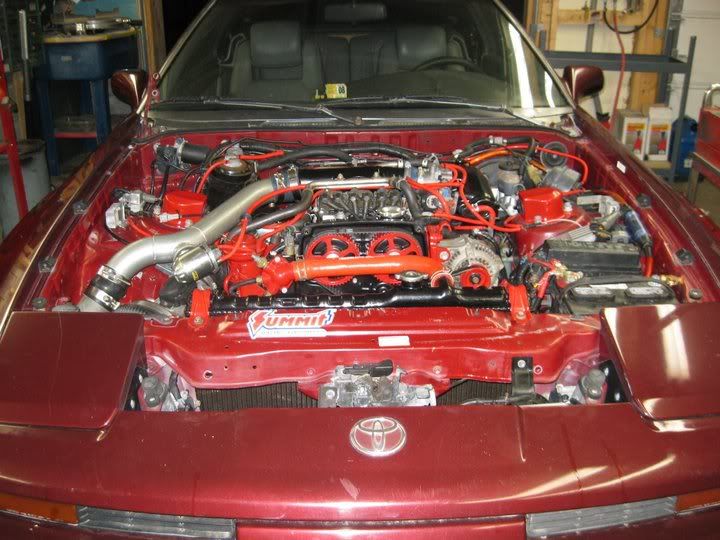
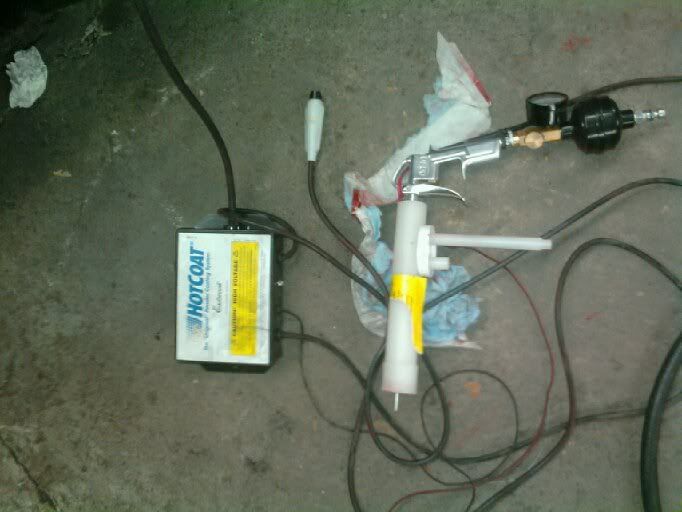
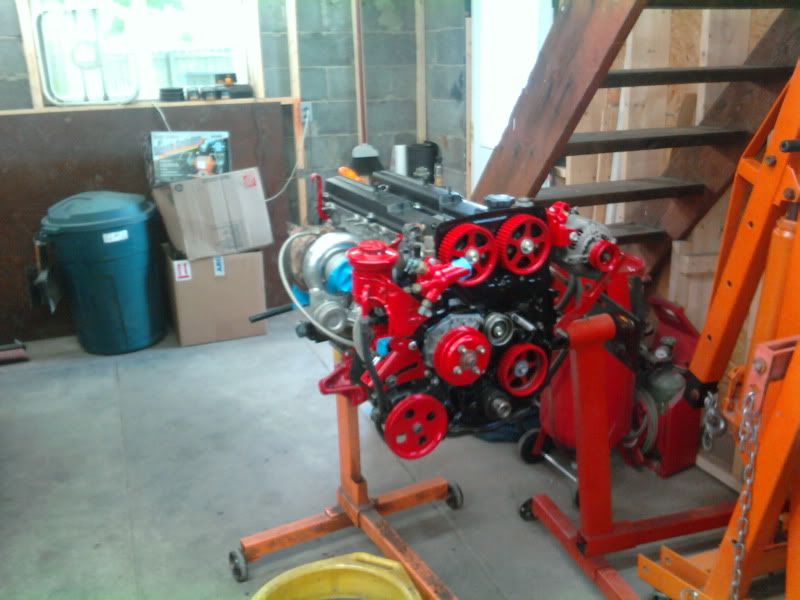
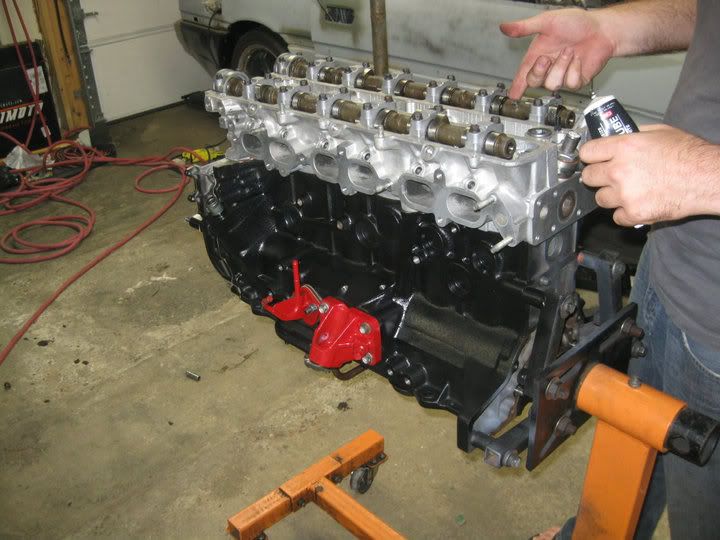
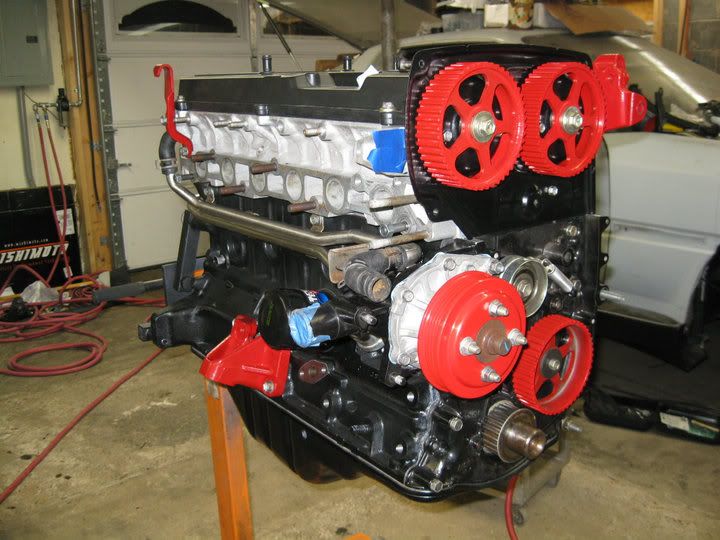
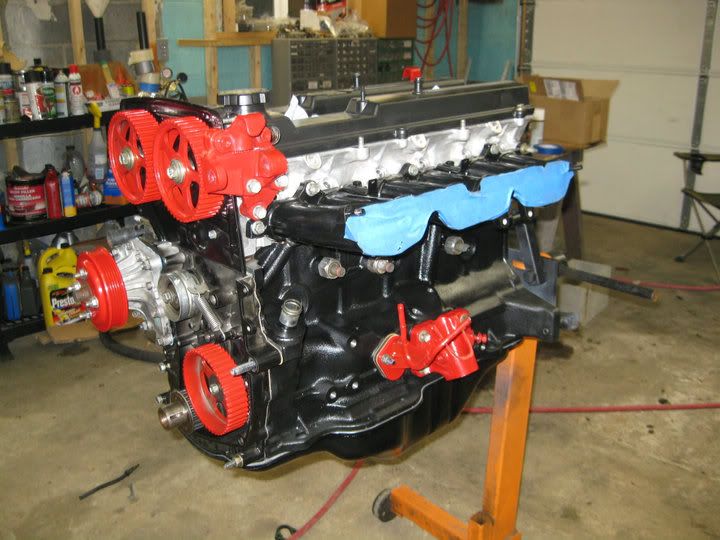
I have sandblasted and Powder coated pretty much every engine component so everything is super clean, and looks the way i want it.
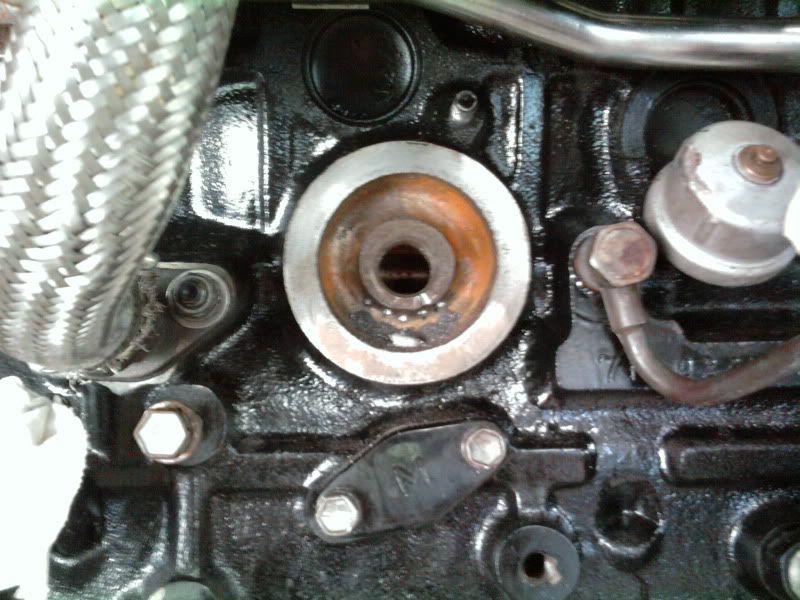
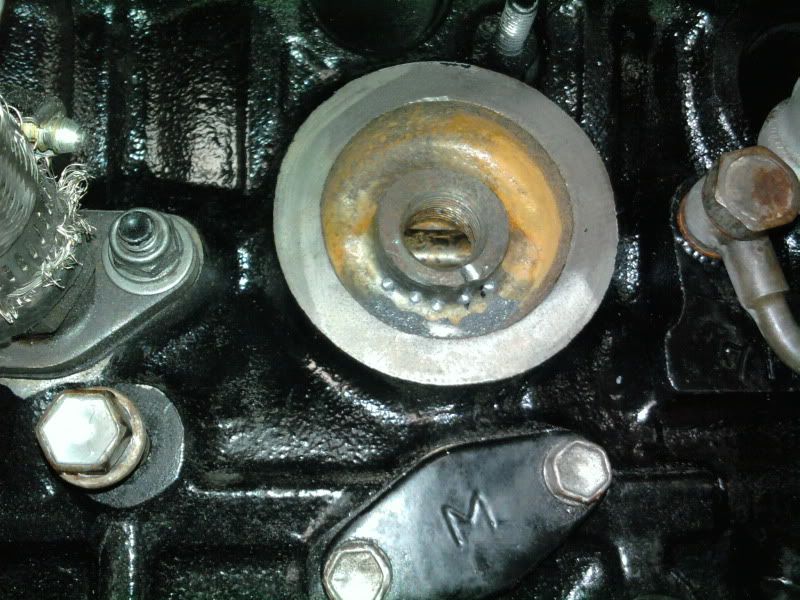
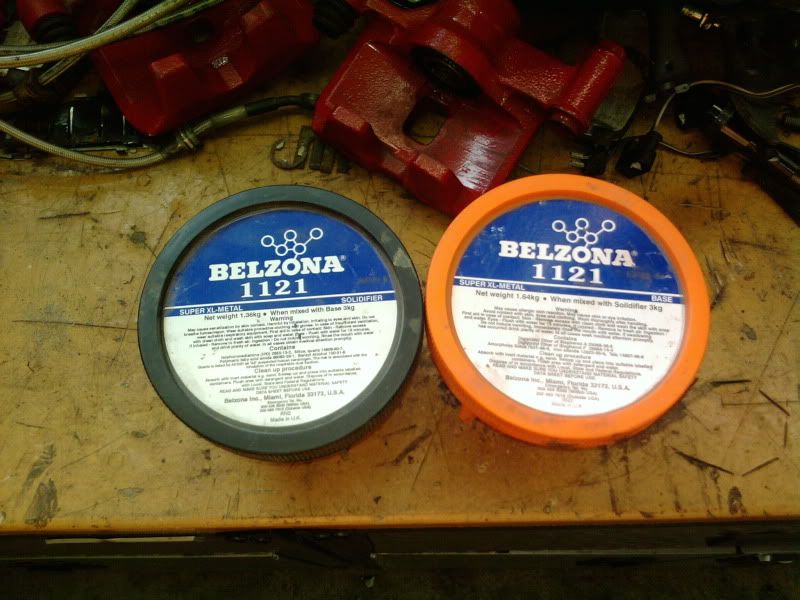
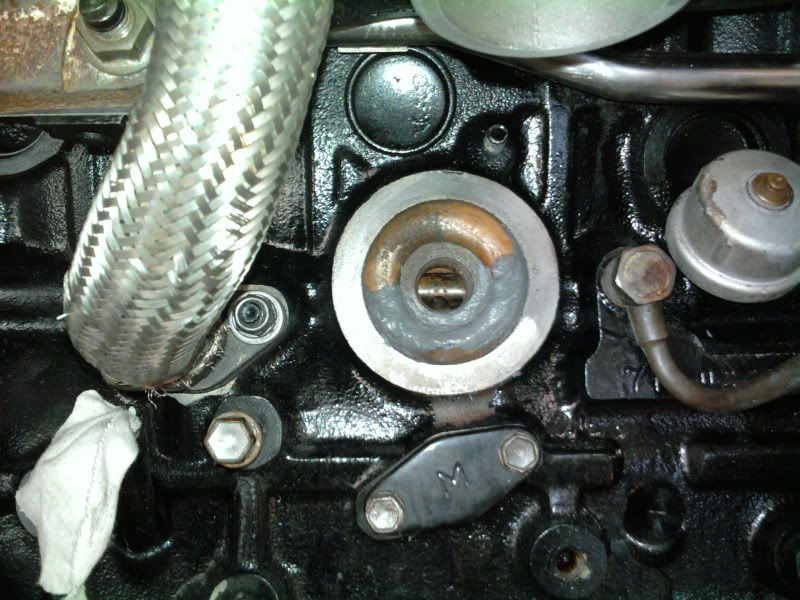
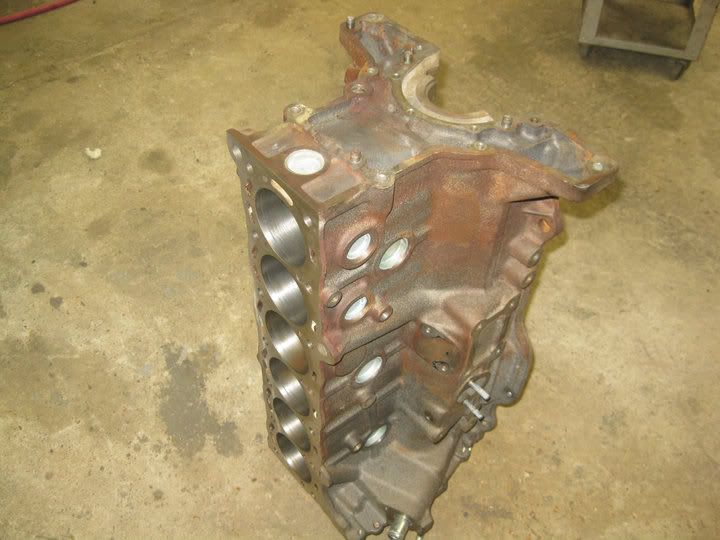
So i had fully built the motor up to a a getting it ready to drop in the car point, and the threads on the block where the big banjo bolt on the turbo oil filter fitting were cracked and we tryed to Belzona it and clean it up and save it.
But in the end the turbo block was completely garbage.
So thus dis assembly commenced. There was so much dirt and some metal shavings and aluminum oxide sand particles from the sandblaster were in the bottom of the oil pan. This was due to improper cleanliness and not being thorough enough. That motor wouldn't have lasted 8000 miles. Good thing that everything happened the way it did for me to rebuild it.....again. so its proper now.
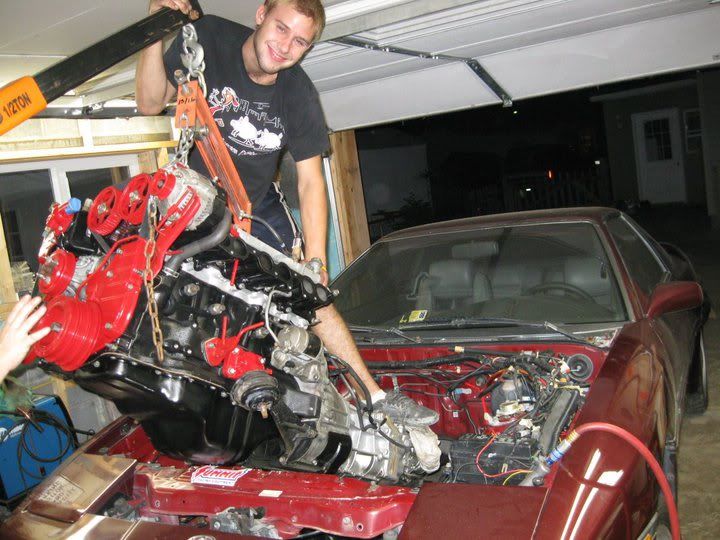
I took an extended weekend to build the motor. So i spent four days straight building the motor, i only slept about 11 hours. Straight through the night assembling everything. for that four day period i built the motor and dropped it into the car, then about a week later spent another 30 some hours straight again rewiring and hooking everything up till start up.
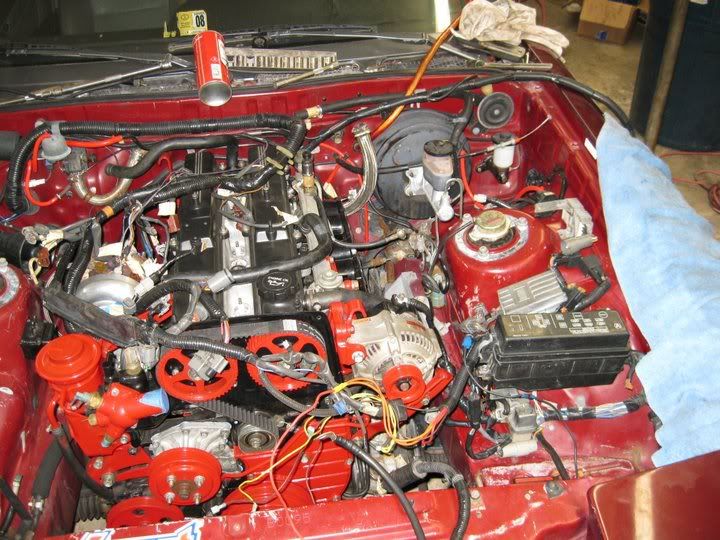
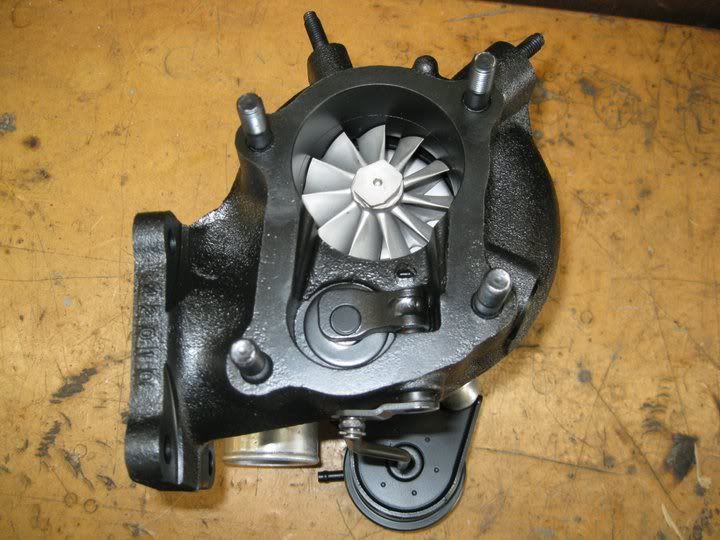
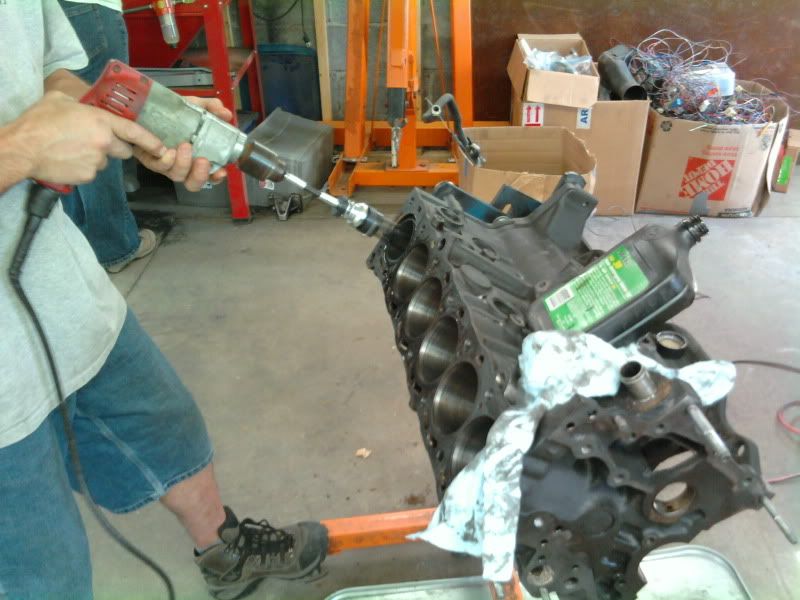
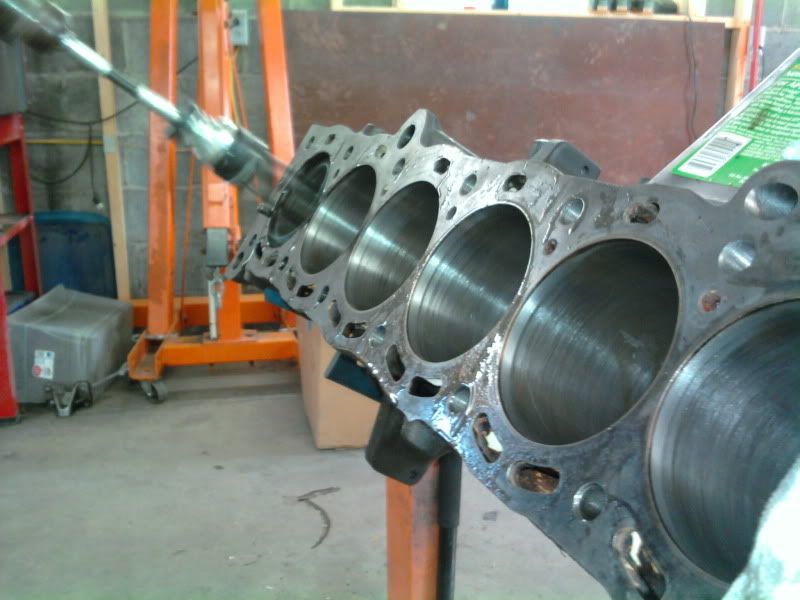
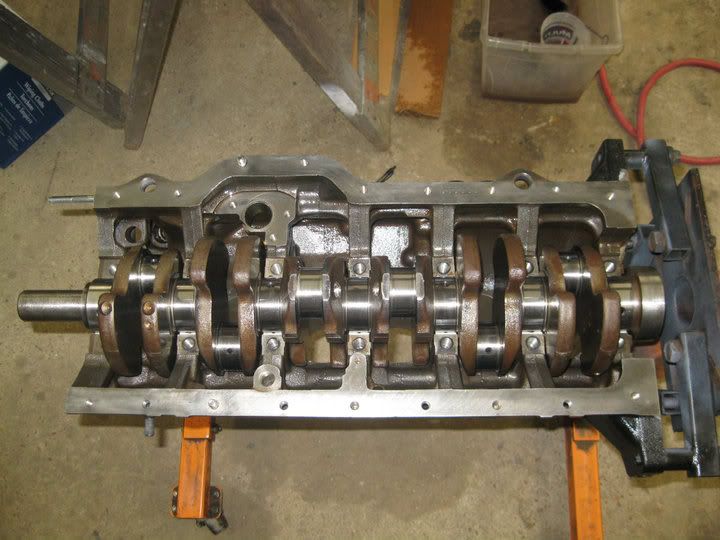
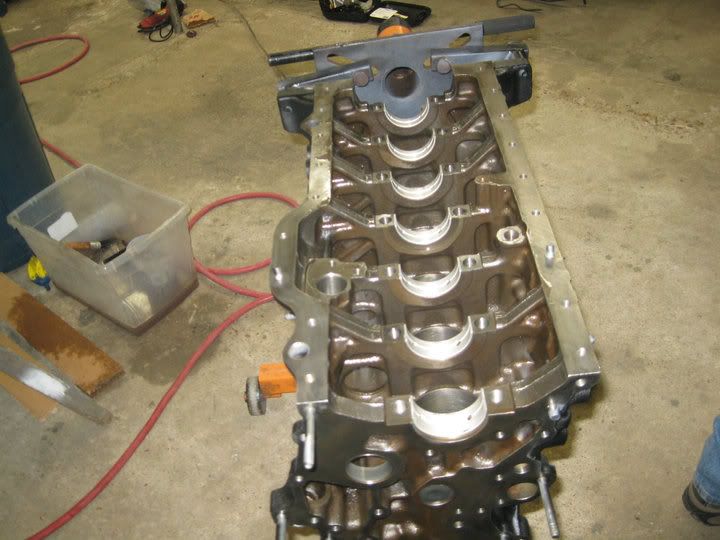
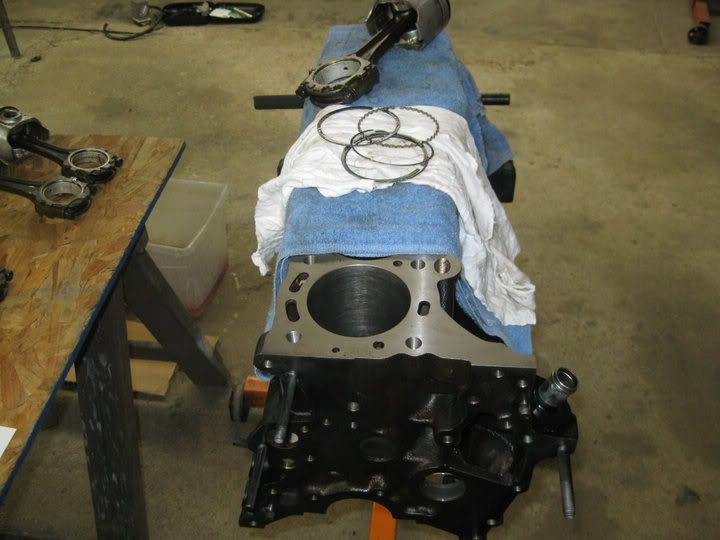
took the Non Turbo block that i had and had it machined, Hotanked, and holes tapped for the knock sensors. brought it home and honed the cleaned up. I wire brushed the whole block, prepped it, and high temp primer it, then high temp gloss black. Tapped every hole, and washed the piss out of it.
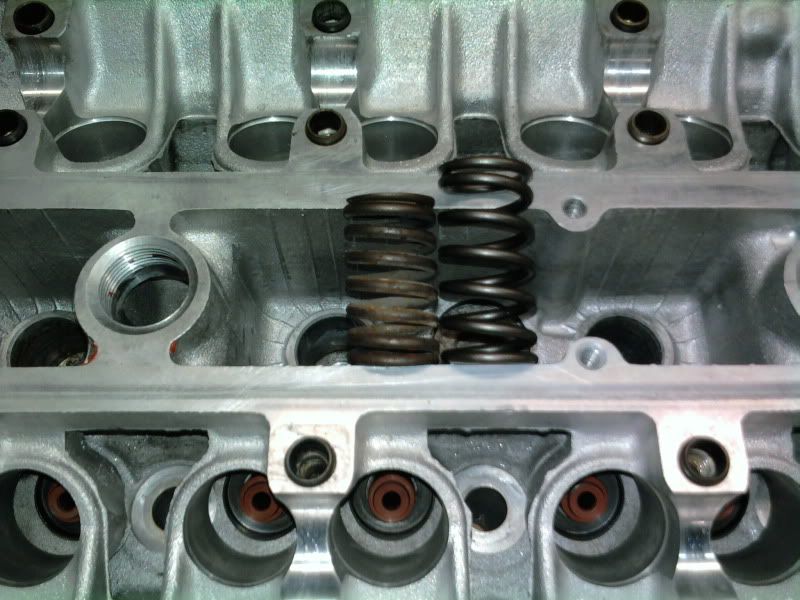
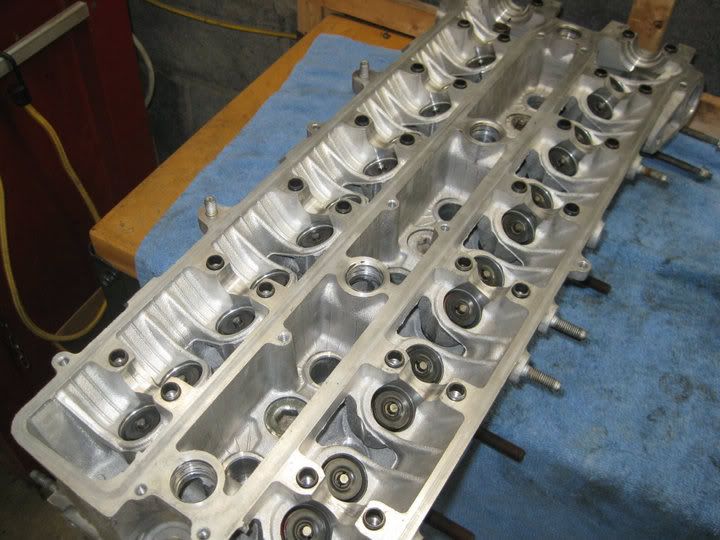
I then took the head and pulled it completely apart, lapped the valves, installed the new compcam valve springs, cleaned everything vigorously, new valve seals, new turbo cams, all new seals, replaced the o rings in the heater core, and reassembled.
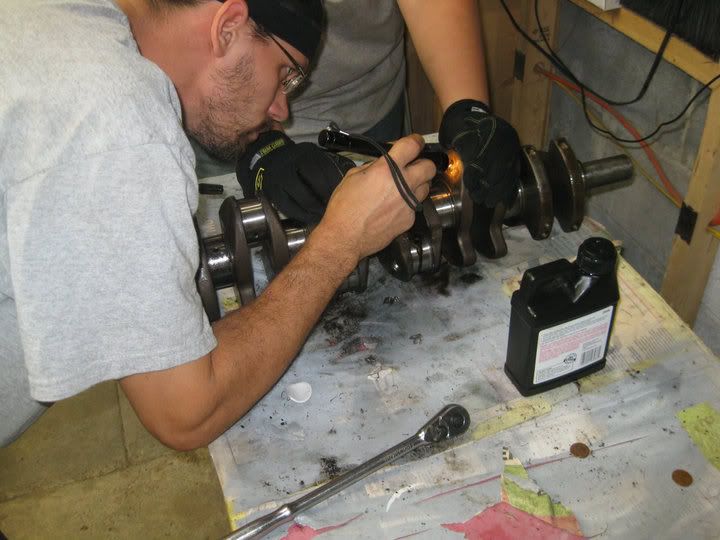
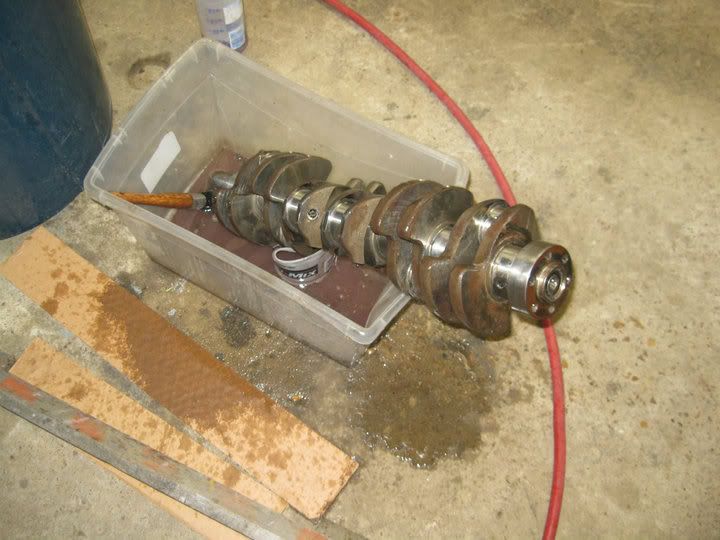
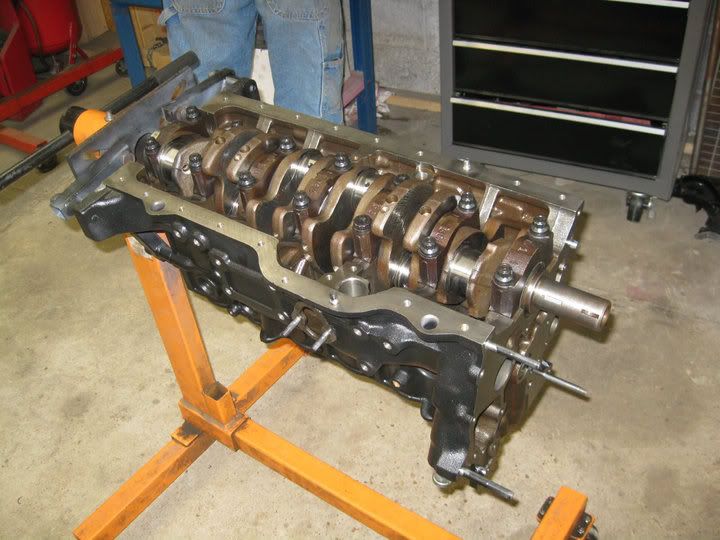
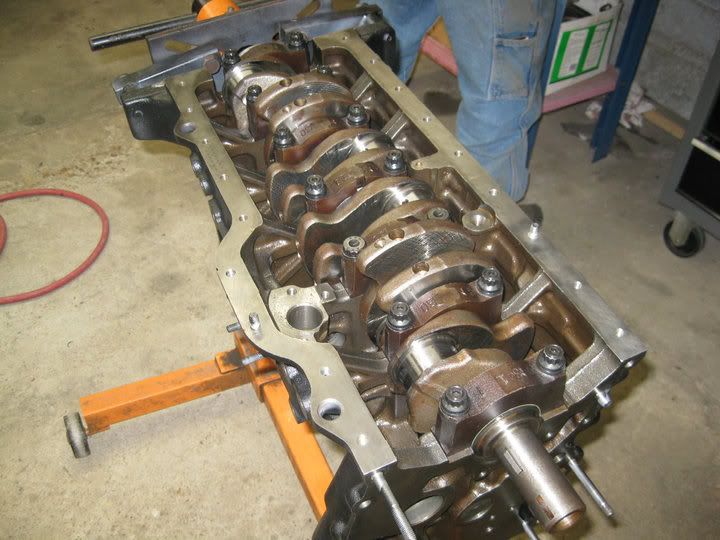
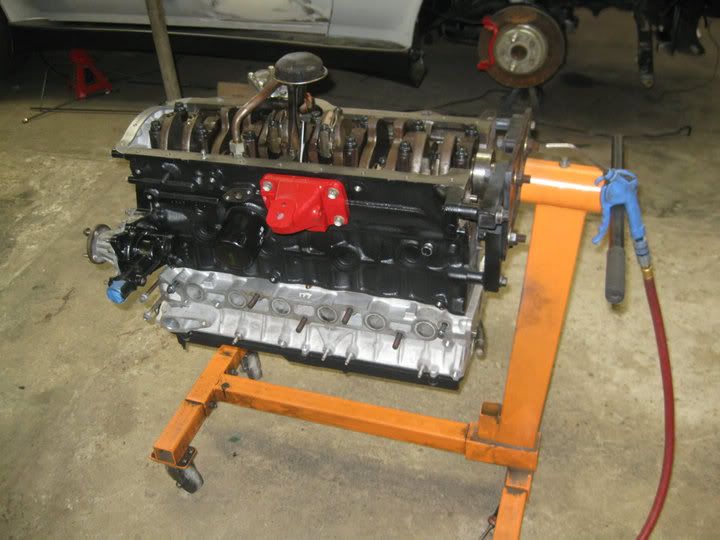
I then took the new crankshaft. the bigger thicker one and cleaned all the plugs and oil passages out, had it spun at the shop, and installed it in the block with the new bearings ARP main studs after plastigauging every bearing clearance.
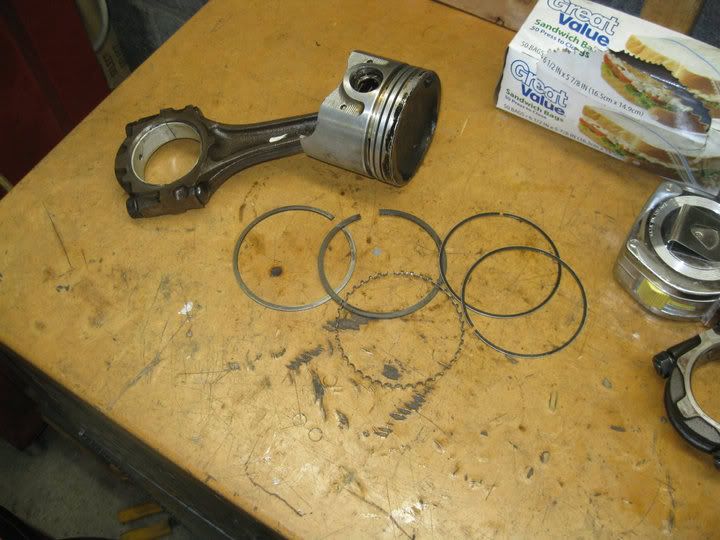
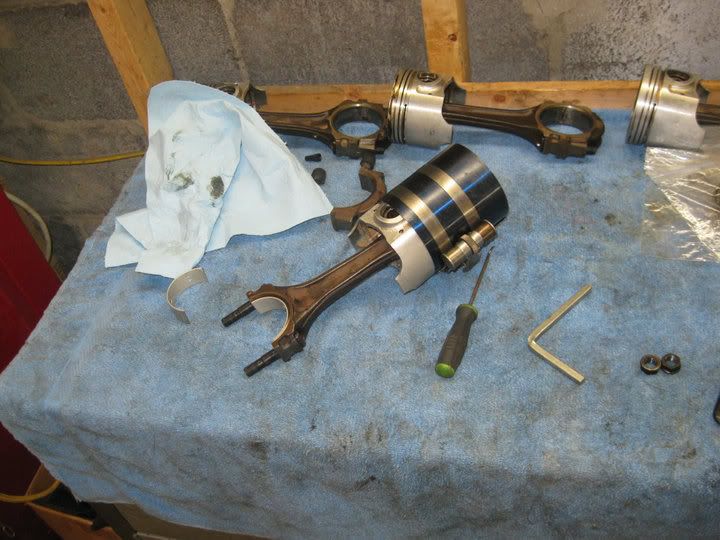
Then took the pistons out of the original turbo motor and took each individual new NPR piston ring and measured the end gap for each cylinder and then installed the pistons with the new bearings after plastigauging as well. I also had them measure the correct bore to piston size to make sure everything was right.
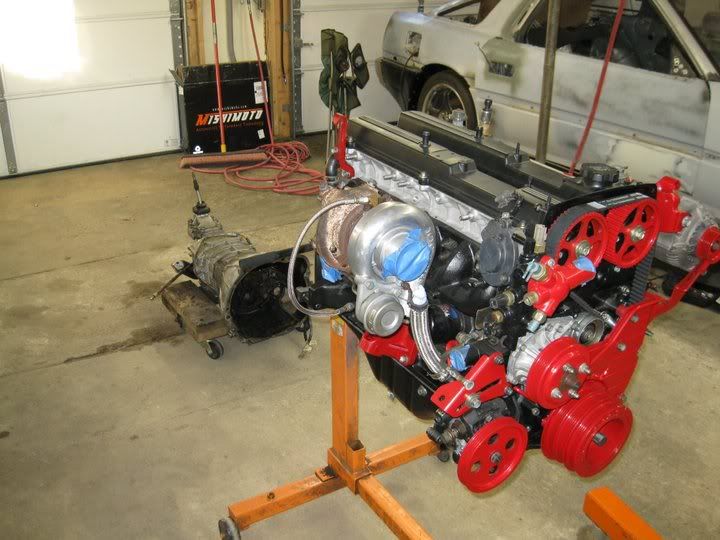
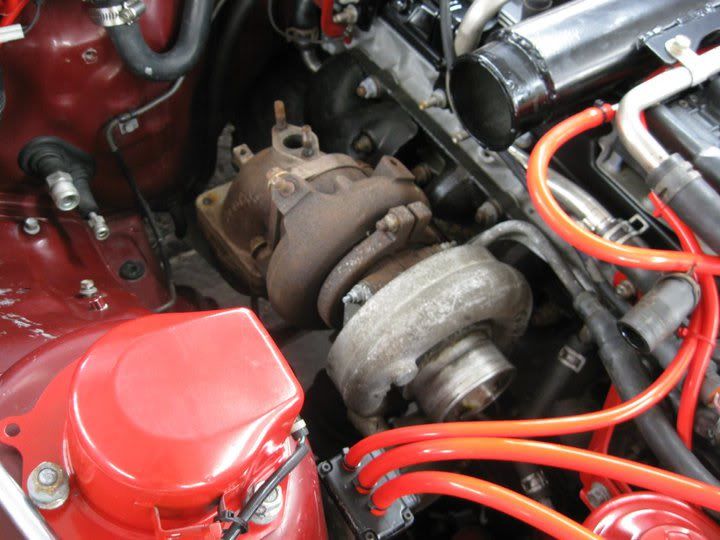
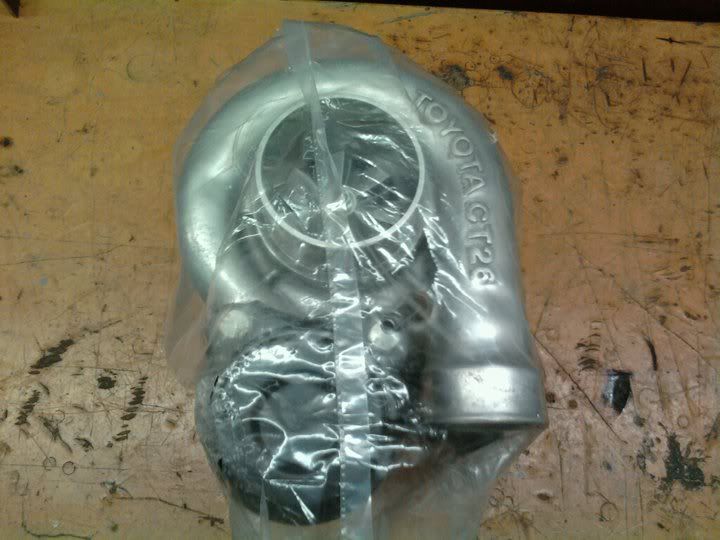
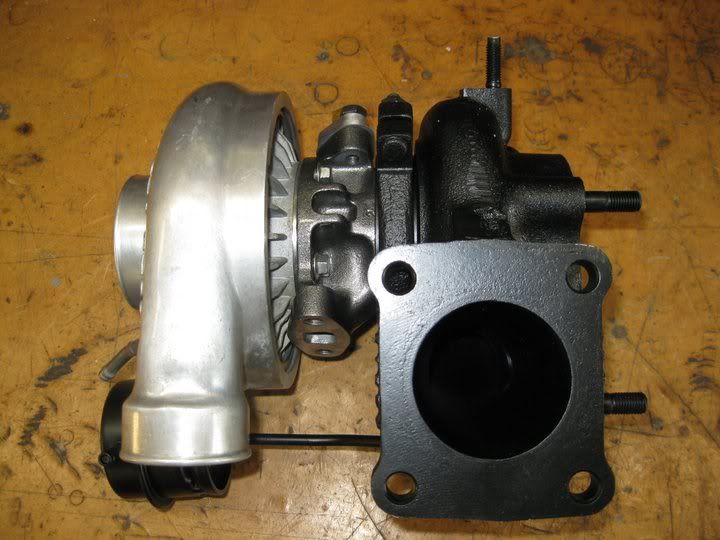
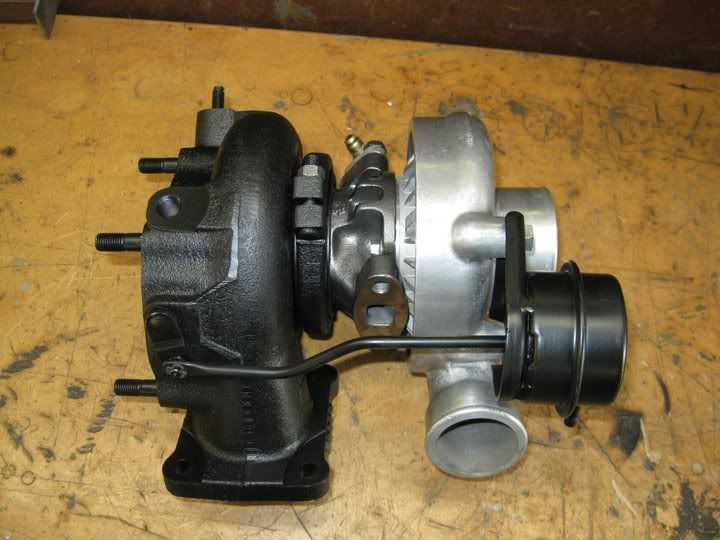
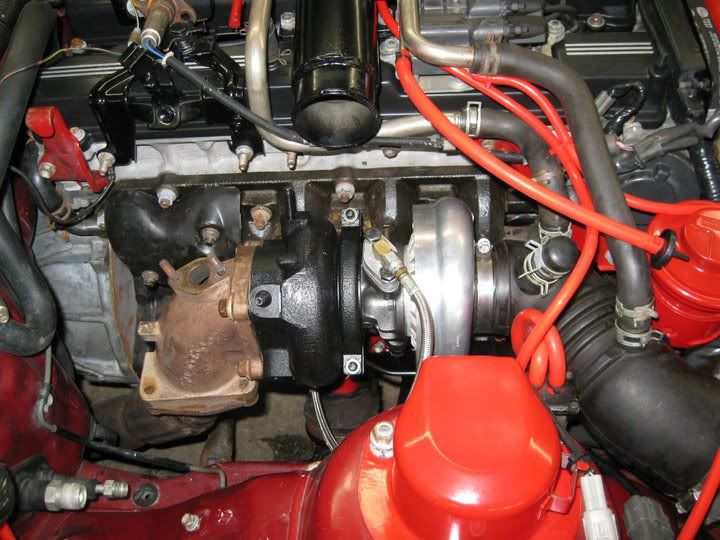
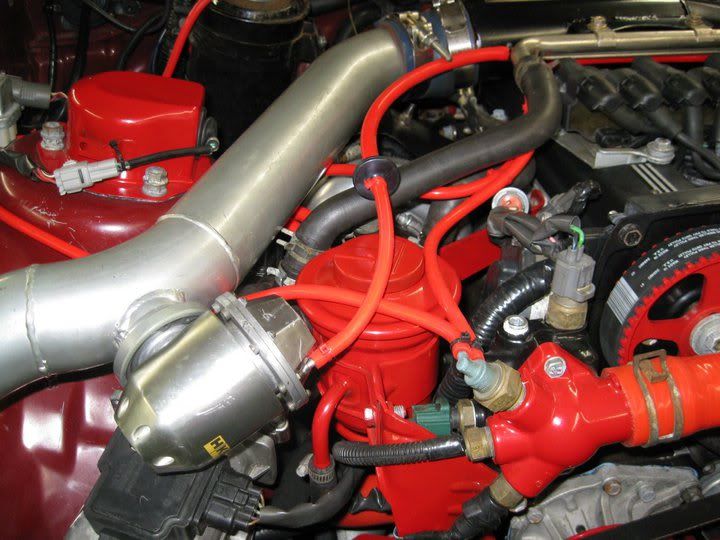
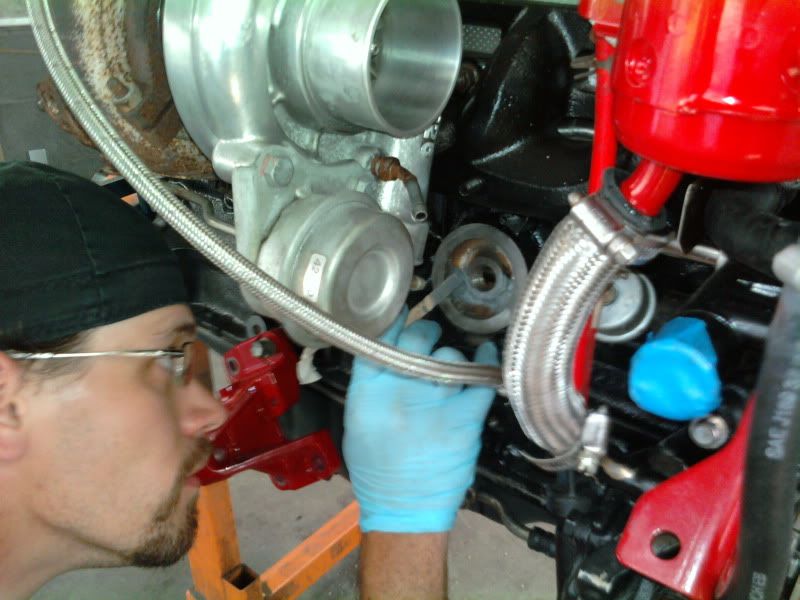
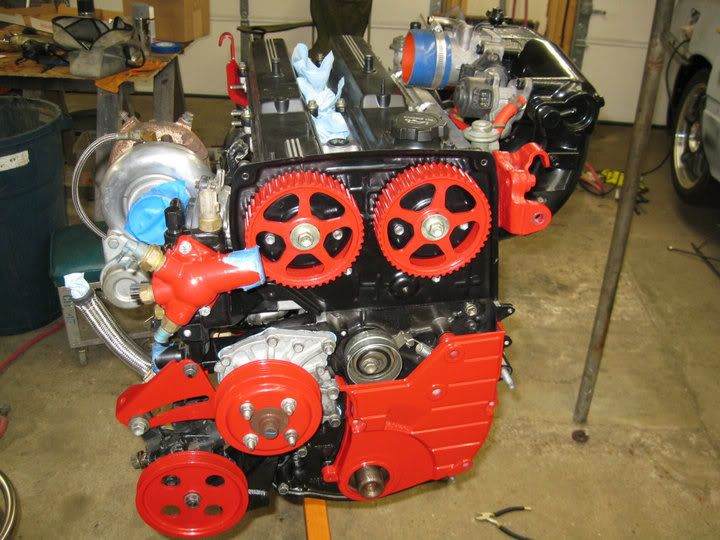
Then rerouted the oil lines for the turbo out of one of the feed ports and drain port on the block. My buddy Mark welded up a hard line for the drain line so it added extra support for my 60-1 ct with t3 oil channel.
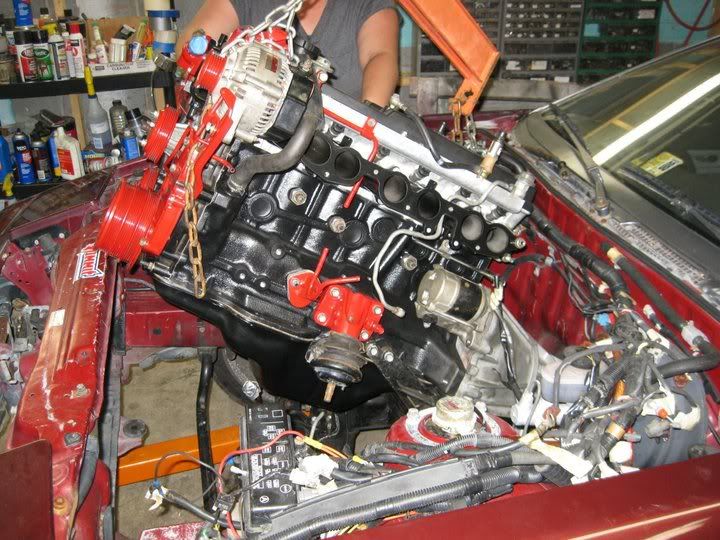
Sprayed the metal head gasket with copper gasket sealer and installed the head with ARP headstuds.
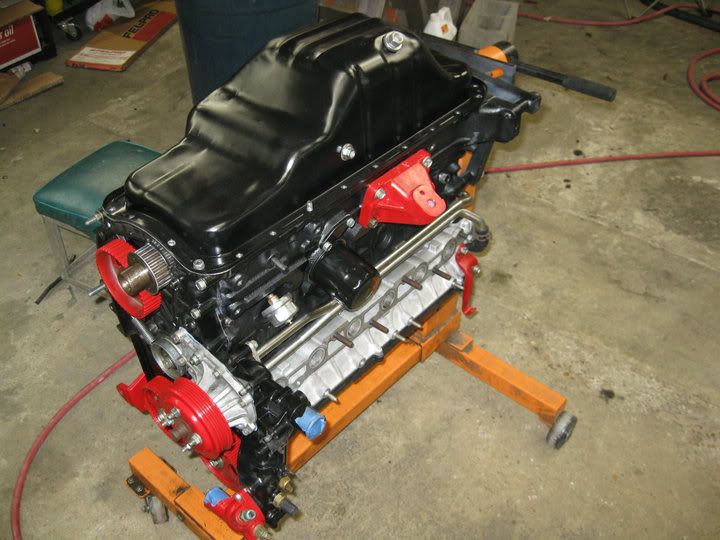
Shimmed the oil pump and cleaned the piss out of it and rebuilt it. cleaned the oil pump drive as well. Installed those.
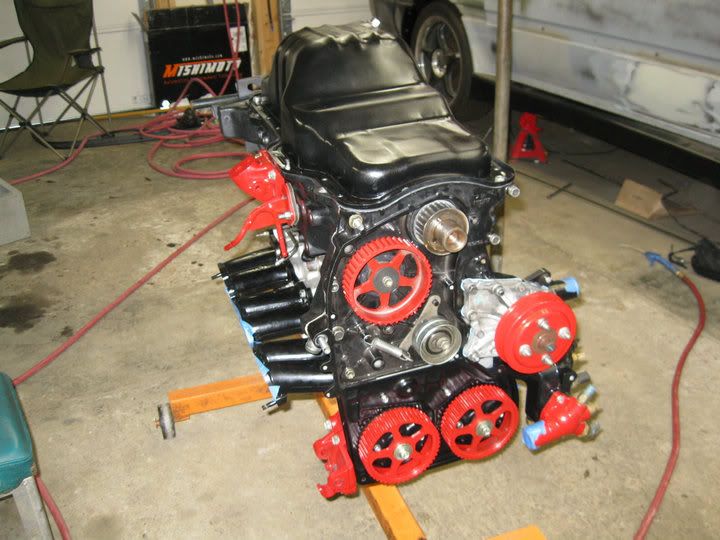
Sandblasted and High temp primed and high temp Gloss black the oil pan. A new oil pan from a parts box laying around
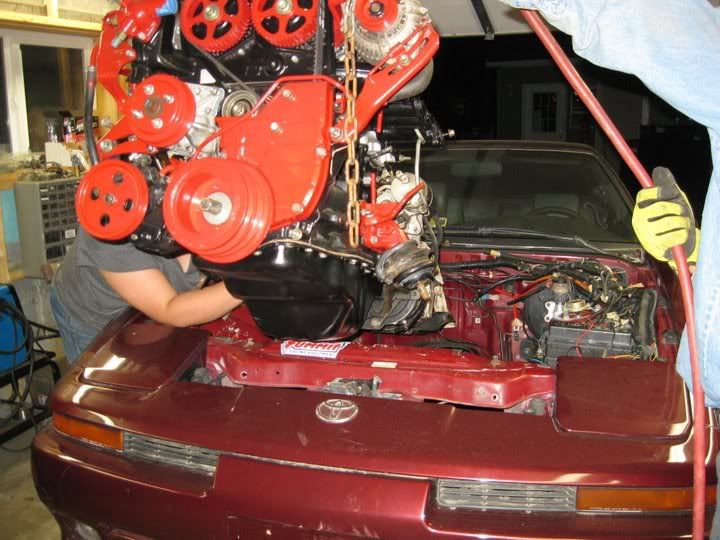
installed all the exterior pieces, and turbo was hooked up. Poured oil in the motor and spun the oil pump with a drill, priming the motor and turbo with oil and making sure that there was enough pressure, as i did so, a temporary rubber plug i had installed on the oil feed source on the block exploded off the block and shot ten feet and dented a box with a huge splurge of oil on the ground. everything went well other than that. everything was sealed and no oil leaks.
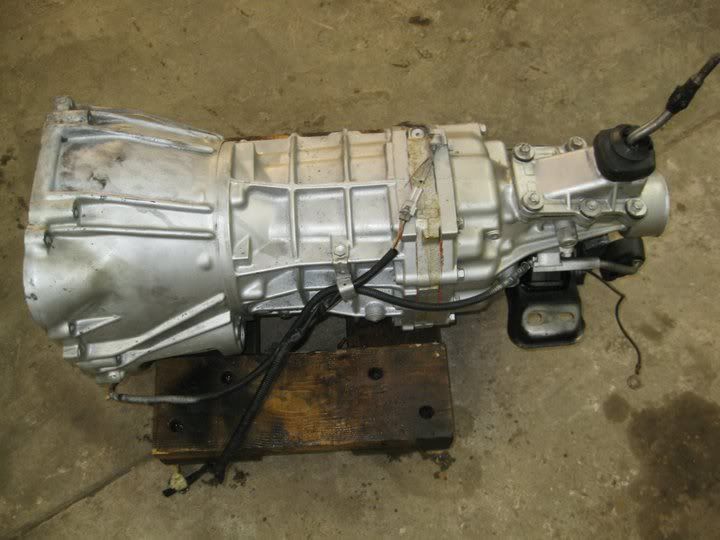
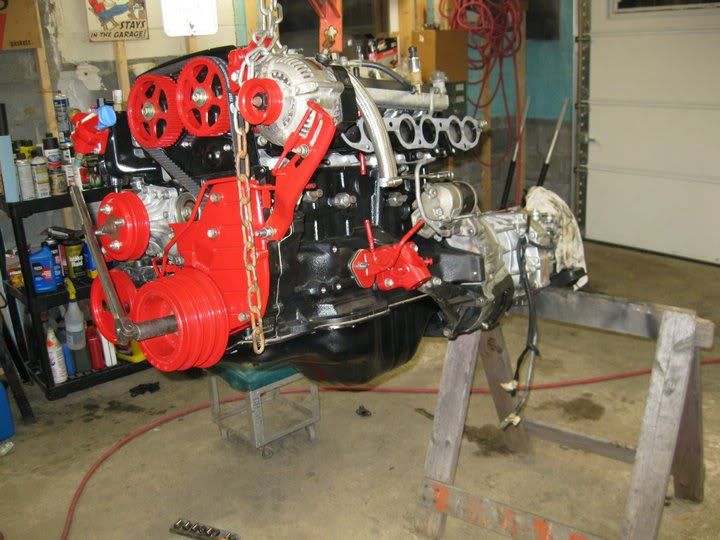
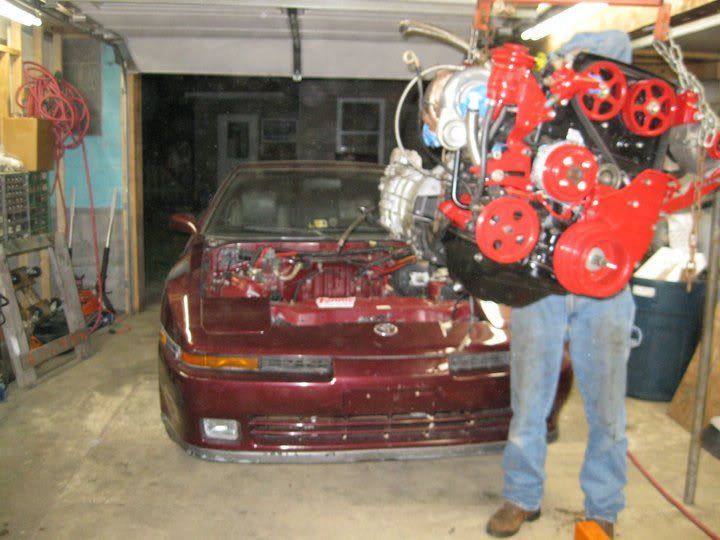
Threw it on the cherry picker and installed the new Southbend Stage 3 clutch and reground flywheel with the new ARP flywheel bolts. i had to grind the bolts a hair to get the clutch to not hit it when it spins. Installed the r154 and hooked everything up.
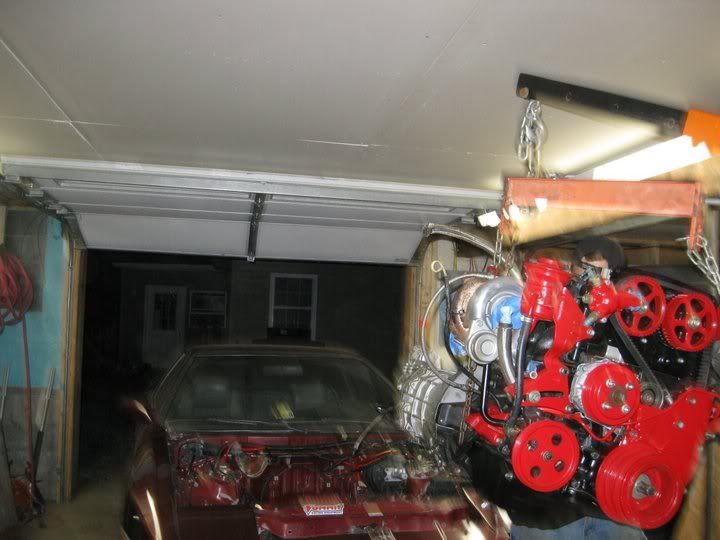
Dropped it in the car and connect the driveshaft and shifter with new gear oil.
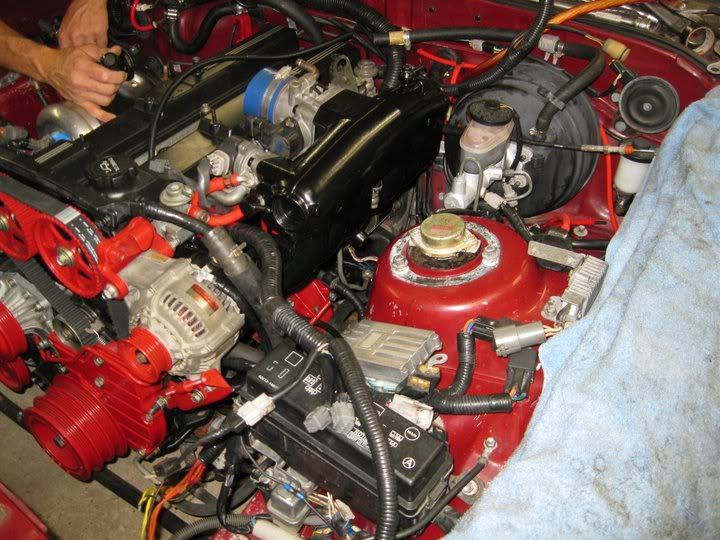
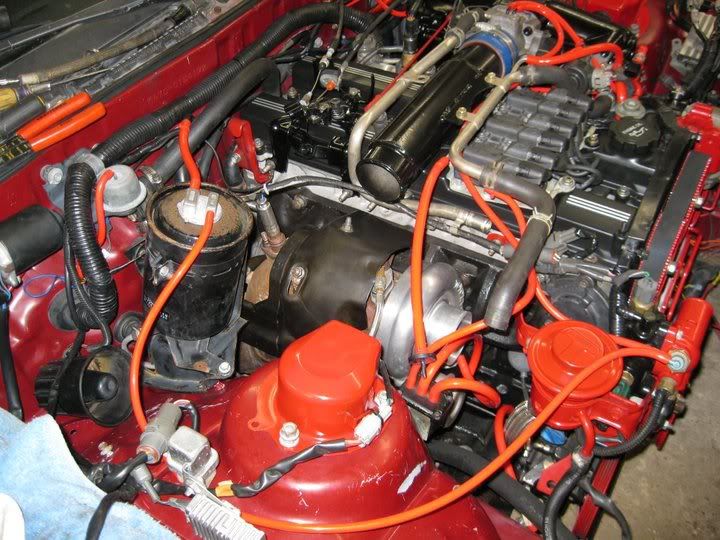
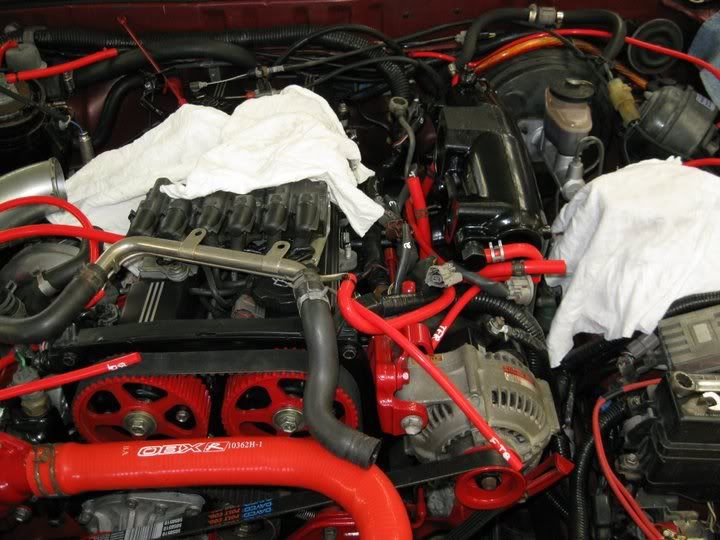
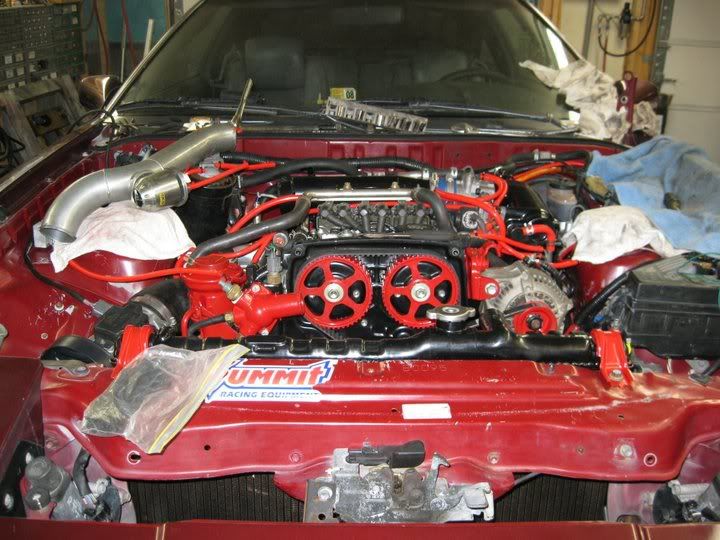
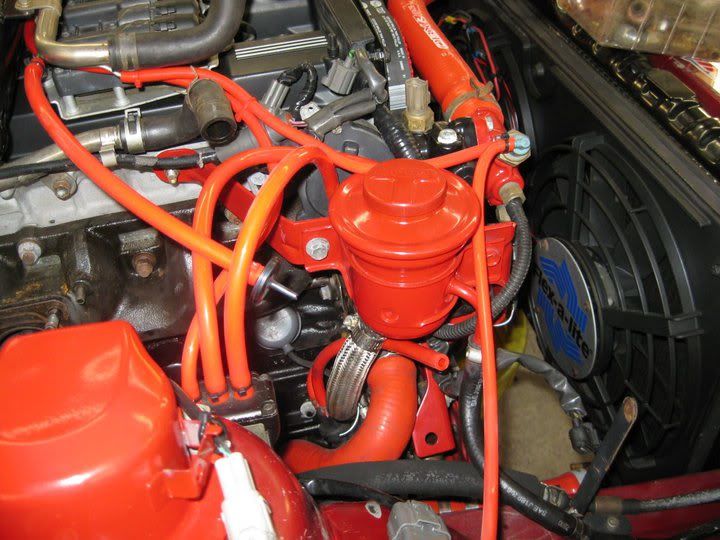
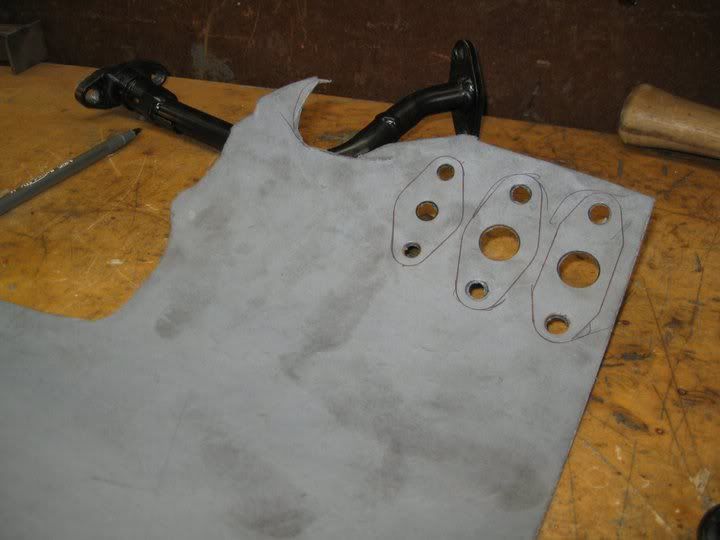
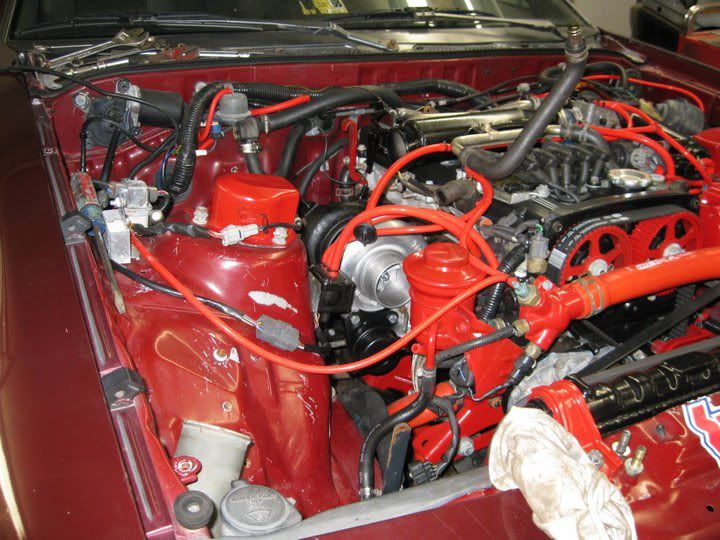
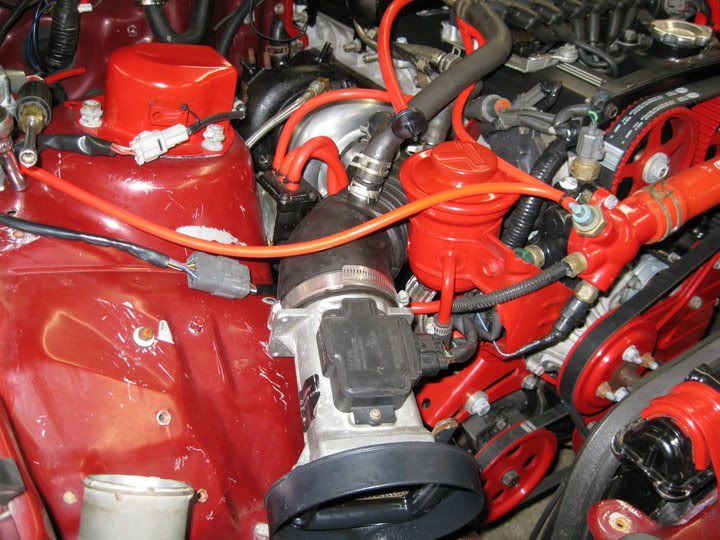
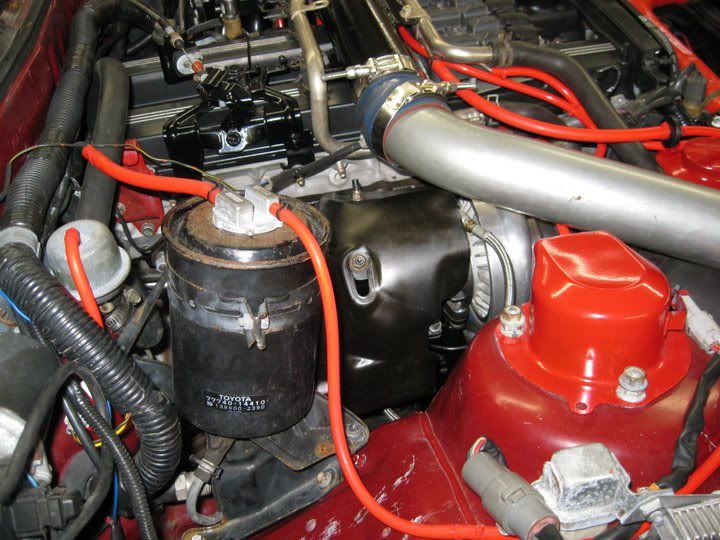
Took the entire wiring harness apart and re taped and reorganized the entire harness, replaced a couple things hooked the motor up, ran all the New hose techniques red vacuum lines, and hooked up the ignition. Ran all the intercooler piping, intake, and hooked up the original suprasport stamped turbo elbow to the megan downpipe and 3 inch exhaust.
installed the new radiator and flex a light fans, and redid the battery wires and terminals.
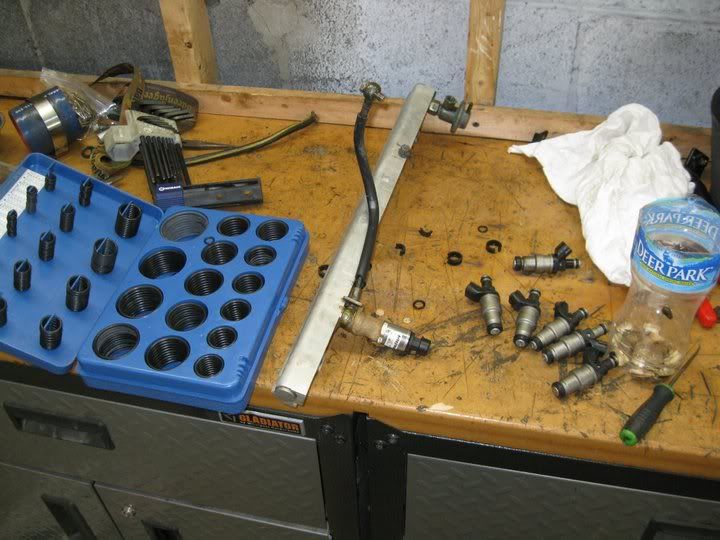
Replaced all the fuel injector o rings, and redid the fuel rail.
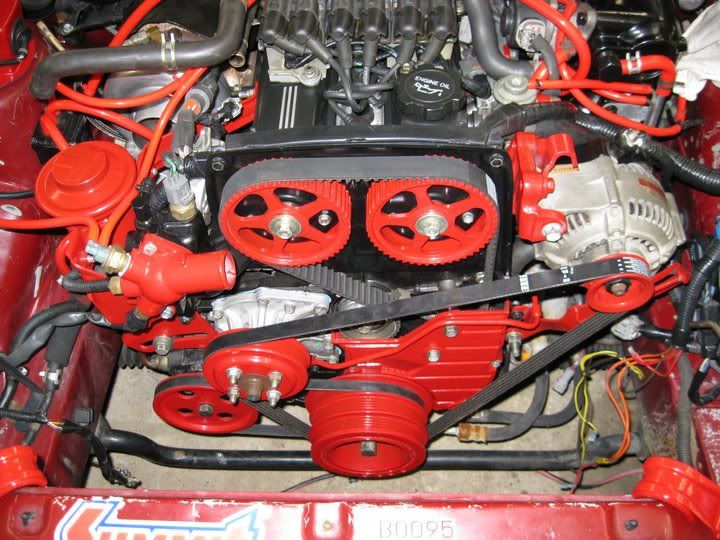
Did the timing and belts and prepped the motor for start.
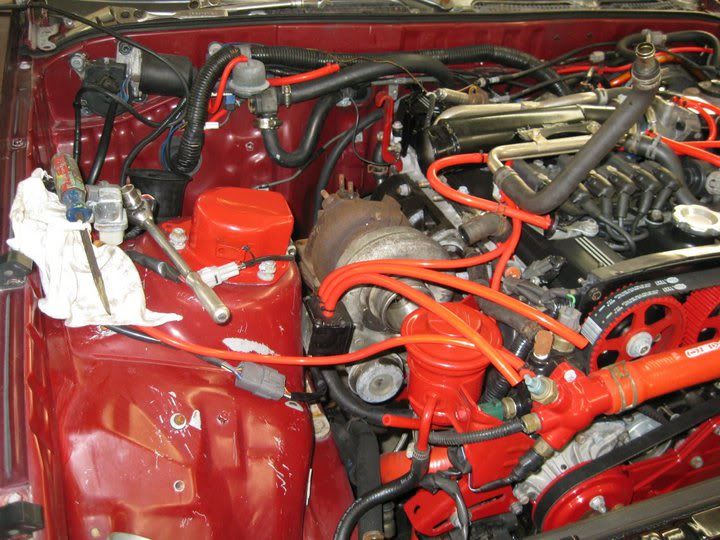
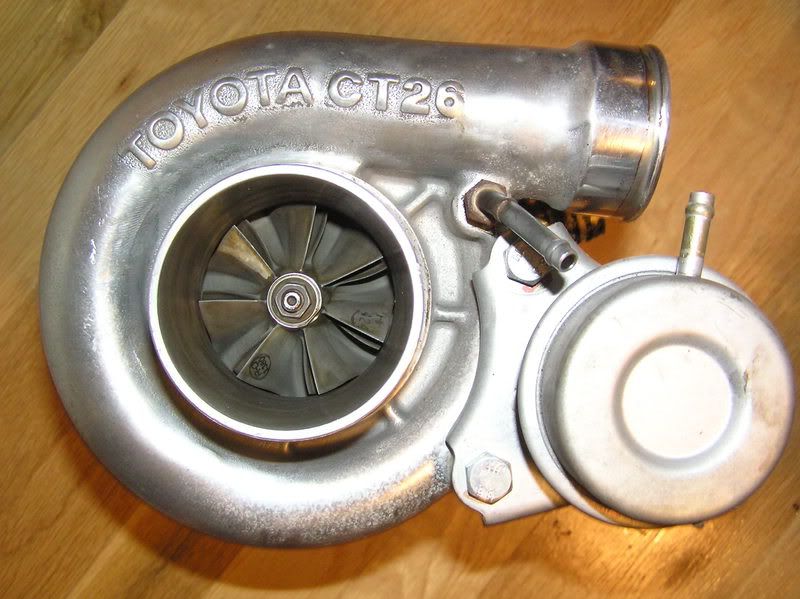
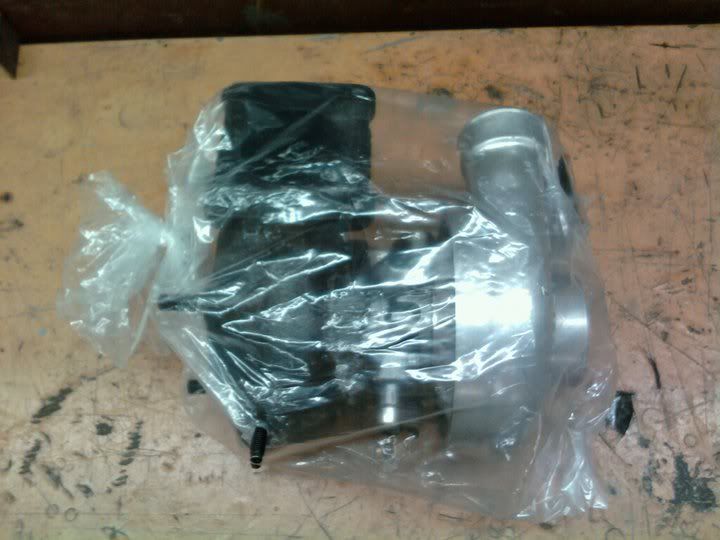
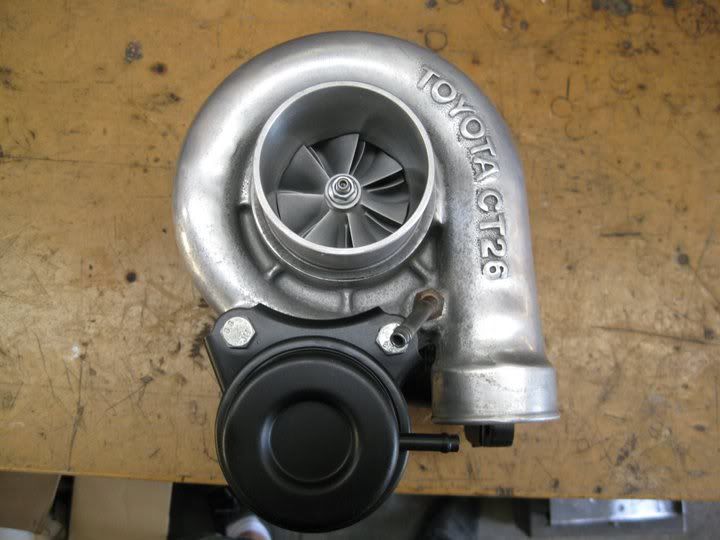
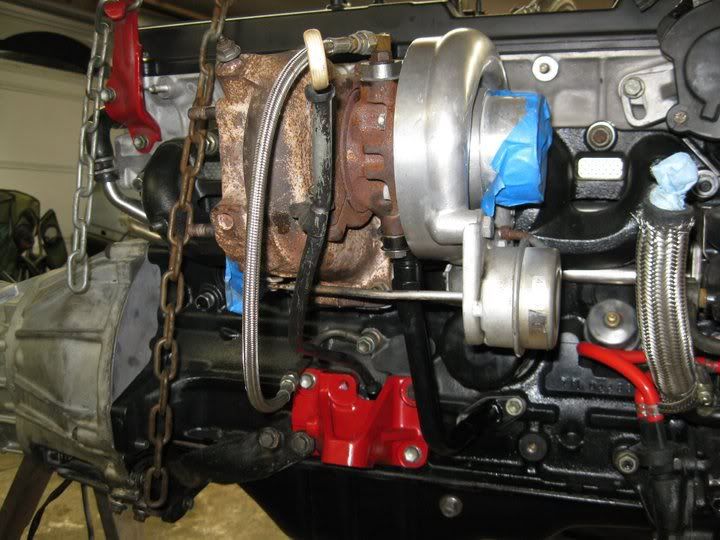
Prime started the motor and cranked it over. took a couple times but she eventually started running on her own. But since i had not put a gasket on the O2 sensor and the turbo had sat for so long not taken care of, the seals were blown on My CT26 60-1. so oil was pouring out my exhaust and smoking bad. so i replaced the turbo with a buddys stock extra turbo, only to fire it up again and have that turbo seals blown as well, not as bad, but still.... oil was comming out of my intake.....
The motor itself runs excellent right now for two warm ups. oil pressure is good, fuel pressure is good, temperature is good, and there are only complications with the turbo and oil leaks through hooking up the different turbos. but other than that the car is ready.
So this is where im at right now with no turbo, im saving and selling my Chevy nova to get the money for a rebuild from Evergreen Turbo. I hear great things about them and was referred.
So after the fourth time rebuilding this car, its finally alive again. thank the good lord.
So let me know what you think? Its my masterpiece.
Here is the video of the startup.
http://www.facebook.com/video/video.php?v=1594555867673
here are some pictures, click on the photo albums for more pictures.
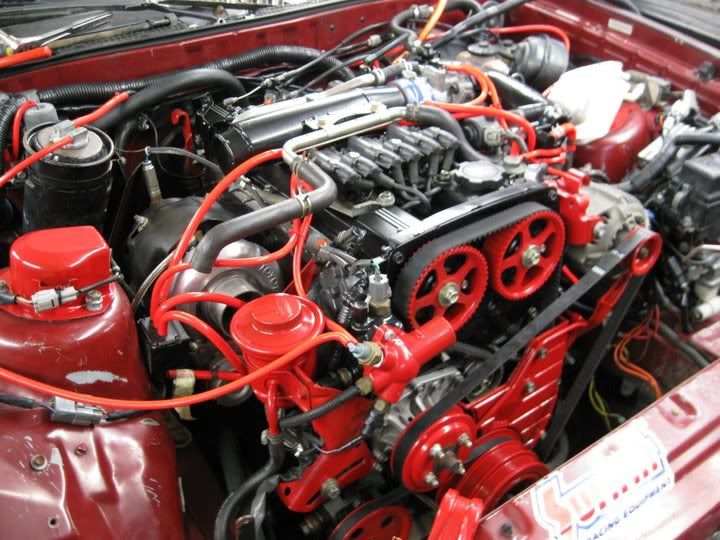
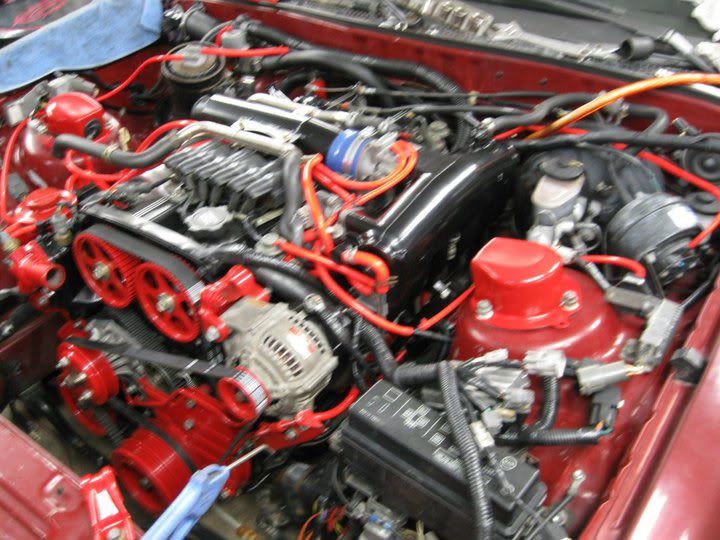
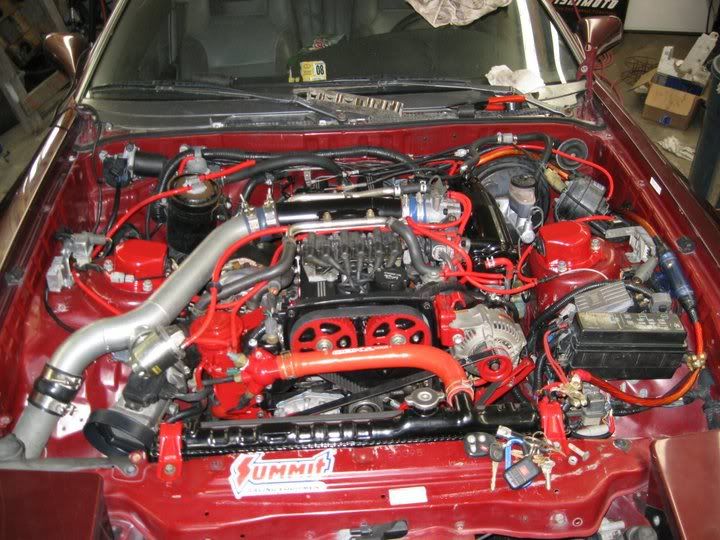
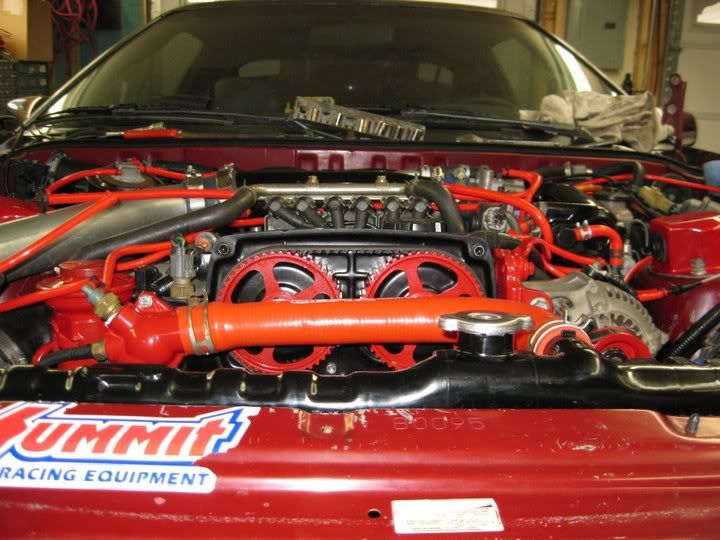
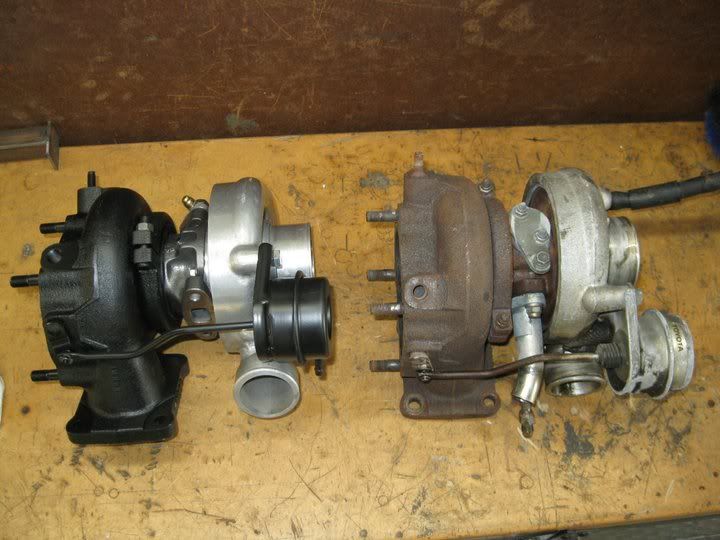
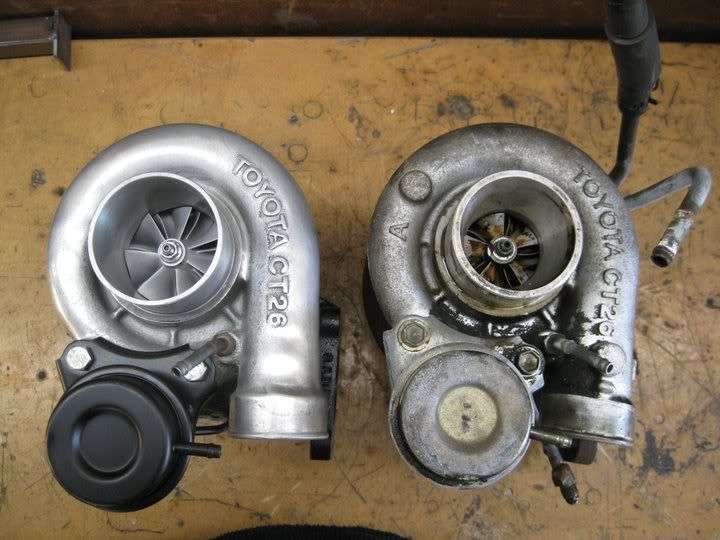
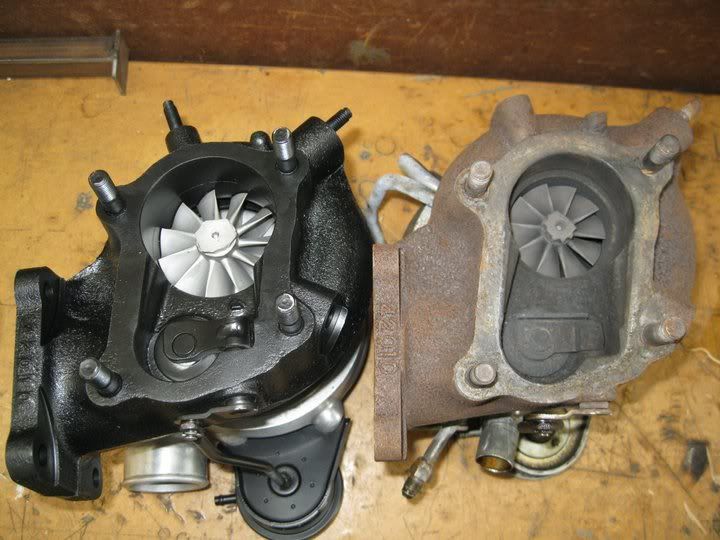
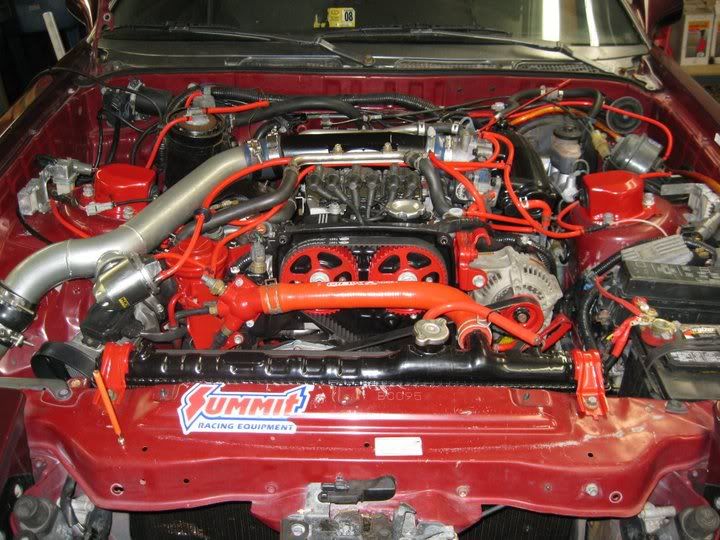
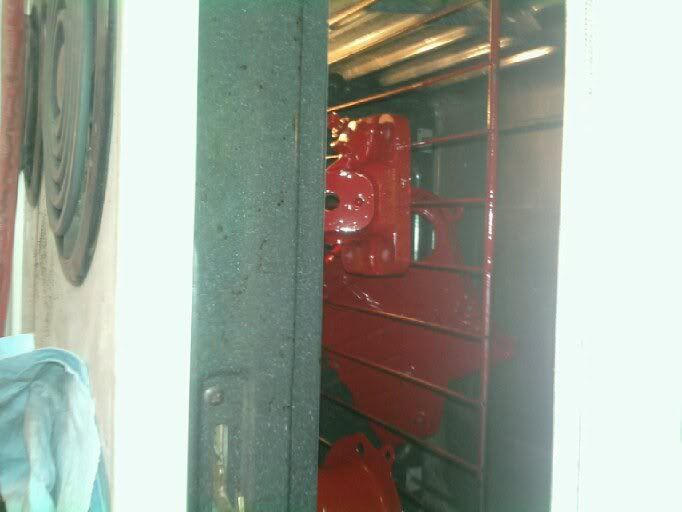
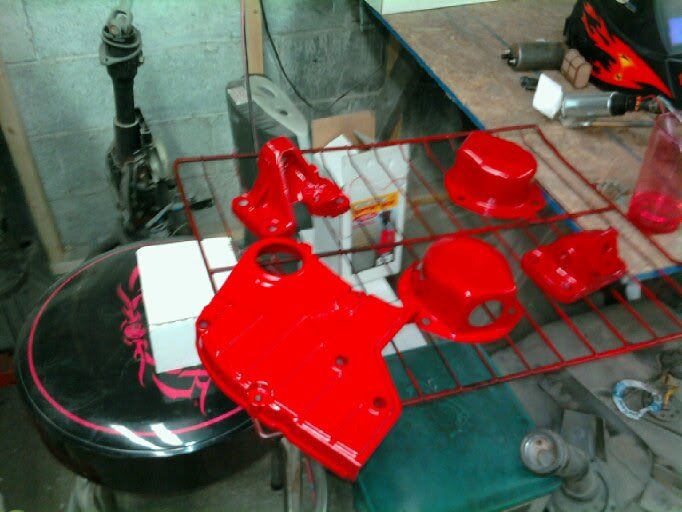
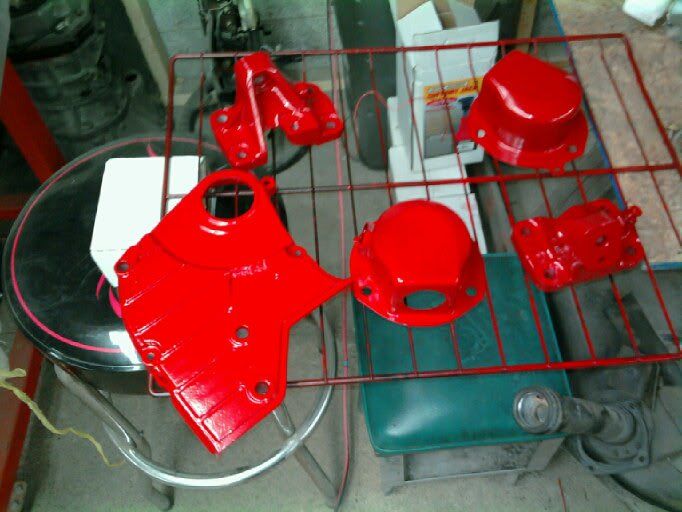
~~Every engine part has been sandblasted and powdercoated with Red wagon, Semi Gloss and Gloss black. Everything turned out so nice and pristine.
.
.

.
.
.
.
.
.
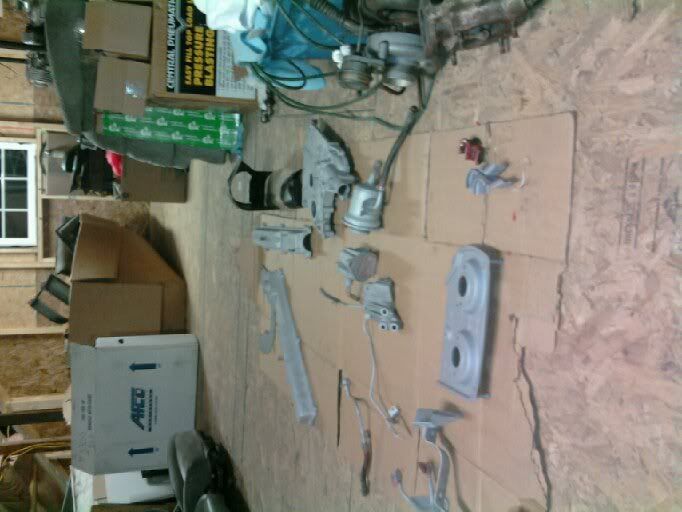
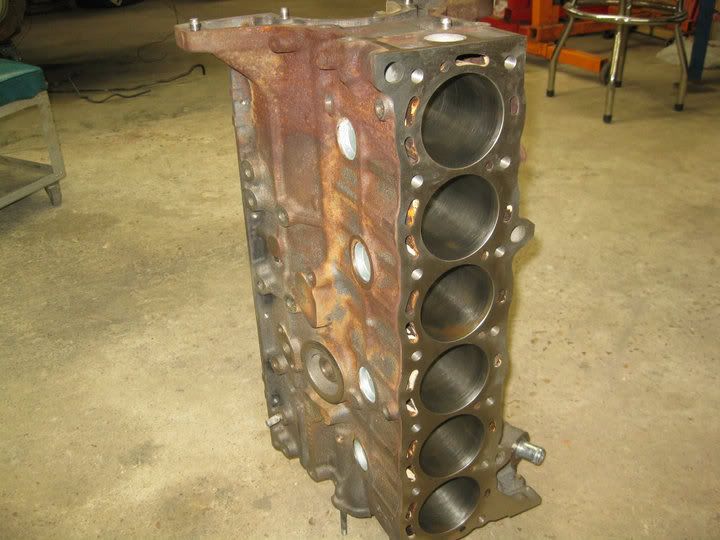
~~This is the first time I built this motor with all the new parts. Here are a bunch of pics of the cracked block and whatnot, but this block is now a boat anchor anyways.
.
.
.
.
.
.
.
.
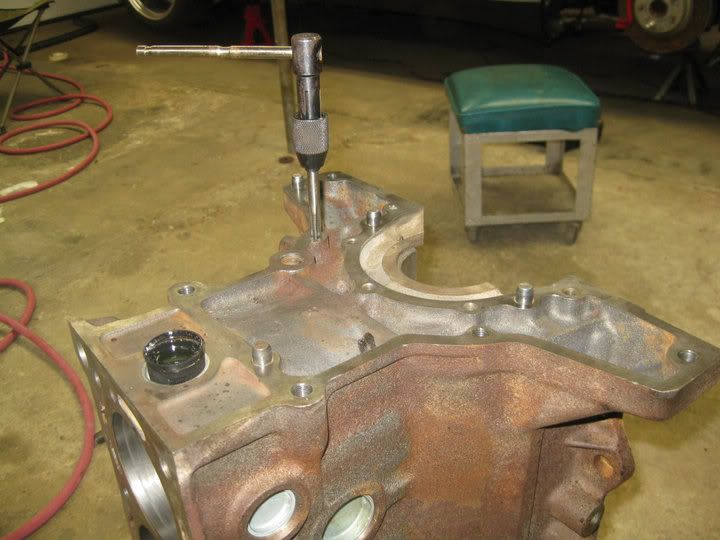
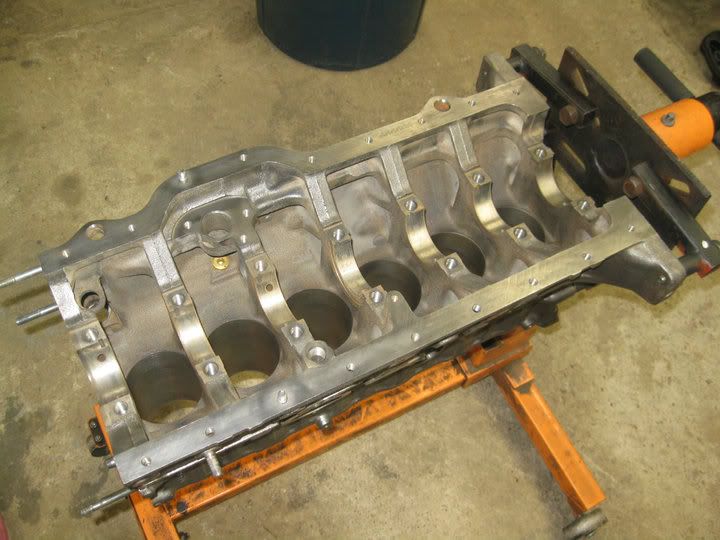
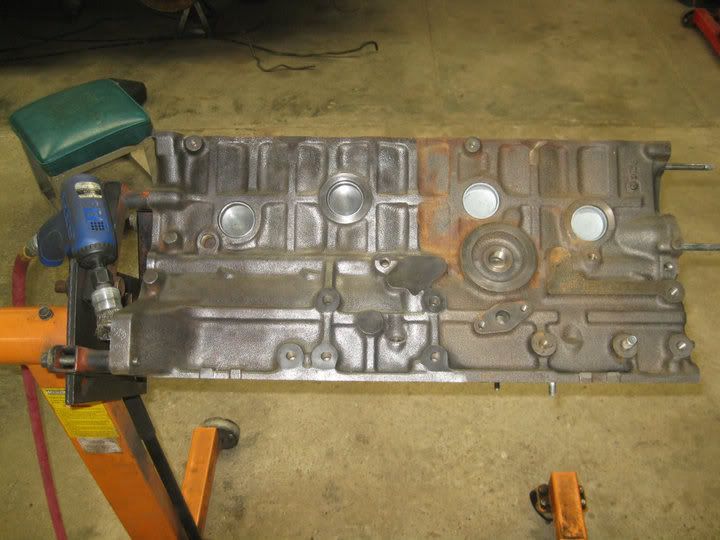
~~This is the new NA block being honed, sent to the machinist, decked, dipped, and tapped. I then went through a couple wire brushes cleaning the piss outta the block. High temp primered and glossed.
.
.
.
.
.
.
.
.
.
.

.
.
.
.
.
.
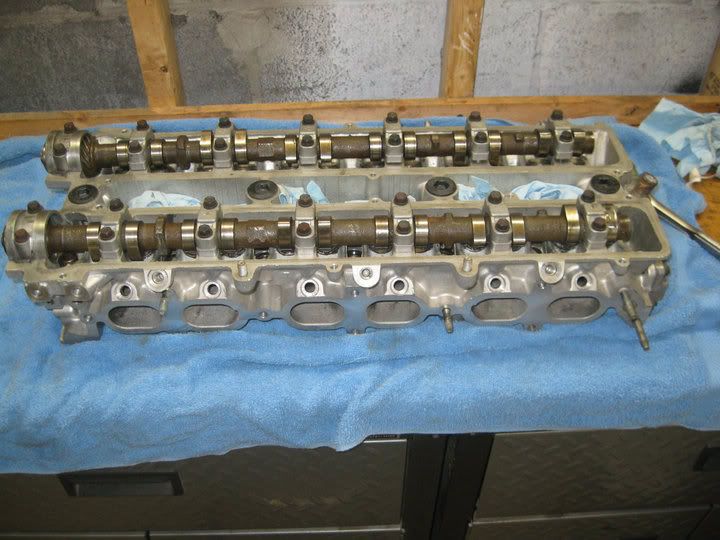
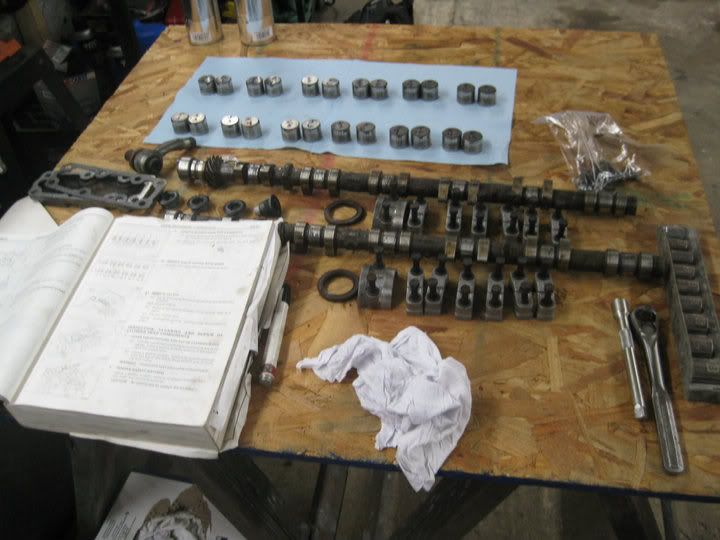
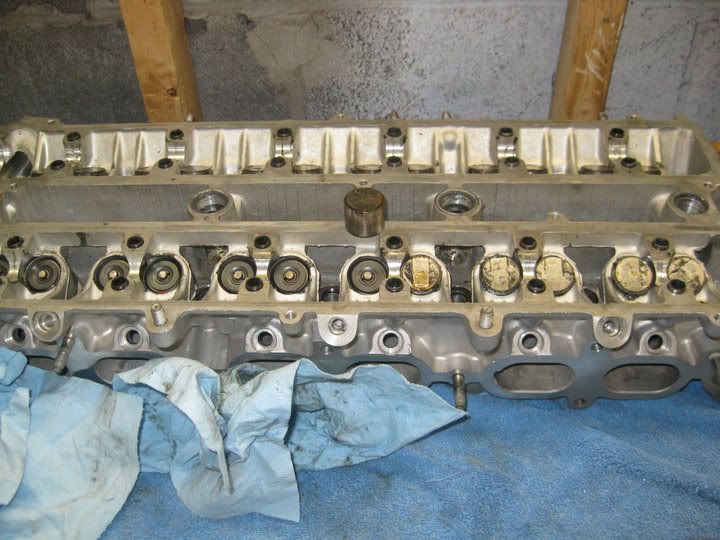
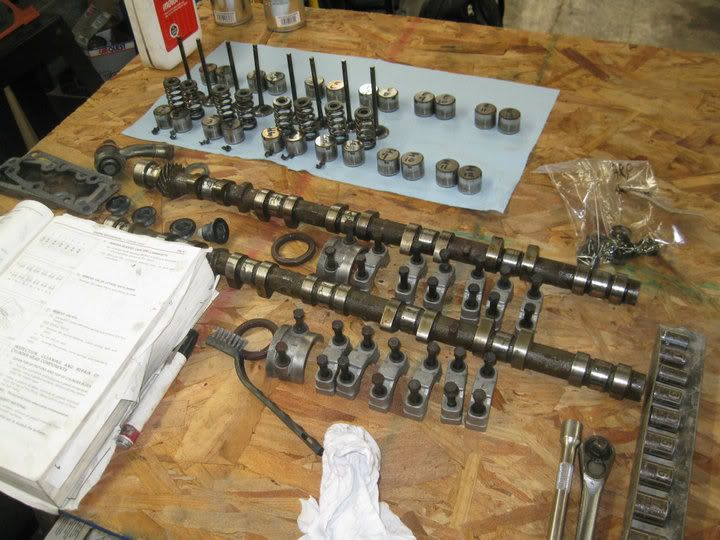
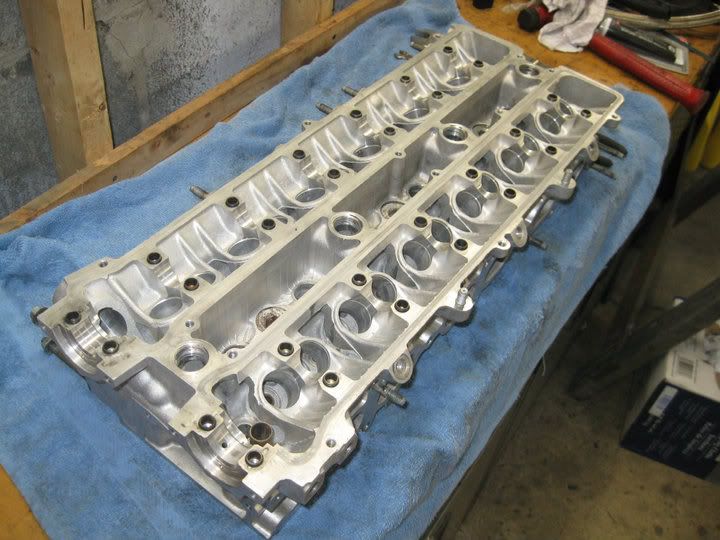
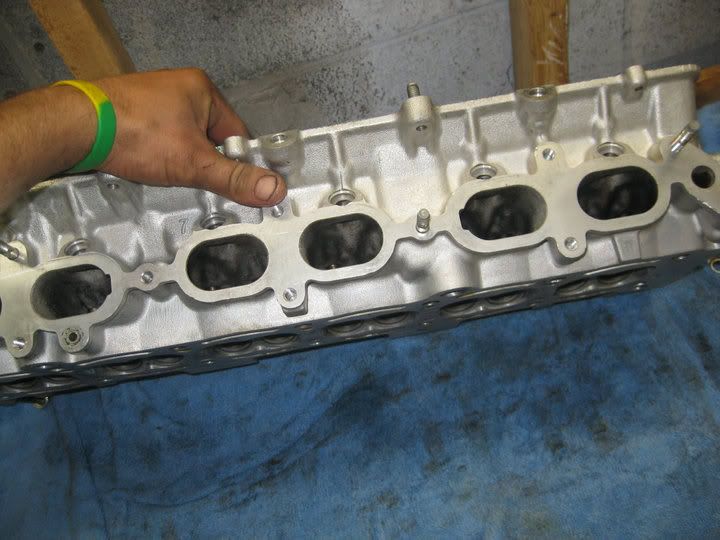
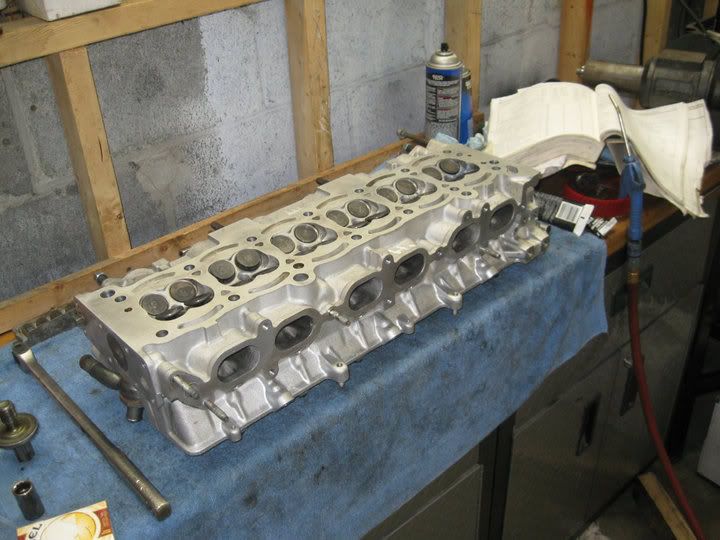
~~Disassembling the head and Cleaning everything. Lapping the valves and reinstalling the new valve springs.
.
.
.
.
.
.
.
.
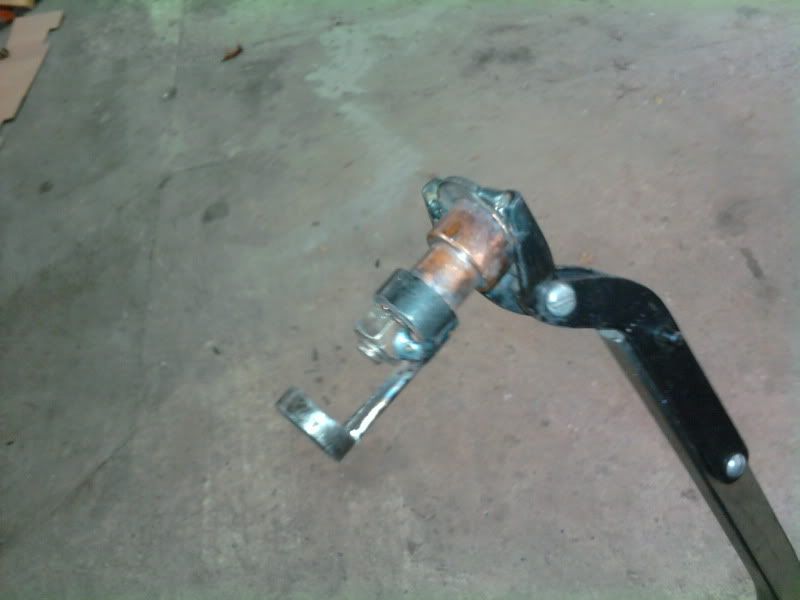
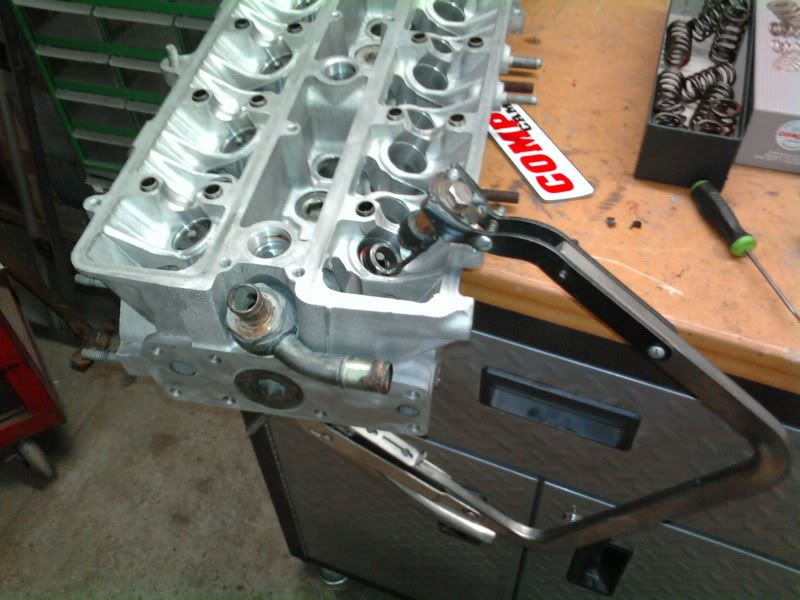
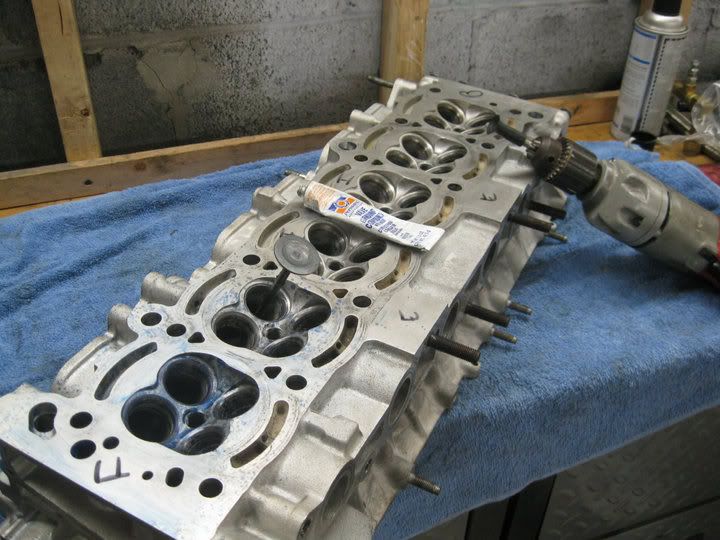
~~My special custom ghetto fabricated valve spring compressor for the 7m head. Works like a charm.
.
.

.
.
.
.
.
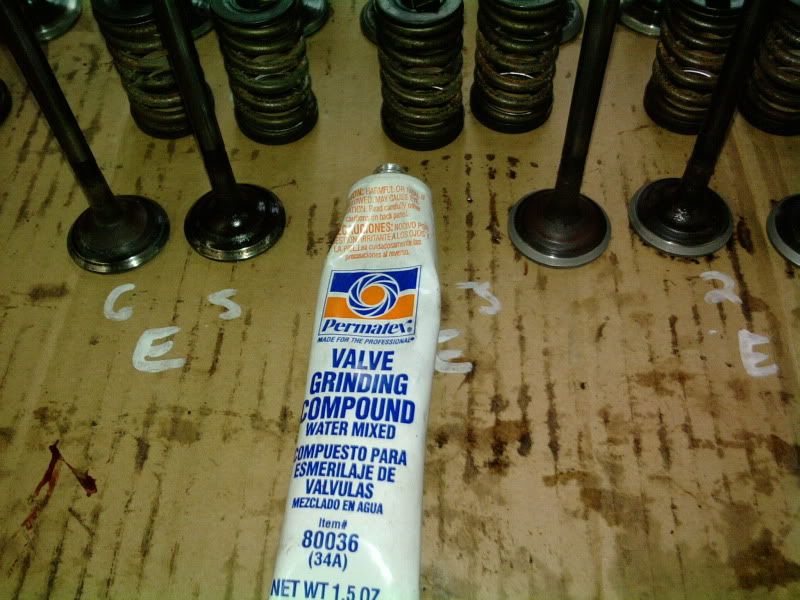
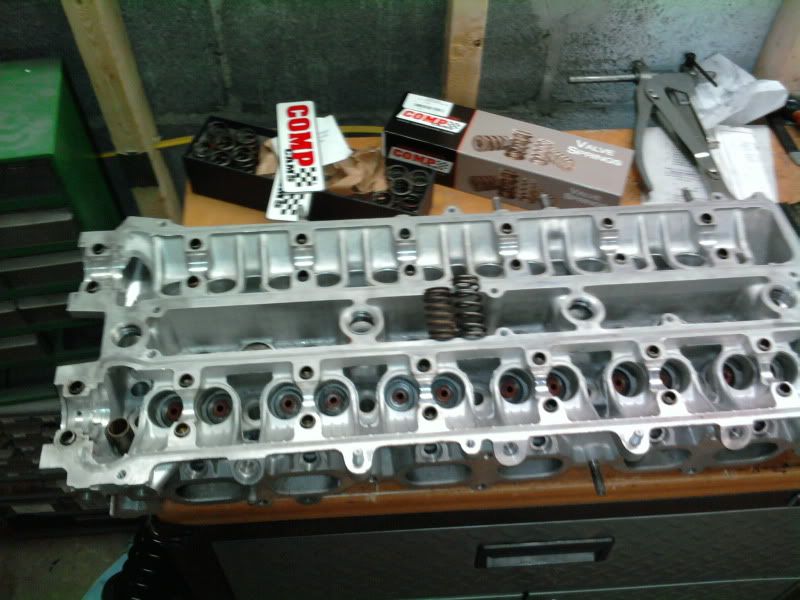
``Lapping the valves and head. And then Cleaning. Then new Compcam Valve Springs.
.
.
.
.
.
.
.
.
.
.
The car sat for a year or so until I had saved up a little money and until I had met a really great friend. Mark Eastep. So I had my car towed to his garage and we began work.
I couldn’t have done any of this and gotten to this point with the car and my life without Mark and his wife Dana. I owe everything to them for helping me and giving me the opportunity to build the car in this fashion and with such precision to detail. Thank you
Here are the old build threads for my car, from the day I got it till what you see now. My progress over the past years.
http://www.supramania.com/forums/showthread.php?82092-7M-BHG-repair-and-rebuild
and
http://www.supramania.com/forums/sh...te-rebuild-and-upgrades...........again/page2
here is the link for the photobucket album with all the build pics. They are not in order, i had trouble uploading them properly.
http://s56.photobucket.com/albums/g180/street_skater069/Final Motor Rebuilding and start/
I have sandblasted and Powder coated pretty much every engine component so everything is super clean, and looks the way i want it.
So i had fully built the motor up to a a getting it ready to drop in the car point, and the threads on the block where the big banjo bolt on the turbo oil filter fitting were cracked and we tryed to Belzona it and clean it up and save it.
But in the end the turbo block was completely garbage.
So thus dis assembly commenced. There was so much dirt and some metal shavings and aluminum oxide sand particles from the sandblaster were in the bottom of the oil pan. This was due to improper cleanliness and not being thorough enough. That motor wouldn't have lasted 8000 miles. Good thing that everything happened the way it did for me to rebuild it.....again. so its proper now.
I took an extended weekend to build the motor. So i spent four days straight building the motor, i only slept about 11 hours. Straight through the night assembling everything. for that four day period i built the motor and dropped it into the car, then about a week later spent another 30 some hours straight again rewiring and hooking everything up till start up.
took the Non Turbo block that i had and had it machined, Hotanked, and holes tapped for the knock sensors. brought it home and honed the cleaned up. I wire brushed the whole block, prepped it, and high temp primer it, then high temp gloss black. Tapped every hole, and washed the piss out of it.
I then took the head and pulled it completely apart, lapped the valves, installed the new compcam valve springs, cleaned everything vigorously, new valve seals, new turbo cams, all new seals, replaced the o rings in the heater core, and reassembled.
I then took the new crankshaft. the bigger thicker one and cleaned all the plugs and oil passages out, had it spun at the shop, and installed it in the block with the new bearings ARP main studs after plastigauging every bearing clearance.
Then took the pistons out of the original turbo motor and took each individual new NPR piston ring and measured the end gap for each cylinder and then installed the pistons with the new bearings after plastigauging as well. I also had them measure the correct bore to piston size to make sure everything was right.
Then rerouted the oil lines for the turbo out of one of the feed ports and drain port on the block. My buddy Mark welded up a hard line for the drain line so it added extra support for my 60-1 ct with t3 oil channel.
Sprayed the metal head gasket with copper gasket sealer and installed the head with ARP headstuds.
Shimmed the oil pump and cleaned the piss out of it and rebuilt it. cleaned the oil pump drive as well. Installed those.
Sandblasted and High temp primed and high temp Gloss black the oil pan. A new oil pan from a parts box laying around
installed all the exterior pieces, and turbo was hooked up. Poured oil in the motor and spun the oil pump with a drill, priming the motor and turbo with oil and making sure that there was enough pressure, as i did so, a temporary rubber plug i had installed on the oil feed source on the block exploded off the block and shot ten feet and dented a box with a huge splurge of oil on the ground. everything went well other than that. everything was sealed and no oil leaks.
Threw it on the cherry picker and installed the new Southbend Stage 3 clutch and reground flywheel with the new ARP flywheel bolts. i had to grind the bolts a hair to get the clutch to not hit it when it spins. Installed the r154 and hooked everything up.
Dropped it in the car and connect the driveshaft and shifter with new gear oil.
Took the entire wiring harness apart and re taped and reorganized the entire harness, replaced a couple things hooked the motor up, ran all the New hose techniques red vacuum lines, and hooked up the ignition. Ran all the intercooler piping, intake, and hooked up the original suprasport stamped turbo elbow to the megan downpipe and 3 inch exhaust.
installed the new radiator and flex a light fans, and redid the battery wires and terminals.
Replaced all the fuel injector o rings, and redid the fuel rail.
Did the timing and belts and prepped the motor for start.
Prime started the motor and cranked it over. took a couple times but she eventually started running on her own. But since i had not put a gasket on the O2 sensor and the turbo had sat for so long not taken care of, the seals were blown on My CT26 60-1. so oil was pouring out my exhaust and smoking bad. so i replaced the turbo with a buddys stock extra turbo, only to fire it up again and have that turbo seals blown as well, not as bad, but still.... oil was comming out of my intake.....
The motor itself runs excellent right now for two warm ups. oil pressure is good, fuel pressure is good, temperature is good, and there are only complications with the turbo and oil leaks through hooking up the different turbos. but other than that the car is ready.
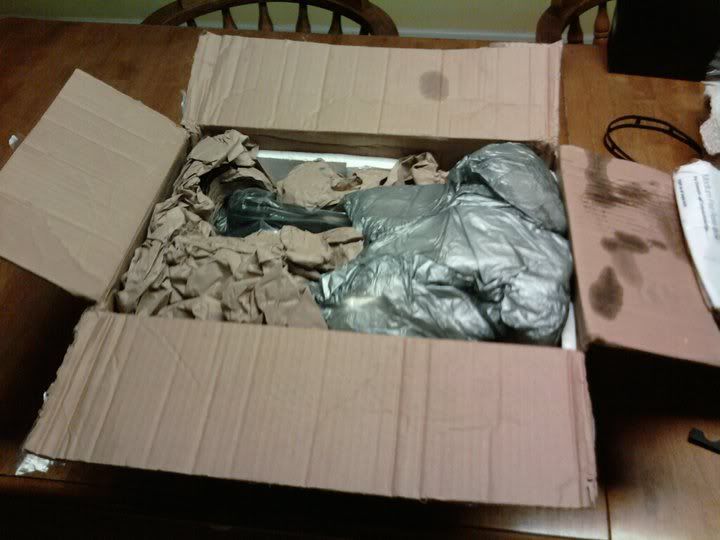
So this is where im at right now with no turbo, im saving and selling my Chevy nova to get the money for a rebuild from Evergreen Turbo. I hear great things about them and was referred.
So after the fourth time rebuilding this car, its finally alive again. thank the good lord.
So let me know what you think? Its my masterpiece.
Here is the video of the startup.
http://www.facebook.com/video/video.php?v=1594555867673
here are some pictures, click on the photo albums for more pictures.
~~Every engine part has been sandblasted and powdercoated with Red wagon, Semi Gloss and Gloss black. Everything turned out so nice and pristine.
.
.
.
.
.
.
.
.
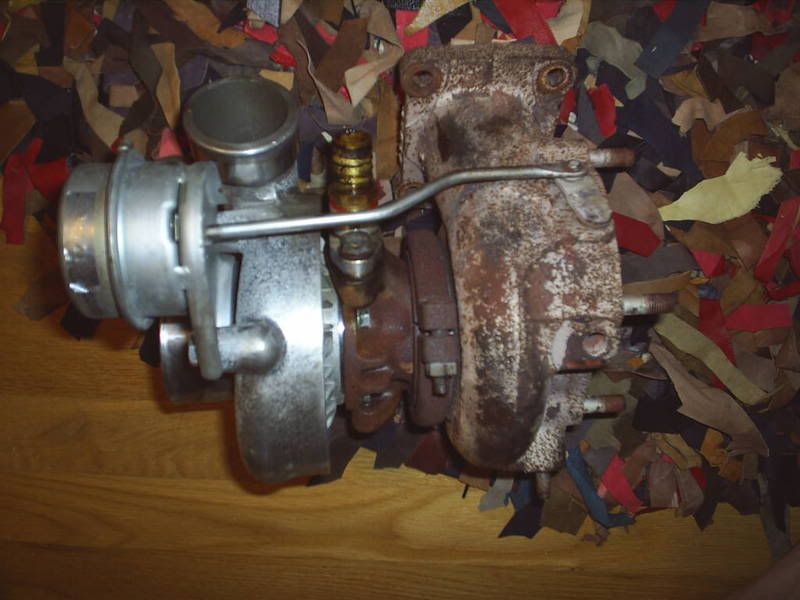
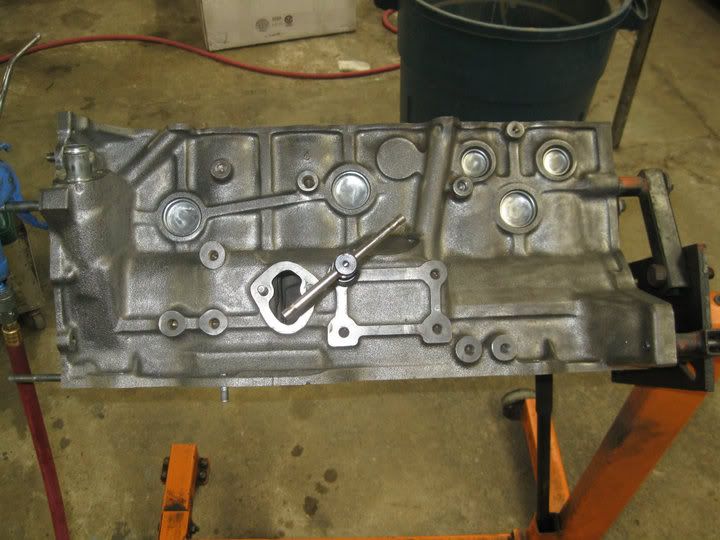
~~This is the first time I built this motor with all the new parts. Here are a bunch of pics of the cracked block and whatnot, but this block is now a boat anchor anyways.
.
.
.
.
.
.
.
.
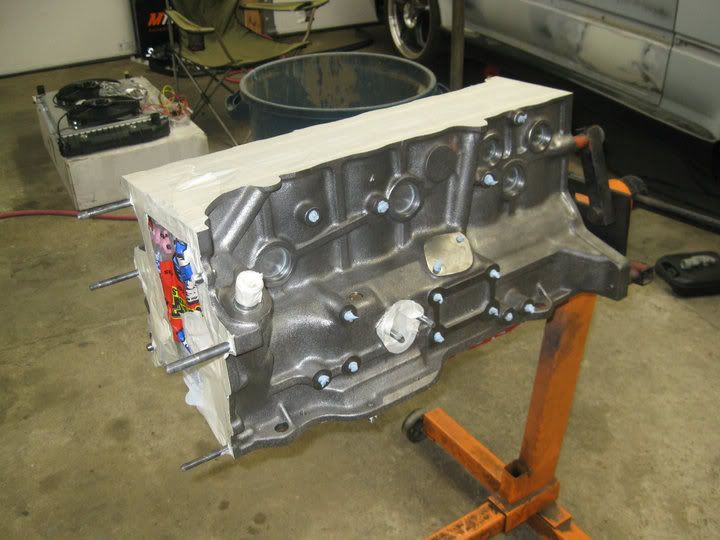
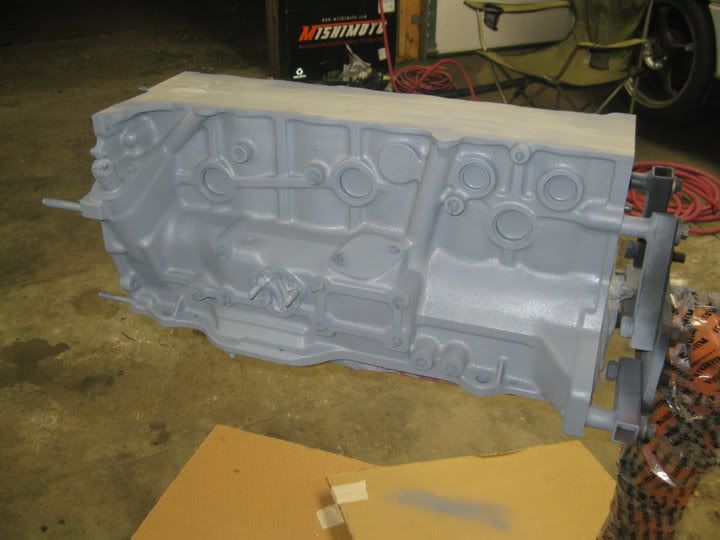
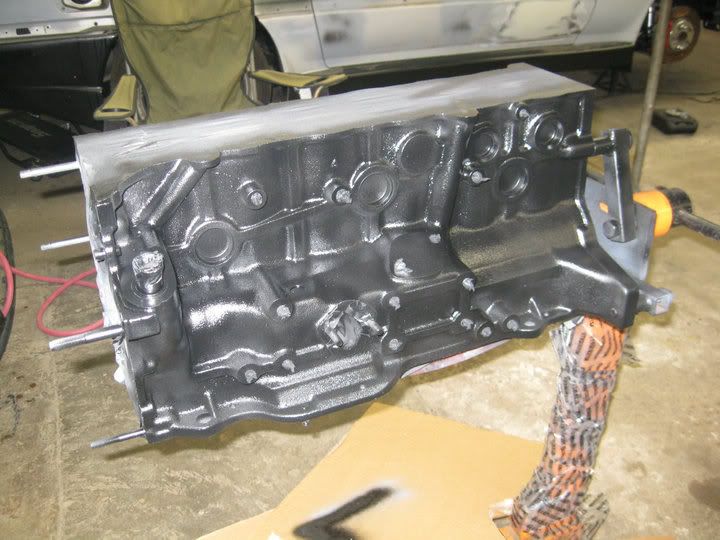
~~This is the new NA block being honed, sent to the machinist, decked, dipped, and tapped. I then went through a couple wire brushes cleaning the piss outta the block. High temp primered and glossed.
.
.
.
.
.
.
.
.
.
.
.
.
.
.
.
.
~~Disassembling the head and Cleaning everything. Lapping the valves and reinstalling the new valve springs.
.
.
.
.
.
.
.
.
~~My special custom ghetto fabricated valve spring compressor for the 7m head. Works like a charm.
.
.
.
.
.
.
.
``Lapping the valves and head. And then Cleaning. Then new Compcam Valve Springs.
.
.
.
.
.
.
.
.
.
.
Last edited:

")