Ok... late last year I built a template for my rear hatch area. I wanted to design a rear hatch template that had an amp enclosure, had access to the spare tire and maintained access to the side storage areas and panels (Little black storage tray area). But above all, I wanted something unique - I'm not saying this hasn't been done before, but if it has, I haven't seen it. I'm hesitant to post pics of my car, but what the hell...
Disclosure: Just got car back from shop, so not as clean as I would like.
Picture 1: This is the front of my sub box - half of it anyway. I built this circa Spring 2001.
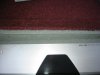
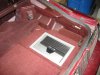
Picture 2: This is the rear hatch area with carpet covering template. The box allows the targa to fit. I have to fix it thought... it's too high now - the template I built raised it up a bit.
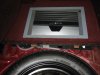
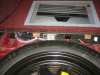
Picture 3: Behold, my rear hatch template. It's in two sections: The right side is fixed and houses the amp. The left side can be removed to access the spare tire.
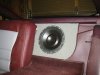
Picture 4: IMO this is pretty cool... IF the radio is on AND IF the hatch is open, neon tubes light up the amp.
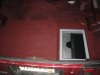
Picture 5: This kind of shows access to the hidden compartment... it's lifted up in the pic, but when closed it's flush and you can't even tell it's a door. This allows you to access the side light and power antenna compartment. The left side one has the same function. The hinges were recessed in the wood so not to bulge, and there is a support plate on the bottom side to allow it to support weight.
I ran out of picture downloads, so I'll continue in the next post.
Disclosure: Just got car back from shop, so not as clean as I would like.
Picture 1: This is the front of my sub box - half of it anyway. I built this circa Spring 2001.
Picture 2: This is the rear hatch area with carpet covering template. The box allows the targa to fit. I have to fix it thought... it's too high now - the template I built raised it up a bit.
Picture 3: Behold, my rear hatch template. It's in two sections: The right side is fixed and houses the amp. The left side can be removed to access the spare tire.
Picture 4: IMO this is pretty cool... IF the radio is on AND IF the hatch is open, neon tubes light up the amp.
Picture 5: This kind of shows access to the hidden compartment... it's lifted up in the pic, but when closed it's flush and you can't even tell it's a door. This allows you to access the side light and power antenna compartment. The left side one has the same function. The hinges were recessed in the wood so not to bulge, and there is a support plate on the bottom side to allow it to support weight.
I ran out of picture downloads, so I'll continue in the next post.
Attachments


Last edited: