
The manual gearbox used in the Supra (turbo) is the R154. This has often been described as 'agricultural' and, in all honesty, it's far from sporty! One thing it does do well is hold power though so it's not common to swap it out. There are a number of true short shift kits available from the US but there has been a cheap and cheerful approach kicking around for many years now known as the 'SOGI short shift mod'.
The best bit is that it's free and dramatically changes the gear shifts for the better. The only thing you need to buy are (optionally) an aftermarket gearknob and 2 bushes :
1. White pivot bush on the ball at the base of the gearstick 33548-31010 3.06+VAT
2. Green support bush/seat 33505-35020 7.13+VAT
I recommend you replace these 2 bushes even if not doing the mod and you'll be surprised at the difference! You can get aftermarket poly bushes from a company (marlin crawler) in the US but postage was going to be $55 for me (price in Jan 09) so was prohibitively expensive
Note, after performing this mode you may notice a very slight amount of noise from the gearbox and possibly a little more vibration because you have a little less rubber damping the movements. This really is negligible though in my opinion. The upside is that you will have a notchier and stiffer feel that allows quicker shifts and also looks a lot better
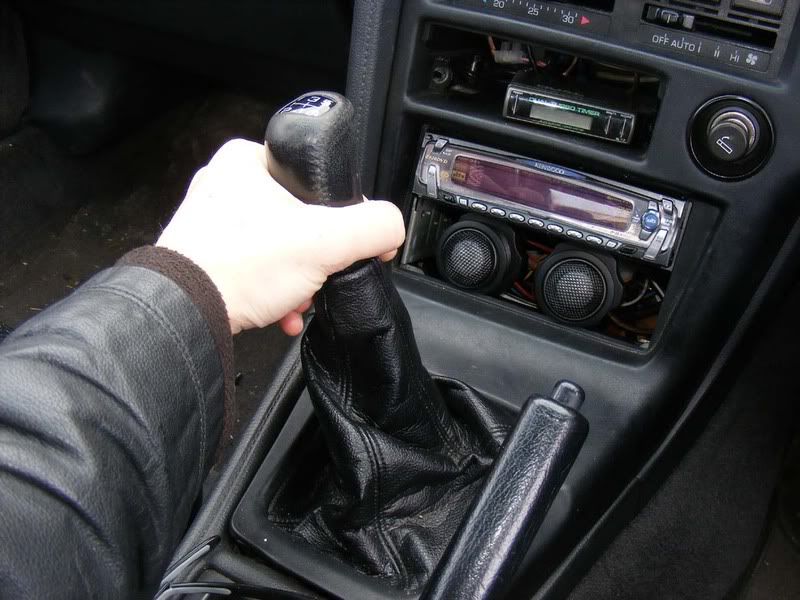
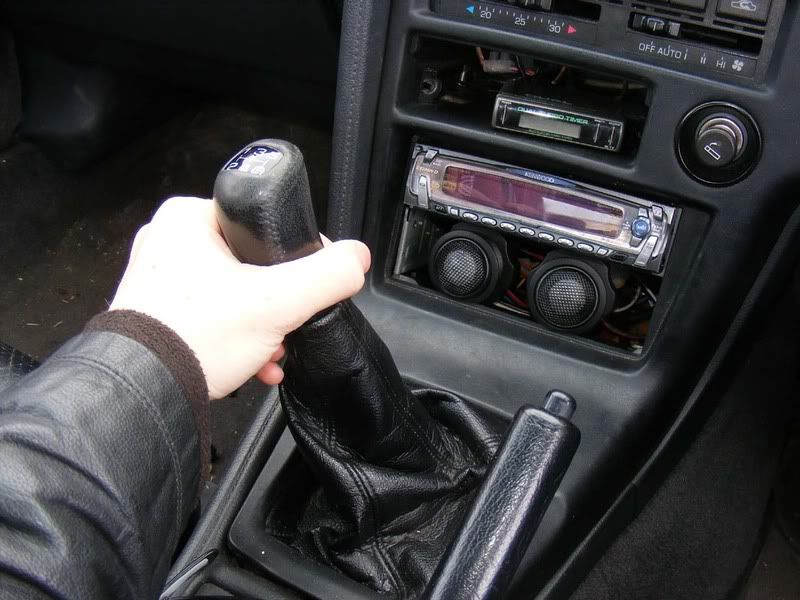
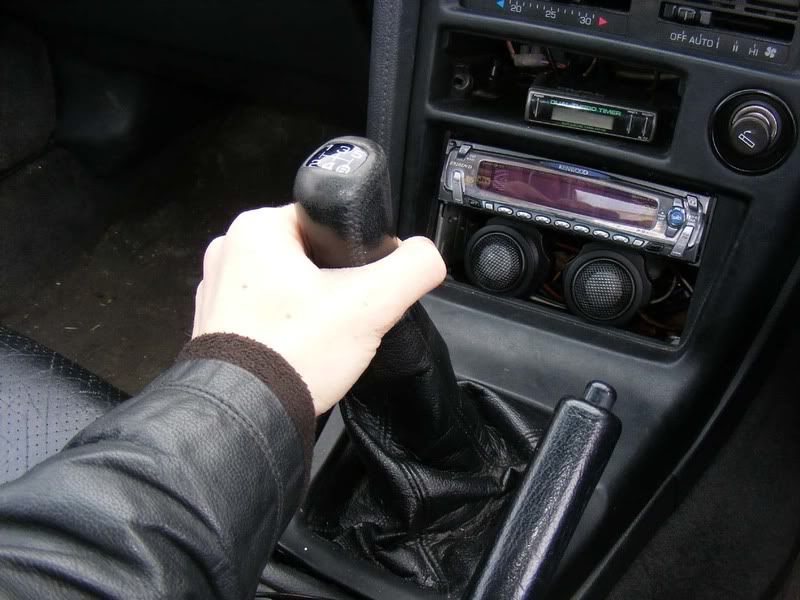
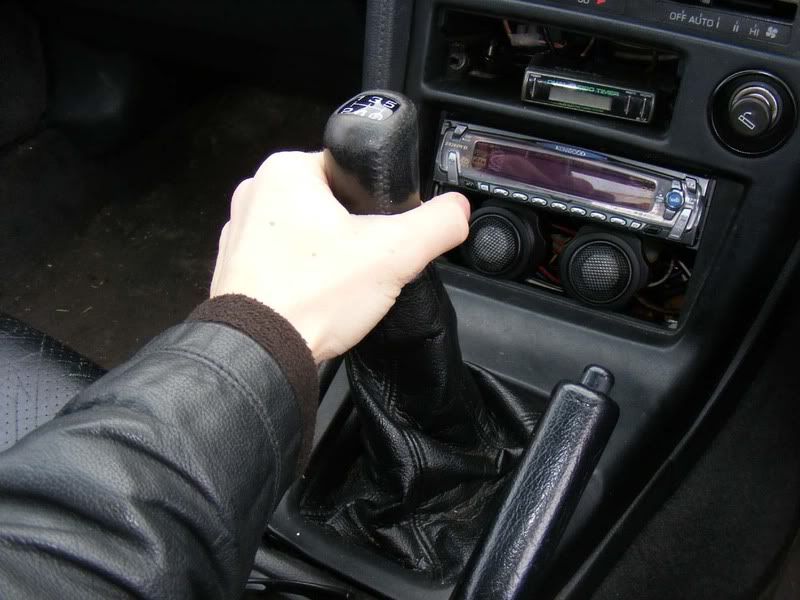
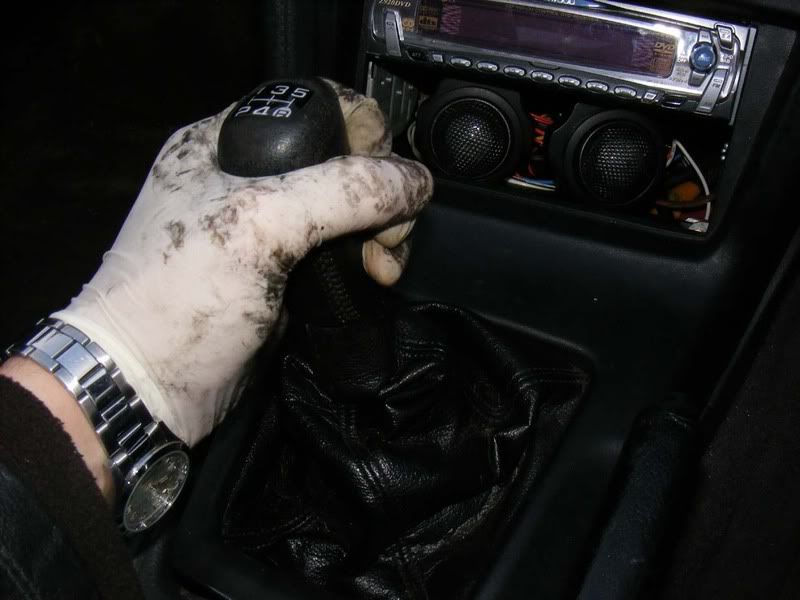
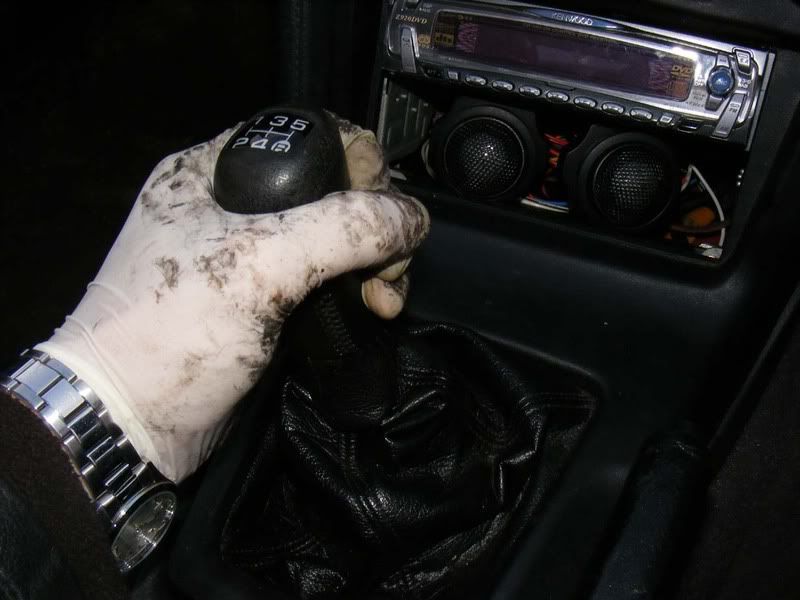
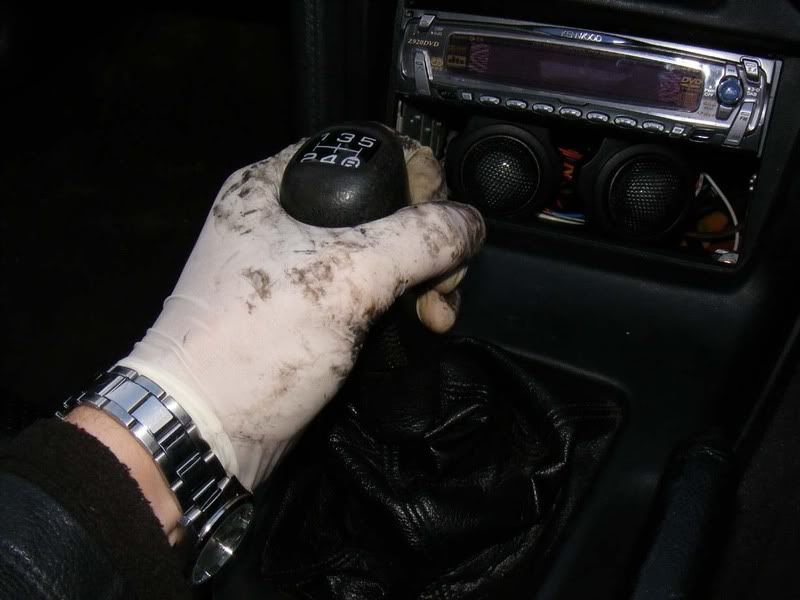
Step 1 - I wanted to show you how much play I had in my gearstick so the following sequence shows the movement when in first gear. Note that this felt pretty tight before I'd done the bushes so I wasn't expecting much improvement - I was pleasantly surprised
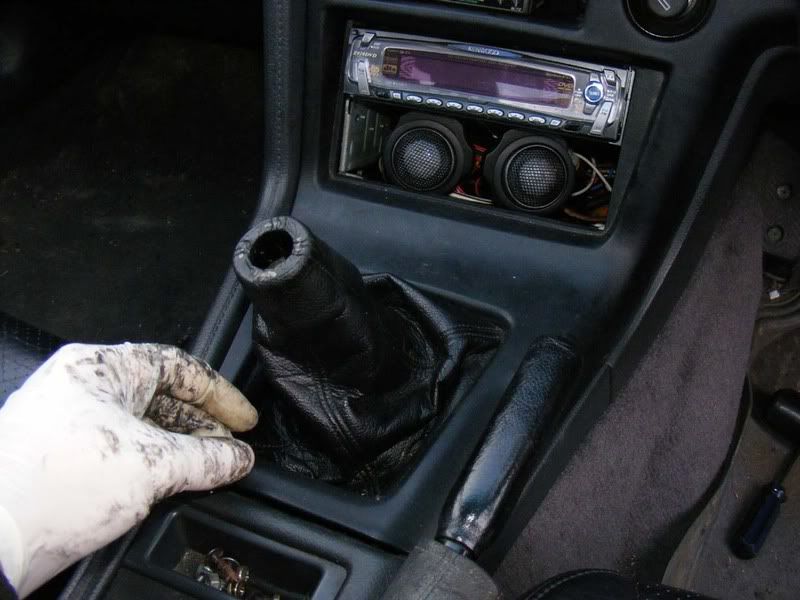
Step 2 - Unscrew the gear knob and follow steps 14-21 in the turbo timer guide to remove the gearstick surround
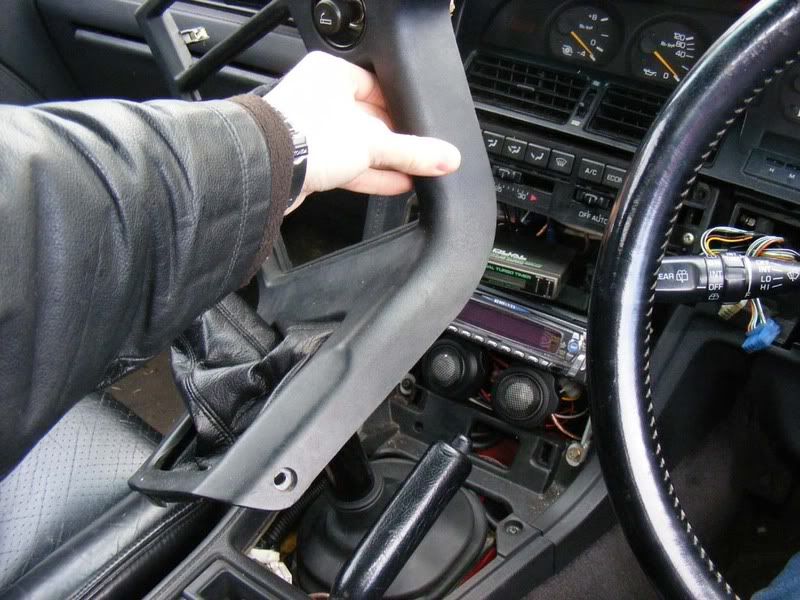
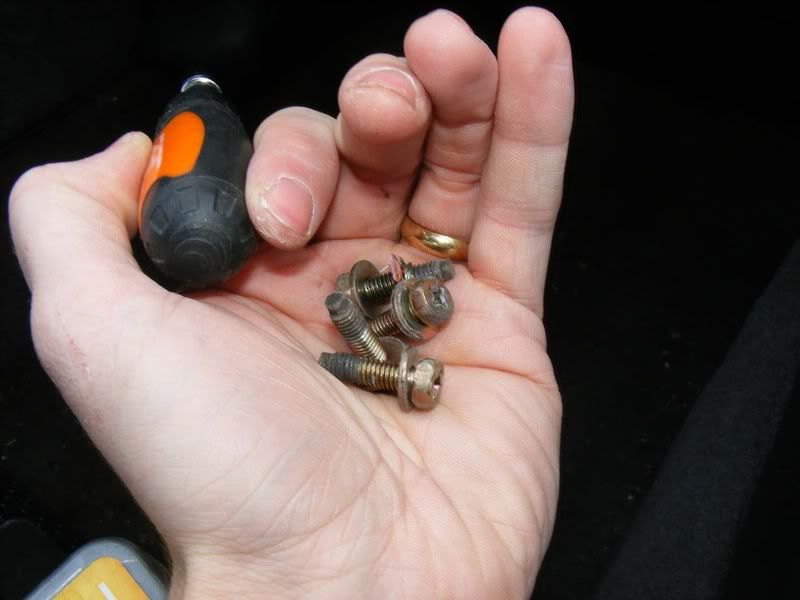
Step 3 - The first task you're faced with is removing this outer rubber surround. There are four 10mm bolts with philips screw heads in them, remove them all. Note that I always choose the socket over the screwdriver for any bolt like this
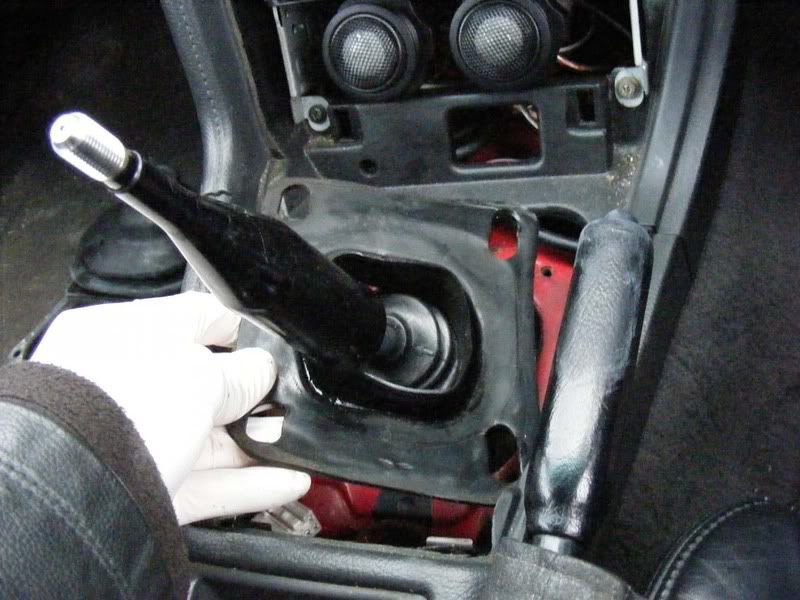
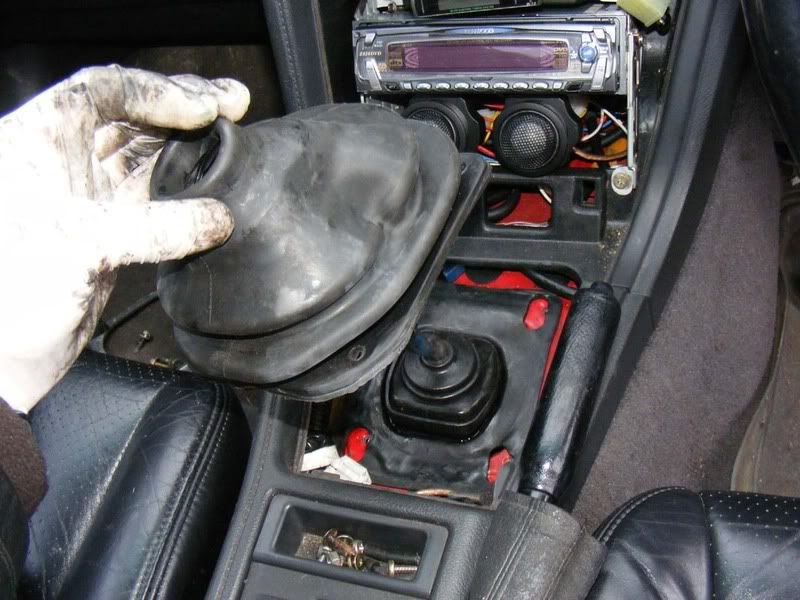
Step 4 - Now you can start to remove the cover, lift up the metal plate as shown
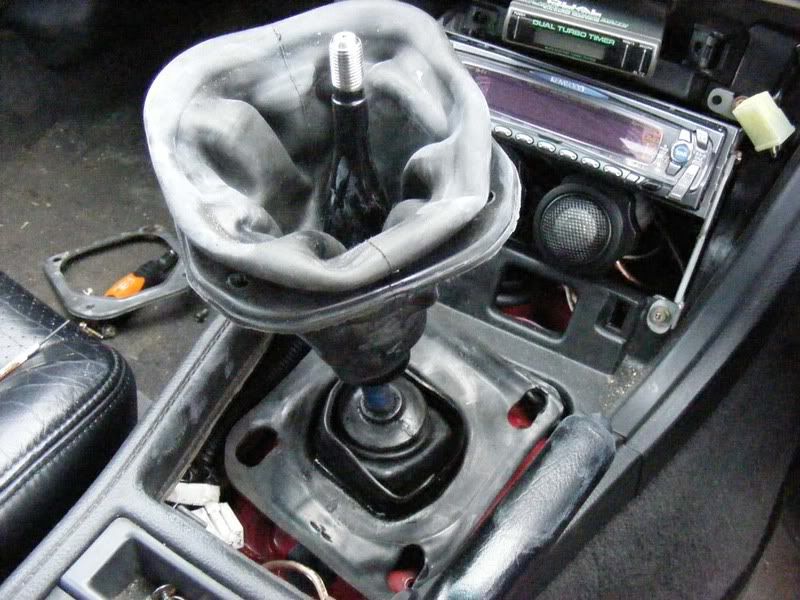
Step 5 - Pull clear of the rubber surround (puish the rubber through if required but it should pull off easily)
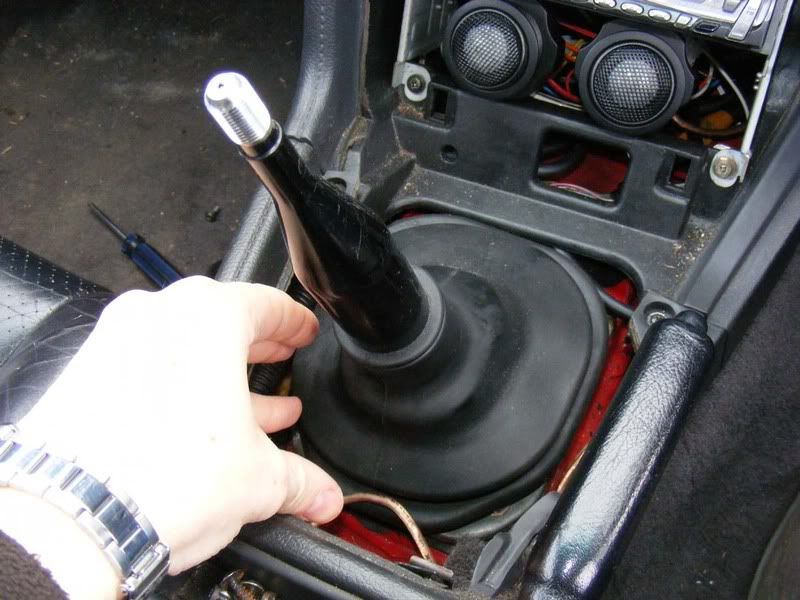
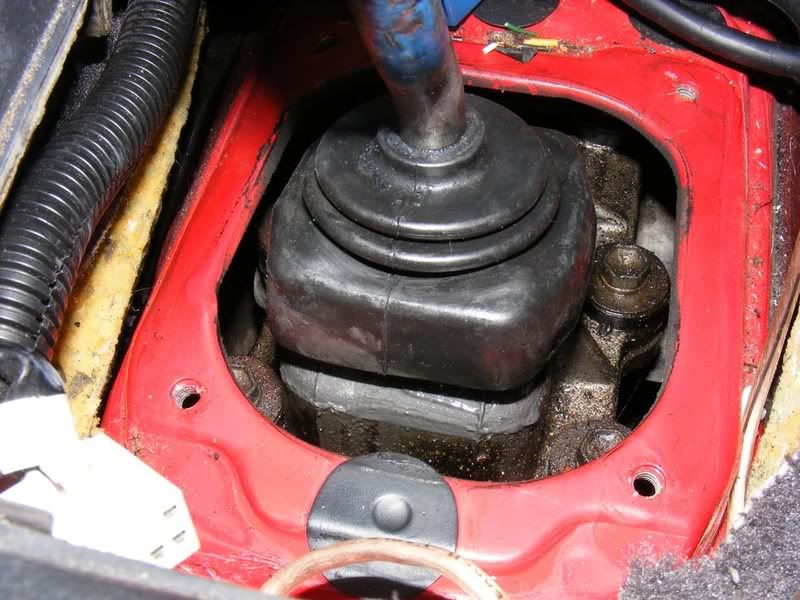
Step 6 - Now you need to remove the rubber boot, this will need quite a bit of force so pull it firmly upwards and it will come off - you'll stress the rubber more by gently pulling at it for half an hour than just whipping it out in one go
Step 7 - Now remove the lower rubber piece if it didn't come away in step 6 all together
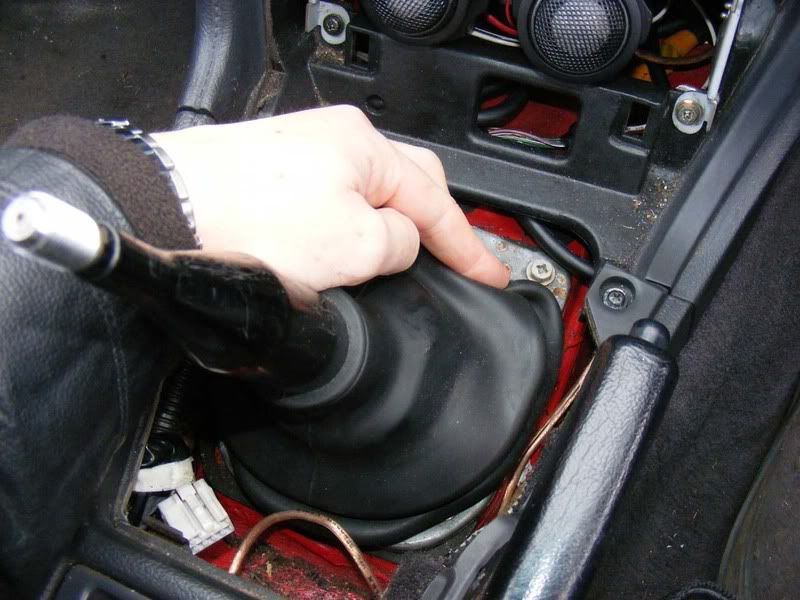
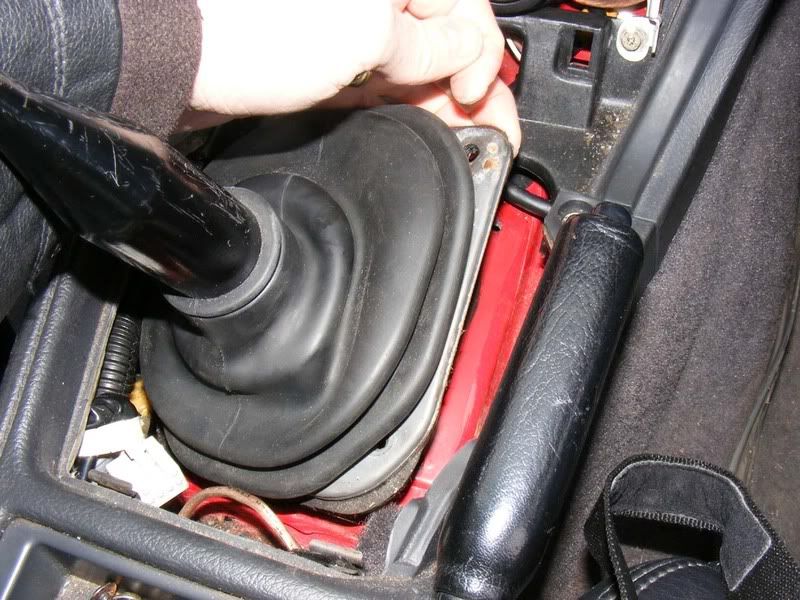
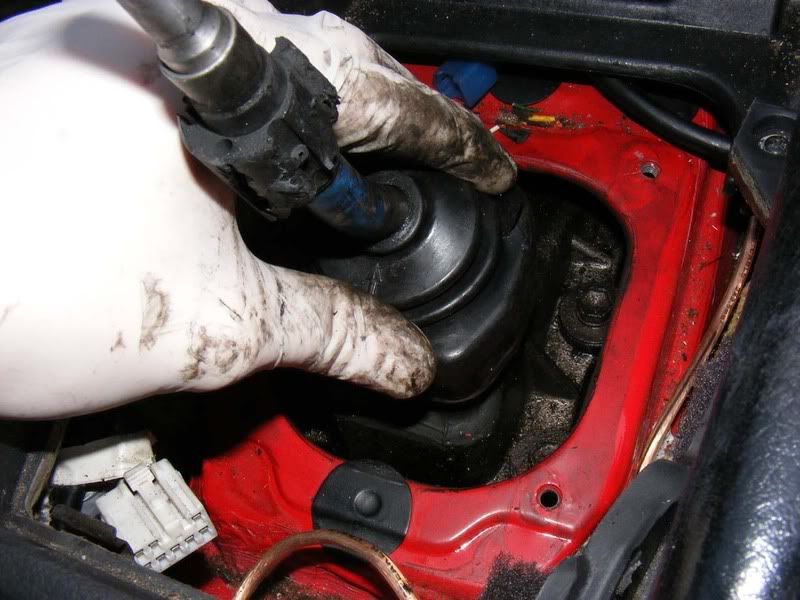
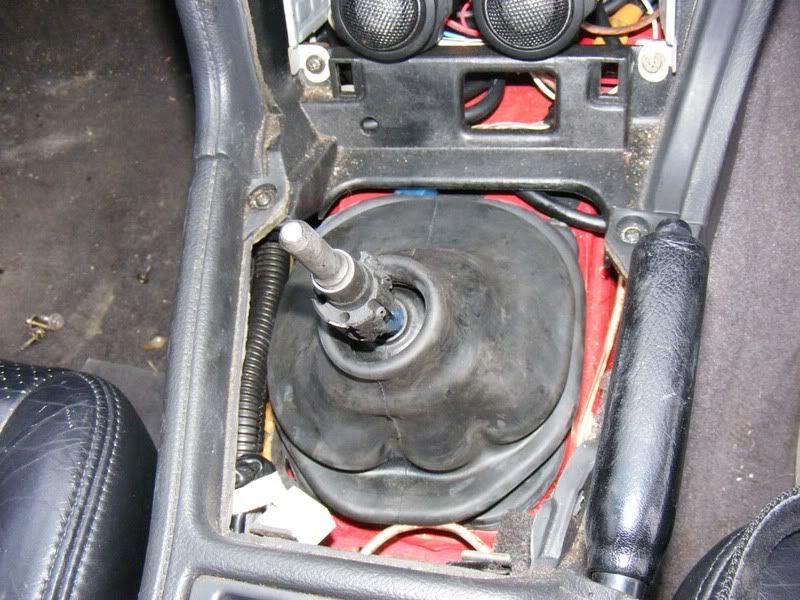
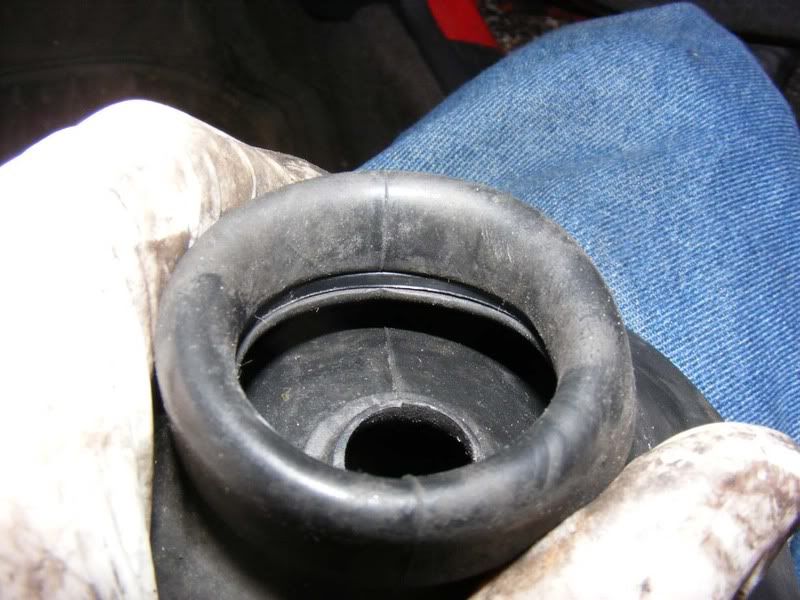
Step 8 - The final rubber boot should be hooked over the base of the stick's surround as shown. Simply peel back and slide it up the shaft
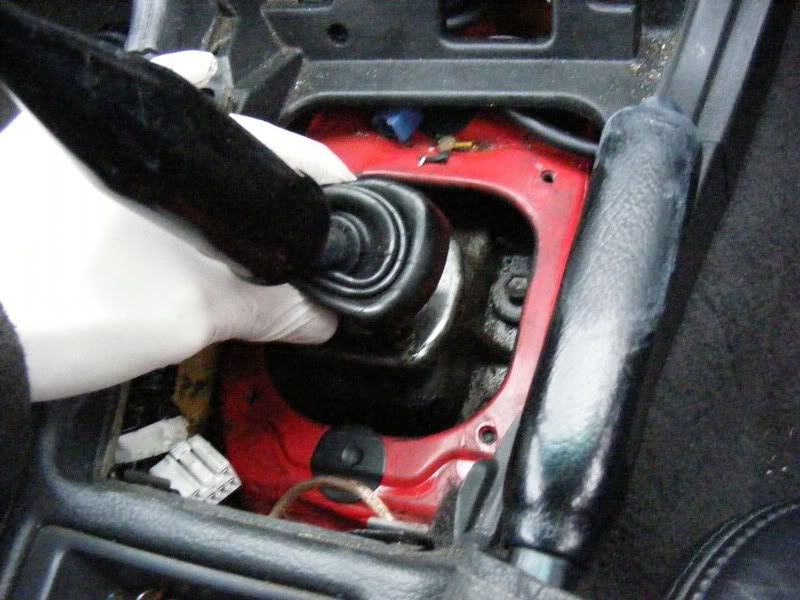
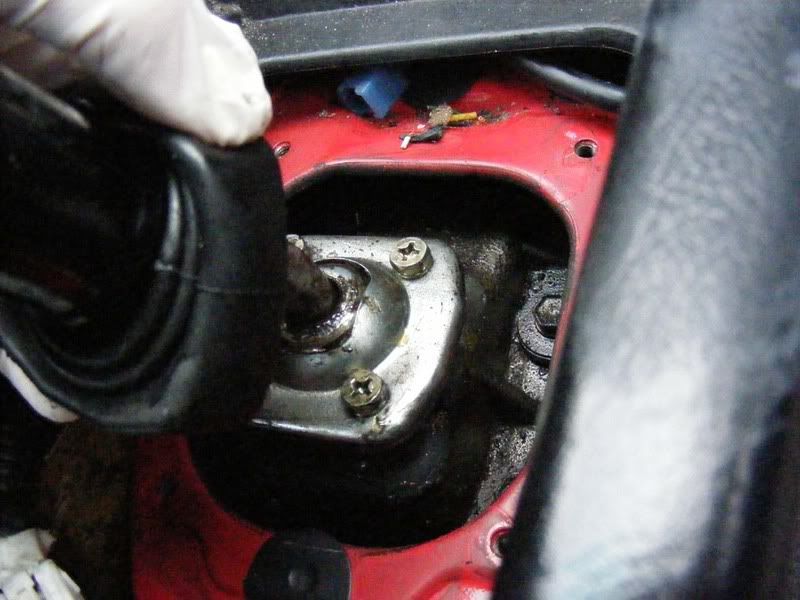
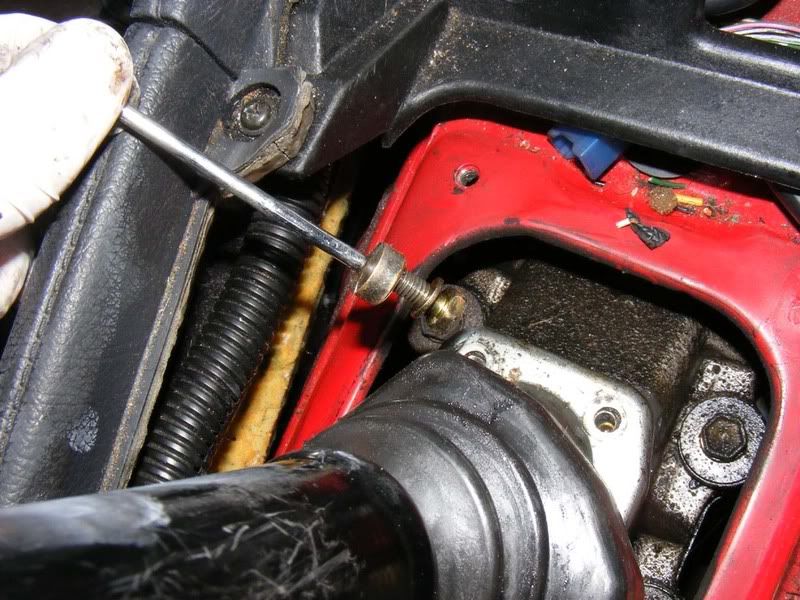
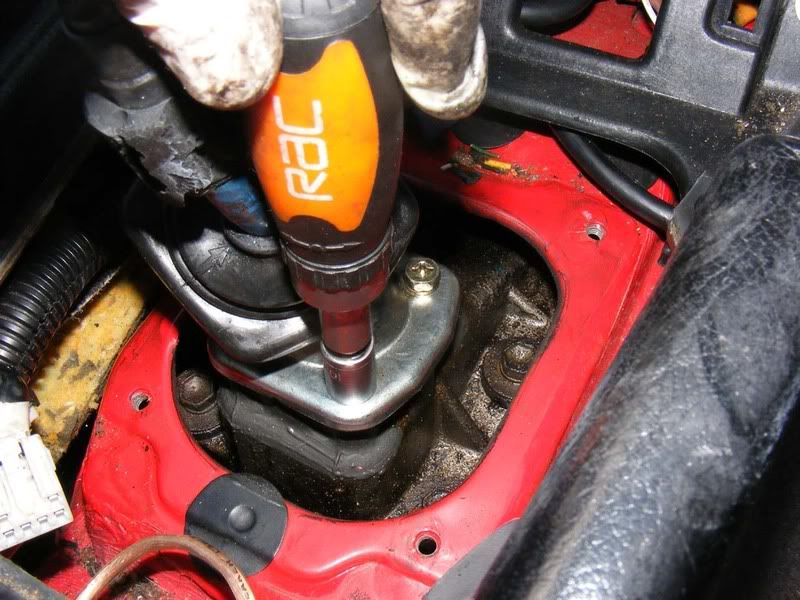
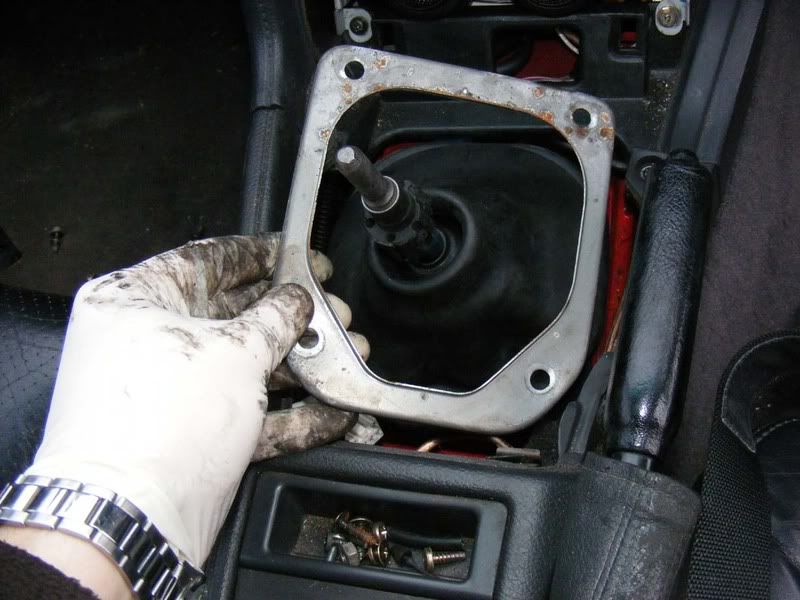
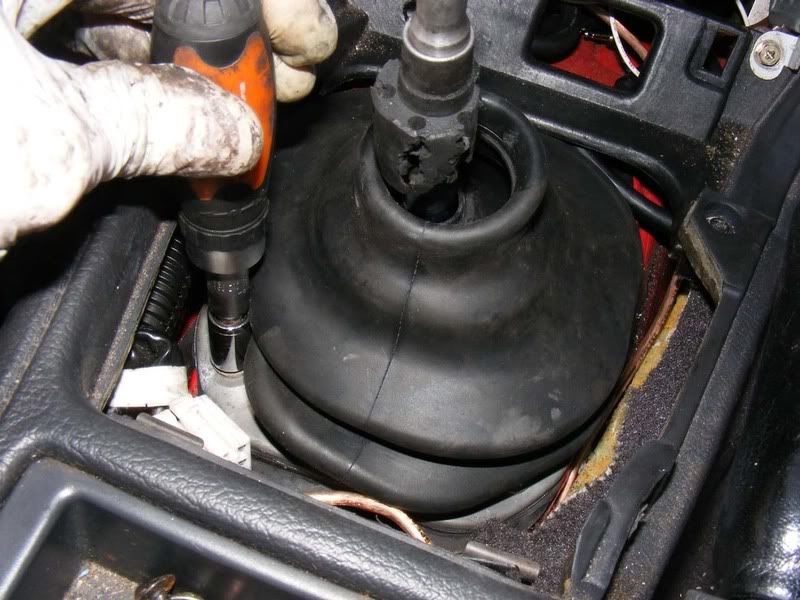
Step 9 - You should now have access to a second set of four 10mm bolts/screw heads, remove all four again
NOTE: You are looking at the top of the gearbox here and it's very easy to drop the bolts which can be quite time consuming to find. I suggest that you stick a magnetic parts retriever on the bolt as you are removing it to avoid any issues
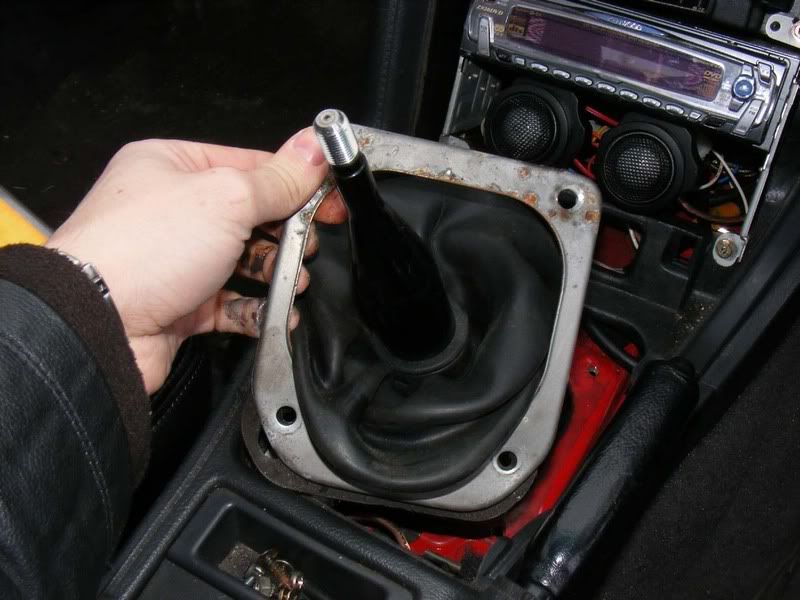
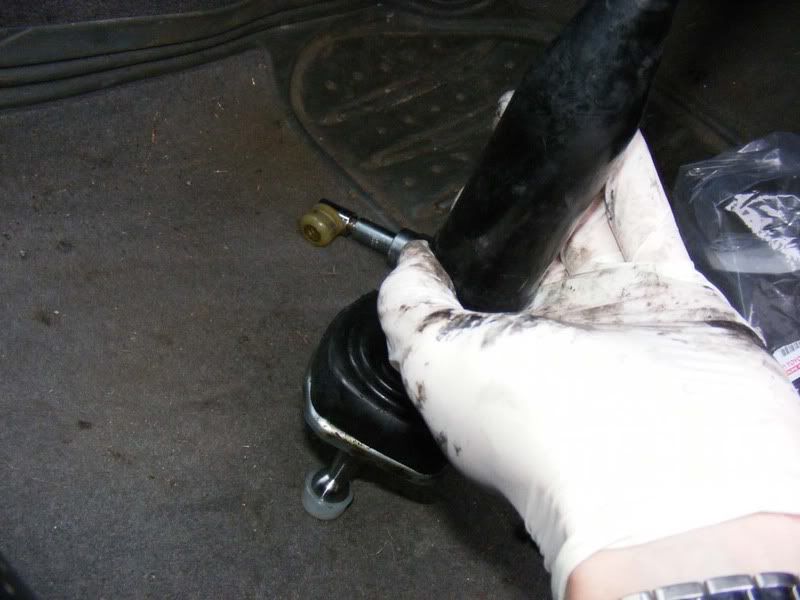
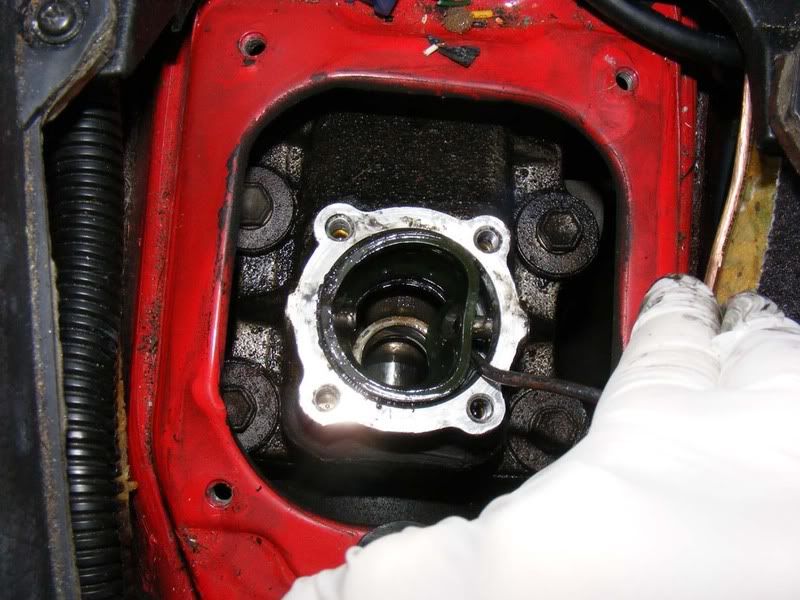
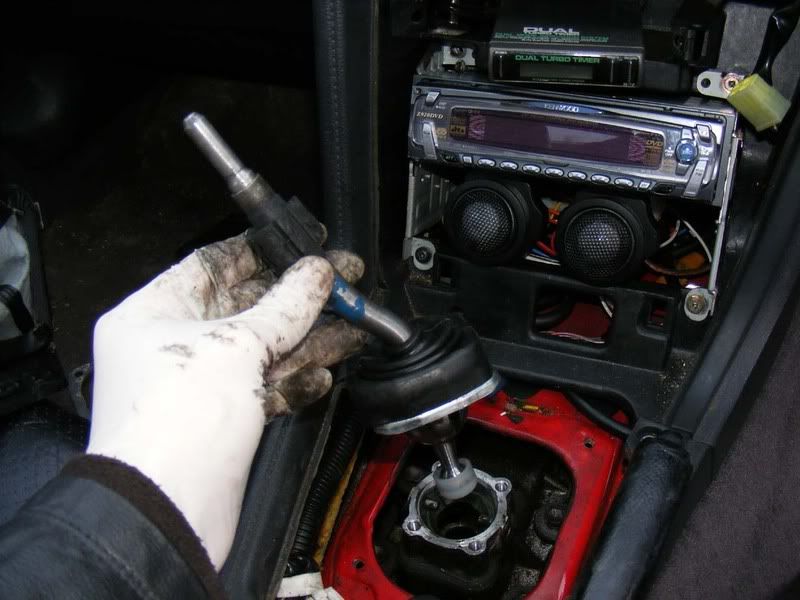
Step 10 - Now lift the gearstick straight upwards in a clean movement, you may have brittle crumbled gasket waiting to work its way into the box so be careful here. A swift vertical movement to get it clear is required, not much force is needed
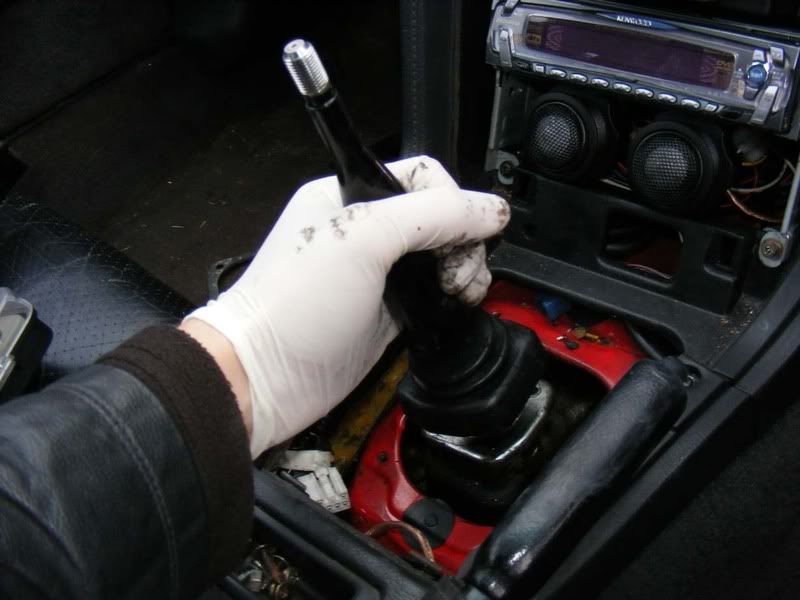
Step 11 - You now reveal the other end of the shaft, this is the bit you will be keeping, the black piece may be re-used later depending on your requirements
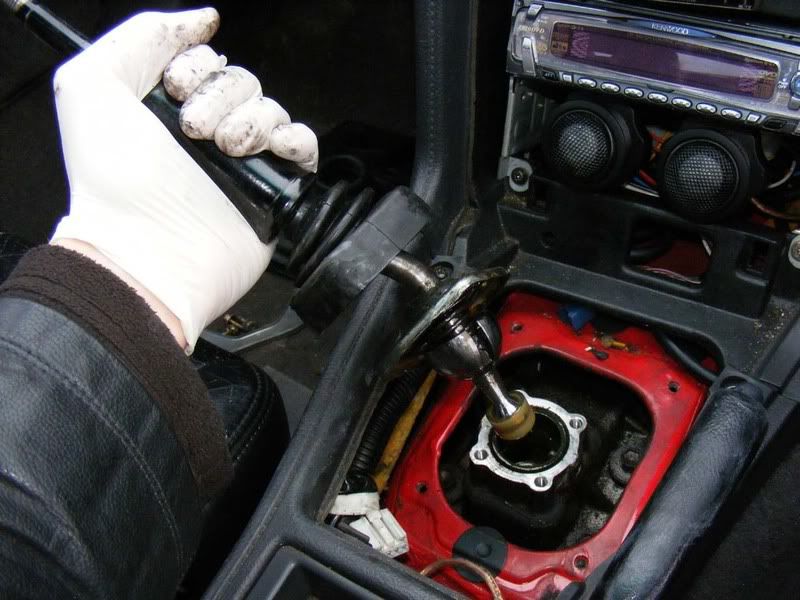
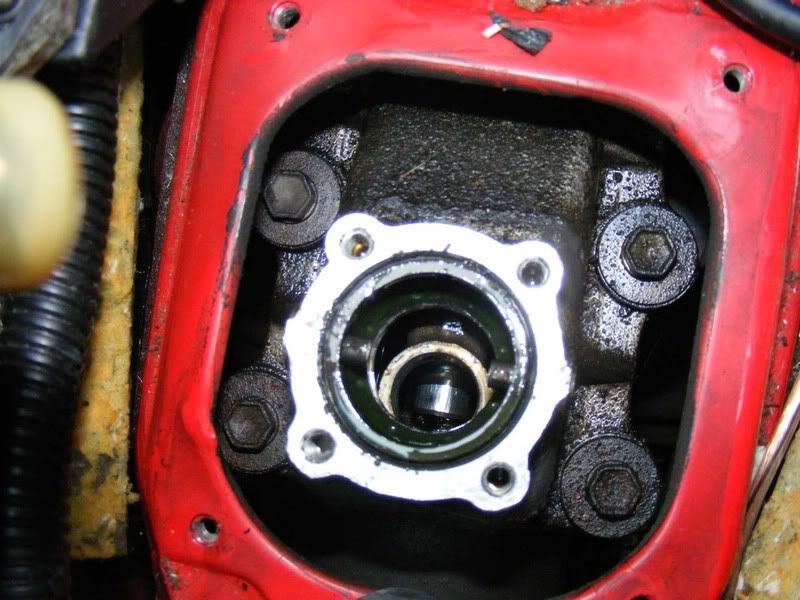
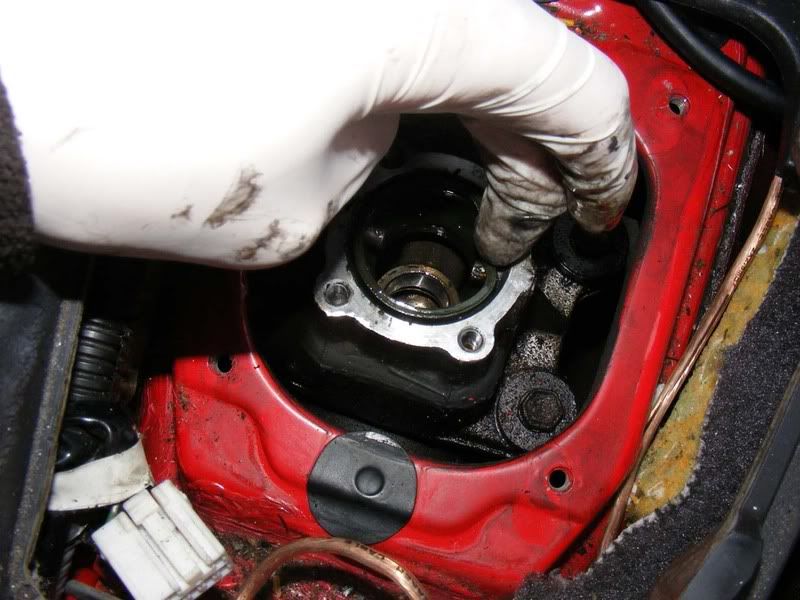
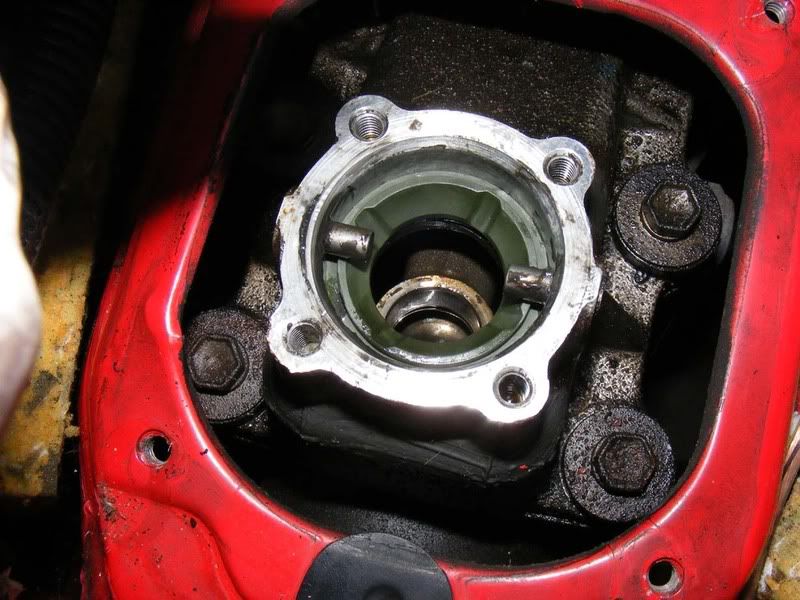
Step 12 - Have a look into the transmission and you'll see one of the bushes you need to replace, it's the green piece around the circumference of the hole. You need to be extra careful if it is looking tatty/broken but mine was fine. Put a piece of rag in the hole if you're worried (but don't push it all the way in of course!)
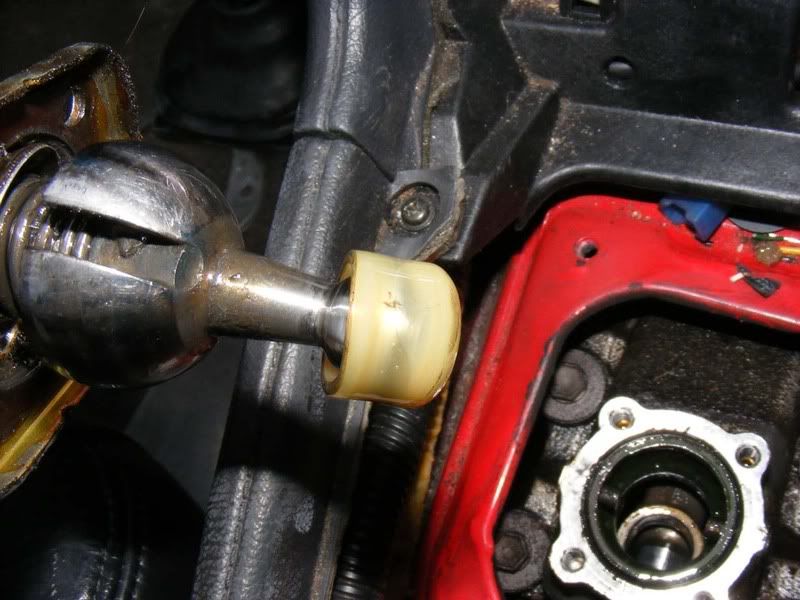
Step 13 - The other bush you need to replace will probably be brownish and brittle on the base of the gearstick as shown
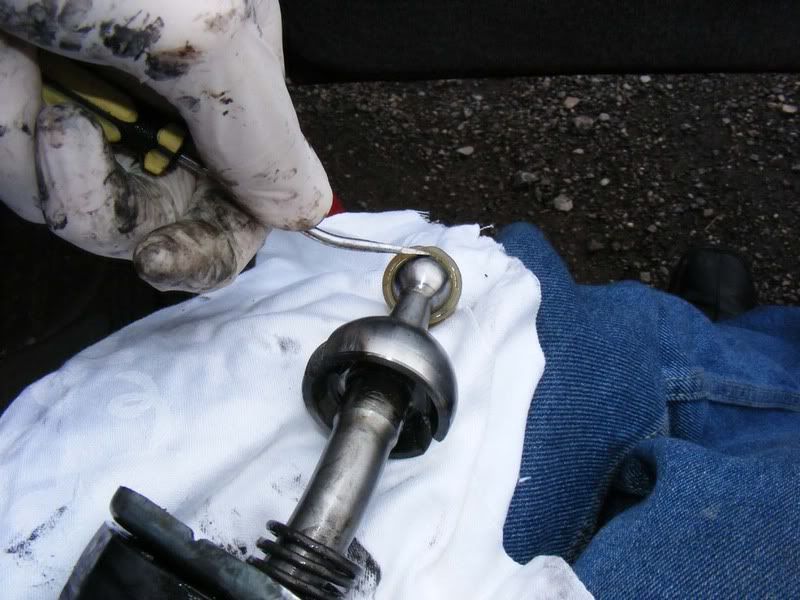
Step 14 - I started on the white bush, being careful not to jab the metal ball too much slide a small flatblade screwdriver forcefully into the area between the bush and ball. It will pop off but may take some force
Notice I'm using some rags to prevent any kind of dirt being picked up - ensure you don't get grit etc on the ball and then into the box itself
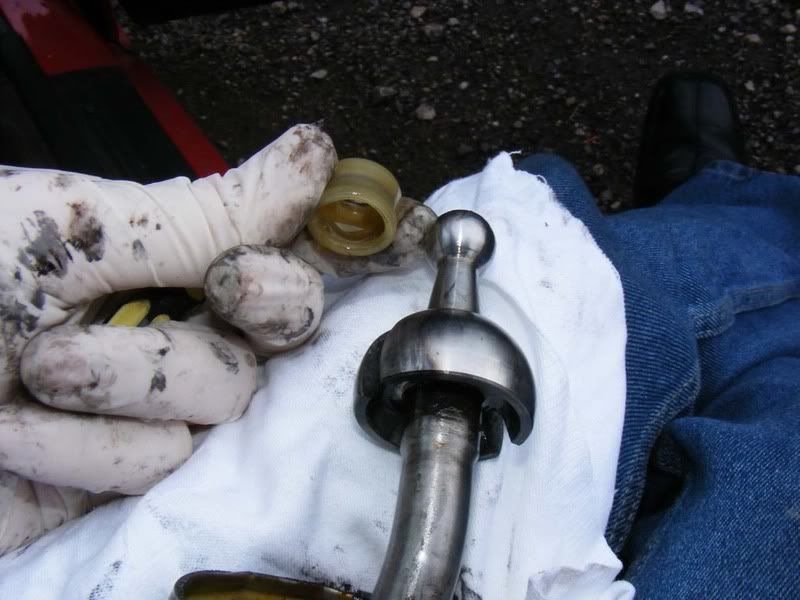
Step 15 - To fit the new white bush, simply place on a solid surface and line the shaft up squarely and apply a short amount of pressure and it will simply click into place
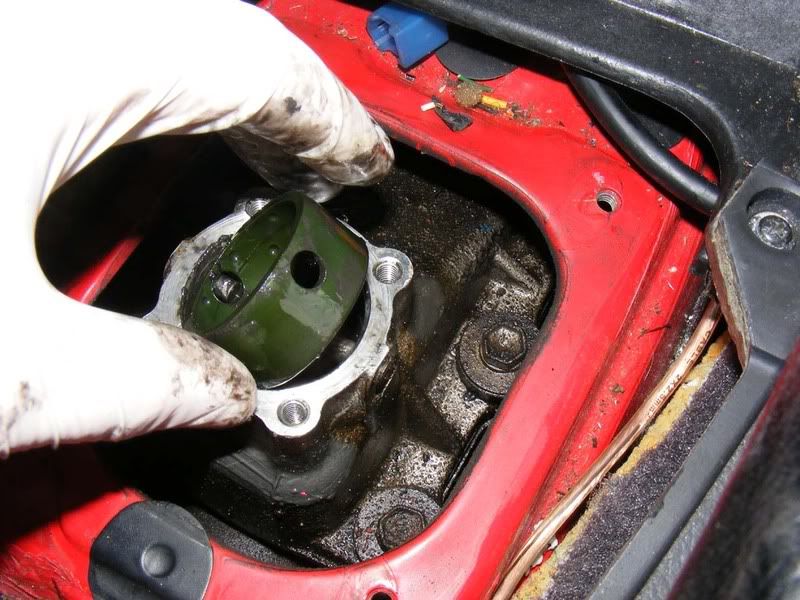
Step 16 - Next is the green bush, mine was quite soft so I eased it away from the side with my finger (picture 1) then slide a screwdriver in to help (picture 2). You need to get over the two dowels to remove it then it will just slide out (picture 3)
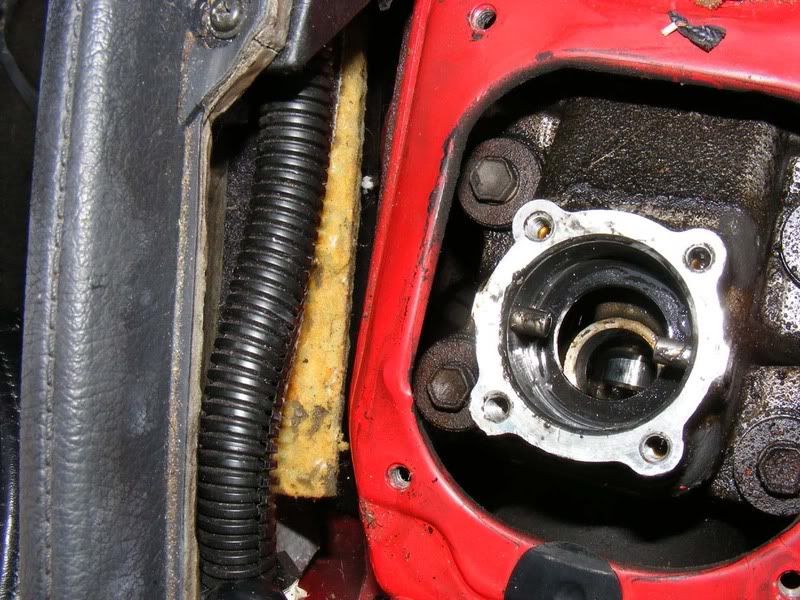
Step 17 - Give the inside a quick wipe before you fit the new bush
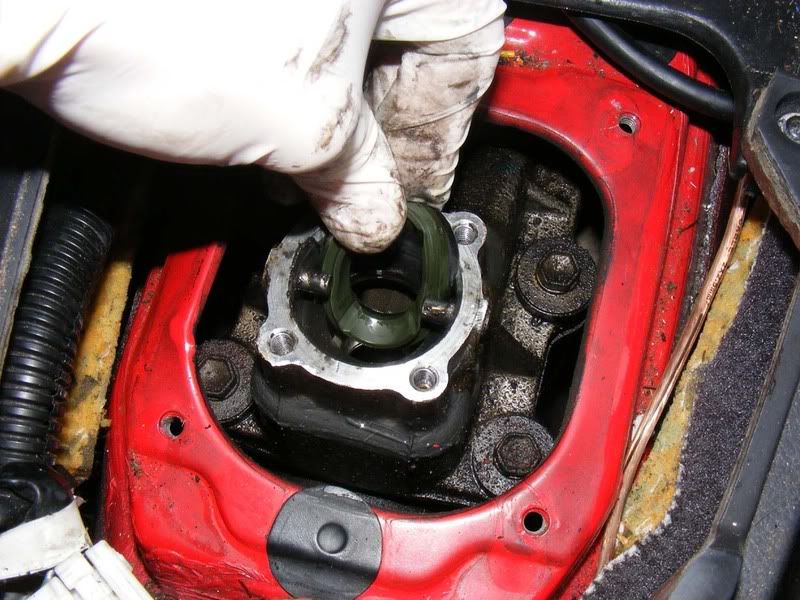
Step 18 - Now to fit the new green bush, this will be a slightly different design to the old one which is perfectly normal. Squeeze to an oval shape and slide in as shown on the underside of the dowels. From this position (picture 1) you just slide your finger through the hole and pull it into place, very simple. Picture 2 shows it fitted
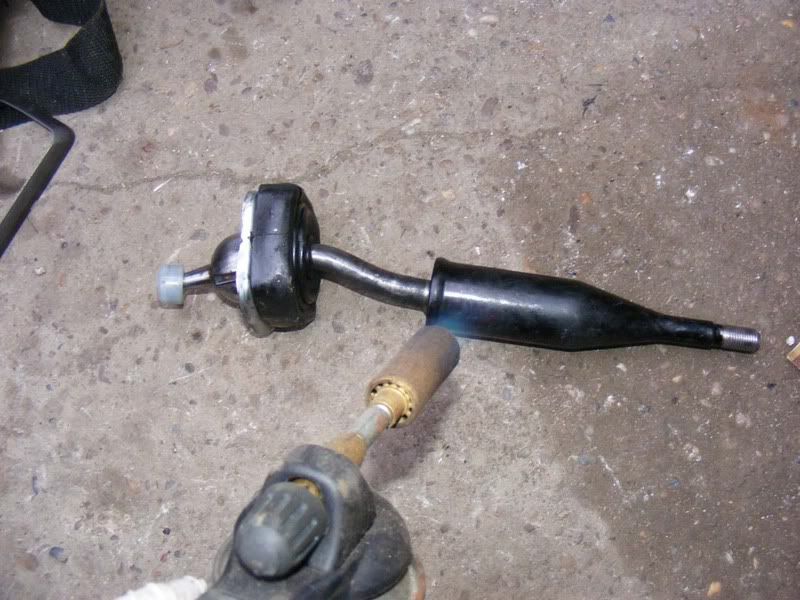
Step 19 - Now your bushes are replaced we can continue to the short shift mod itself (if you just want to change the bushes and reduce slack you can skip the next few steps and go to step 22). You will need to heat the shaft at the base of the black piece, there is a piece of rubber bonding two sections of the gearstick together. Do this by applying heat for ~20 seconds at a close distance then turn the stick through 180 degrees (half a turn) and do the same again on the other side. Once you see smoke appearing from the base of the join (the bit shown in picture 2 to the right of the mole grips) you are ready to crack it off
Note : You can separate it with brute force alone but heat is better and helps the rubber survive without tearing
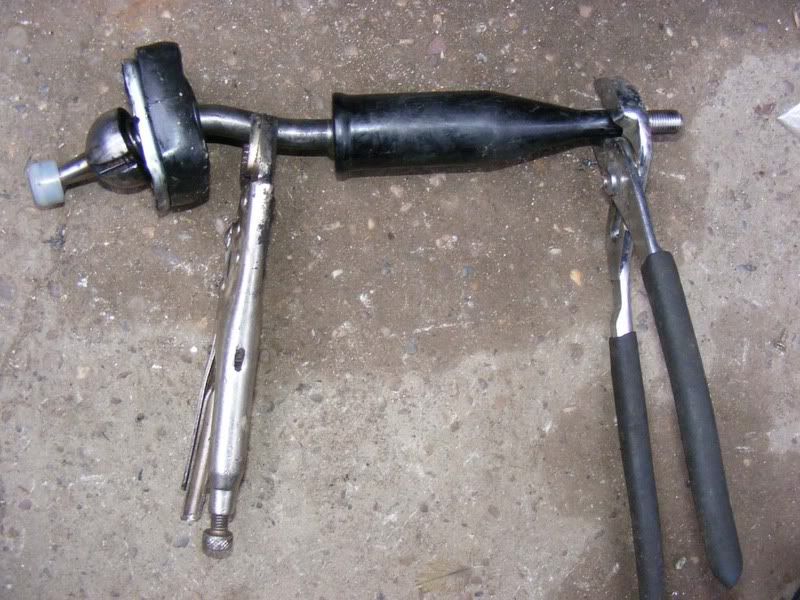
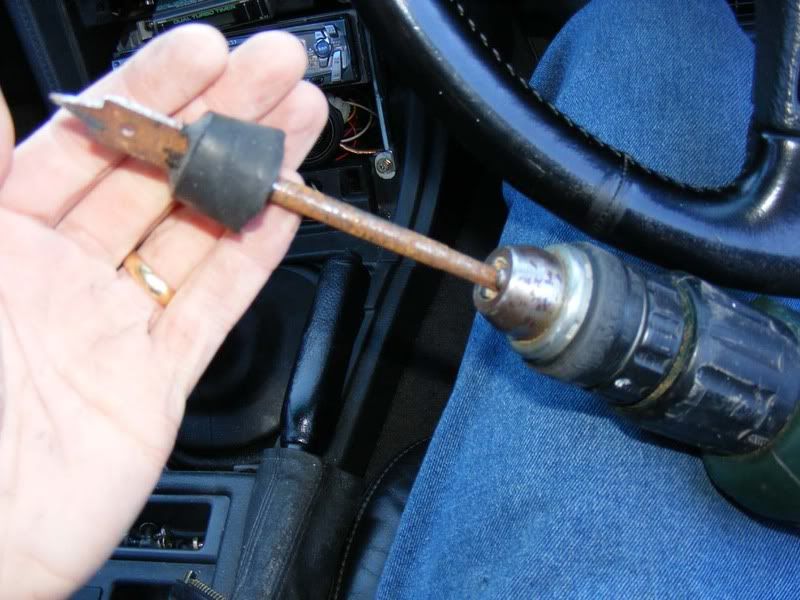
Step 20 - Once you've heated the shaft, use mole grips to simply twist the two parts in opposite directions with a good degree of focre. You will feel the two pieces separate inside, note you'll need to apply a fair amount of pressure here
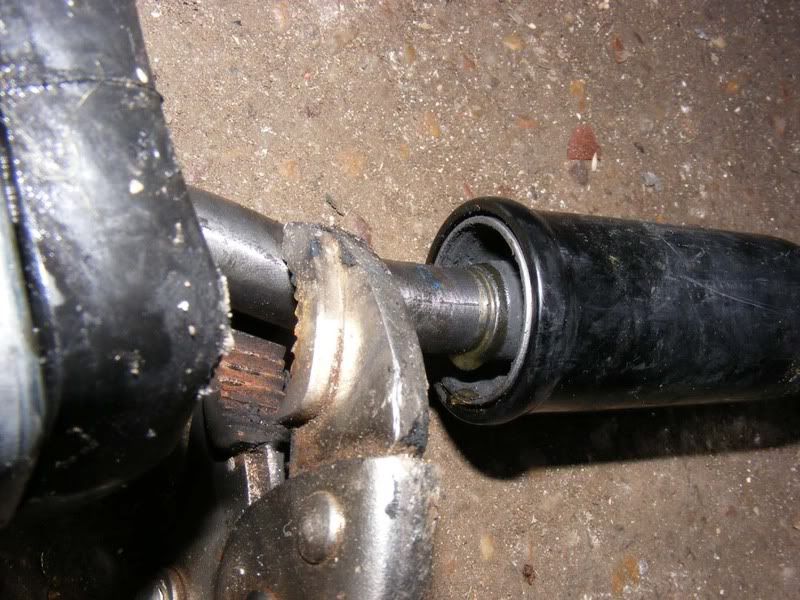
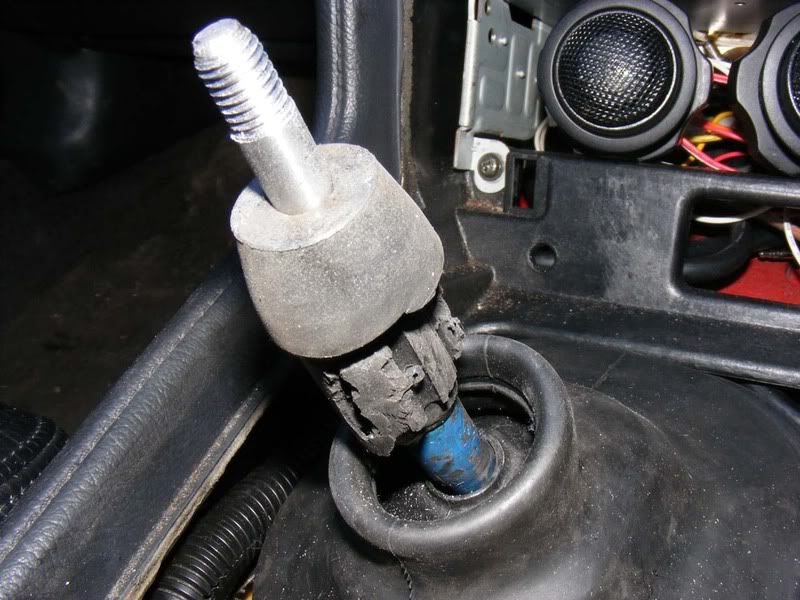
Step 21 - Once the two pieces have cracked off, you can wriggle them apart with the mole grips (careful not to touch them as they hold their heat well, I found this out last time I did the job!!). As shown in the picture there is a piece of rubber that was bonding the two sections together, mine came out pretty well unscathed. Use a pair of scissors to trim the rubber if required to a reasonably neat shape, you need to preserve it if possible so the gaitor doesn't drop down later on

Step 22 - Now you can start putting things back together, drop your newly bushed and shortened into the transmission (make sure there is no dirt on it). Click it down into place firmly
Step 23 - Tighten the four 10mm bolts up, there is a spring mechanism you need to compress to fit them but it doesn't take much force
Step 24 - Now replace the lower rubber boot, this should hook over the sides of the metal box you just screwed into, careful not to tear the rubber though so be gentle yet forceful. The second picture shows the boot correctly fitted in place
Step 25 - Now you can fit the rubber matting in place, ensure it's the correct way round i.e. the holes line up

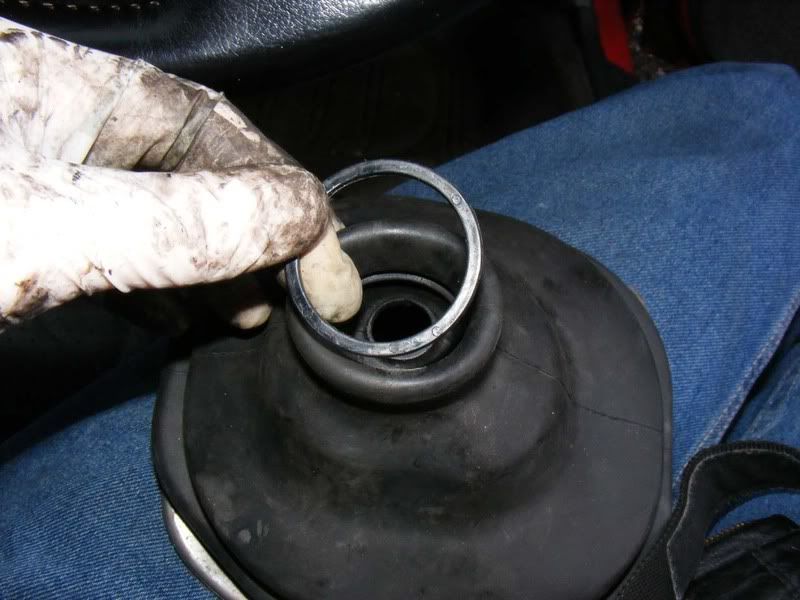
Step 26 - Now slide the big rubber boot over the top, again you will meet some resistance when refitting due to a plastic ring (shown in the pictures, it can be re-inserted if, like mine, it pops off). Also refit the metal surround - you may find it easier to feed the rubber through the metal piece then fit both together as shown in the final picture

Step 27 - Fit the four 10mm bolts, make sure you loosely fit each one before you start tightening any down because they can be quite fiddly and are easy to thread if you're not careful. Fit all of them with your fingers then tighten in stages
Step 28 - Refit the centre console surround and you'll find the gearstick doesn't have to poke through the gaitor any more!
Step 29 - Push the gaitor down to expose the gearstick
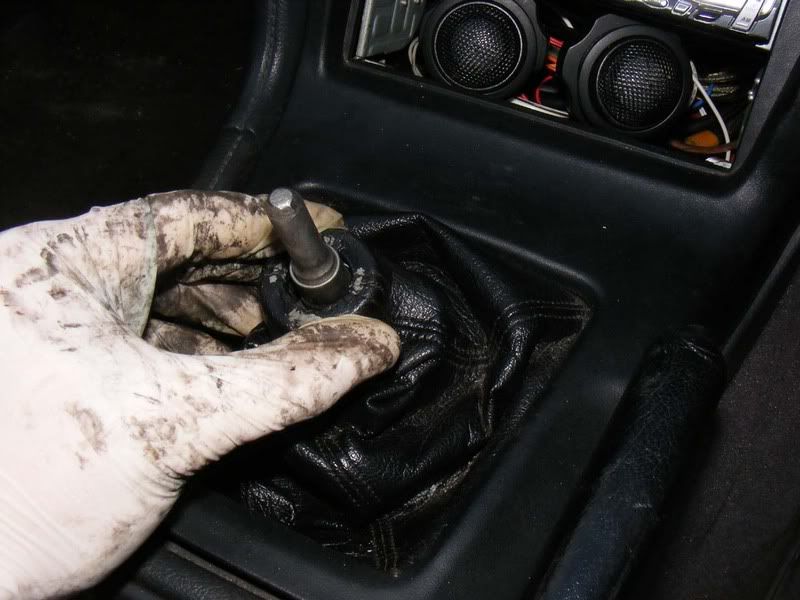
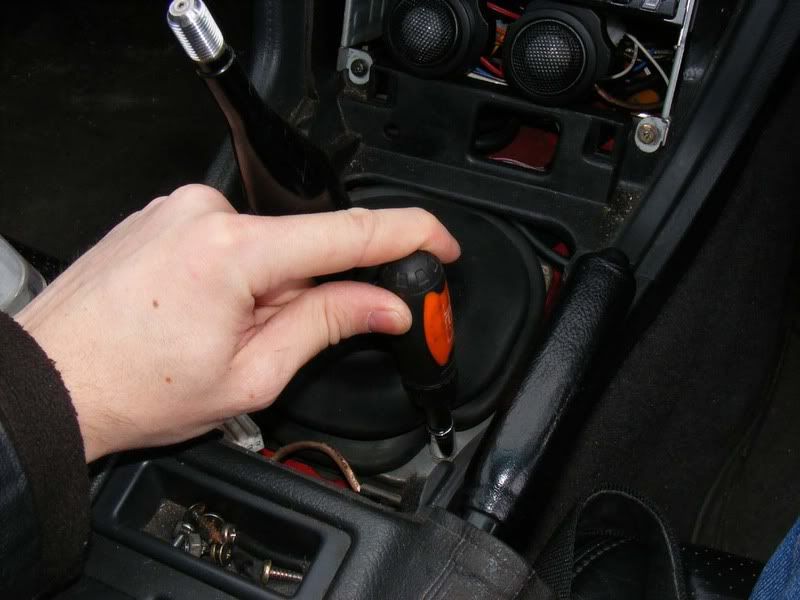
Step 30 - I have put the stock gearknob in place and done the same thing as step 1 to show the play in the gearstick, it is almoost nothing at all! The stick hardly moves a millimetre when in gear

Step 31 - At this stage you can go down 3 different routes
1. Buy an aftermarket momo-style gearknob with one or more grub screws (small screws in the collar of the shift knob) that hold the gear knob to the gearstick.
Pro: Cheap with minimal effort and very low final position
Con: Doesn't look standard and a small amount of money required. These gear knobs always tend to work loose eventually in my experience
2. Tap the shifter as it stands and fit a screw-type gear knob
Pro: More rugged fitment than a grub screw arrangement with very low shift
Con: More effort and possibly cost too unless you have a threaded knob kicking around
3. Modify the original black part of the shifter to be re-used
Pro: Stock look and support for the collar on the gaitor, no cost
Con: Some work required and higher final position than other methods
I'm going to assume you'll figure out how to do route #1 on your own which is the most common approach, go and buy an aftermarket gear knob and then tighten the grub screws so it stays on the exposed shaft.
We'll walk through routes 2 and 3, my recommendation is #3 but we'll start with the tap and die routine (I doubt anyone will go this route so you can skip to step 43 usually)
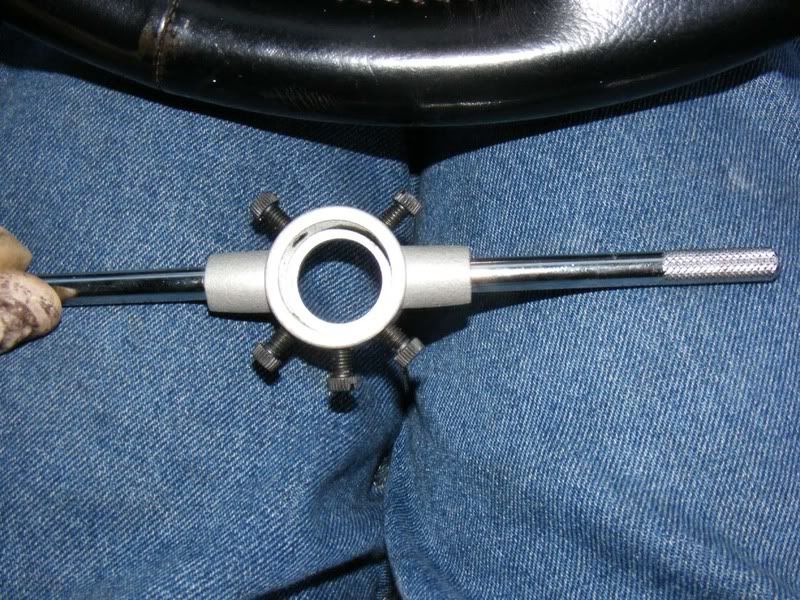
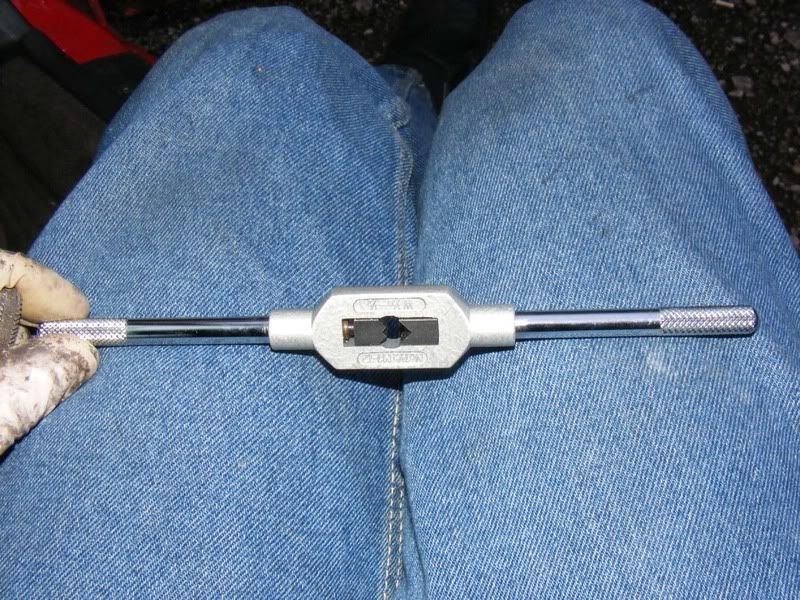
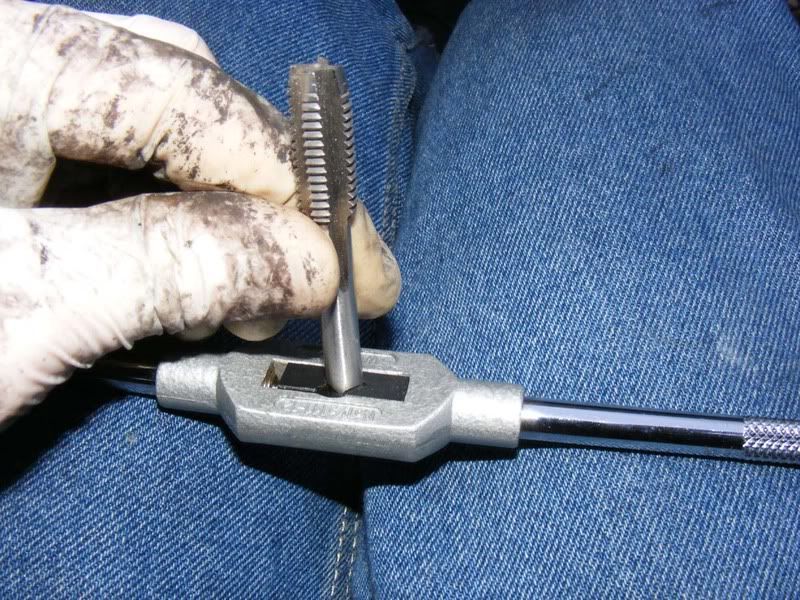
Get yourself a tap and die set and remove the grub screws from your die holder as shown in the picture
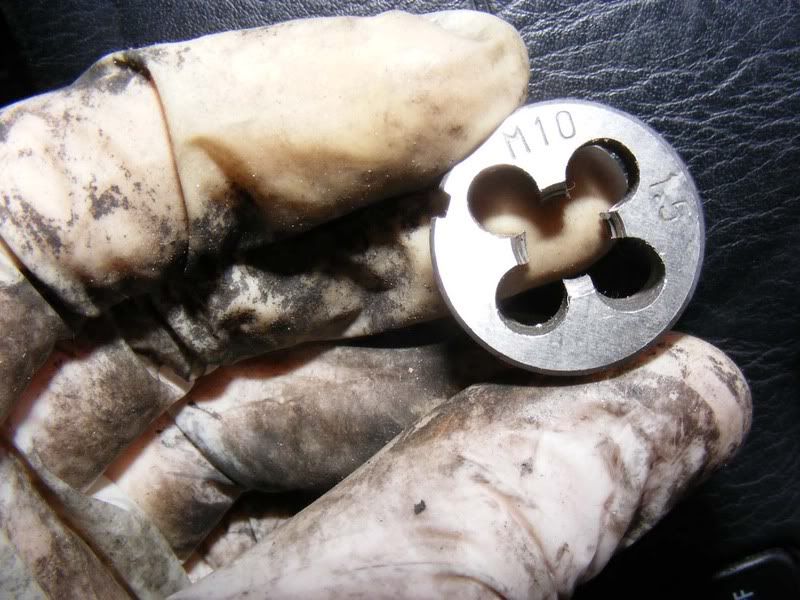
Step 32 - The size you choose will depend on the set you have but it will be an M10 die and a thread pitch of around 1.5, as long as the tap and the die are the same it is of little consequence
Step 33 - Drop the die into the recess and tighten the grub screws
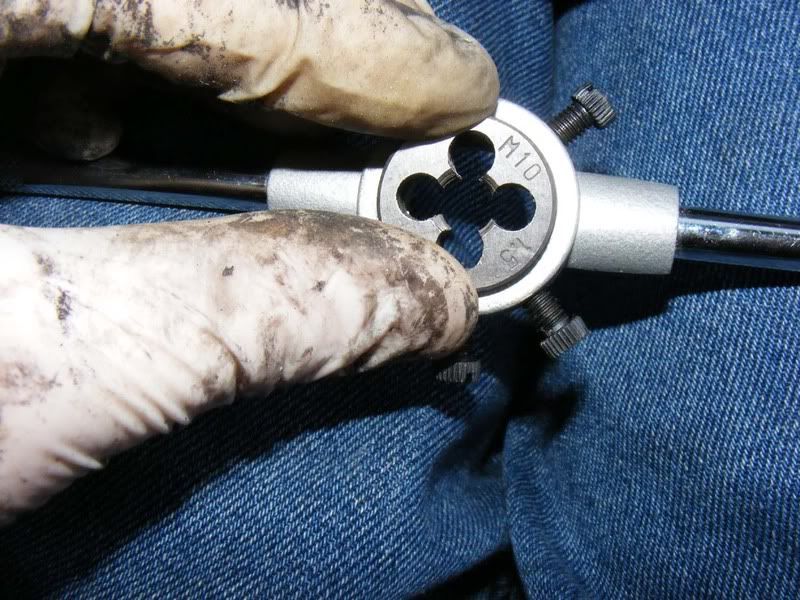

Step 34 - Place the device on the gearstick and apply a smooth turning force to start cutting the thread
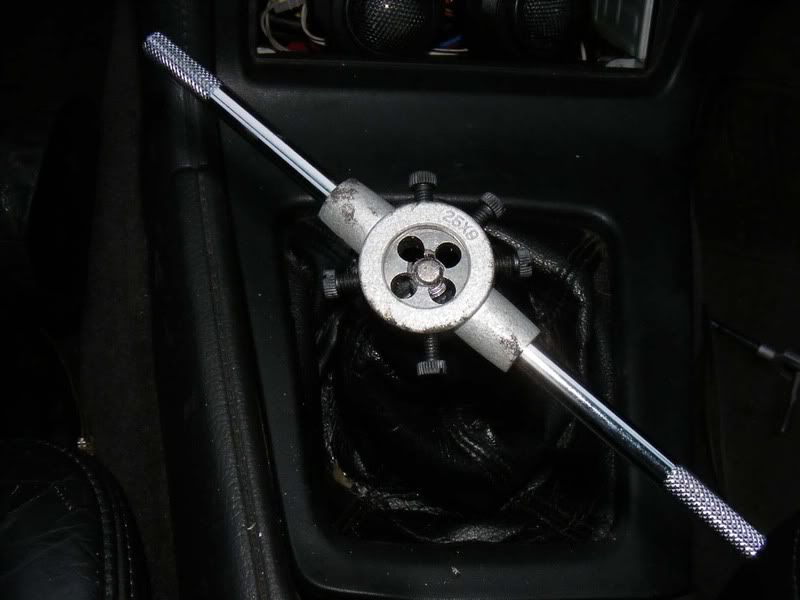
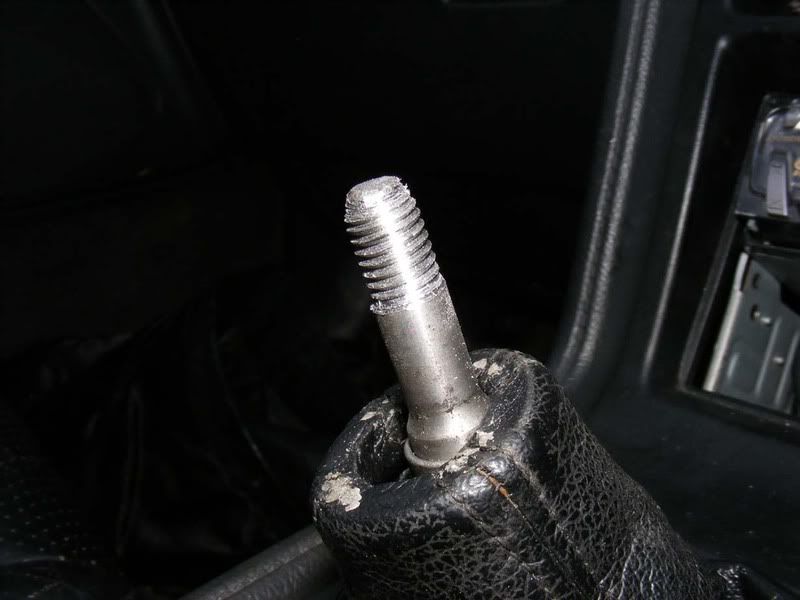
Step 35 - As you turn you'll see little spirals of metal appear, regularly ease of and unwind steadily before working your way about 1 inch down
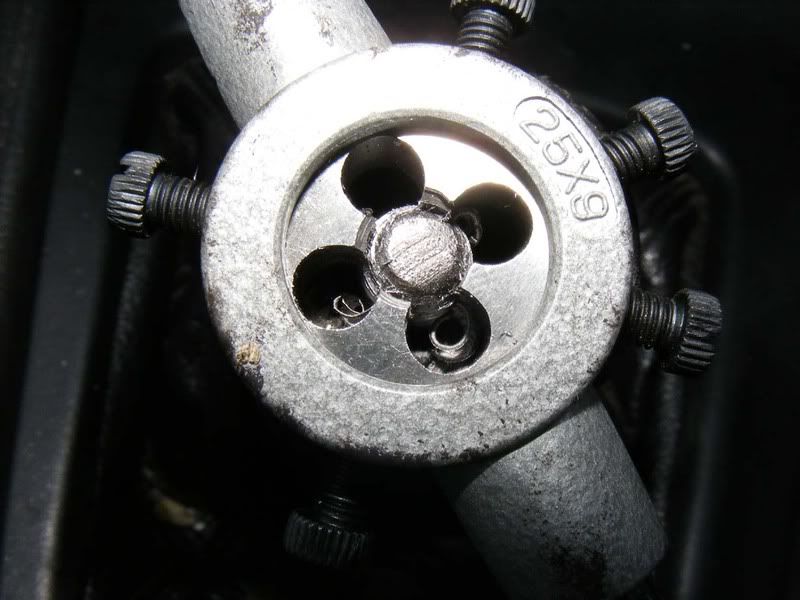
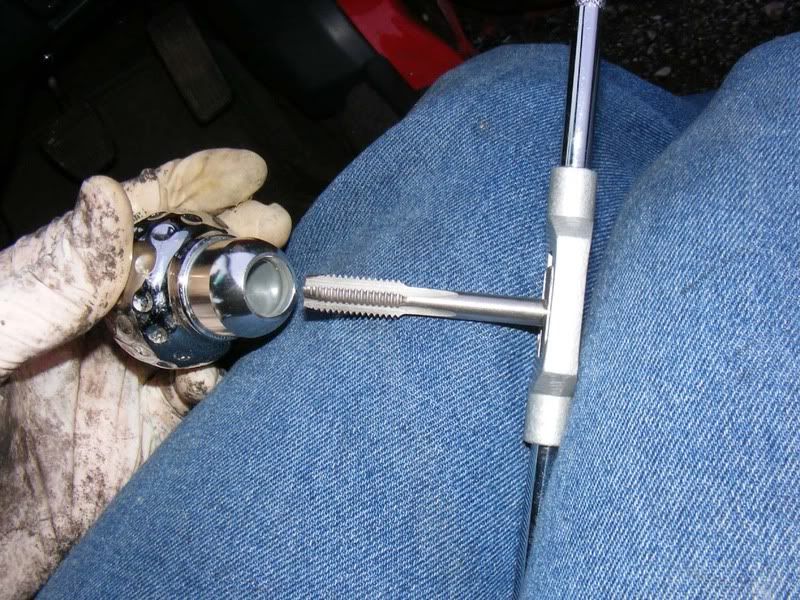
Step 36 - By the time you've finished you should have something like this
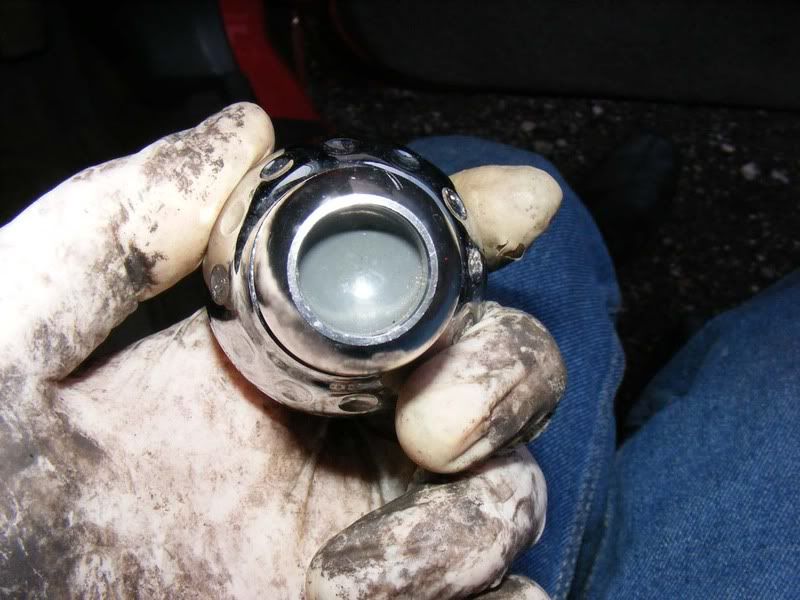
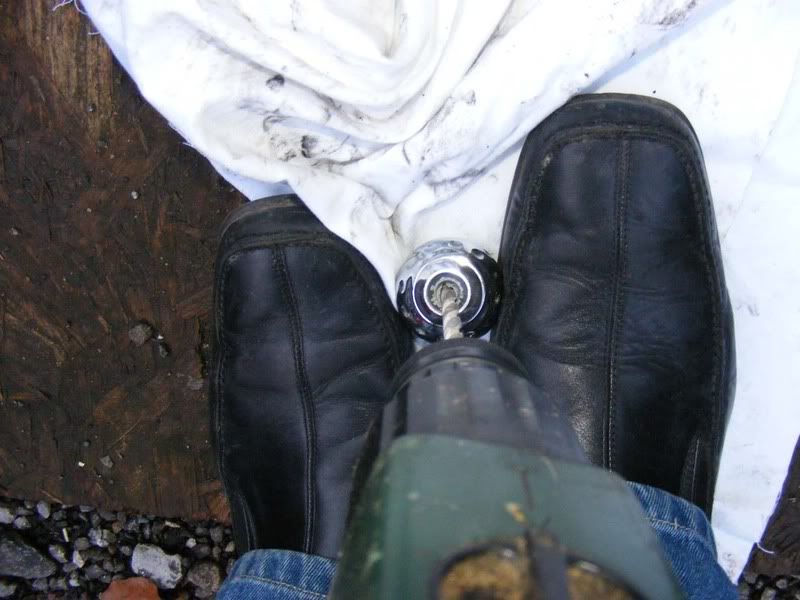
Step 37 - Now we need to tap the gearknob, mine was an aftermarket ball that had been filled with some sort of resin (I found this lying around which is why I went down the tap/die route). If you have a threaded gear knob then make sur eyou use the correct die to match the thread pitch
Step 38 - You'll need some more tools from your tap and die set now to get your tap ready, see pictures
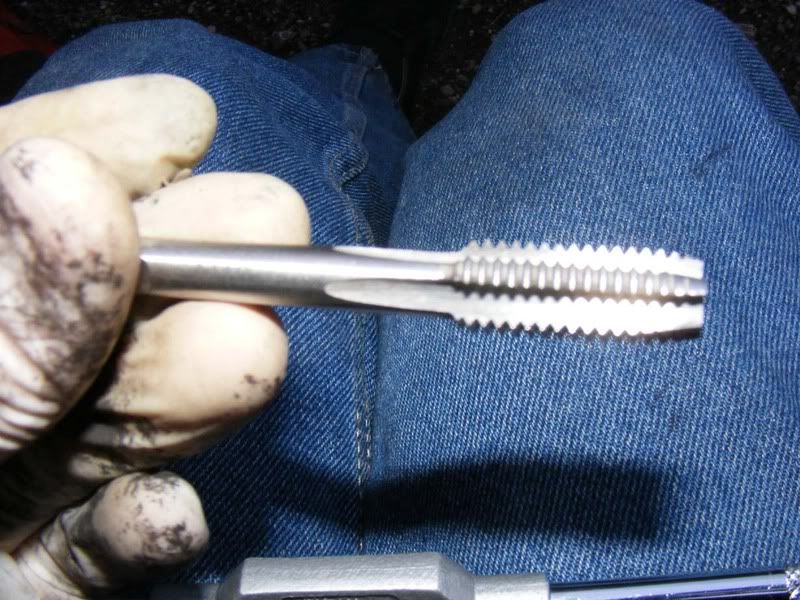
Step 39 - Ensure you have a pilot hole which is smaller than the minimum width of the gearstick (something like 6-7mm on a 10mm threaded bar would be fine)
Step 40 - Now put your tap in and apply a moderate force whilst turning to mark out the threads. As before, work forwards and backwards regularly to remove any material and ensure good threads
Step 41 - Once you've finished making your mating part you can clear out any leftover swarf

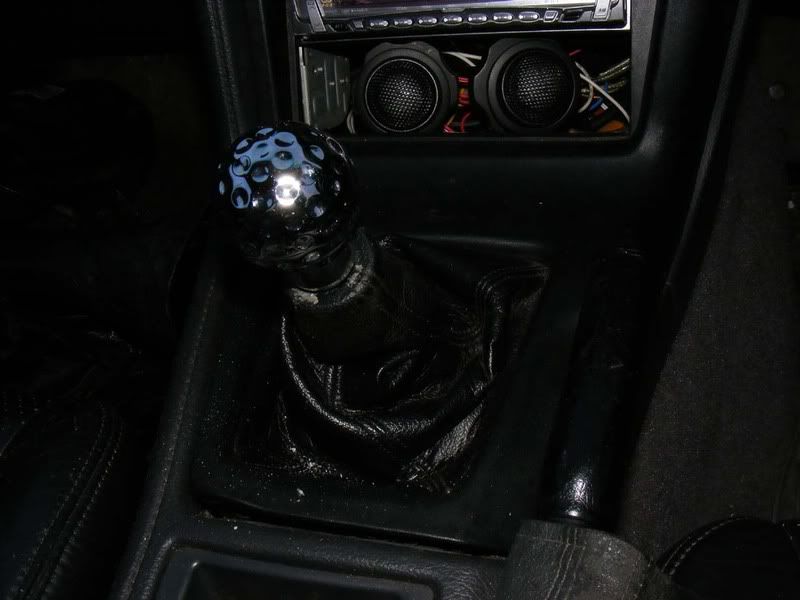
Step 42 - Screw the gearknob on and you're done
Step 43 - If you want to retain the stock gear knob and also the 'shoulders' that the black piece of metal provide (to keep the gaitor in place properly) then I suggest you perform the following steps.
Note that using a modified version of the black metal piece will raise the shifter slightly from the previously mentioned approaches but I personally think this is a good approach anyway
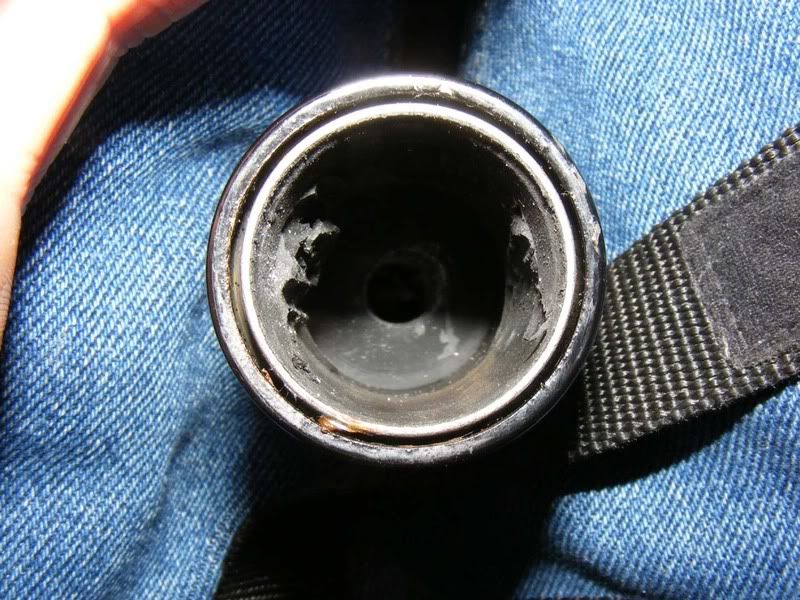
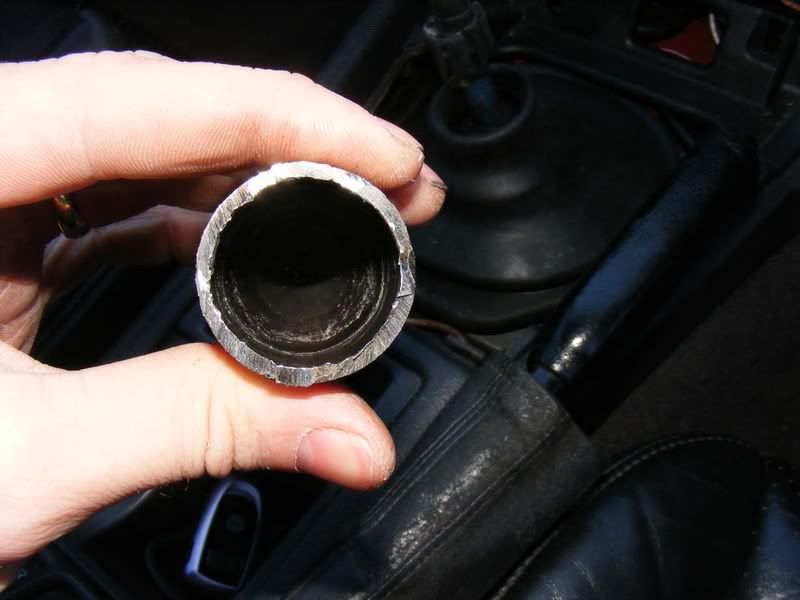
Have a look inside the black shaft removed earlier and you will see some rubber residue and the base of another rubber insert with a hole in it
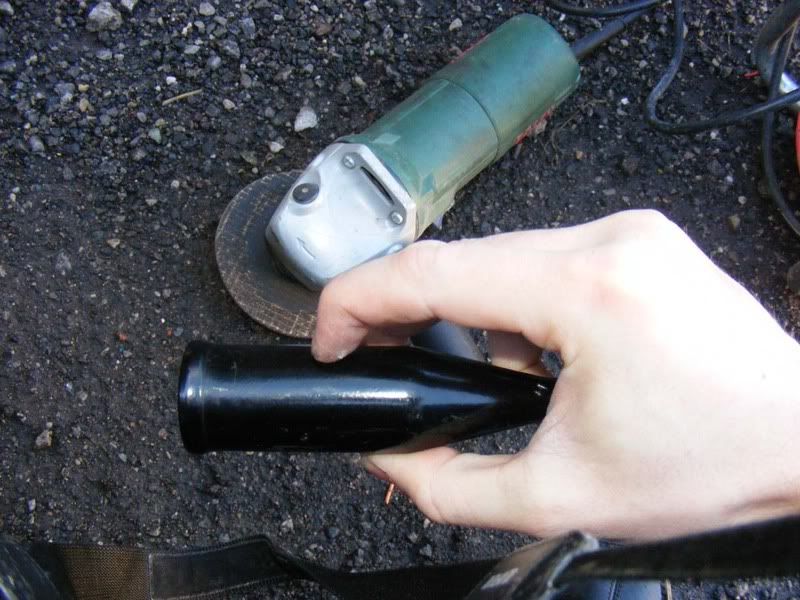
Step 44 - You want to remove the base of the outer sleeve until about 1 inch below this as shown in the picture, this can easily be achieved with an angle grinder
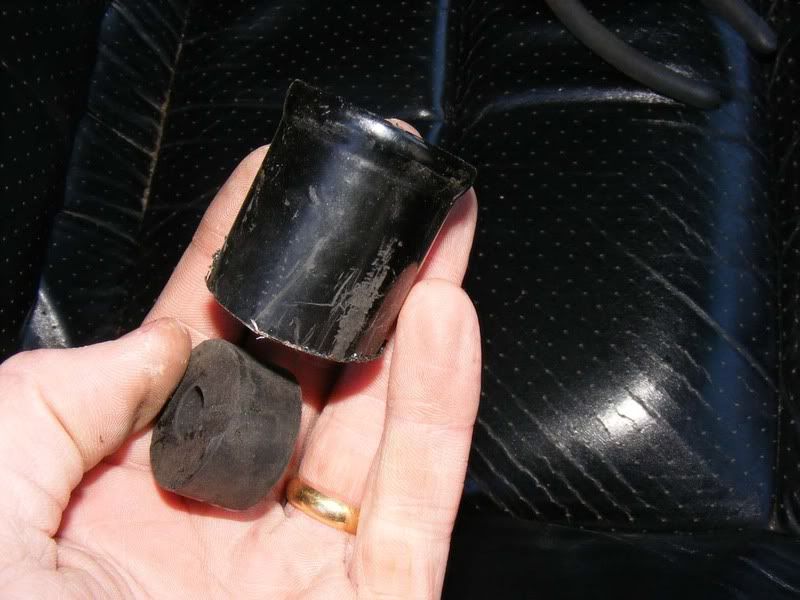
Step 45 - Now you need to remove the rubber insert from the shaft (you can also see how close the shaft has been cut to the base of the rubber piece). A small screwdriver should be inserted and used to lever the rubber piece out (one screwdriver on either side is easiest to lever it out)
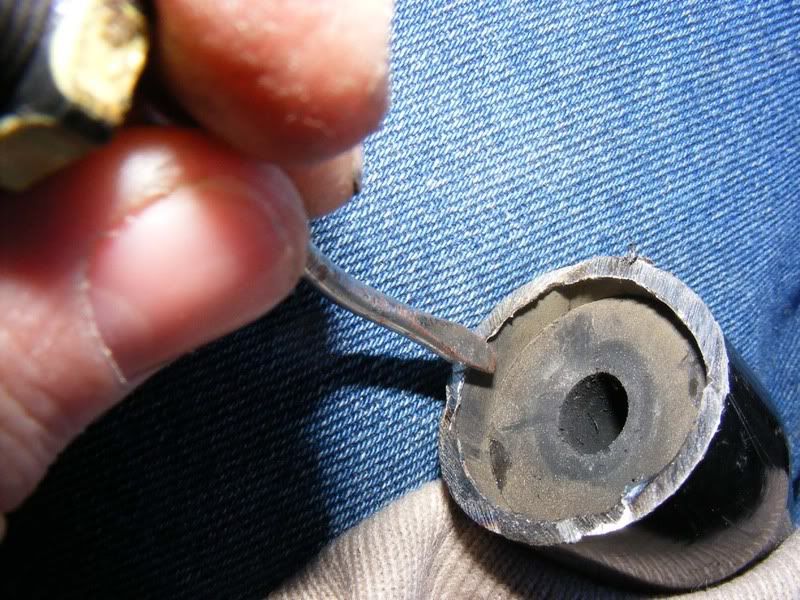
Step 46 - Be careful to remove the insert as one piece as shown
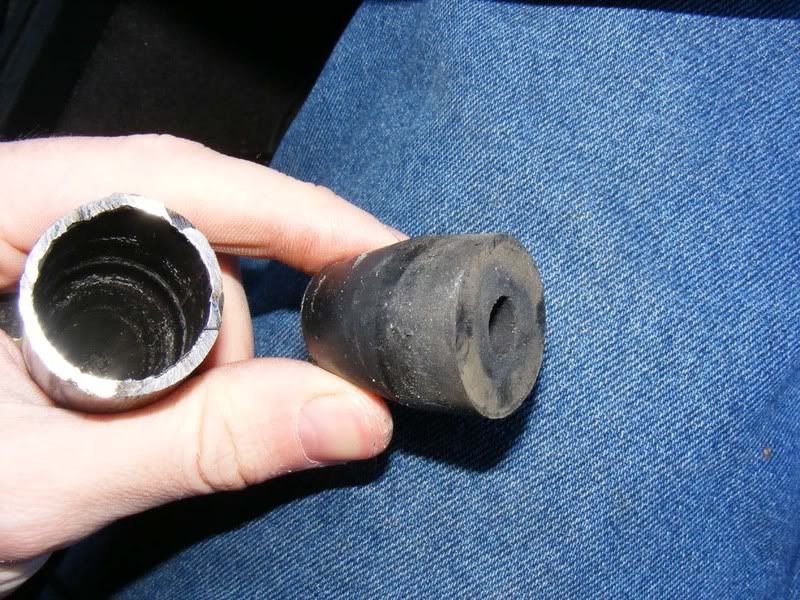
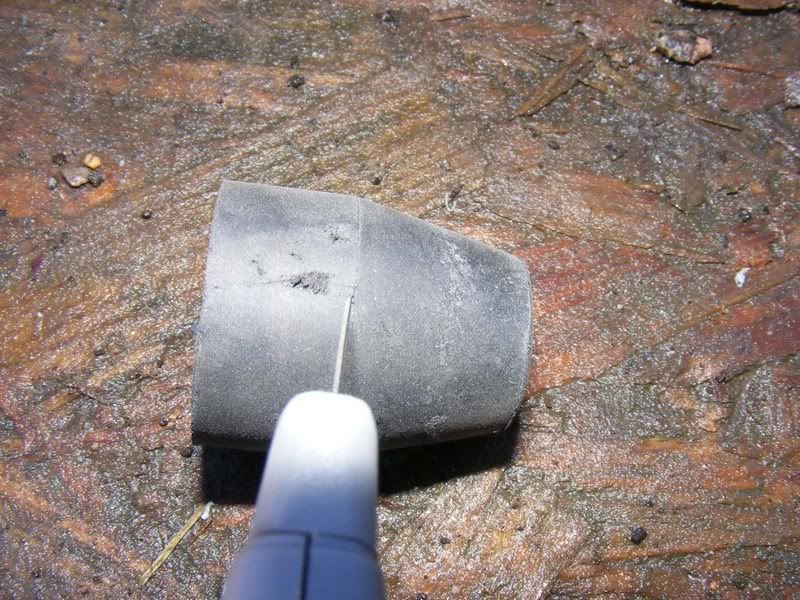
Step 47 - Use a Stanley knife to separate the rubber piece along the seam as shown, this will allow you to push the black metal piece further down and get a lower shift height. The second picture shows the amount of metal removed from the black outer metal sleeve and rubber removed at this stage (these are basically the bits you throw aWay)
Step 48 - I ran a 16mm drill bit through the rubber piece so it would be easier to fit over the shifter and then forced it over the gearstick as shown. When working with flexible materials such as rubber you ned to apply a good deal of even force and rotate the material rather than short blows such as a hammer
Step 49 - With the rubber piece pushed right down to the point at which the old bonded rubber remains you can now refit the black piece of the gearstick, apply downward force and twist to seat the rubber

Step 50 - Refit the surround and stock gearknob. This is more of a 'mid shift' rather than short shift but it's enough to improve the feel of the gear changes and make a noticeable difference to gearchanges. Due to the additional piece of rubber you are reusing there is a little more damping over the standard short shift method which helps reduce vibration but it's not a huge difference.
The shift height is about mid way between the short shift and stock position but I personally like having the stock gear knob in place and am willing to have a slightly longer shift because of it. Hopefully you have all the detail you need to perform a short or mid shift, any questions please ask
The best bit is that it's free and dramatically changes the gear shifts for the better. The only thing you need to buy are (optionally) an aftermarket gearknob and 2 bushes :
1. White pivot bush on the ball at the base of the gearstick 33548-31010 3.06+VAT
2. Green support bush/seat 33505-35020 7.13+VAT
I recommend you replace these 2 bushes even if not doing the mod and you'll be surprised at the difference! You can get aftermarket poly bushes from a company (marlin crawler) in the US but postage was going to be $55 for me (price in Jan 09) so was prohibitively expensive
Note, after performing this mode you may notice a very slight amount of noise from the gearbox and possibly a little more vibration because you have a little less rubber damping the movements. This really is negligible though in my opinion. The upside is that you will have a notchier and stiffer feel that allows quicker shifts and also looks a lot better
Step 1 - I wanted to show you how much play I had in my gearstick so the following sequence shows the movement when in first gear. Note that this felt pretty tight before I'd done the bushes so I wasn't expecting much improvement - I was pleasantly surprised
Step 2 - Unscrew the gear knob and follow steps 14-21 in the turbo timer guide to remove the gearstick surround
Step 3 - The first task you're faced with is removing this outer rubber surround. There are four 10mm bolts with philips screw heads in them, remove them all. Note that I always choose the socket over the screwdriver for any bolt like this
Step 4 - Now you can start to remove the cover, lift up the metal plate as shown
Step 5 - Pull clear of the rubber surround (puish the rubber through if required but it should pull off easily)
Step 6 - Now you need to remove the rubber boot, this will need quite a bit of force so pull it firmly upwards and it will come off - you'll stress the rubber more by gently pulling at it for half an hour than just whipping it out in one go
Step 7 - Now remove the lower rubber piece if it didn't come away in step 6 all together
Step 8 - The final rubber boot should be hooked over the base of the stick's surround as shown. Simply peel back and slide it up the shaft
Step 9 - You should now have access to a second set of four 10mm bolts/screw heads, remove all four again
NOTE: You are looking at the top of the gearbox here and it's very easy to drop the bolts which can be quite time consuming to find. I suggest that you stick a magnetic parts retriever on the bolt as you are removing it to avoid any issues
Step 10 - Now lift the gearstick straight upwards in a clean movement, you may have brittle crumbled gasket waiting to work its way into the box so be careful here. A swift vertical movement to get it clear is required, not much force is needed
Step 11 - You now reveal the other end of the shaft, this is the bit you will be keeping, the black piece may be re-used later depending on your requirements
Step 12 - Have a look into the transmission and you'll see one of the bushes you need to replace, it's the green piece around the circumference of the hole. You need to be extra careful if it is looking tatty/broken but mine was fine. Put a piece of rag in the hole if you're worried (but don't push it all the way in of course!)
Step 13 - The other bush you need to replace will probably be brownish and brittle on the base of the gearstick as shown
Step 14 - I started on the white bush, being careful not to jab the metal ball too much slide a small flatblade screwdriver forcefully into the area between the bush and ball. It will pop off but may take some force
Notice I'm using some rags to prevent any kind of dirt being picked up - ensure you don't get grit etc on the ball and then into the box itself
Step 15 - To fit the new white bush, simply place on a solid surface and line the shaft up squarely and apply a short amount of pressure and it will simply click into place
Step 16 - Next is the green bush, mine was quite soft so I eased it away from the side with my finger (picture 1) then slide a screwdriver in to help (picture 2). You need to get over the two dowels to remove it then it will just slide out (picture 3)
Step 17 - Give the inside a quick wipe before you fit the new bush
Step 18 - Now to fit the new green bush, this will be a slightly different design to the old one which is perfectly normal. Squeeze to an oval shape and slide in as shown on the underside of the dowels. From this position (picture 1) you just slide your finger through the hole and pull it into place, very simple. Picture 2 shows it fitted
Step 19 - Now your bushes are replaced we can continue to the short shift mod itself (if you just want to change the bushes and reduce slack you can skip the next few steps and go to step 22). You will need to heat the shaft at the base of the black piece, there is a piece of rubber bonding two sections of the gearstick together. Do this by applying heat for ~20 seconds at a close distance then turn the stick through 180 degrees (half a turn) and do the same again on the other side. Once you see smoke appearing from the base of the join (the bit shown in picture 2 to the right of the mole grips) you are ready to crack it off
Note : You can separate it with brute force alone but heat is better and helps the rubber survive without tearing
Step 20 - Once you've heated the shaft, use mole grips to simply twist the two parts in opposite directions with a good degree of focre. You will feel the two pieces separate inside, note you'll need to apply a fair amount of pressure here
Step 21 - Once the two pieces have cracked off, you can wriggle them apart with the mole grips (careful not to touch them as they hold their heat well, I found this out last time I did the job!!). As shown in the picture there is a piece of rubber that was bonding the two sections together, mine came out pretty well unscathed. Use a pair of scissors to trim the rubber if required to a reasonably neat shape, you need to preserve it if possible so the gaitor doesn't drop down later on
Step 22 - Now you can start putting things back together, drop your newly bushed and shortened into the transmission (make sure there is no dirt on it). Click it down into place firmly
Step 23 - Tighten the four 10mm bolts up, there is a spring mechanism you need to compress to fit them but it doesn't take much force
Step 24 - Now replace the lower rubber boot, this should hook over the sides of the metal box you just screwed into, careful not to tear the rubber though so be gentle yet forceful. The second picture shows the boot correctly fitted in place
Step 25 - Now you can fit the rubber matting in place, ensure it's the correct way round i.e. the holes line up
Step 26 - Now slide the big rubber boot over the top, again you will meet some resistance when refitting due to a plastic ring (shown in the pictures, it can be re-inserted if, like mine, it pops off). Also refit the metal surround - you may find it easier to feed the rubber through the metal piece then fit both together as shown in the final picture
Step 27 - Fit the four 10mm bolts, make sure you loosely fit each one before you start tightening any down because they can be quite fiddly and are easy to thread if you're not careful. Fit all of them with your fingers then tighten in stages
Step 28 - Refit the centre console surround and you'll find the gearstick doesn't have to poke through the gaitor any more!
Step 29 - Push the gaitor down to expose the gearstick
Step 30 - I have put the stock gearknob in place and done the same thing as step 1 to show the play in the gearstick, it is almoost nothing at all! The stick hardly moves a millimetre when in gear
Step 31 - At this stage you can go down 3 different routes
1. Buy an aftermarket momo-style gearknob with one or more grub screws (small screws in the collar of the shift knob) that hold the gear knob to the gearstick.
Pro: Cheap with minimal effort and very low final position
Con: Doesn't look standard and a small amount of money required. These gear knobs always tend to work loose eventually in my experience
2. Tap the shifter as it stands and fit a screw-type gear knob
Pro: More rugged fitment than a grub screw arrangement with very low shift
Con: More effort and possibly cost too unless you have a threaded knob kicking around
3. Modify the original black part of the shifter to be re-used
Pro: Stock look and support for the collar on the gaitor, no cost
Con: Some work required and higher final position than other methods
I'm going to assume you'll figure out how to do route #1 on your own which is the most common approach, go and buy an aftermarket gear knob and then tighten the grub screws so it stays on the exposed shaft.
We'll walk through routes 2 and 3, my recommendation is #3 but we'll start with the tap and die routine (I doubt anyone will go this route so you can skip to step 43 usually)
Get yourself a tap and die set and remove the grub screws from your die holder as shown in the picture
Step 32 - The size you choose will depend on the set you have but it will be an M10 die and a thread pitch of around 1.5, as long as the tap and the die are the same it is of little consequence
Step 33 - Drop the die into the recess and tighten the grub screws
Step 34 - Place the device on the gearstick and apply a smooth turning force to start cutting the thread
Step 35 - As you turn you'll see little spirals of metal appear, regularly ease of and unwind steadily before working your way about 1 inch down
Step 36 - By the time you've finished you should have something like this
Step 37 - Now we need to tap the gearknob, mine was an aftermarket ball that had been filled with some sort of resin (I found this lying around which is why I went down the tap/die route). If you have a threaded gear knob then make sur eyou use the correct die to match the thread pitch
Step 38 - You'll need some more tools from your tap and die set now to get your tap ready, see pictures
Step 39 - Ensure you have a pilot hole which is smaller than the minimum width of the gearstick (something like 6-7mm on a 10mm threaded bar would be fine)
Step 40 - Now put your tap in and apply a moderate force whilst turning to mark out the threads. As before, work forwards and backwards regularly to remove any material and ensure good threads
Step 41 - Once you've finished making your mating part you can clear out any leftover swarf
Step 42 - Screw the gearknob on and you're done
Step 43 - If you want to retain the stock gear knob and also the 'shoulders' that the black piece of metal provide (to keep the gaitor in place properly) then I suggest you perform the following steps.
Note that using a modified version of the black metal piece will raise the shifter slightly from the previously mentioned approaches but I personally think this is a good approach anyway
Have a look inside the black shaft removed earlier and you will see some rubber residue and the base of another rubber insert with a hole in it
Step 44 - You want to remove the base of the outer sleeve until about 1 inch below this as shown in the picture, this can easily be achieved with an angle grinder
Step 45 - Now you need to remove the rubber insert from the shaft (you can also see how close the shaft has been cut to the base of the rubber piece). A small screwdriver should be inserted and used to lever the rubber piece out (one screwdriver on either side is easiest to lever it out)
Step 46 - Be careful to remove the insert as one piece as shown
Step 47 - Use a Stanley knife to separate the rubber piece along the seam as shown, this will allow you to push the black metal piece further down and get a lower shift height. The second picture shows the amount of metal removed from the black outer metal sleeve and rubber removed at this stage (these are basically the bits you throw aWay)
Step 48 - I ran a 16mm drill bit through the rubber piece so it would be easier to fit over the shifter and then forced it over the gearstick as shown. When working with flexible materials such as rubber you ned to apply a good deal of even force and rotate the material rather than short blows such as a hammer
Step 49 - With the rubber piece pushed right down to the point at which the old bonded rubber remains you can now refit the black piece of the gearstick, apply downward force and twist to seat the rubber
Step 50 - Refit the surround and stock gearknob. This is more of a 'mid shift' rather than short shift but it's enough to improve the feel of the gear changes and make a noticeable difference to gearchanges. Due to the additional piece of rubber you are reusing there is a little more damping over the standard short shift method which helps reduce vibration but it's not a huge difference.
The shift height is about mid way between the short shift and stock position but I personally like having the stock gear knob in place and am willing to have a slightly longer shift because of it. Hopefully you have all the detail you need to perform a short or mid shift, any questions please ask
")