GUIDE : Rods and Pistons

JSeaman

SM Official Expert: Guide Author
SM Expert
May 26, 2009
216
0
0
Derbyshire, UK
This is a different guide to the normal ones – it’s basically a tutorial on rods and pistons, what they do and various factors surrounding them. It is based on a 7MGTE rod and piston but the principle’s the same for most vehicles. As always, feel free to add comments/suggestions.

p1329370_1.jpg


The job of the piston is to transfer energy from the combustion chamber to the crankshaft via the connecting rods (‘con rods’ or just ‘rods’). The piston is subjected to incredible stresses and so strength is of key importance.

Also. the engine rotates at high speeds and on each revolution the piston must travel to the top of its ‘stroke’, stop, then travel down to the bottom of the stroke and stop again. This stop/start will occur 100 times a second when you are doing 6k rpm so weight is also an important factor in piston design. Below gives an indication of size and weight of a Supra piston:

p1329370_2.jpg

p1329370_3.jpg
 

JSeaman

SM Official Expert: Guide Author
SM Expert
May 26, 2009
216
0
0
Derbyshire, UK
In a 4 stroke engine the piston will :

a) Move down the chamber/cylinder/hole in the block during the intake stroke where it creates a vacuum and sucks in fresh charge (air)
b) When it reaches the bottom (known as ‘Bottom Dead Centre’ or BDC),the piston will momentarily stop and then change direction for the compression stroke where 130-140 psi of gas pressure will be generated and must be sealed.
c) Once the piston reaches the top of its travel it will stop again (this time we are at ‘Top Dead Centre’ or TDC). The piston then heads back down the chamber on the power stroke where the piston is subjected to the full force of the combustion
d) After the piston has been forced down the chamber it will hit BDC again and then head up on the exhaust stroke pushing all the hot exhaust gases up towards the cylinder head where it escapes

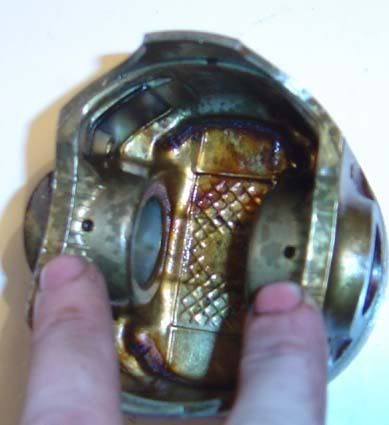
The extreme temperatures the pistons and block are exposed to will cause the metal to expand. The bores (and the whole ‘block’ of the engine) are made of cast iron whereas the pistons themselves are an aluminium alloy so there will be differences in expansion rates here. The difference in expansion rates of the piston and block need to be considered when specifying clearances for the engine.

Note that the cast iron block has cooling channels through it whereas the piston must rely on direct cooling through the oil system and passing heat through the bores to the block. Due to the need for expansion and also the fact the piston needs to move within the bore, a small clearance gap is found between the piston and the cylinder.

More commonly with forged pistons, the clearance can be quite large between the piston and bore when cold (this is to allow for piston expansion) and so the piston can make a noise as it comes into contact with the block when moving up and down the chamber. This is an audible phenomena referred to as ‘piston slap’ and usually disappears when warmed up but can damage cylinder walls. See below for more information on side thrust which causes this. This is reduced with modern techniques for skirt design (read on for piston skirts) and metal treatment/alloys allowing smaller clearances between the piston and cylinder. It is desirable to have a low coefficient for thermal expansion which means we want a material that doesn’t get a lot larger as it heats up.

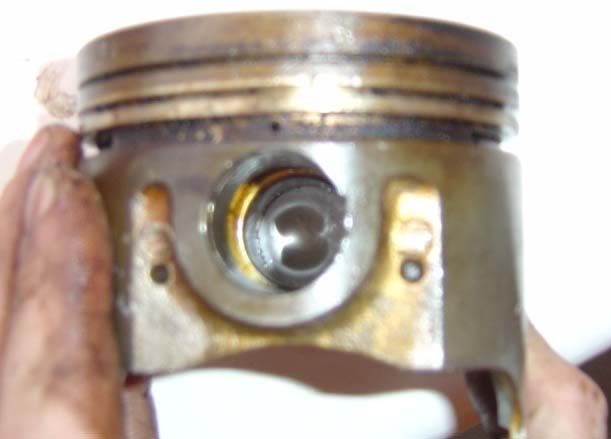
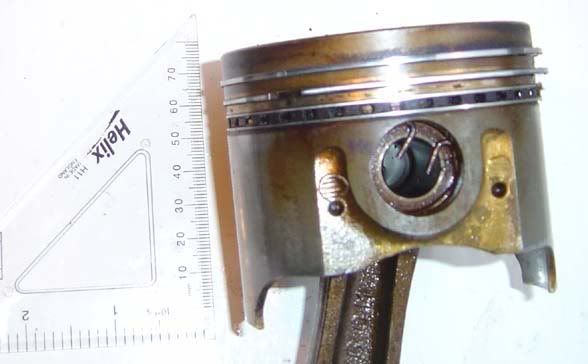
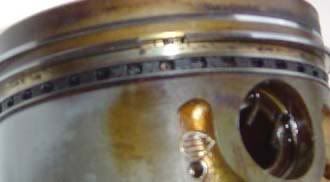
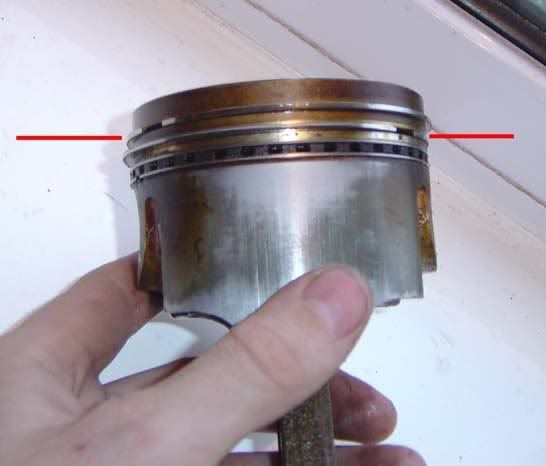
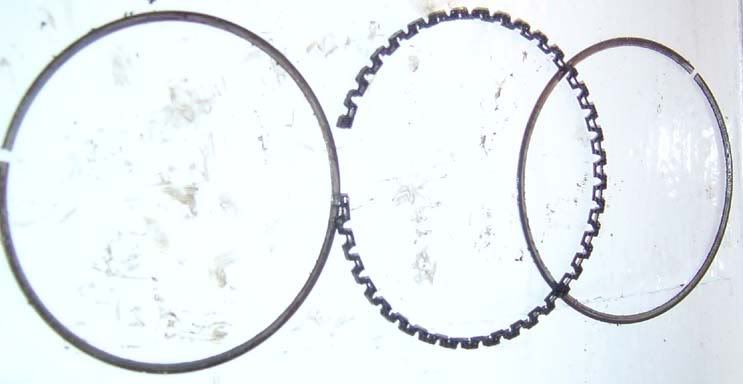
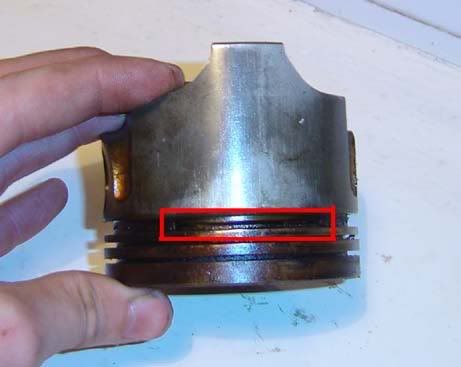
Obviously if we have a gap between the cylinder and the piston then any gas will try to escape past this. To prevent this, ‘piston rings’ are fitted to the piston. Typically (as with the Supra) there are three rings fitted, the first two being compression rings (also called gas rings or pressure rings) and the third is an oil scraper ring (see picture below). The three rings together are referred to as the ‘ring belt’

p1329372_1.jpg


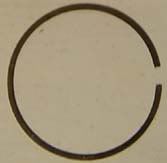
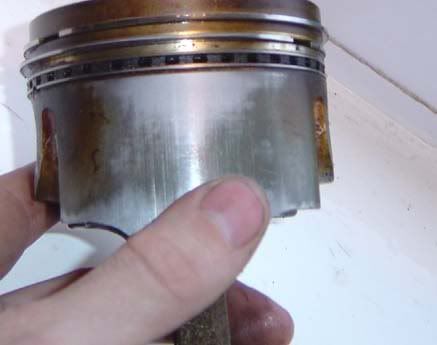
The compression rings prevent gases from bypassing the piston and heading towards the sump (known as ‘blow-by’ gases). The rings themselves are not a complete circle and have a small gap to allow them to be expanded for fitting/removal from the piston. This gap is set to a specific value known as the ‘end gap’ or ‘working gap’ and varies for different piston manufacturers and applications. The gap should be large enough to ensure that there is still a clearance between the ends of the ring after exposure to normal cylinder temperatures but not so large that significant blow-by will occur. Below shows the end gap

p1329372_2.jpg


To set the gap you usually put the ring into a cylinder and level it off with the piston before using a feeler gauge to check the clearance and a file to alter the size.

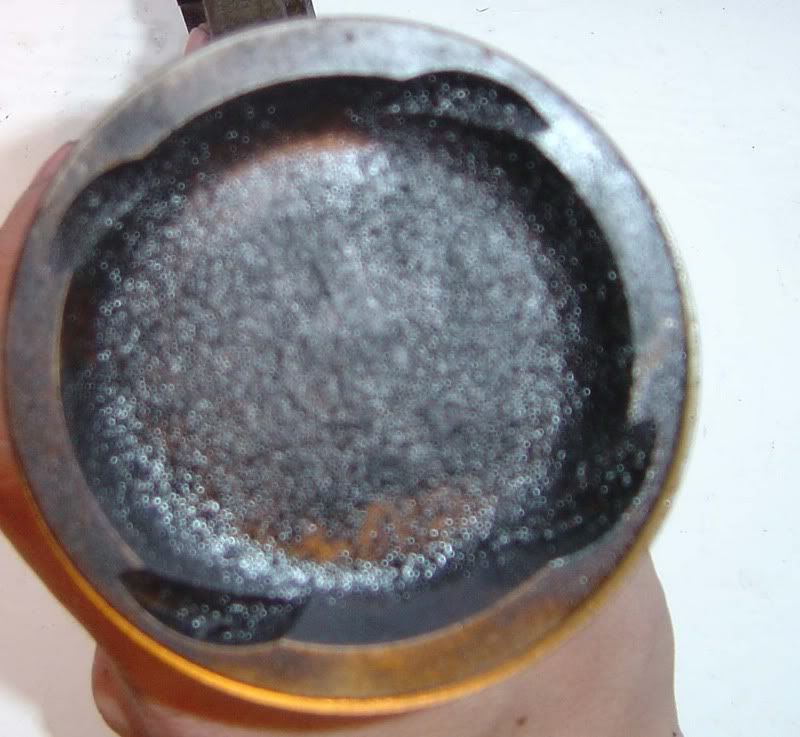
Note that the end gap is larger when the piston is not in the cylinder due to the fact the ring springs out to a greater diameter when not surrounded by the cylinder. When the ring is not fitted, the gap is known as the ‘free gap’ (see picture). The material used in the piston rings is selected to ensure they spring outwards towards the cylinder when installed.

p1329372_3.jpg


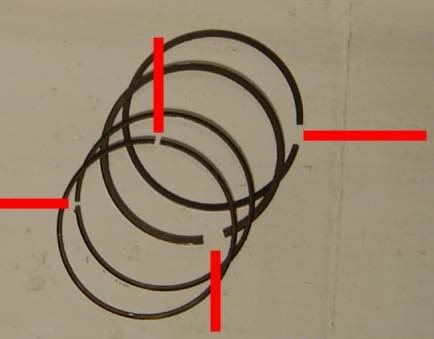
The end gaps will let a small amount of gas bypass the ring and head past this initial seal. A second compression ring is fitted and the end gap for this piston ring is usually set ‘out of phase’ from the other. By this I mean it is not lined up but set 90 degrees apart (360 degrees in a circle and we have 4 rings to fit-because the oil scraper ring comprises of two smaller rings-so 360/4=90 degrees). See below for the alignment:

p1329372_4.jpg


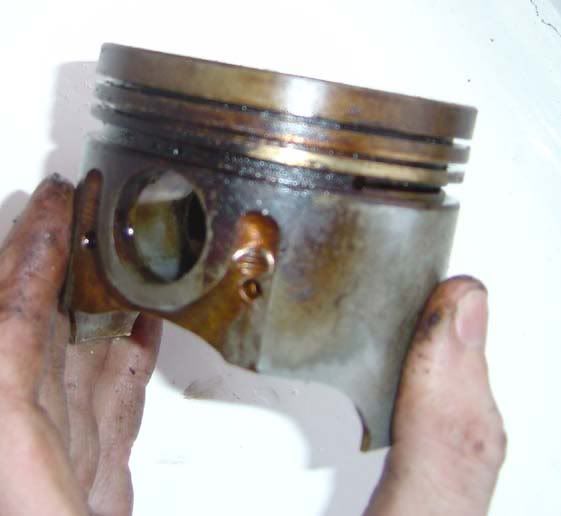
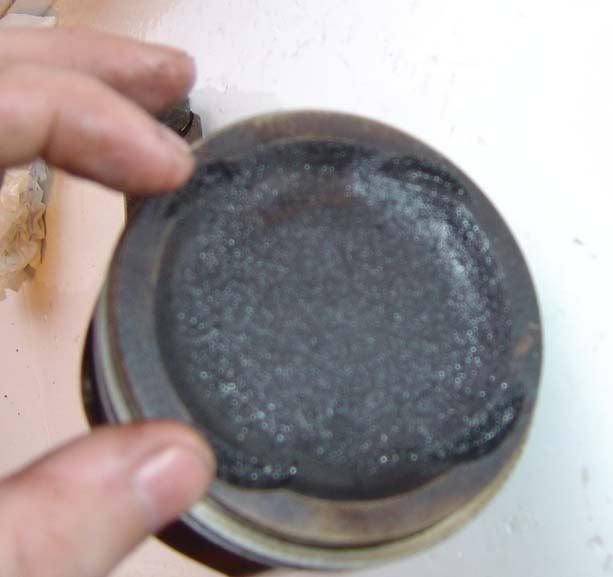
The primary ring is made of stainless steel and the second is cast iron on the Supra. See picture for the end gaps :

p1329372_5.jpg


With the two compression rings working together (sometimes even 3 are used but not on Supras) a tight enough seal is formed to prevent much gas escaping from the combustion chamber into the crankcase. The third ring, the oil scraper ring’, has a different task – as I’m sure you’ve guessed it is to scrape oil. As oil is pumped around the engine it will be fed to the rods and fired at the underside of the pistons to cool them down. This oil will inevitably end up on the bores and the oil scraper ring prevents this from rising up into the combustion chamber. Now you can see why ‘worn rings’ can lead to lots of smoke coming out the exhaust – oil is escaping past the ring into the chamber and being burnt with the normal combustion of air/fuel.

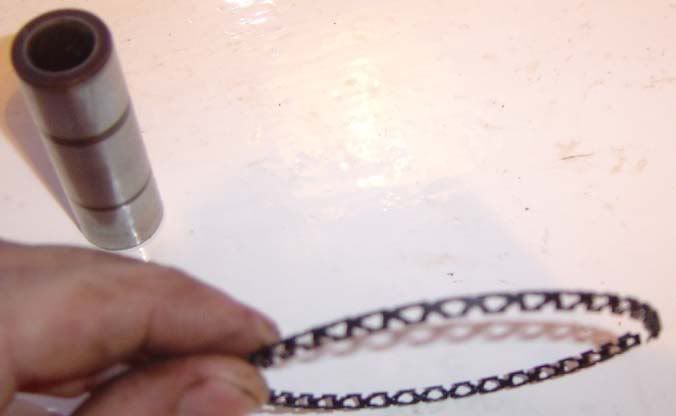
The oil scraper ring is designed to slide over oil when the piston is travelling up the cylinder but then to retrieve all but fine layer of oil on the downward stroke. Oil is then forced down to the crank case by the scraper ring and can escape through a small hole in the piston. Note that the compression rings can also perform some oil control but it is principally the job of this third ring. The oil scraper ring consists of 3 parts as shown below:

p1329372_6.jpg

p1329372_7.jpg


You can see there are two rings similar to the compression rings (but smaller) which sandwich the scraper.
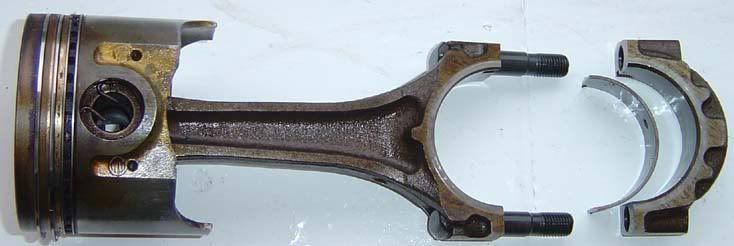
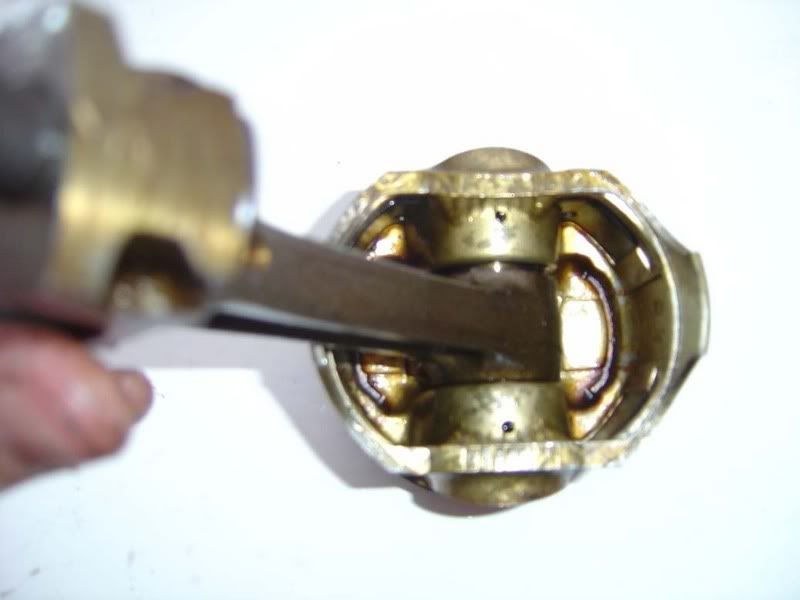
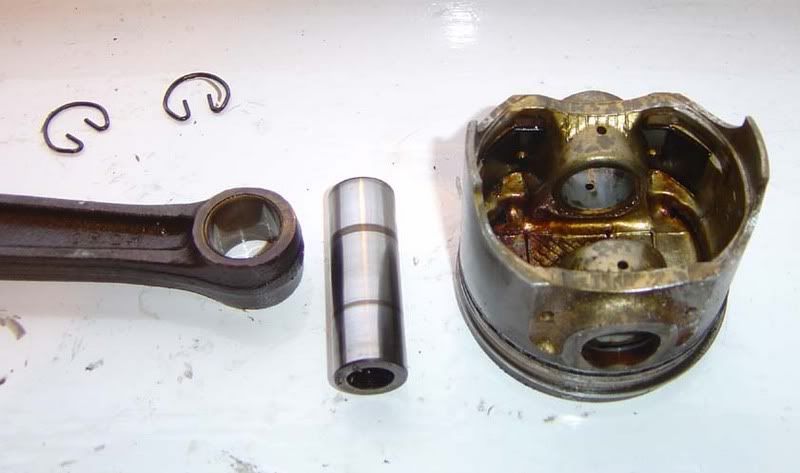
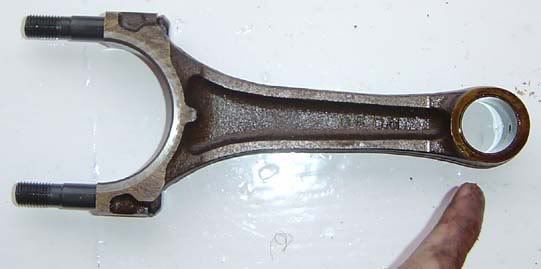
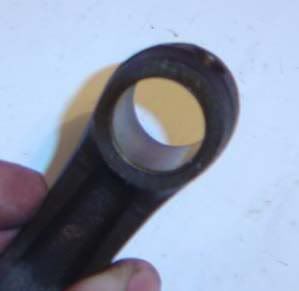
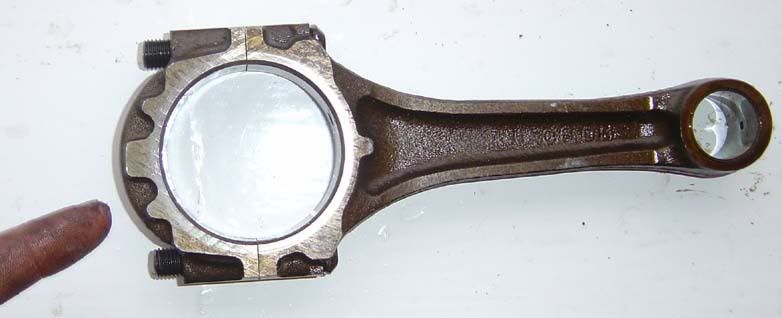
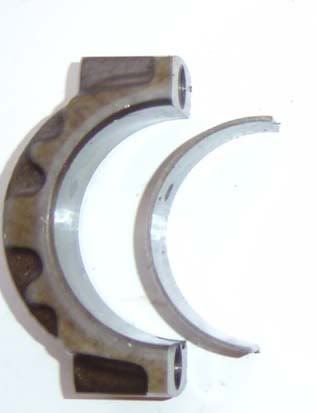
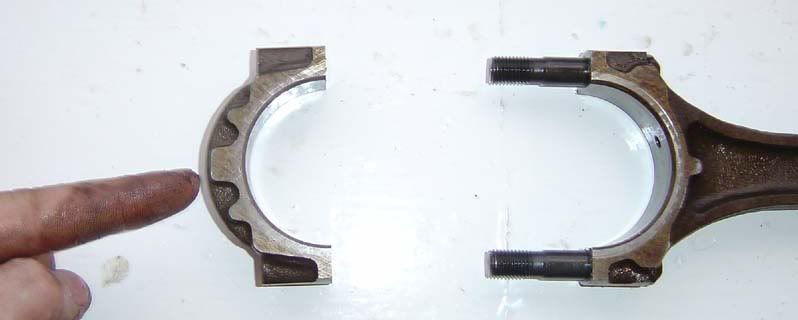
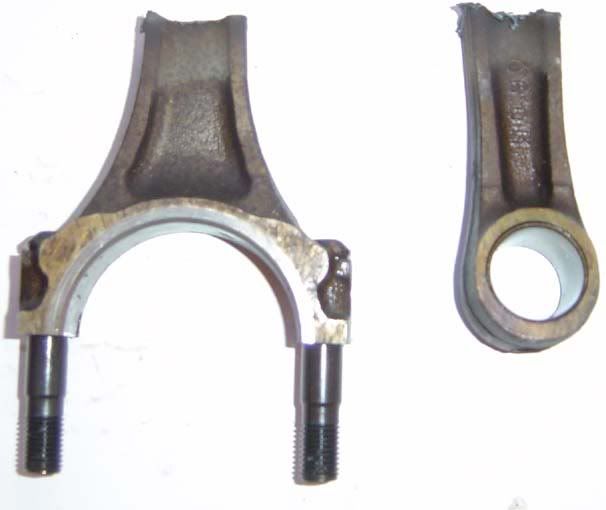
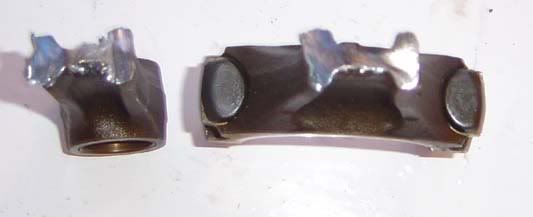
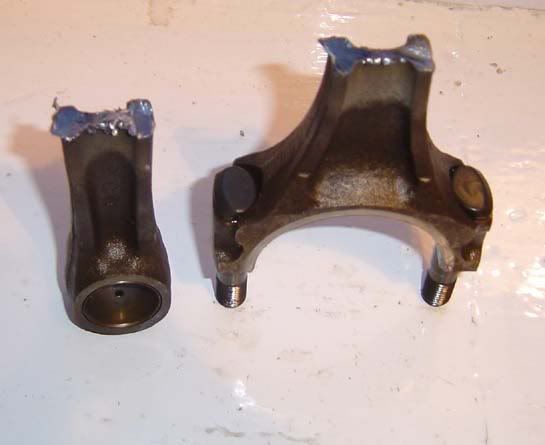
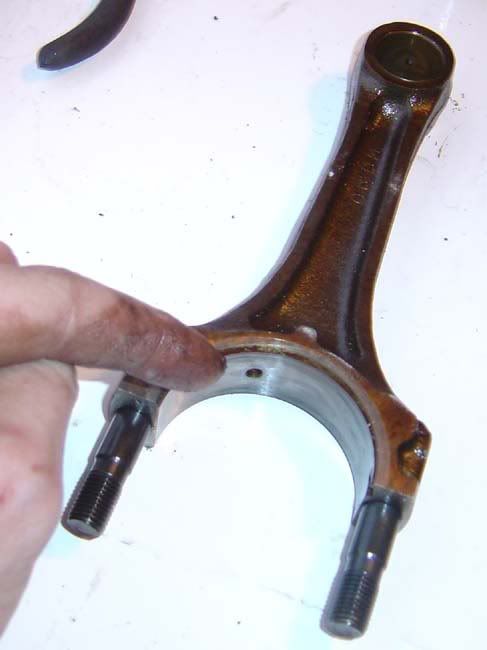
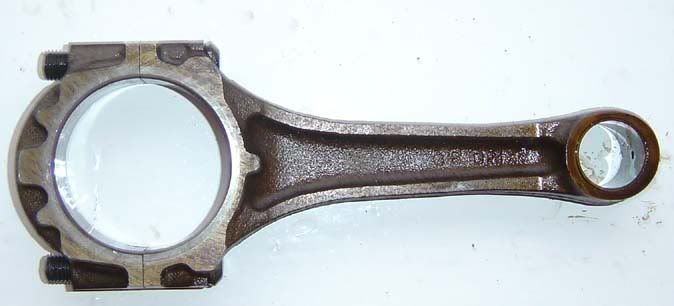
 

JSeaman

SM Official Expert: Guide Author
SM Expert
May 26, 2009
216
0
0
Derbyshire, UK
The piston rings sit in ‘ring grooves’ which are separated by the ‘ring lands’ on the piston. These grooves are accurately machined ‘cut outs’ in the piston as shown below

p1329373_1.jpg


The ring grooves have a depth which is slightly larger than the size of the piston ring which ensures the ring can be pushed into this gap and therefore the piston bears against the cylinder wall rather than the piston ring. The height of the ring gap is also slightly bigger than the height of the piston rings itself (piston-to-groove wall clearance) to allow a small amount of movement. Without this clearance, the ring would be liable to becoming stuck with carbon build up. Piston rings can come in tapered and cut out varieties to improve bedding in and avoid ridges on worn cylinders but typically are just rectangular metal bands.

As the piston moves up and down, the connecting rods join the vertical piston motion to the crankshaft to create rotational movement. A side effect of this is that the piston is pushed against the bore at an angle (side thrust) and the side of the piston rubs against the block. This is worst as the piston passes TDC and BDC. When you remove an old piston you may see signs of wear on the bearing surfaces which can cause distortion and make the cylinders oval.

p1329373_2.jpg


The main force of combustion (250 degrees C+) is centred on the piston ‘crown’ which is the big flat face at the top of the piston you see when removing the cylinder head. This large area is designed to produce certain burn characteristics, alter compression ratios and in some cases allow clearance for the valves. The cut outs you find for the valves (see below) mean that our engine is ‘non-interference’ i.e. if the cam belt breaks then the piston cannot physically hit the valves.

p1329373_3.jpg

p1329373_4.jpg


The amount of force acting on the piston during combustion is defined by the cross-sectional area of the chamber multiplied by the pressure of gas acting on the piston i.e. the amount of crown that is exposed and how much the gas is going to press onto that area.

Heat build up is a big issue and the piston must be able to conduct the heat from combustion/exhaust gases away efficiently to prevent overheating. The energy is conducted away through the side of the piston (known as the skirt), and the rings. A good conductor of heat is essential. The 7MGTE uses oil squirters to cool the underside of the piston with engine oil to help prevent overheating. If the piston crown stays too warm then it heats up the fresh intake charge which reduces combustion efficiency.

Aluminium is often used for pistons due to the fact it conducts heat away quickly, is very light (great for high revving applications) and has a low melting point which makes it easy to cast. The downside is the high coefficient for thermal expansion (expands with temperature a lot), relatively low strength and expense when compared to some other metals.

Combinations of aluminium/cast iron have been made to overcome the problems of aluminium but machining techniques and metal treatments mean that aluminium is a viable solution. The addition of silicon (and other elements) enable the creation of a stronger material with lower expansion values than the raw aluminium.

The piston ‘skirt’ is the side of the piston which provides the bearing surface against the bore. Various designs of skirt have been used which can allow for small clearances when cold and less heat expansion such as having a ‘split’ in the skirt which allows for the metal expansion. The Supra has a split and is shown in the picture below (although it’s hard to see unfortunately):

p1329373_5.jpg


Modern ‘solid skirt’ designs are now more common. A haze may be found on the side of the piston (striation finish) as well as various other forms of toughening and/or heat treatment to prolong the life of the piston. Below shows the skirt area on a 7MGTE piston

p1329373_6.jpg


Now we have covered the rings, crown, skirt and properties of a piston we move onto the rods. The pistons are connected to the rods by a ‘gudgeon pin’ (also called a ‘piston pin’ or ‘wrist pin’ – gudgeon pin is the British term). This is a tube that allows the piston to tilt on the rod and connects the rod and piston together - see below for a picture:

p1329373_7.jpg
 

JSeaman

SM Official Expert: Guide Author
SM Expert
May 26, 2009
216
0
0
Derbyshire, UK
This part is obviously subject to some serious stresses and special ‘bosses’ are machined into the piston where the gudgeon pin is fitted. There are two main types of gudgeon pin design that are used, these are :

1. The fully floating type (as used in the Supra) where the pin can turn freely in both the rod and the piston and is held in place by snap rings/circlips to prevent the pin coming into contact with the cylinder bores

p1329374_1.jpg


2. Semi floating pins that are secured to either the rod or the piston (but not both because we need free movement). Historically gudgeon pins have been screwed into piston bosses but it is more common now to have them fixed in the rod via interference fit (where it is pressed in a tight gap) or clamping. Via some kind of fastener.

The gudgeon pin is fitted through the boss in the piston (see picture below) and is often a tight fit when the piston is cold. To insert/remove the pin, the piston should be gradually heated first.

p1329374_2.jpg

p1329374_3.jpg


As well as mounting through the piston, the gudgeon pin is inserted through the ‘small end’ or ‘little end’ of the rod. Care must be taken to ensure the insertion and removal of the gudgeon pin doesn’t stress or bend the rod. The little end is usually fitted with some kind of press-fit bush made of a material such as bronze. See below for a little end and bushing

p1329374_4.jpg

p1329374_5.jpg


While we are on the subject of stressing rods, you may come across the term ‘magnafluxing’. This process is used to find cracks and deformities in metal and can be used on many parts including the rods. The process involves producing a magnetic field then watching for abnormalities in the pattern of iron filings scattered on the part. If you are re-using some rods you may want to get them magnafluxed as well as checking for straightness, balance etc.

As well as the ‘little end’ we have a ‘big end’ (or ‘big end eye’) of the rod which is where the rod bolts to the crankshaft (on what is known as the ‘crank pin’). Between the big end and the crankshaft we have bearings or ‘shells’ which are metal inserts designed to wear over the life of the engine. Below shows the bid end cap of the rod and the bottom bearing surface

p1329374_6.jpg


When people refer to their ‘big ends’ knocking, it is the clearance between the crankshaft and the ‘big end’ of the rod becoming too large. If the clearance does become too great, a ‘knock’ will be heard as the piston changes direction and the rod takes up any gap with the crankshaft which can rapidly cause serious damage. The bearing in between these two surfaces may be replaced to rectify this knock and various bearing sizes are available. Below shows half a big end shell or bearing :

p1329374_7.jpg


Some big ends are a single-piece design (‘solid eye’) where the crankshaft comes apart and slides into the big end without splitting the rod. This is not common on modern car engines and was more for old single-cylinder bikes. Instead, modern crankshafts are a single piece unit and the rod is split around the crank at the big end (the ‘big end cap’ is the removable piece). The split may either be a lateral split or n oblique one (at an angle) to allow for greater clearances.

p1329374_8.jpg


The ‘shank’ is the piece of metal between the big and little ends of the rod and is subject to a great deal of stress. To prevent buckling, the shank is often made in an H section where, if you were to cut the rod in half and look down it, you would see and ‘H’ shape. This provides strength for the rod to reduce the chance of bending

And if you were to spend a little while with an angle grinder and a vice like I did last night to annoy my neighbours and get an almighty ringing in my ears (see the suffering I endure for these guides!), you’d be able to see a cross-section of the rod as shown below.

p1329374_9.jpg

p1329374_10.jpg

p1329374_11.jpg
 

JSeaman

SM Official Expert: Guide Author
SM Expert
May 26, 2009
216
0
0
Derbyshire, UK
Lubrication of the connecting rods around the crank is achieved via oil passageways that are drilled in the crank, rods and bearings. Oil is fed under pressure into the big end of the rod to lubricate the bearings and provide a surface between the rod/crank/shells to reduce friction and wear. The oil is passed up through the rod to feed the small end and splashes onto the cylinder walls. For the 7MGTE, additional cooling is provided by oil squirters that fire directly at the base of the pistons. See below for oil passageways

Hole for oil forced by the oil scraper ring :

p1329375_1.jpg


Holes to lubricate the gudgeon pin

p1329375_2.jpg


Oil path through the rod itself

p1329375_3.jpg


Pinhole at the top of the little end

p1329375_4.jpg


Rod bolts are used to hold the big end bearing cap to the rest of the rod once it is around the crank pin. These bolts are (as with all these components) subject to extreme stresses and are extremely strong. The picture below shows an assembled rod with the two bolts protruding from the base of the rod.

p1329375_5.jpg


Rods are often strengthened and lightened further by techniques such as shot peening which involves firing small balls at the rod to compress the surface and harden the rod. The bottom end (rod, crank, piston) are also often balanced as a single rotating assembly. The rod has small bevels drilled out the side to reduce weight and produce a precisely balanced set of rotating parts.

Several topics here can be taken into more detail but hopefully that provides a solid overview of the role of the piston and rod in your engine. The magic of the internals begins to fade as you realise it really is just big lumps of metal flying around!


Big thanks to either Sean or Dino depending on which engine it was I stole these bits from!