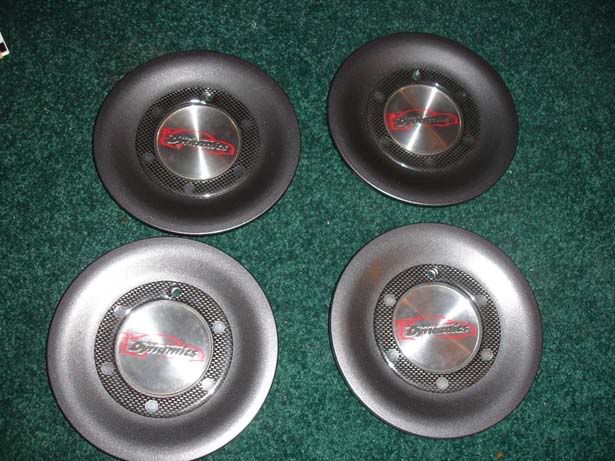
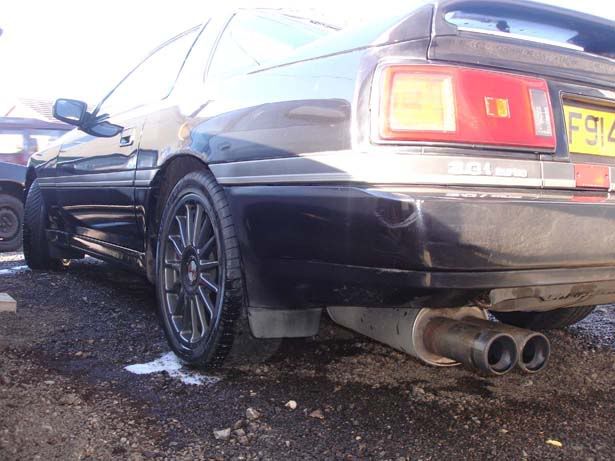
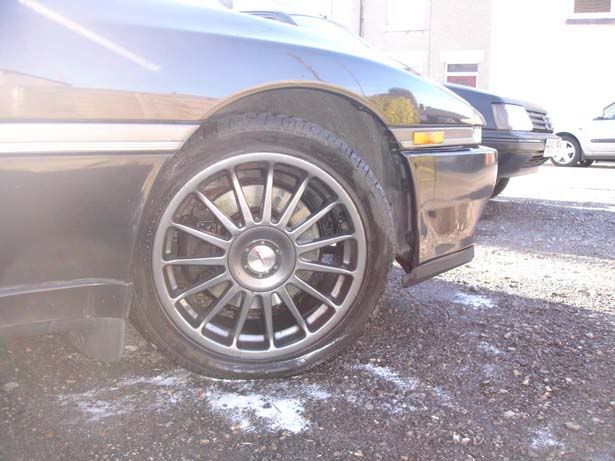
This is done on a set of 17 inch Team Dynamics Monza 15 spoke wheels in Anthracite (Try to find the exact colour of yours so you can match the paint properly). I had a refurb kit consisting of stick-on carbon fibre style surrounds and centre logos specifically for these wheels and I recommend you get a similar set for your own wheels if available
The basics of painting will be the same for any set of wheels and hopefully this will give you a rough idea of what to do. The results on mine were really good, the only real problem I had was the lack of a dust free environment for the spraying process. Saying that, I'm more than happy with the finished article
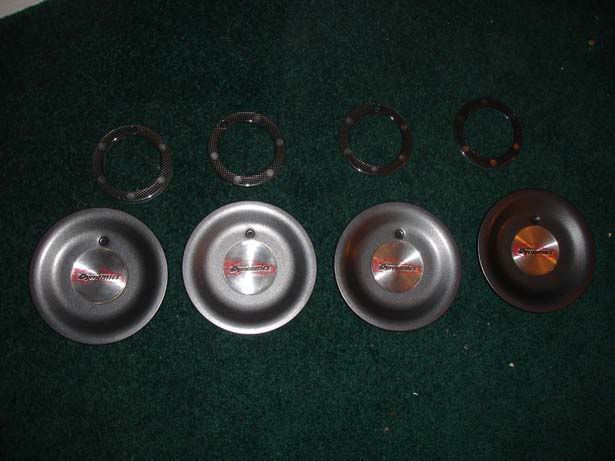
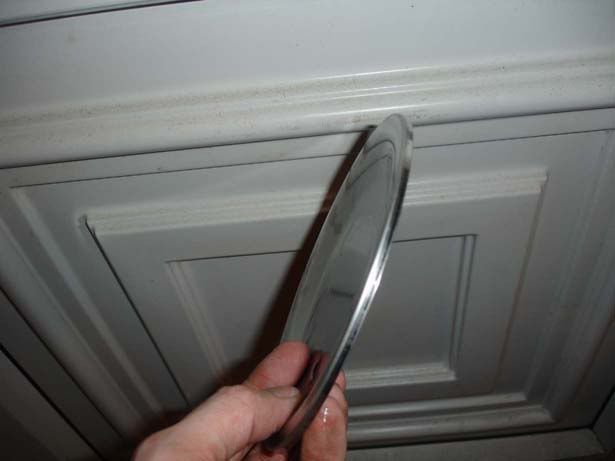
Step 1 - Remove the centre caps from the 4 wheels. In my case it was an allen key bolt to remove them
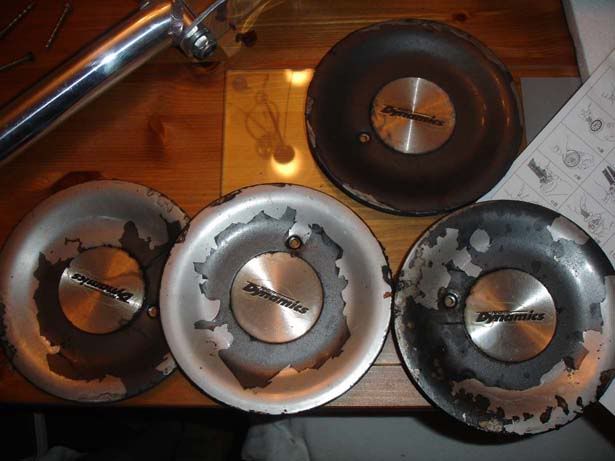
Step 2 - Using a knife, remove the centre logo which is stuck on
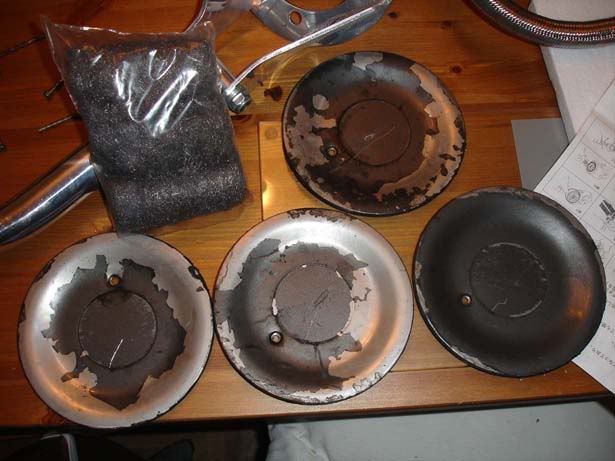
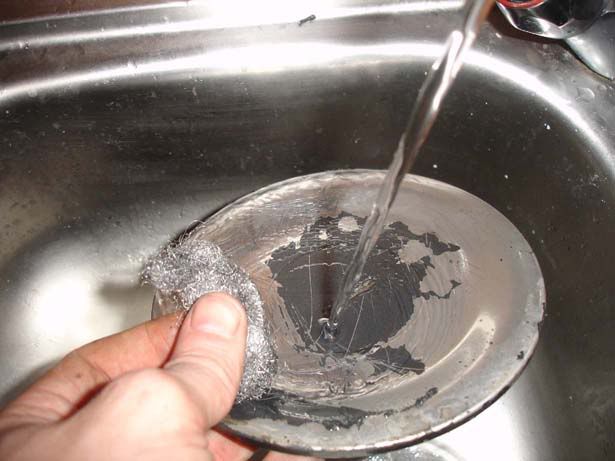
Step 3 - Once they are all done, grab some wire wool and rub all loose bits of paint away
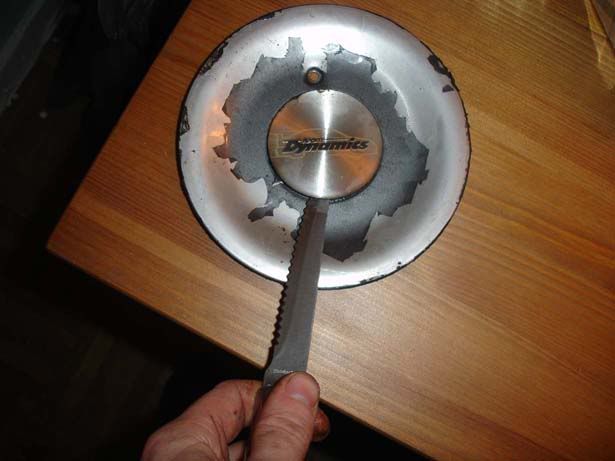
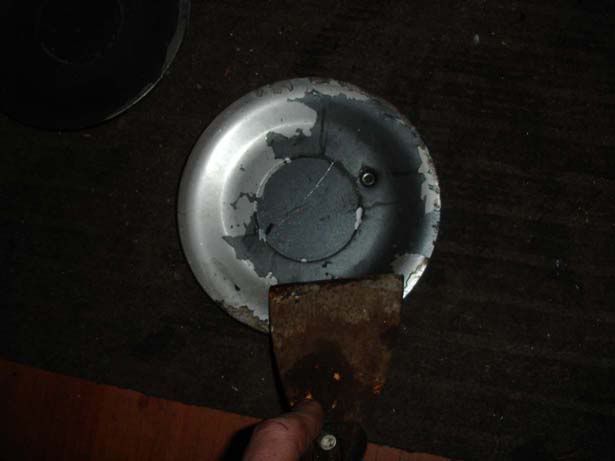
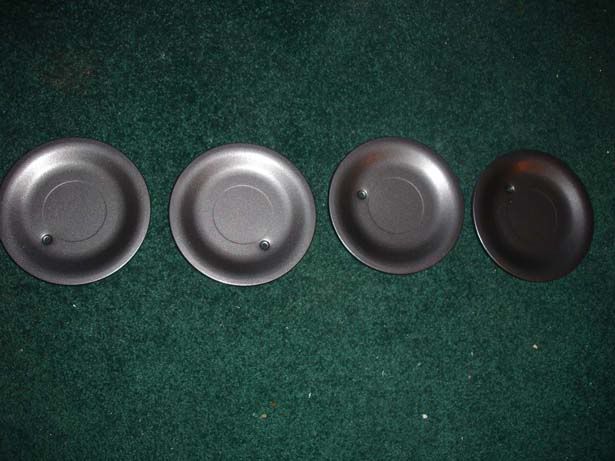
Step 4 - Using a gasket scraper/wallpaper stripper/other suibtable sharp instrument, scrape away the stubborn paint. This will take some time and patience, careful not to score too deeply into the metal
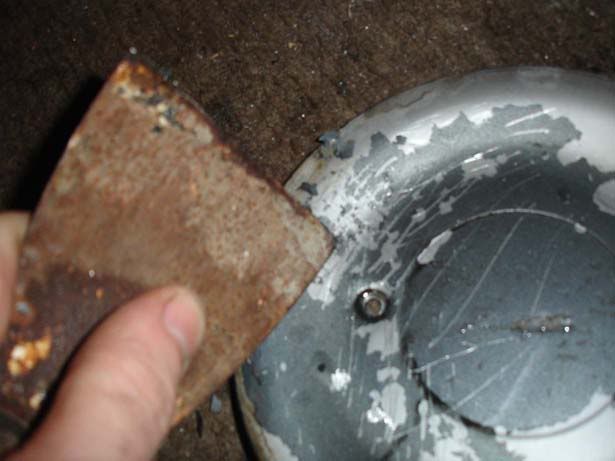
The second picture shows that you work on very small areas at a time
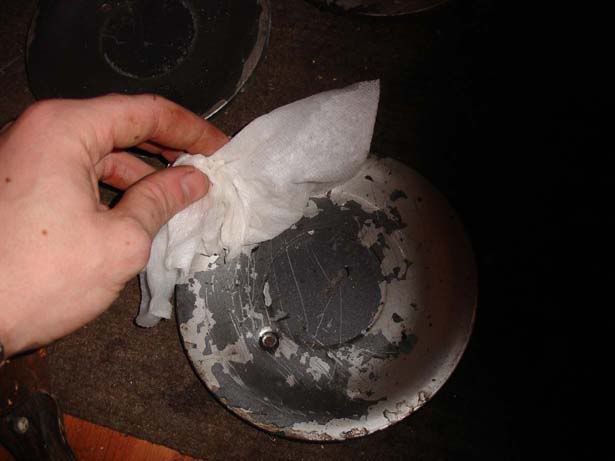
Step 5 - Use a damp paper towel to collect loose flecks of paint and it also gives more protection to stop you scraping the surface. If you leave a little water on the surface then the paint dust you scrape of will collect in it
Step 6 - Regaularly rince thoroughly and have a go with the wire wool
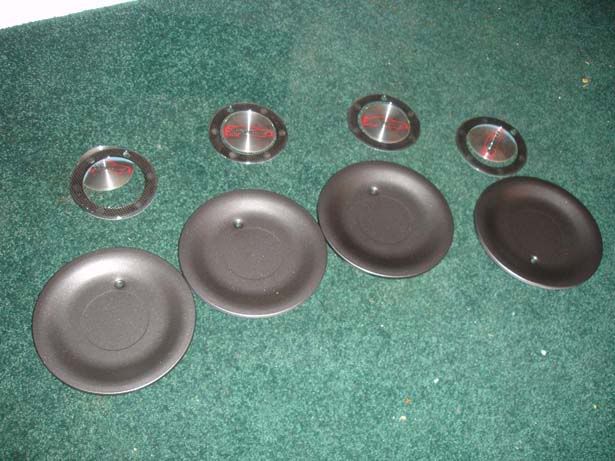
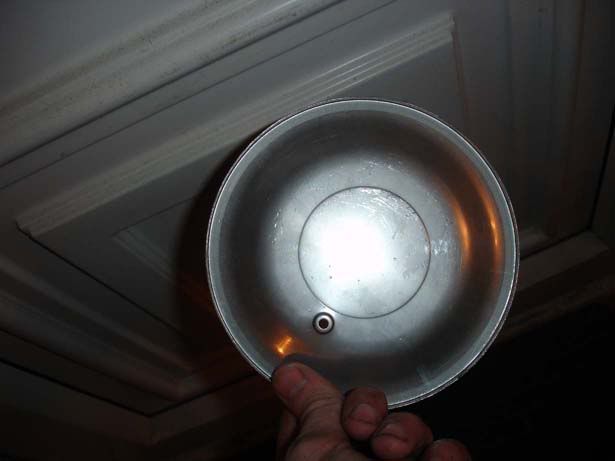
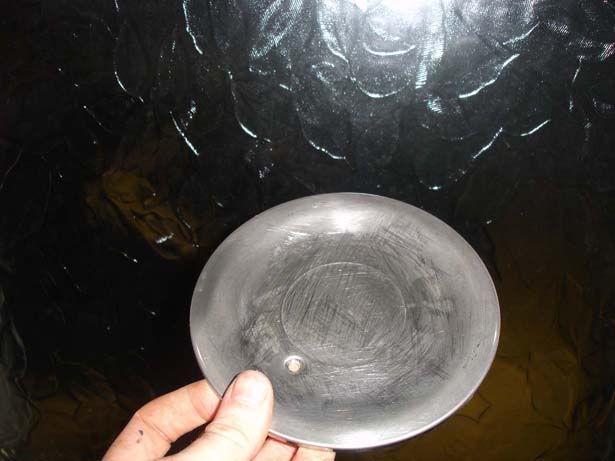
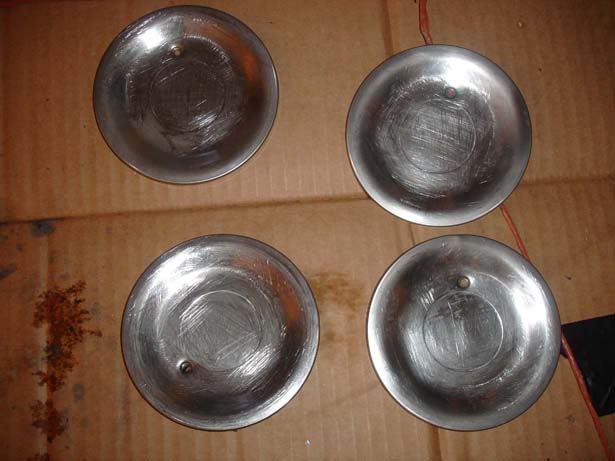
Step 7 - The finished article. Step 1 shows the sides (completely smooth), step 2 the back (Again, completely smooth) and step 3 shows the front (Lots of scoring). I deliberately left scratch marks across the facing surface of all 4 discs to help the primer take hold and not flake off again - this is known as 'keying' the surface. The final picture shows all 4 completely stripped of paint
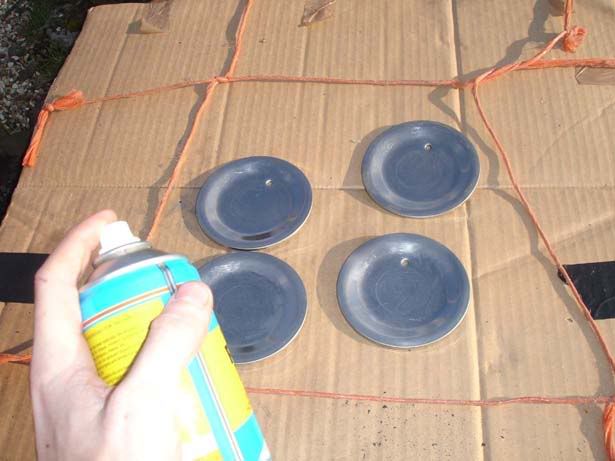
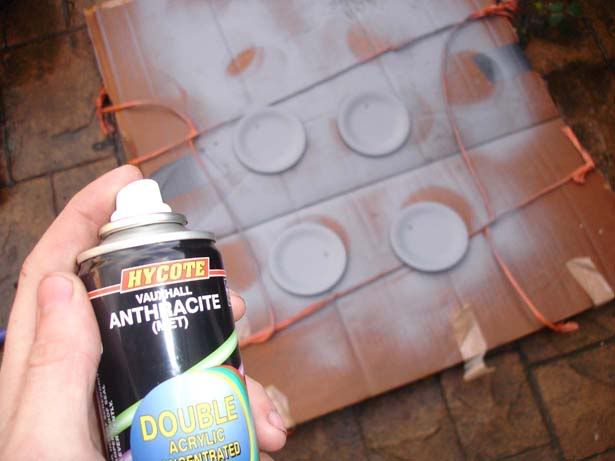
Step 8 - Get yourself a warm, ventilated and dust free (if you can) area to work in and lay all the discs out on some card or an area you can get paint on. I used plastic primer on mine although it is designed to work on metal too. The results were fine.
Follow the instructions! I've tried spraying numerous things and patience is really a virtue, I did about 6 or 7 coats at 10-15 minute intervals from 20-30cm away. Long sweeping motions and don't try to 'colour it in', simply spray over it and any bits you miss will gradually sort themselves out. I had to leave 24 hours between priming and colour and 24 again prior to lacquer
Second picture shows all painted
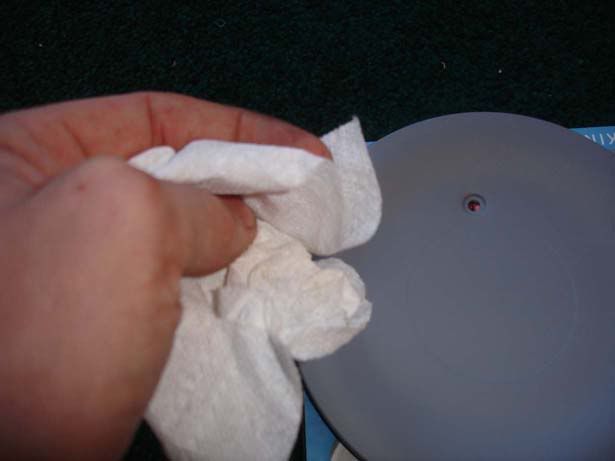
Step 9 - If necessary wet sand back a little then spray again - Use wet sanding paper/sponges and regularly dip it in cold water - this forms a protective barrier and prevents you scoring the painted surface when flatting it out. The job will only look as good as the worst bit you do - make this look good now or it'll look crap through the top coat. I was OK to just give mine a rub with some kitchen towel
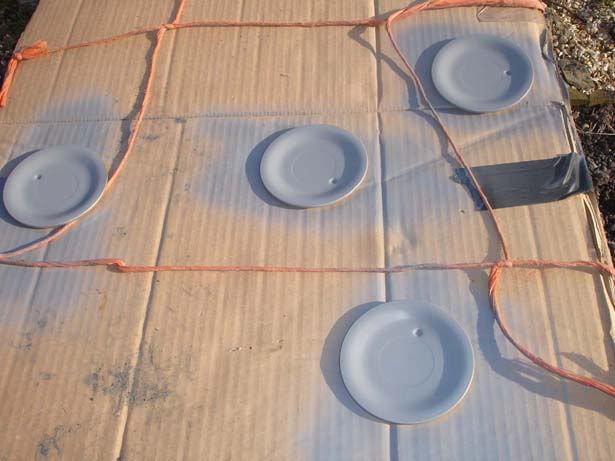
Step 10 - Give them their first coat of colour
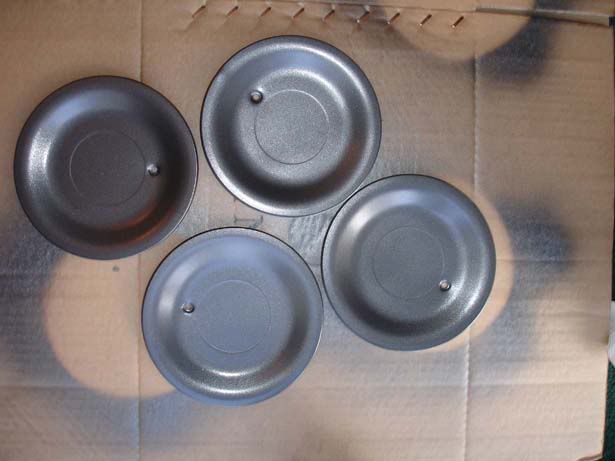
Step 11 - I've included a picture of the first coat to reiterate the whole idea of not colouring the disc in - notice the speckled appearance, this is fine and will disappear after a few coats. Lots of thin layers is the key and don't spray too closely or it will be patchy
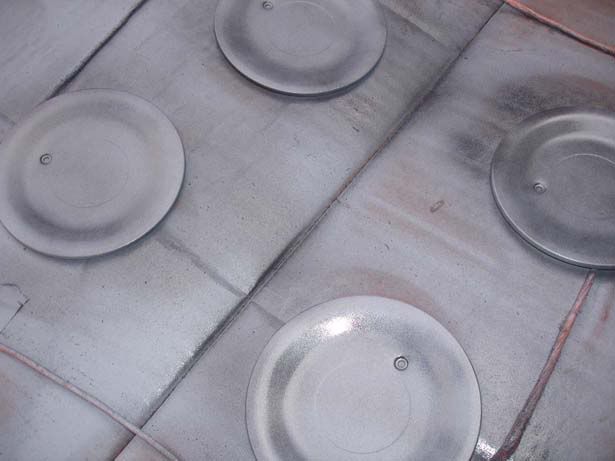
Step 12 - Here's what you should have after all your coats of colour
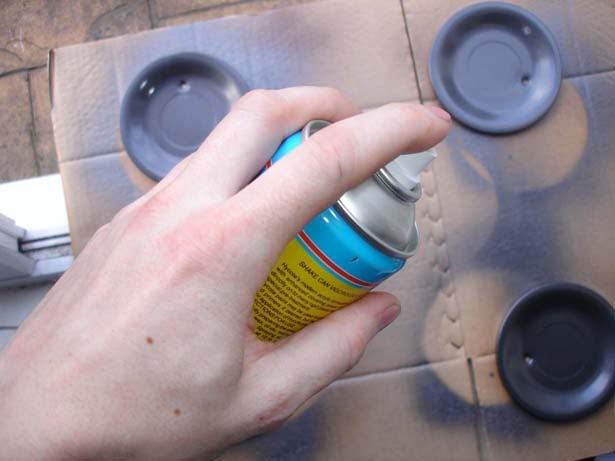
Step 13 - Now move on to lacquer. I had to wait 24 hours before doing this and I wanted to make sure I had plenty of protection with the lacquer so did lots of coats. In total I think I did 5-6 in the morning then another 4-5 in the evening
Step 14 - Once you have applied all the coats of lacquer you should be left with a glossy layer of protection. Be careful not to apply thick coats because it will go really patchy. I used Hycote for my primer, colour and lacquer and it was very good stuff. I've used a bad lacquer before and it dripped which ruined the final piece so test it out before wasting all your hard work
The basics of painting will be the same for any set of wheels and hopefully this will give you a rough idea of what to do. The results on mine were really good, the only real problem I had was the lack of a dust free environment for the spraying process. Saying that, I'm more than happy with the finished article
Step 1 - Remove the centre caps from the 4 wheels. In my case it was an allen key bolt to remove them
Step 2 - Using a knife, remove the centre logo which is stuck on
Step 3 - Once they are all done, grab some wire wool and rub all loose bits of paint away
Step 4 - Using a gasket scraper/wallpaper stripper/other suibtable sharp instrument, scrape away the stubborn paint. This will take some time and patience, careful not to score too deeply into the metal
The second picture shows that you work on very small areas at a time
Step 5 - Use a damp paper towel to collect loose flecks of paint and it also gives more protection to stop you scraping the surface. If you leave a little water on the surface then the paint dust you scrape of will collect in it
Step 6 - Regaularly rince thoroughly and have a go with the wire wool
Step 7 - The finished article. Step 1 shows the sides (completely smooth), step 2 the back (Again, completely smooth) and step 3 shows the front (Lots of scoring). I deliberately left scratch marks across the facing surface of all 4 discs to help the primer take hold and not flake off again - this is known as 'keying' the surface. The final picture shows all 4 completely stripped of paint
Step 8 - Get yourself a warm, ventilated and dust free (if you can) area to work in and lay all the discs out on some card or an area you can get paint on. I used plastic primer on mine although it is designed to work on metal too. The results were fine.
Follow the instructions! I've tried spraying numerous things and patience is really a virtue, I did about 6 or 7 coats at 10-15 minute intervals from 20-30cm away. Long sweeping motions and don't try to 'colour it in', simply spray over it and any bits you miss will gradually sort themselves out. I had to leave 24 hours between priming and colour and 24 again prior to lacquer
Second picture shows all painted
Step 9 - If necessary wet sand back a little then spray again - Use wet sanding paper/sponges and regularly dip it in cold water - this forms a protective barrier and prevents you scoring the painted surface when flatting it out. The job will only look as good as the worst bit you do - make this look good now or it'll look crap through the top coat. I was OK to just give mine a rub with some kitchen towel
Step 10 - Give them their first coat of colour
Step 11 - I've included a picture of the first coat to reiterate the whole idea of not colouring the disc in - notice the speckled appearance, this is fine and will disappear after a few coats. Lots of thin layers is the key and don't spray too closely or it will be patchy
Step 12 - Here's what you should have after all your coats of colour
Step 13 - Now move on to lacquer. I had to wait 24 hours before doing this and I wanted to make sure I had plenty of protection with the lacquer so did lots of coats. In total I think I did 5-6 in the morning then another 4-5 in the evening
Step 14 - Once you have applied all the coats of lacquer you should be left with a glossy layer of protection. Be careful not to apply thick coats because it will go really patchy. I used Hycote for my primer, colour and lacquer and it was very good stuff. I've used a bad lacquer before and it dripped which ruined the final piece so test it out before wasting all your hard work