
You've got Medallion Man to thank for this one. He did all the leg work, I'm just putting it in the usual format.
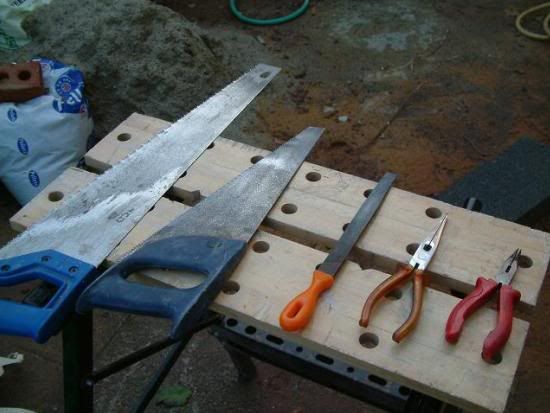
Step 1 - Get yourself some tools - workbench, saw (or panel saw, the smaller the more precise), pliers, file and some fine sand/glass paper
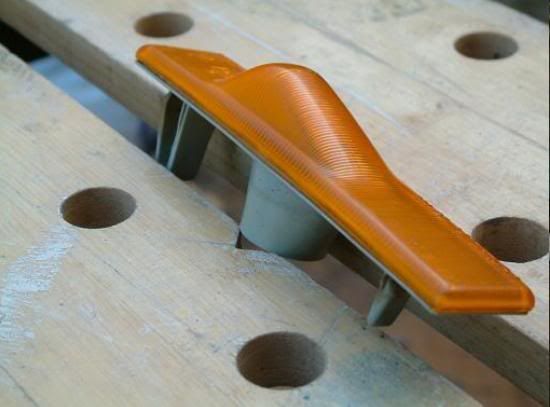
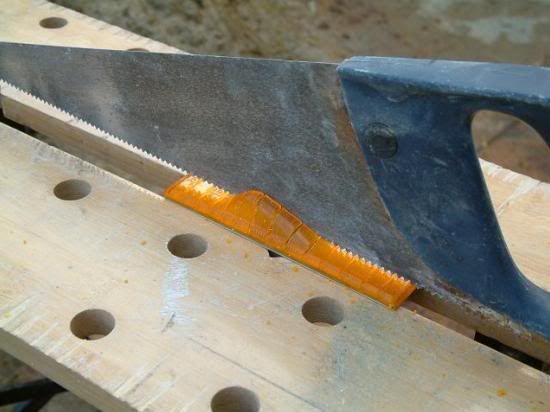
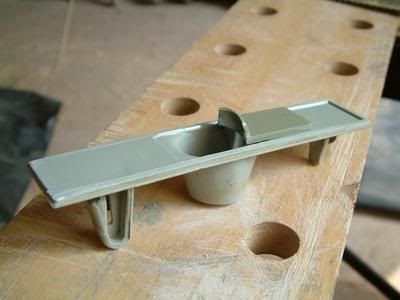
Step 2 - Place the indicator in the workbench so the bump at the back sits snugly in the notch
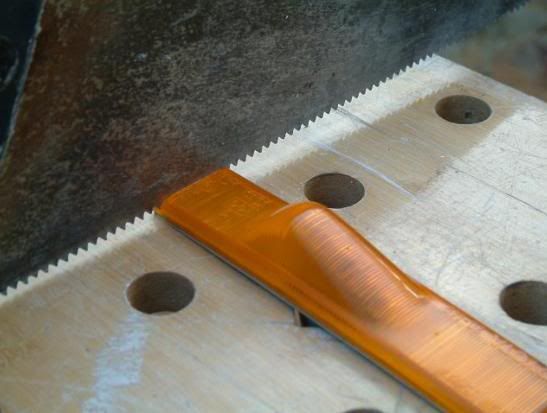
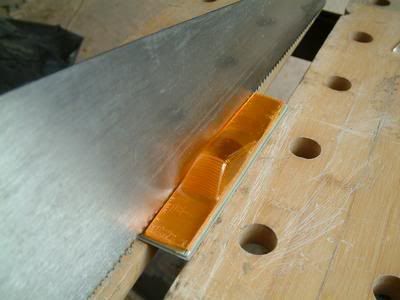
Step 3 - Start cutting across the indicator as close to the edge as possible (3mm), once you can see grey stop (with the other cuts you will see a bit of grey at either side).
Make sure that you don’t cut all the way through and score the surface of the backing. KEEP CHECKING THAT YOU HAVEN’T GONE TOO FAR!
Step 4 - Continue cutting slots along the whole lens (max 10mm apart). Again I can’t stress this enough “be careful”, it makes your job later much easier!
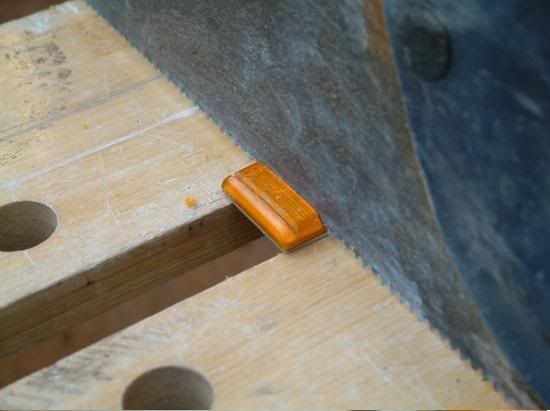
Step 5 - Once you’ve finished making these slots (and cut as close to the other end as possible) make a single lengthways cut. Again be very careful so as not to score the backing
Step 6 - Start to remove the individual plastic pieces with the pliers, peel them off outwards, they should snap off, some may leave small bits, file them off later.
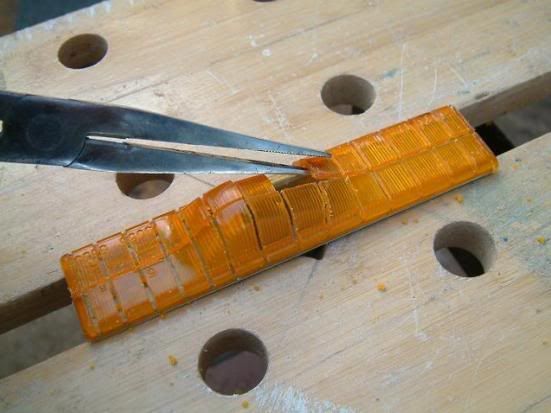
Step 7 - Bigger bits use the same outward motion
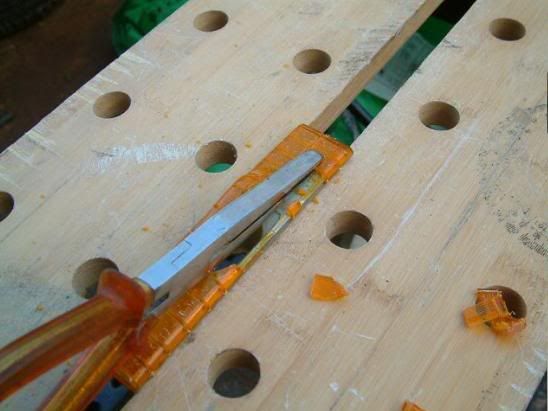
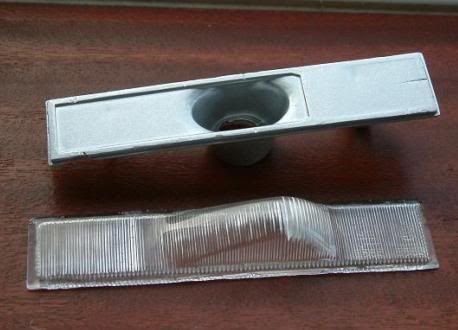
Step 8 - File off the remaining bits of lens and clean up the edges
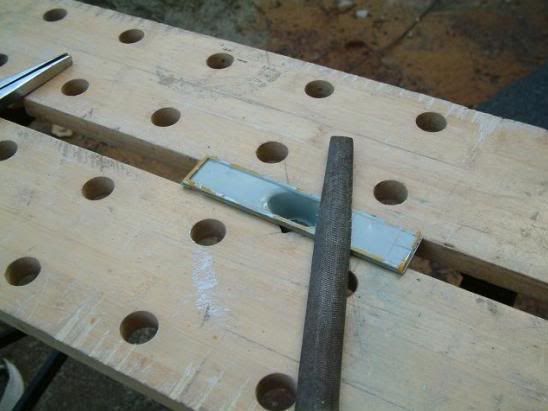
As you can see it’s difficult do this without scoring the backing. To remedy this use a bit of wet & dry (or fine sand paper), this will also help to get a better key for spraying
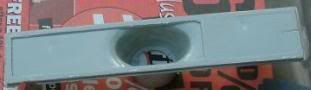
Step 9 - Choose the colour (color, lol) you want to spray the backing, I’ve used silver (to match the car but also for reflective properties.
Step 10 - Fix the lens to the backing (sand off the paint from the joining surface edge & make sure it’s the right way around), to get a watertight seal you may want to use silicon around the edge after gluing
Wolfie308 has given some recommendations as to what adhesives to use (see appropriate threads)
Good luck.
Additional comment from Medallion Man:
something I just found out (when doing another set of repeaters), there are two different types, most are the same as pre facelift but the late model soops (92's) have an extra bit inside the unit, it's some sort of reflector.
This would not apply to the dremel users but if you use my suggested removal technique it will cause you problems.
To check if they have the extra bit just look inside from the back and you should be able to see the extra piece.
To get around this you can just cut around the edges, so as with the first cut as close the end as possible (3mm) do that all the way around the repeater and avoid damage to the extra bit.
Step 1 - Get yourself some tools - workbench, saw (or panel saw, the smaller the more precise), pliers, file and some fine sand/glass paper
Step 2 - Place the indicator in the workbench so the bump at the back sits snugly in the notch
Step 3 - Start cutting across the indicator as close to the edge as possible (3mm), once you can see grey stop (with the other cuts you will see a bit of grey at either side).
Make sure that you don’t cut all the way through and score the surface of the backing. KEEP CHECKING THAT YOU HAVEN’T GONE TOO FAR!
Step 4 - Continue cutting slots along the whole lens (max 10mm apart). Again I can’t stress this enough “be careful”, it makes your job later much easier!
Step 5 - Once you’ve finished making these slots (and cut as close to the other end as possible) make a single lengthways cut. Again be very careful so as not to score the backing
Step 6 - Start to remove the individual plastic pieces with the pliers, peel them off outwards, they should snap off, some may leave small bits, file them off later.
Step 7 - Bigger bits use the same outward motion
Step 8 - File off the remaining bits of lens and clean up the edges
As you can see it’s difficult do this without scoring the backing. To remedy this use a bit of wet & dry (or fine sand paper), this will also help to get a better key for spraying
Step 9 - Choose the colour (color, lol) you want to spray the backing, I’ve used silver (to match the car but also for reflective properties.
Step 10 - Fix the lens to the backing (sand off the paint from the joining surface edge & make sure it’s the right way around), to get a watertight seal you may want to use silicon around the edge after gluing
Wolfie308 has given some recommendations as to what adhesives to use (see appropriate threads)
Good luck.
Additional comment from Medallion Man:
something I just found out (when doing another set of repeaters), there are two different types, most are the same as pre facelift but the late model soops (92's) have an extra bit inside the unit, it's some sort of reflector.
This would not apply to the dremel users but if you use my suggested removal technique it will cause you problems.
To check if they have the extra bit just look inside from the back and you should be able to see the extra piece.
To get around this you can just cut around the edges, so as with the first cut as close the end as possible (3mm) do that all the way around the repeater and avoid damage to the extra bit.
