Step 1 - Remove the roller blind and undo the screw holding the speaker down (See picture) on the offside of the car. The grill should now pull off completely
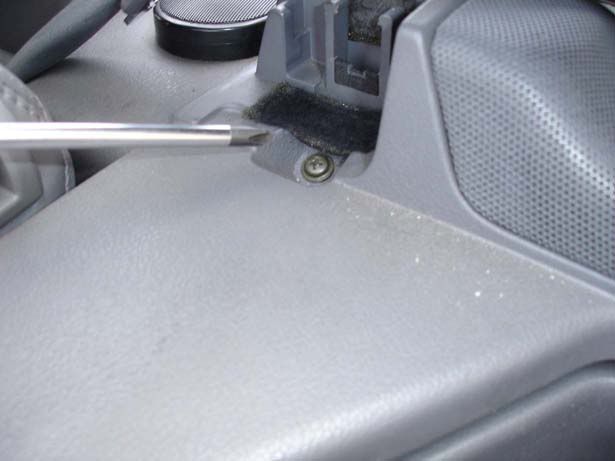
Step 2 - Remove the piece of trim in the boot that sits in front of the antenna (it just pulls out) and then undo the screw shown
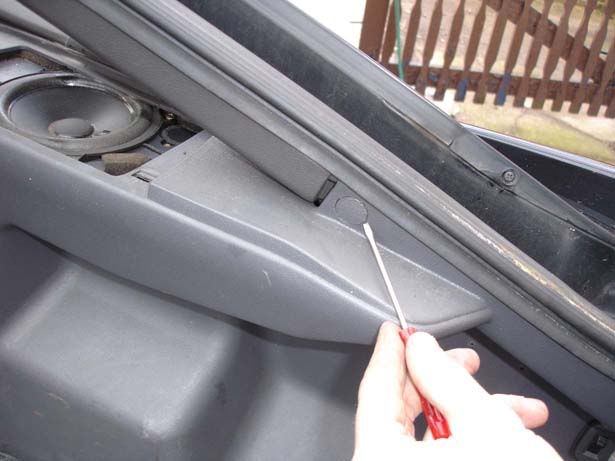
Step 3 - Remove the screw cover with a small screwdriver (Careful not to damage these), and then remove the screw behind it
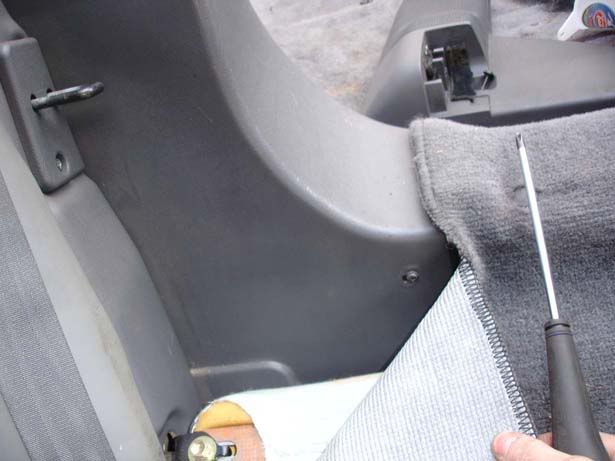
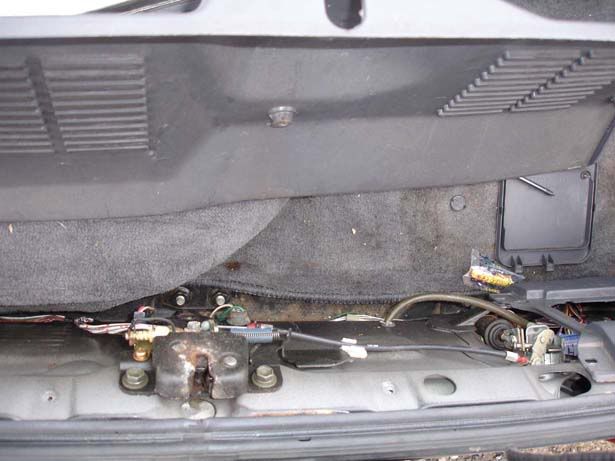
Step 4 - Fold down the back seats and pull back the carpet to reveal this screw, remove it
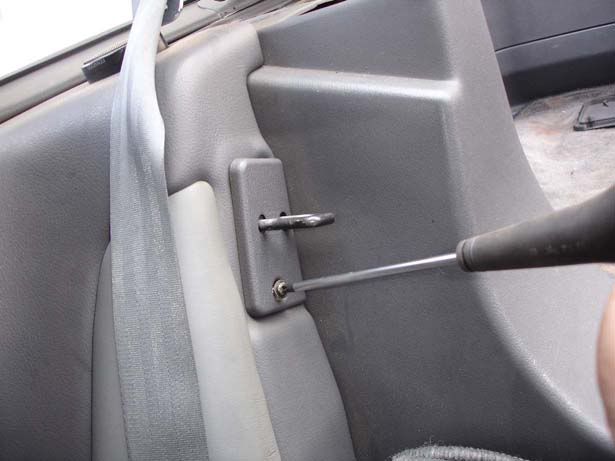
Step 5 - Remove the screw holding the plastic cover over the seat locking mechanism
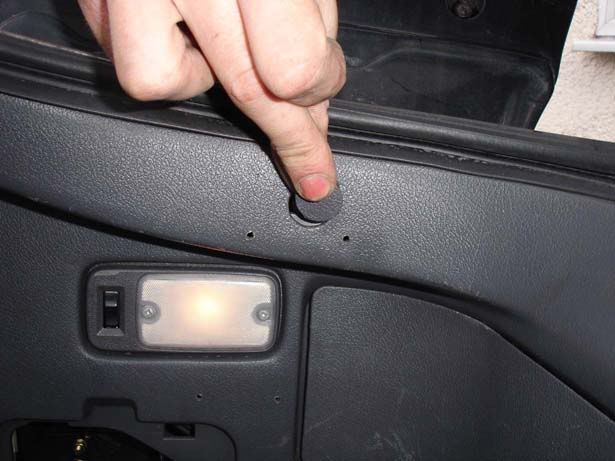
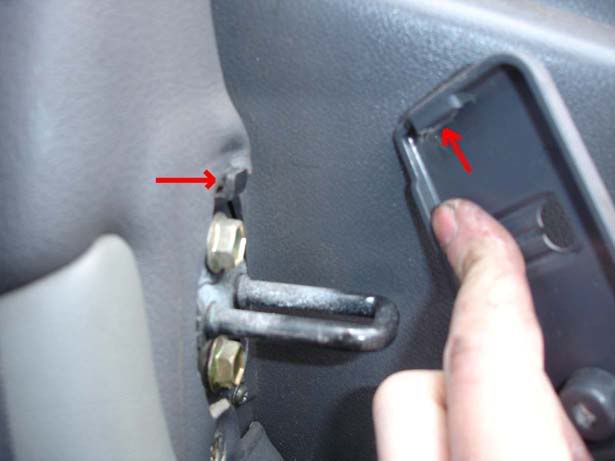
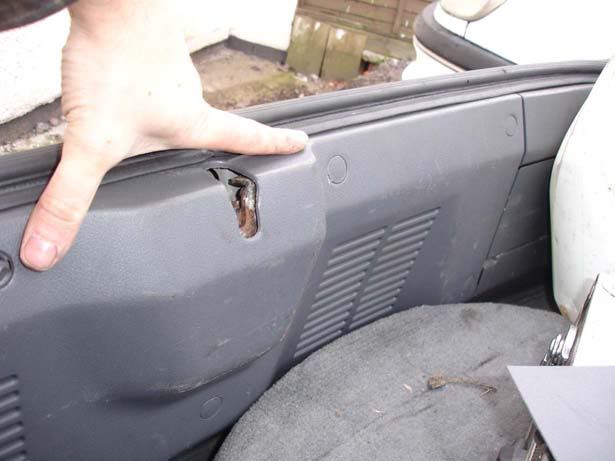
Step 6 - Remove the plastic cover by pulling the base out and then sliding upwards. Notice the plastic recess and metal tab, don't snap it!
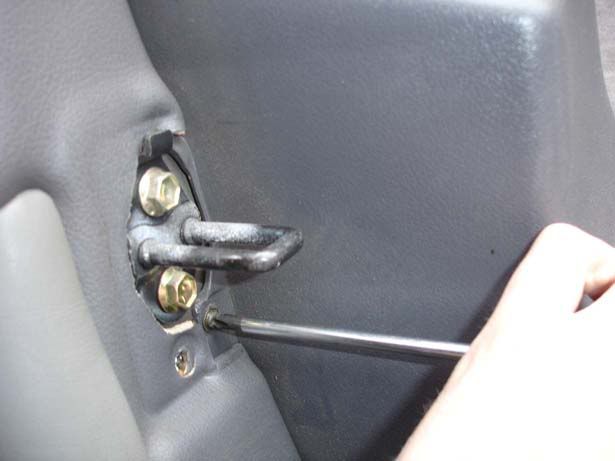
Step 7 - You now have access to another screw holding the trim on, remove this as shown
Step 8 - Another screw cap and screw to remove
Step 9 - Go along the whole of the centre piece of trim in the boot and remove all the covers/screws completely
Step 10 - The trim should now slide out of the car
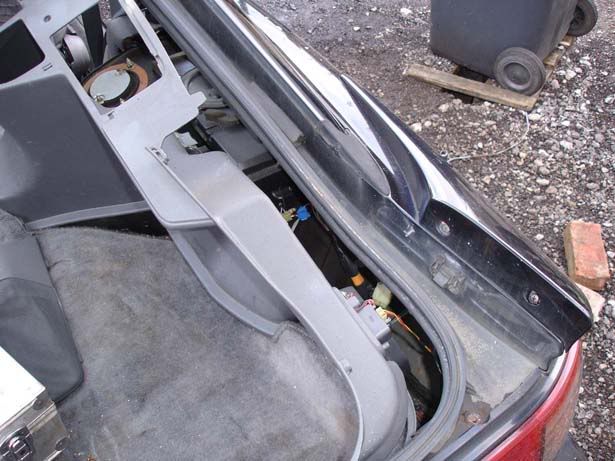
Step 11 - With the centre piece removed you should now be able to slide the rear quarter panel towards the centre of the car. Careful, it's not completely free yet
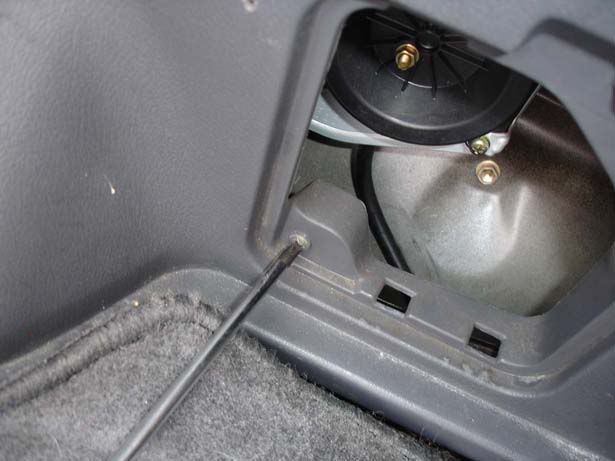
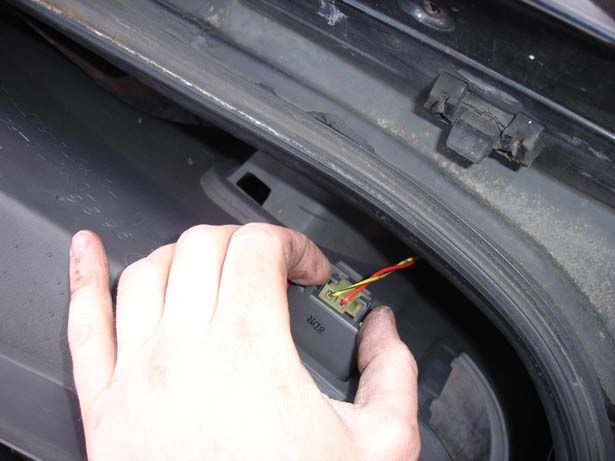
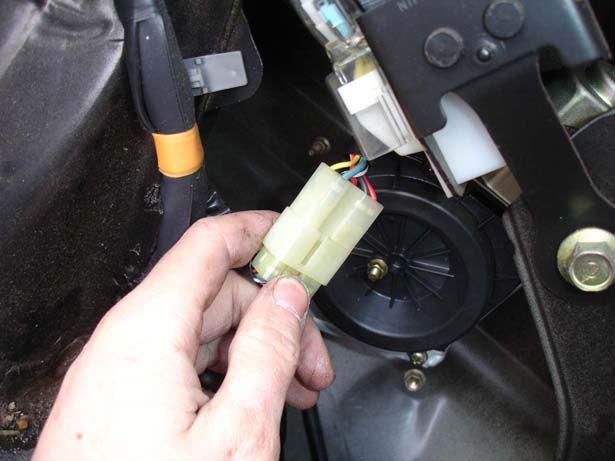
Step 12 - Squeeze the connector as shown to remove the wiring to the boot light
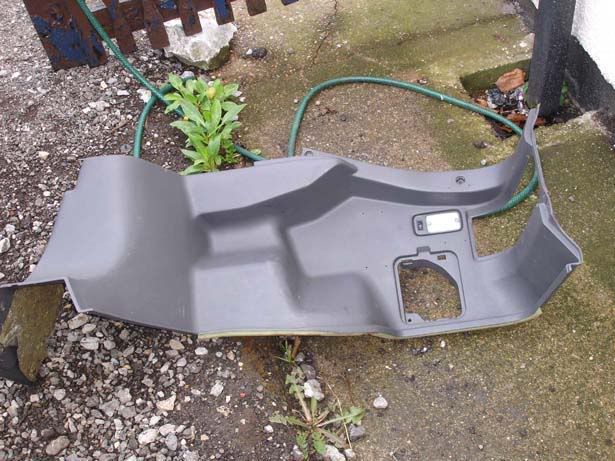
Step 13 - Remove the trim from the car
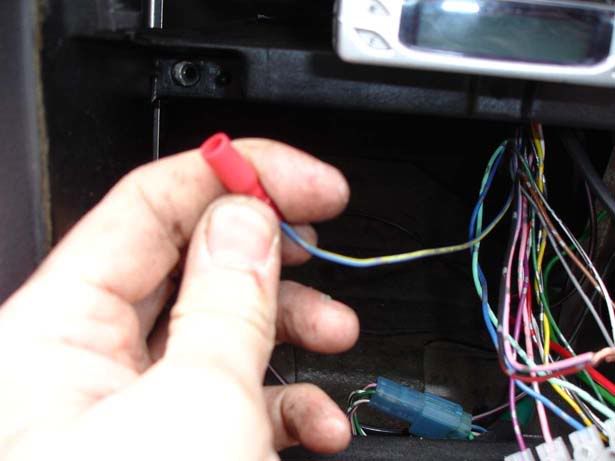
Step 14 - Press the locking tab and release the connector to the antenna
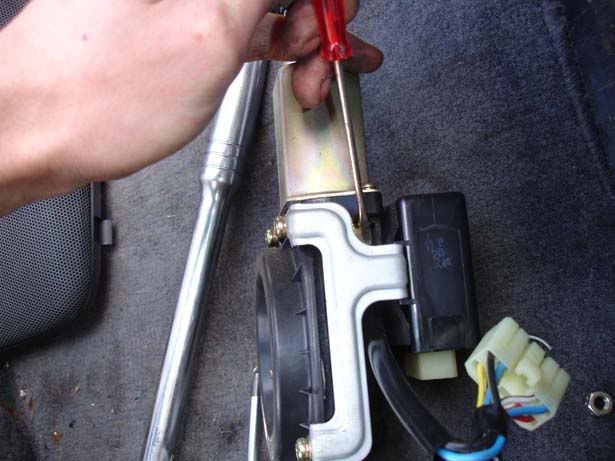
Step 15 - Use a spanner to undo the 10mm nut holding the bracket to the antenna in place

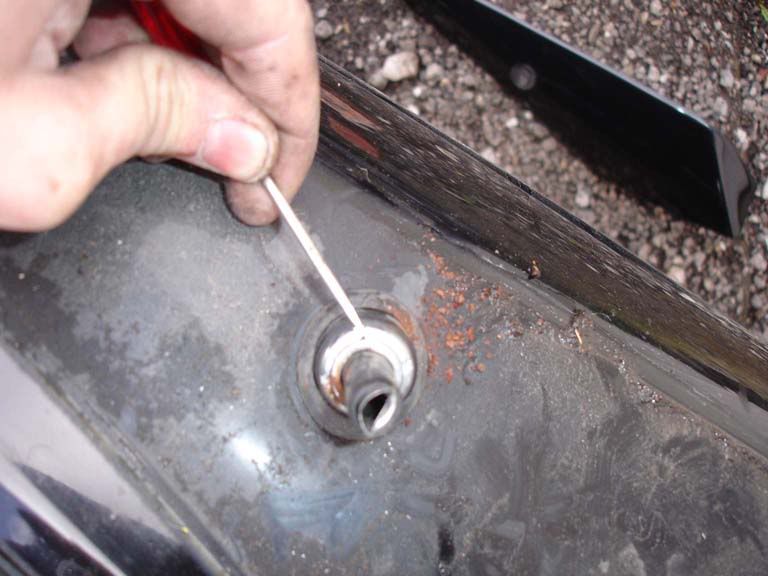
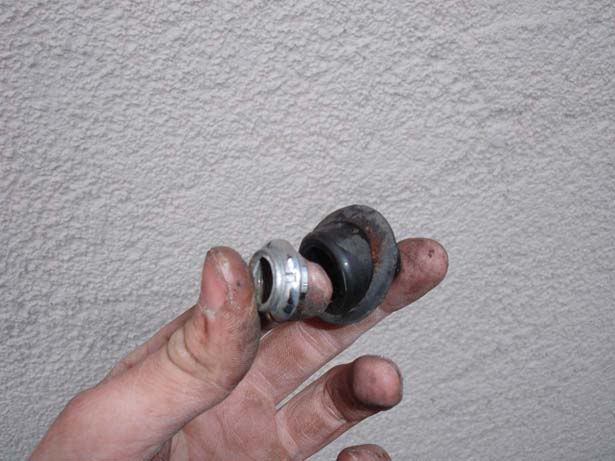
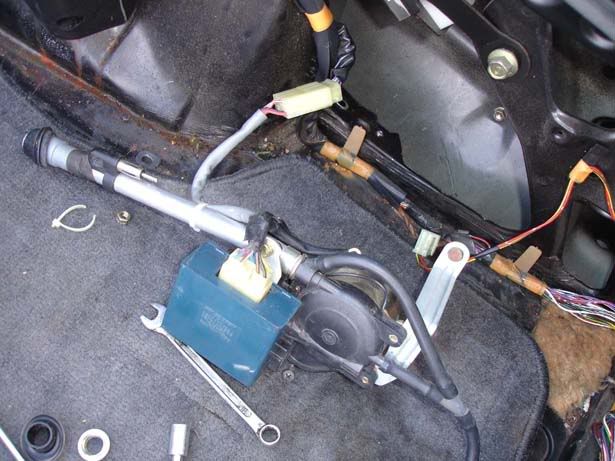
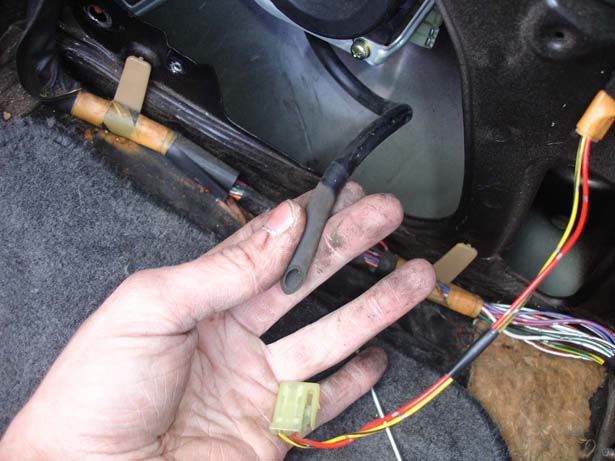
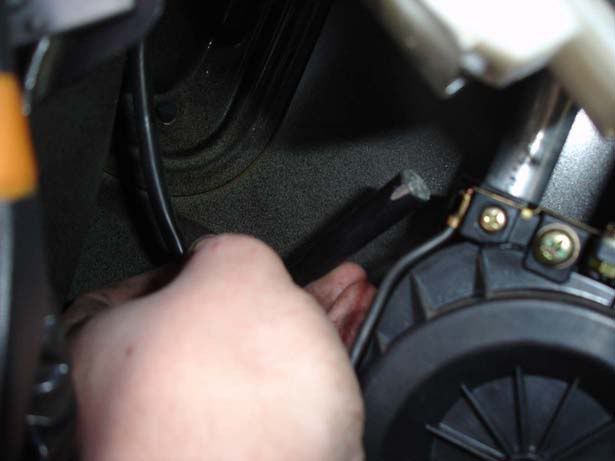
Step 16 - Pull the breather hose out which runs down to the wheel arch (There should also be a rubber grommit you need to remove)
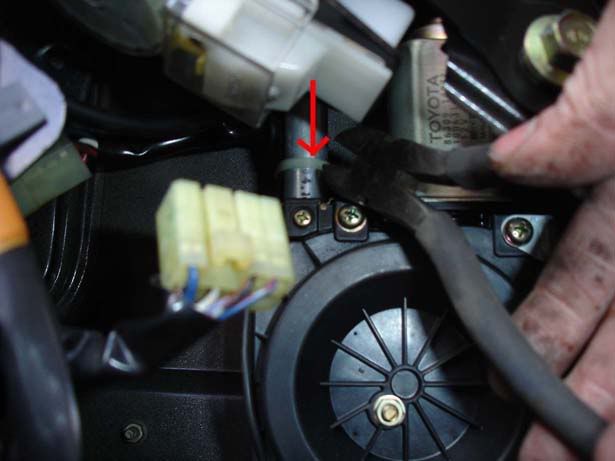
Step 17 - I had to use snips to remove a cable tie holding the wiring to the antenna body
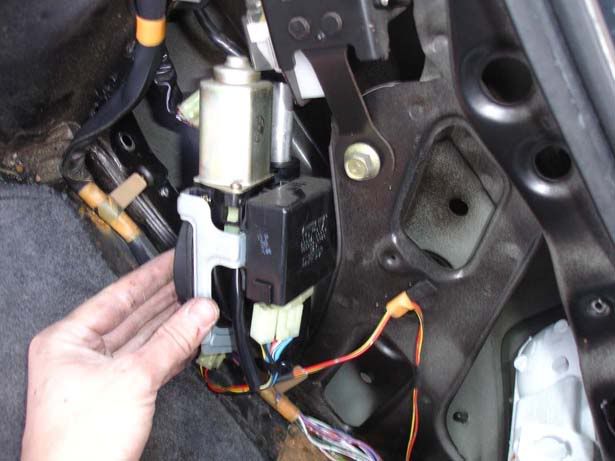
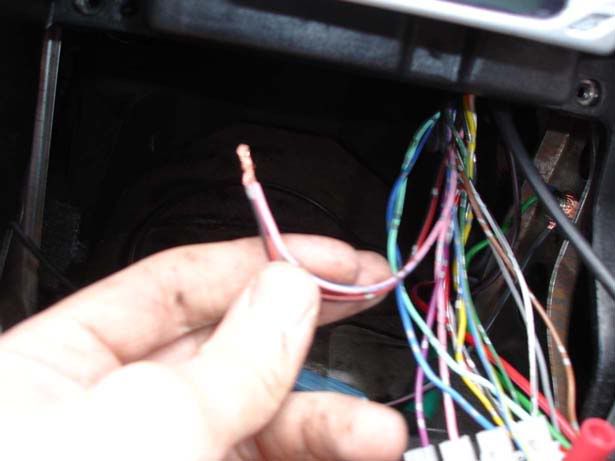
Step 18 - Reach in and pull the antenna connector straight down and it will slide off the unit
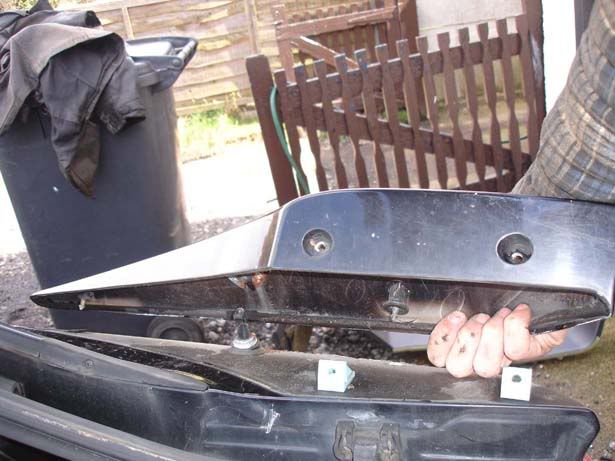
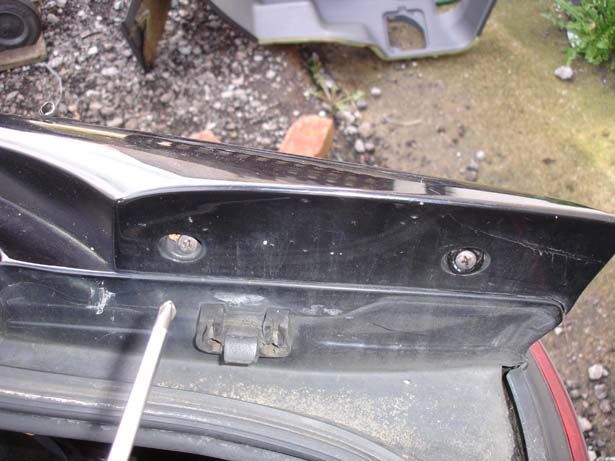
Step 19 - Undo the two screws holding the spoiler trim in place
Step 2 - Remove the piece of trim in the boot that sits in front of the antenna (it just pulls out) and then undo the screw shown
Step 3 - Remove the screw cover with a small screwdriver (Careful not to damage these), and then remove the screw behind it
Step 4 - Fold down the back seats and pull back the carpet to reveal this screw, remove it
Step 5 - Remove the screw holding the plastic cover over the seat locking mechanism
Step 6 - Remove the plastic cover by pulling the base out and then sliding upwards. Notice the plastic recess and metal tab, don't snap it!
Step 7 - You now have access to another screw holding the trim on, remove this as shown
Step 8 - Another screw cap and screw to remove
Step 9 - Go along the whole of the centre piece of trim in the boot and remove all the covers/screws completely
Step 10 - The trim should now slide out of the car
Step 11 - With the centre piece removed you should now be able to slide the rear quarter panel towards the centre of the car. Careful, it's not completely free yet
Step 12 - Squeeze the connector as shown to remove the wiring to the boot light
Step 13 - Remove the trim from the car
Step 14 - Press the locking tab and release the connector to the antenna
Step 15 - Use a spanner to undo the 10mm nut holding the bracket to the antenna in place
Step 16 - Pull the breather hose out which runs down to the wheel arch (There should also be a rubber grommit you need to remove)
Step 17 - I had to use snips to remove a cable tie holding the wiring to the antenna body
Step 18 - Reach in and pull the antenna connector straight down and it will slide off the unit
Step 19 - Undo the two screws holding the spoiler trim in place