
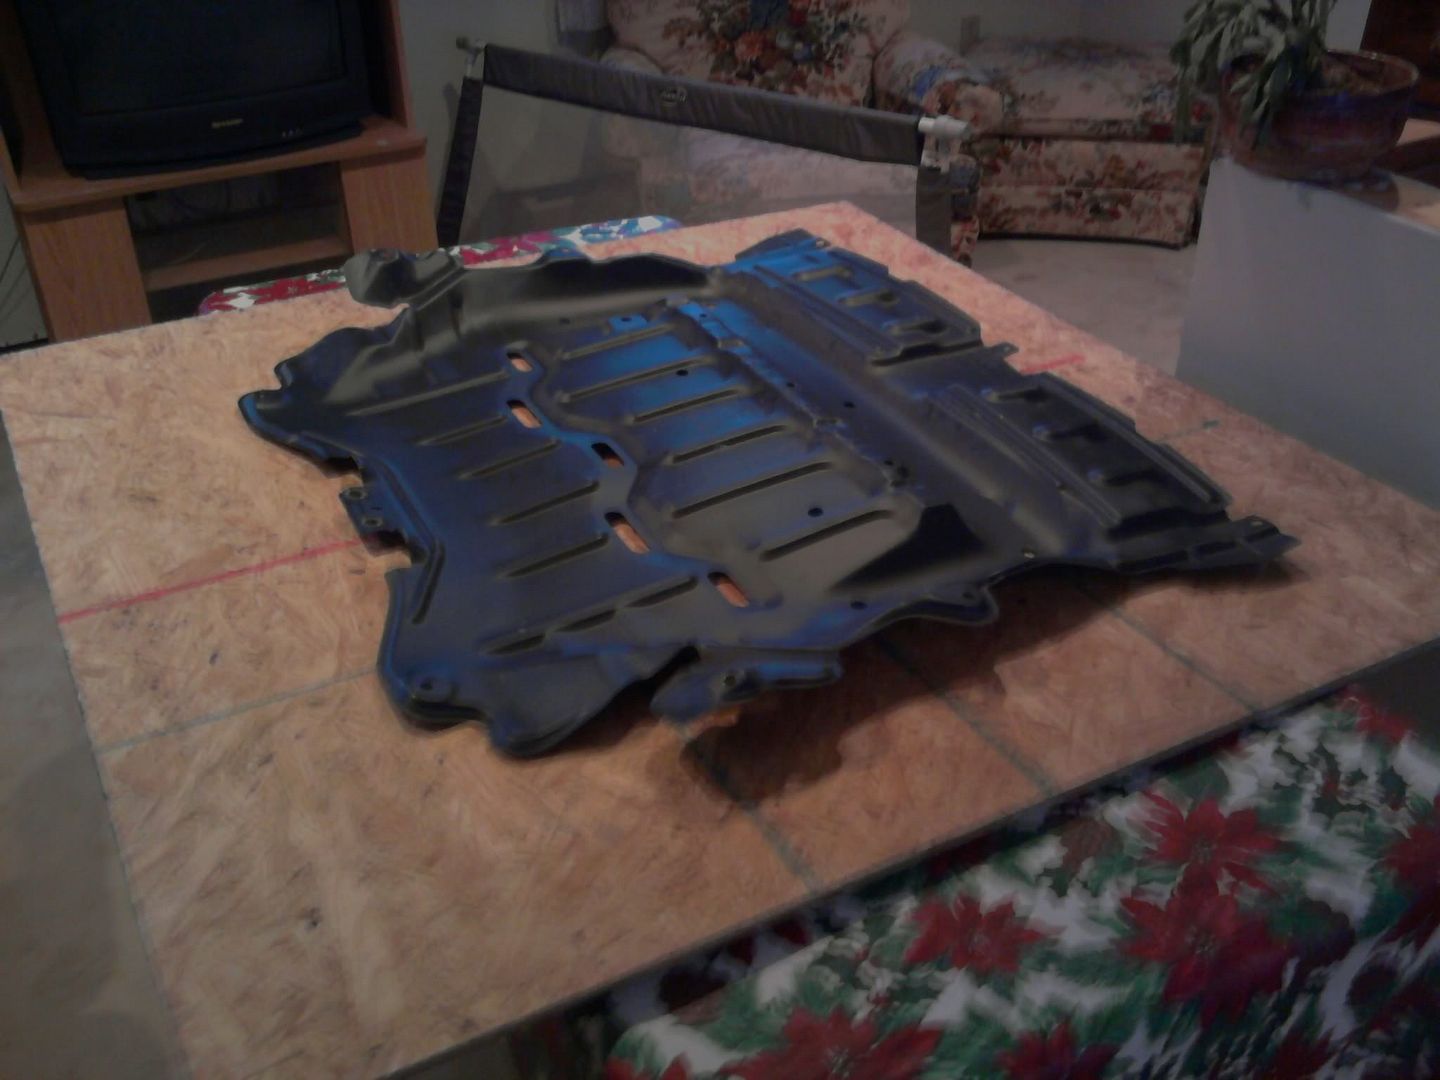
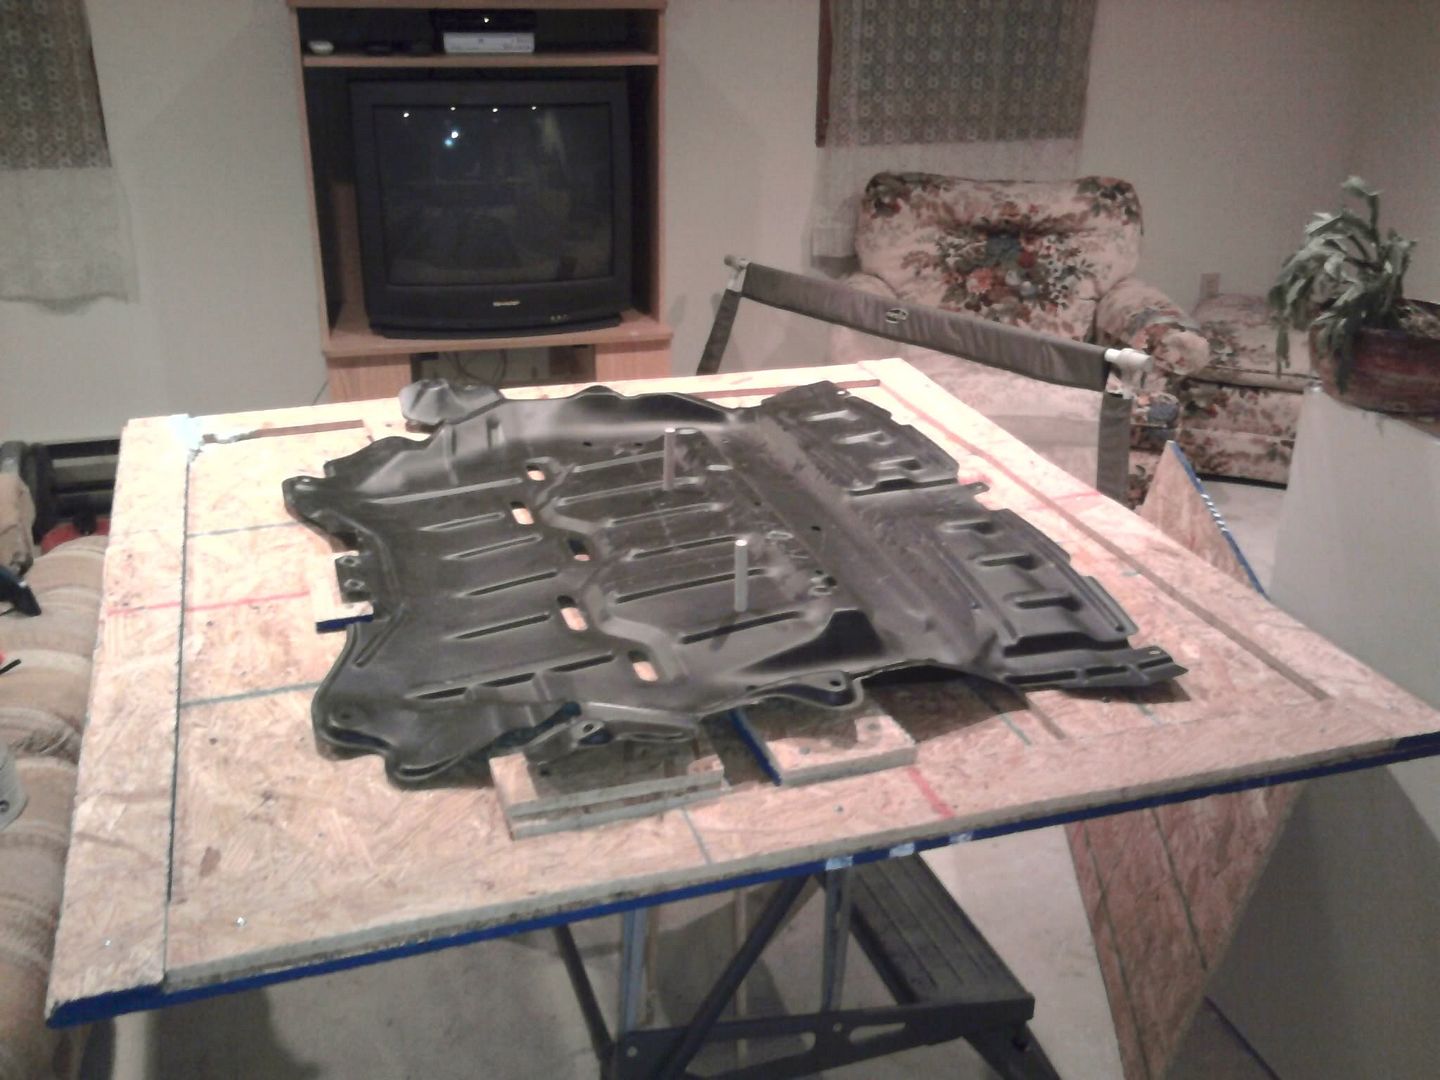
Anyone with an engine undercover please take a glance...(composite possibility)
- Thread starter SideWinderGX
- Start date
You are using an out of date browser. It may not display this or other websites correctly.
You should upgrade or use an alternative browser.
You should upgrade or use an alternative browser.
IJ.;1471988 said:How are you going to do the side ears?
They're a little different on each car I've worked on so you need some flex to locate them.
No idea honestly haha. That was a question I had when I ran into my prof. at 5:30 today and didn't want to bug him too much :icon_razz I'll see him tomorrow @ 10 anyways.
I had a few ideas floating around in my head, but those aren't based on anything I've learned thus far so I don't trust them yet (such as not using the stitchmat in the ear areas).
To you other two, thanks, I'll keep this updated
")
If you could make an undercover with some sort of metal/heavy duty nylon rings around each hole for added stability that would be great.
Kinda like they have on tarps.
Kinda like they have on tarps.
IJ.;1471988 said:How are you going to do the side ears?
They're a little different on each car I've worked on so you need some flex to locate them.
This explains the point I was going to bring up - even from Toyota brand new they need a bit of man handling to get all the bolts in the 1st time. So make sure its flexible.
While at first glance an undertray seems like a simple part in true Toyota fashion it's a damn complex "system", while they're available new I'll continue to buy factoy ones.
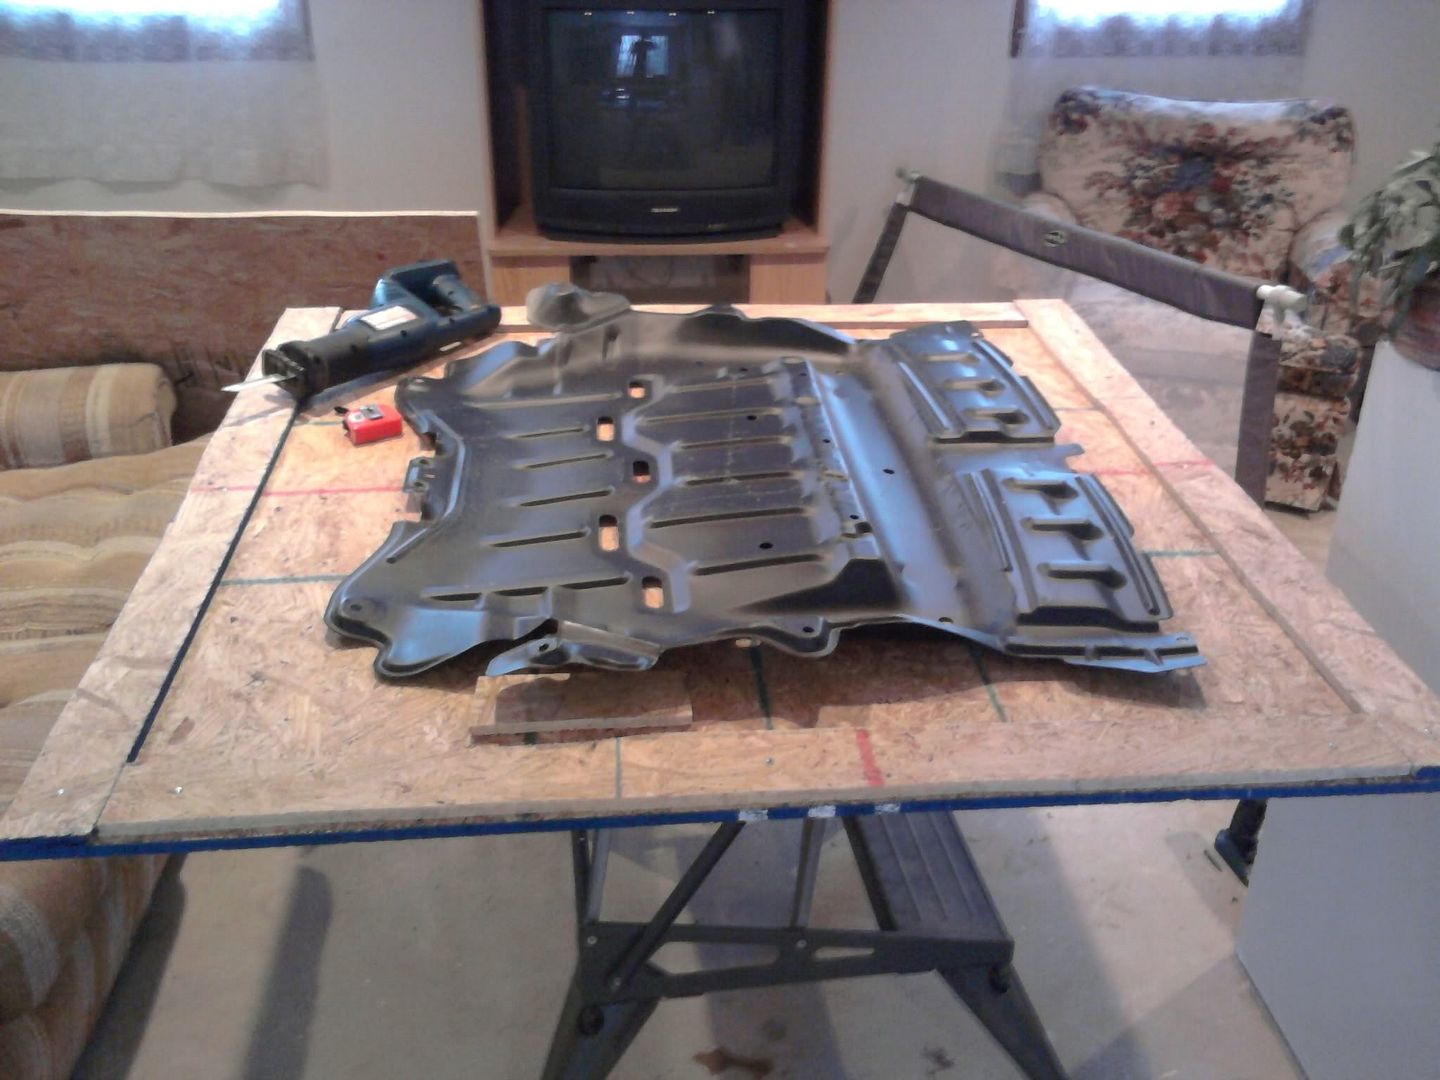
As for the rings around the holes, I'll look into that but can't promise anything yet. I just got the original tray from pparrigo on Thursday which will definitely be a big help! More holes in this thing than I expected but not a big problem anyways.
I'll check out how it fits on the car after I wrap it with some plastic film to keep it from getting dirty/scratched to see for myself how much of a problem it is fitment-wise.
A mold for this shouldn't be difficult at all to make, and the double stitched mat is more than pliable enough to incorporate all the bends.
My prof. seems to think that a single layer of stitched might be TOO flimsy (advised a double layer), but after goofing around with some chopped mat (which we double layered) that was pretty stiff. I know the double stitched is stiffer than chopped mat anyways. One layer of chopped would be as flimsy as the regular plastic injection mold no matter how much resin I put in...so I'll just have to see
Update, although kind of late lol:
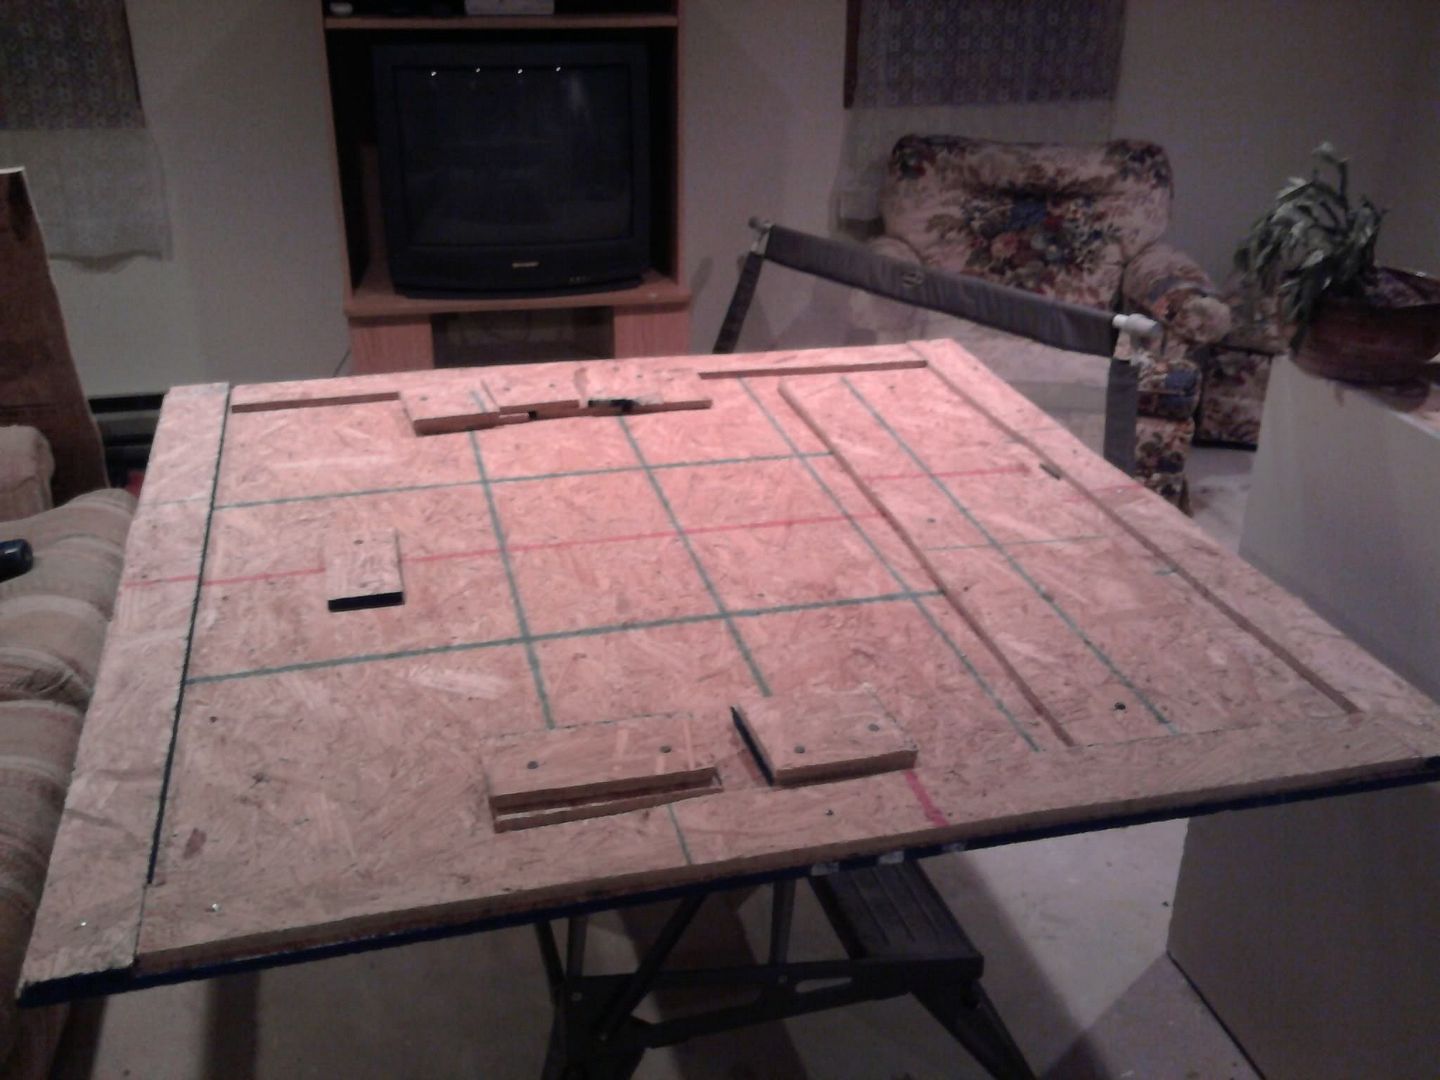
Went to Home Depot to buy some OSB board to cut up and get the project underway...then realized that a 4 foot wide board won't fit in my car. So the bungee cords in the back of my car came in handy, I was impatient:

Got home with the 2 4x4 boards, they're a good size for the undertray:
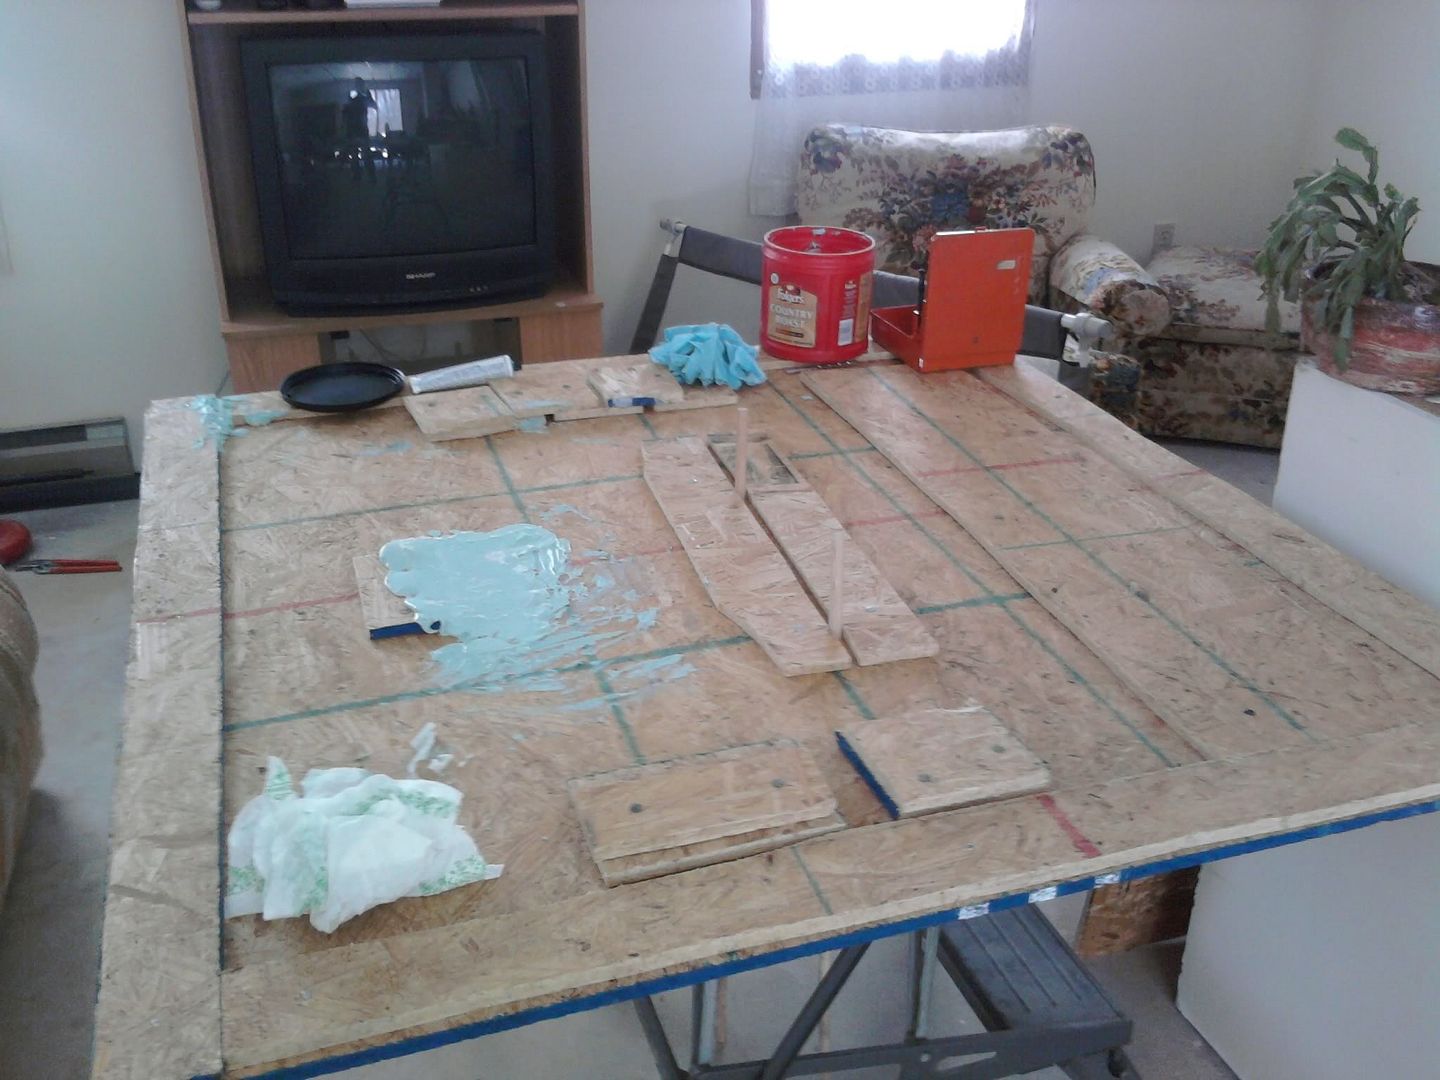
Screwed in a few boards for the border just so I can contain everything, assuming something spills or drops:
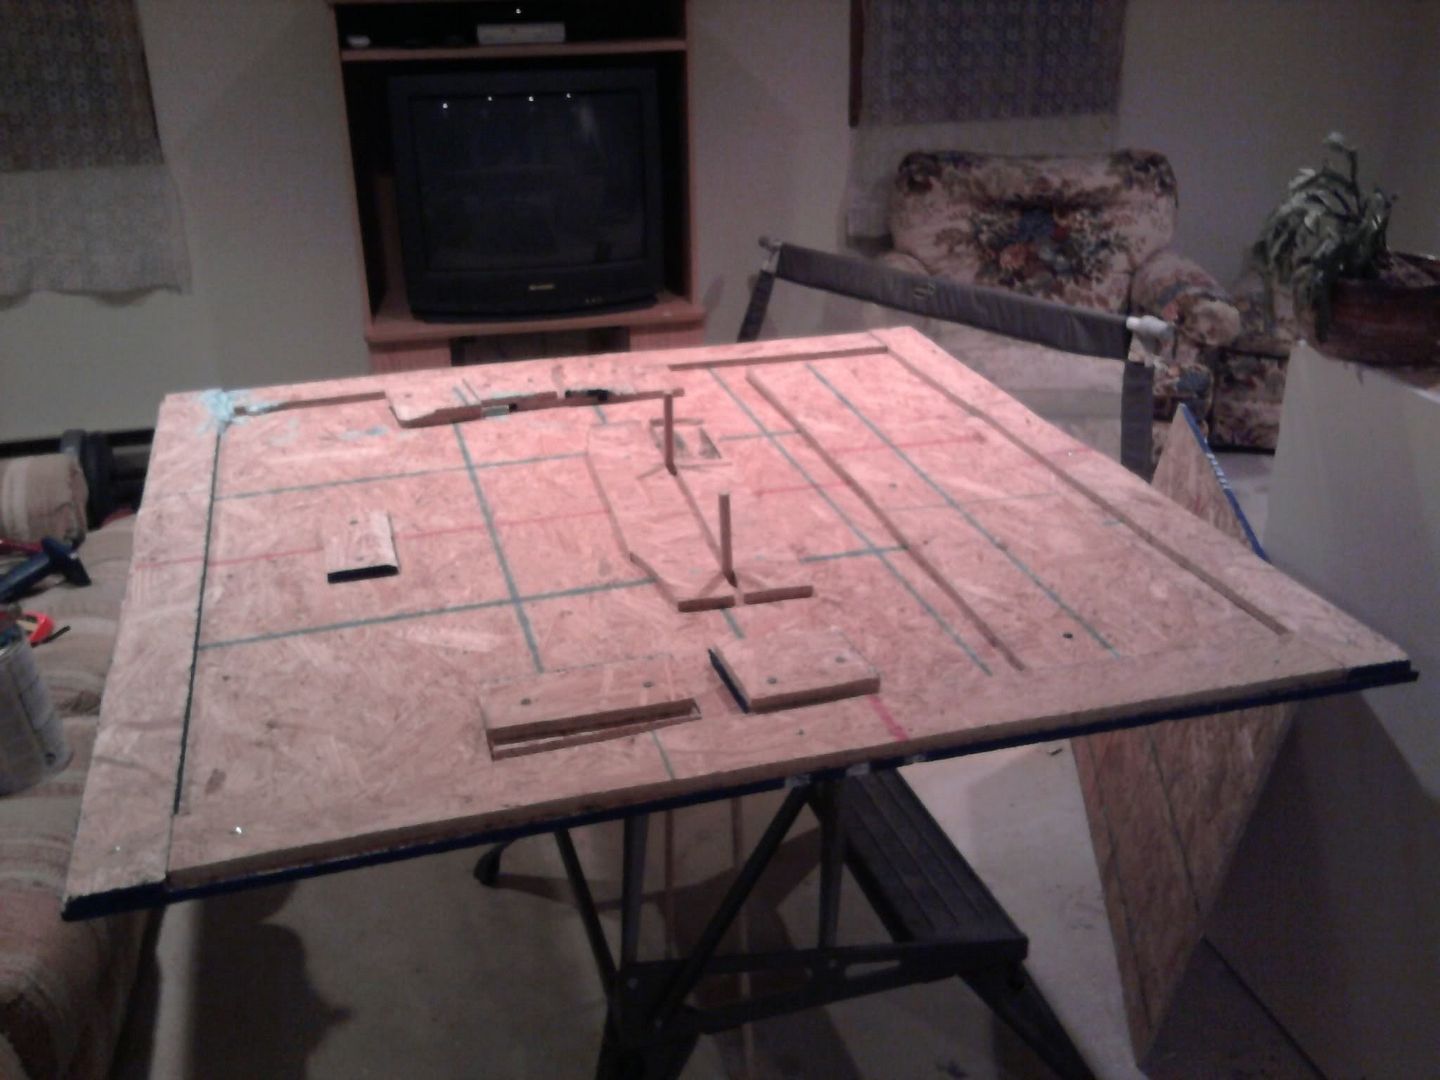
Cut a few rough boards out to raise up the curved edges of the undertray, so I don't use so much filler material and have a few references for when I actually make the mold.
In the third and fourth pic, the back left corner border isn't flush...I used a bit of filler material just now to fill it in and get used to the material. I think I ended up using too much hardener because it hardened in under 10 minutes, and I found out I have a pretty small window in which to mold the filler (unless I use less hardener, then it widens a bit)...too soon and it is sticky and I'll have a hard time releasing it, and too late it just won't mold.
Tomorrow I'll start laying the actual mold, I might do it in sections because the whole thing is too big to work with.
Course, I could tape a large piece of paper or thin piece of cloth around the entire undertray, press it into the filler material when wet, untape it to remove the tray and let it dry...which leaves the impression but doesn't dirty the tray, and peel it up afterwards...I'll have to see.
Went to Home Depot to buy some OSB board to cut up and get the project underway...then realized that a 4 foot wide board won't fit in my car. So the bungee cords in the back of my car came in handy, I was impatient:
Got home with the 2 4x4 boards, they're a good size for the undertray:
Screwed in a few boards for the border just so I can contain everything, assuming something spills or drops:
Cut a few rough boards out to raise up the curved edges of the undertray, so I don't use so much filler material and have a few references for when I actually make the mold.
In the third and fourth pic, the back left corner border isn't flush...I used a bit of filler material just now to fill it in and get used to the material. I think I ended up using too much hardener because it hardened in under 10 minutes, and I found out I have a pretty small window in which to mold the filler (unless I use less hardener, then it widens a bit)...too soon and it is sticky and I'll have a hard time releasing it, and too late it just won't mold.
Tomorrow I'll start laying the actual mold, I might do it in sections because the whole thing is too big to work with.
Course, I could tape a large piece of paper or thin piece of cloth around the entire undertray, press it into the filler material when wet, untape it to remove the tray and let it dry...which leaves the impression but doesn't dirty the tray, and peel it up afterwards...I'll have to see.
Last edited:
Thanks hvy and Travis
Update:
Built it up a bit more and used the 3/4" dowel pins I got at Home Depot to center the piece. No I didn't cut them, yes they are 3 feet long, yes they are run through the entire thing down to the floor...temporary until I cement them in with filler (cut out the bottoms) or go buy more. Don't need any more at the moment so oh well
Tada, perfectly centered:
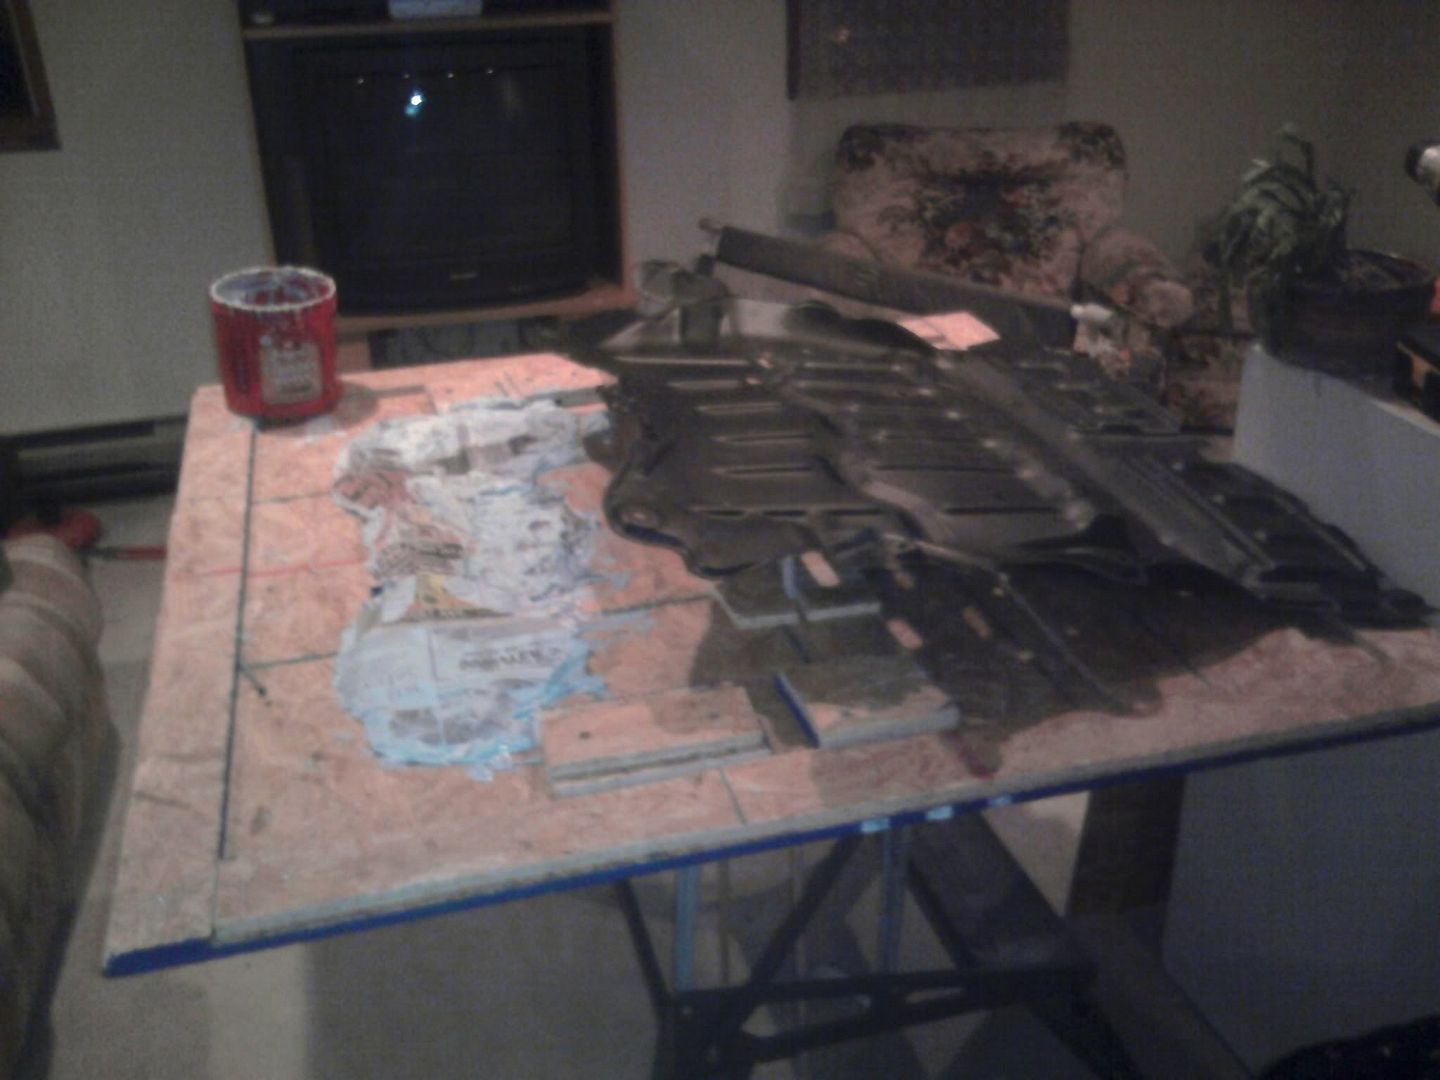
Beginnings of using the filler...starting out small so I can fix any mistakes I make. I decided to go with a medium between the piece and the filler material...first choice was paper towels. Pliable, plentiful, easy to use...except they have patterns on them and the dots and ridges came out on the filler haha. No worries, as the next layer I used newspaper...and while the ink bled through to the filler, the paper pulled right up without a hitch and conformed to the smooth grooves in the undertray, so this is what I'll be using. Worst case scenario I am too late to pull it up and some gets stuck, in which case it gets sanded down anyways...so really, no worst case scenario. Maybe go crosseyed trying to read the backwards print? I dunno.
Used up the .8 gallon canister I had, I'm confident I can lay down the whole can in 3 or 4 fell swoops compared to the 6 or 7 baby steps I took on the first can. Bad news is it might take another 3 cans...I'll go to the store tomorrow afternoon:
Updates will keep coming along, but I've got a few things I'm juggling: work + overtime, mom backed into my car so I need a new taillight and need to straighten the metal behind the trim, need to go running more, forms filled out for something over the summer, one more bushing to replace on my suspension if the weathers warmer...blah. But I did get a 4.0 this past quarter so I feel compelled to get stuff done haha.
Update:
Built it up a bit more and used the 3/4" dowel pins I got at Home Depot to center the piece. No I didn't cut them, yes they are 3 feet long, yes they are run through the entire thing down to the floor...temporary until I cement them in with filler (cut out the bottoms) or go buy more. Don't need any more at the moment so oh well
Tada, perfectly centered:
Beginnings of using the filler...starting out small so I can fix any mistakes I make. I decided to go with a medium between the piece and the filler material...first choice was paper towels. Pliable, plentiful, easy to use...except they have patterns on them and the dots and ridges came out on the filler haha. No worries, as the next layer I used newspaper...and while the ink bled through to the filler, the paper pulled right up without a hitch and conformed to the smooth grooves in the undertray, so this is what I'll be using. Worst case scenario I am too late to pull it up and some gets stuck, in which case it gets sanded down anyways...so really, no worst case scenario. Maybe go crosseyed trying to read the backwards print? I dunno.
Used up the .8 gallon canister I had, I'm confident I can lay down the whole can in 3 or 4 fell swoops compared to the 6 or 7 baby steps I took on the first can. Bad news is it might take another 3 cans...I'll go to the store tomorrow afternoon:
Updates will keep coming along, but I've got a few things I'm juggling: work + overtime, mom backed into my car so I need a new taillight and need to straighten the metal behind the trim, need to go running more, forms filled out for something over the summer, one more bushing to replace on my suspension if the weathers warmer...blah. But I did get a 4.0 this past quarter so I feel compelled to get stuff done haha.
Looks like allot of work. Are you going to use Bondo/ filler for the whole mold?
I like the fact that you are doing it in your living room!!!
I like the fact that you are doing it in your living room!!!
How are you doing the wings location?
(assuming the new tray isn't going to be as flexible as the original?)
(assuming the new tray isn't going to be as flexible as the original?)
becauseican;1523764 said:Looks like allot of work. Are you going to use Bondo/ filler for the whole mold?
I like the fact that you are doing it in your living room!!!
Ended up being more work than I wanted haha, but it should go quicker. Yup I plan on using it for the whole mold as its a bit too late to switch.
Couch and crappy TV got shoved downstairs a few weeks ago, but regardless you can't use it with my stuff taking up so much space
reydio;1523814 said:Nice!! That's a lot of patience....Good job!!
Thanks!
IJ.;1523844 said:How are you doing the wings location?
(assuming the new tray isn't going to be as flexible as the original?)
I'm going to go out to my car and see how close the stock undertray is to lining up the wing bolt holes on the car and get the mold as close as possible. But, should be the same as everything else: build it up, sand it down. When I make the first replica I'll fit it onto my car, then tout it around to Rochester/Albany and bug people to shove it on themselves to see how fitment is to get some feedback, and see what I can improve.
Again, I'm unsure as to how flexible one sheet will be, as everything I've done so far has been three or four...but I'll find out haha.
Hey Nick, once the prototype is ready, you're more than welcome to test fit it on my car and see how it goes. Hopefully my car will even be running by then. Keep up the good work bro!
Good to hear you two! I'm gonna try building up the remaining volume with paper mâché as I'll have to buy a few more gallons of filler. Saving this last gallon for touchup or a final layer.
Work will continue on Friday when I get back home, should have most of it done.
Work will continue on Friday when I get back home, should have most of it done.
Instead of using body filler for the entirety of it, I laid down a ton of paper mache, and with the help of the part I got it to within a quarter to an eighth of an inch for the majority of the mold, which means less body filler used and I'll be able to lay it down quicker. I'll lay down body filler on top of that so I can sand it down. $20 a gallon was expensive, I was gonna need a few more haha I have a picture but I have a class in 20 minutes so I'll edit this post later today.
Sorry about the lack of updates, last weekend I replaced brakes/rotors on my moms car and had to replace my waterpump, and this past weekend it was a fuel leak on my dads car and the tiny coolant hose near my power steering reservoir blew apart. This weekend I'm dedicating to the mold.
I have a picture but I have a class in 20 minutes so I'll edit this post later today.Sorry about the lack of updates, last weekend I replaced brakes/rotors on my moms car and had to replace my waterpump, and this past weekend it was a fuel leak on my dads car and the tiny coolant hose near my power steering reservoir blew apart. This weekend I'm dedicating to the mold.