
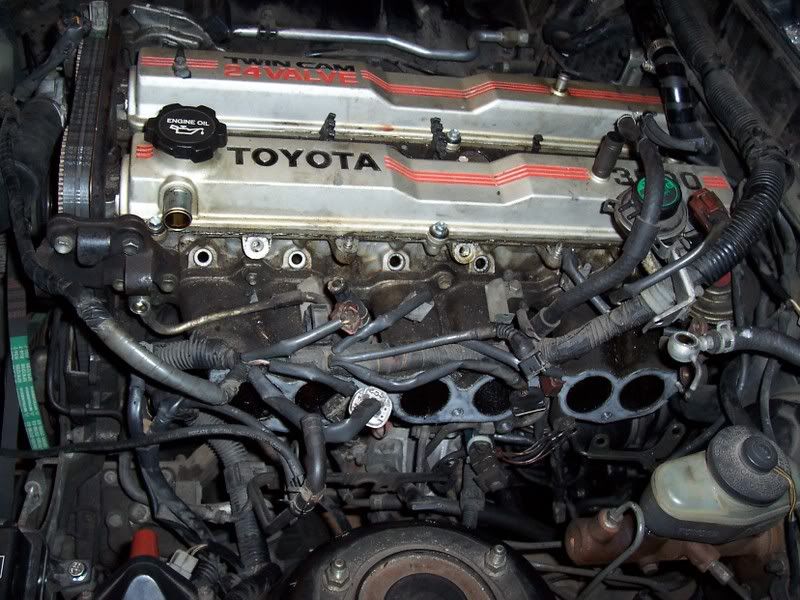
nothing beats that good ol feeling like looking down on your pistons.sounds weird but it was i guess that feeling of accomplishment when it's your first time.good job main.suprarx7nut;893219 said:Fuel rail up next:

Fuel rail off. If you're keeping the manifold in the bay, just pull the rail from the head and push aside.
Now comes a part that I could have made easier. The intake manifold can simply be unbolted and set aside, while still in the engine bay. I took mine off and had a hell of a time getting to all the connectors and removing all the wiring mess. In hindsight, it would have nice to simply leave it in, but now I'll have a chance to carb-clean the living hell out of it and end up with a sparkling clean intake.
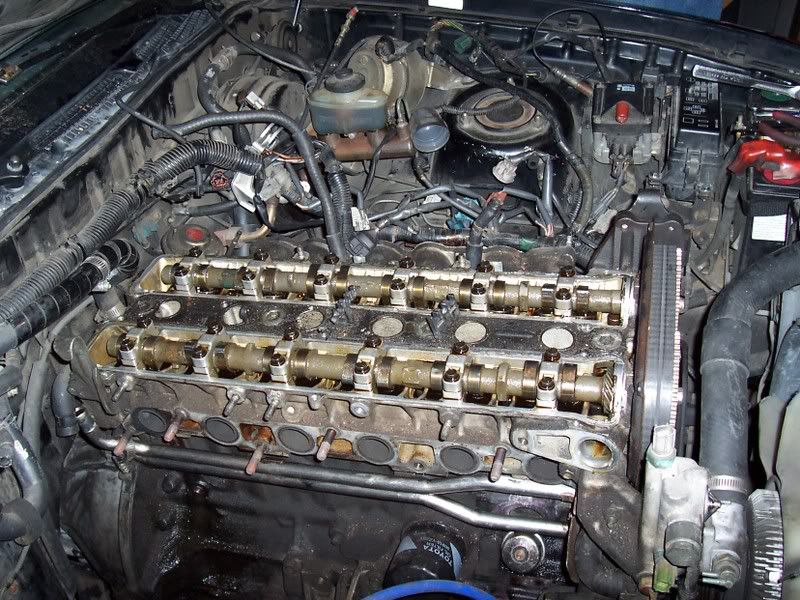
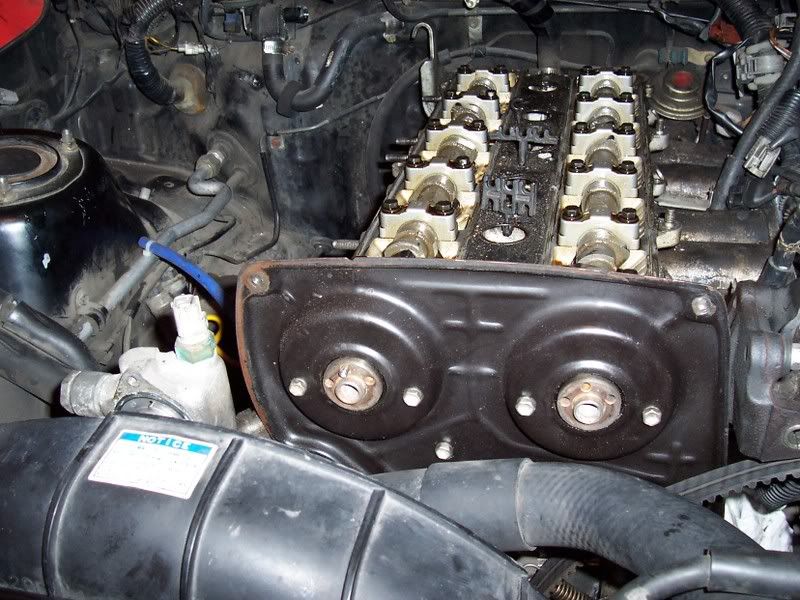
Now comes the fun part. We get to see fresh gold oil covered metal.Cam covers removed. simple unbolt and if you still have the horrible bolts, switch them out with M6 flange bolts.
reverse view
Now you need to take off the pulleys. Loosen the tensioner bolt and use a screwdriver to pry it sideways. Then tighten the tensioner bolt to keep the belt loose. Now pull of the belt. If you're doing the timing belt, the lower cover will need to be removed as well.
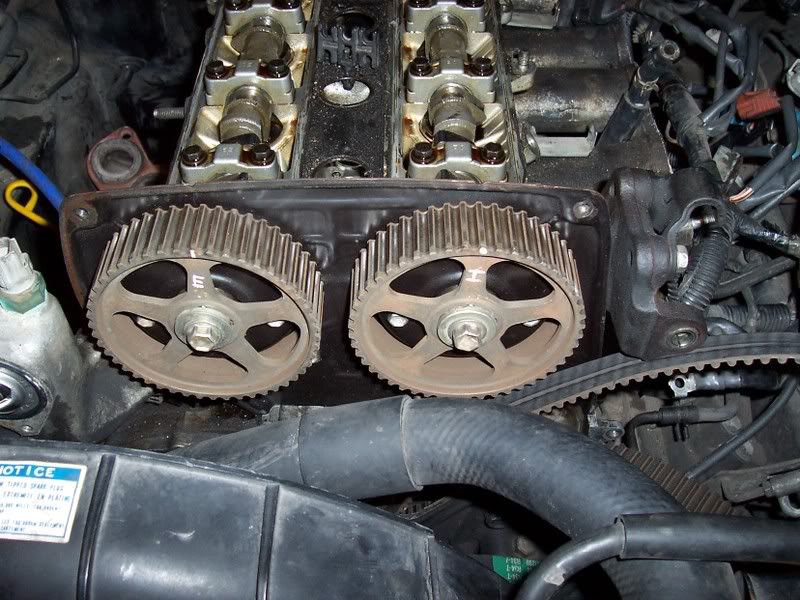
With the belt off, you can now remove the pulleys. The TSRM asks for a special tool that you don't have. Get a 10mm socket, the more robust the better, and stick it onto the timing plates bolts that are right behind the star of the center of the pulley. Now when you turn the pulley's bolt it will catch and you can loosen it. It may take some strentgh, but you shouldn't hurt anything. Be sure to remember to grab the pins that align the pulleys.
Now comes the fun part.
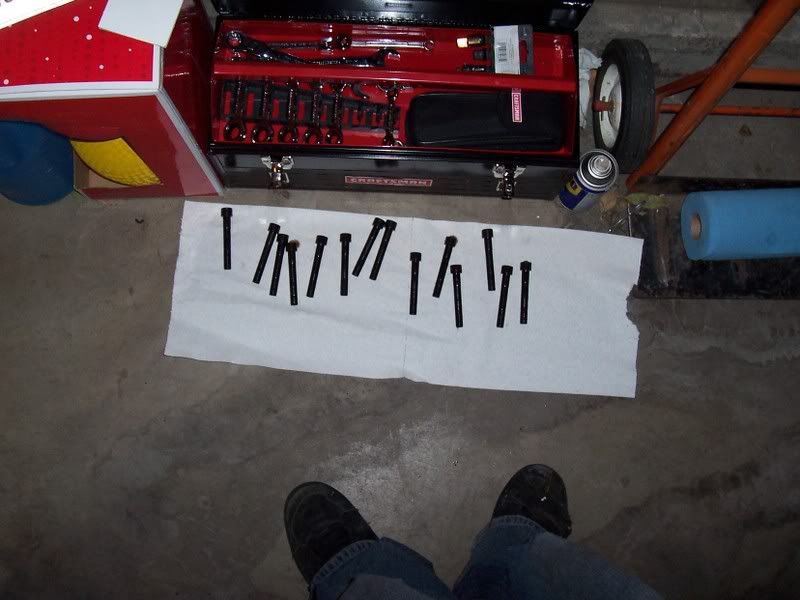
You can see the bolts just under the cams and the oil will form a suction which will allow you to pull the bolts out simply with the socket. NEATO!!
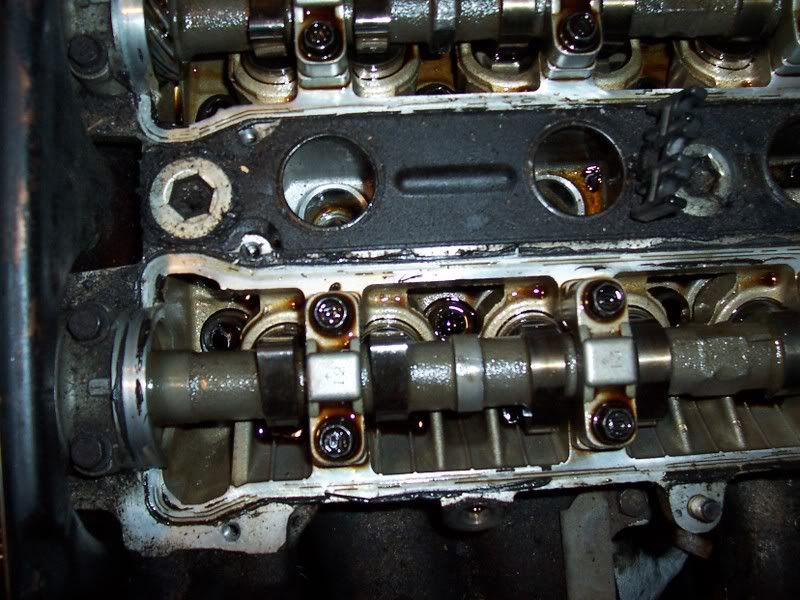
After 20 mins or so and 3-4 passes the bolts are out and all lined up.
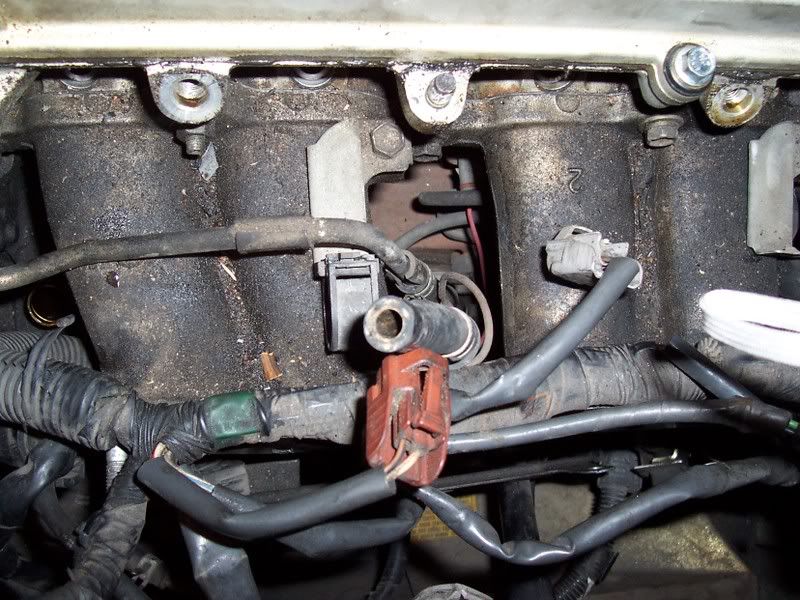
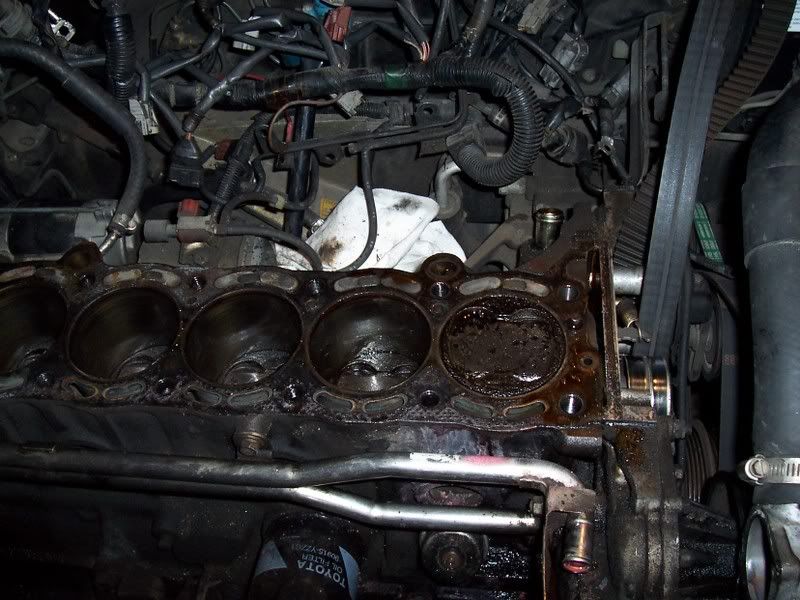
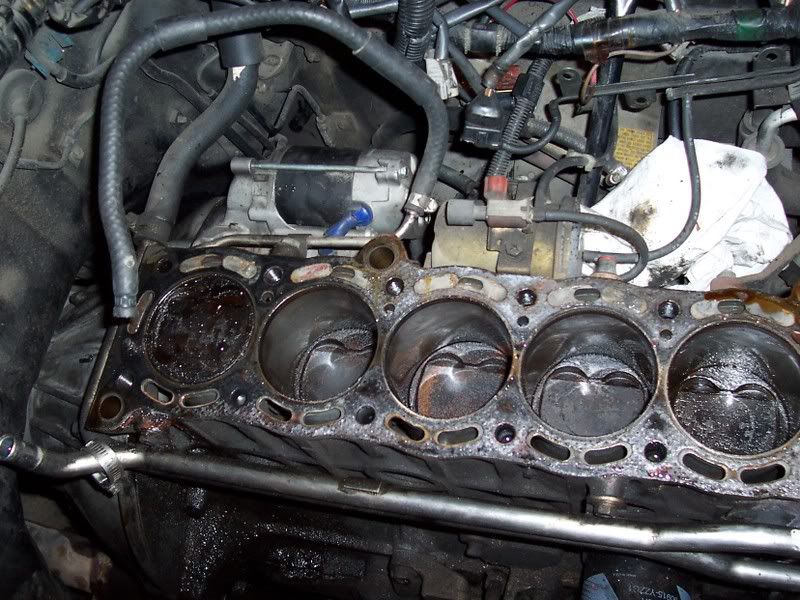
Now here's another "learning point". The water housing doesn't need to be removed, but the hoses connecting it to the block or anything other than the head do. My friend and I both missed this and pulled the head about an inch off before realizing it. We undid the hoses and coolant got onto the block surface. Contamination anyone? :nono: So I'll be doing about 5 oil changes and having the oil system fully flushed by a shop just to be sure I don't hear rod knock anytime soon.
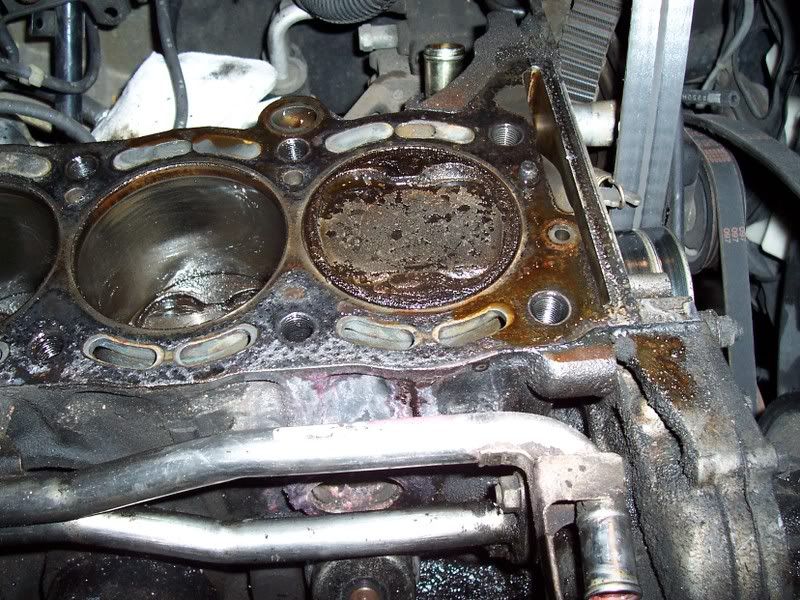
The gasket stuck to the head and the camera ran out of battery and storage so I only have pics of the block surface for now.
WHAT DO YOU GUYS THINK?
Suprarx7nut 's 7MGE BHG repair job done right (hopefully)
- Thread starter suprarx7nut
- Start date
You are using an out of date browser. It may not display this or other websites correctly.
You should upgrade or use an alternative browser.
You should upgrade or use an alternative browser.
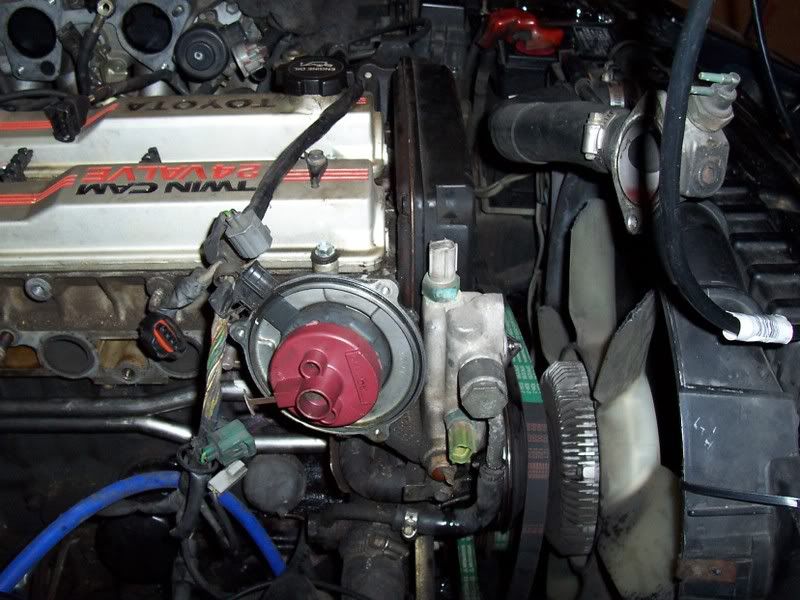
Nick M;970789 said:I sure love a rust free Colorado car. Why did you pull the distributor cap?
Just to make it easier to get to the hoses and such below it. I changed the o-ring as well just for good measure.
Good gravy my car is dirty. Living in a house with a garage will change that very soon.
Jonathan, how do I "check" the fan clutch?
suprarx7nut;983760 said:Just to make it easier to get to the hoses and such below it. I changed the o-ring as well just for good measure.
Good gravy my car is dirty. Living in a house with a garage will change that very soon.
Jonathan, how do I "check" the fan clutch?
Just to pull this thread back from a month ago....
In your first thread you mention many ziploc bags. Good idea. In addition to this, I highly recommend screwing bolts and nuts back into where they go after you take each part off. This saves a ton of work labelling and bagging them, and eliminates all possibility of mixing them up within the bag. You can do this with almost everything.
To check your fan clutch, give it a spin with your hand (engine off!). If it spins freely for a while, your fan clutch fluid is probably gone. If it has a drag to it, and stops spinning fairly quickly, you're good.
Spin the fan clutch by hand when the engine is HOT. If it spins more than about a half rev. then it's probably not working properly.
I've spun it before and it stopped very quickly. I'll try it hot tomorrow, but I think it's good.
I do have a LOT of creaks coming from the front suspension now.... I'm hoping its the struts and not the ball joints...
I do have a LOT of creaks coming from the front suspension now.... I'm hoping its the struts and not the ball joints...
I'm following this right now(like... right this second... aka: laptop is in the garage right next to the supra)
Didn't see this post until right now. How did your repair go? Are there any huge gaps in my writeup? I'd love some feedback because the whole goal of this writeup was to assist others.turbofreak said:I'm following this right now(like... right this second... aka: laptop is in the garage right next to the supra)
IIRC, you've already had some experience with this sort of thing though, right?timf808;1069218 said:how much of the wiring did u have to take off? i just did this on my 92 cressida and i had a bunch of problems with my wiring
how different is the cressida vs supra
I just had to unplug a bunch of sensors and snake the wiring harness around to allow the manifold to come out.
Not sure how different the plugs are on a Cressi, but feel free to PM me with pics of anything you're having trouble with and I'll try to remember or search through pics of mine to see if I can identify any for you.
Oh and as an update, the car runs perfectly still and it seems my biggest problems now are a very small/slow coolant leak on the rear 90 degree elbow coolant hose due to using a generic hose instead of the real OME toyota hose. Lesson learned: buy OEM hoses form Toyota!!! The system still holds pressure a full day after being driven so the leak is very, very minimal, but it is annoying.
Last edited:
wow, well done. i know this threads been dead for a bit but i just wanted to let you know that this thread has been a HUGE help to me. i've been under the hood of my 87 turbo on and off for the last couple of days doing this same thing(my first time) and have had this page up permanently. one of the best things about it imo is the pics, i have the tsrm but your pics are great for reference. with them i've been able to get everything off and will hopefully pull the head tomorrow. the only thing that intimidates me now is plugging all the connections and everything back in after im done. i took pics but im still kinda scared, its a lot of shit...
anyways thanks for the great info, hows your car been running since, had any problems other than the coolant leak?
anyways thanks for the great info, hows your car been running since, had any problems other than the coolant leak?
Glad to hear it's helped some people out! I hope more and more people can use it as a reference. I missed a bunch of pics, but I think it's still rather helpful. The connections on the intake side are intimidating and they're a pain, but definitely not impossible.
My N/A has been running problem free for nearly 12k miles now. The coolant leaks eventually stopped after I replaced a few hoses and tightened some others. I just made the trip to Vegas and back with it and it ran flawlessly for all 1700 miles in one weekend. Averaged about 95 mph on the way there and about 75 on the way back. It's treated me very, very well in the last year.
My N/A has been running problem free for nearly 12k miles now.
The coolant leaks eventually stopped after I replaced a few hoses and tightened some others. I just made the trip to Vegas and back with it and it ran flawlessly for all 1700 miles in one weekend. Averaged about 95 mph on the way there and about 75 on the way back. It's treated me very, very well in the last year. I know this is old but I just read through it all (n00b) but dam this gave me a headache. I'm not too mechanical and just looking at this crushed any hopes I had of doing some of the engine stuff myself, lol!
If and when I finally find a Supra in Pennsylvania or New Jersey I'm going to need some serious help, lol! Anybody around this area wanna help play mechanic?:1zhelp:
I'll provide food, beer and definetly aspirin:icon_bigg
~Dave
If and when I finally find a Supra in Pennsylvania or New Jersey I'm going to need some serious help, lol! Anybody around this area wanna help play mechanic?:1zhelp:
I'll provide food, beer and definetly aspirin:icon_bigg
~Dave
Devoted2Supra;1273081 said:I know this is old but I just read through it all (n00b) but dam this gave me a headache. I'm not too mechanical and just looking at this crushed any hopes I had of doing some of the engine stuff myself, lol!
If and when I finally find a Supra in Pennsylvania or New Jersey I'm going to need some serious help, lol! Anybody around this area wanna help play mechanic?:1zhelp:
I'll provide food, beer and definetly aspirin:icon_bigg
~Dave
Two years ago I knew how to change the oil and air filter. That was it. All it takes is time, patience and reading. I learned EVERYTHING you need to know to change a head gasket right here on this forum. The help on this site is un-matched and simply astounding.
Learn to heed the warning of the veterans around here, (Supracentral, jdub, grimjack, jetjock, Jeff Lange, Adjuster...etc...) and it's like having free education handed to you.
Go buy some tools, a supra, and dig in!
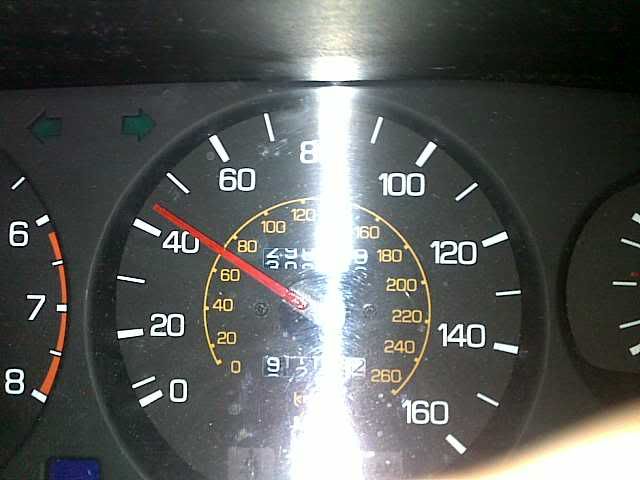
*Oh and as an update to this thread, the car still runs just great. It's at 292,000 miles, approx 15k miles after BHG.
Yeah thanks bro! I'm reading up all I can believe me. Just when I see an open shot of under the hood I'm like dam that is a lot of stuff. And when people start tearing things out I'm like dam there is even more stuff than I had first realized and I freak when I see all the little stuff. Just don't want to put things where they don't go or forget how it goes back together. But yeah I'm trying for now to read up everything and have already posted asking for help, lol!
~Dave
~Dave
Devoted2Supra;1273081 said:I know this is old but I just read through it all (n00b) but dam this gave me a headache. I'm not too mechanical and just looking at this crushed any hopes I had of doing some of the engine stuff myself, lol!
If and when I finally find a Supra in Pennsylvania or New Jersey I'm going to need some serious help, lol! Anybody around this area wanna help play mechanic?:1zhelp:
I'll provide food, beer and definetly aspirin:icon_bigg
~Dave
LOL...it just takes the want to do the job .:icon_razz
Just figured I'd post an update:
HG job was done at about 277k miles. I just hit 293k and all is well. Can't wait to roll over 300k on the original block! Finally got around to replacing the damn 90 degree hose at the back of the head and now it is in tip-top shape.
I'm running 5W-30 Pennzoil Platinum Synthetic, and next will be German Castrol (got 1/2 off 16 quarts last week). I only use Purolator PureONE filters and have noticed a significant pressure increase with those over the Thailand Toyota filters.
Oil pressure is good. ~2-5psi at idle and ~30 psi when warm and crusing at 3000rpm.
No more coolant or oil leaks that I can find, power seems good (for an N/A... lame), did a compression test a while back and it was acceptable. (150-170 on all cylinder if memory serves me)
It's serving me well for now, but as soon as I have a full time income I plan on a GTE swap... Can't wait!
HG job was done at about 277k miles. I just hit 293k and all is well. Can't wait to roll over 300k on the original block!
Finally got around to replacing the damn 90 degree hose at the back of the head and now it is in tip-top shape.I'm running 5W-30 Pennzoil Platinum Synthetic, and next will be German Castrol (got 1/2 off 16 quarts last week). I only use Purolator PureONE filters and have noticed a significant pressure increase with those over the Thailand Toyota filters.
Oil pressure is good. ~2-5psi at idle and ~30 psi when warm and crusing at 3000rpm.
No more coolant or oil leaks that I can find, power seems good (for an N/A... lame), did a compression test a while back and it was acceptable. (150-170 on all cylinder if memory serves me)
It's serving me well for now, but as soon as I have a full time income I plan on a GTE swap... Can't wait!
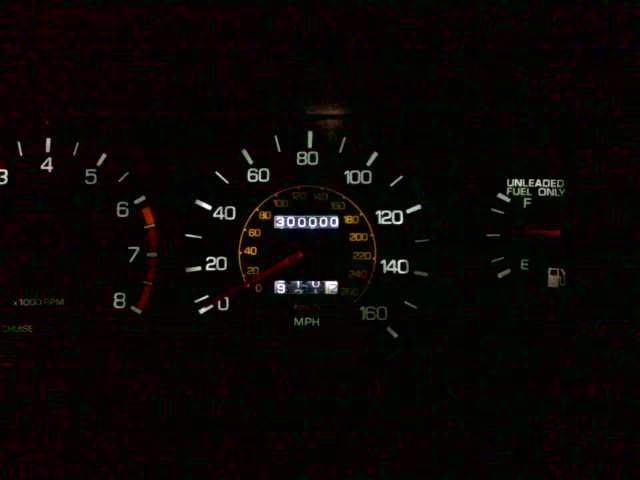
Came across this and figured I'd update just for kicks since I hit a milestone a while back...
300K miles!!!
I'm now at 303k running strong. Engine has been rebuilt due to previous bhgs, but otherwise no major parts have really been replaced beyond basic maintenance on this 20 year old Toyota. I have FULL records of the history. Oil change receipts and all, dating back to 1990. Even the dealership window sticker.
Trying to make a GTE swap happen this spring and freshen the car up all around, but I plan on driving this chassis until it's ready to be put down for good.
I :love: my MA70.
300K miles!!!
I'm now at 303k running strong. Engine has been rebuilt due to previous bhgs, but otherwise no major parts have really been replaced beyond basic maintenance on this 20 year old Toyota.
I have FULL records of the history. Oil change receipts and all, dating back to 1990. Even the dealership window sticker.Trying to make a GTE swap happen this spring and freshen the car up all around, but I plan on driving this chassis until it's ready to be put down for good.
I :love: my MA70.