Suprarx7nut 's 7MGE BHG repair job done right (hopefully)

suprarx7nut

YotaMD.com author
Nov 10, 2006
3,811
1
38
Arizona
www.supramania.com
Alright folks, I'm beginning the removal of the head and I'll try to document it and provide somewhat of a how-to for the 7MGE. I'm a rookie when it comes to head removal, so please, ANY TIPS are greatly appreciated.

If any of you experts/veterans notice any potential or current flaws please let me know. I'm on a budget, but I want to do this right.

Things for preparation:
-disconnect negative lead from battery.
-prepare MANY ziploc bags. You're a damn fool if you think you can remember where all these bolts will go.


Pics of my progress:
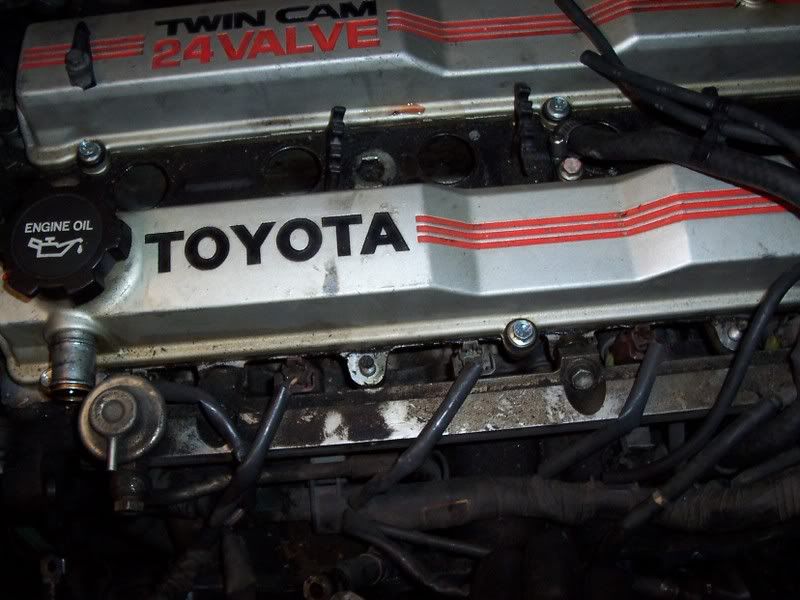
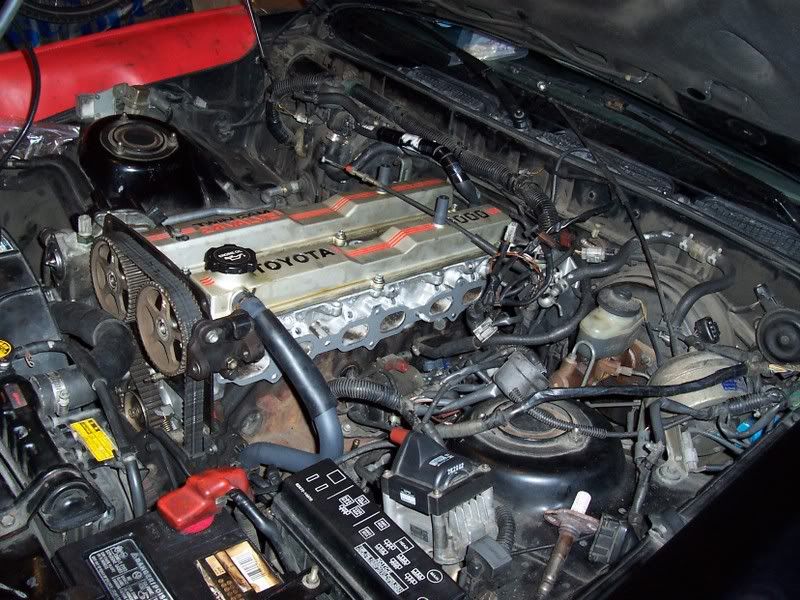
Starting product:
p891909_1.jpg


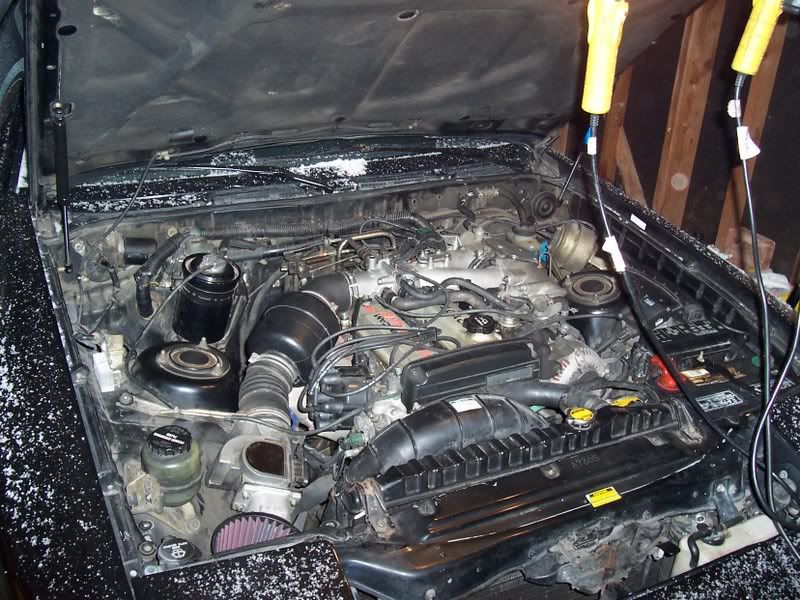
Gloves are VERY crucial when working in Colorado in January in a poorly insulated garage. It's 10F outside.
p891909_2.jpg


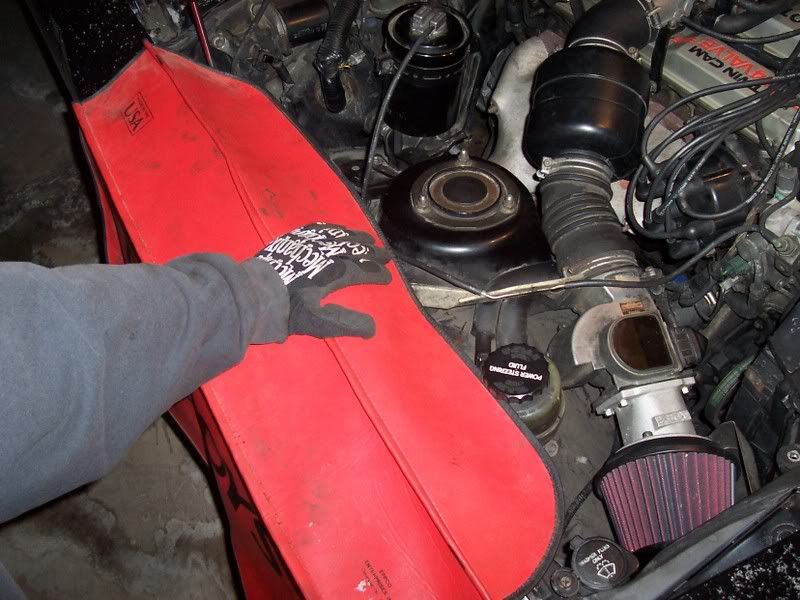
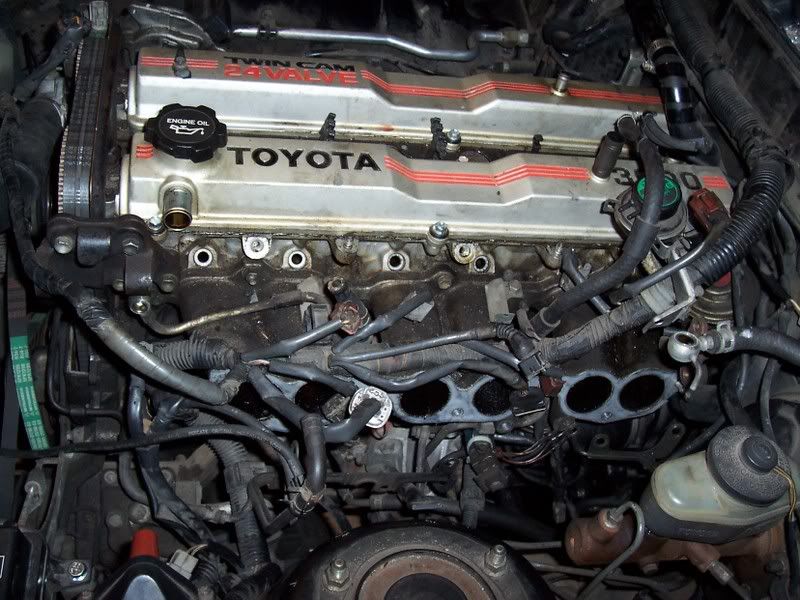
I started by removing the accordion. When pulling this off remember the connector and the vacuum line.
p891909_3.jpg


Intake accordion off, here's what the rest of the intake looks like, durrr. Notice the high quality black duct tape. :)
p891909_4.jpg


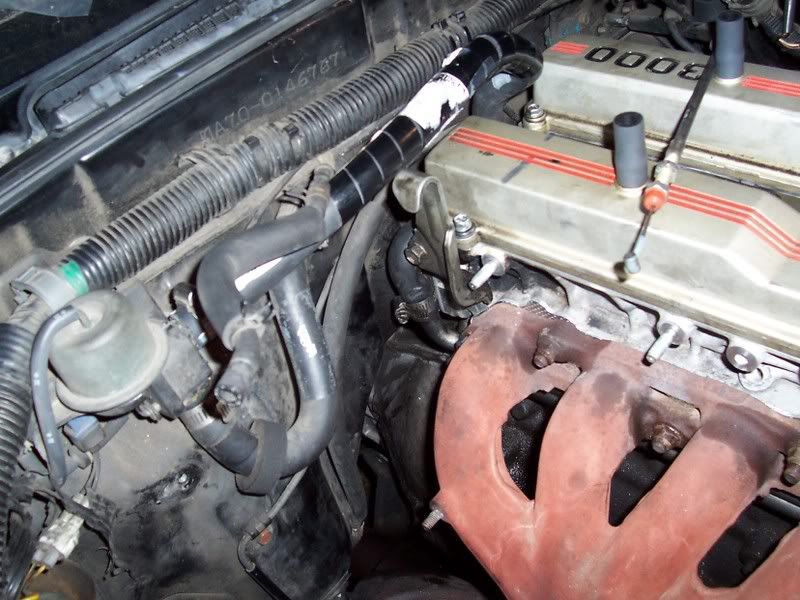
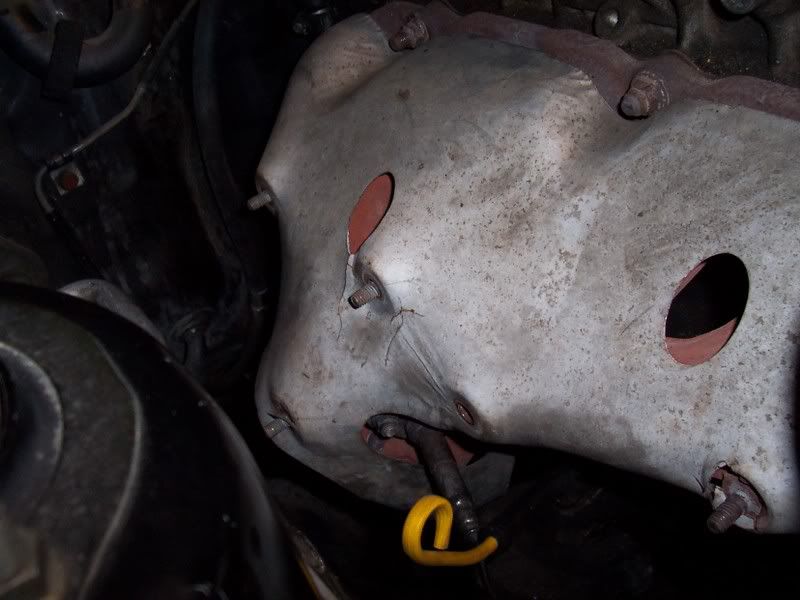
I decided to move to the exhaust now. Gotta get the shield off which requires an awkward removal of the O2 sensor. California Spec dipsticks are in the way for this. I think non-cali cars will have easier access.
p891909_5.jpg


I now jacked up the car and drained the coolant from the radiator. The drain bolt at the exhaust manifold will be removed and drained after the exhaust is all out of the way.

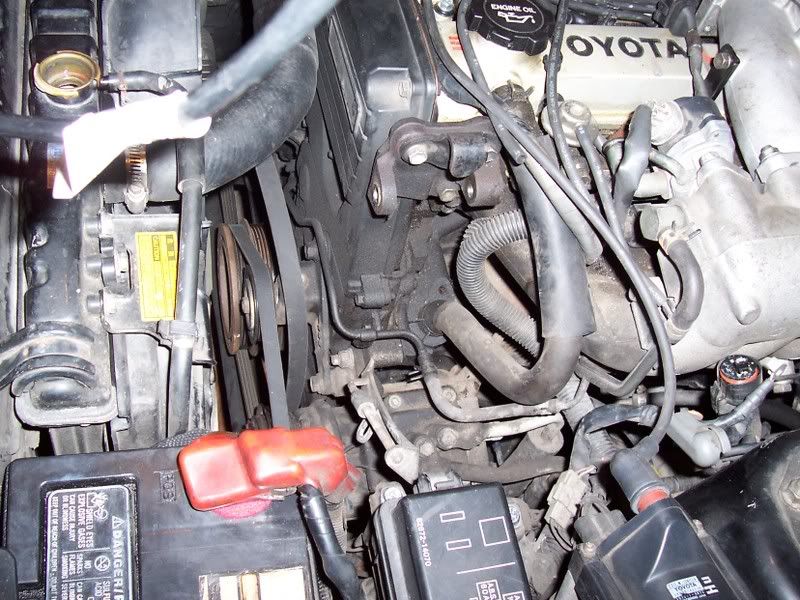
Alternator removed. I hadn't ever done this before, but follow the TSRM and you should figure it out. Watch for the nut on the long threaded stud that allows tightening of the belt. I didn't find this right away. :)
p891909_6.jpg


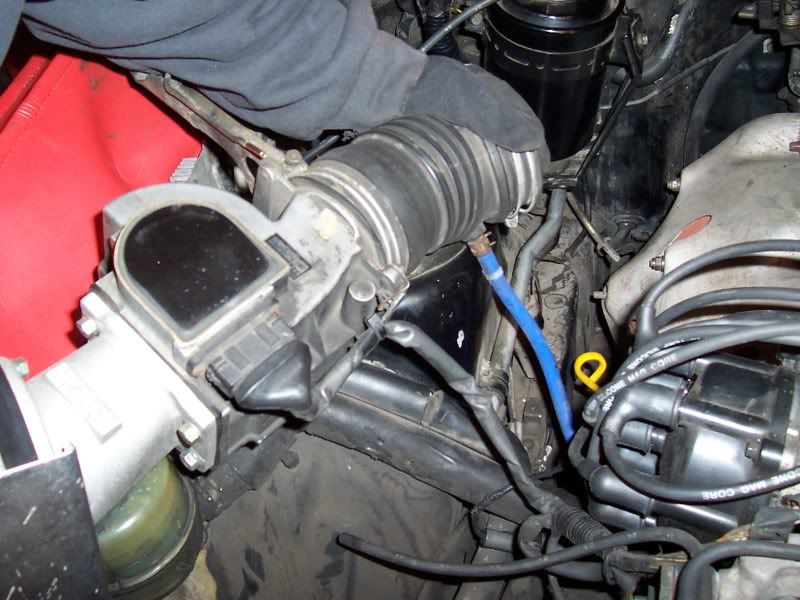
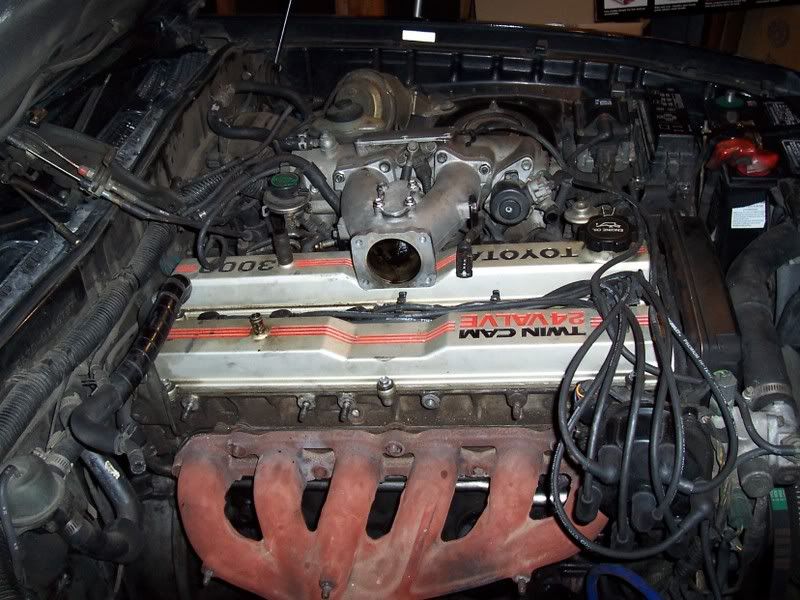
Now I removed the throttle body. All the hoses simply pull off, but may very well need some persuading from a small flathead screwdriver.
p891909_7.jpg


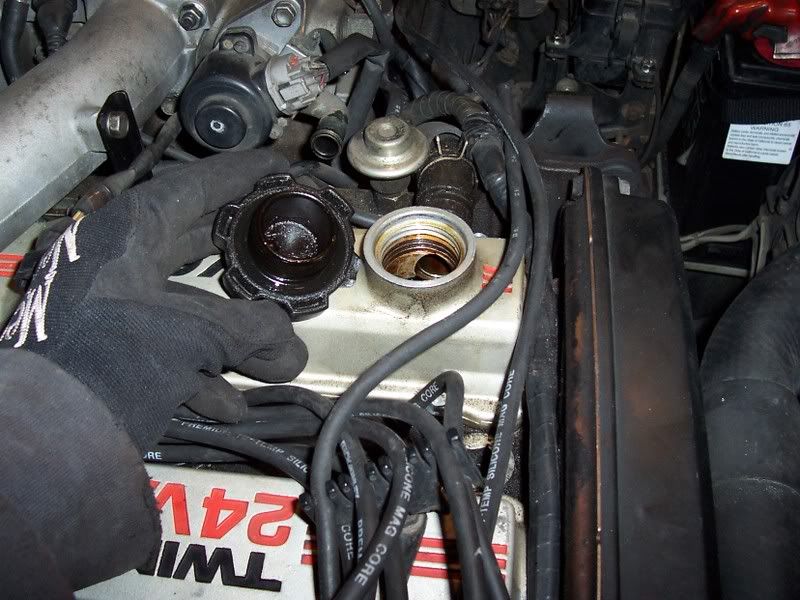
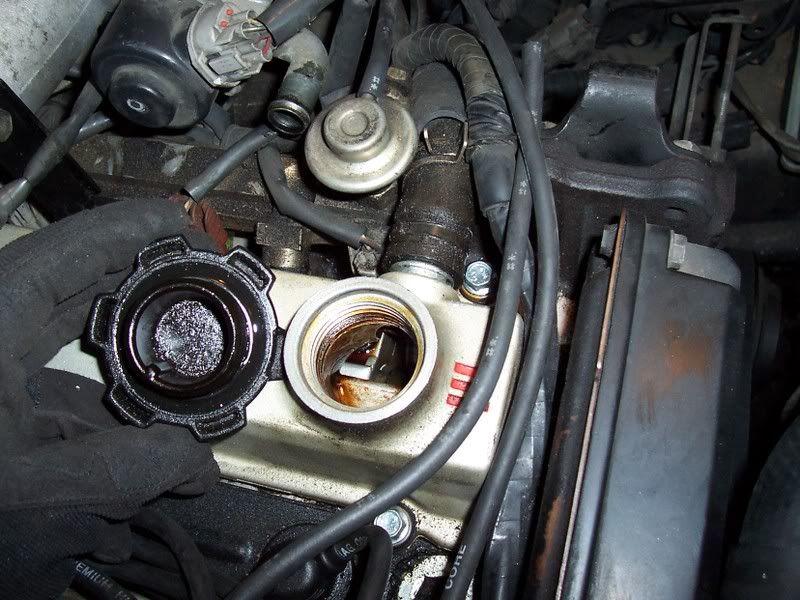
A quick check in the oil cap just to be sure I got to this before something catastrophic happened... looks good!! No milkshake!!:)
p891909_8.jpg

p891909_9.jpg


Removed the y-intake pipe. The rear lower bolt is a bitch to get to, but if you remove the bracket it can be done with a wobbler extension.
p891909_10.jpg


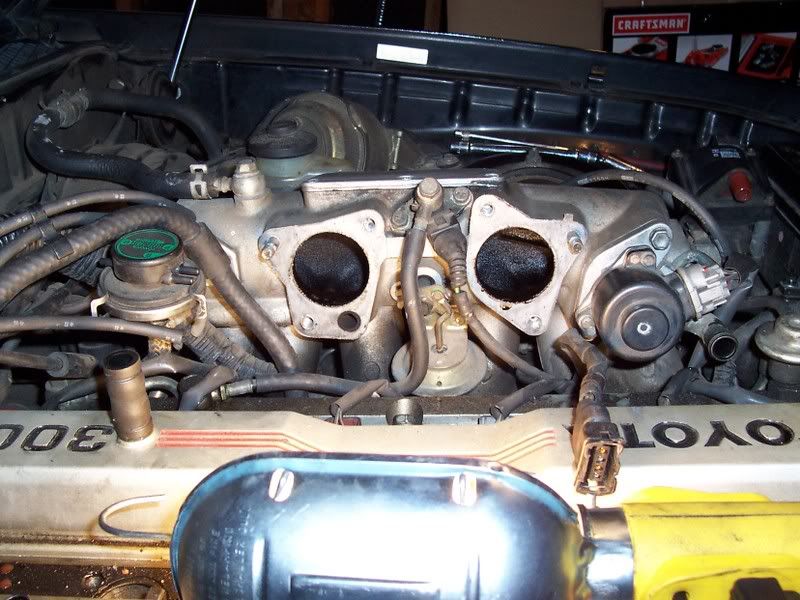
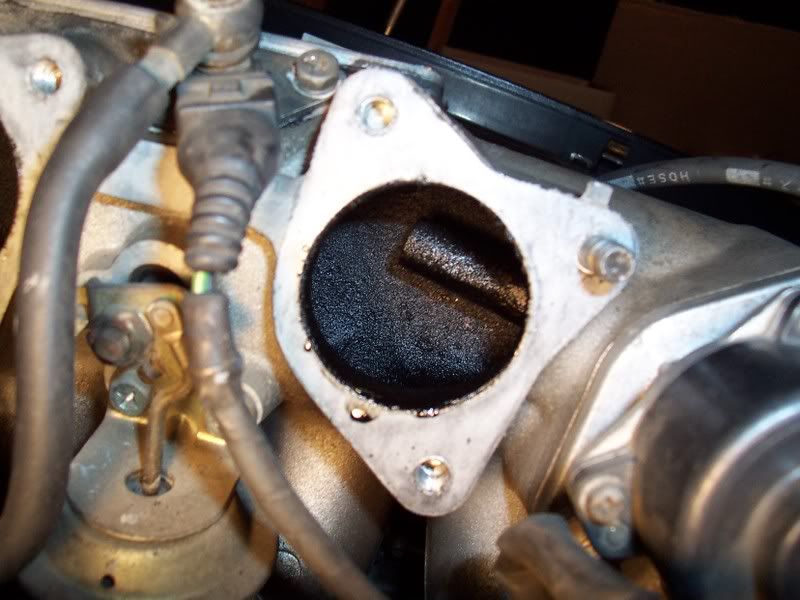
Look at how dirty your intake can get! O_O Some carb cleaner and/or throttle body cleaner will be put to work on this later.
p891909_11.jpg


Next Morning:
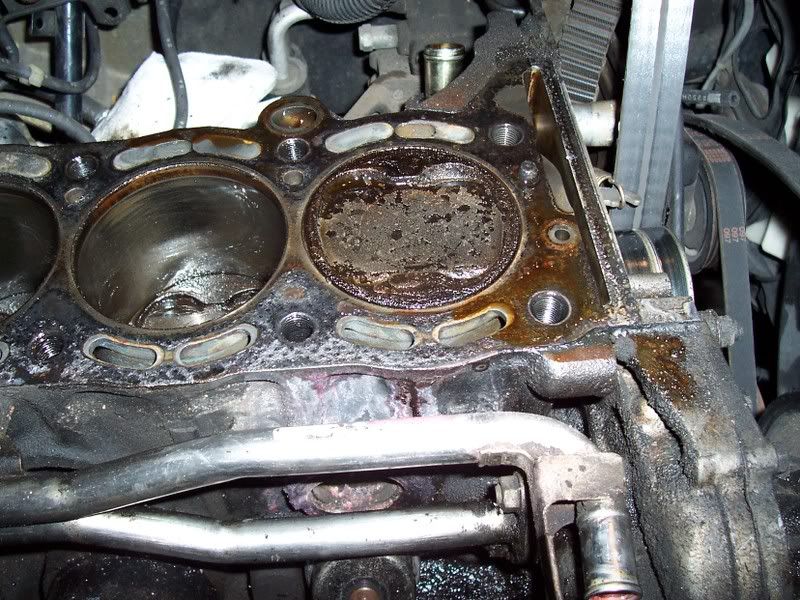
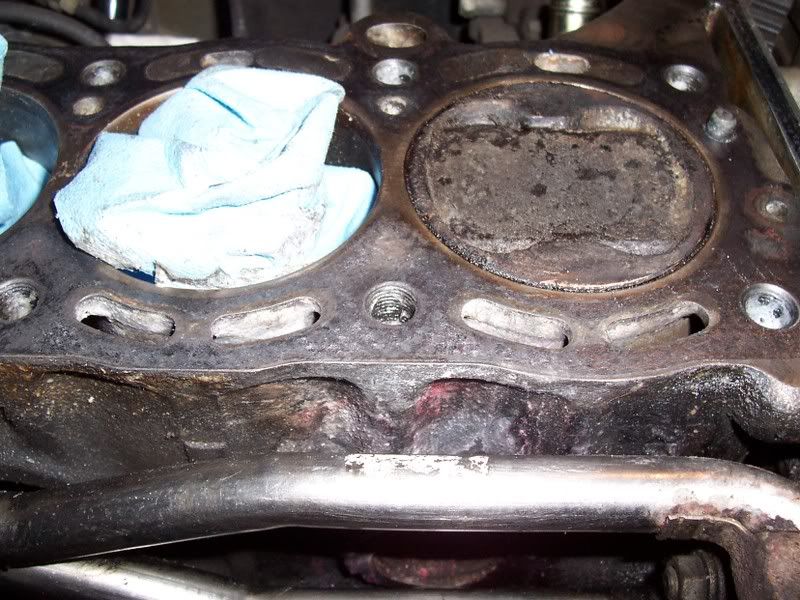
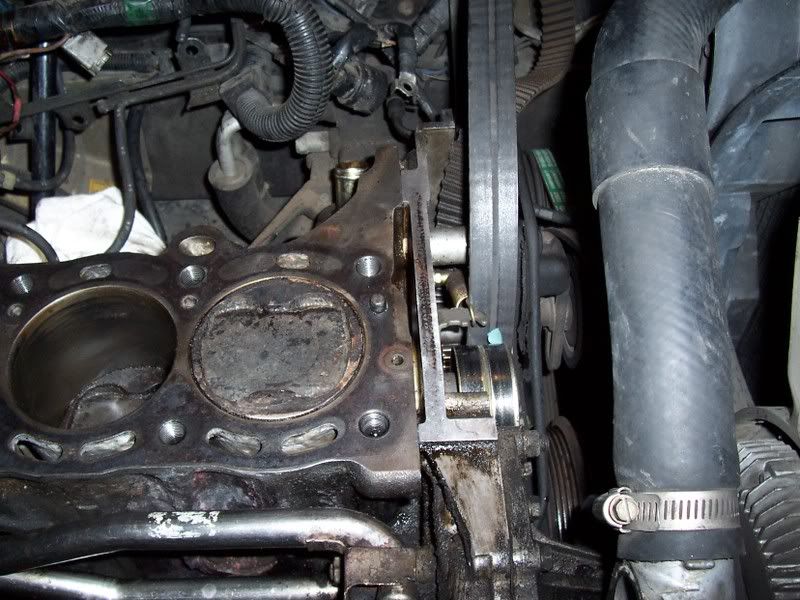
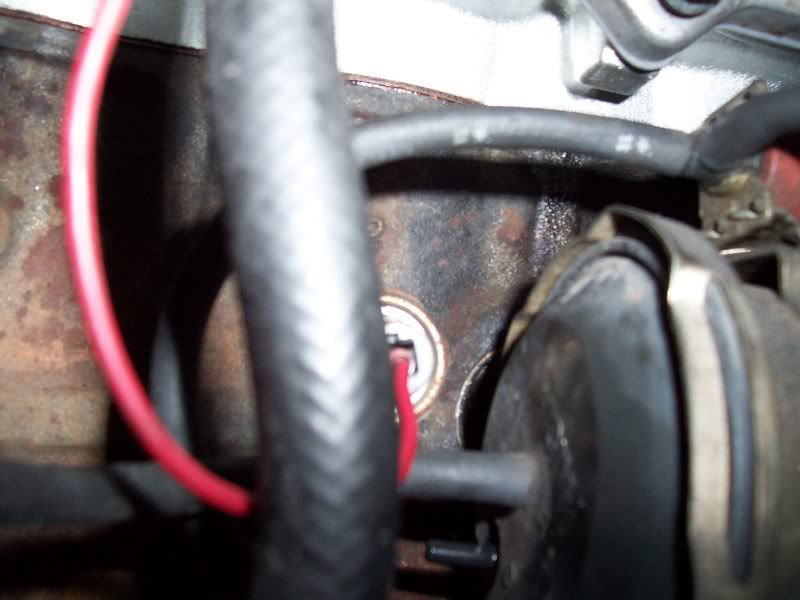
Exhaust is off and now the coolant must be drained from the block. The bolt is on the backside and mine was VERY, VERY hard to break loose. There is a lot more coolant in the block and head than i thought there would be. Be ready.
p891909_12.jpg


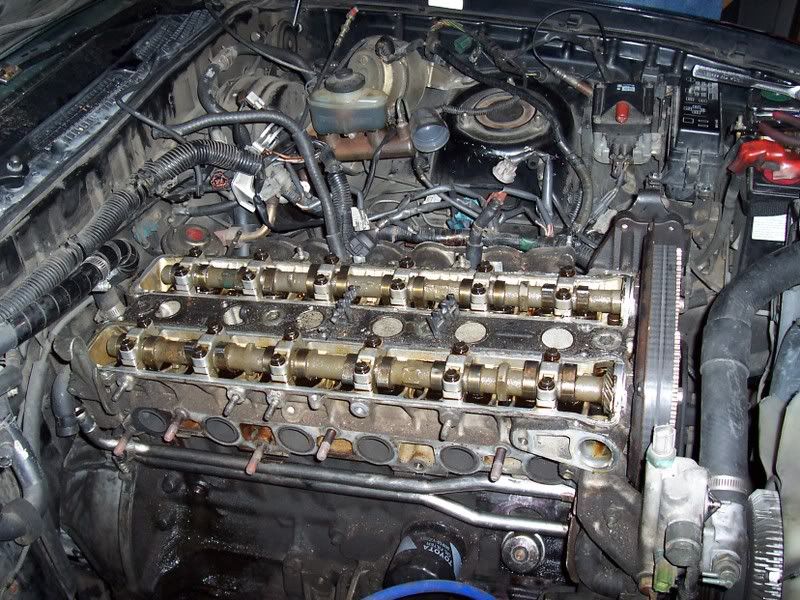
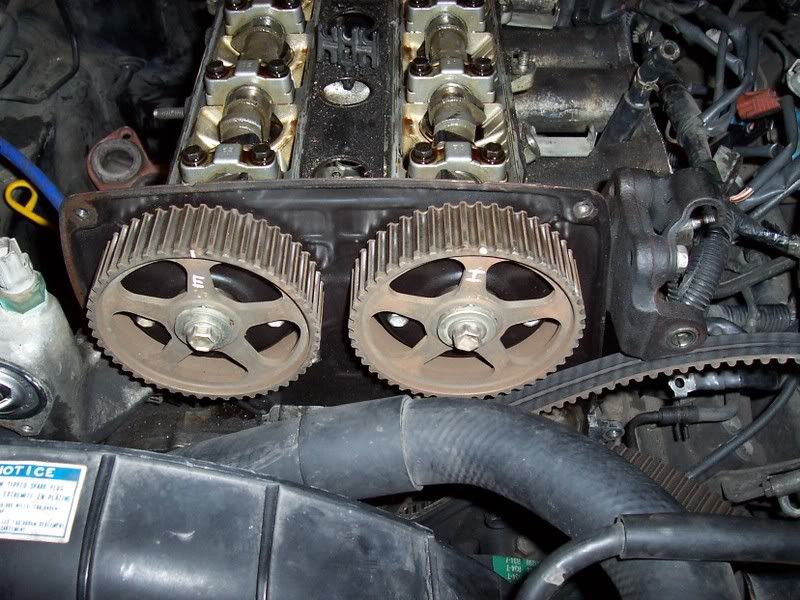
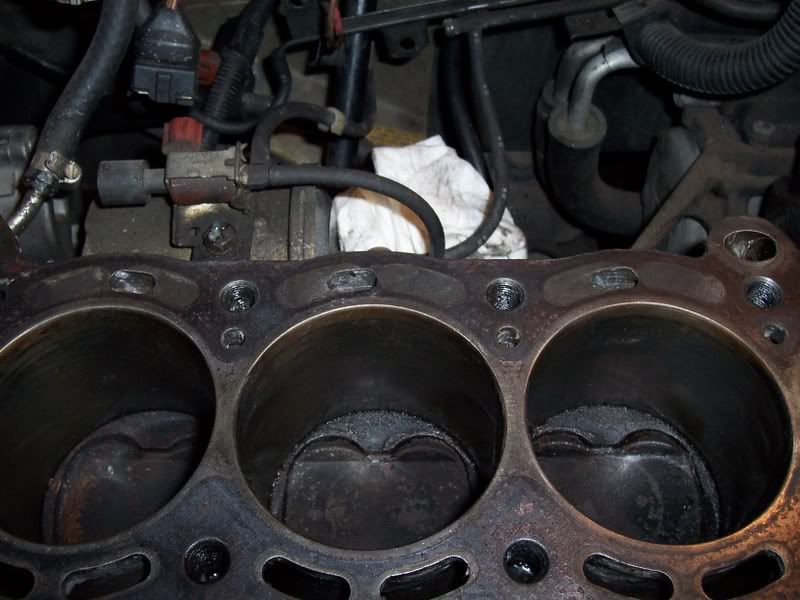
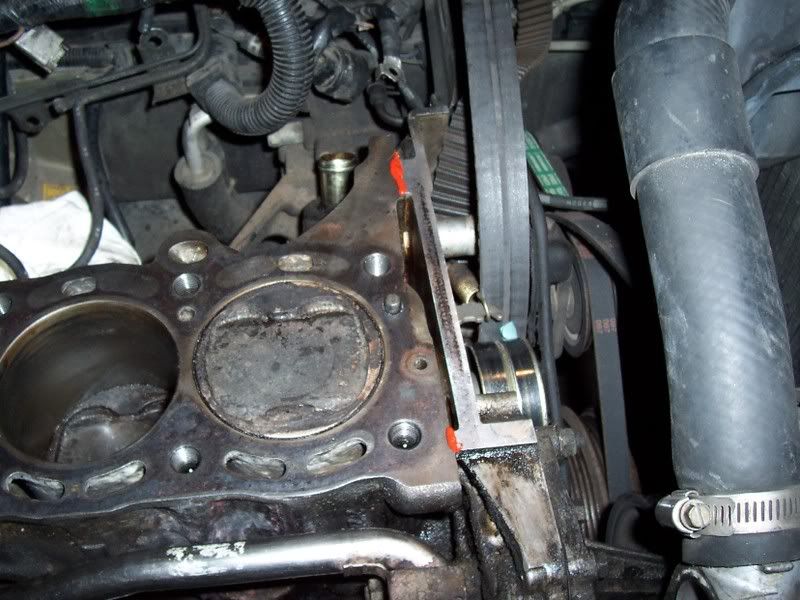
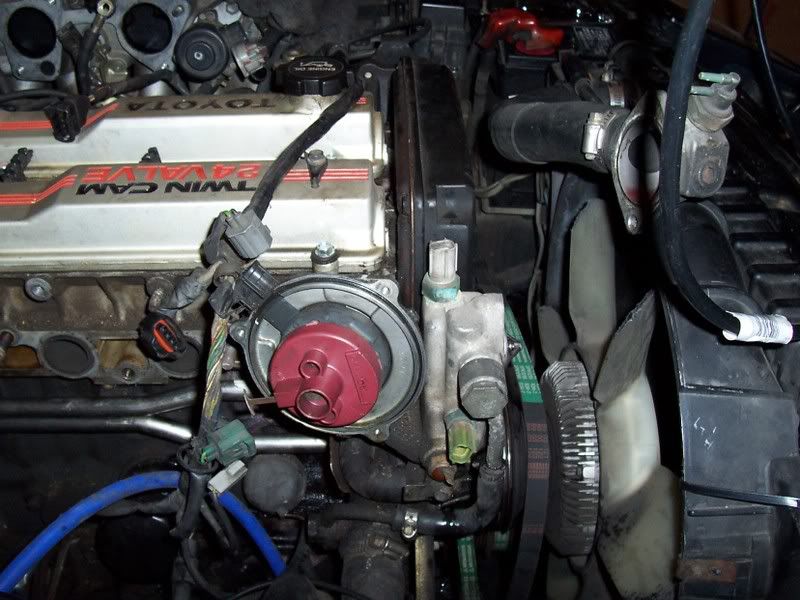
Distributor needs to come off now. Follow the tsrm, but basically you need the motor @ TDC before you pull the distributor out. Turn the crank by hand and be sure the car is in neutral. Otherwise you'll be like me and trying to power your car with your arm. I call it 1 Andy-power. ;)
p891909_13.jpg


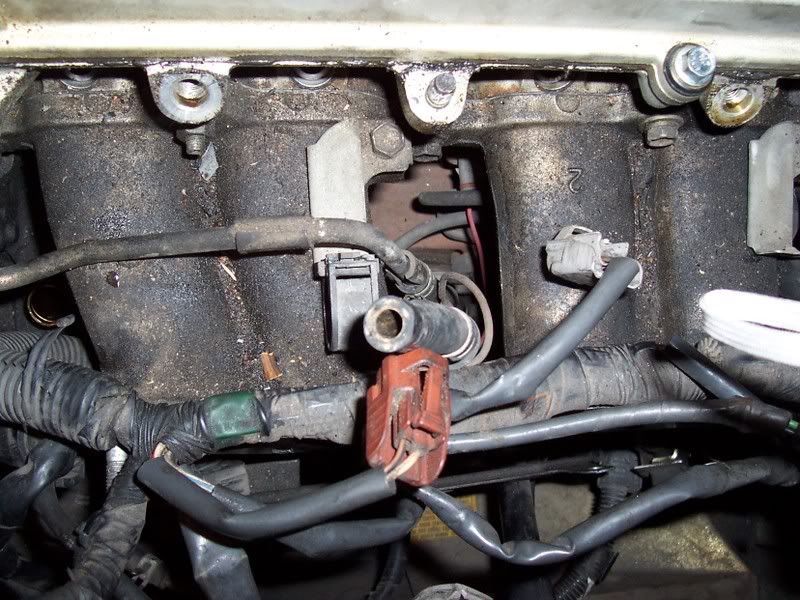
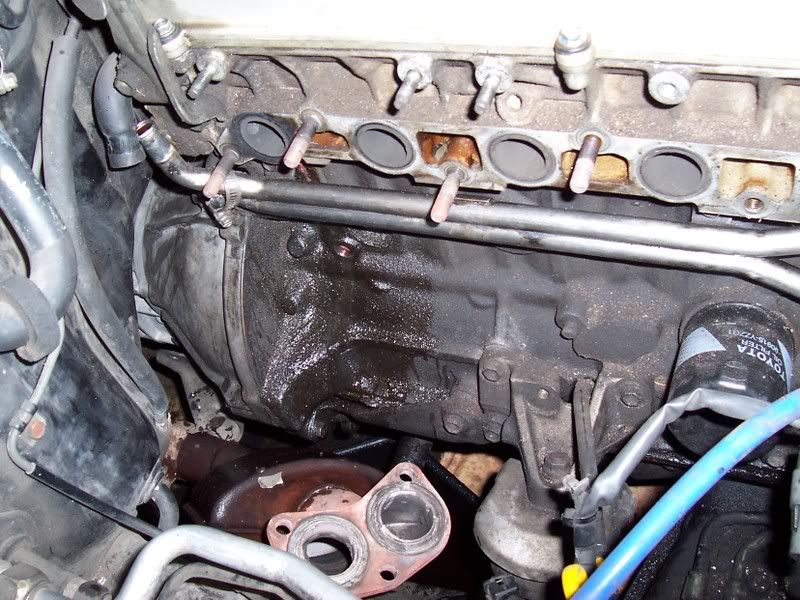
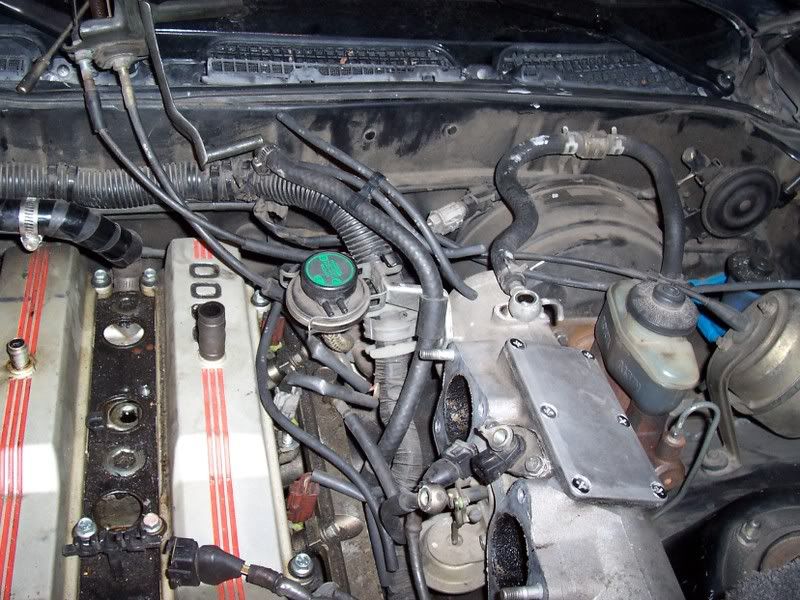
The mess on the intake side...
p891909_14.jpg


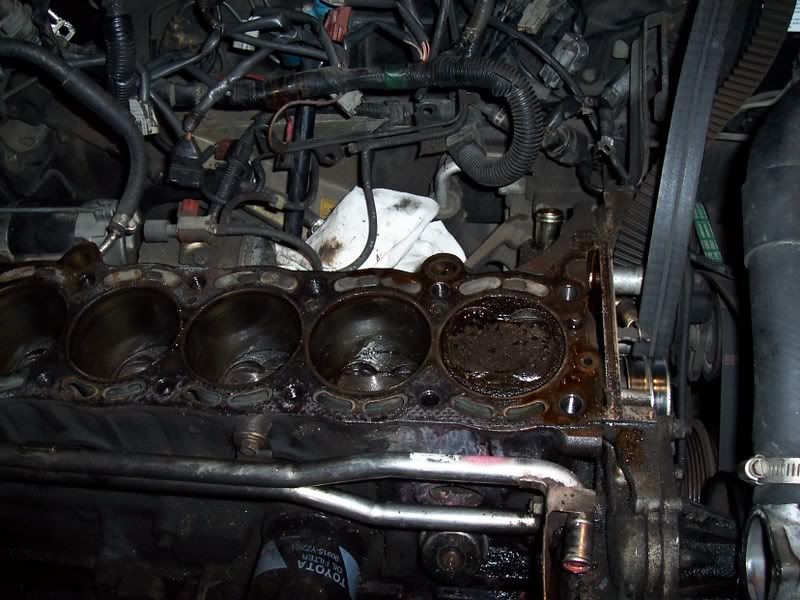
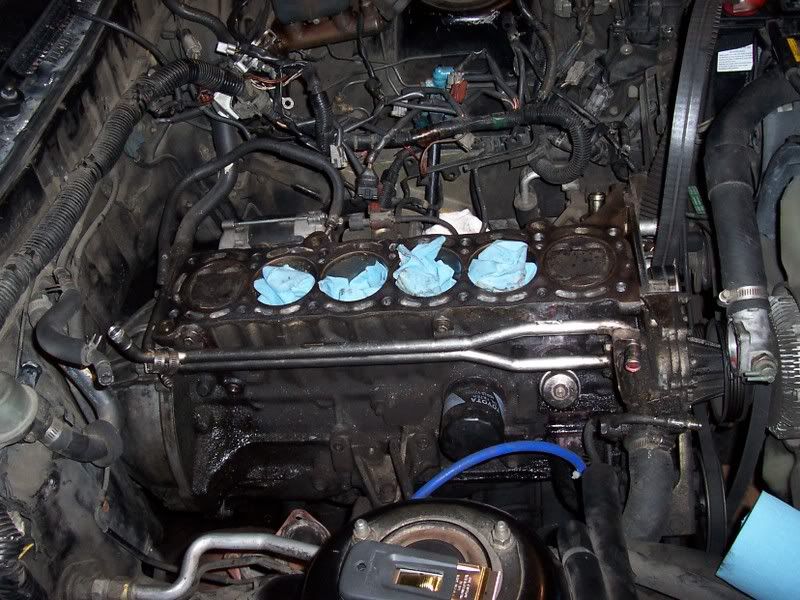
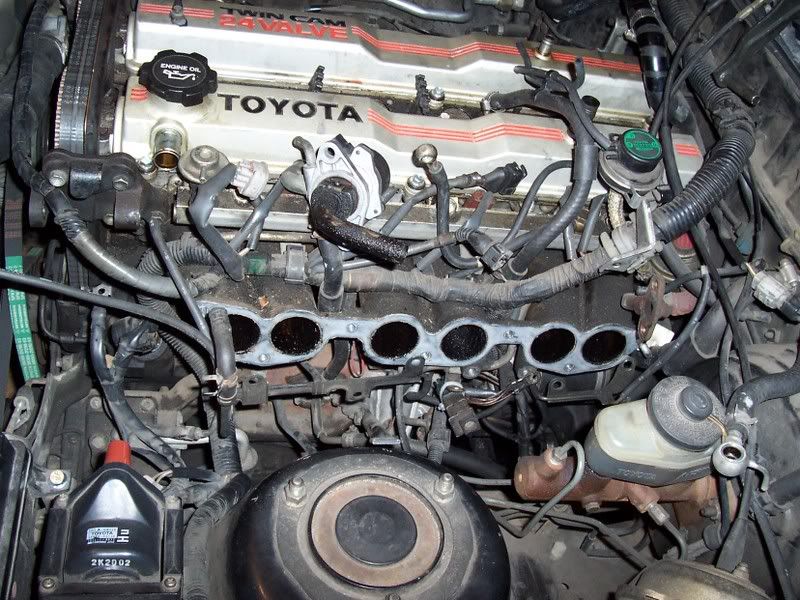
Plenum removed. There are plenty of connectors and hidden bolts to get you stuck here. I can't offer much more advice than to look at the TSRM diagrams for the cylinder head and try to find all the bolt holes.
p891909_15.jpg
 
Last edited:

TurboFreak

NOBAMA
Jan 22, 2006
1,374
1
0
East Coast
Ughh I'm in the thick of this right now. I've finallllly gotten everything put back together up to the upper intake manifold.

IM me with questions. BGTurboFreak
 

suprarx7nut

YotaMD.com author
Nov 10, 2006
3,811
1
38
Arizona
www.supramania.com
Thanks guys and yes, I have read theough the entire process in the TSRM and dylan's writeup. I've been studying ;)

Exhaust is off, intake 1/2 off and coolant draining. Goal is to get at least the plenum off before I go to sleep.

Pics will be all be added to first post.
 

KongGMC

Shady tree mechanic
Nov 26, 2007
88
0
0
37
Crestview, Fl
Hey man, thnx for doing this. I'm sure it'll help as I can't understand half of what I'm reading in the TSRM. One thing I wanted to point out though as I've already removed mine, before you yank the distributor out, make sure you mark where it is pointing at TDC, as well as where the base is sitting. I didn't so now that'll be guess work when I go to put it back together.

The snow is a nice touch too!:aigo:
 

suprarx7nut

YotaMD.com author
Nov 10, 2006
3,811
1
38
Arizona
www.supramania.com
Fuel rail up next:
p893219_1.jpg


Fuel rail off. If you're keeping the manifold in the bay, just pull the rail from the head and push aside.
p893219_2.jpg


Now comes a part that I could have made easier. The intake manifold can simply be unbolted and set aside, while still in the engine bay. I took mine off and had a hell of a time getting to all the connectors and removing all the wiring mess. In hindsight, it would have nice to simply leave it in, but now I'll have a chance to carb-clean the living hell out of it and end up with a sparkling clean intake. :)
p893219_3.jpg


Now comes the fun part. We get to see fresh gold oil covered metal. :) Cam covers removed. simple unbolt and if you still have the horrible bolts, switch them out with M6 flange bolts. :)
p893219_4.jpg

reverse view
p893219_5.jpg


Now you need to take off the pulleys. Loosen the tensioner bolt and use a screwdriver to pry it sideways. Then tighten the tensioner bolt to keep the belt loose. Now pull of the belt. If you're doing the timing belt, the lower cover will need to be removed as well.
p893219_6.jpg


With the belt off, you can now remove the pulleys. The TSRM asks for a special tool that you don't have. Get a 10mm socket, the more robust the better, and stick it onto the timing plates bolts that are right behind the star of the center of the pulley. Now when you turn the pulley's bolt it will catch and you can loosen it. It may take some strentgh, but you shouldn't hurt anything. Be sure to remember to grab the pins that align the pulleys.
p893219_7.jpg


Now comes the fun part. :) Headbolts are coming off. Follow the TSRM and do 3 passes in the order they give. If you dont, you may warp the head worse than it already might be. You'll need a 10mm inverse hex socket thing like this one.
p893219_8.jpg


You can see the bolts just under the cams and the oil will form a suction which will allow you to pull the bolts out simply with the socket. NEATO!!
p893219_9.jpg


After 20 mins or so and 3-4 passes the bolts are out and all lined up. :)
p893219_10.jpg


Now here's another "learning point". The water housing doesn't need to be removed, but the hoses connecting it to the block or anything other than the head do. My friend and I both missed this and pulled the head about an inch off before realizing it. We undid the hoses and coolant got onto the block surface. Contamination anyone? :nono: So I'll be doing about 5 oil changes and having the oil system fully flushed by a shop just to be sure I don't hear rod knock anytime soon.
p893219_11.jpg


The gasket stuck to the head and the camera ran out of battery and storage so I only have pics of the block surface for now.
p893219_12.jpg

p893219_13.jpg


WHAT DO YOU GUYS THINK?
 
Last edited:

suprarx7nut

YotaMD.com author
Nov 10, 2006
3,811
1
38
Arizona
www.supramania.com
**Completed tutorial/writeup after this post. KEEP READING


BHG job complete and it appears to be a complete success.

Drove 55 miles on it and lost almost no coolant at all after filling the overflow when the thermostat first opened up.

Oil was changed once after a brief start up to be sure she could run. :)

Another oil change and a possible third on Thursday just to be sure any coolant that was spilled on the block deck when taking the head off doesn't stay in the oil.

Thanks to CRE for his great help and johnathan1 for his advice on a few things.

I'll update the thread with MANY more pics in a few days, but now I'm going to sit back, relax and enjoy the BHG-free zone I now find myself in. :)
 
Last edited:

suprarx7nut

YotaMD.com author
Nov 10, 2006
3,811
1
38
Arizona
www.supramania.com
THANKS ALL!!!!

I have learned soooo much in the last month because of this job. I'll try to make a guide of sorts for the N/A for a head gasket job if one hasn't already been put together. I figure its about time I contribute to this fine forum. :)

AJ'S 88NA;903433 said:
I feel for you doing that in the cold. Nice job.

Ya, the first weekend sucked. The garage was 10F when I started. :( I rushed some of the organizational parts of the job simply because I was getting tired of being so damn cold and hurried myself.

This last weekend was AWESOME though. It was at least 45F in the garage at all times. That's pretty warm. :) I was down to just a long-sleeve shirt when the head studs went in.
 

suprarx7nut

YotaMD.com author
Nov 10, 2006
3,811
1
38
Arizona
www.supramania.com
Ok well I'm adding some more pics now and I'll give a few more descriptions, but I still have a dozen or so pics to add later.

I started to clean the block with gasket remover and it worked well in some area, but left quite a bit of graphite gasket material behind.
p909193_1.jpg

p909193_2.jpg


A scraper was then incorporated
p909193_3.jpg


These pics are from about half way through the cleaning so it's not done. I failed to take pics of the final product before the head went on. I was getting anxious. :)
p909193_4.jpg

p909193_5.jpg

p909193_6.jpg

p909193_7.jpg

p909193_8.jpg

p909193_9.jpg

p909193_10.jpg


Ok so there was about 6 hours of prep work with the head in between these pics so don't be fooled just becuase you get to look at them one after the other.

This is where the sealant should go. I would use Toyota FIPG, but I didn't have any and I figured high temp RTV would suffice. ADD MORE THAN I DID HERE!!! I went back and added more when I actually did it.
p909193_11.jpg


Ok, now here a HUGE gap in the pictures.
Let me emphasize this... PREP WORK, PREP WORK!!!


***helicoil error found, read this thread to fully understand: http://www.supramania.com/forums/showthread.php?t=72860

So I attempted to helicoil.... not a great idea.
I got the kit from Aaron which had everything needed and was an all inclusive package. The process involves drilling out the old holes to the size of the helicoil. I used an intermediate drill bit to ease into the larger size required. I got the 7/16 kit so the new holes were much bigger.

My problems:
The drilling was fine until I realized that the threads on the tap don't get to their full diameter until the tap is more than an inch into the head. I was afraid to drill through into the water jackets, so i drilled just deep enough to get the helicoil fully in. WRONG!!!! You need to drill as deep as possible because the threads in the tap won't be at full diameter until the tap is further inserted.

I didn't realize the problem until i inserted the helicoil. It was VERY difficult to get started and since I didn't drill deep enough to tap the entire thread, the helicoil did not thread in far enough and the prong broke off. FUCK.

I was able to cut off the last thread of the helicoil to make it flush. Problem solved? NO.

Inserting the stud was near impossible. I fought with it for 45 mins before i finally got it to catch. When it did finally go, i got it far enough in and torqued it to test it. It held. Thank god. Problem solved? NO!!!

After this I realized I really did not want to go through this 6 more times so i tested the studs. I put the manifold on the head, which was sitting on my work bench and installed the rear 4 nuts and the second from the front. I torqued all of them to 25 ft. lbs. All held. I then tried 35 ft. lbs. and all held just fine.

So i decided not to helicoil the remaining holes, since they could hold the torque. BIG MISTAKE!!! Keep reading to find out why...

I then CLEANED THE BLOCK SURFACE AGAIN!!! You should clean this as much as possible. I spent more than an hour sitting there spraying and scraping it.

Now to lower the head back on, you need to lay down the head gasket first. If you are using an OEM(composite) head gasket like me it might be a good idea to use copper spray on it. The spray, in theory, will help to fill in small imperfections that may otherwise lead to another BHG. It's an additional precautionary measure. Spray the gasket while its hanging on a coat hanger and get a smooth, uniform coat on each side.

Now lay the gasket down on the block carefully aligning it with the pins in the block. Now comes the fun part. THE HEAD!!!

You can simply get a friend and place the head on, or you can be creative. ;) CRE was with me and suggested we get a piece of wood and rope and have two people hold the head above the block and slowly lower it while a third guides the head down onto the block. This was a great idea and made the process much easier. Thanks CRE!!!
 
Last edited:

suprarx7nut

YotaMD.com author
Nov 10, 2006
3,811
1
38
Arizona
www.supramania.com
Head on and it looks sooooo purdy!!! Note: I took this pic after I'd installed the head studs and the cam covers. Yours will not look wuite this complete at this stage. duh.
p909231_1.jpg


Ok so now you need to get the head fastened down. I chose to use ARP head studs because they are re-useable again and again and again and I plan on doing more head jobs than just this one whether its on this car or another. If you are using head bolts from either ARP or the toyota ones, the process is EXACTLY what the TSRM states.

If you are using ARP head studs:
-YOU WILL NEED A 14mm, 12 PT, DEEP SOCKET FOR THESE!!!!! Sears should have this and mine was only $4.50.
-You need to first lube the washers on both sides. Use the ARP assembly lube.
-Now place each washer over the holes for the studs/bolts. If you put the studs in first, you will NOT be able to get the washers down into place. I lubed them up and then put the washer over my pinky finger tip and got it down into place. Then wiggled my finger and they dropped into place.
-Now lube the threads on the studs and drop the studs through the washers and the bolt holes. Don't be afraid to be liberal here, ARP gives you plenty of lube.
-Now use an allen wrench to HAND tighten the studs. If you can use your fingers thats fine, but its very tight and I didn't have the patience to try that.
-Once the studs are in place its game time. This process took me an hour and it'll take you about the same if you do it right. The torque spec in the ARP paperwork i got for the 7M stated that 80 ft-lbs is the spec. This is what I shall use.
-You want to do this in many passes, not just two or three. You want to tighten IN THE ORDER IN THE TSRM!!! This is crucial. Basically, you start at the middle and work outwards.
-I started at 30 ft lbs, then moved to 40, then 50, then 60, then 67, then 74, then 80. This should be obvious, but you need to do each bolt at each stage before moving on... dur. If you do the math, this is more than 100 steps.
-Before i was done, the garage was 50F and I was breaking a sweat. Once all the bolts are tightened you can move on and get the car together again!


Ok, now comes the part that is still puzzling me:
I put on the exhaust manifold and went to tighten the nuts. Now remember this is the part that I tested on the work bench earlier and the studs held 25 ft-lbs no sweat, some even held 30.

Manifold on:
p909231_2.jpg


So i go to tighten the bolts... MOTHERFUCKER. The rear studs that was helicoiled doesn't reach 20 ft-lbs and seems to be pulling out. I move on to the others... each one a tried in the rear of the head pulls the FUCK out!!!

I don't understand even a little. I tested them and they held 25 no sweat. Now I cant get them past 20. I am now severly pissed at myself for not paying the machine shop to do this and I'm feeling like a 'tard. :(

I got the car together and it ran and all was well, but I have an exhaust leak and I fear its from the head. :( I'm hoping that the cheap gasket i got is the problem, it may very well be that the studs aren't supplying ehough grip. DAMN.

Oh and here's a pic of the vacuum reservoir that has a few hoses going to it. Its under the intake manifold and is near impossible to see. You can also see the knock sensor up against the block.
p909231_3.jpg
 

suprarx7nut

YotaMD.com author
Nov 10, 2006
3,811
1
38
Arizona
www.supramania.com
Car has no been running for nearly a month and all is well. I had a few small coolant leaks from where the new coolant hose fittings weren't tight enough. After tightening those, I have ZERO coolant loss and ZERO oil loss after about 3 weeks. WOOHOO!!! :)

Time will tell if the sealing surface is good enough...