
Mr.Yuk's Swap/Build
- Thread starter Mr.Yuk
- Start date
You are using an out of date browser. It may not display this or other websites correctly.
You should upgrade or use an alternative browser.
You should upgrade or use an alternative browser.
lol yup. Next friday is hundo friday.
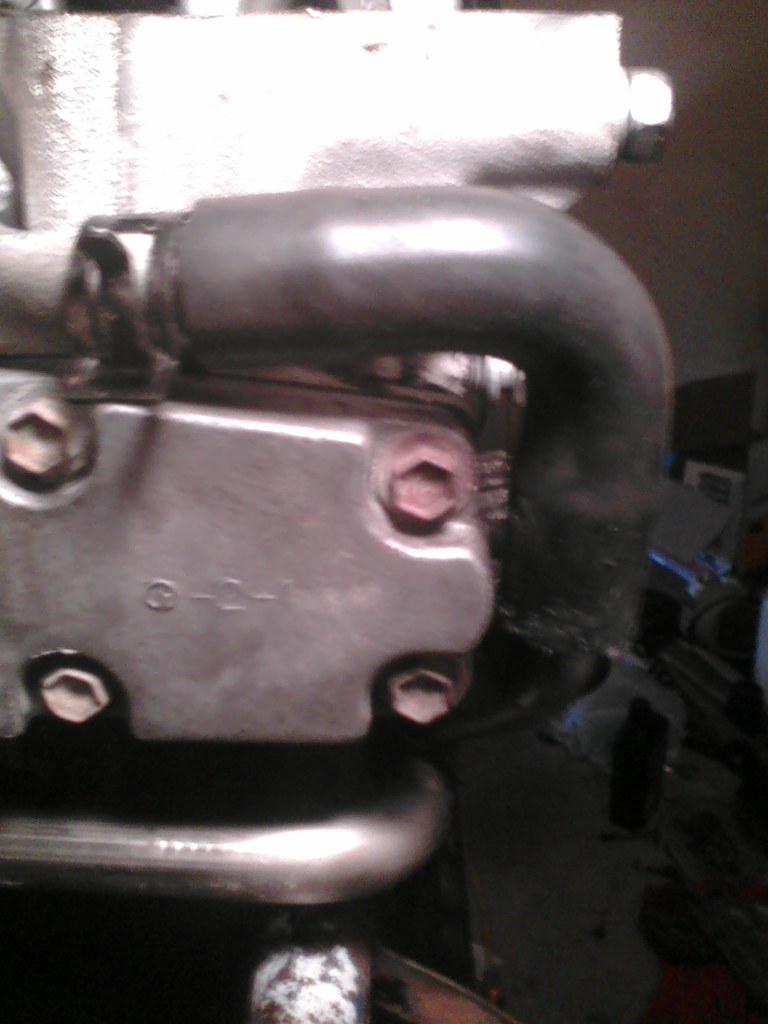
Right now I'm trying to de-carbon the valves on my intake side, the exhaust side wasn't leaking at all.. so.. we will see what happens. Also at this time, I'm checking valve shim clearances and getting everything squared away. soon it will be bolt up the piddly stuff time.
Whilst STEVE was up, I had him take a look at the oh-so-smoooooooked turbo that I got from Rob, no one believed me on shaft play untill Mr. STEVE decided to have a look. It sounds like STEVE will be bringing me up a good center section and we will be rebuilding my CT-26.
Here's some more pics to tide things over.
This is the Gates hose 18801 in action for use as the coolant hoses for the front AND back of the head, I just cut about a half inch or so off one end and an inch of the numbered end... they fit perfectly!

Also.. had my flywheel turned a while back.. and then I tossed it in the scrap pile. Notice the heat spots and a crack next to one of the drain holes. Woo!!
Before:

After:

---------- Post added at 03:50 PM ---------- Previous post was at 03:43 PM ----------
By the way.. the awesome part about this build? I'm doing this in a Townhouse garage!! Some how I still have room in there for a Supra, an engine on a stand, tools, and a cherry picker! But... not much else. So far we've gotten 4 people in the garage and still been able to move. Not bad for barely a one-stall.
Right now I'm trying to de-carbon the valves on my intake side, the exhaust side wasn't leaking at all.. so.. we will see what happens. Also at this time, I'm checking valve shim clearances and getting everything squared away. soon it will be bolt up the piddly stuff time.
Whilst STEVE was up, I had him take a look at the oh-so-smoooooooked turbo that I got from Rob, no one believed me on shaft play untill Mr. STEVE decided to have a look. It sounds like STEVE will be bringing me up a good center section and we will be rebuilding my CT-26.
Here's some more pics to tide things over.
This is the Gates hose 18801 in action for use as the coolant hoses for the front AND back of the head, I just cut about a half inch or so off one end and an inch of the numbered end... they fit perfectly!
Also.. had my flywheel turned a while back.. and then I tossed it in the scrap pile. Notice the heat spots and a crack next to one of the drain holes. Woo!!
Before:
After:
---------- Post added at 03:50 PM ---------- Previous post was at 03:43 PM ----------
By the way.. the awesome part about this build? I'm doing this in a Townhouse garage!! Some how I still have room in there for a Supra, an engine on a stand, tools, and a cherry picker! But... not much else. So far we've gotten 4 people in the garage and still been able to move. Not bad for barely a one-stall.
Good center section? I don't know about that, but it should be better than what's sitting in the storage cabinet right now. At least for the thrust play, it should be better.
Using some Toyota fuel injector cleaner courtesy of STEVE, I just emptied the contents of the can into a spray bottle and I'm giving the valves a bath in this stuff... Hopefully it will take care of some if not most of the carbon.. enough to let the intake valves seat properly.. I hope.
If not... I'm not sure what I'm going to do, as taking the head off is the last thing I want to do now that the MHG has been torqued down.
Wow.. that stuff should definitely be used in an open area... did it outside and I'm feeling all kinds of :crazy1: LOL
If not... I'm not sure what I'm going to do, as taking the head off is the last thing I want to do now that the MHG has been torqued down.
Wow.. that stuff should definitely be used in an open area... did it outside and I'm feeling all kinds of :crazy1: LOL
Alrighty, tonight I went nuts and just put as much stuff together as I could, Sean stopped by and furthered the cause... I know present the photos of the Valve Stem Seal operation which STEVE came up for as well as what was all accomplished tonight.
On a side note, after rocking the Toyota EFI cleaner.. my valves look all kinds of clean... hopefully this will solve any valve leak issues. I hope!
Valve stem seal install:


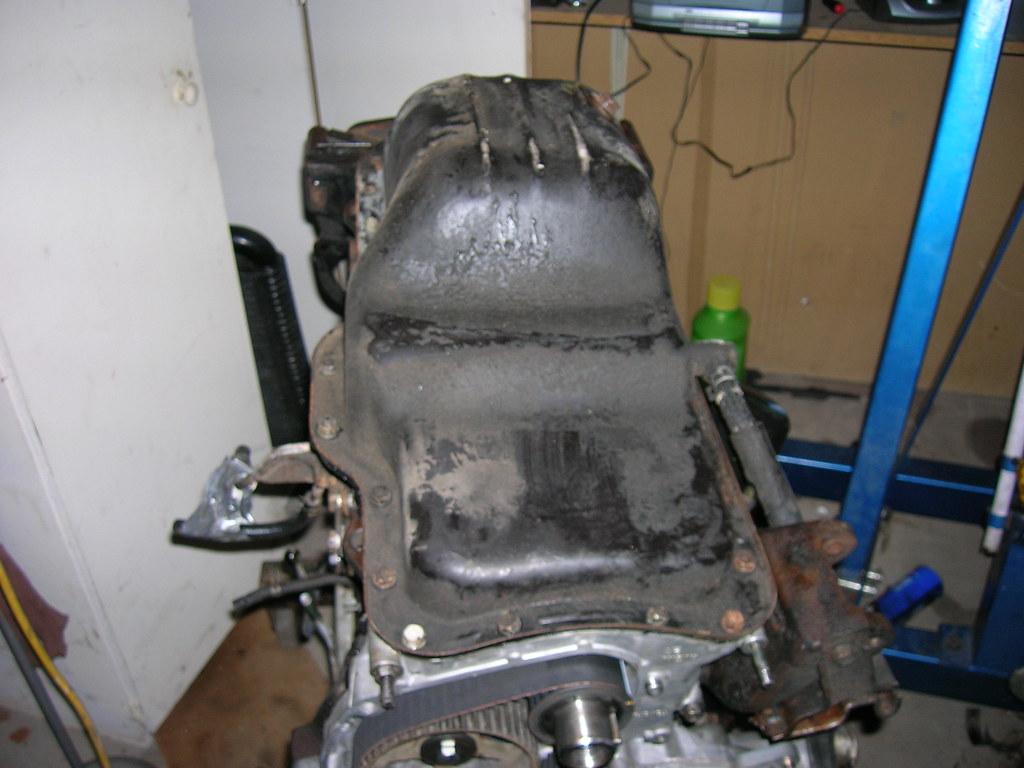
And here's what I did tonight.. First off installing the oil pan.. There is a new oil pump, shimmed out 3mm.. but like a dummy, I done forgots ta take a picture of that
And after installing cam covers with new cam cover gaskets oh.. and timing belt was installed at the same time:

Installed Timing covers and.... an assembled 7MGTE!!!! WOO!:


After all of this.. I'm a clutch kit, O2 sensor, some belts, and a long runner FFIM being built by Sean away from running! Not bad :icon_bigg
On a side note, after rocking the Toyota EFI cleaner.. my valves look all kinds of clean... hopefully this will solve any valve leak issues. I hope!
Valve stem seal install:
And here's what I did tonight.. First off installing the oil pan.. There is a new oil pump, shimmed out 3mm.. but like a dummy, I done forgots ta take a picture of that
And after installing cam covers with new cam cover gaskets oh.. and timing belt was installed at the same time:
Installed Timing covers and.... an assembled 7MGTE!!!! WOO!:
After all of this.. I'm a clutch kit, O2 sensor, some belts, and a long runner FFIM being built by Sean away from running! Not bad :icon_bigg
Heheheh.. Economically priced Mishimoto??? Read on:
A couple months ago, I got a hold of Mr. STEVE about a Tototo 7M HG (wound up not being able to use due to needing machine work.. see previous posts) which he had for sale, when I went down to see him, it turned out he also had a Mishimoto Radiator for sale. Said Mishimoto had had the typical mount issues when STEVE bought it and Mishimoto sent him a new one and he still had the "ill fitting" Mishi so STEVE sold me the "ill fitting" radiator for a whopping $30!! :naughty: Yes.. STEVE is FTW.
Skip ahead to tonight.. I decided to try to mock up the rad, and see what modification I would have to do to the upper and lower mounts. Well... when doing my "mock up" the lower mounts just popped right in! Snug and good to go! I then took a look at the upper mounts... with a bit of time with a vise, I should be able to get them perfect. I did have a whack at the upper mounts for a bit with a mallet on the floor.. helped a bit, but I'm going to try to get them as close to form fitting as possible.
Mishimoto for $30 install:
Dam, over all fricking AWESOME with the rad. If anything find a alum or steel tubing (thicker wall) with the I.D. the radius of the top mount on the rad, and 1/8" thick flat piece XX inches wide.
Cut the tubing in half and weld together. Bam! custom, that looks good.
If you get the materials I can cut them and welded up for you
Cut the tubing in half and weld together. Bam! custom, that looks good.
If you get the materials I can cut them and welded up for you
Congrats Drew, I knew it could be done! Just make sure you have a rubber insulator on the upper mount- the rad should be electrically insulated from the body.
May I suggest getting a small piece of flat steel and just have it welded onto the stock upper mounts and drill a hole where the bolt goes thru. Simple to do and keeps you from needing to destroy the stock ones. You really need a rubber or foam padded insulator for the rad tho. Extending the stockers to where u need them to be is very easy, and simple.
Post up some pics of the old thrust bearing and collar- I wanna see it! (and the main bearings, too!)
My Question is when is the Whammy action going to happen on getting this engine underneath the bonnet?
Needs clutch very much.. hopefully in 2 weeks I'll be ready for some engine installing. Also for got to mention, the stock upper rad mounts have already been "modified" with a large hammer.. and don't look too bad, but not smooth... Like I said, once I get everything in, I will polish all the little turds.
Will post worn turbo parts pics tonight
---------- Post added at 05:43 PM ---------- Previous post was at 05:40 PM ----------
And hopefully tomorrow will be the beginning of the Long runner FFIM (ahem.. Sean)
Will post worn turbo parts pics tonight
---------- Post added at 05:43 PM ---------- Previous post was at 05:40 PM ----------
And hopefully tomorrow will be the beginning of the Long runner FFIM (ahem.. Sean
)Well.. I got visited by the Renter Rebate fairy this morning so... I ordered my clutch kit from work! WOO!
Sachs 7MGE 6 Puck

And Pics of the old bearings and center section from the CT26. I am fairly worried as like an IDIOT I forgot to index my parts:3d_frown: so Rick (buddy o' mine from way back) and I tried to match up the machined in flat spots as best as possible. HOPEFULLY the turbo shaft isn't too far out of balance and will atleast make it to being parked for winter... or it looks like I'm hitting the junk yard for a CT26.
I am fairly disappointed in me:nono:
Old turbo bits.


In other news.. going to begin Wiring harness repair tomorrow night, and I inherited Dan's old Lotek A-pillar pod.
Hopefully beginning install with in the next 2 weeks:naughty:
Sachs 7MGE 6 Puck
And Pics of the old bearings and center section from the CT26. I am fairly worried as like an IDIOT I forgot to index my parts:3d_frown: so Rick (buddy o' mine from way back) and I tried to match up the machined in flat spots as best as possible. HOPEFULLY the turbo shaft isn't too far out of balance and will atleast make it to being parked for winter... or it looks like I'm hitting the junk yard for a CT26.
I am fairly disappointed in me:nono:
Old turbo bits.
In other news.. going to begin Wiring harness repair tomorrow night, and I inherited Dan's old Lotek A-pillar pod.
Hopefully beginning install with in the next 2 weeks:naughty: