Chambers Build Thread - "Daily Eighty-Seven"

Chambers

Now you know
Sep 9, 2007
981
0
0
34
Baltimore County, Maryland
Its been a while, but I have been busy with a lot of stuff. I recently started parting out a car, I'm using it for a mock up base for my car. I can't stand when my car is down for months at a time, so I'm doing all the leg work on this chassis to see what problems arise and make everything "bolt on" before I tear down my car.

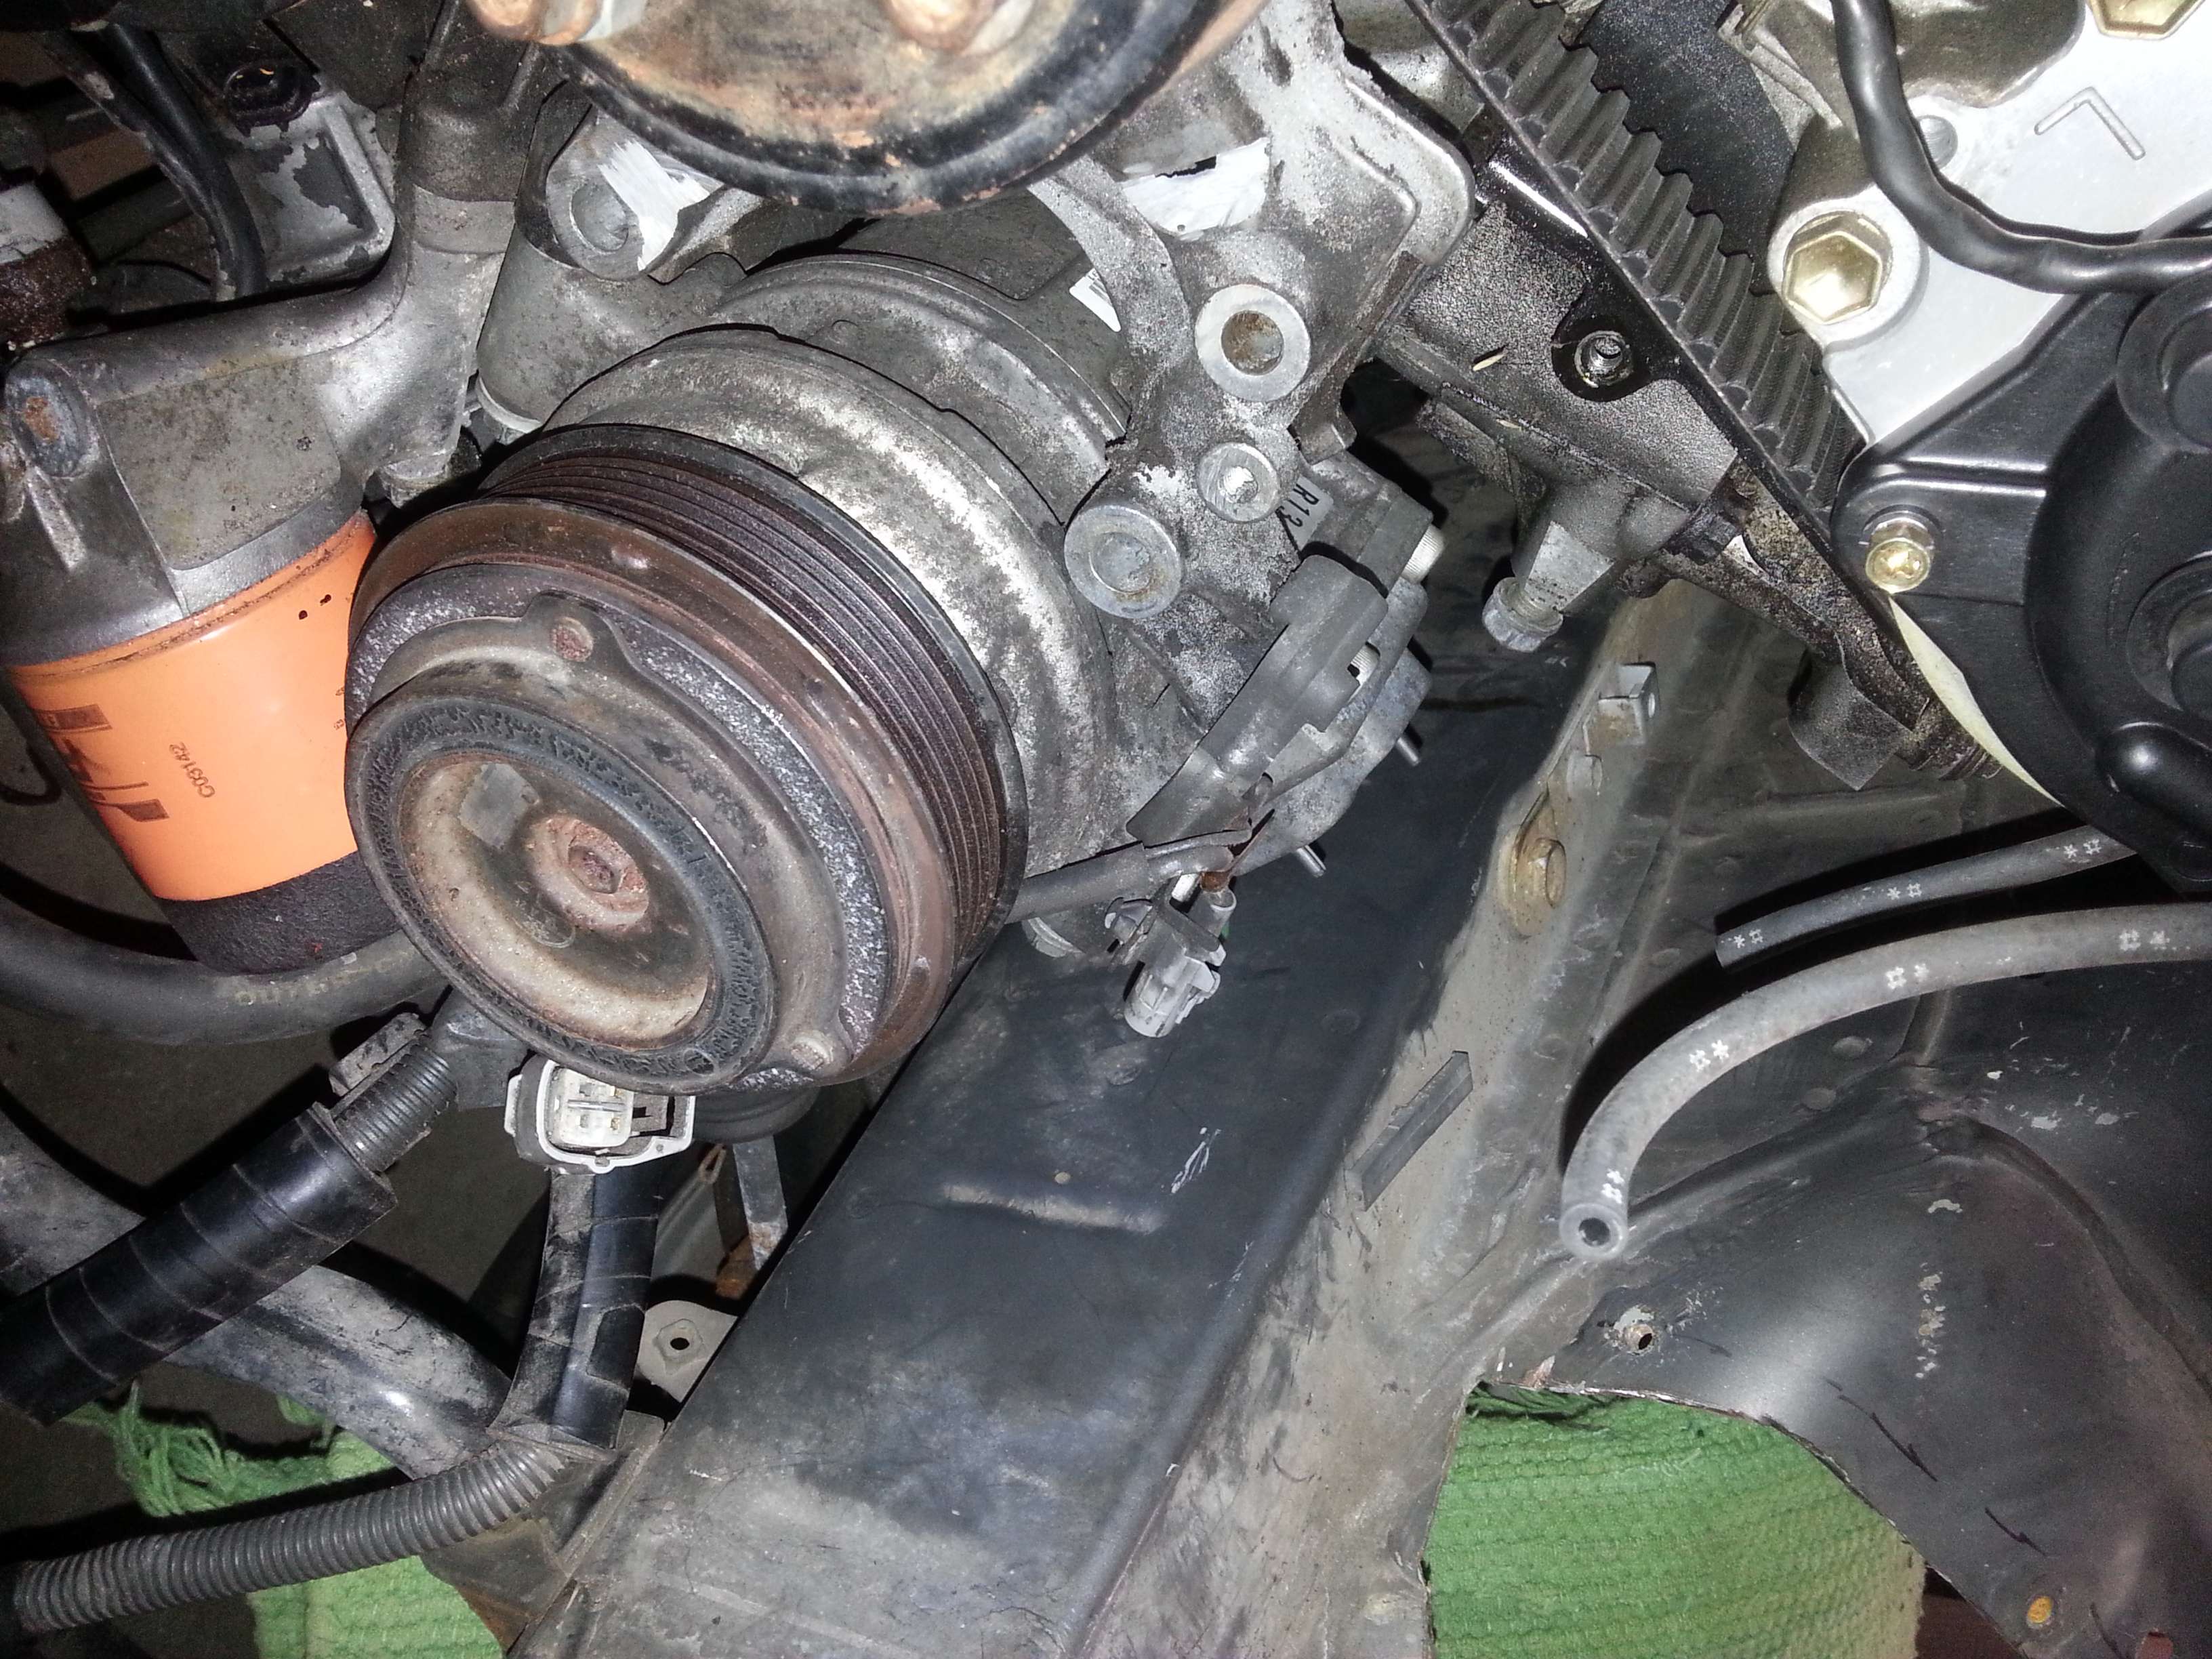
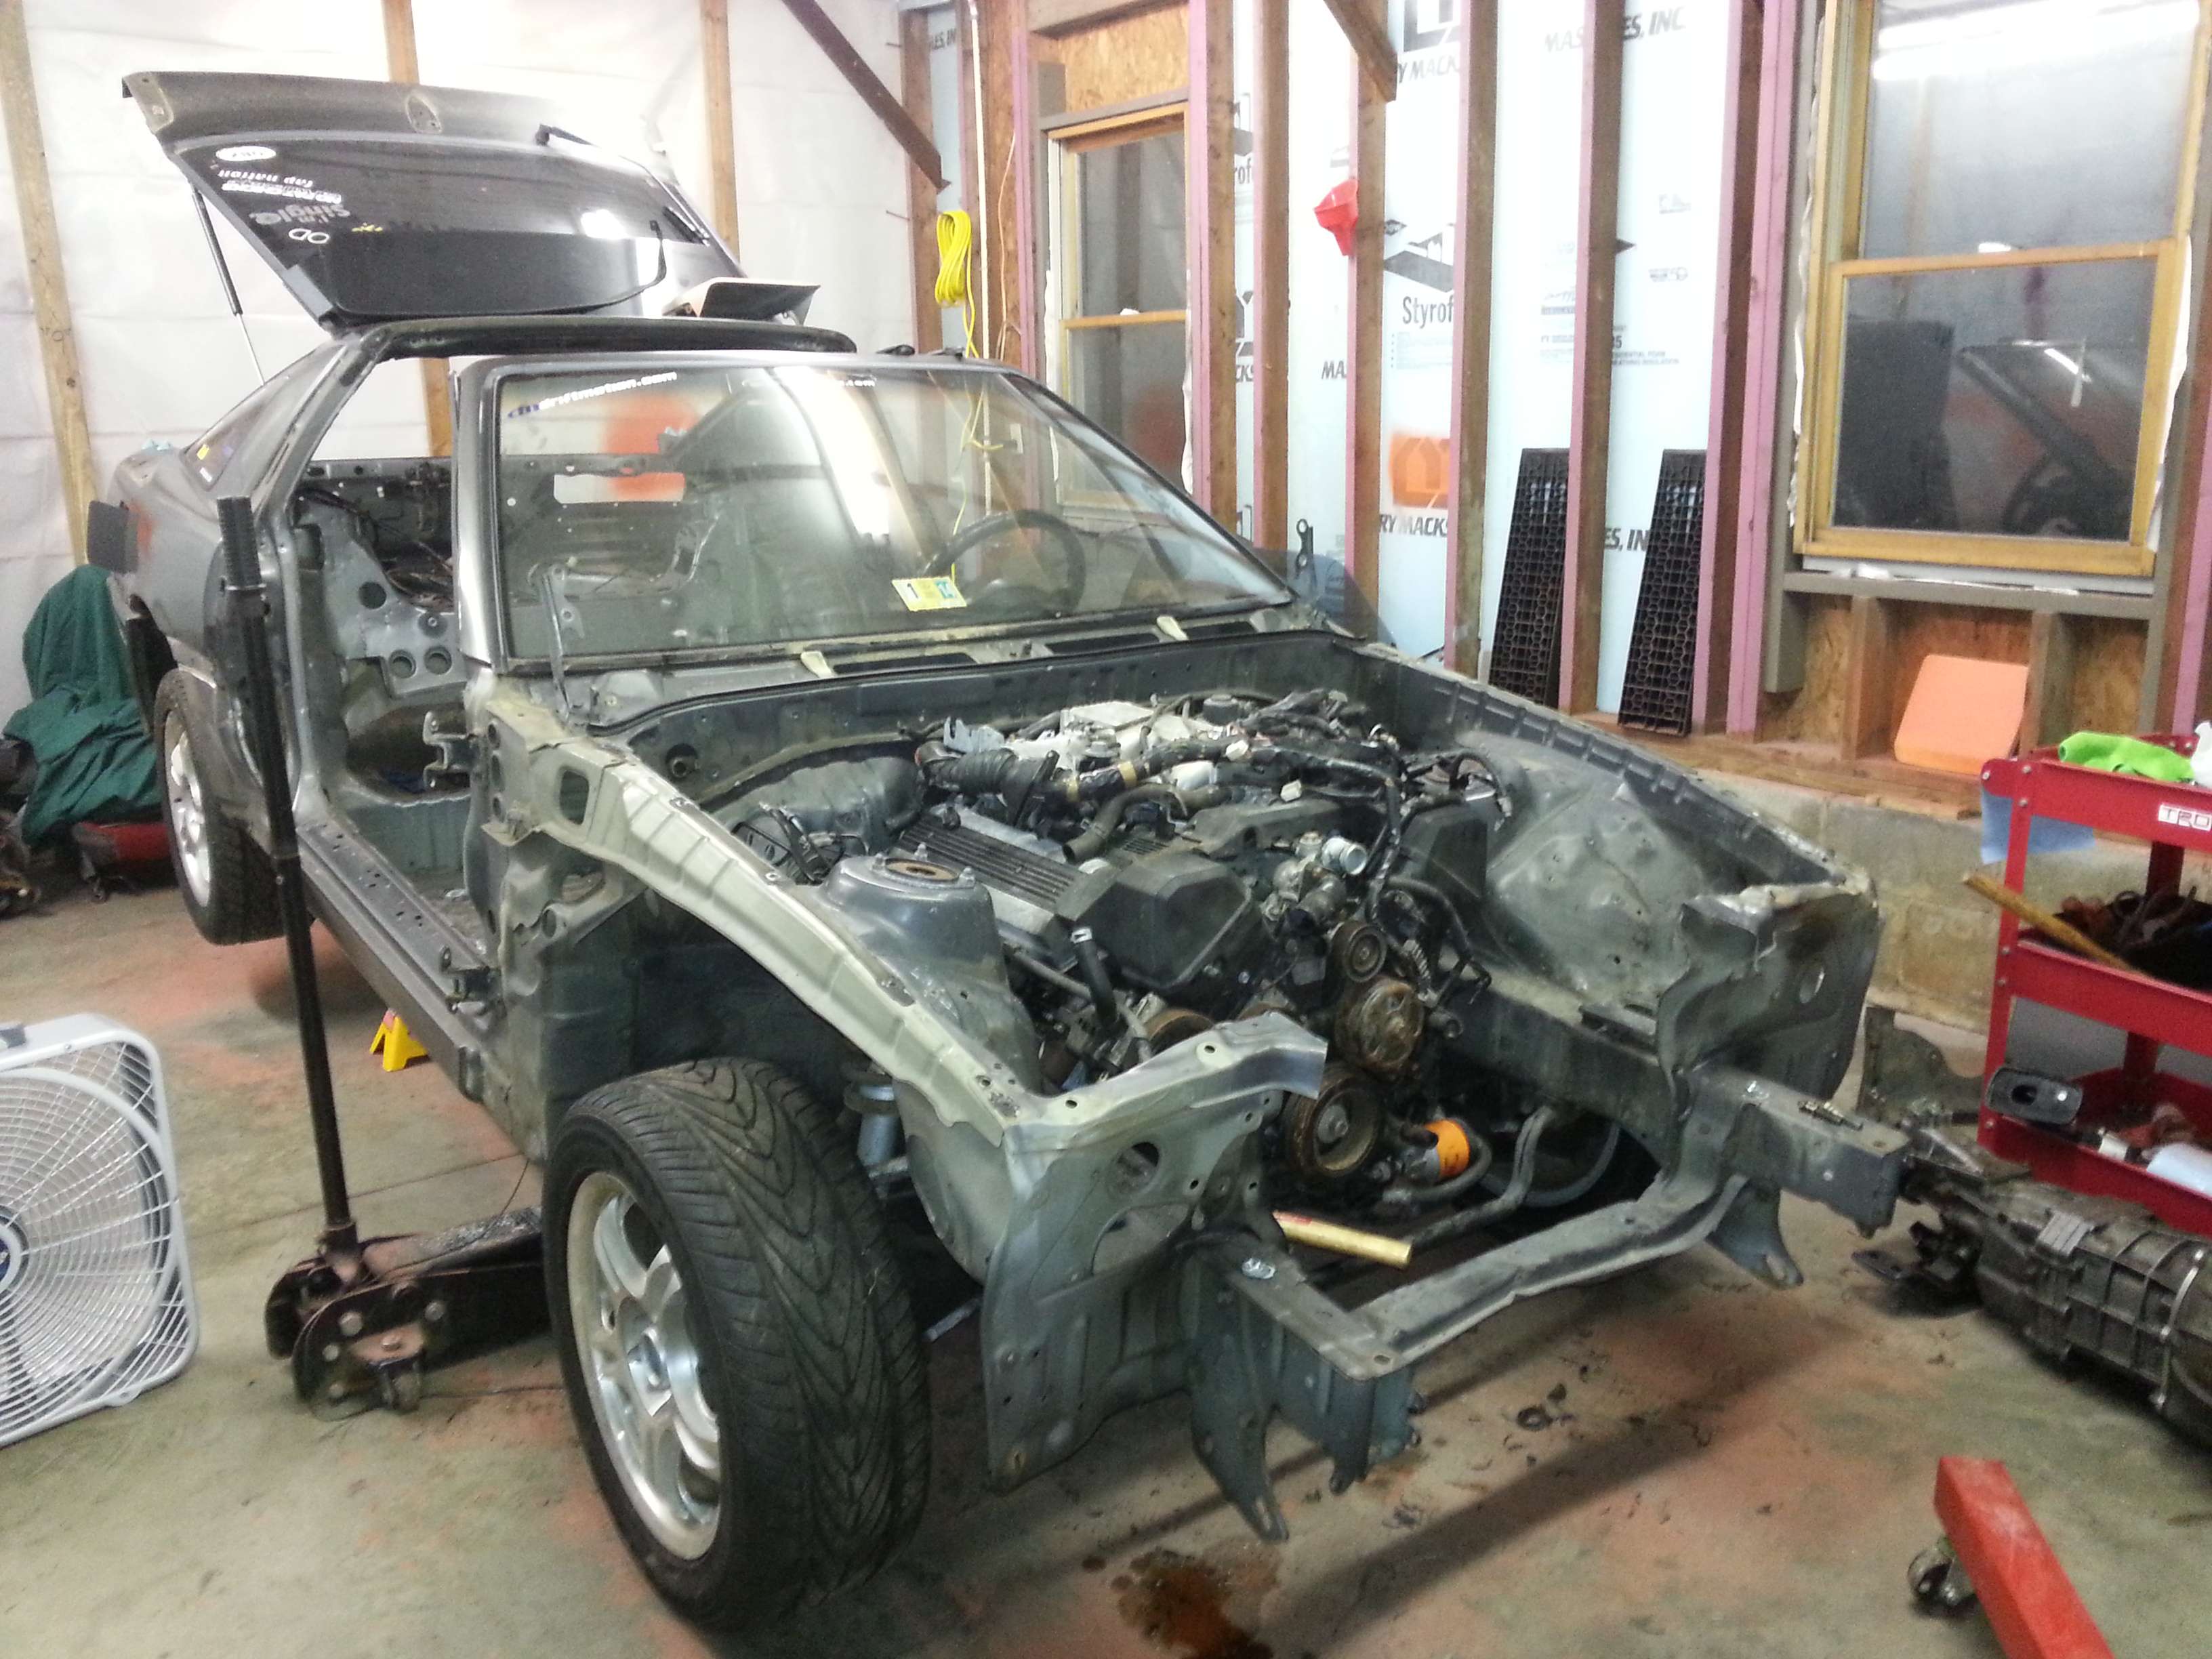
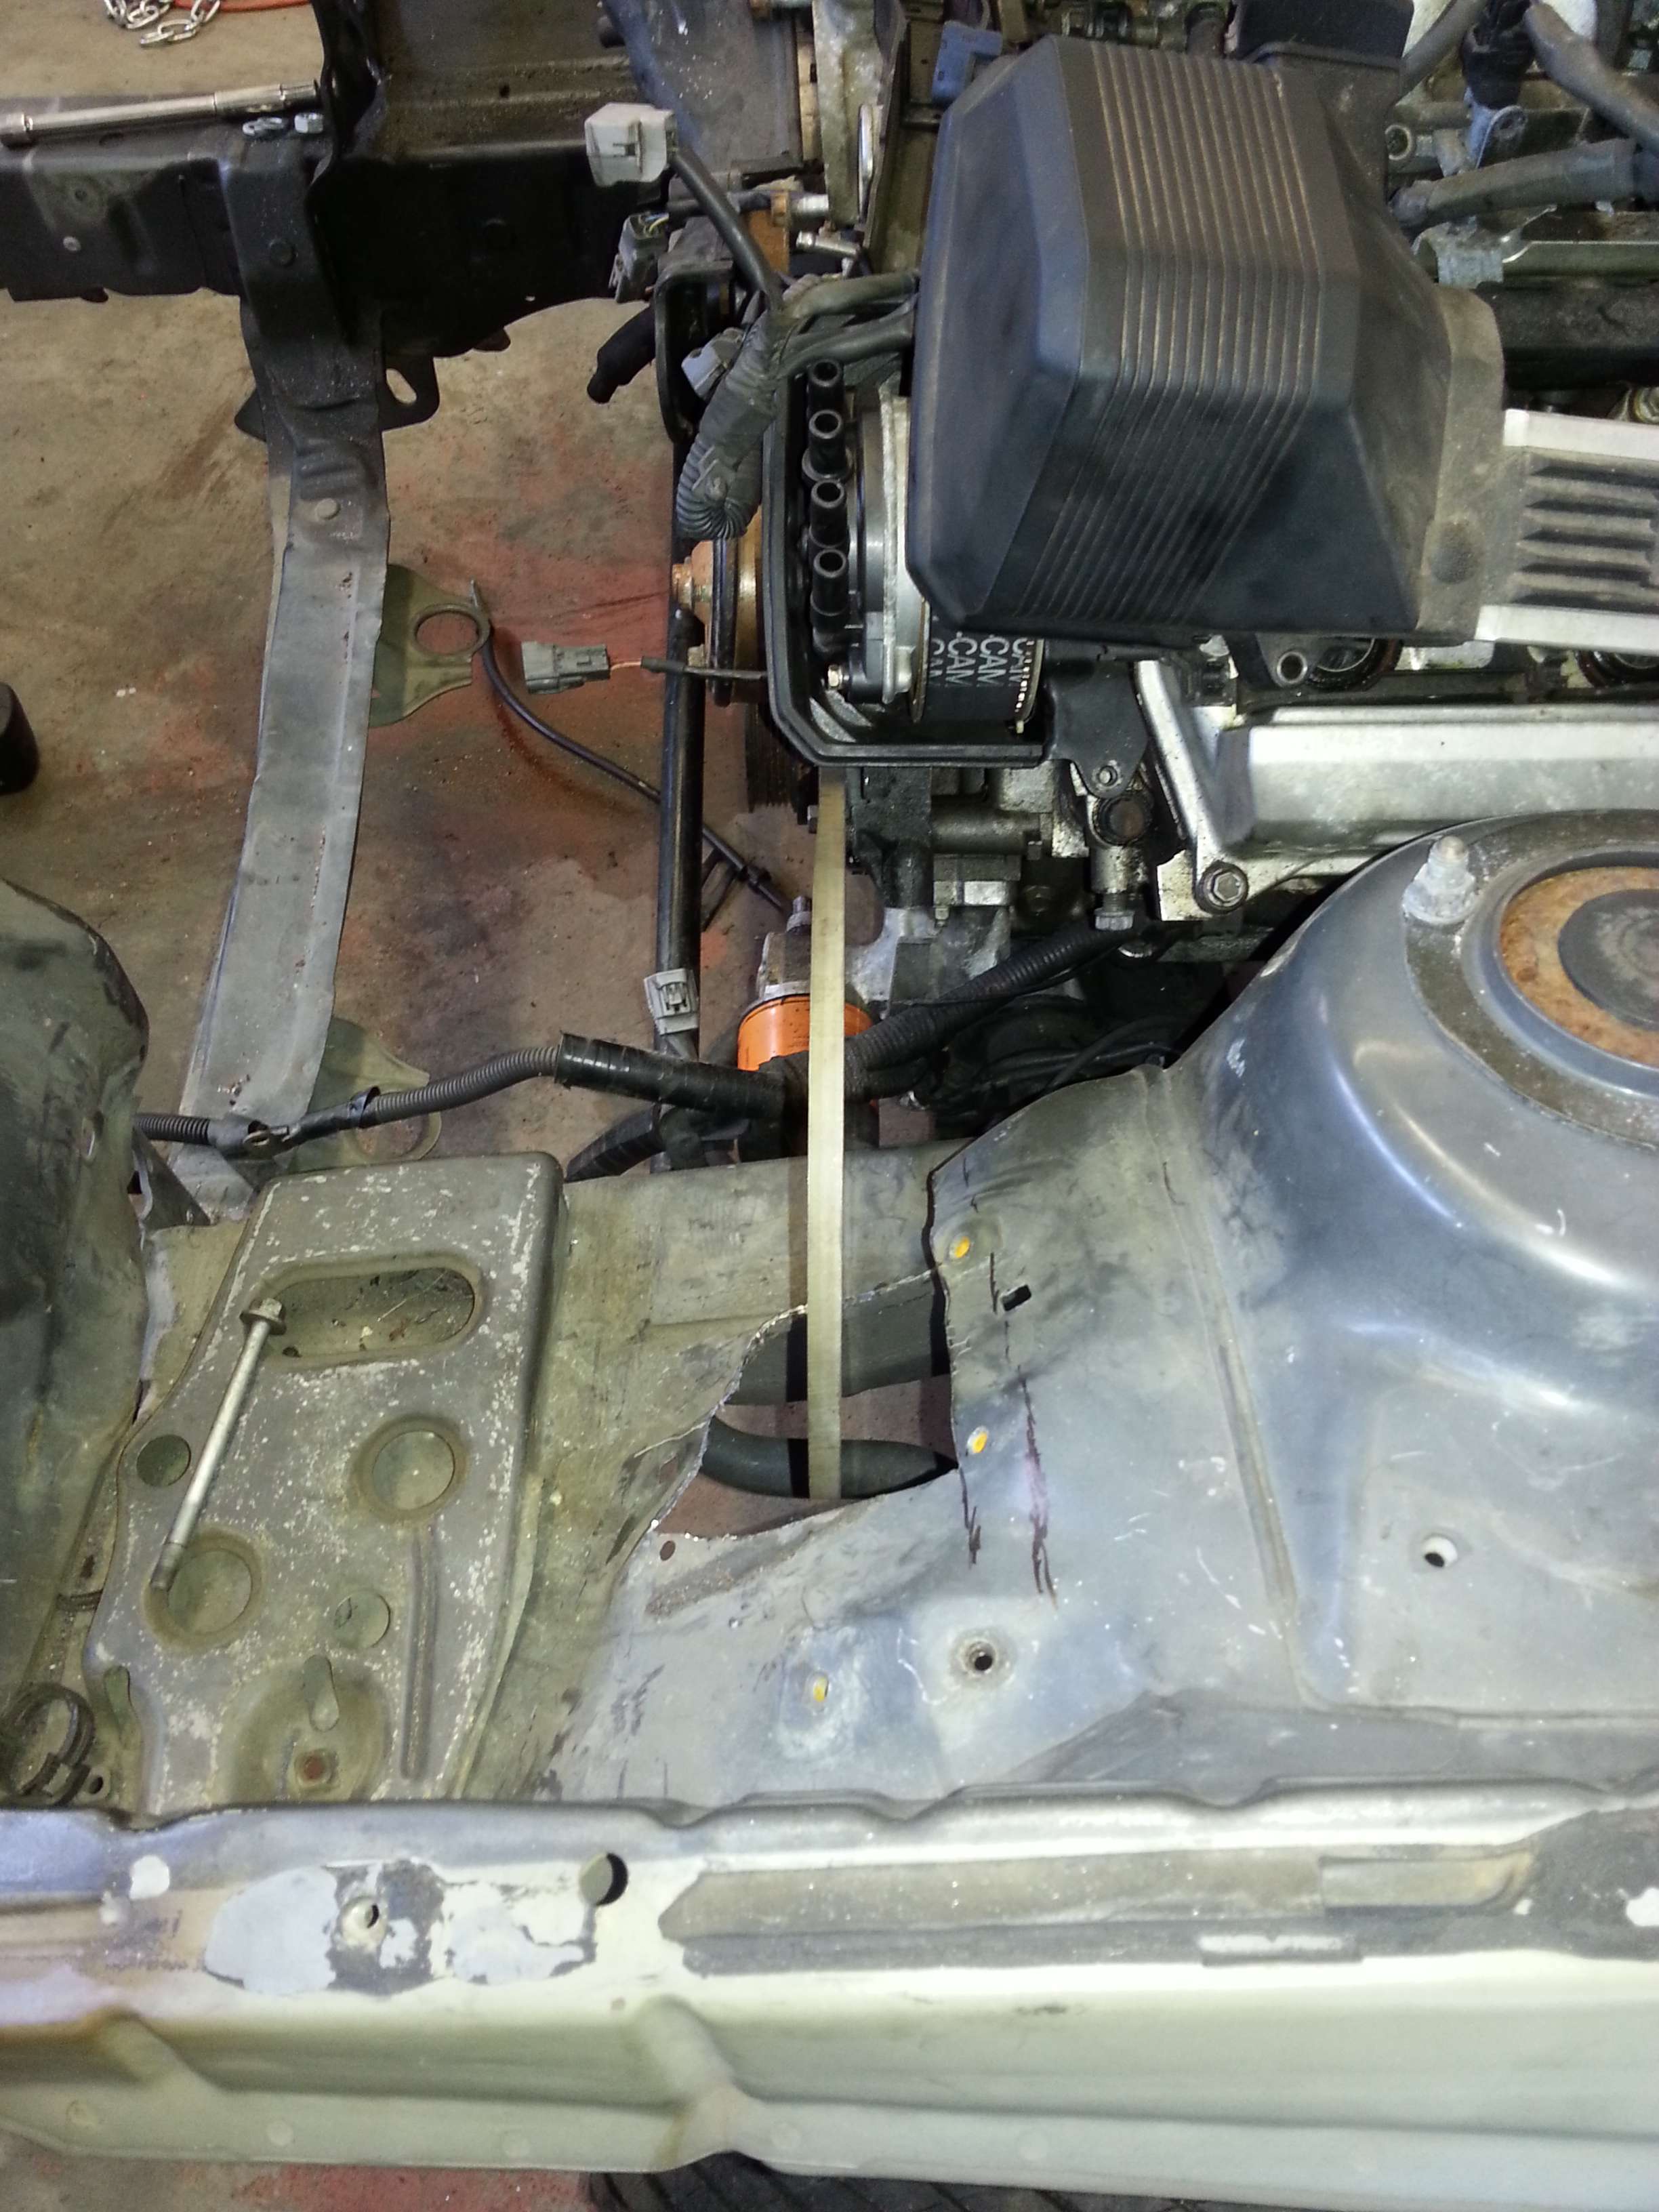
This was the car two days ago, I sat the engine in to the car using the swap mounts from 1uzswapkit.com, great quality parts! After the engine was mounted I fitted my W58 I had from my white car, that way the engine sits in the car at the correct angle.

aalx.jpg


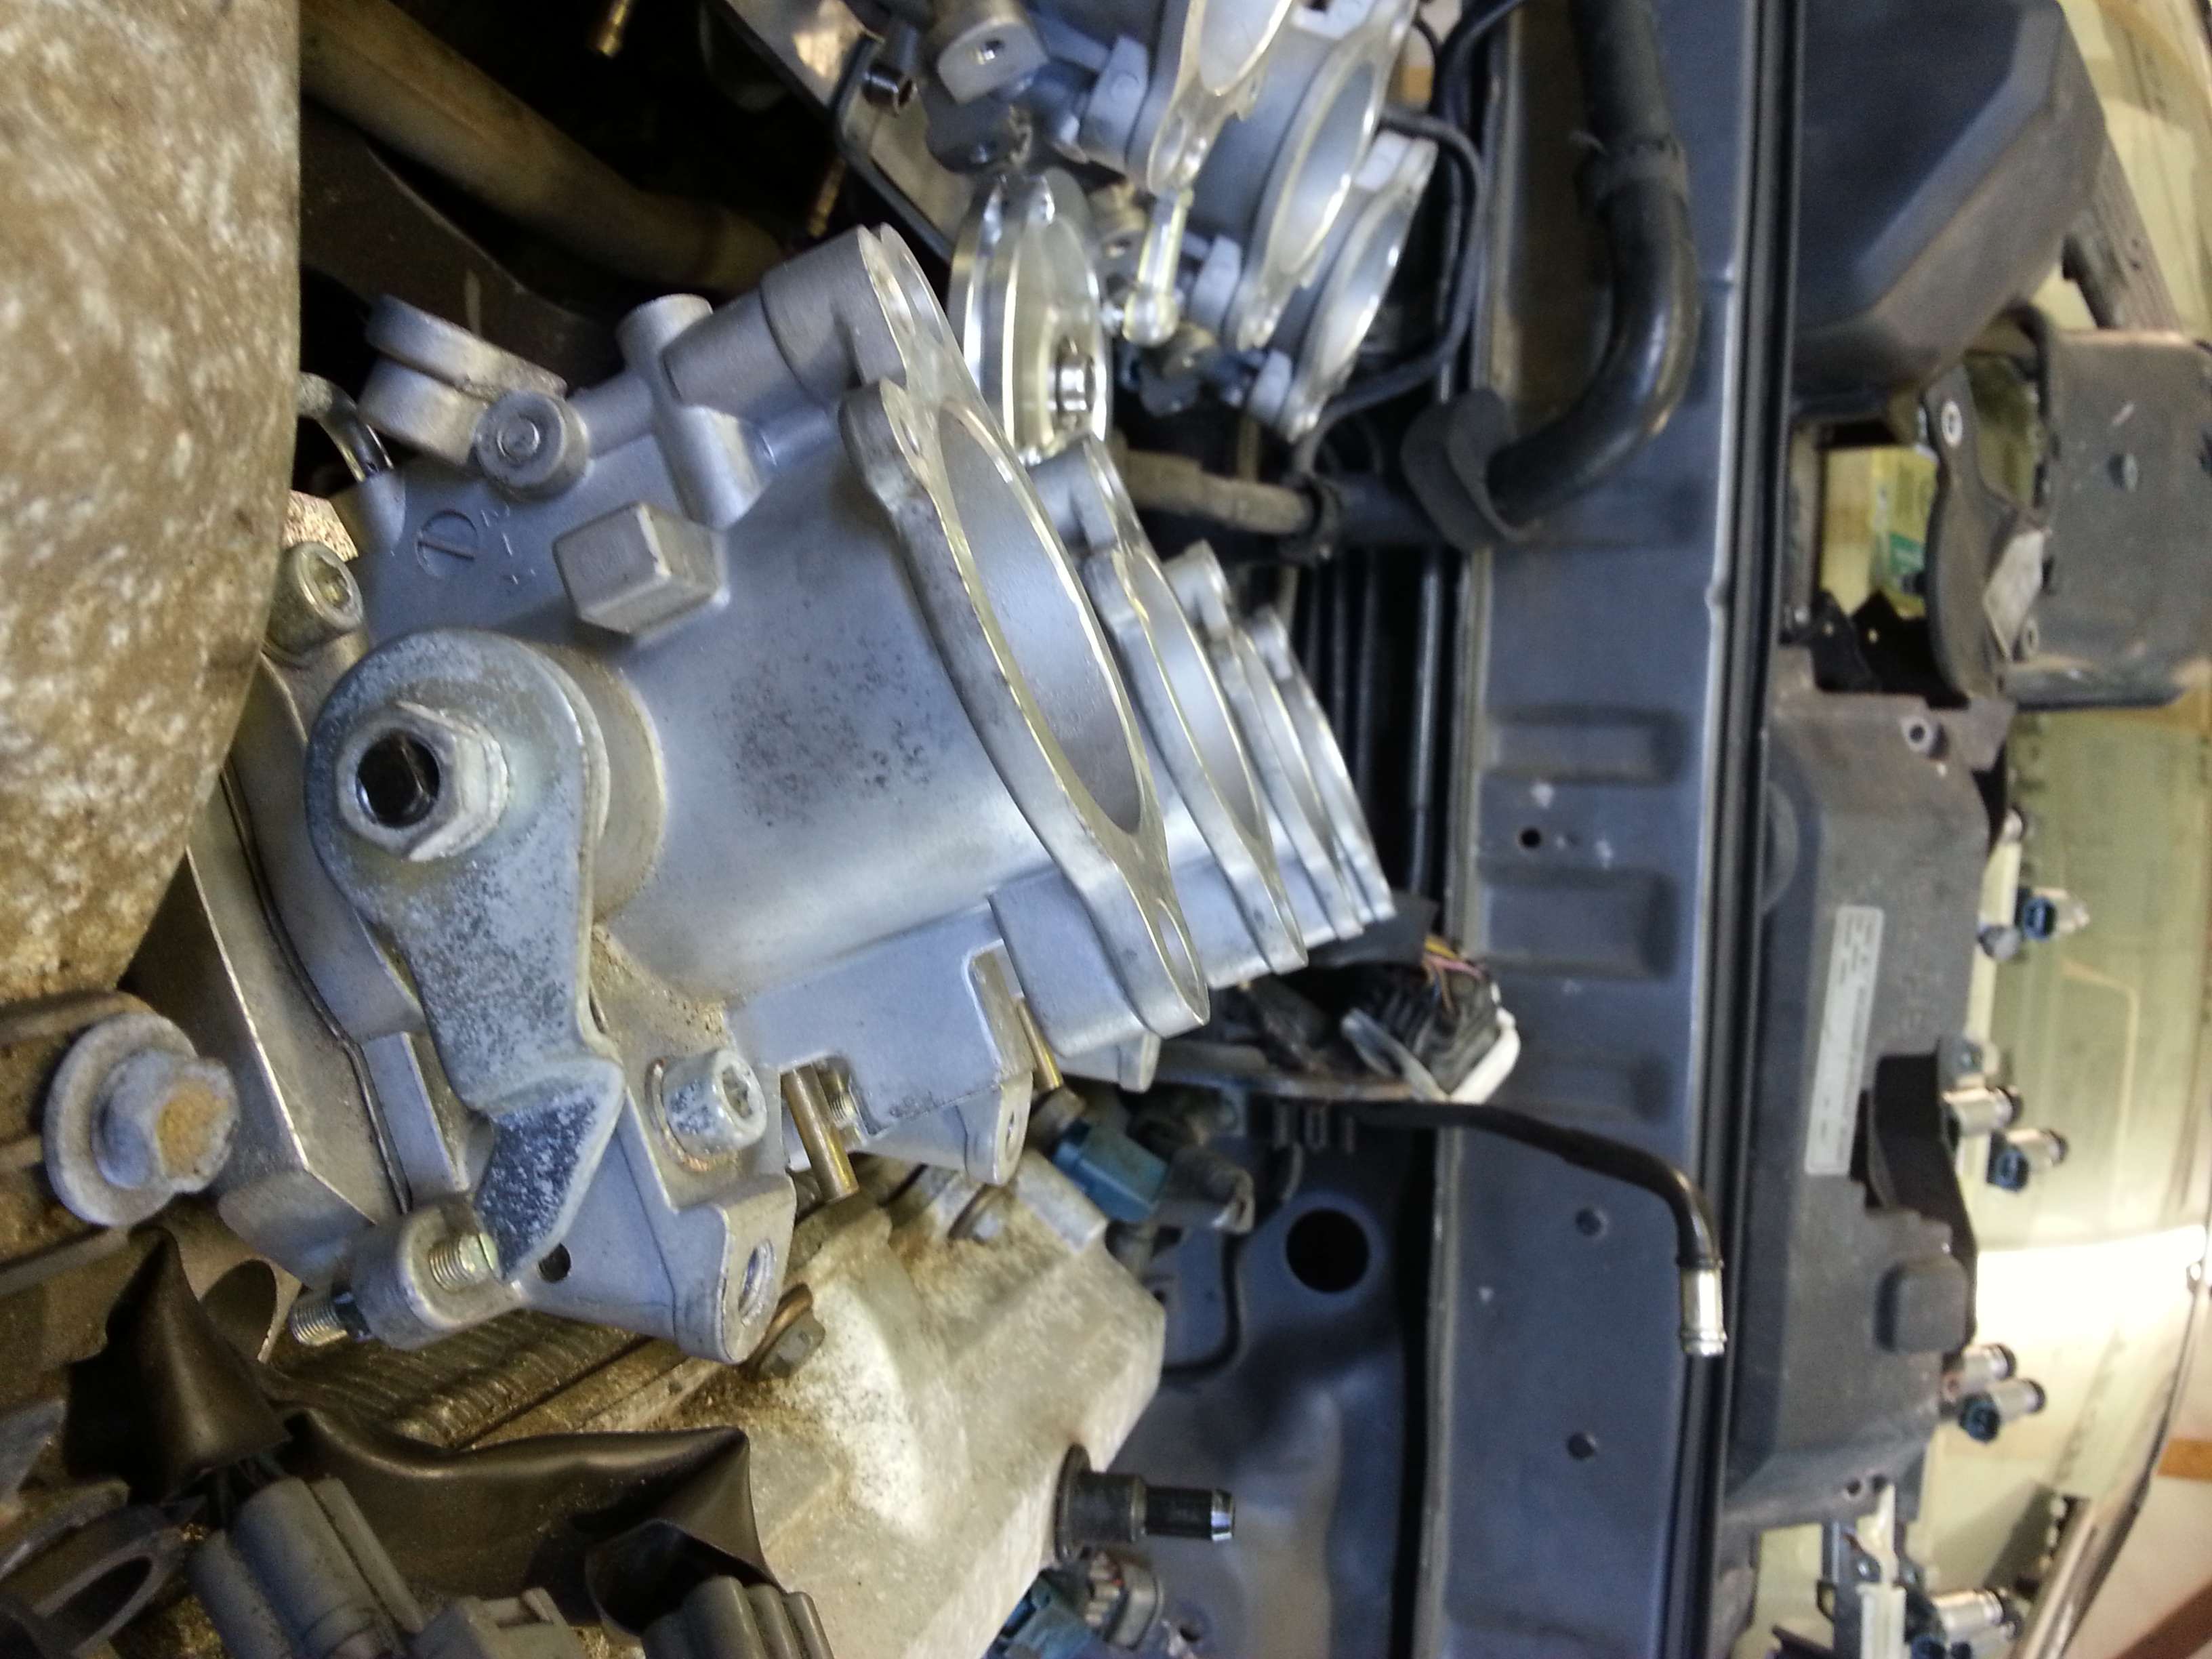
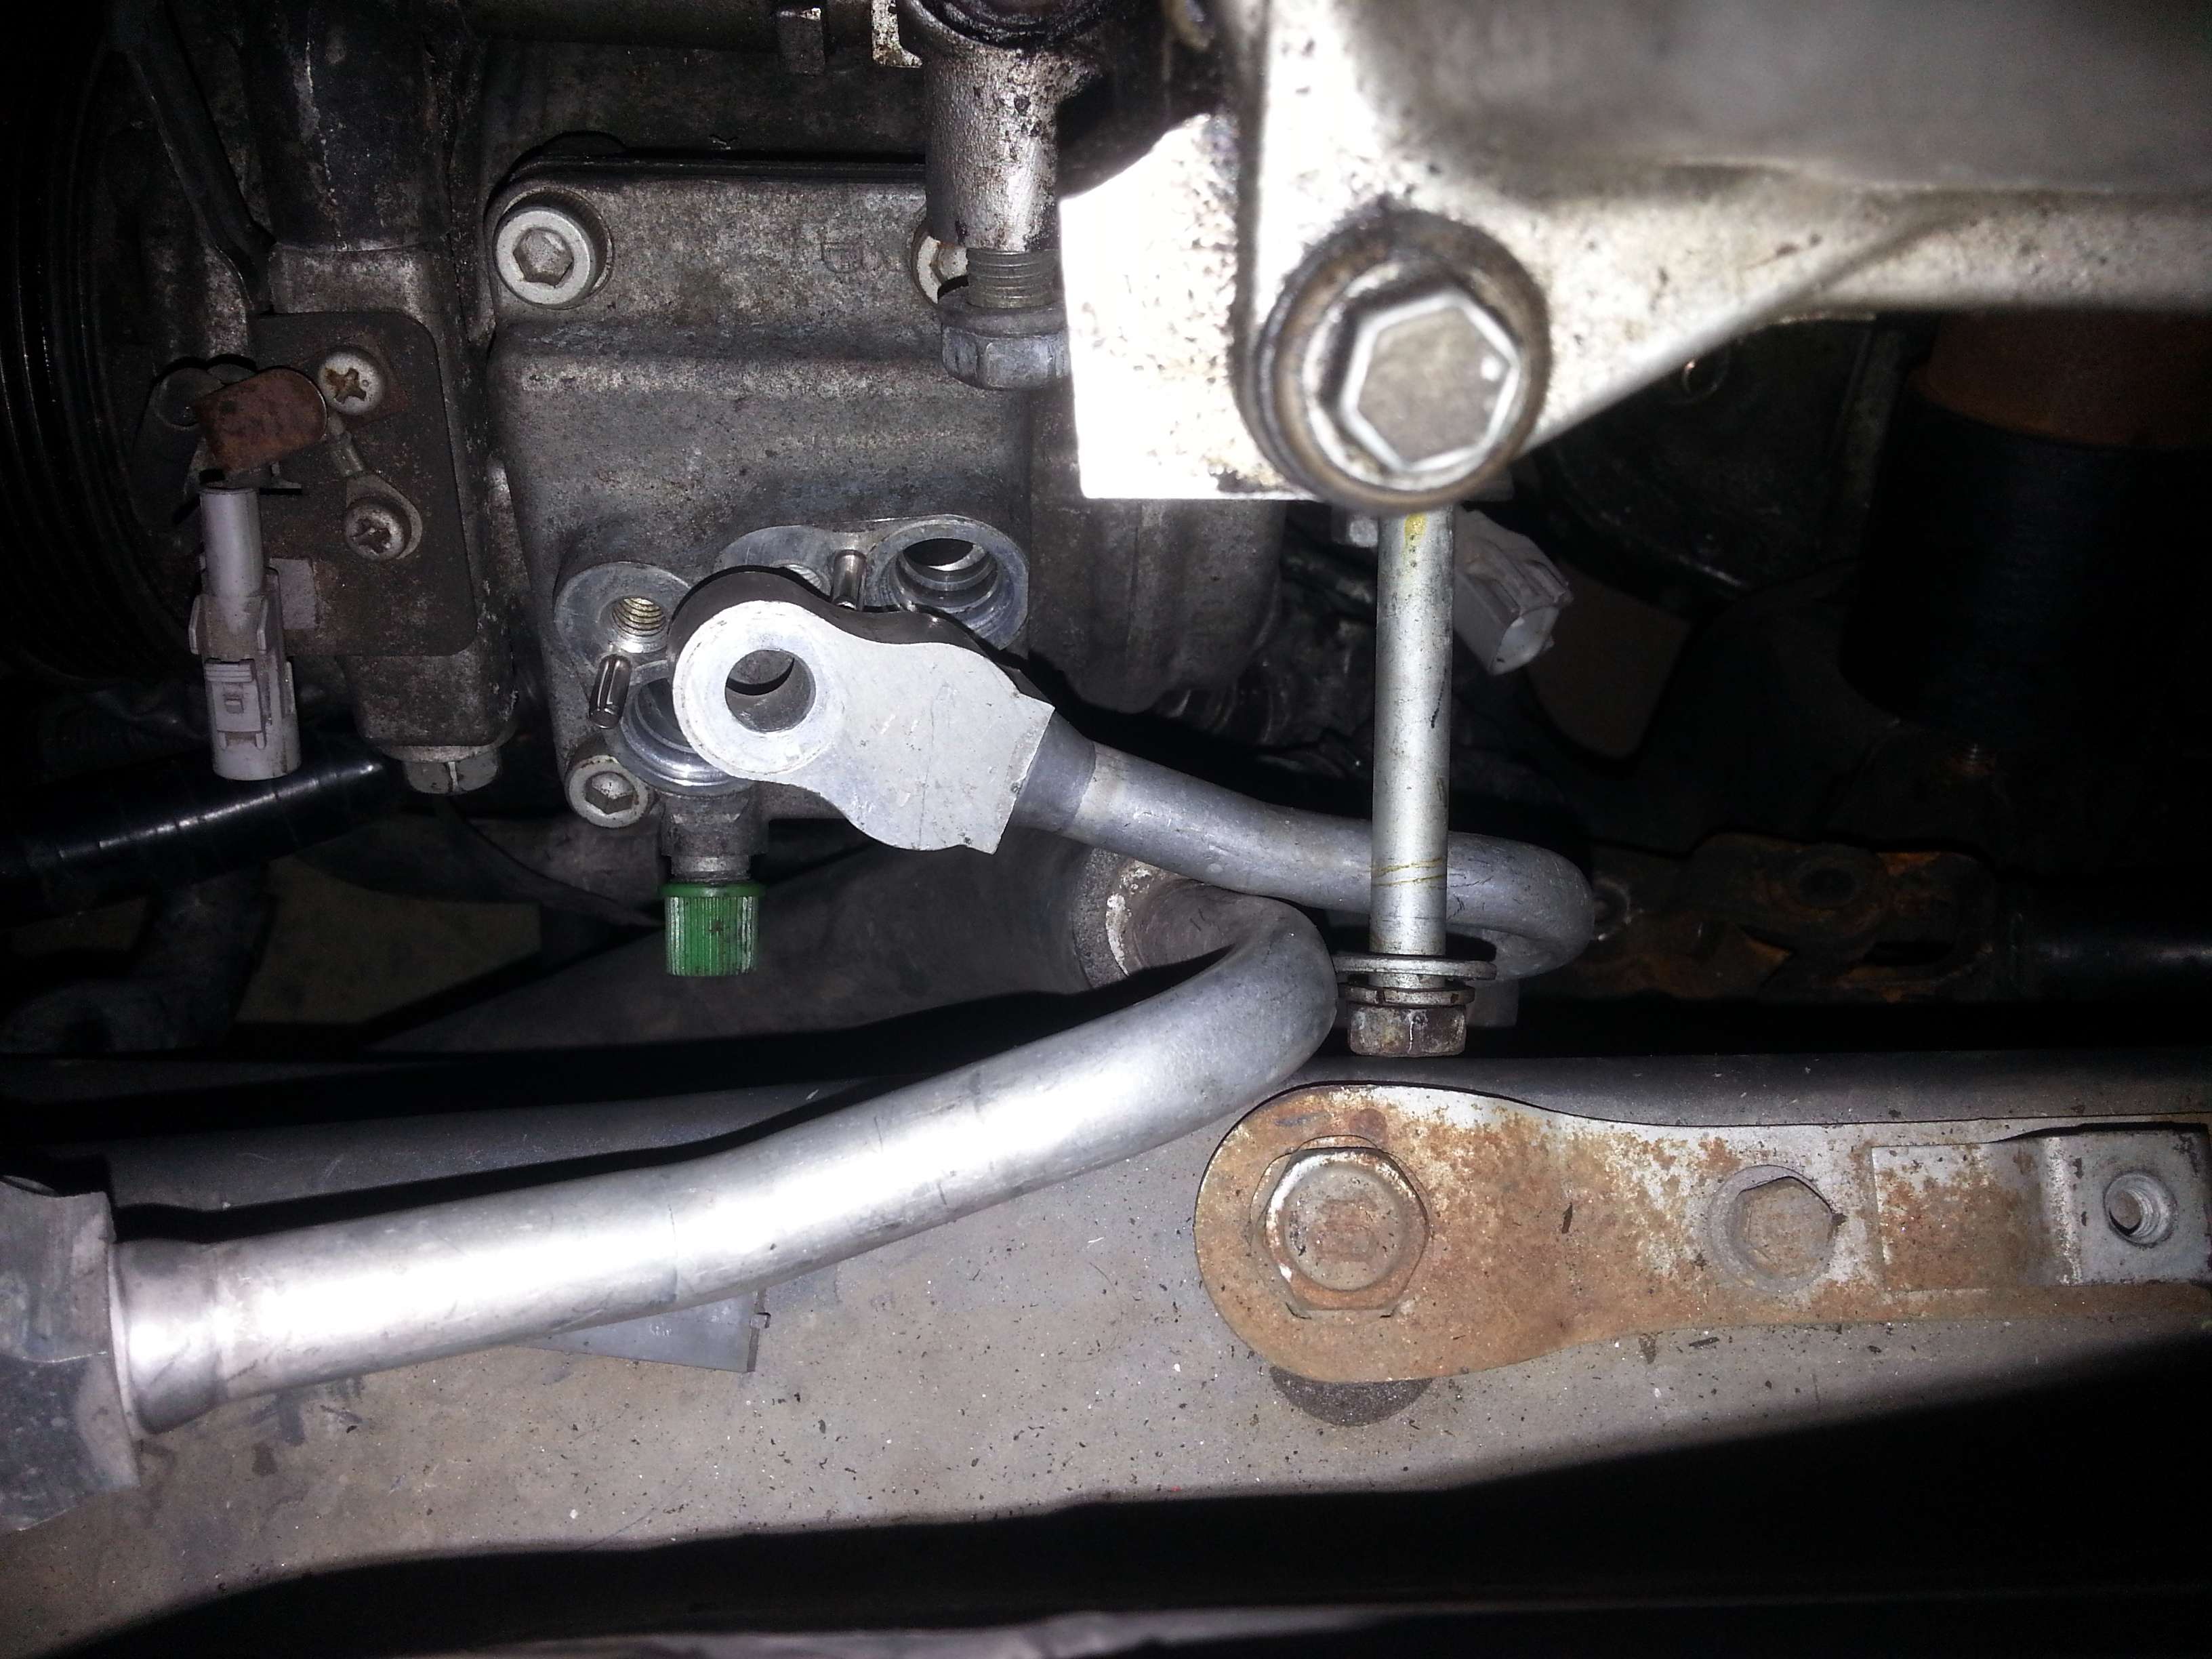
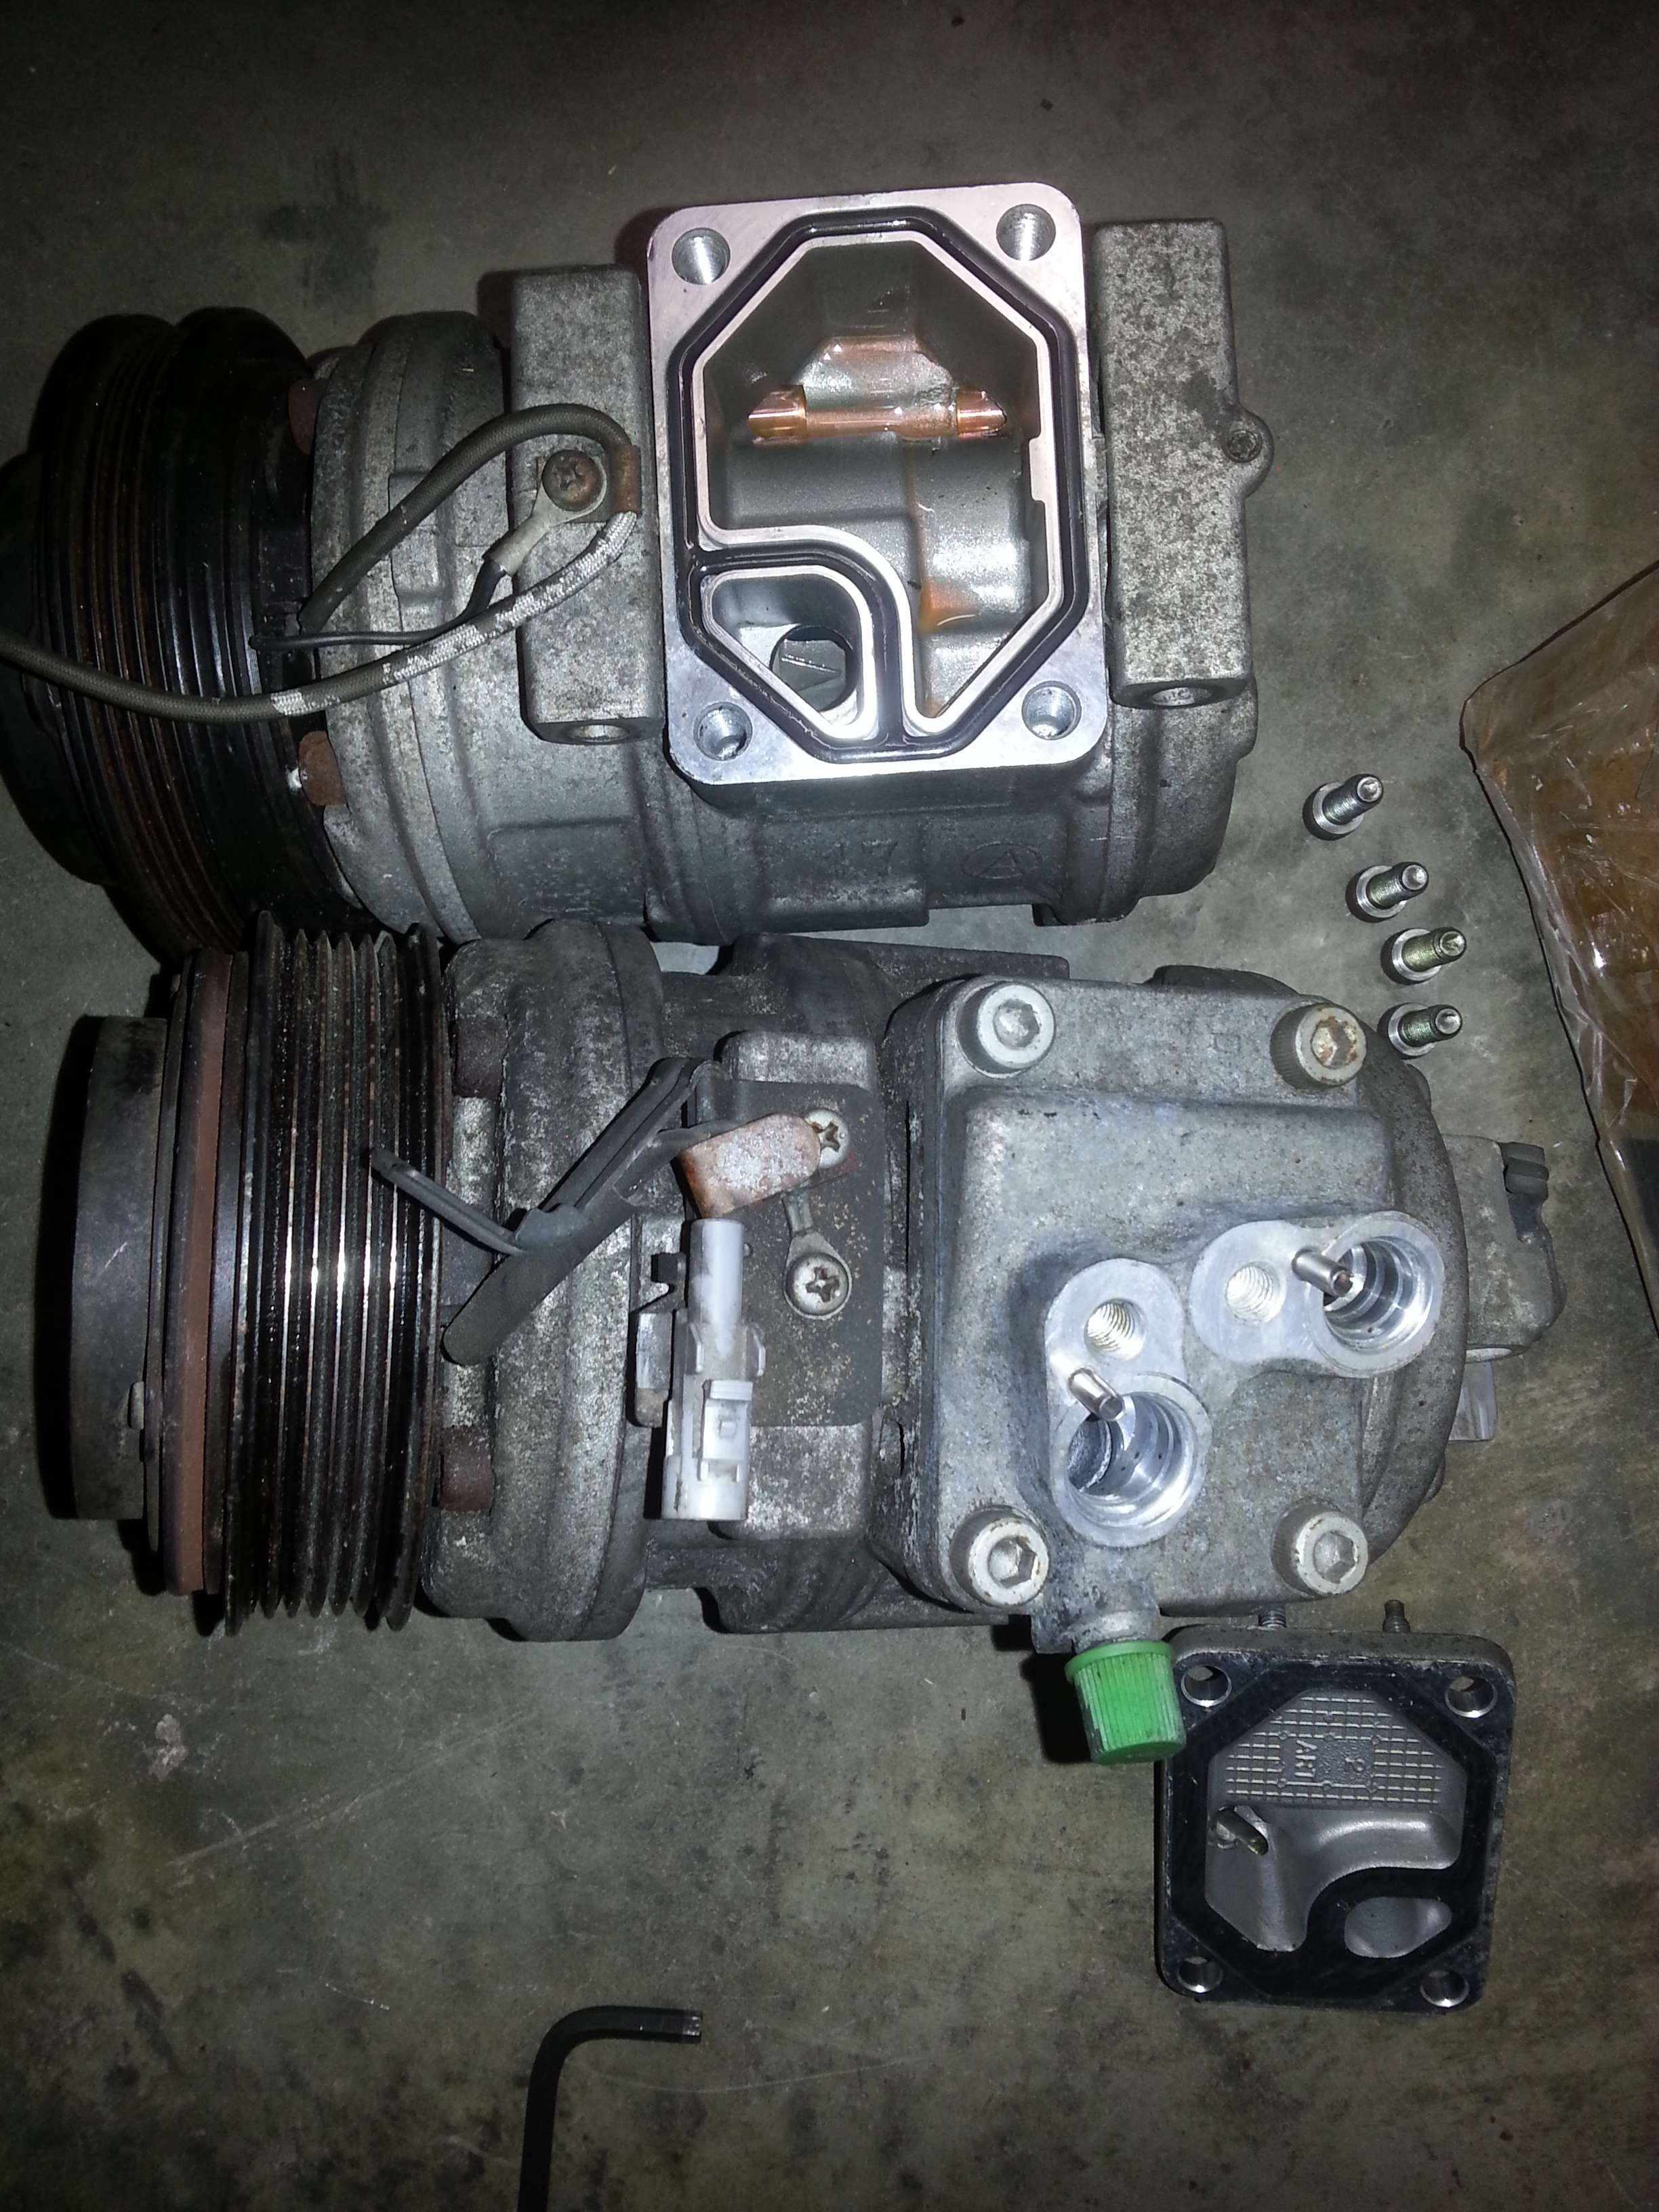
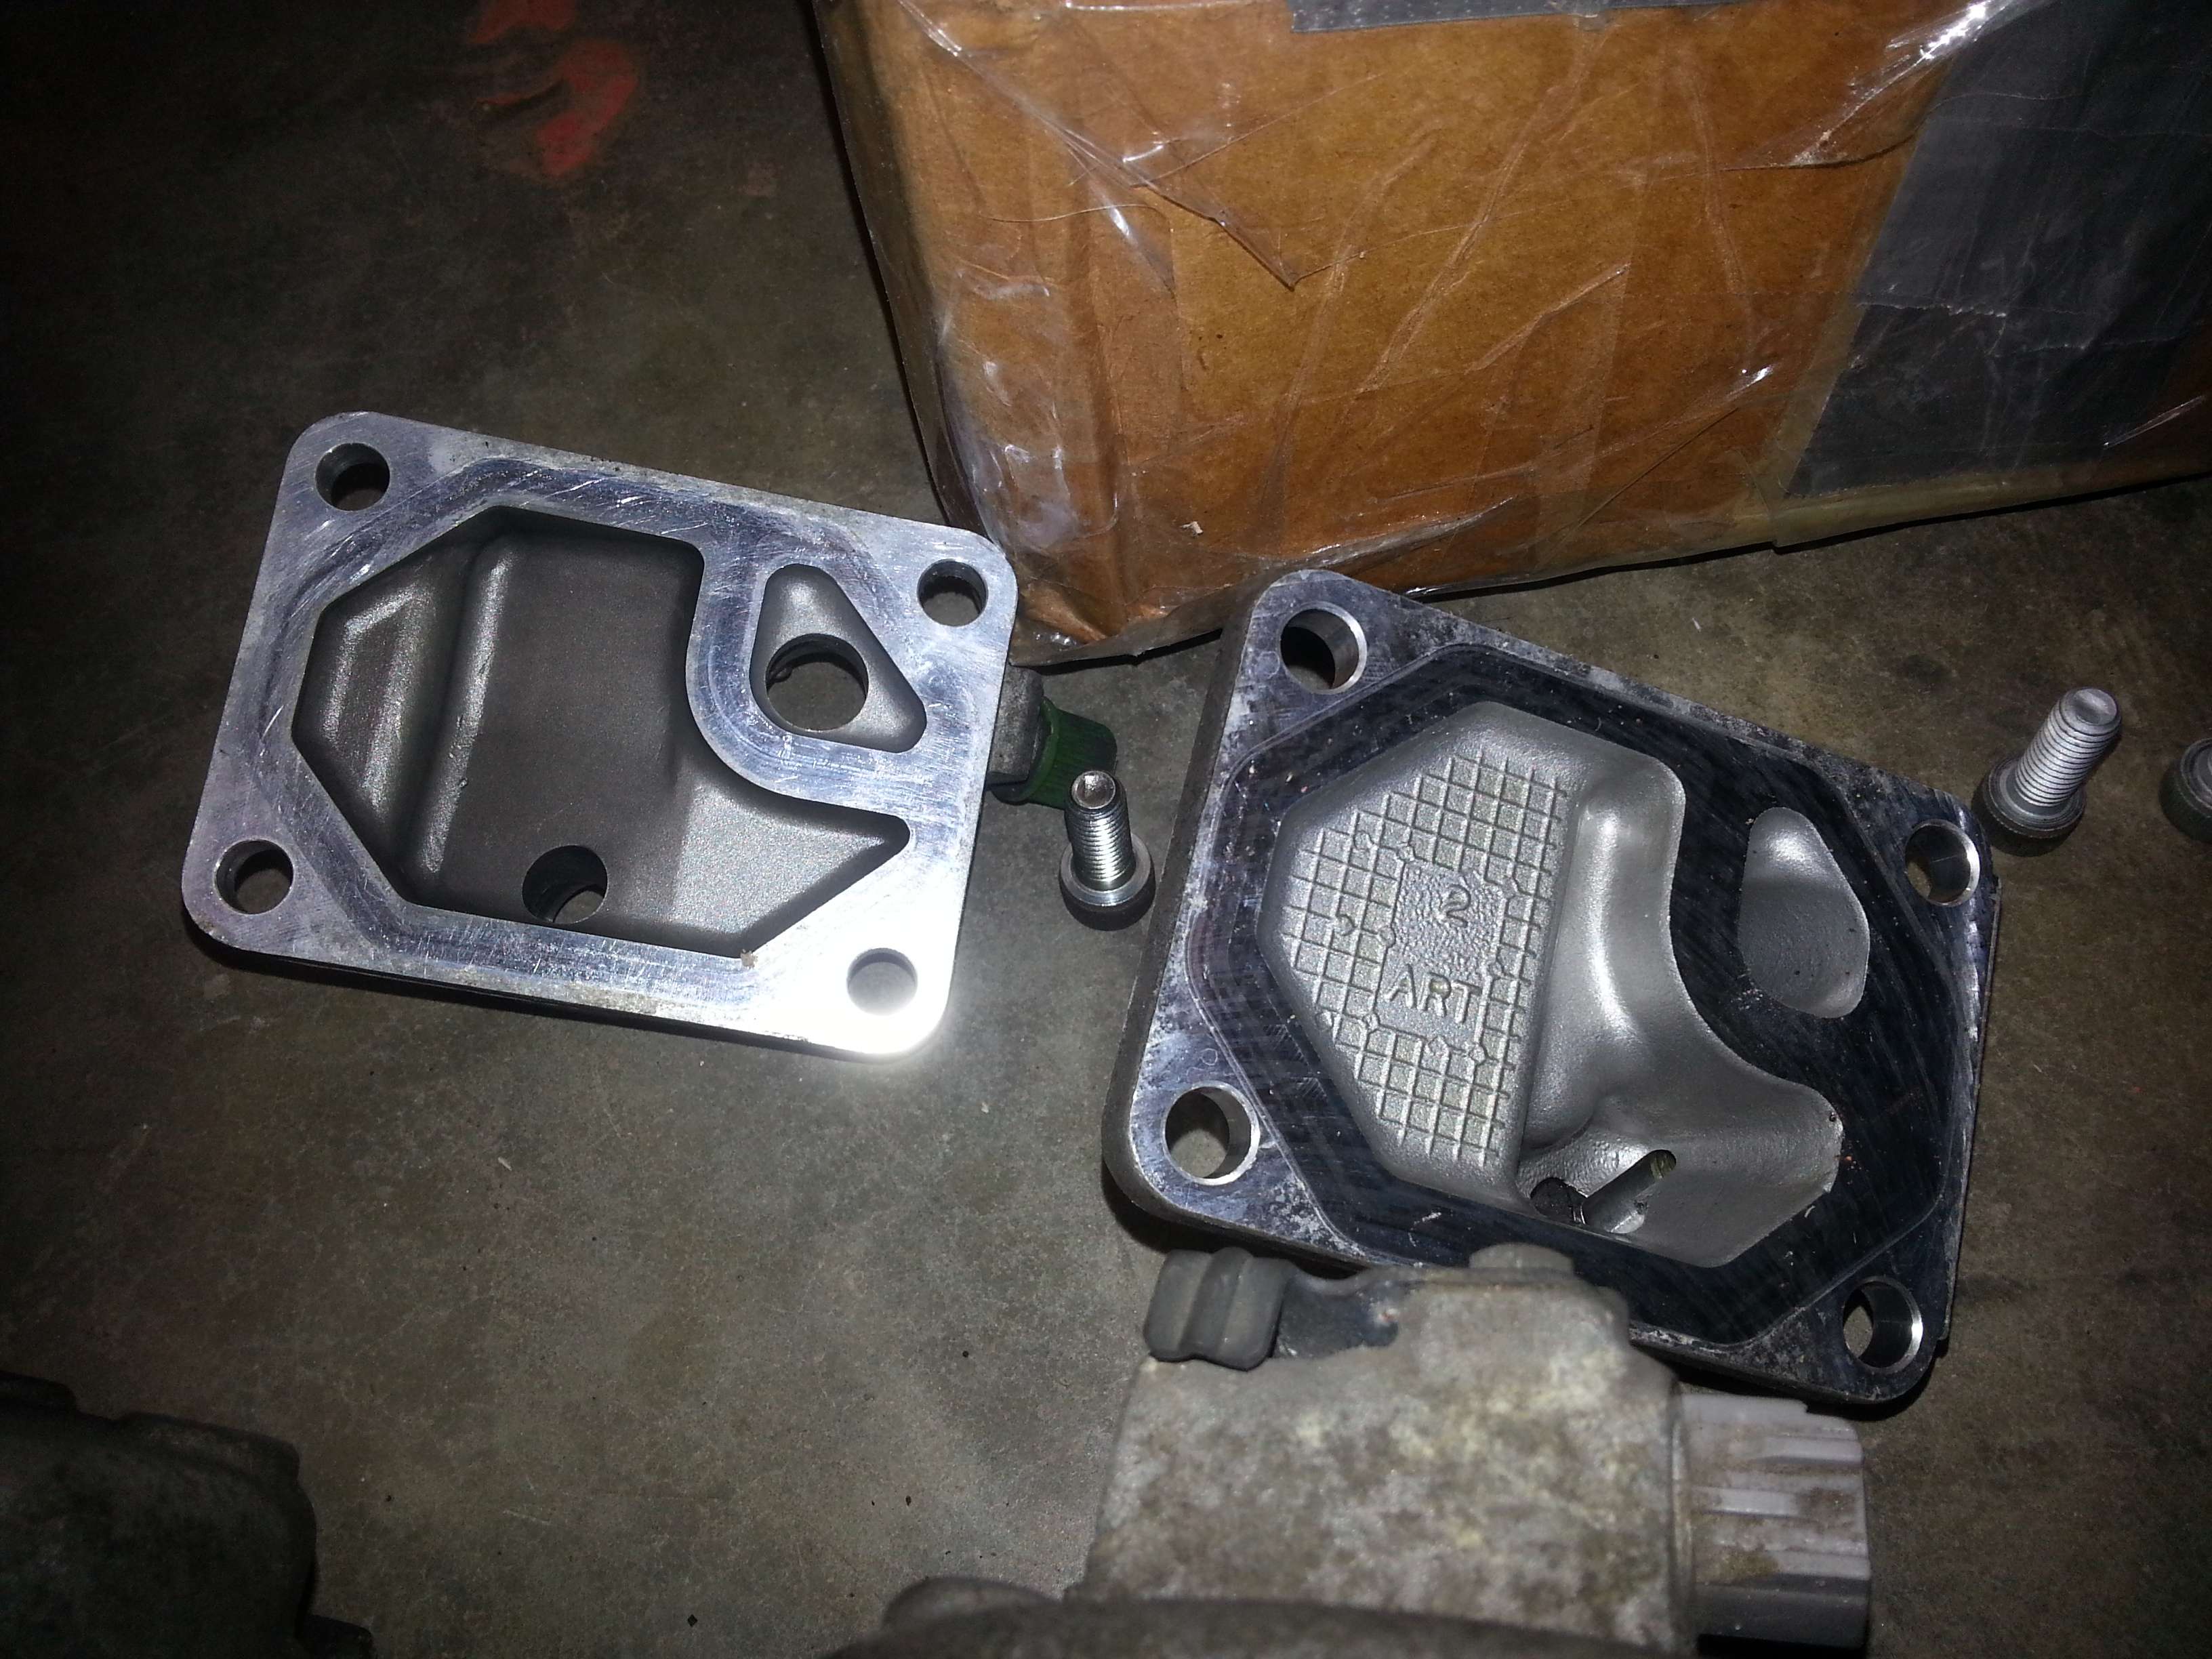
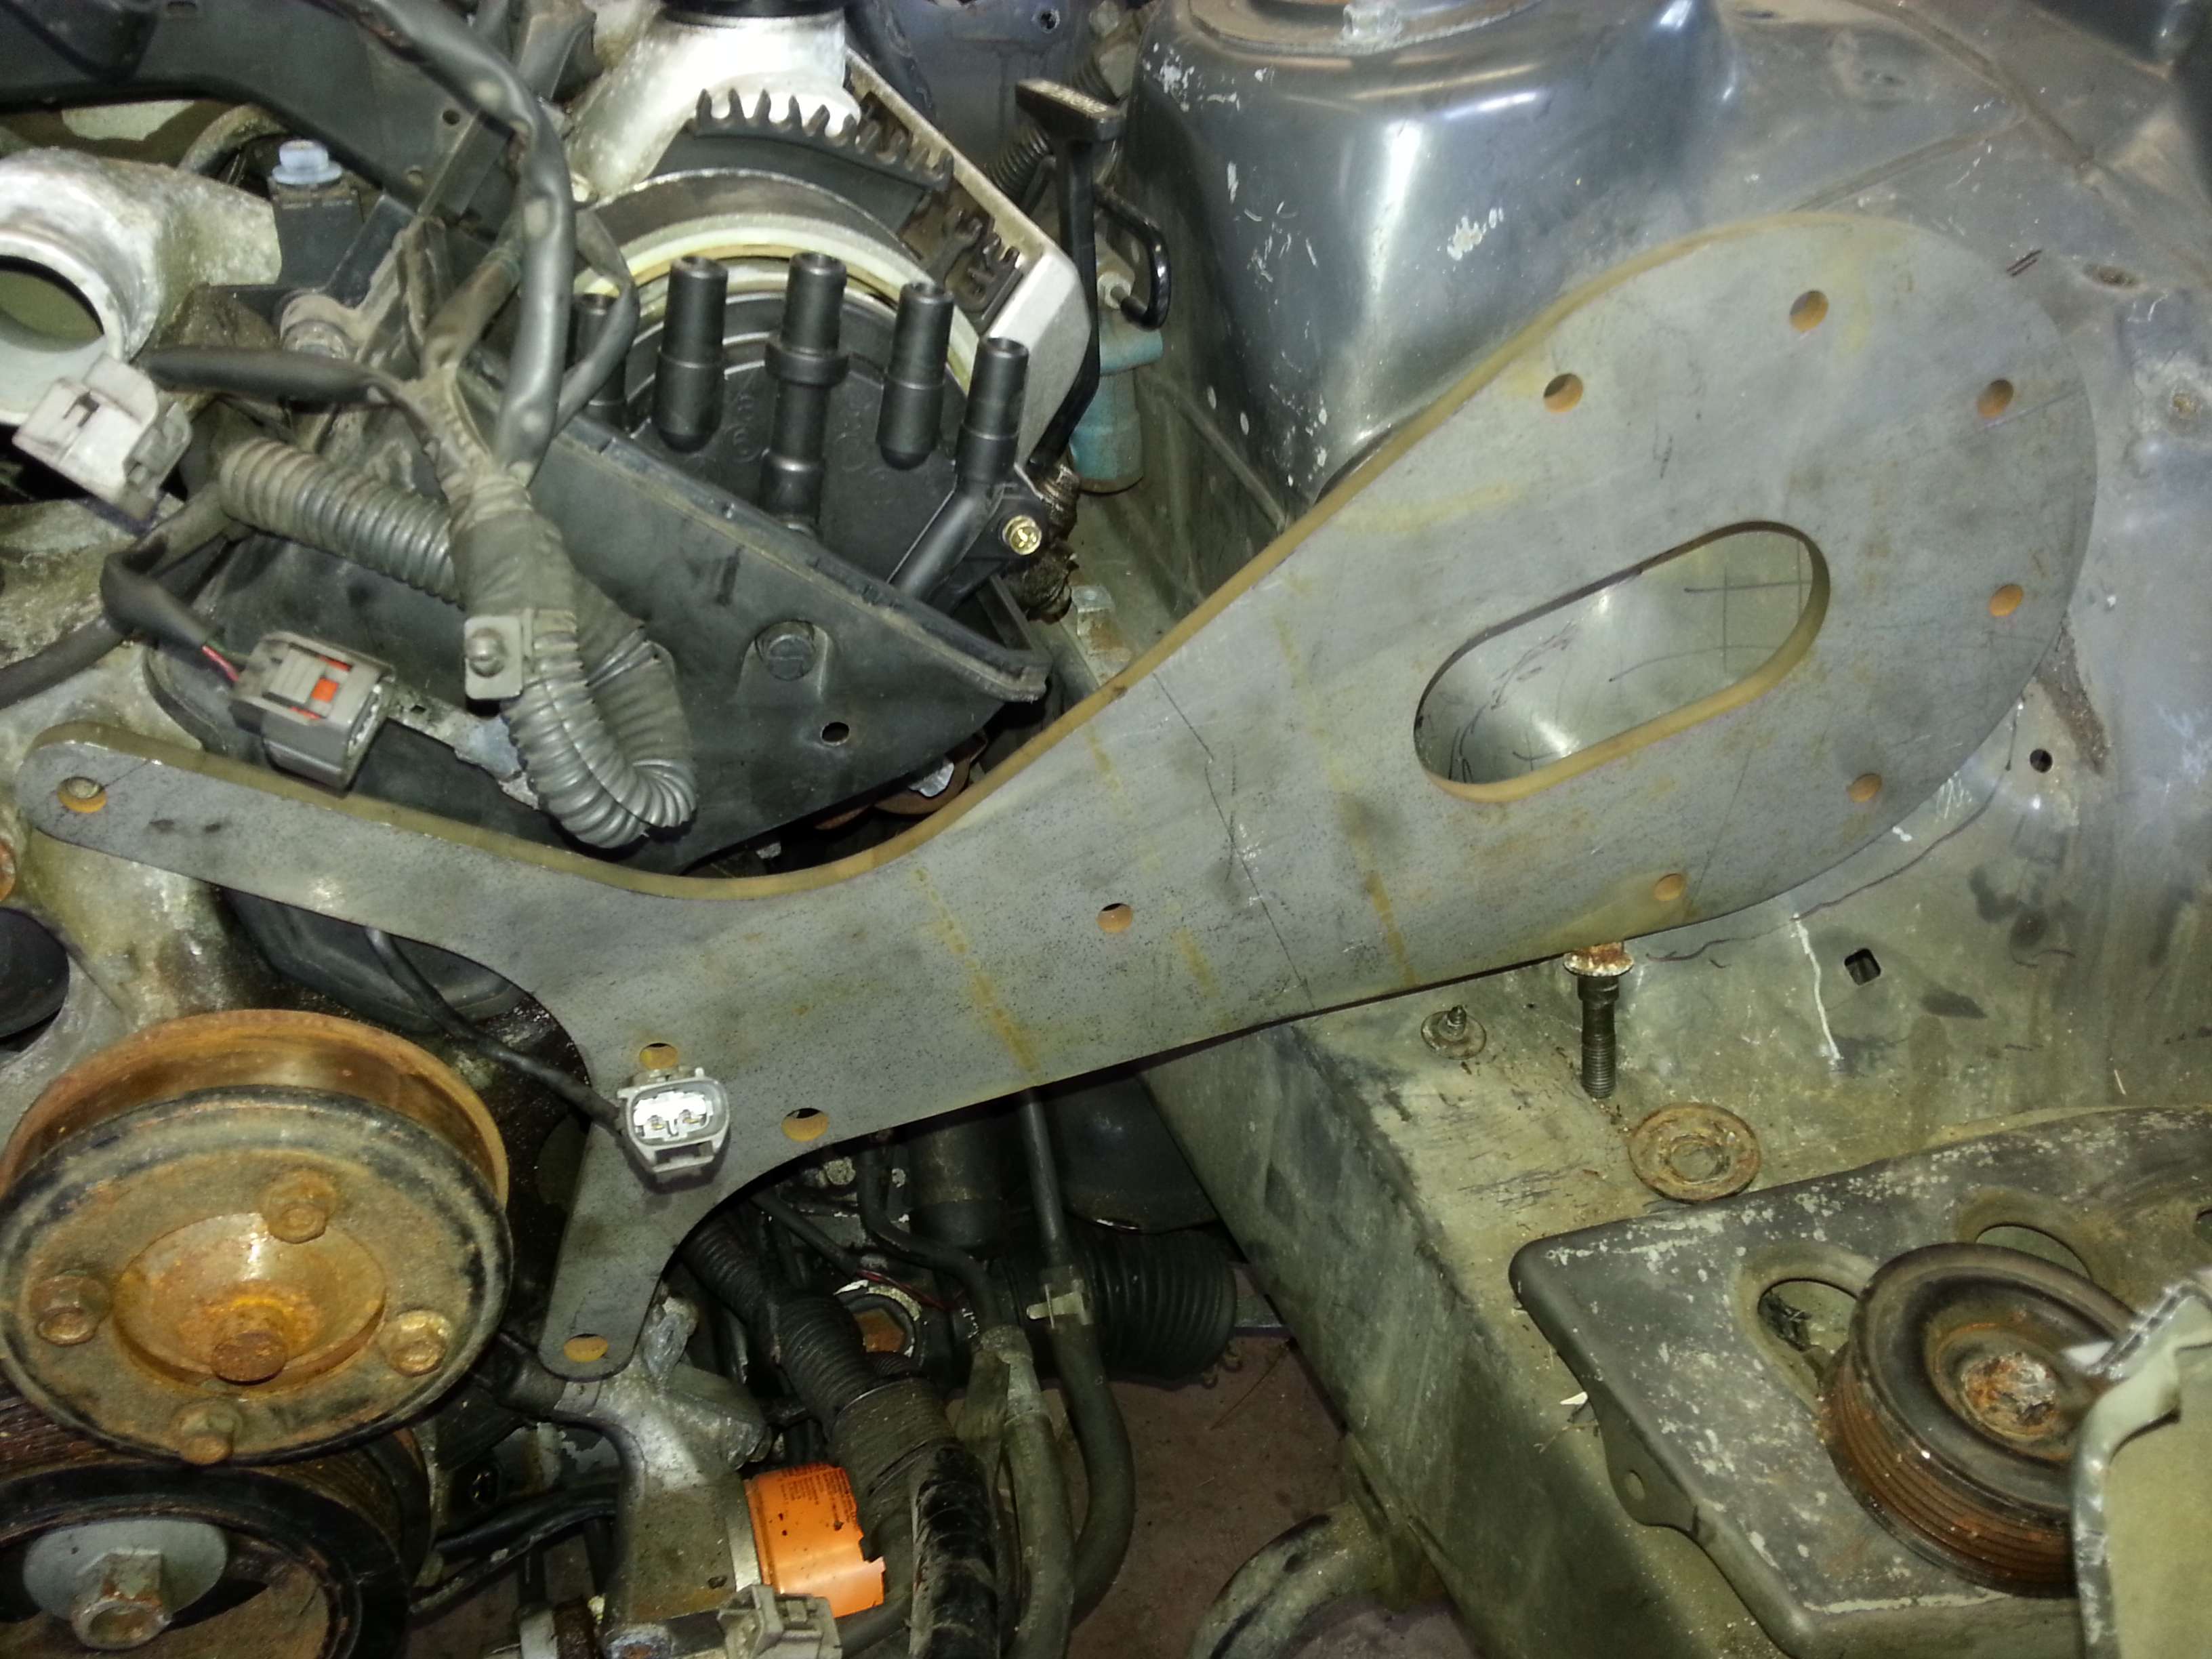
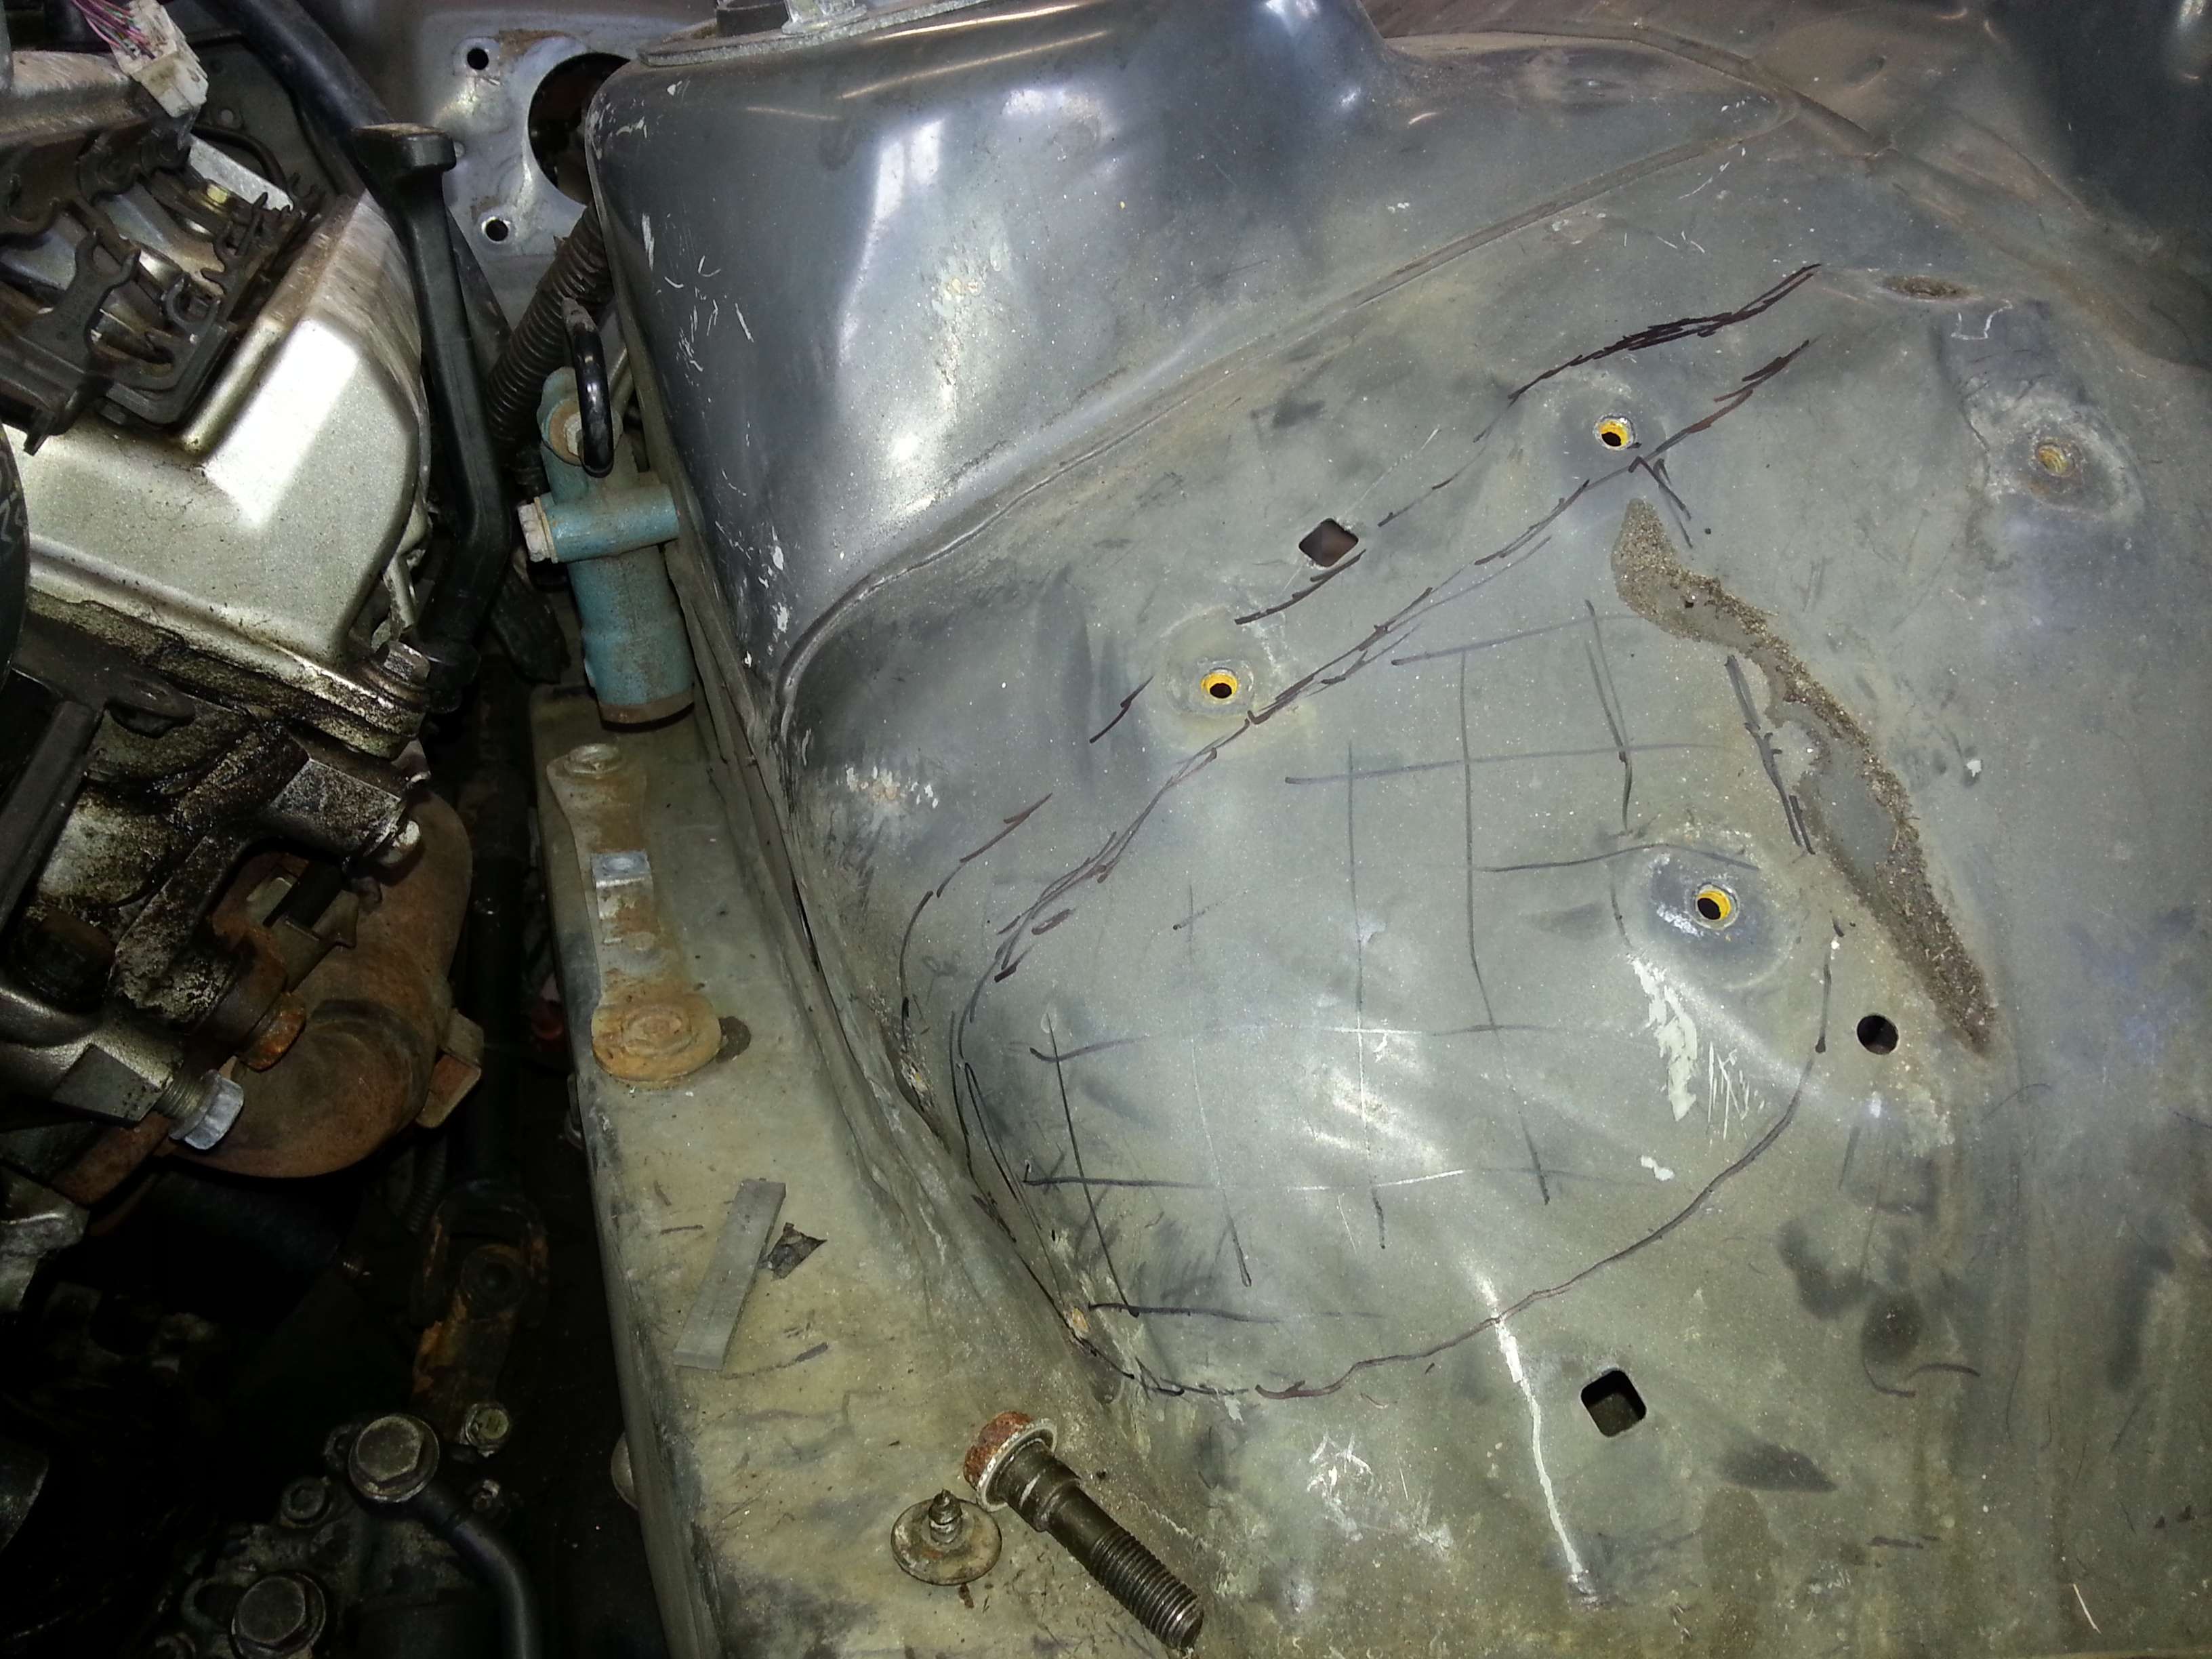
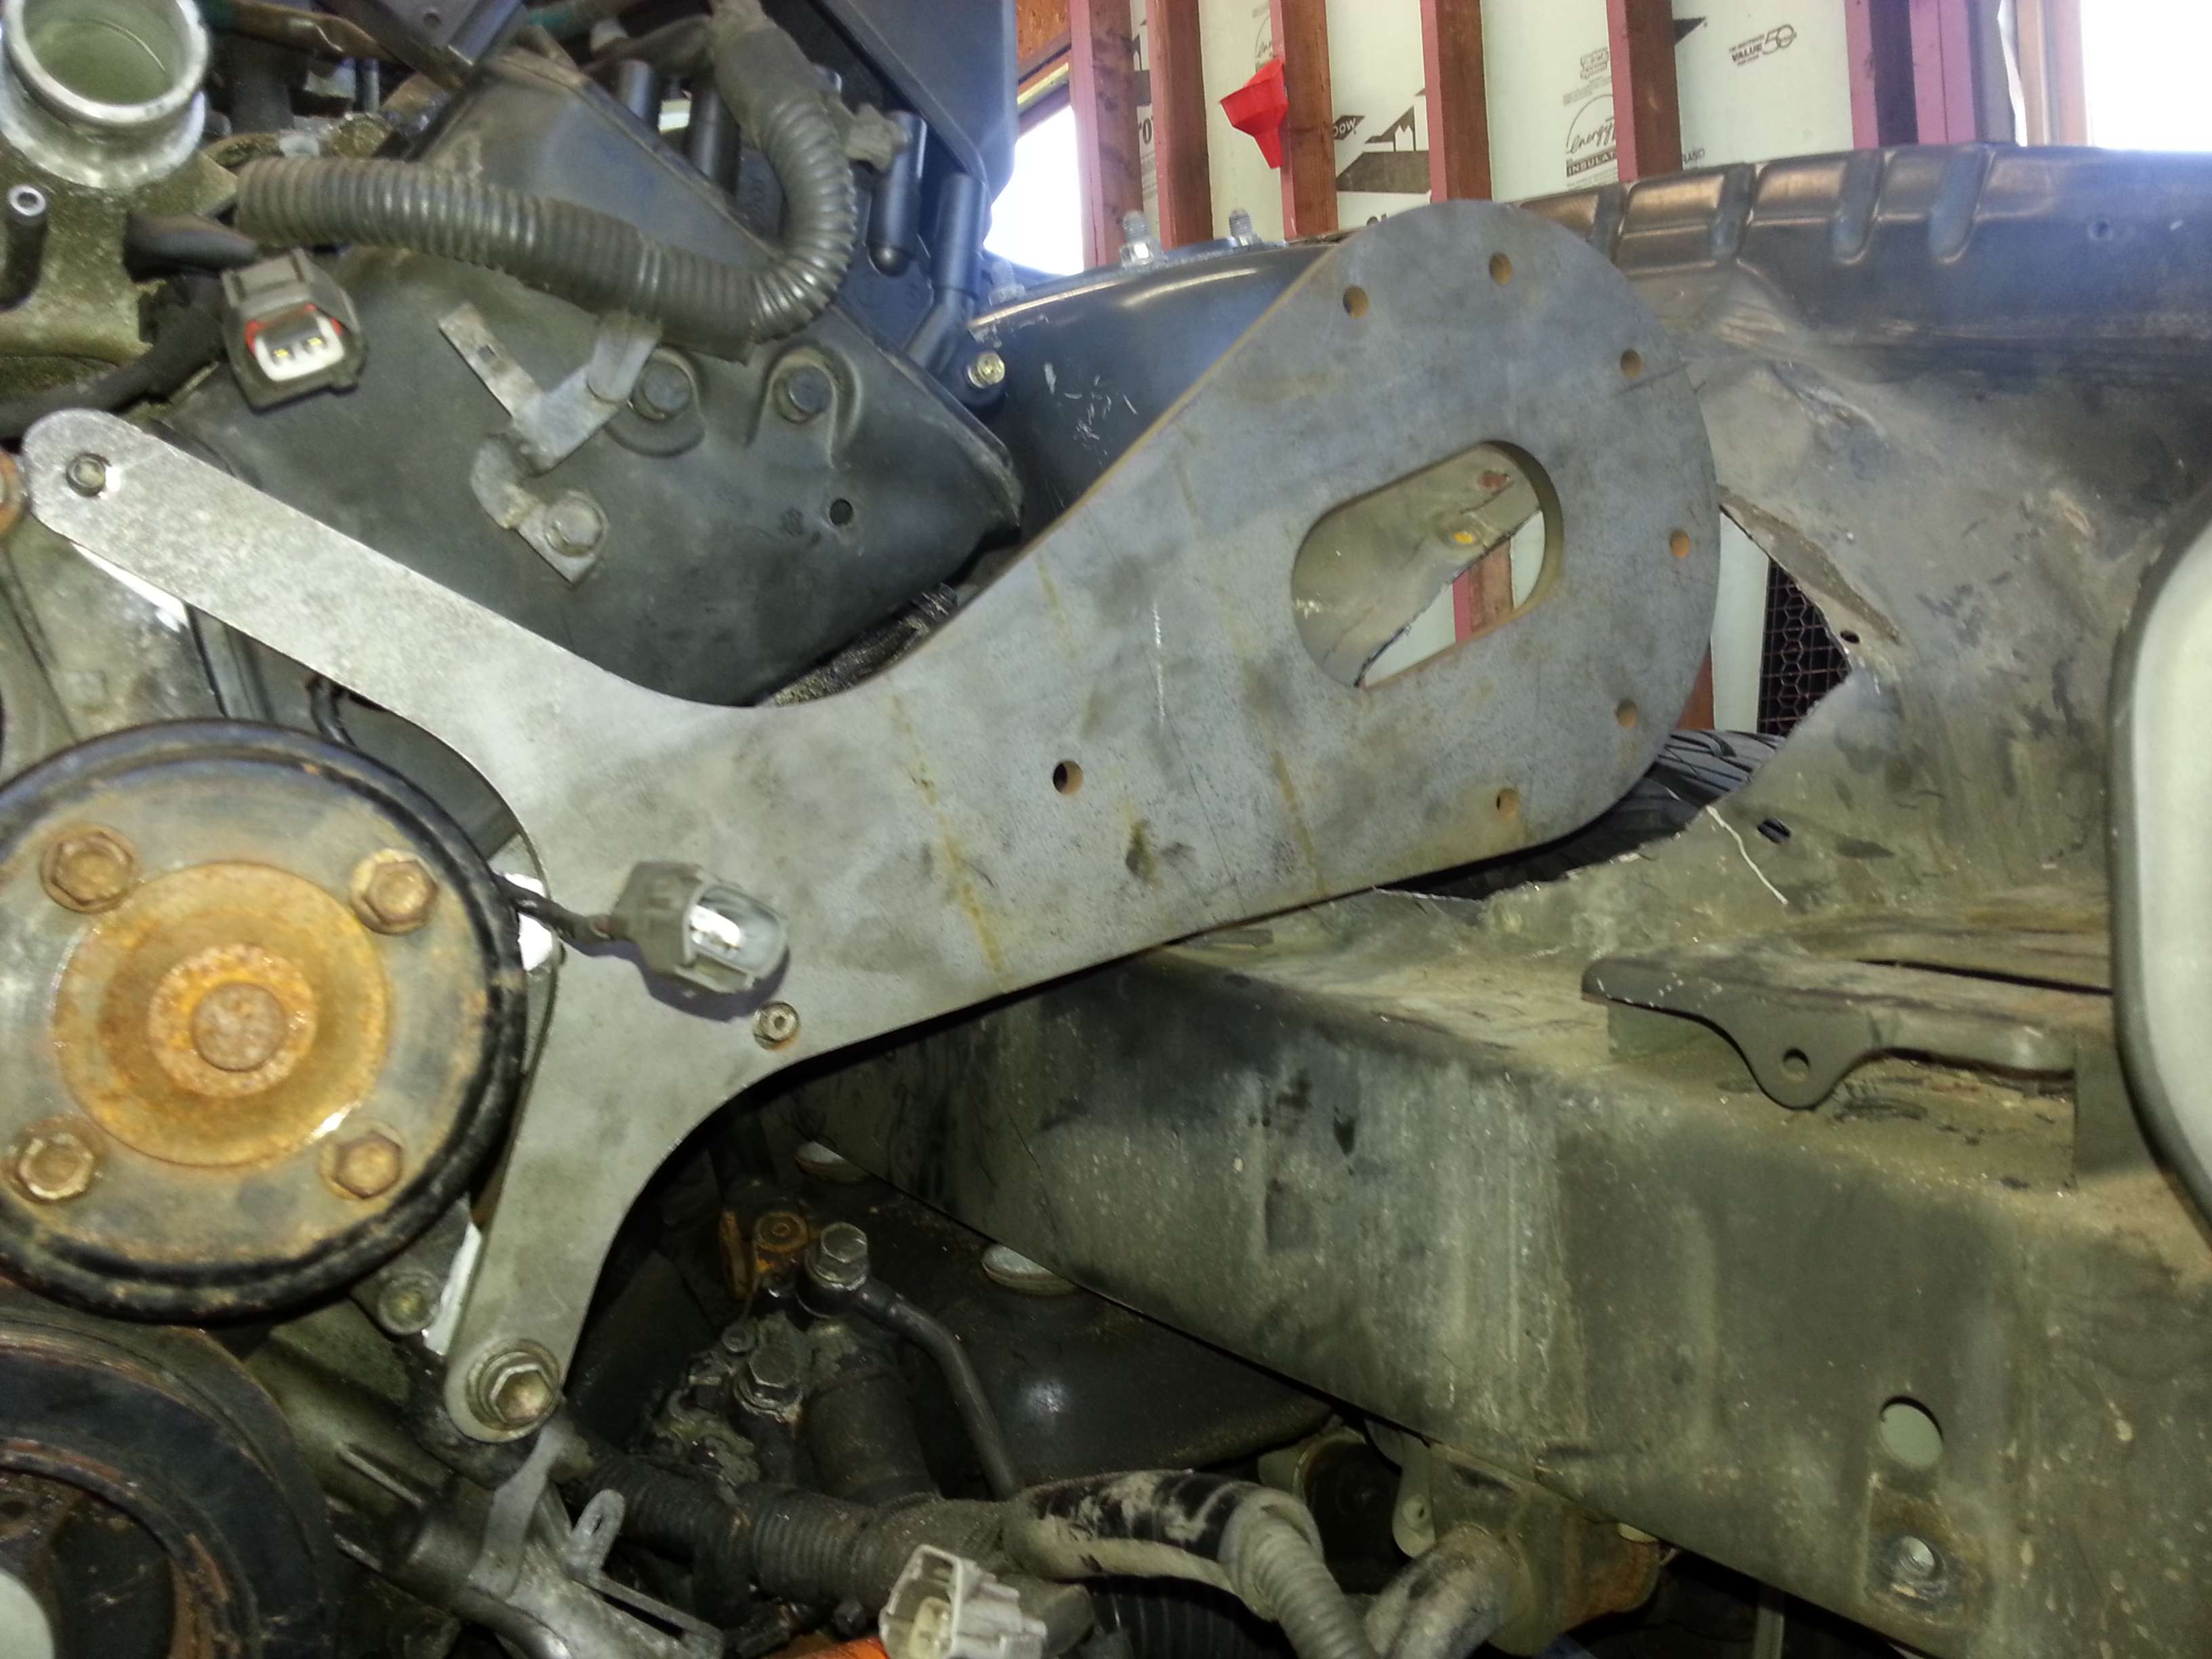
"The fish" bracket was meant for the LS/SC400. They have more room in the engine bay so the unit fits, but with the MA70 chassis, it does not. To make it fit, the hatched area needed to be cut out.

otz9.jpg


j50s.jpg


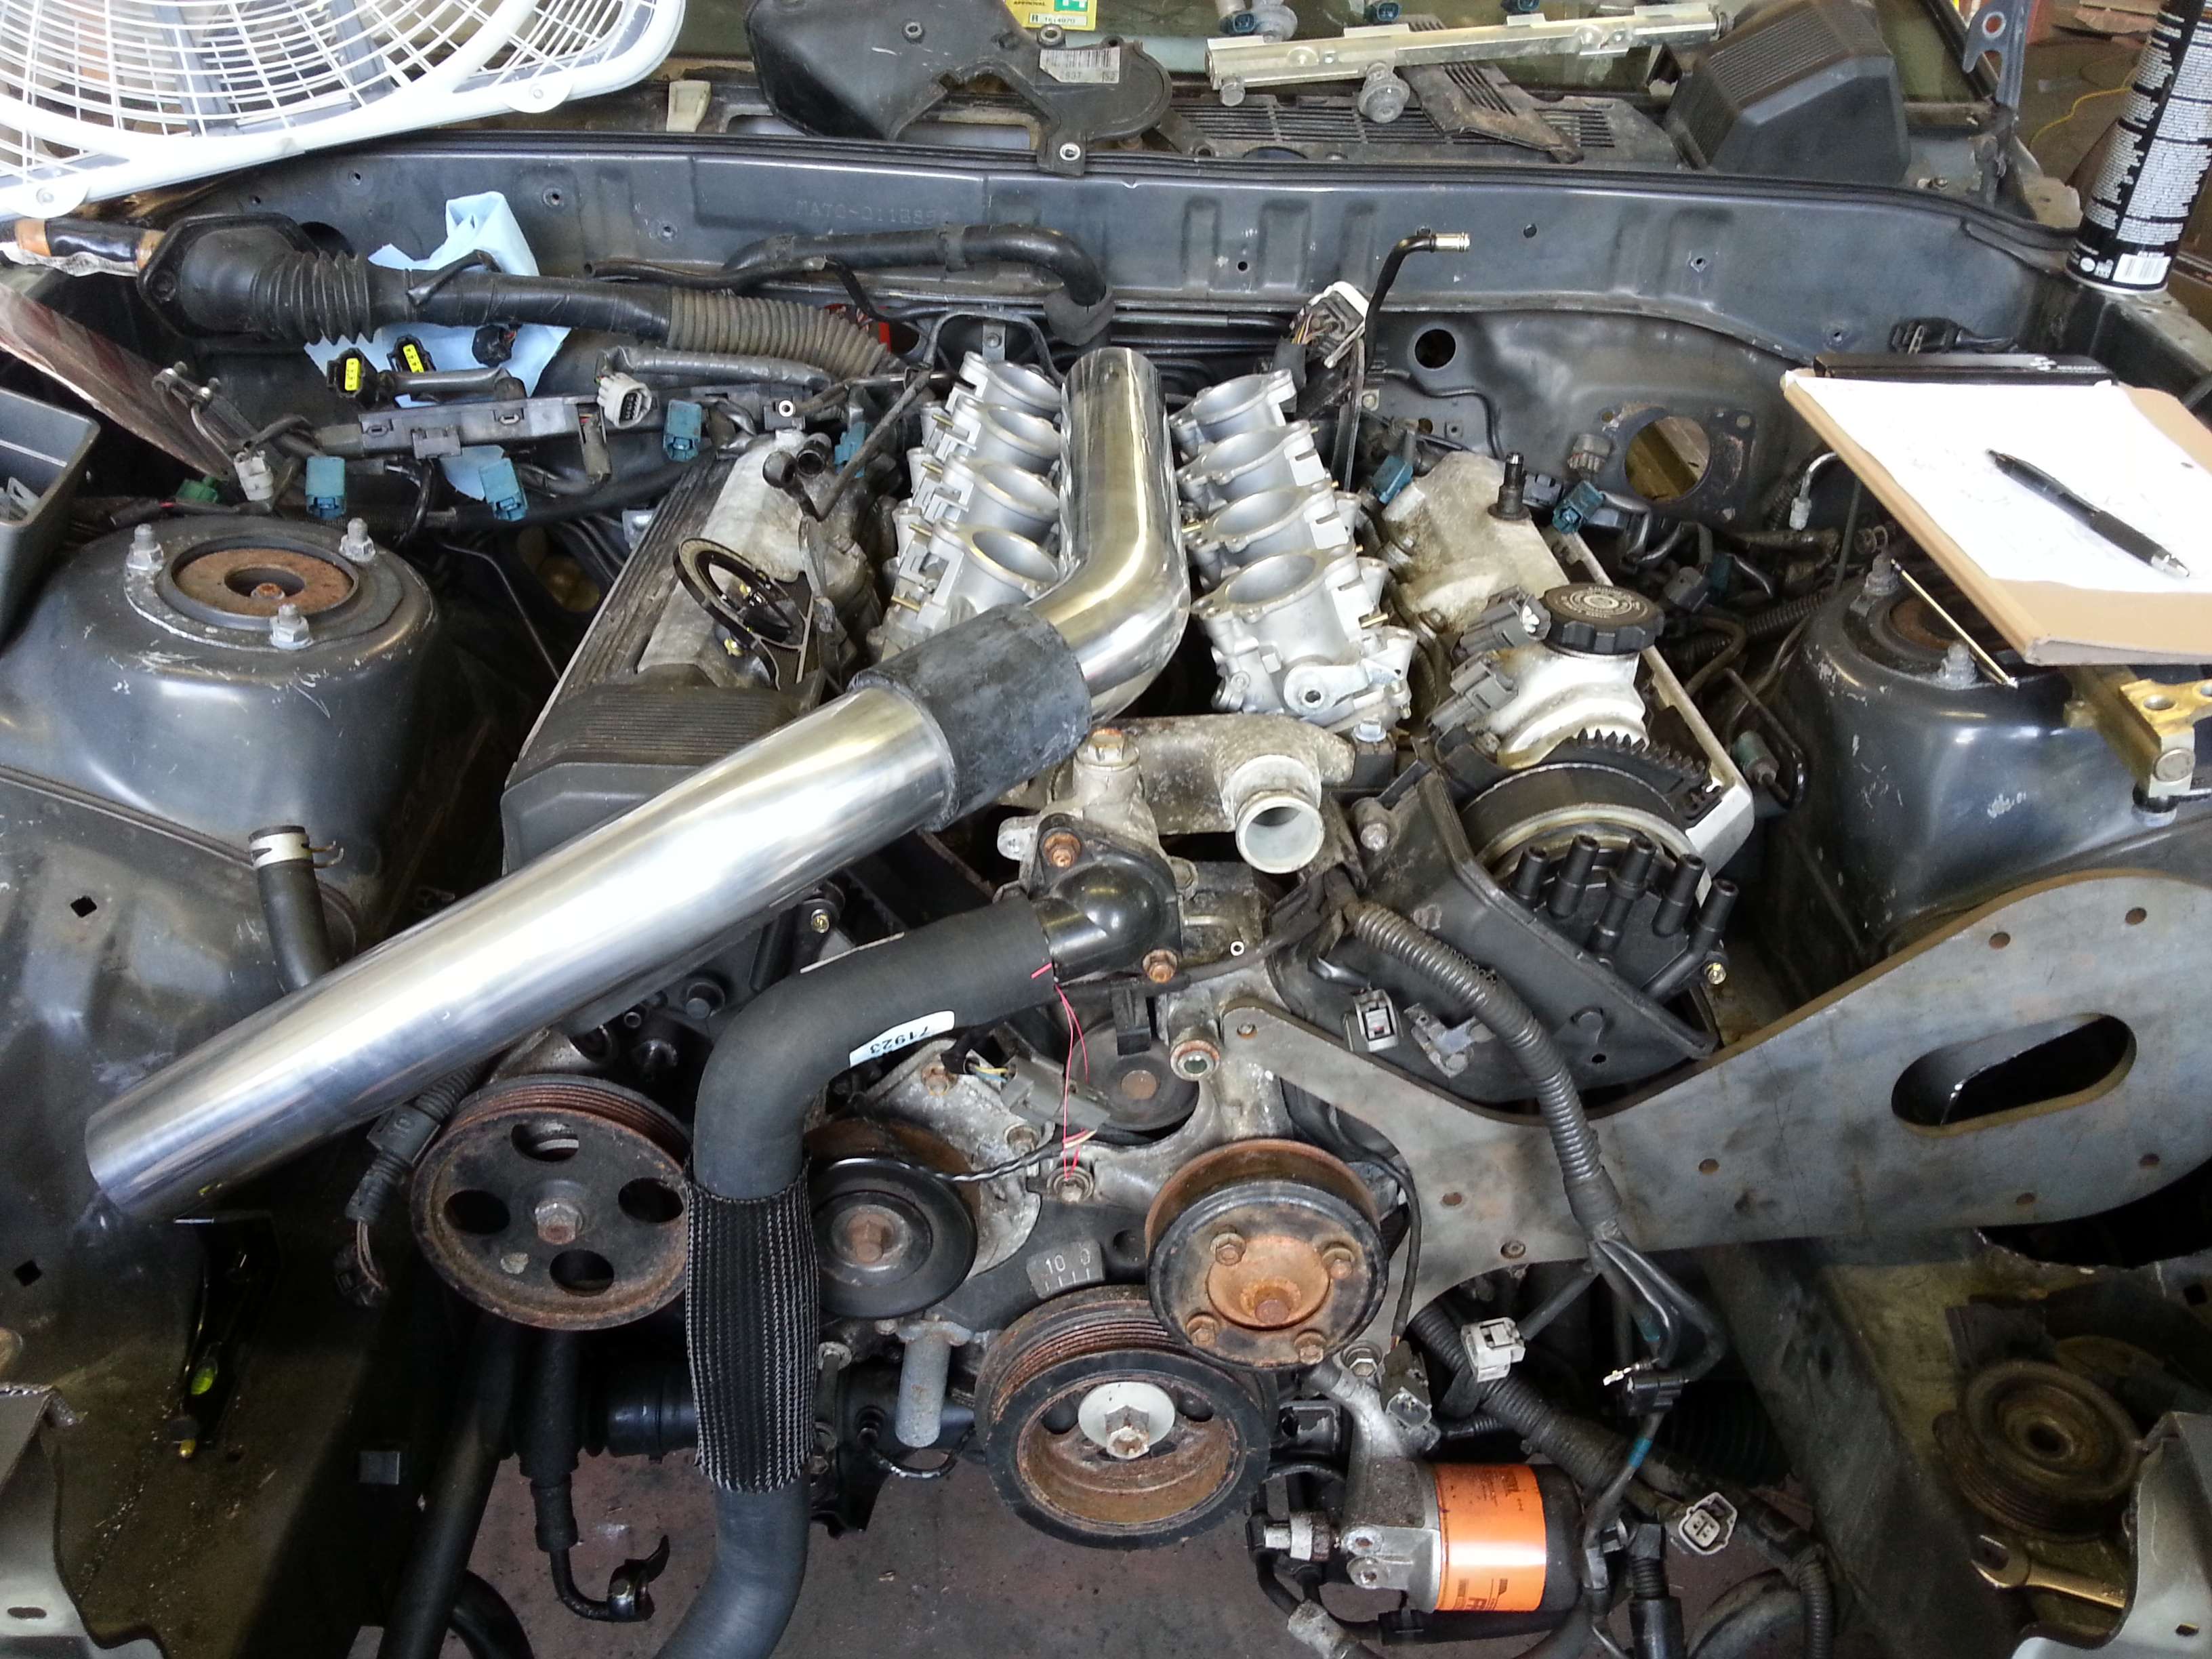
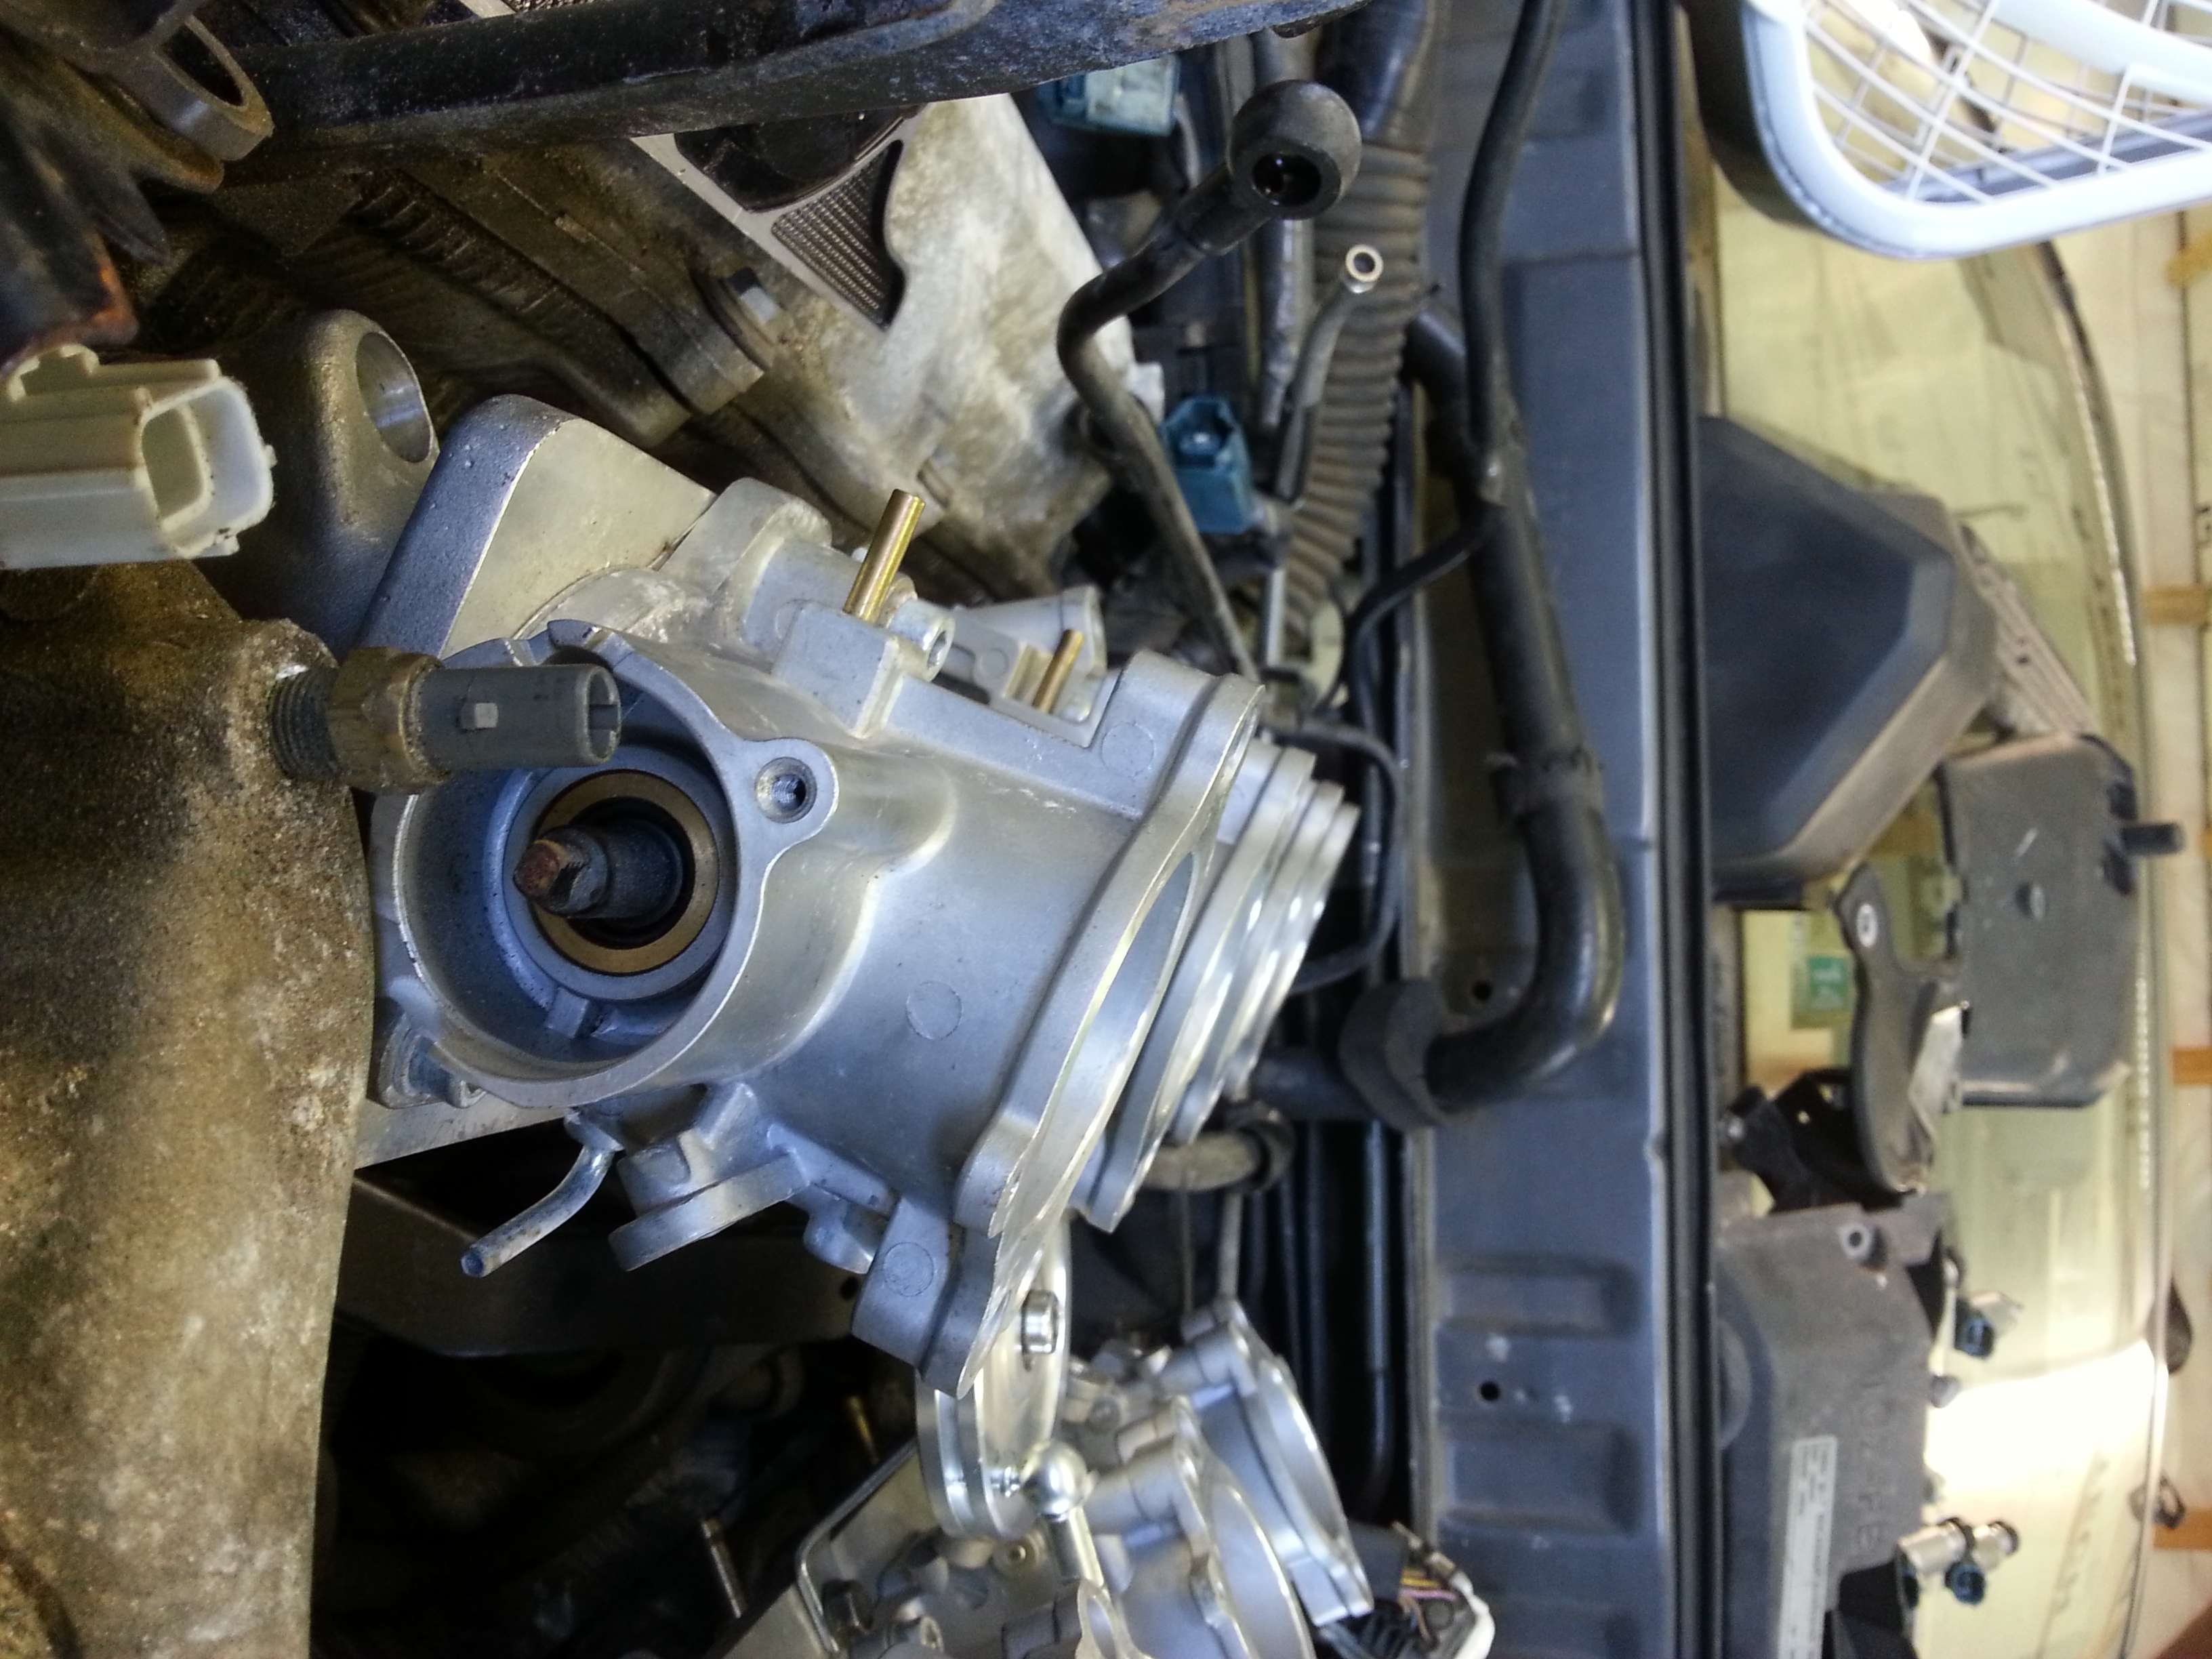
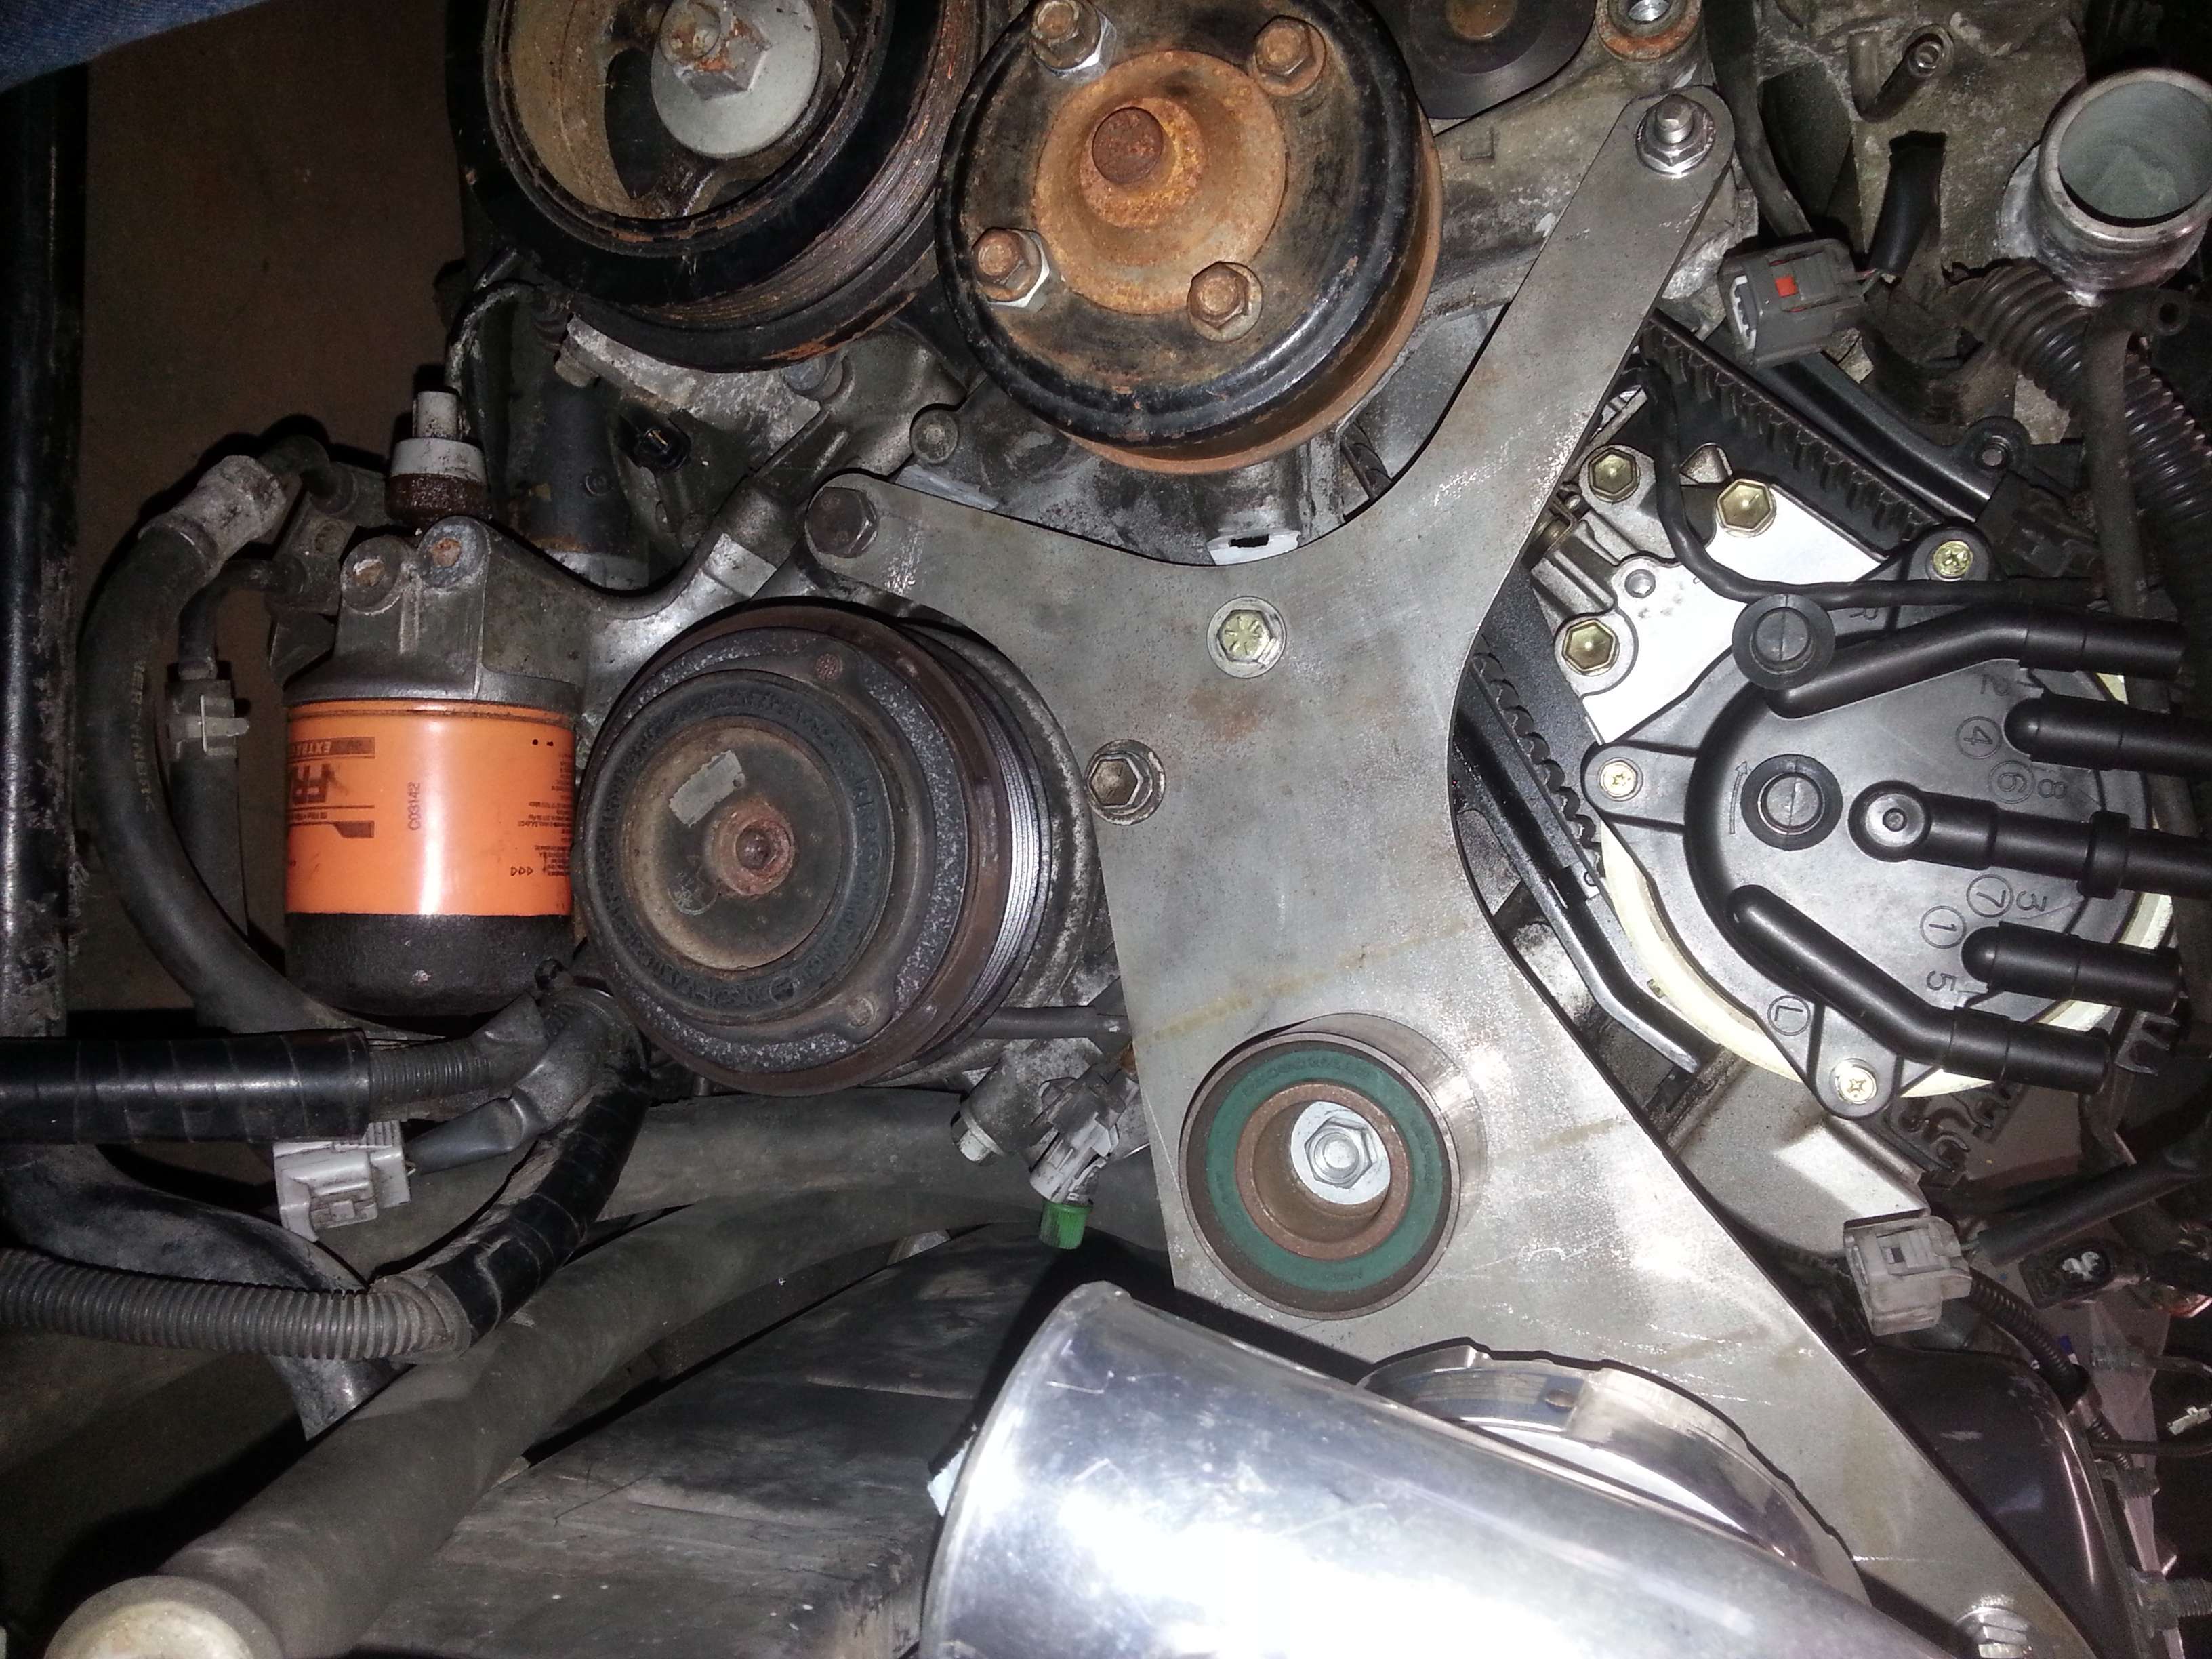
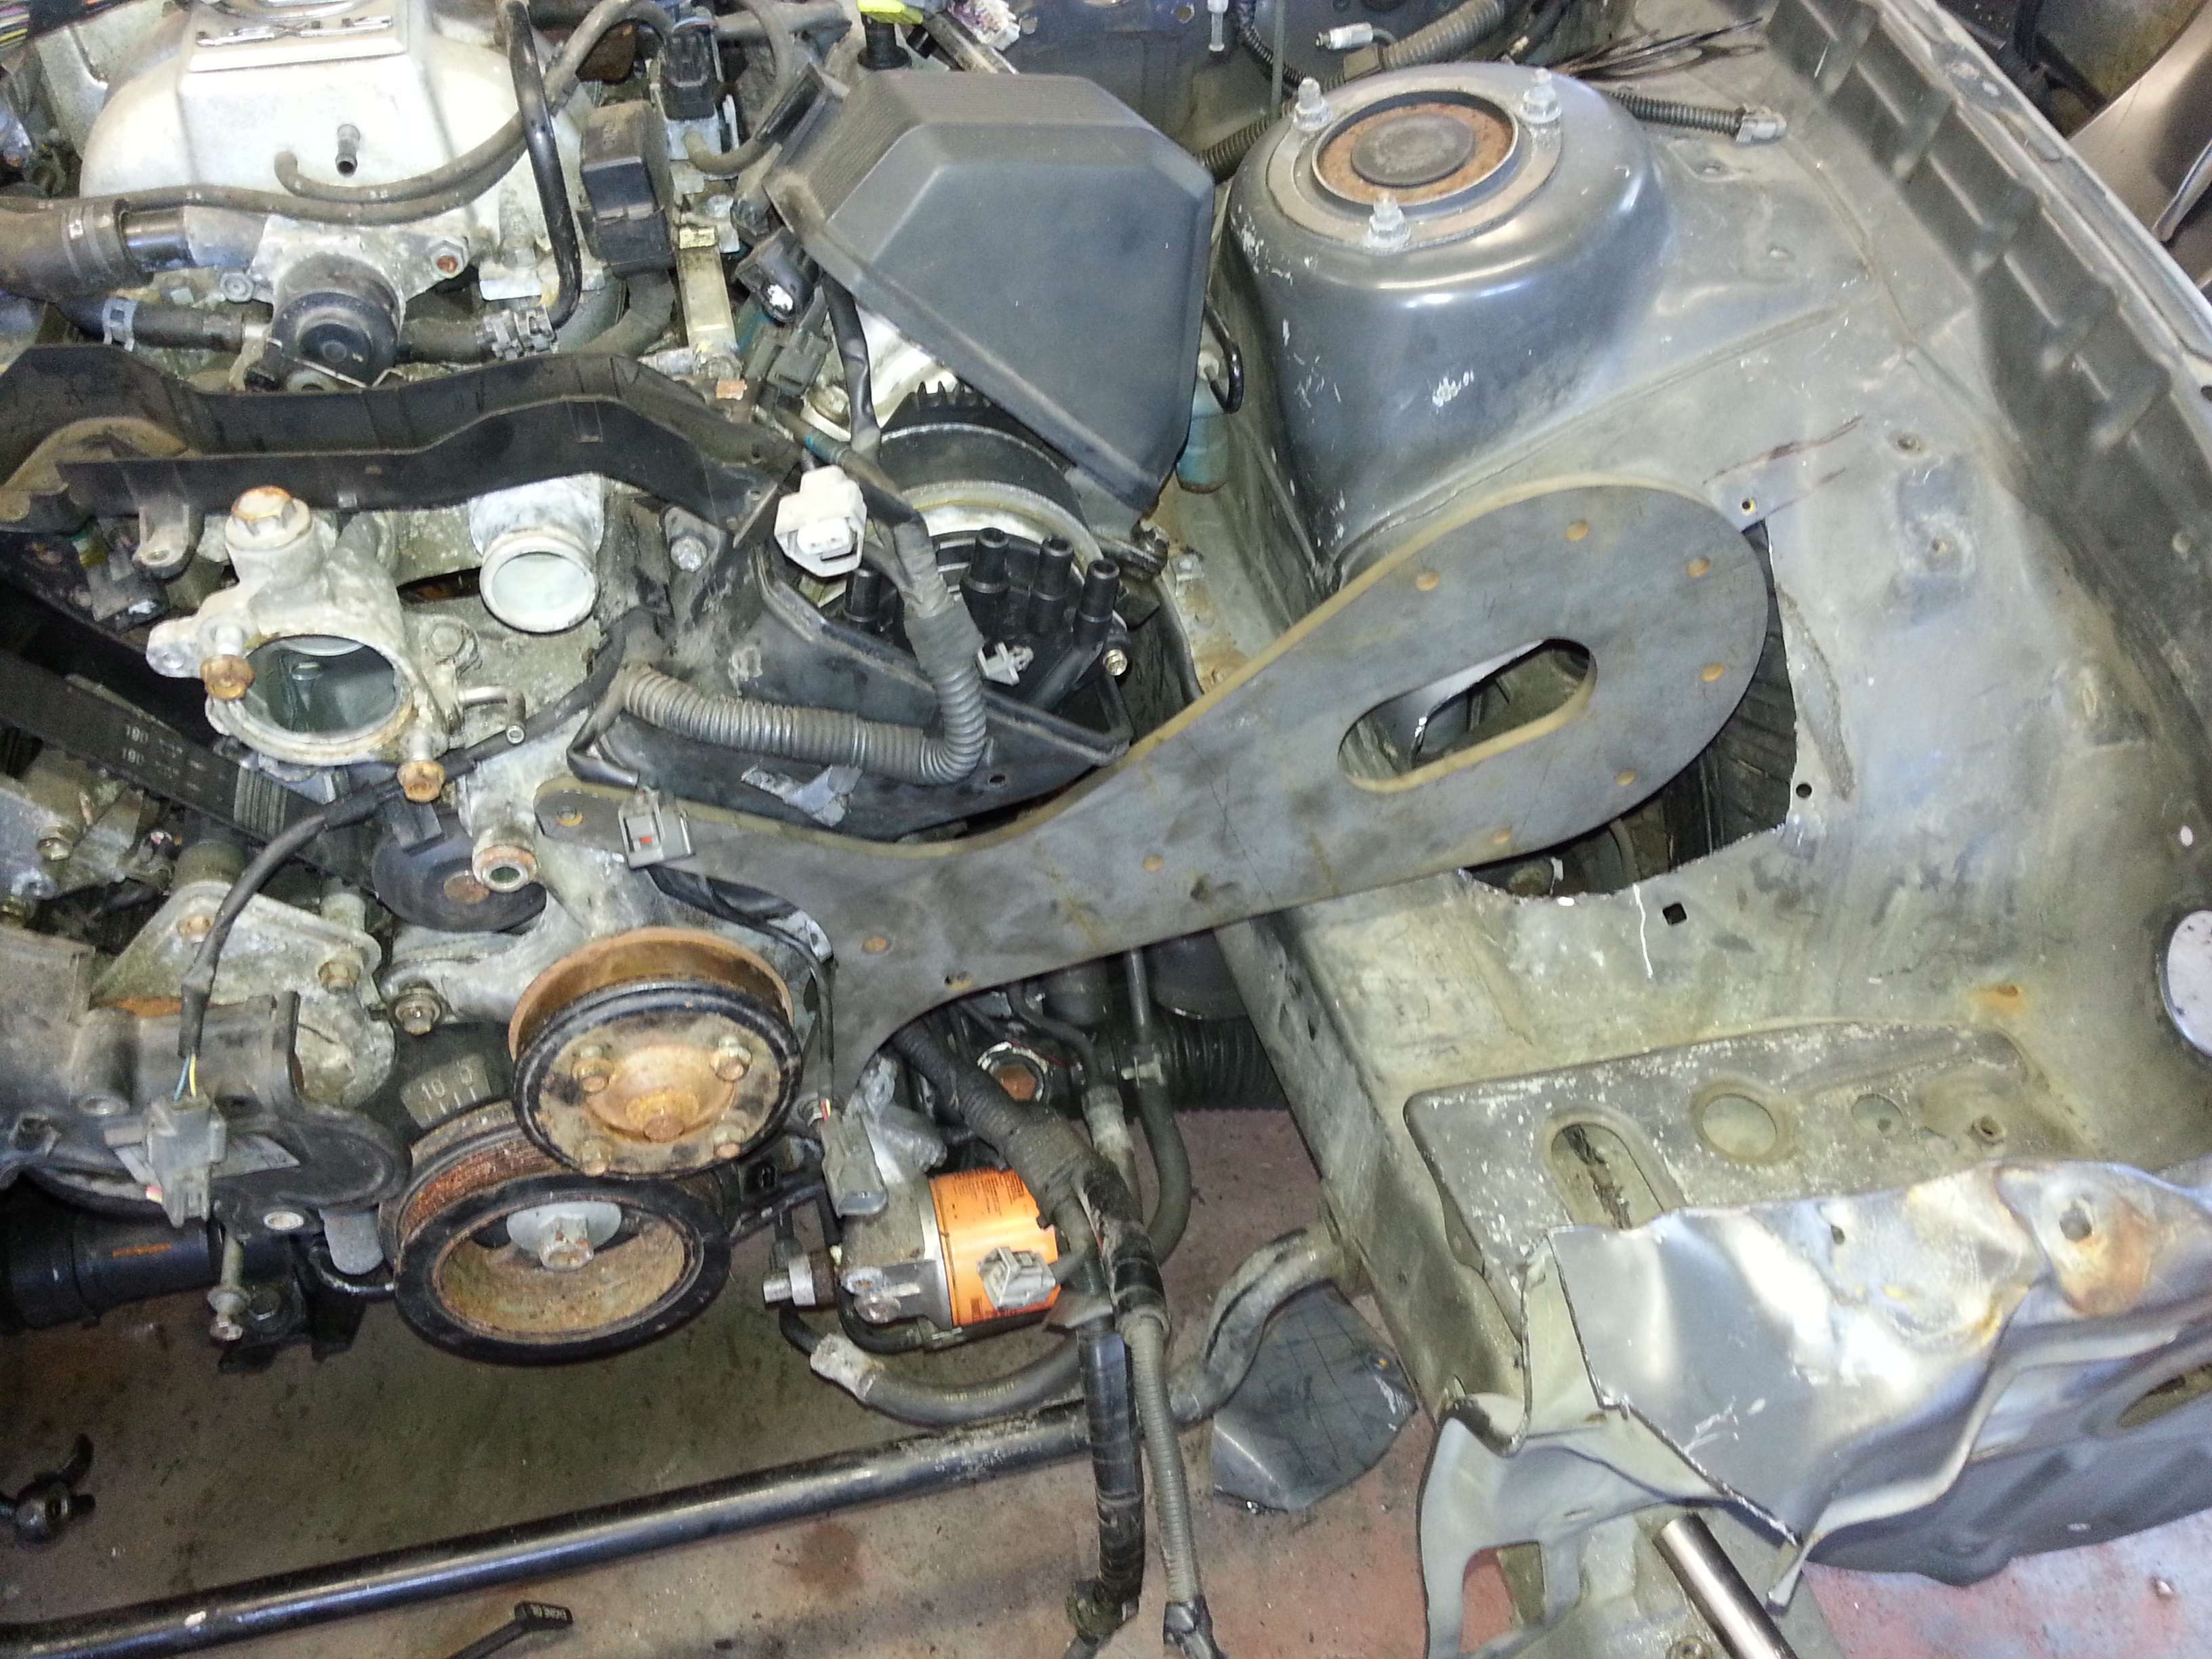
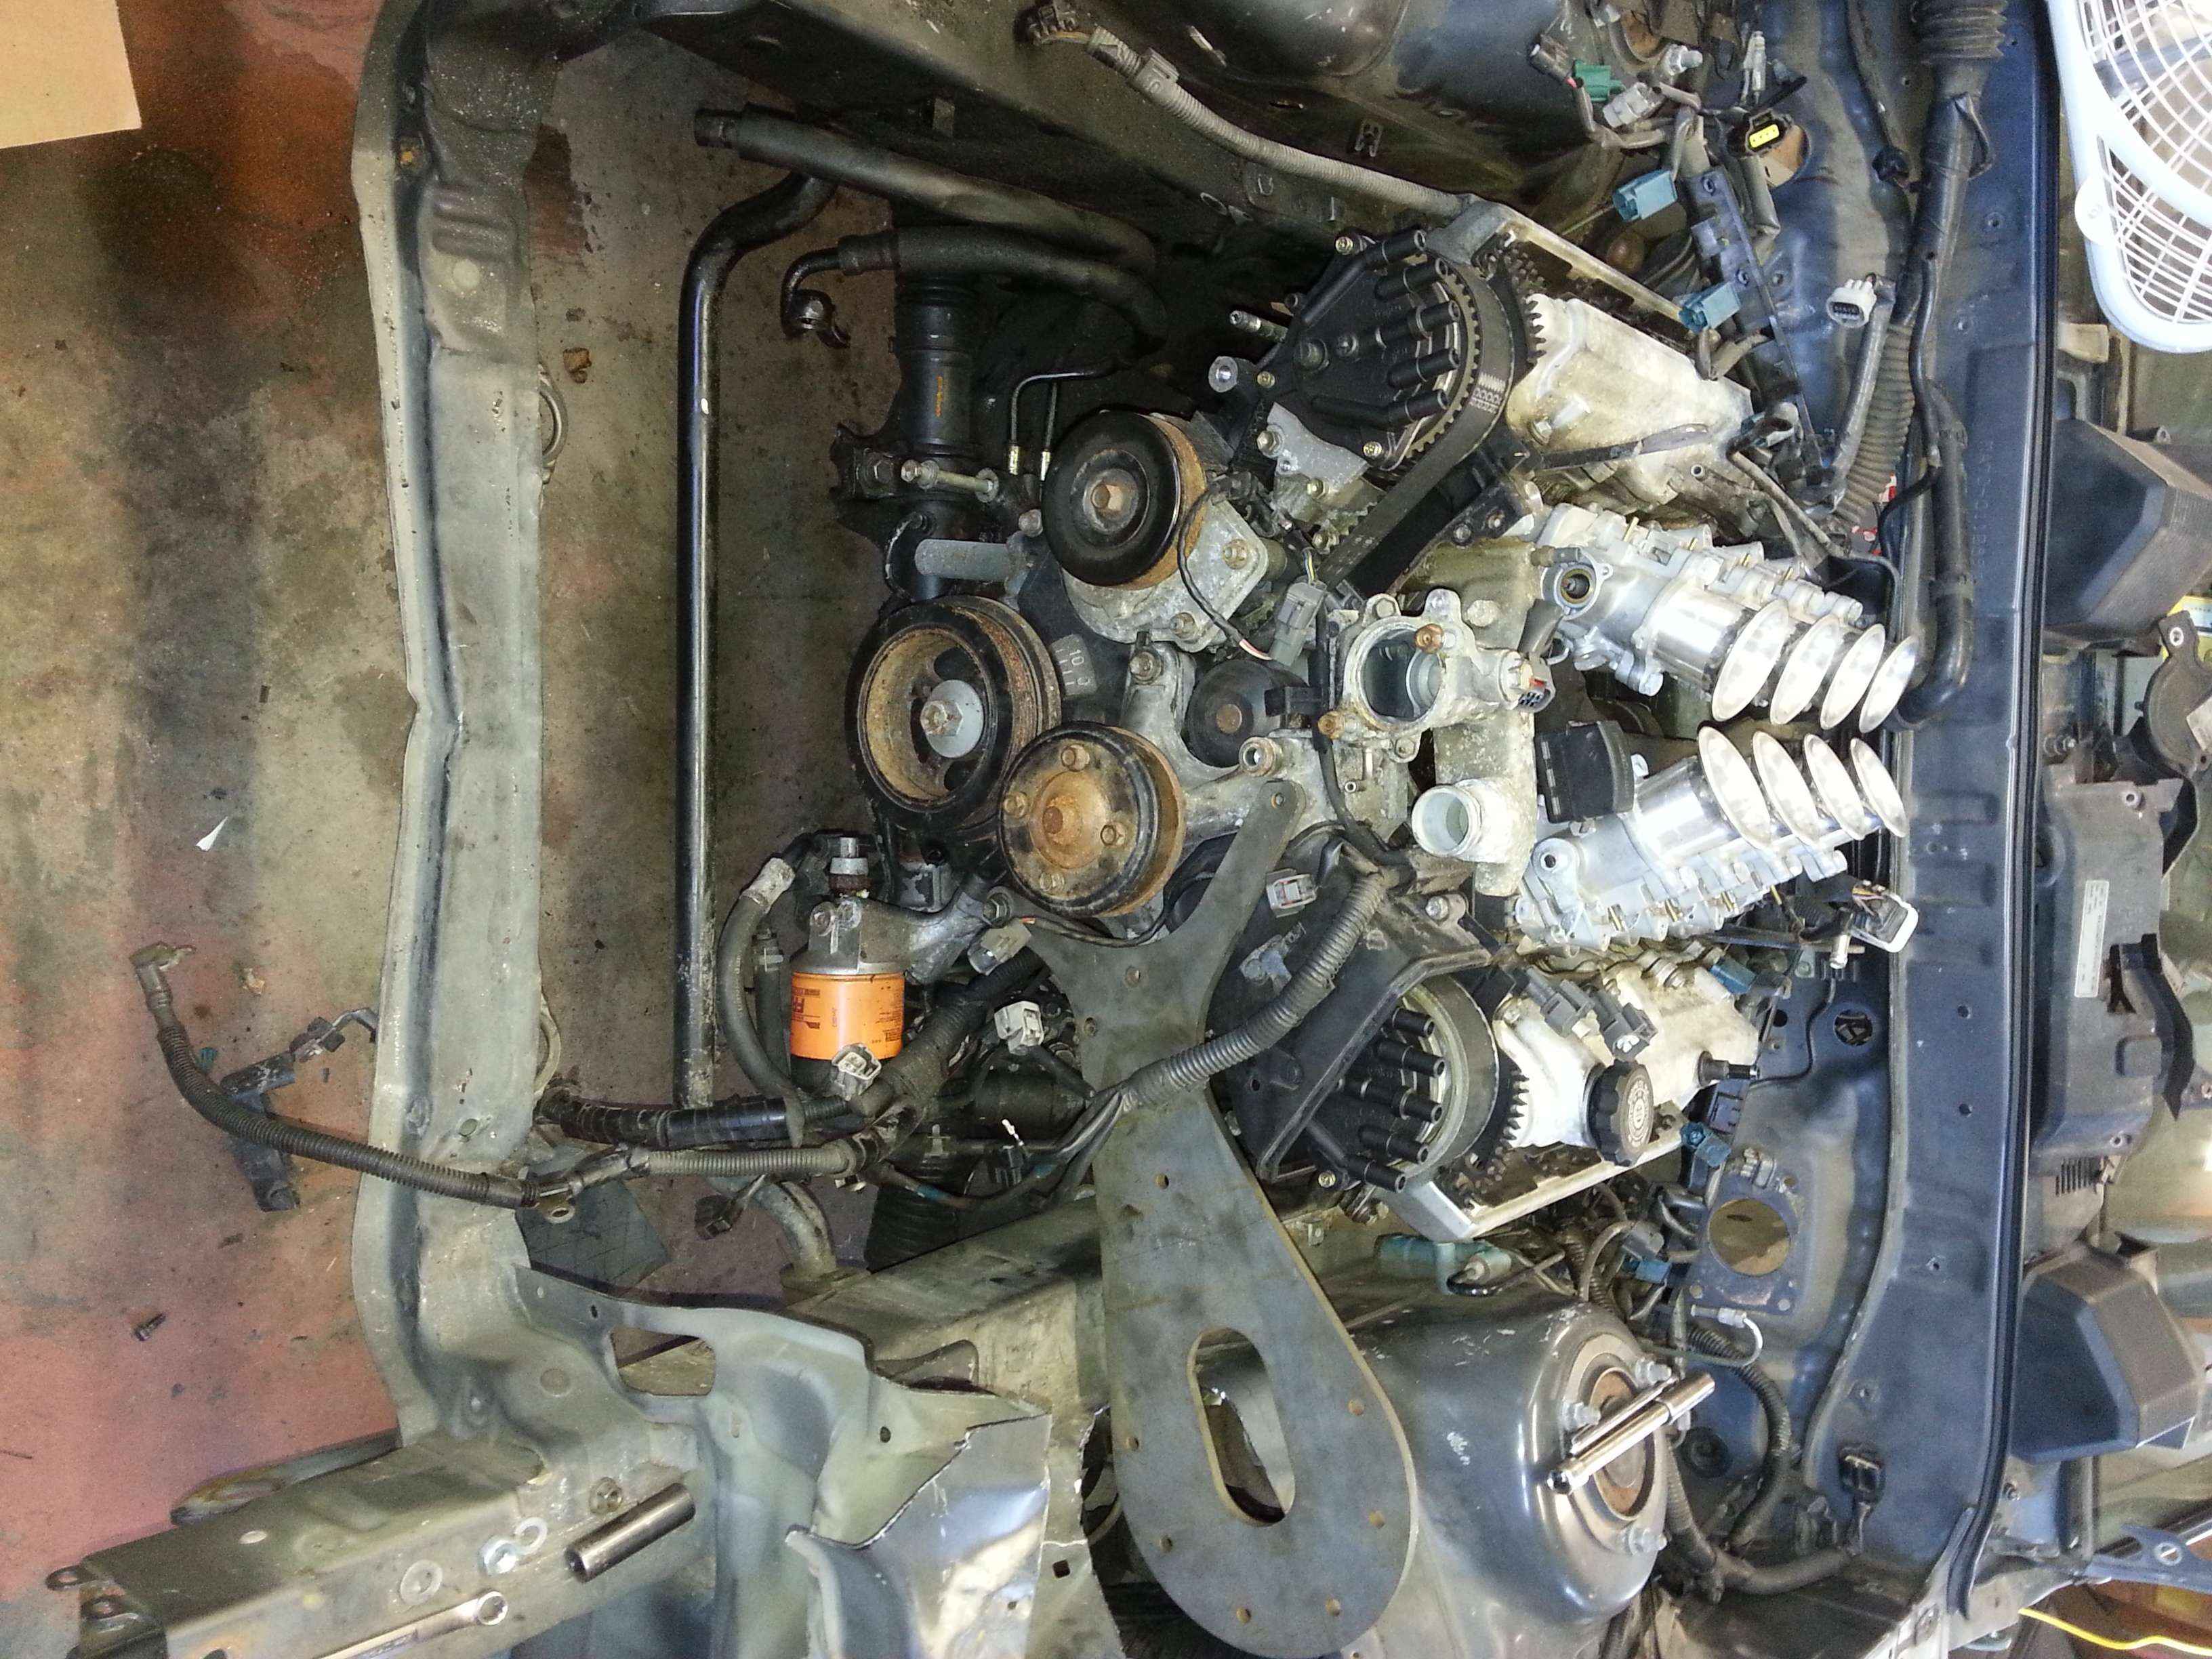
At that point I thought about saying forget the SC, and go single turbo. So I grabbed my manifolds that were fabbed up previously, and started to mock them up. Then I rememberd all the problems I was having/going to have by using them, so I said "F-K IT"!!! It really doesnt protrude that far into the wheel well, I think even lowered with a wider tire so long as I keep the inner metal that I plan to add tight to the bracket I wont have any issues. I also had to grind down some points on the LS400 fan pulley assembly, where "the fish" mounts the casting was keeping it from being flush, after the grinder it went on much easier.

c7ru.jpg


pnbh.jpg


dh70.jpg


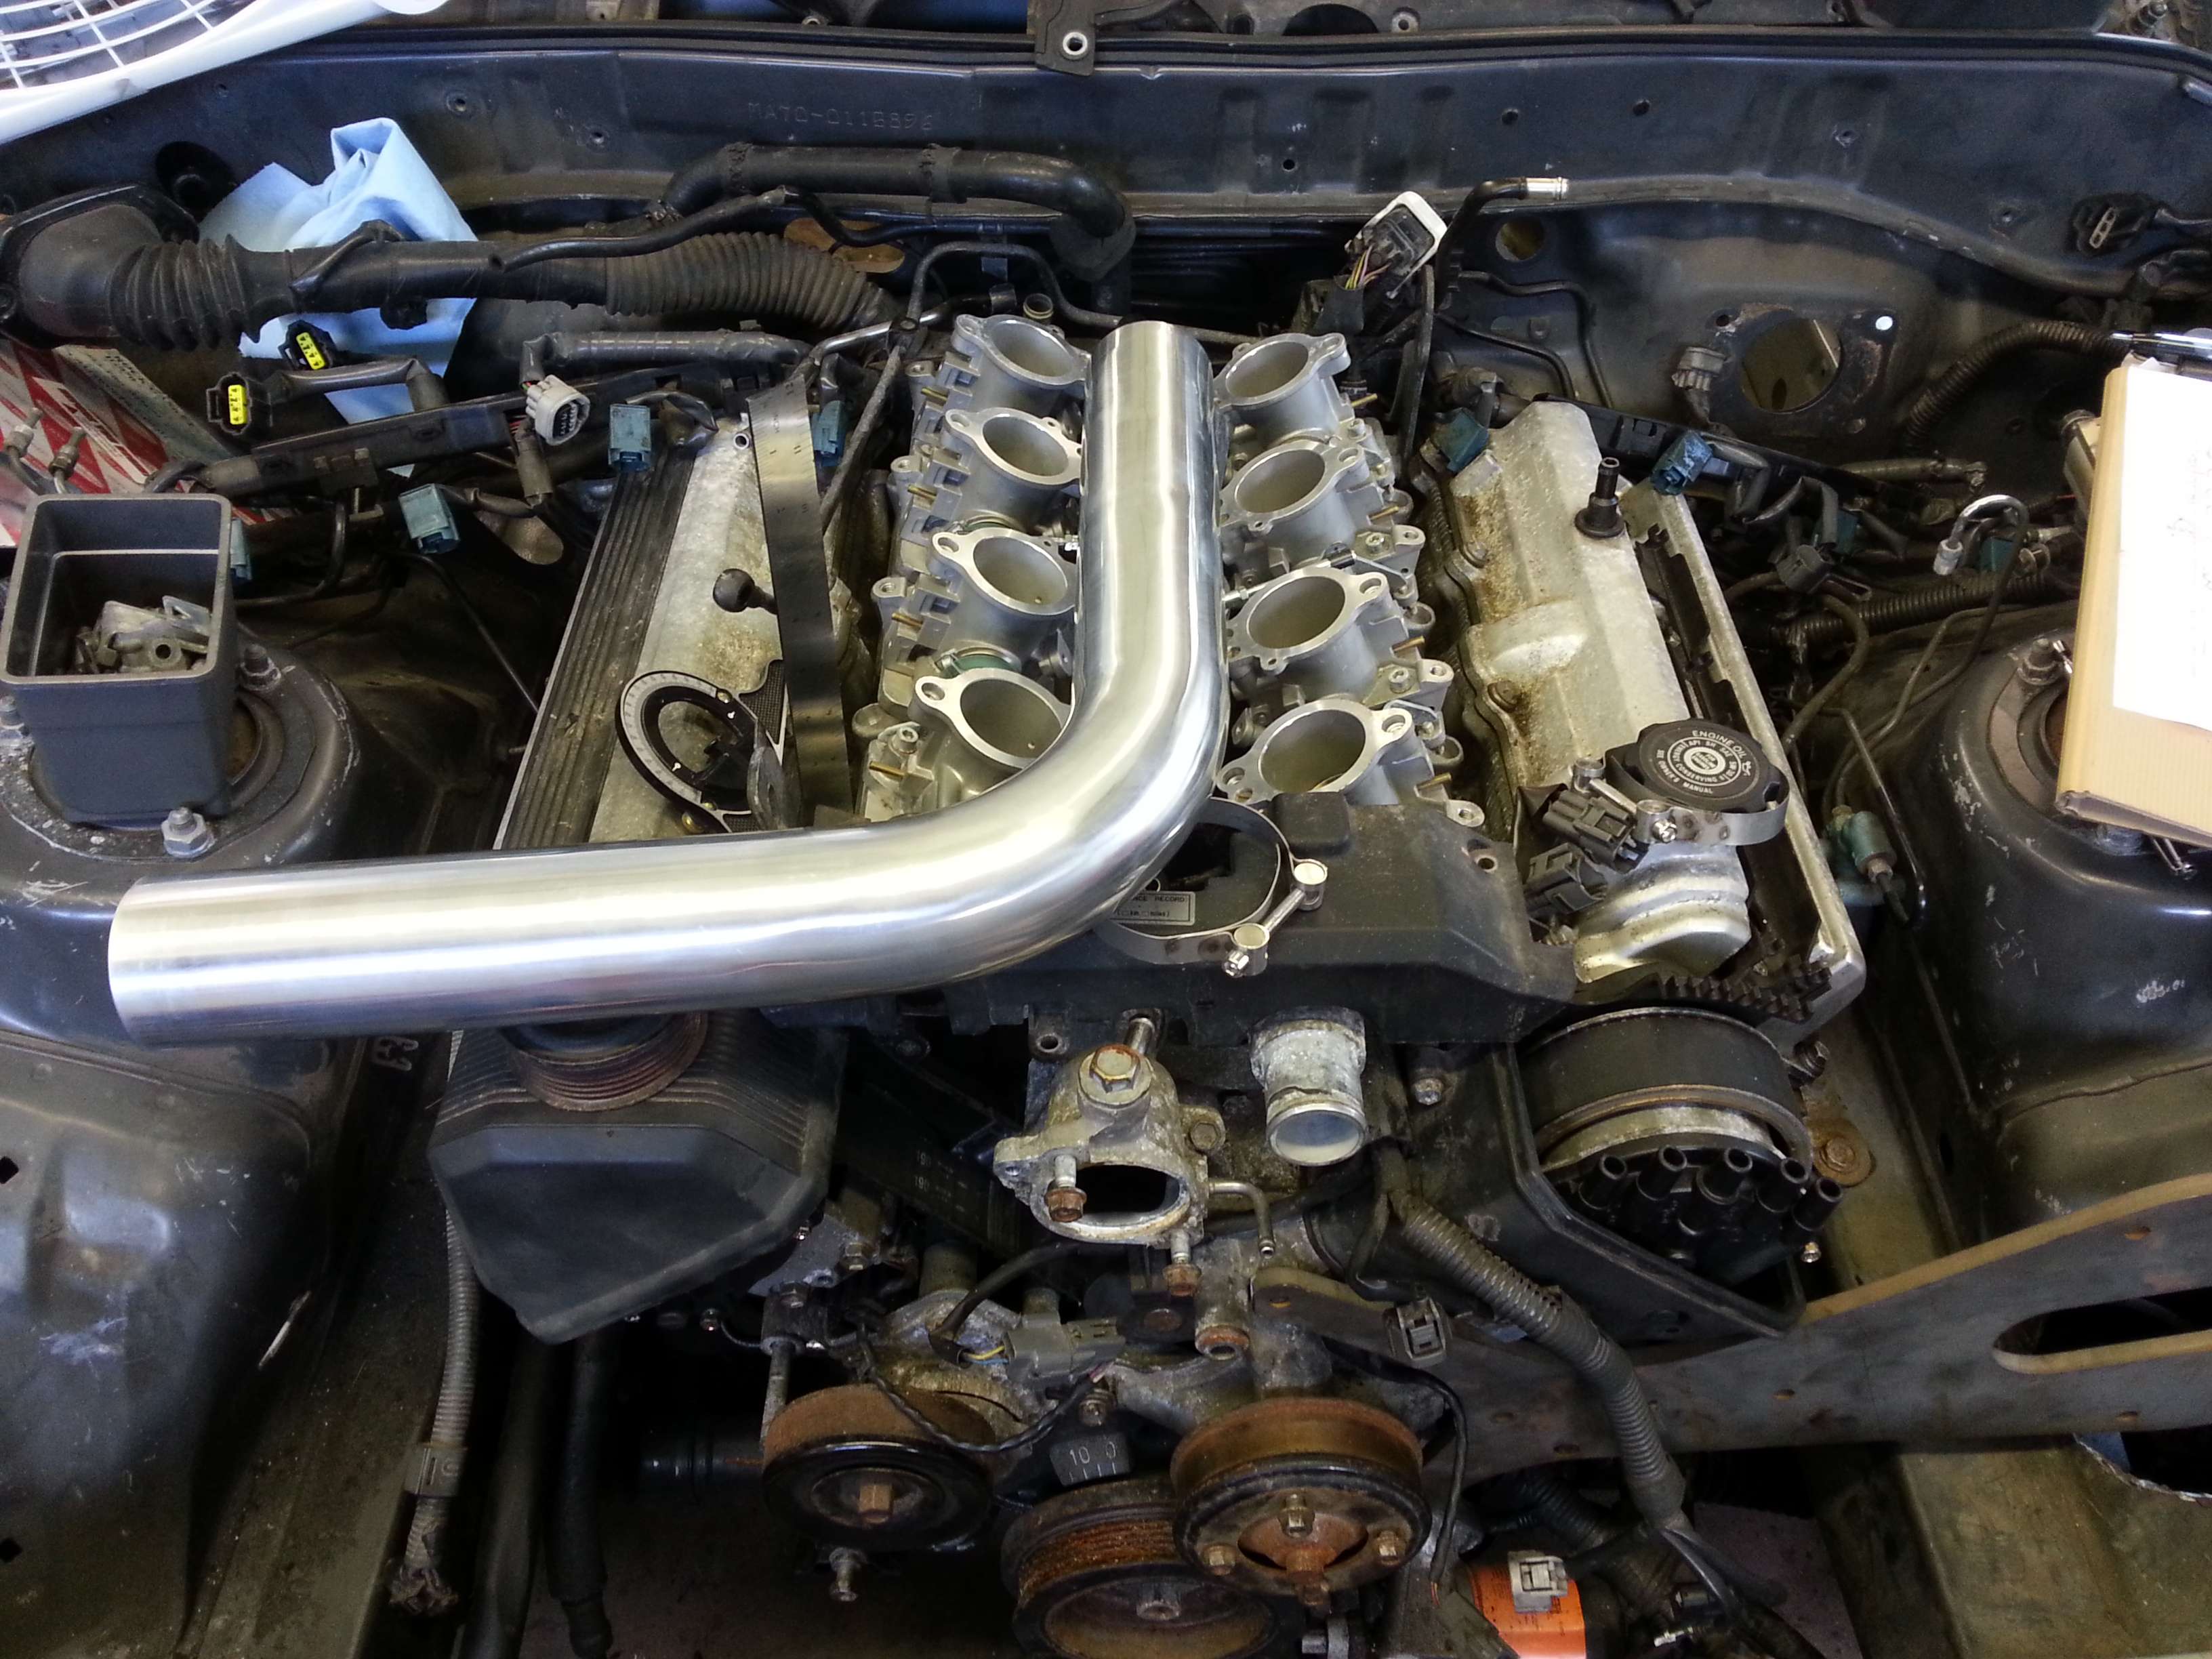
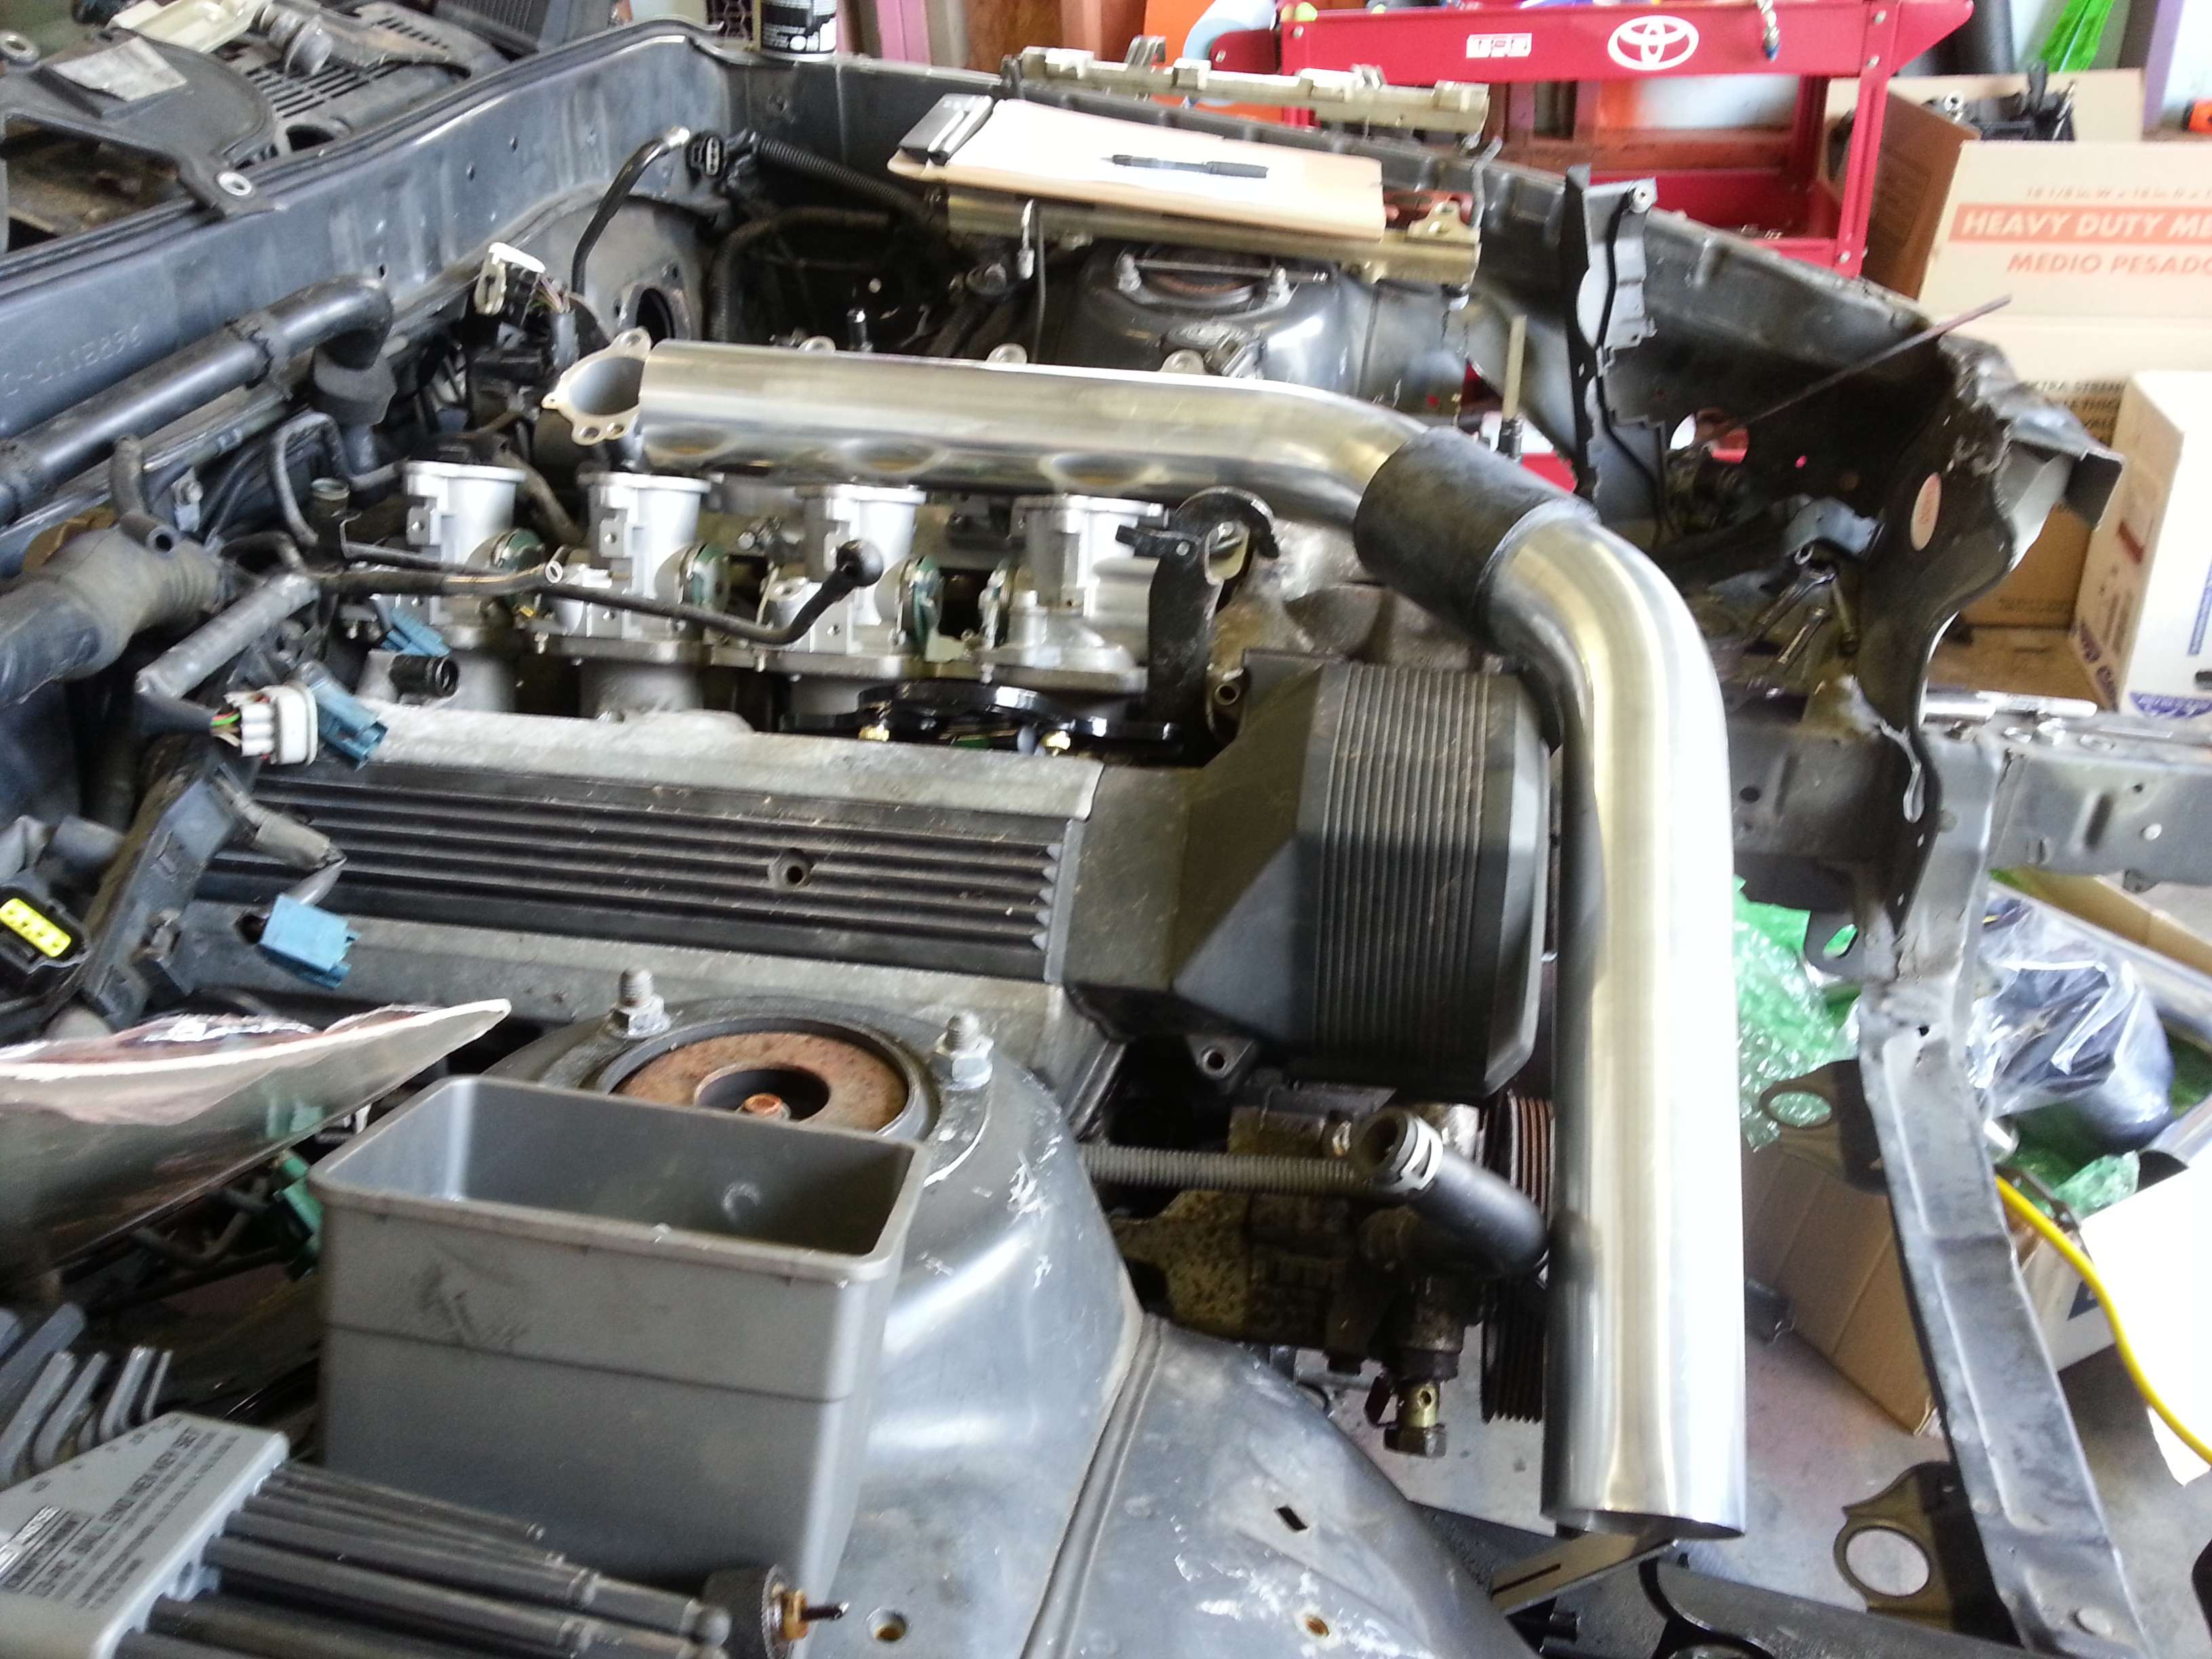
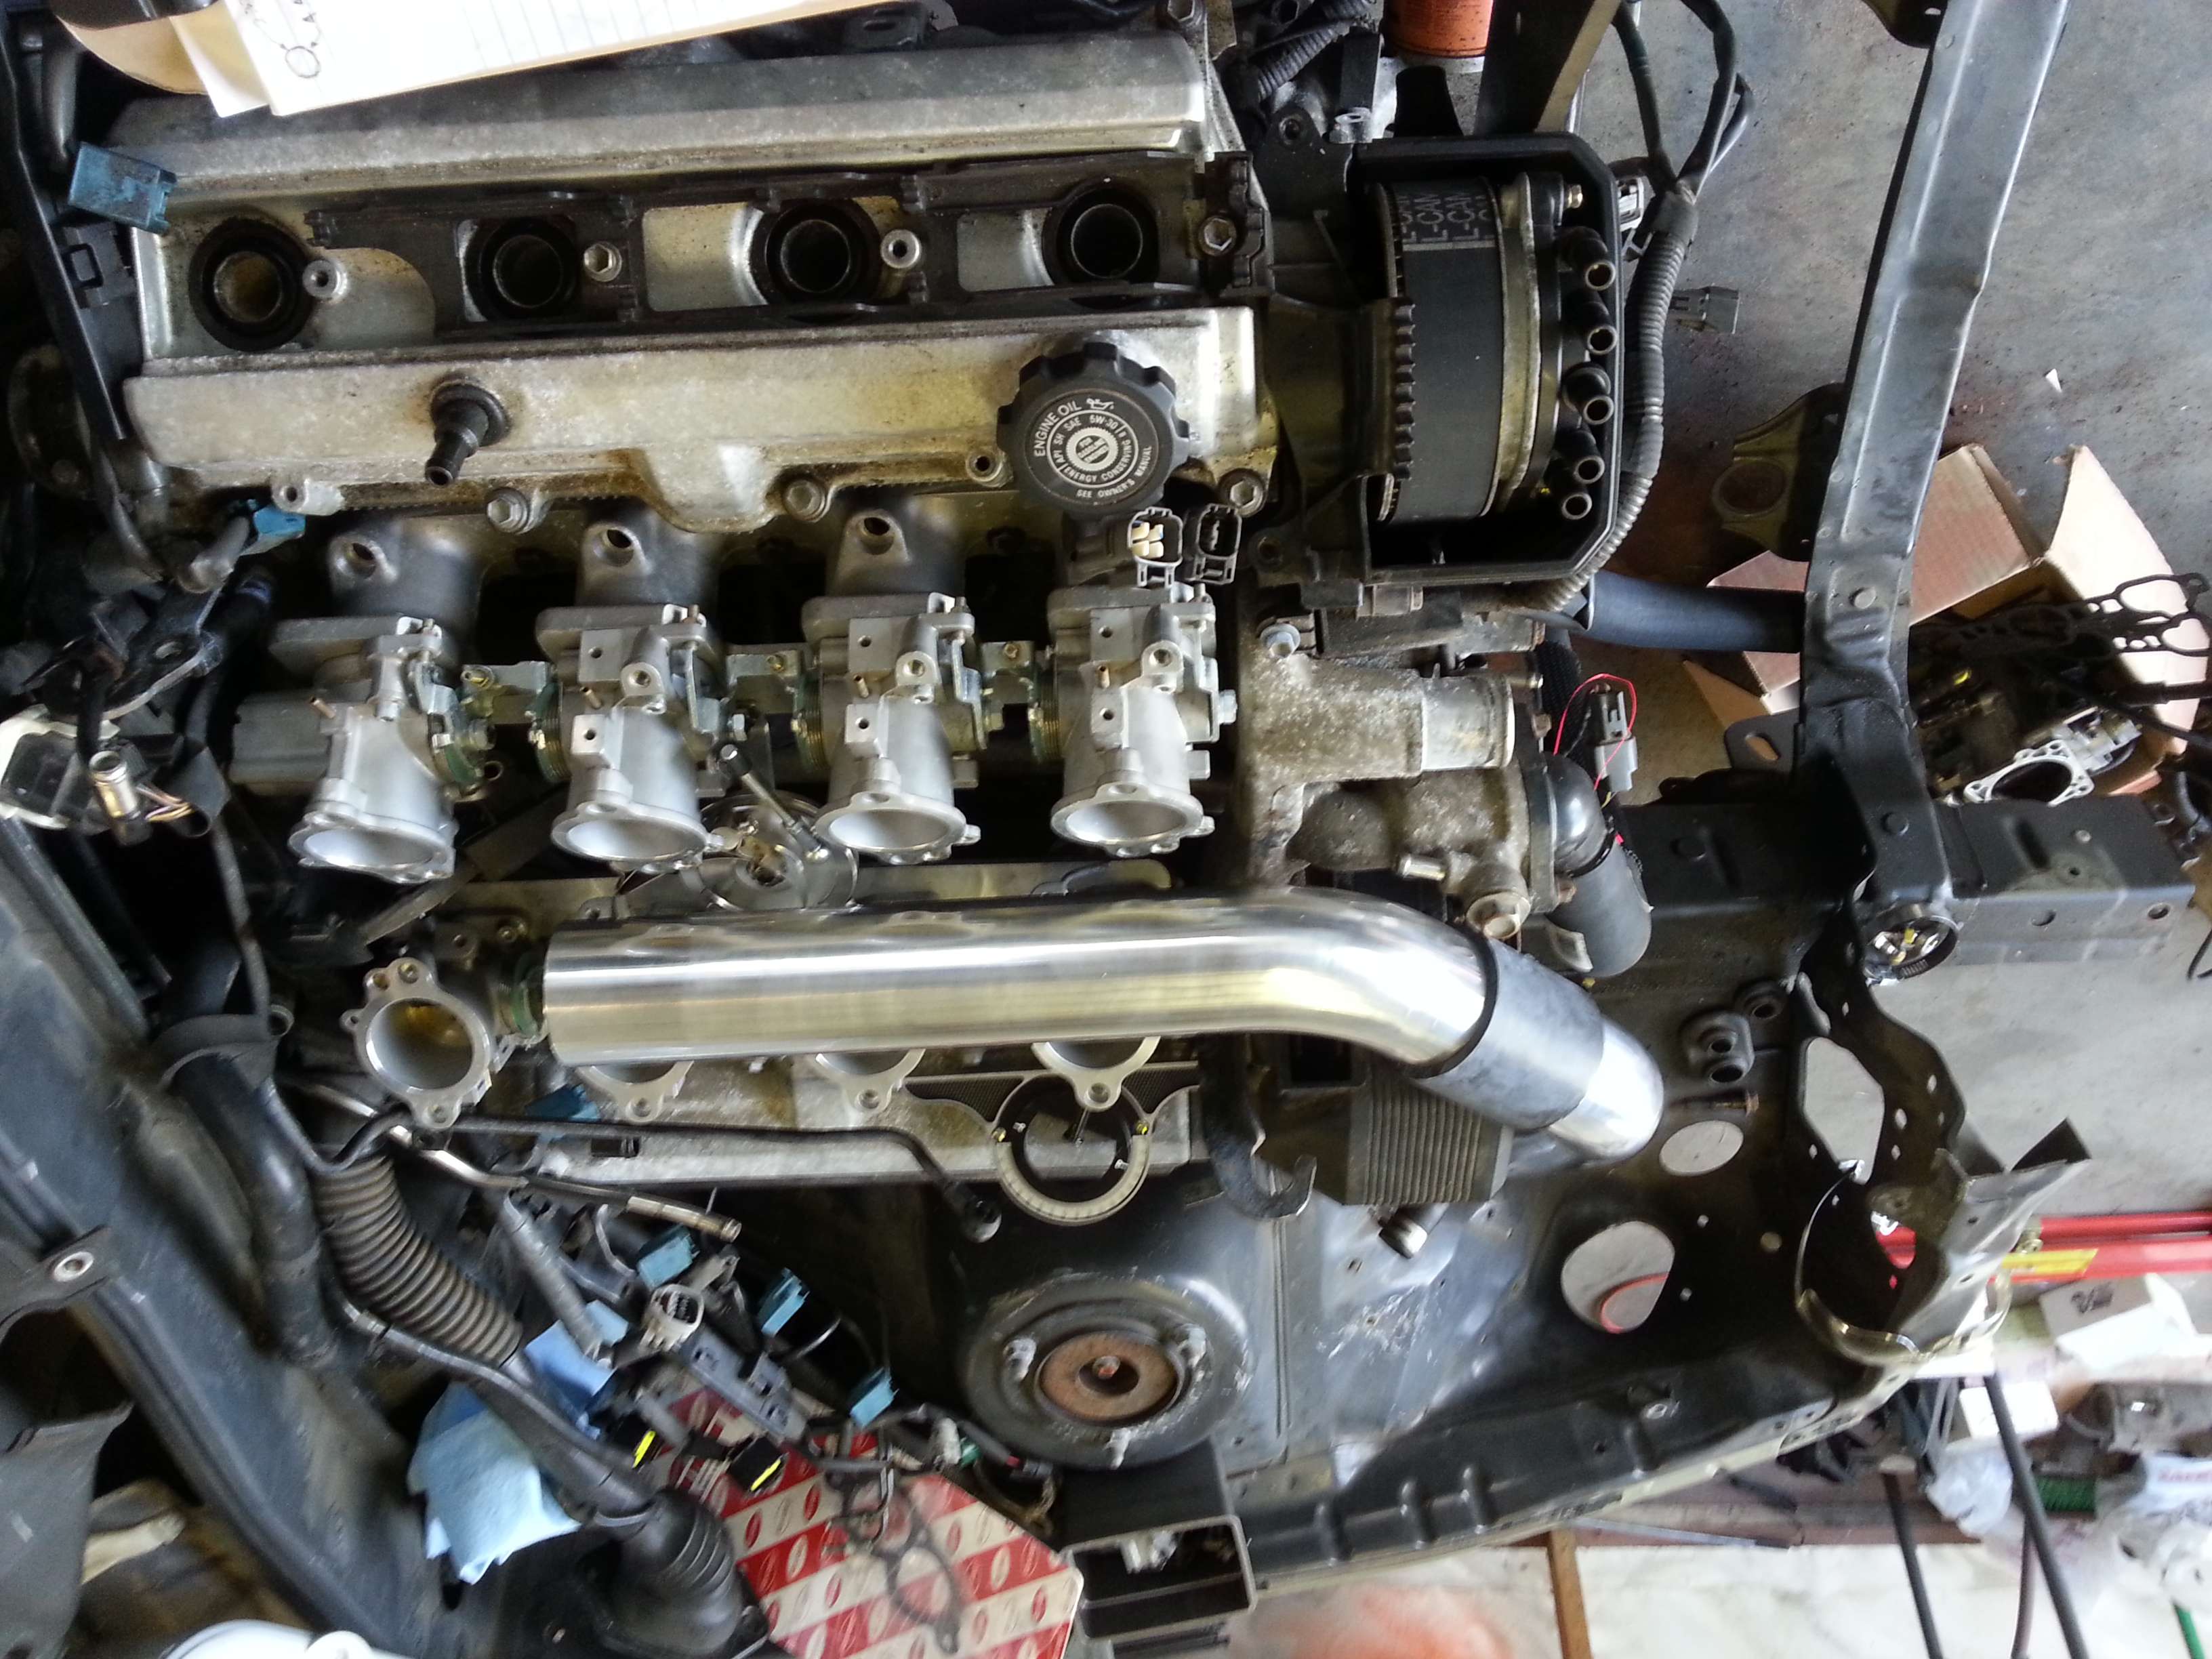
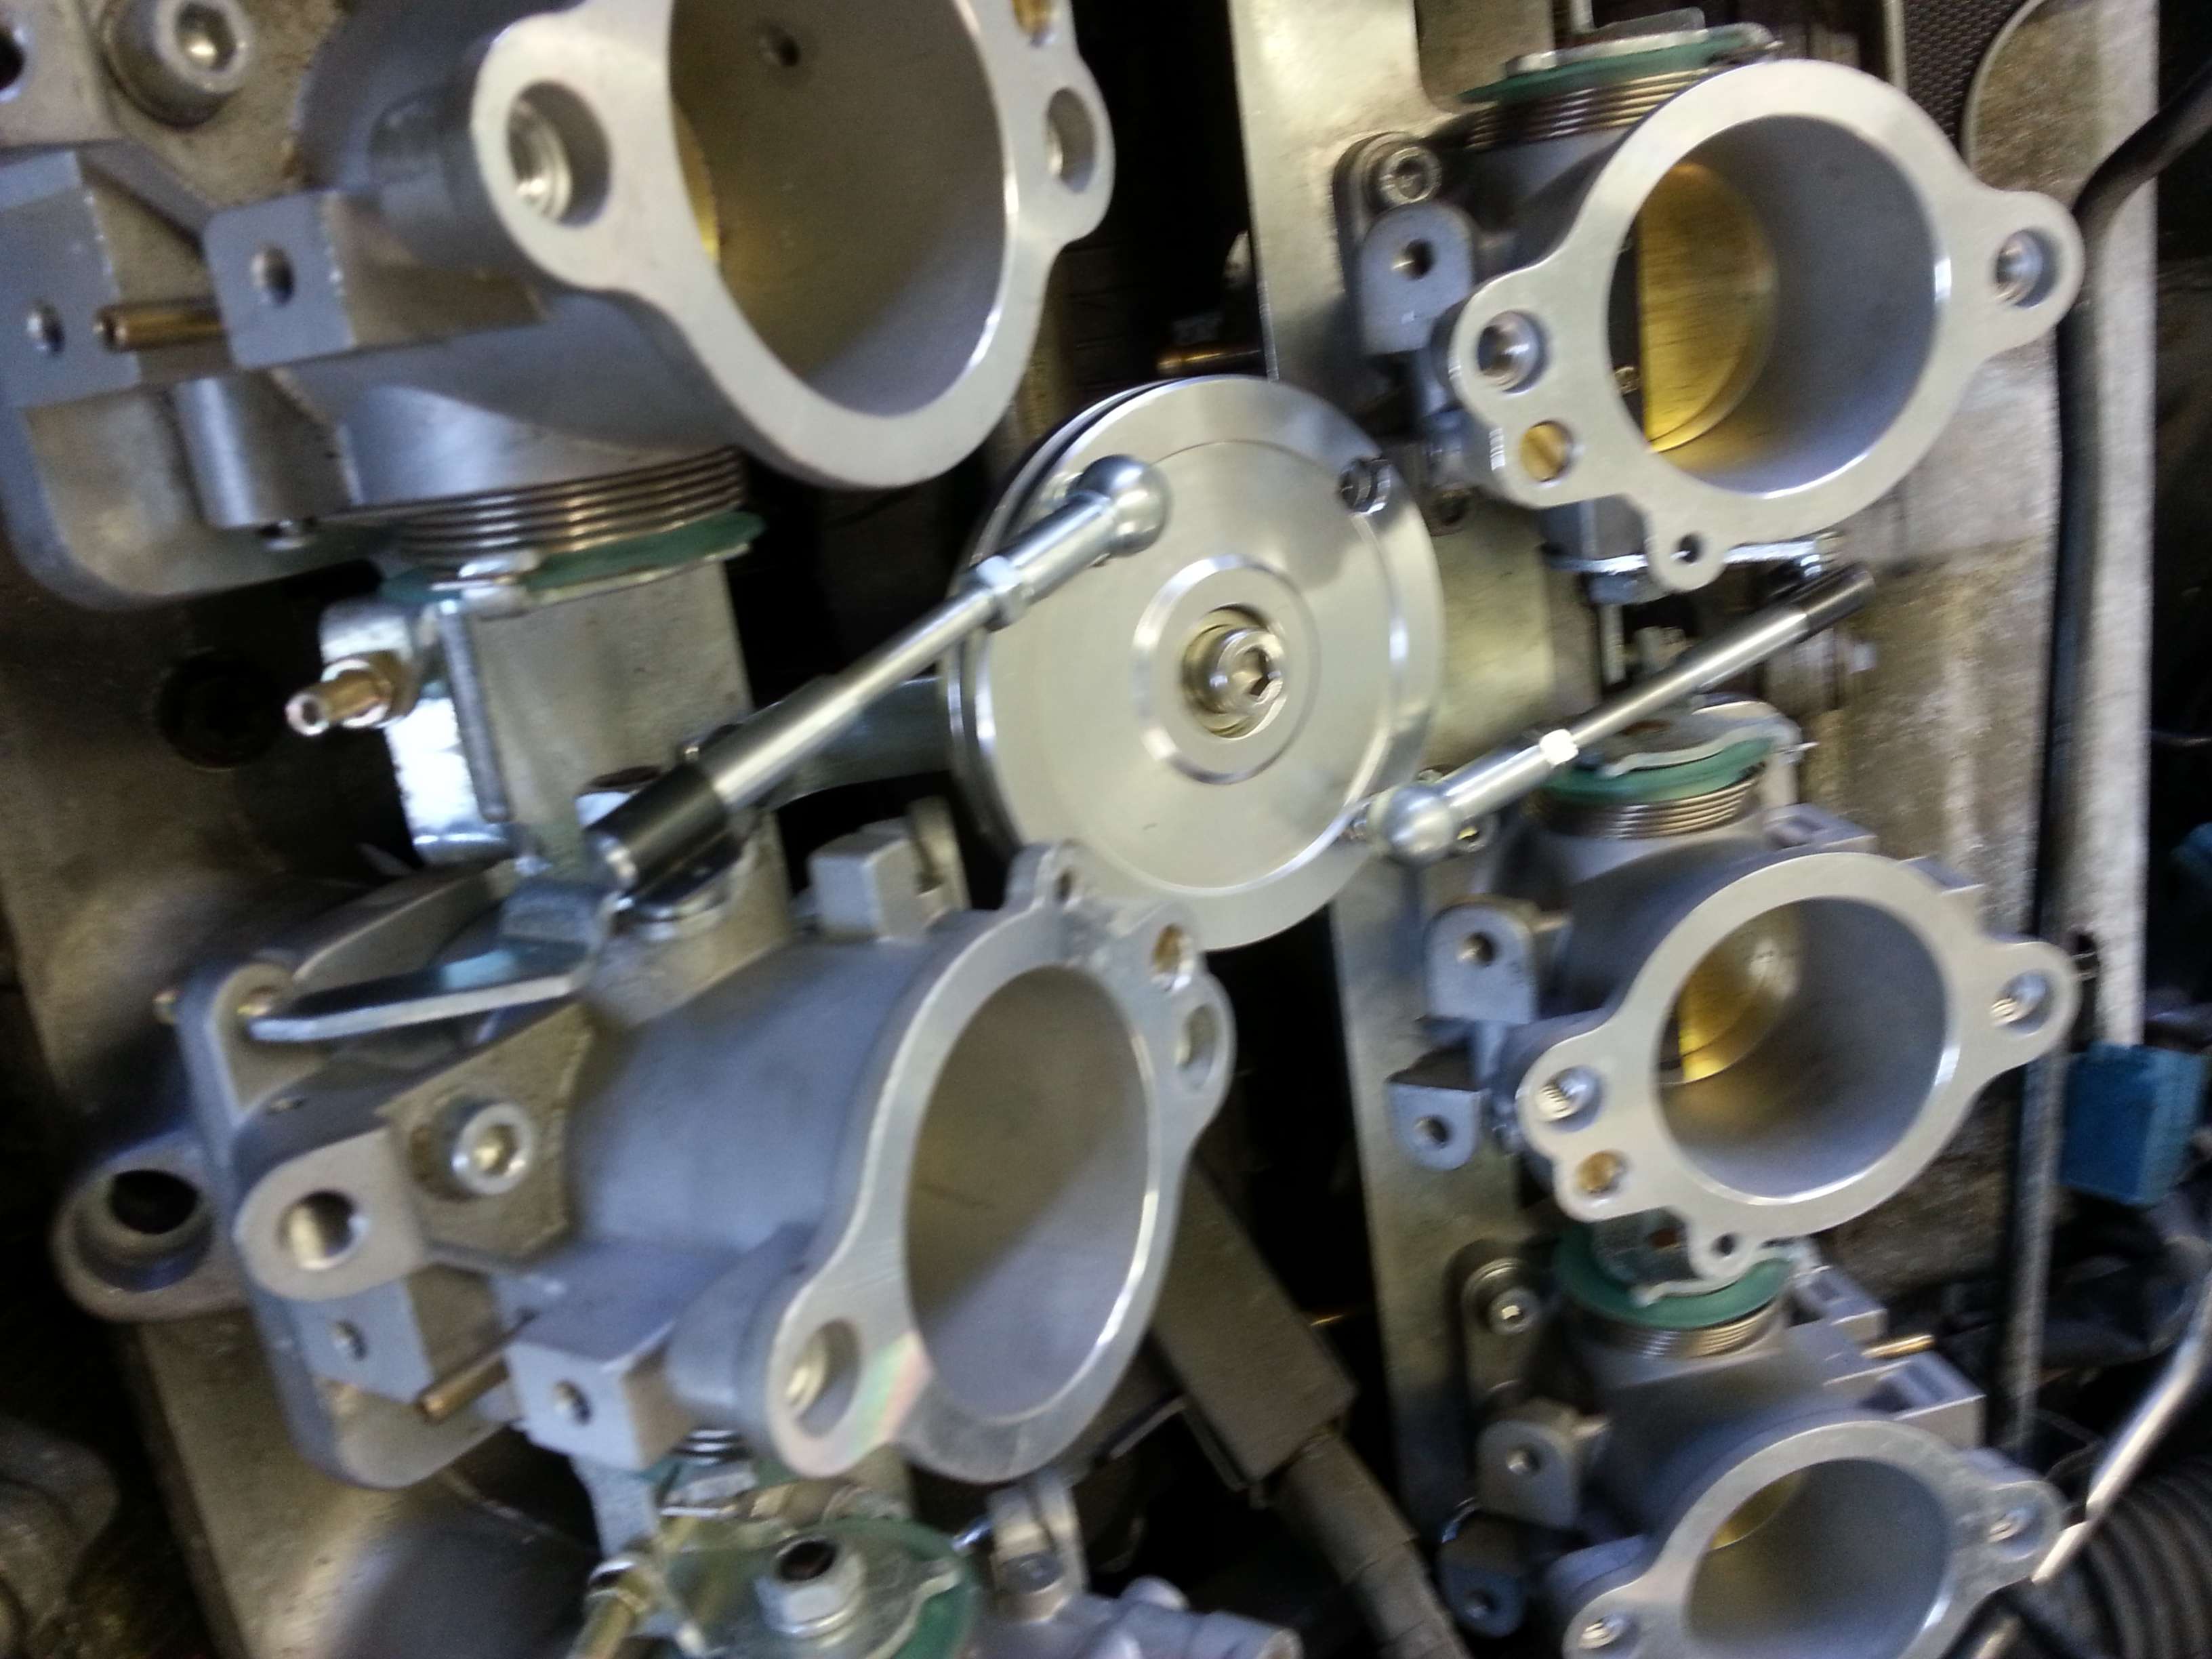
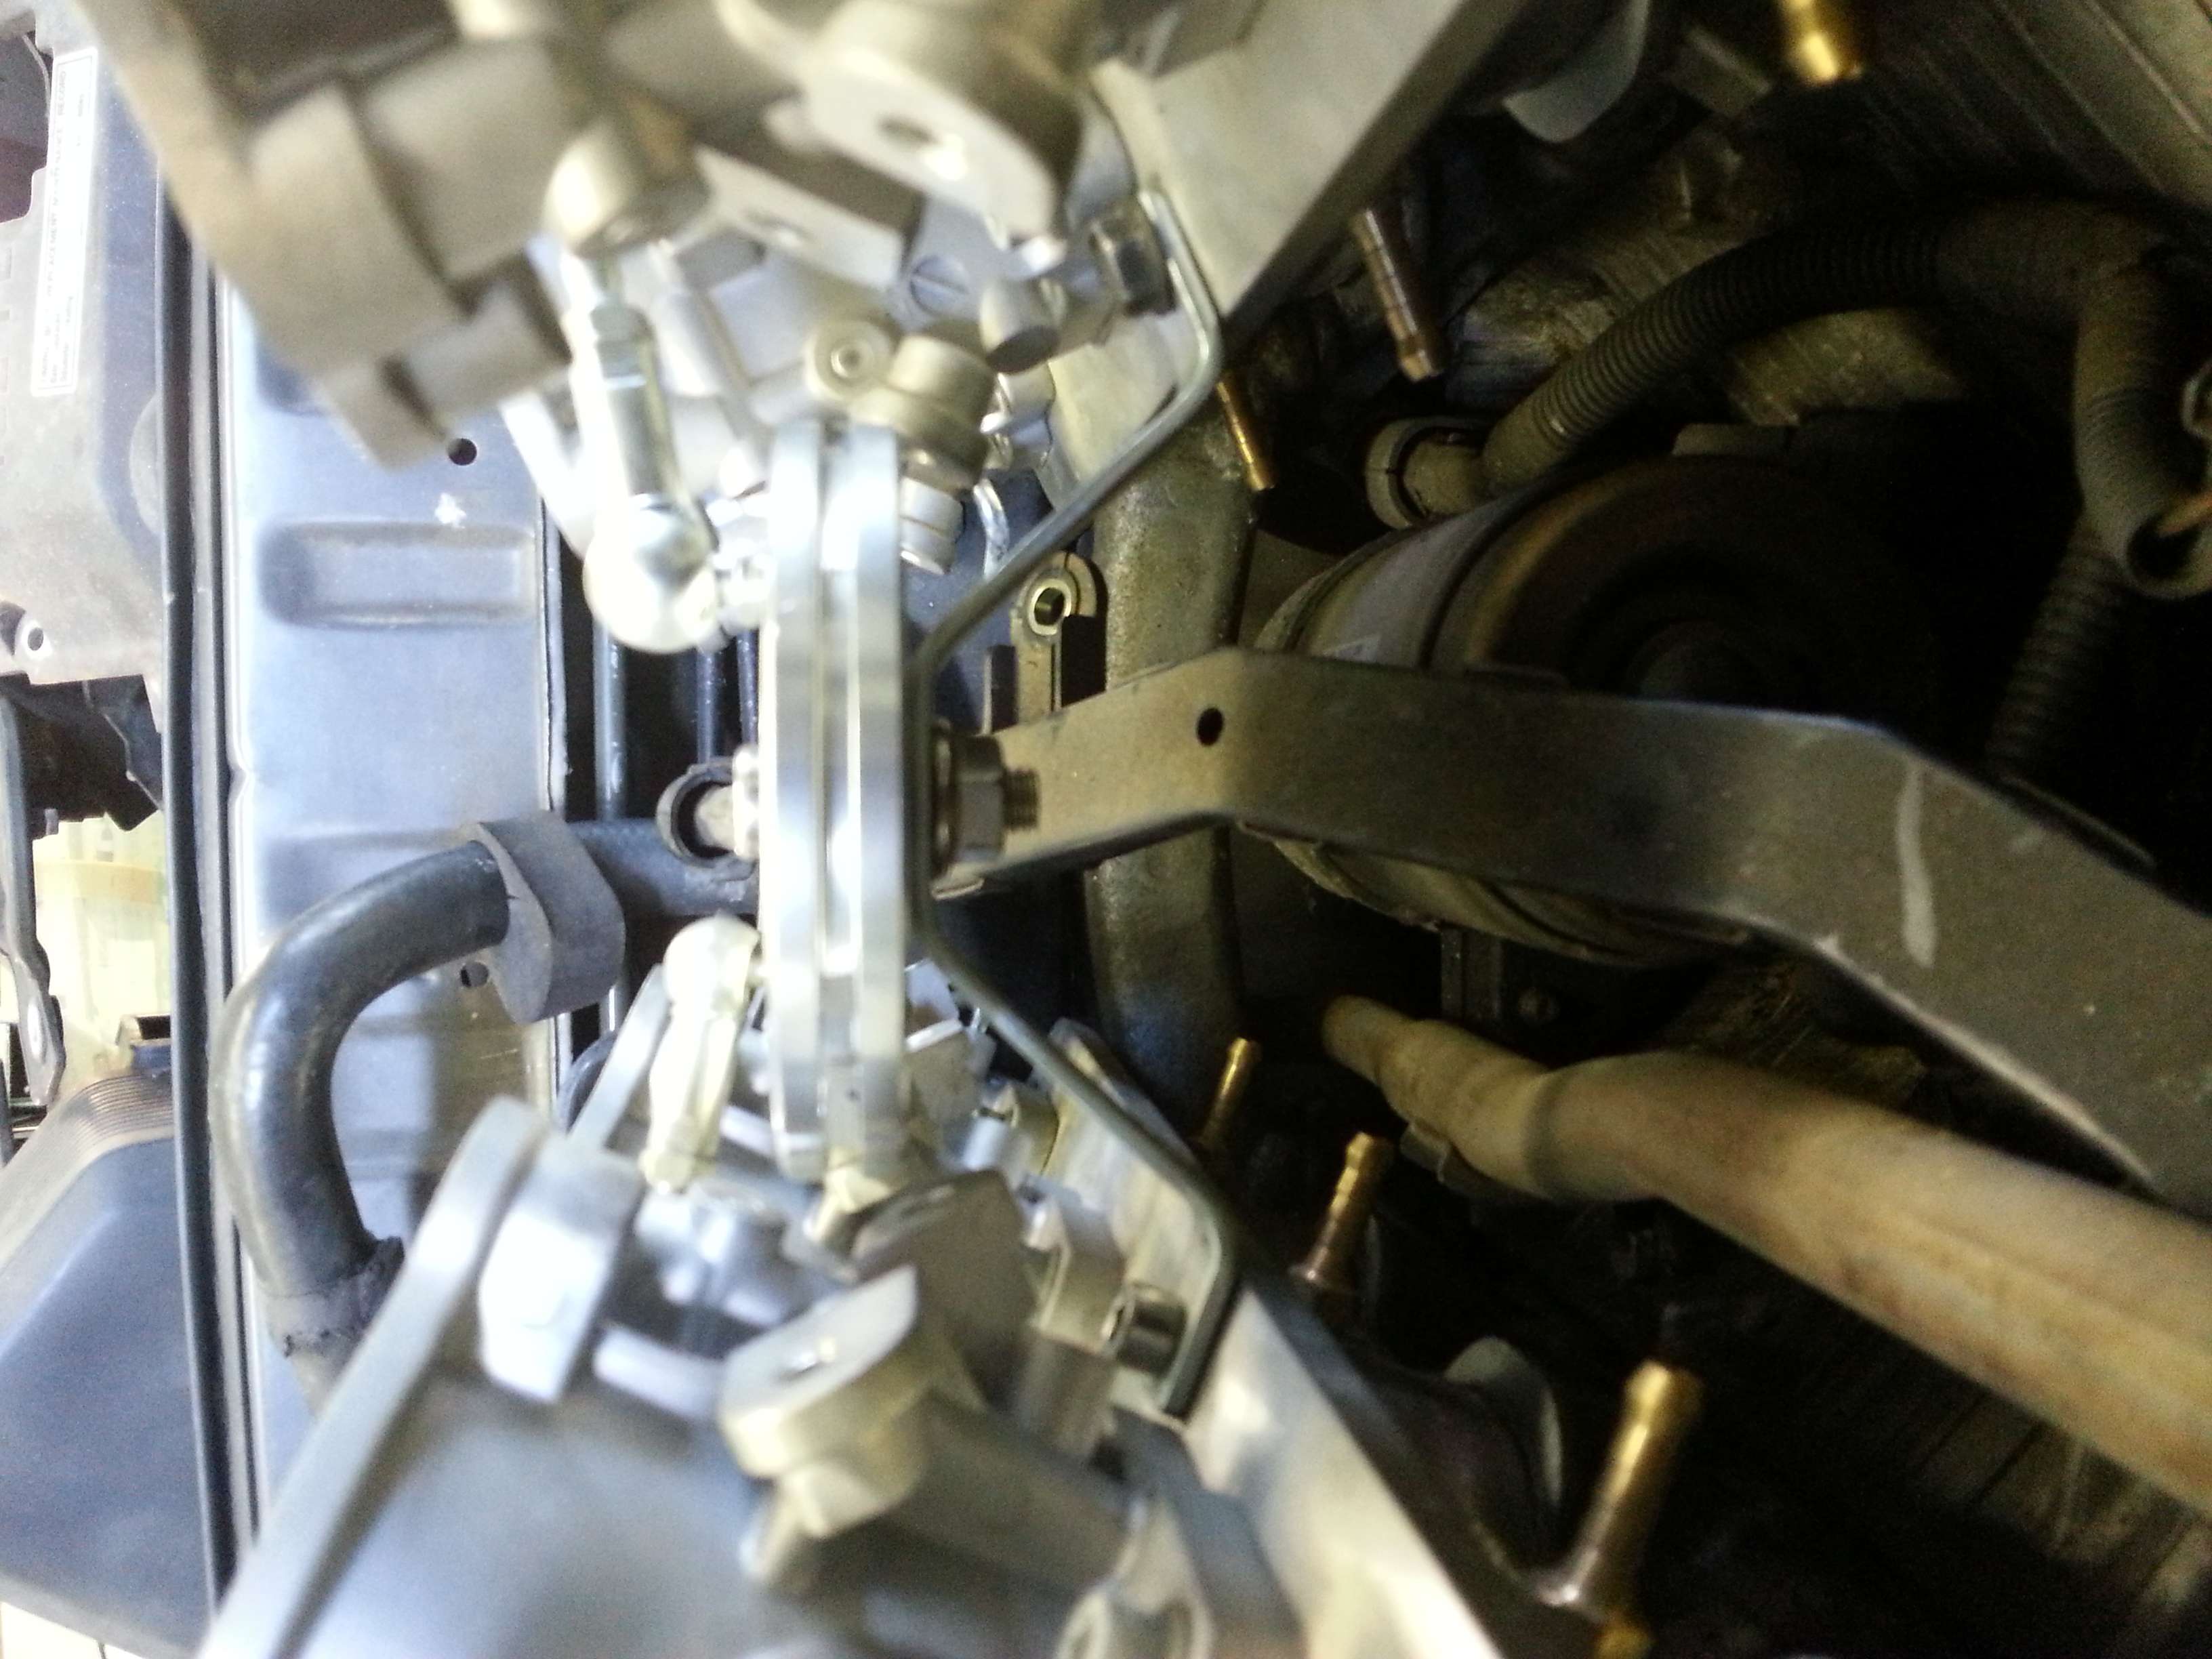
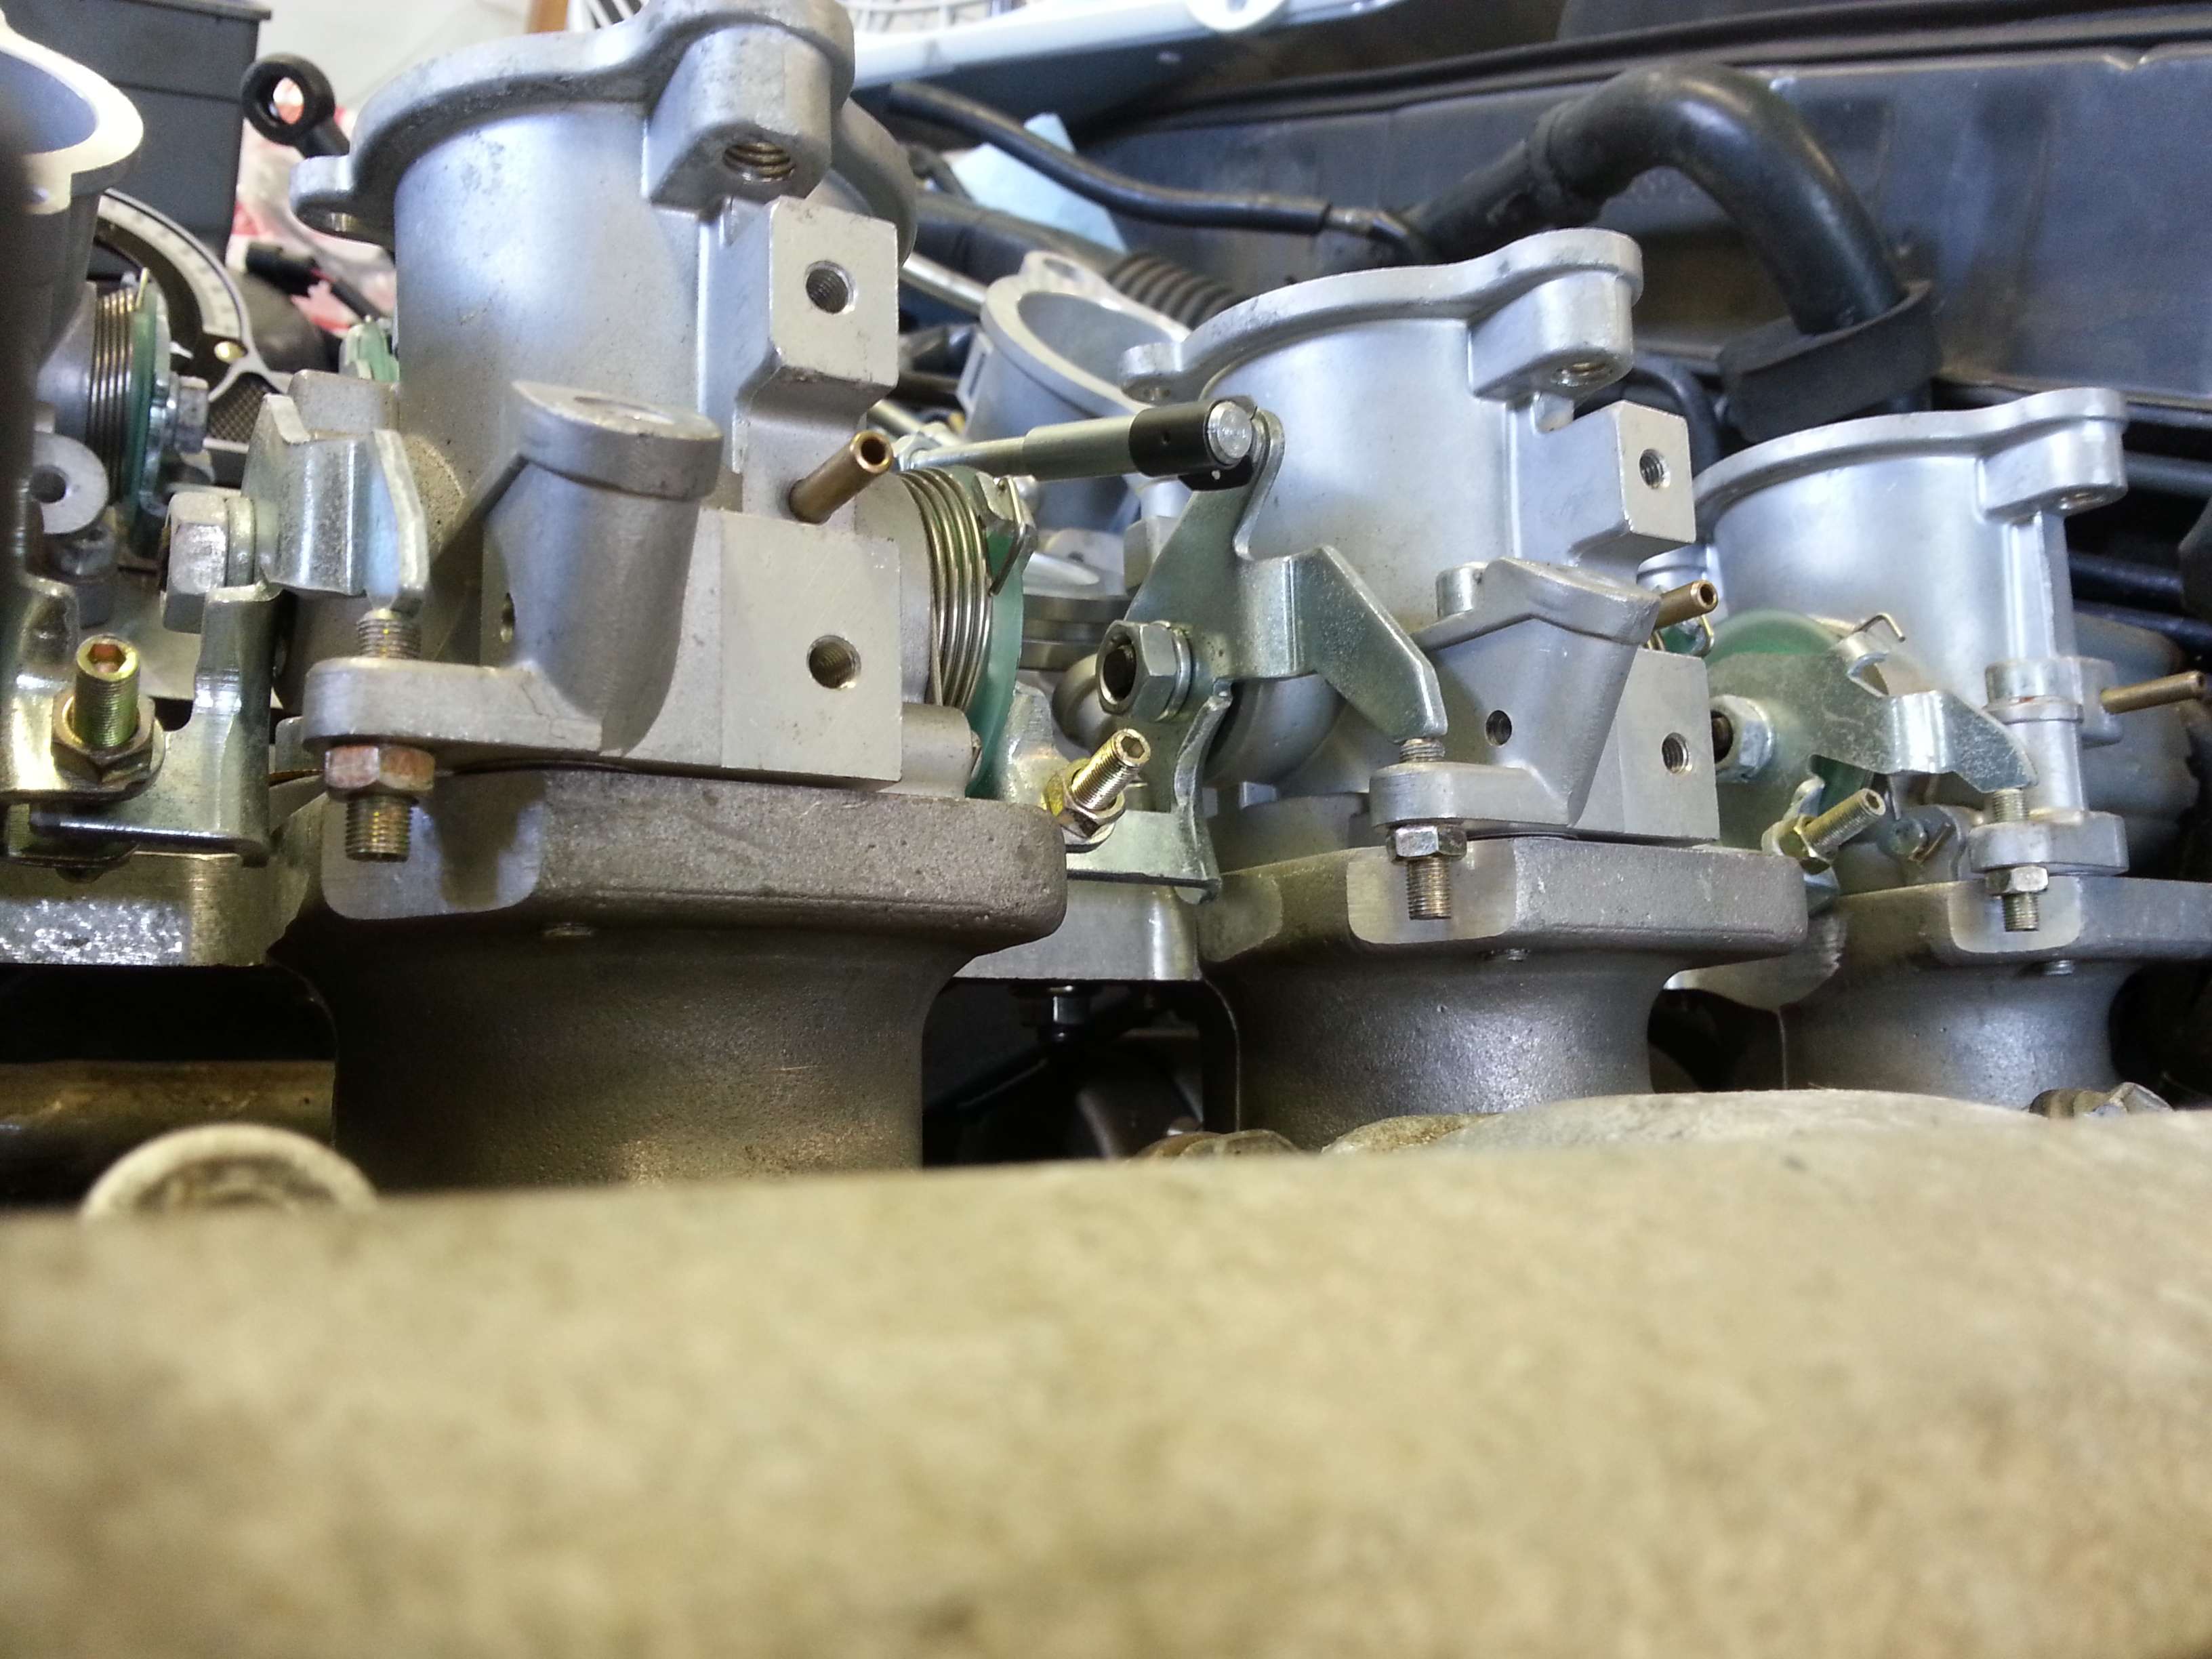
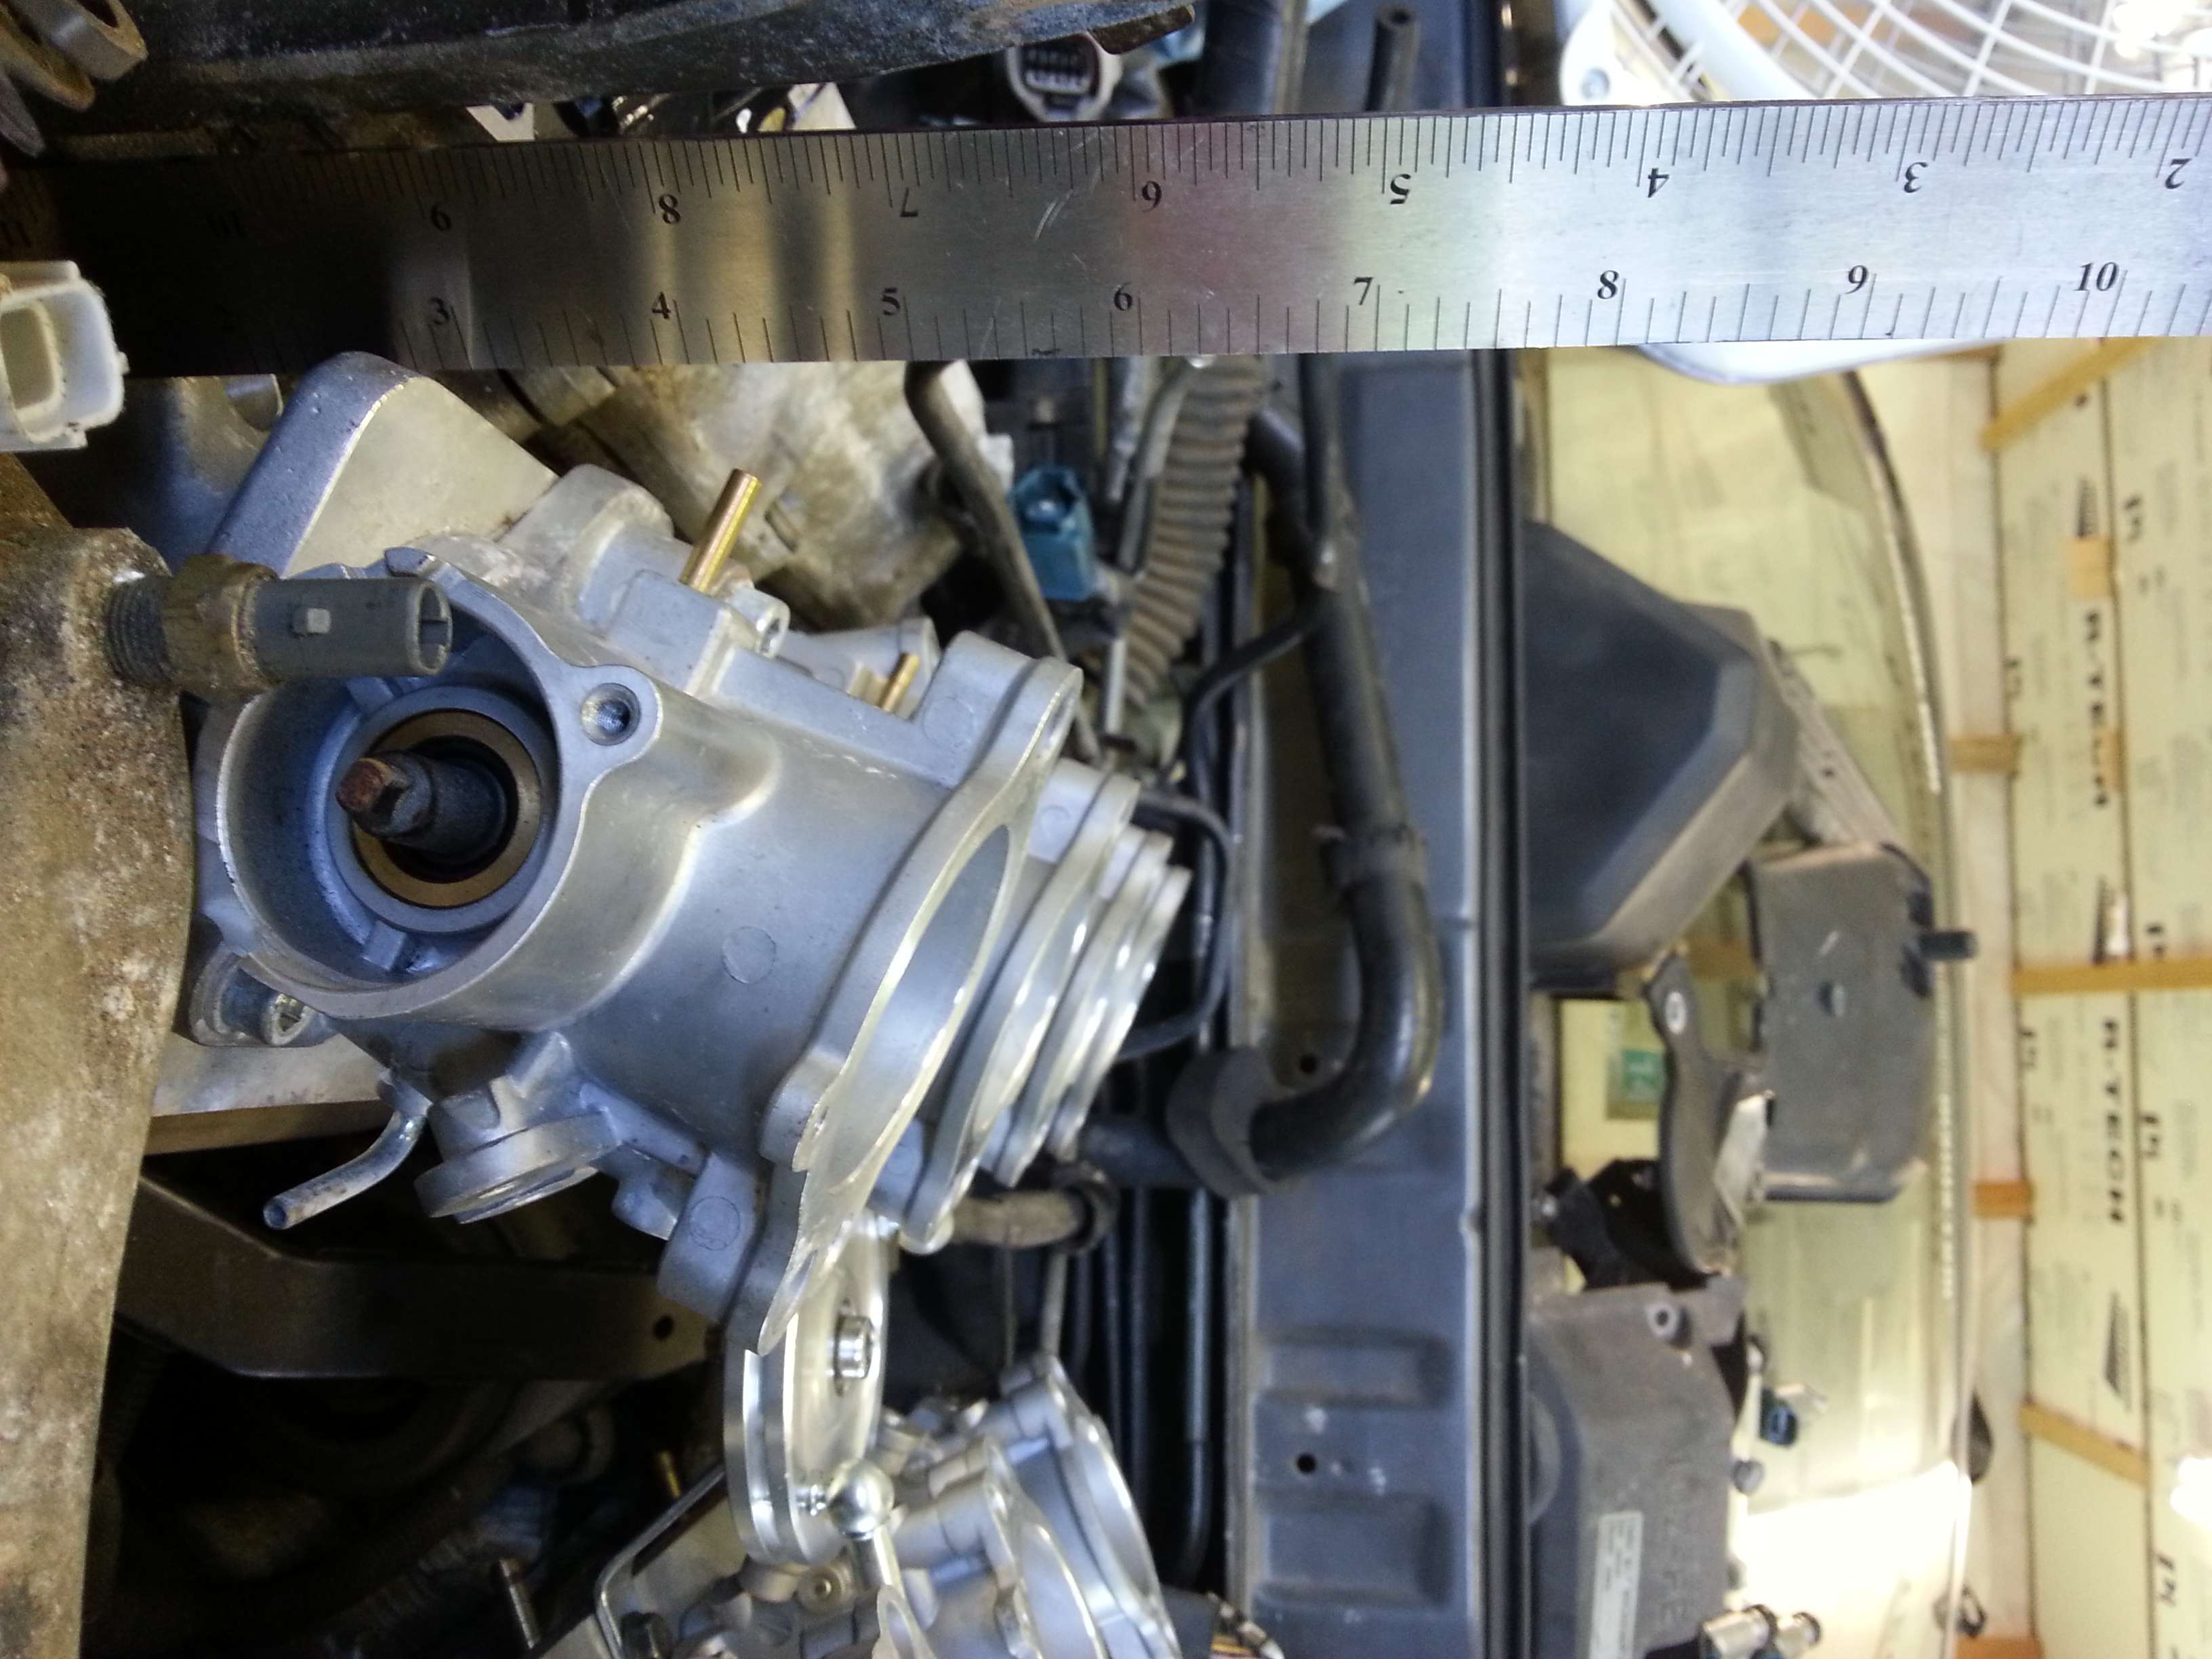
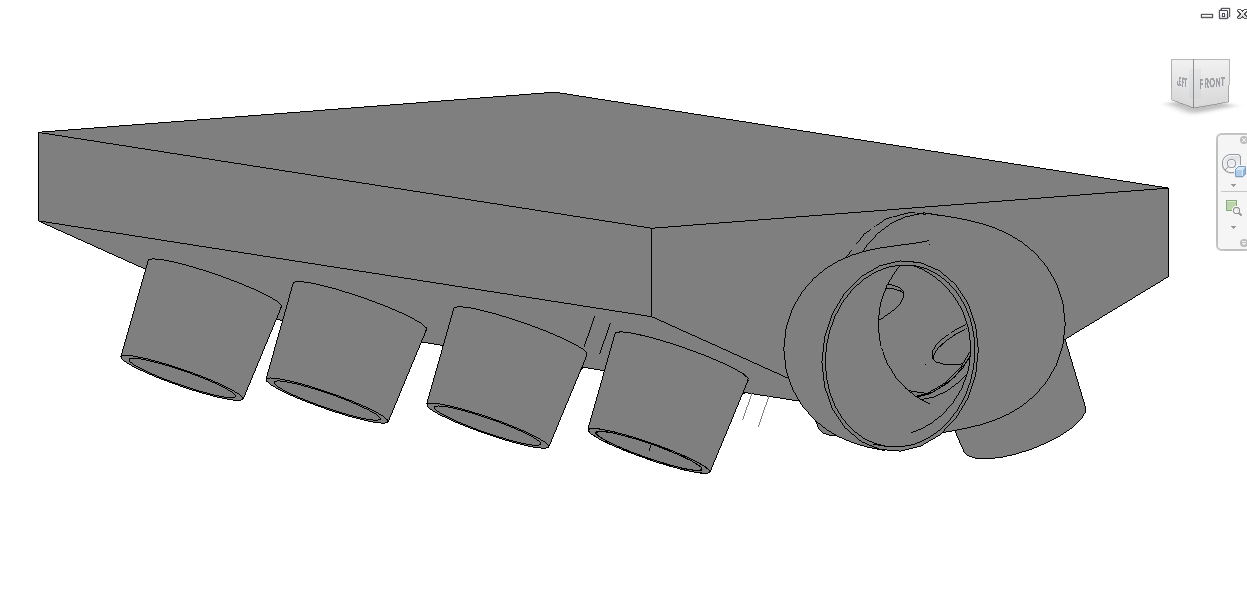
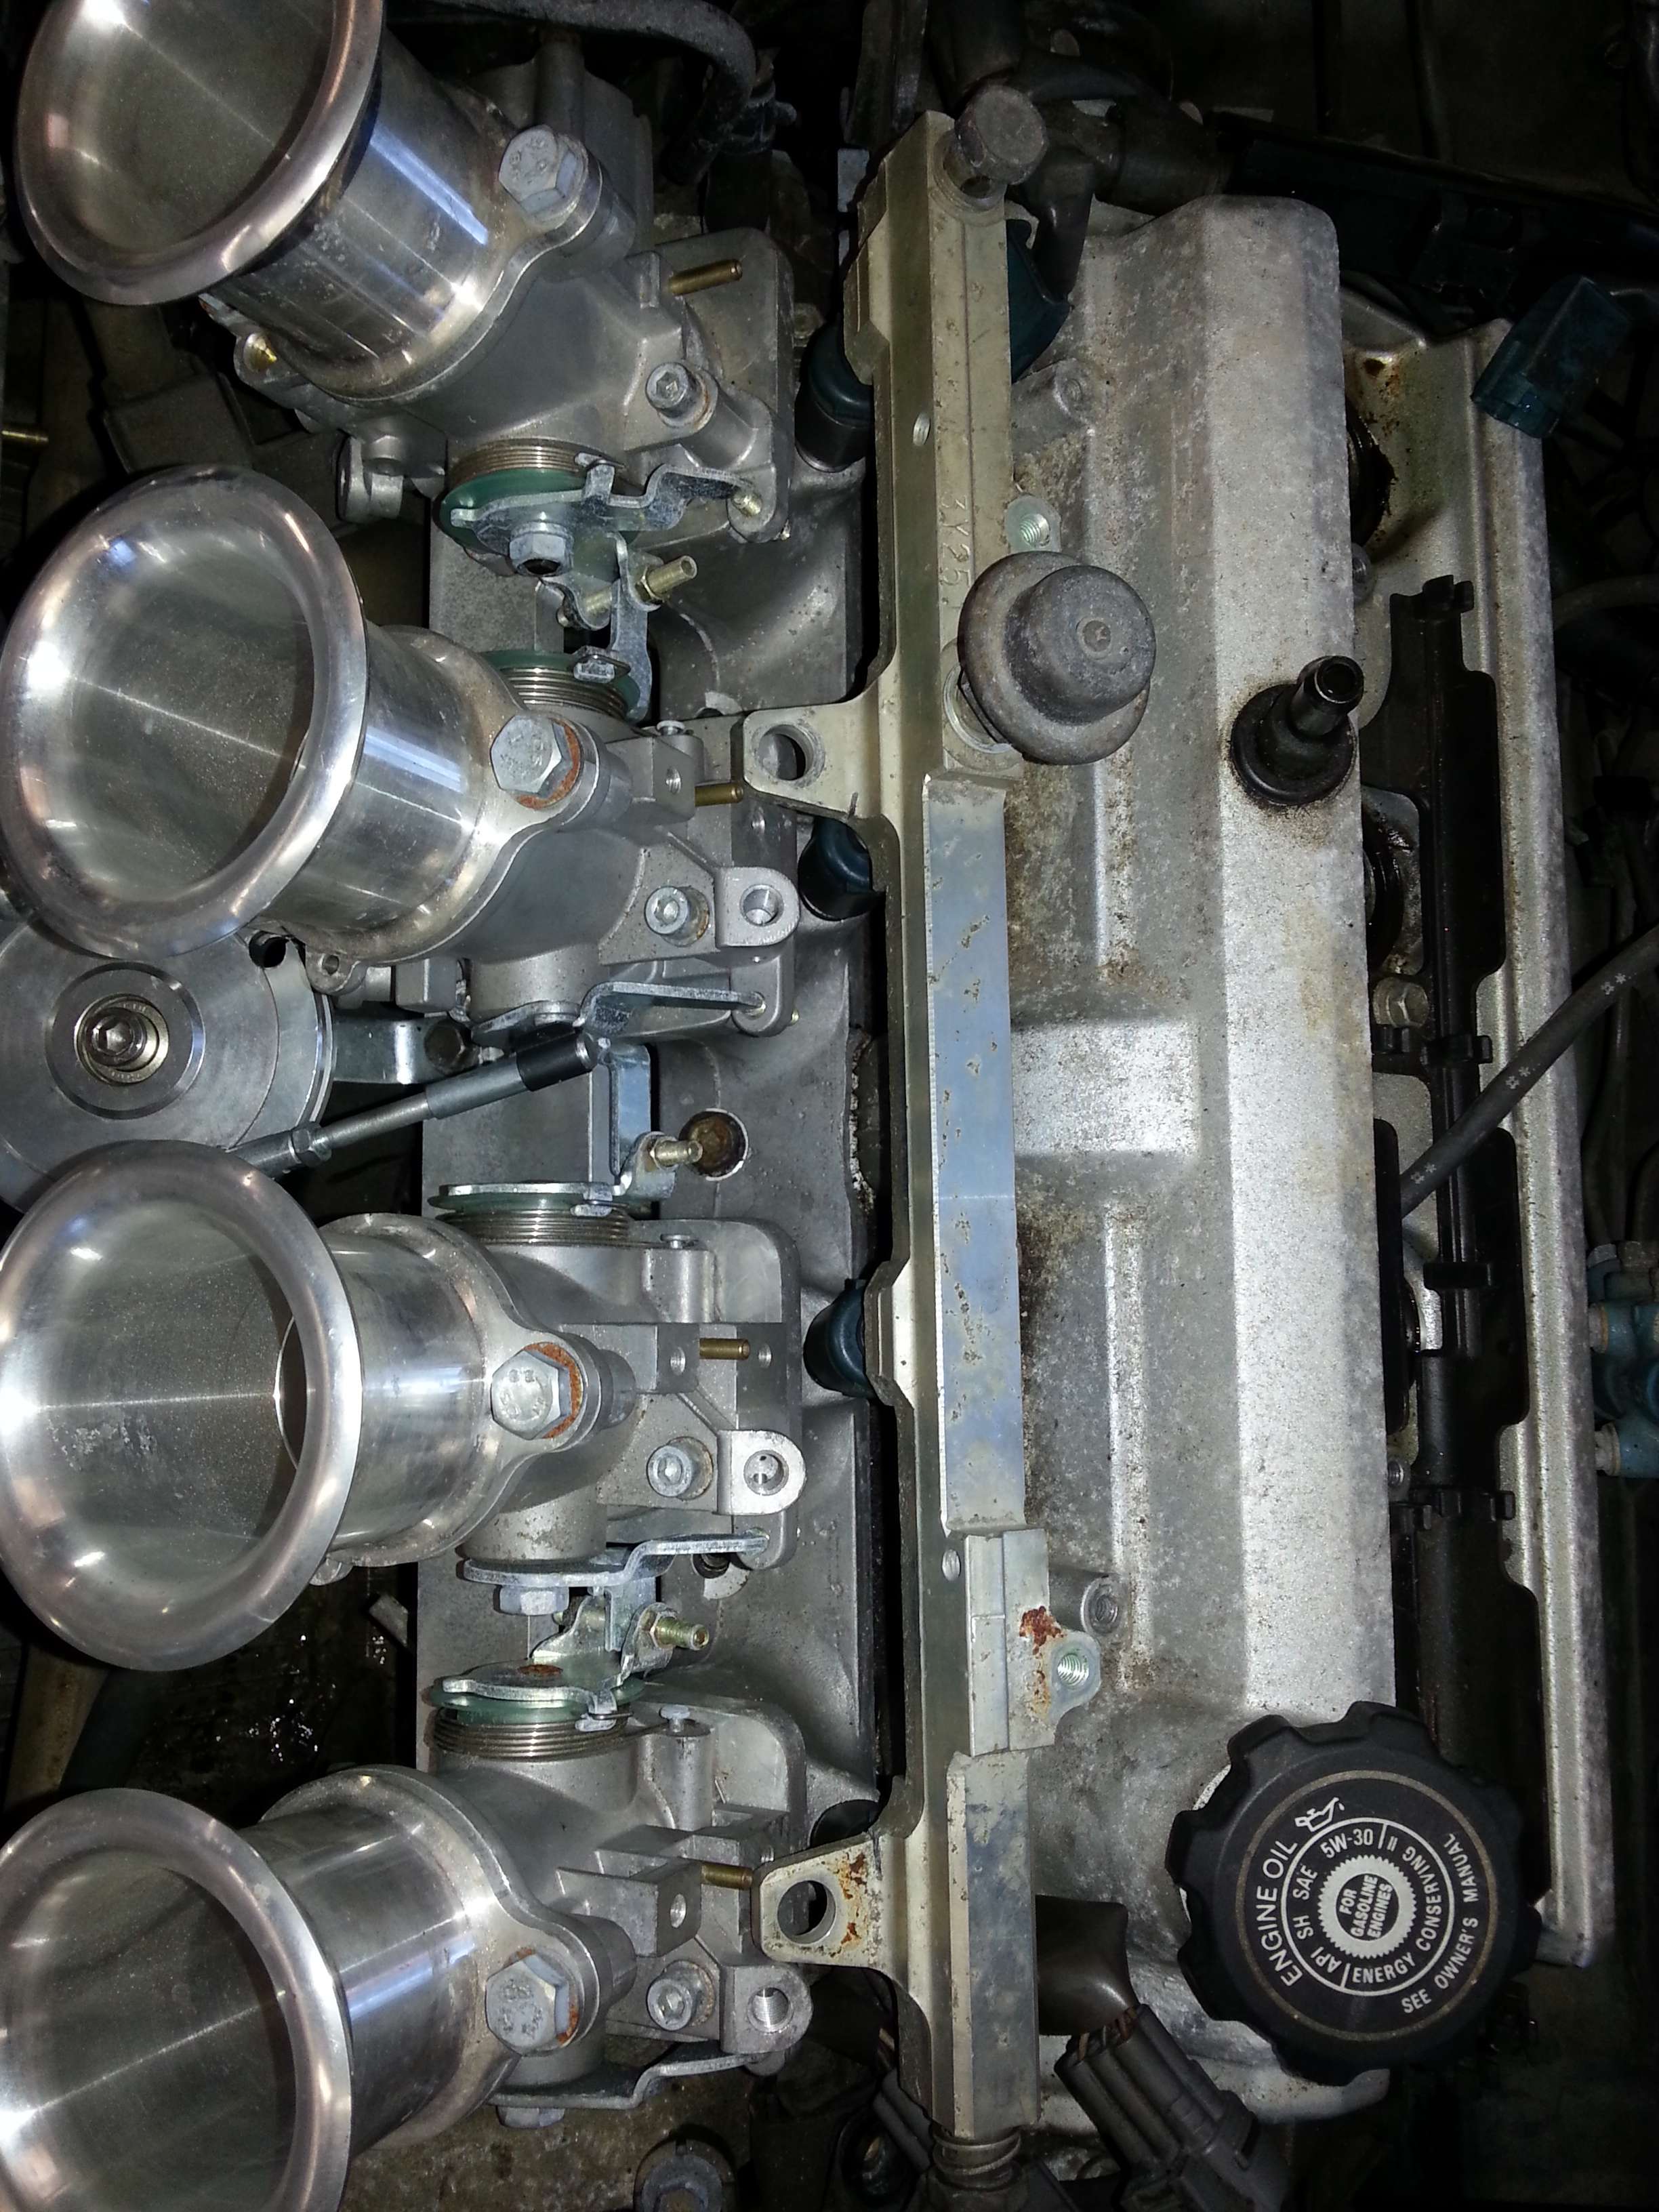
After I did all I could do untill my SC headunit comes in, I finally broke out the ITBs!!!! They required a little grinding as well to make them slip onto the studs easy.

g0fo.jpg


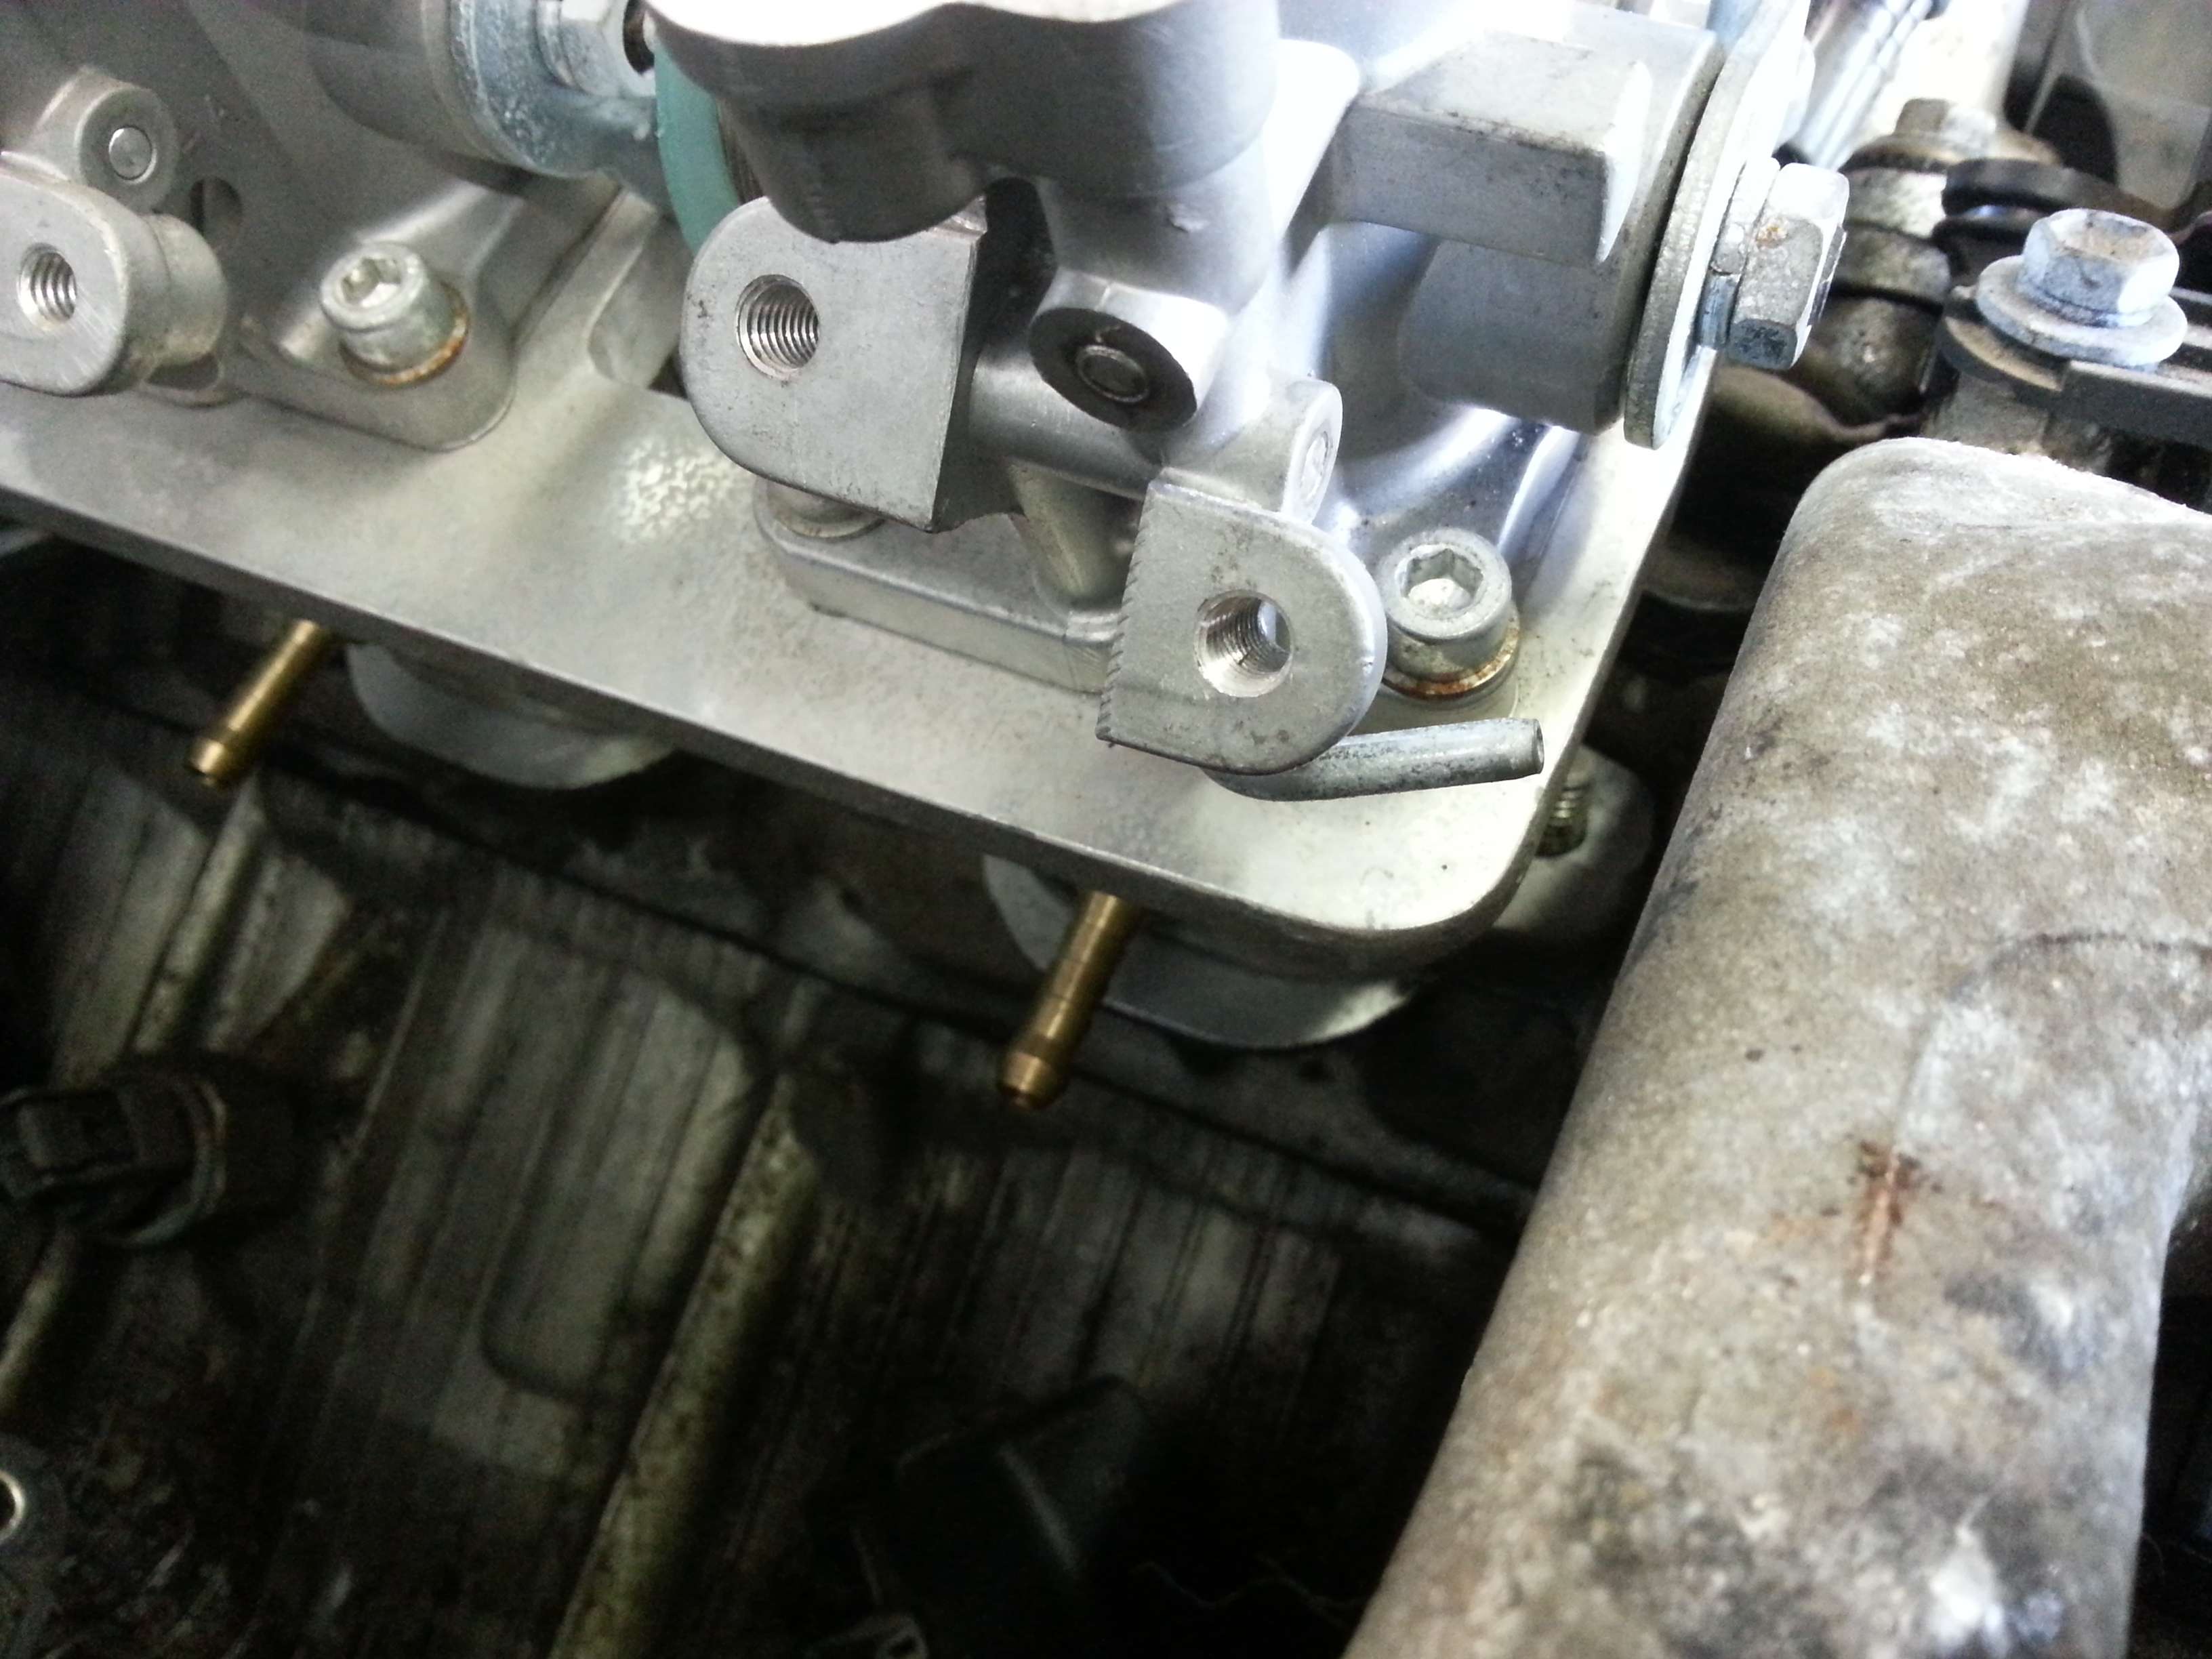
When I bought the ITBs the guy said the fuel rails needed to be modified, so I stuck the fuel injectors in to see how much needed to be modified. And well, none of the mount tabs work, so they need to be cut and welded onto the right spots.

3dmb.jpg


56fq.jpg


After I get a few more bucks in my pocket I will be picking up a set of SC400 headers from OBX, and them modifying them if neccisary to fit them into the MA70 chassis.

More to come!
 

Chambers

Now you know
Sep 9, 2007
981
0
0
34
Baltimore County, Maryland
I started to think of where I want the inlet of the plenum, also took a lot of measurements so I could model the plenum in 3D and have CFD run on it to see if all the runners are getting equal CFM of air. I also took a few photos of the ITBs since there seems to be little info and photos out there.

hpsb.jpg


whaj.jpg


23sh.jpg


yujw.jpg


cqaf.jpg


5qsj.jpg


9z21.jpg


auoh.jpg


2ed0.jpg


2t4c.jpg


g9xg.jpg


8wfe.jpg


jpta.jpg


9kwp.png
 

empera

Authorized Vendor
Mar 30, 2005
4,548
0
36
39
Philly.
damn that is looking good! where do you find that fish bracket? im thinking of picking up an sc400 and adding a SC on there
 

Chambers

Now you know
Sep 9, 2007
981
0
0
34
Baltimore County, Maryland
Thank you!

I found that one on ebay, got it for a steal considering what they cost new. I pretty sure Lextreme still makes them, or at least parts for them. I ordered some 1UZ downpipe flanges last year and out of no where a week or two later they showed up at my door, good quality water jet flanges.
 

Chambers

Now you know
Sep 9, 2007
981
0
0
34
Baltimore County, Maryland
A friend of mine was cruising ClubLexus and found them, but they are on eBay new, the ones I have are OBX. They originally came from a guy who was building a drift/race car and started to fit the ITBs he never finished and parted it out. The ITB cast lowers have to be moddifed to fit, some parts of the lower manifolds hits the valve covers and certan bump outs on the heads. Its what you get for the price (cheapest ITB set up on the market). Most of that work was done when I got them, but the fuel rail still need to be modified.
 

Chambers

Now you know
Sep 9, 2007
981
0
0
34
Baltimore County, Maryland
I finally found a Vortech that was has the correct discharge. It came from a guy who had a SC400 running a 10psi pulley, so its perfect for my goal. It was a little dirty so I cleaned it up, I think I'm going to re finish the polish job and make it look new again! I also managed to find a set of rain guards!!!!!!!!

zzmd.jpg


vx0s.jpg


rjzw.jpg


0aeg.jpg
 

Beals

JZA70 TT-R
Feb 3, 2009
591
0
16
Alberta, Canada
jelly. my dream car is a 1uz boosted jza70, I currently have a 1jz tt-r but it's not the same as having a twin turbo v8 like a ferrari f40 =(

one day I will break down and get myself a jdm 1uz and commence the swap when the inline six is no longer enough lol
 

Chambers

Now you know
Sep 9, 2007
981
0
0
34
Baltimore County, Maryland
Thanks, From what I gather a 1UZ+boost is a monster!!! (in a very good way!)

My "dream" set up for my car at least on the engine side would be a 1UZ that revs and makes power up to 9500 rpms and has boost, by either a lone supercharger or twin charged!
 

Chambers

Now you know
Sep 9, 2007
981
0
0
34
Baltimore County, Maryland
So yea, this make me smile. I got the SC mounted, and I put an order in for some fittings and hose, so I can fab the oil drain and supply. I also orderd some adapters so I can make some custom AC lines, ohh, I also found a AC compressor at the junk yard. The top plates do swap over, but the Supra AC lines do not sit at the right angle for the top plate. Also, the one line would be "in" the first cylinder exhaust runner!

69gi.jpg
 

Chambers

Now you know
Sep 9, 2007
981
0
0
34
Baltimore County, Maryland
Update, I started working on my car again!!!! I started to modify my spare engine harness removing all the bits not needed to make the engine run. There are a LOT of wires not needed if the 1UZ is being mated to a manual transmission. This harness will be made for the ITBs, and it will just happen to work perfectly with the Vortech later on. The plan is still in effect, AEM first, then ITBS, then Supercharger! I have also put effort into getting the AEM up and running, I ordered the necessary connectors and sensors to convert to a MAP based system, so the AEM will be going in soon. Then later on when I'm ready for the Vortech I will only have to replace the factory o2 sensors with widebands.

I’m also going back to a power steering set up, it sucks trying to park my car at car shows when I have to do a 30 point turn to get lined up with the spots because its such a pita to turn when moving. Since there are no plug and play line sets out there I’m going to make them with high pressure 6-AN fittings and they just happen to fit perfectly in the factory line mounts!!!! WIN!!! I also started buying fittings for the AC system! I only have to build lines going from the compressor to the condenser, and the rest fits in the car with no issues!

I also started the search for a TPS for the 1UZ ITBS, the 1UZ TPS like most Toyotas use a clockwise rotation the ITBs use a counter clockwise rotation. Upon searching I have found they really resemble 4A-GE Black Top ITBs, the housing are extremely similar. Since the BT 4A was never in the States I can’t just order the TPS, but I did some more digging, apparently some of the SC430s use a CCW TPS, some of the 3.4L T100 pickups use the CCW TPS, and the older 2.7L 4 Runners use the CCW TPS. I ended up discovering a part number for them too, and that part number just happens to match the 2JZ-GTE TPS too! So there are plenty of options for a Toyota TPS that should plug and play. 89452-22080 is the Toyota part number.

Craigslist deal of the day was a $120 1UZ!! When I got it the valves were rusty and not all of them were moving, and I could not turn the crank. So I sprayed Liquid Wrench Penetrating Oil everywhere and sure nuff the stuff ate the rust and freed the engine, all the valves move and the crank turns completely around with no hang ups. When I did the first complete turn it puked out a bunch of nasty brown crap out of the exhaust ports. Turns out the engine took on some water at some point when sitting. I pulled the pan and found a bunch of RTV in the bottom, it looks like a BHG but the coolant didn’t show any oil in it, so I think the valve covers were not on it for a period of time. Regardless of the condition of the engine I couldn’t pass up the deal for a nearly complete 1UZ that I can keep around incase mine decides to shit the bed!


All this!!!!!


Got TPS?


Yuck!


AC Fittings


Power steering routing:


barrowlights

New Member
Feb 16, 2014
6
0
0
Appalachia
Ah, glad you're back at work on it! Definitely some inspiration in this thread - the Supra was looking great in the last run of full photos, would love to see what it looks like now (when you've got it back together, if necessary, that is).
 

Chambers

Now you know
Sep 9, 2007
981
0
0
34
Baltimore County, Maryland
Thanks! It hasn't changed much on the outside, other than getting a new spoiler. I will be posting plenty of good photos when its back out and the weather improves!

Another update, I got the old manual rack out and installed the power rack!!! I also got the high pressure line in and realized I ordered the wrong type.... So I have to send this hose back and wait for the new correct hose. But, I started to mock up the lines to get lengths and routing done, looks like I can use just about all of the factory mounting points all the way up to the new cooler that will be mounted up front, then back to the reservoir.

On the pump, I have to use a banjo on the pressure side and then an adapter and a 90 on the return. I'm SOOOOOO glad the AC compressor clears ALL of the lines associated with the power steering pump!!!!!! That, makes me very happy.

I also ordered the steering rack spacers but could not for the life of me get the inner tie rod off, they must use some serious lock tight when the rebuild them....


Chambers

Now you know
Sep 9, 2007
981
0
0
34
Baltimore County, Maryland
The power steering project continues! I found an LS400 reservoir at the local junk yard, then welded the -6 AN bung to the front. I debated on cutting off the factory barb, mainly because I was unsure if I could fill the hole in. I ended up cutting it down and welding it closed, the whole process went smoothly. I then fabbed up some brackets for the power steering cooler. The sheet metal could have been a little bit thicker, so I put them in a vice and bent them over to give them some strength. I pulled my front bumper off and welded the mounting brackets on and BAM! I now have a power steering cooler.

The pressure hose however is not going smoothly, I broke my -4 AN wrench (on a -6 fitting...) trying to tighten the fitting that I just barely got to go together... Its double braided air brake hose, rated for over 2k psi and the hose end almost doesn't fit it. I'm using hose ends and hose from Fragola, so all the stuff is meant to mate up but its such a pain. It makes normal dash fittings look like childs play...

I'm happy with the end result!


Chambers

Now you know
Sep 9, 2007
981
0
0
34
Baltimore County, Maryland
Continuing work on the car I have finished the power steering install, and I’m ready to get the alignment. While I had it apart I decided to do some rewiring.

I eliminated my plug and play harness in favor of a direct connection to the body harness. I noticed the body harness had a rather small power wire supplying the engine harness and ECU. So I rewired from the fuse box to the 1UZ body connector with a 10GA wire to maximize the amp capacity. I also rewired my starter and fan circuits to use some of the unused fuses in the fuse box. When I did this it cleaned up the area around the fuse box so much that I had to re locate my igniters, and I’m wondering why I didn’t do that ages ago.

The power steering pressure line was such a big PITA to put together. The collar that slips over the hose would compress the hose just enough that the hose end wouldn’t fit smoothly into place… I had to put a M8 bolt in the hose and spin the collar on and let it sit overnight so it would open the ID enough for the hose end to be installed. If I ever have to re-do this I’m going to measure and get one pre crimped, because that wasn’t fun….

New body harness


Also added a relay for my future AC install


Here you can see the size difference between the factory engine power wire, and my new one


All that!


Pressure hose and my inline filter on the return:


Rack spacers:


Simplified my + terminal to this:


Chambers

Now you know
Sep 9, 2007
981
0
0
34
Baltimore County, Maryland
So I got the car aligned and made a trip down to my friends in Virginia, the car made it there and back once. On the second return trip I heard a POP and the car lost most of its power, I pulled over at a rest stop and couldnt determine the problem. The engine felt and sounded like it was running on 4 cylinders, so I unplugged the one coil I could get to and the engine stalled. That means the other coil was faulty, not having any spares on me and no one close I decided to run her home. The car made it and after swapping out the coil it ran great once again!

In other news I started moching up the new intake for the AEM install. When I get the car tuned I will drive it to the tuner with the stock components then swap out those parts to begin the tuning process.


Chambers

Now you know
Sep 9, 2007
981
0
0
34
Baltimore County, Maryland
I started to notice last year the car was running hot on the highway, 210-215 degrees... This past weekend in a cool 70 degree day the temp went up to 215 again. The only thing I havent replaced is the water pump, but I have a suspicion its not the issue. To be sure I ordered a new water pump from AISIN, it came with a gasket and o-rings, its a really nice piece.

I started to pull the engine apart, other than a HUGE coolant spill everything was going smooth as glass until I realized I need to remove the crank pulley and the timing belt components to pull the water pump... and my impact gun doesnt have enough balls to break the bolt loose so I'm off to find a higher rated air impact gun.


Chambers

Now you know
Sep 9, 2007
981
0
0
34
Baltimore County, Maryland
The crank bolt gave me some issues, I went out and bought an air impact gun because my electric one just couldn't budge the crank bolt. That failed too, the thing is I had that apart before I swapped the engine in and I torqued it to spec, so I didn't see any reason why it wouldn't break it loose. So I reverted to the old faithful, bumping the starter with breaker bar on the bolt. BAM! it came loose! After that the pulley just needed a little persuasion to be pulled off and it was clear sailing. After I got the pulley off I was able to remove the old water pump, and it seems after some poking around it had been replaced with an aftermarket unit some time ago. The factory metal gasket was not there, in its place was a bunch of black RTV. The new AISIN pump came with a metal gasket that looks perfect for the job. I'm going to be assembling the rest of the engine and replacing my alternator power wire while the radiator is apart.


Chambers

Now you know
Sep 9, 2007
981
0
0
34
Baltimore County, Maryland
So I got the car back together, and the new water pump didn't bring down the temps... Just as I thought... Before springfest 5 I made an intake that goes from the TB to the AFM with some 3" mandrel bent pipe. I also started working on modifying the supercharger bracket to make the head unit oriented for better oil drainage and to minimize how much needs to be cut out of the wheel well.