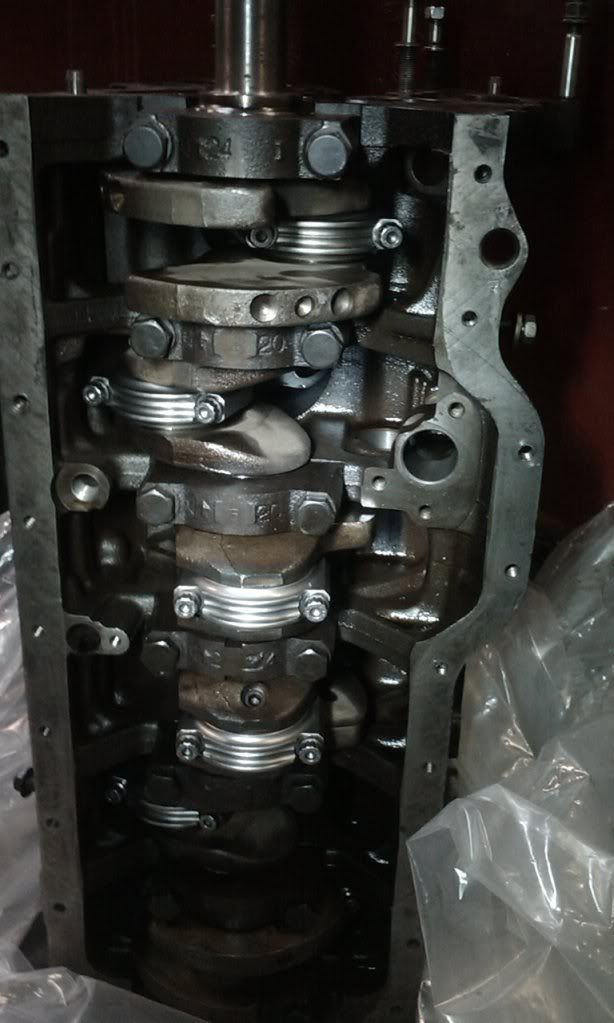
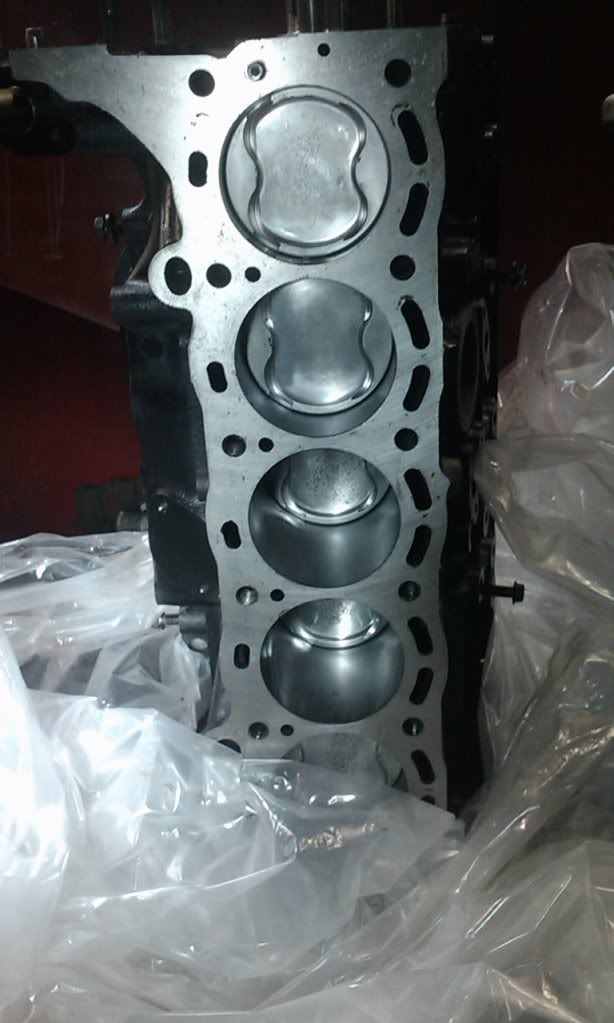
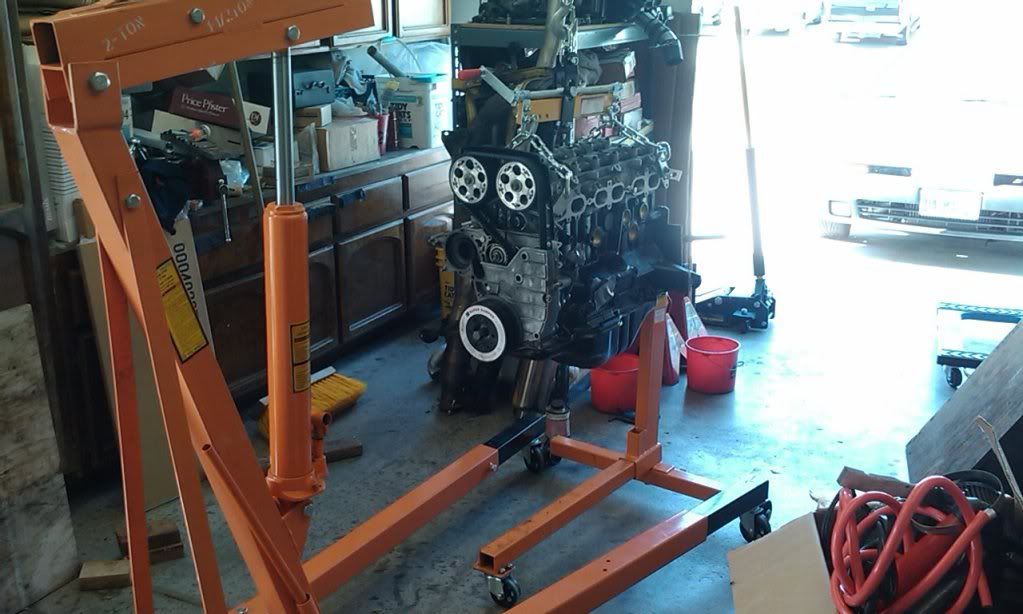
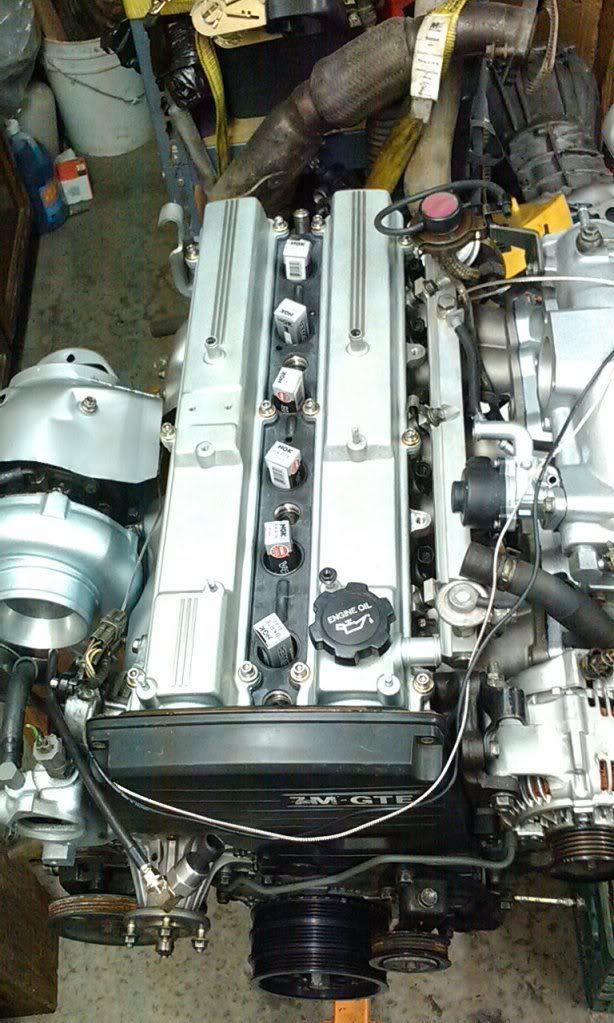
The "Hurry Up and Wait" build

thedave925

Since 9/16/05
Nov 9, 2005
626
0
0
East Bay, Cali
Mod list:
Built Block-
-Eagle Rods
-Arias pistons, .020 overbore (84mm, 83.5 is oem)
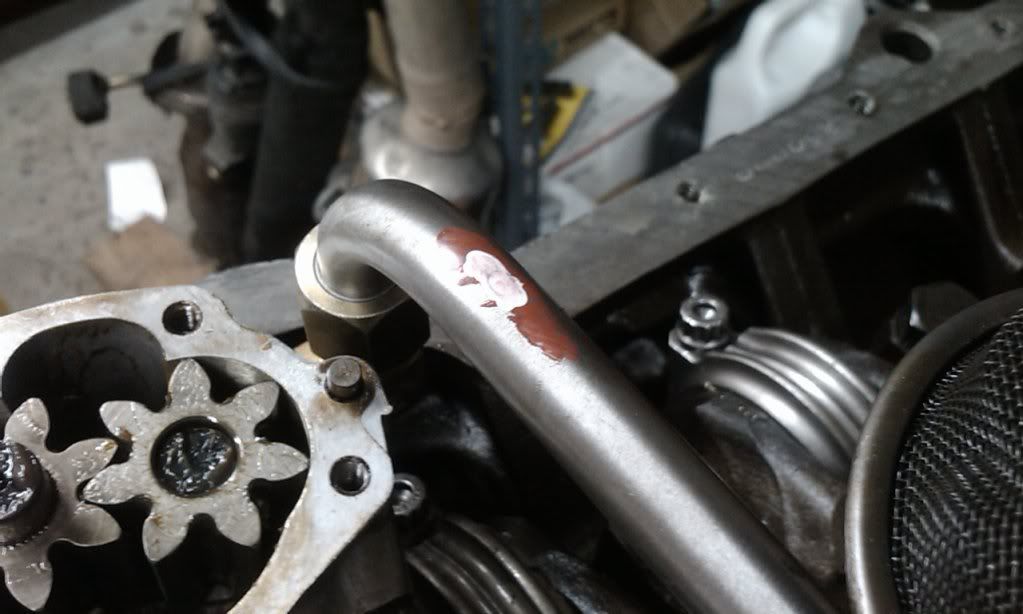
-ARZ upgraded oil pump crossover tube
-5mm shimmed oil pump pressure relief
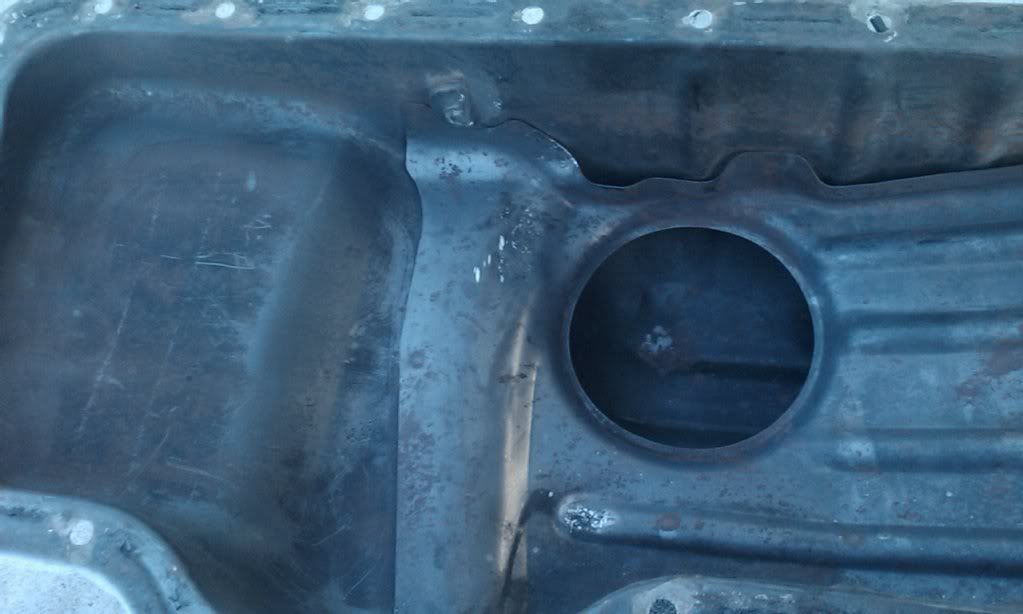
-5mm shimmed oil pump pick up
-ACL bearings, STD size
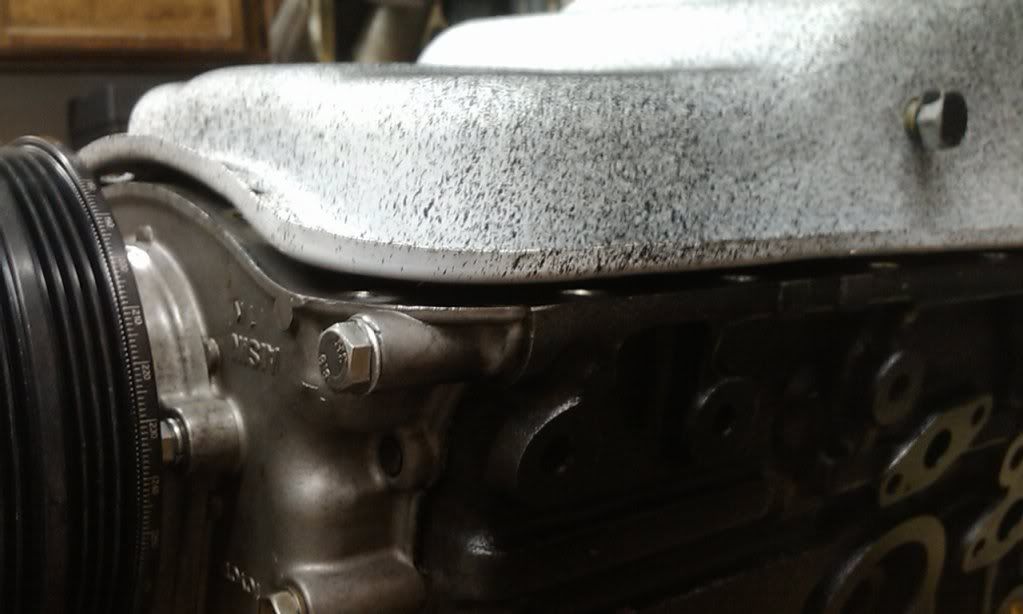
-Block decked about .020" for 2mm HKS Stopper
-ARP Head Studs torqued to 85 ft/lbs
-ARP Series 2000 3/8" (7/16" 12-point head) connecting Rod Bolts, 43 ft/lbs
-Main and Rod bearings set to .030
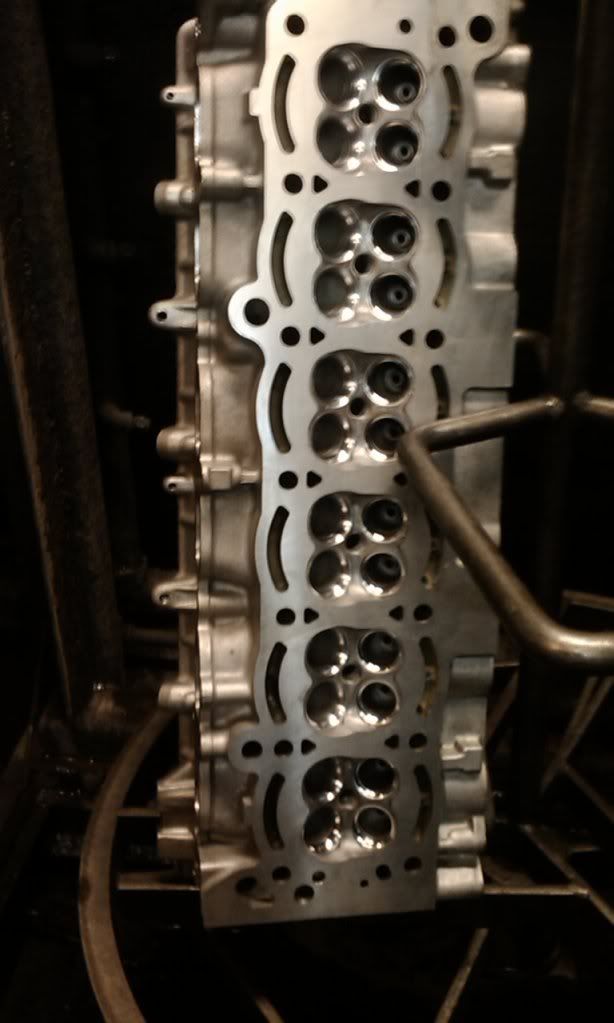
Built Head-
-Supertech Oversize valves, .5mm Intake and Exhaust
-BC Springs and Retainers
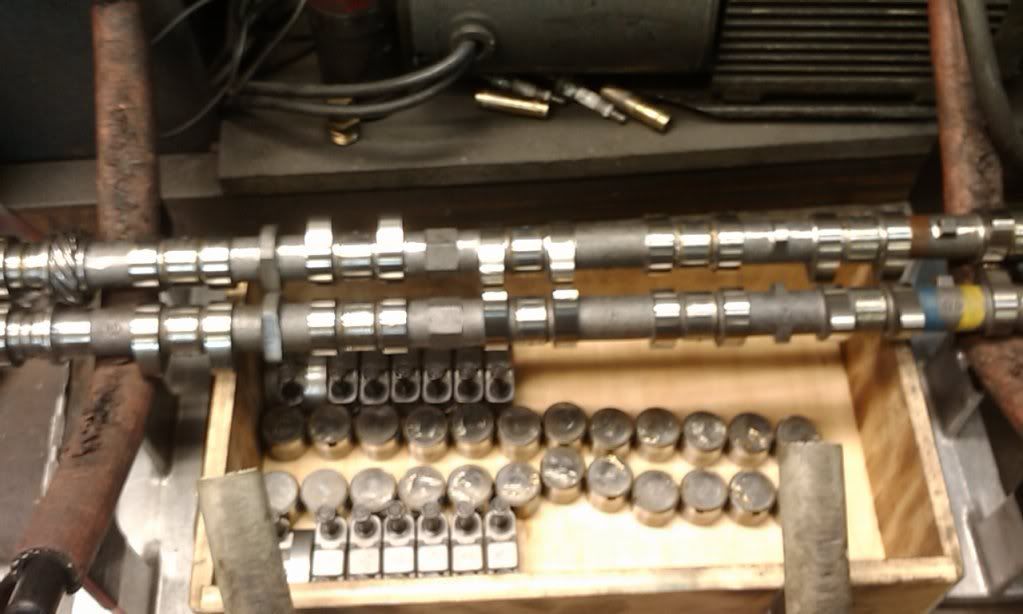
-BC 272 Cams
-mild porting, gasket matched intake
-Toyota valve stems and valve seals, cam seals
-Ferrera adjustable cam gears
-Gates performance timing belt (blue)
Turbo- Bolt-on T70
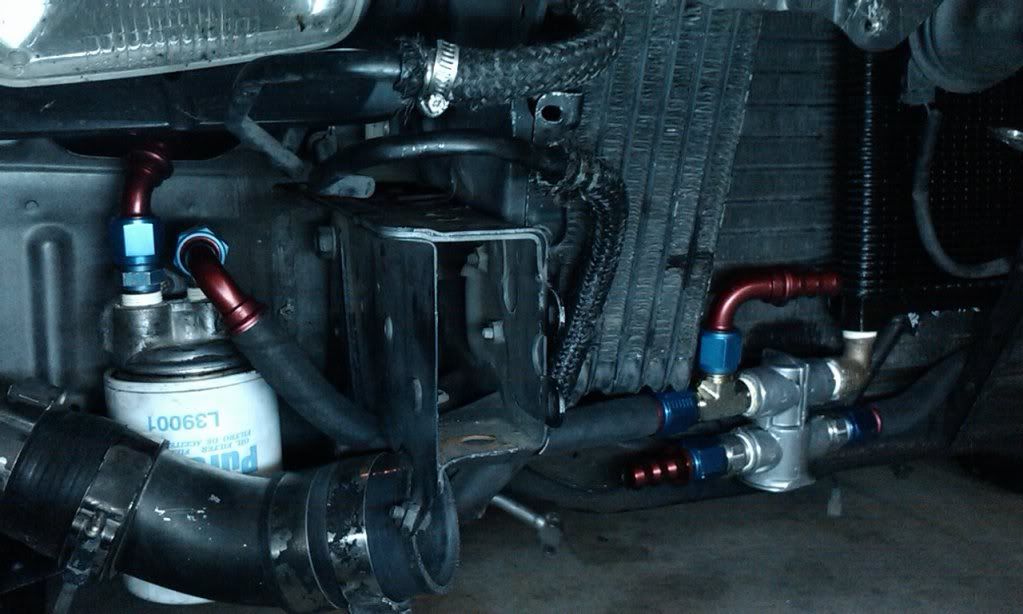
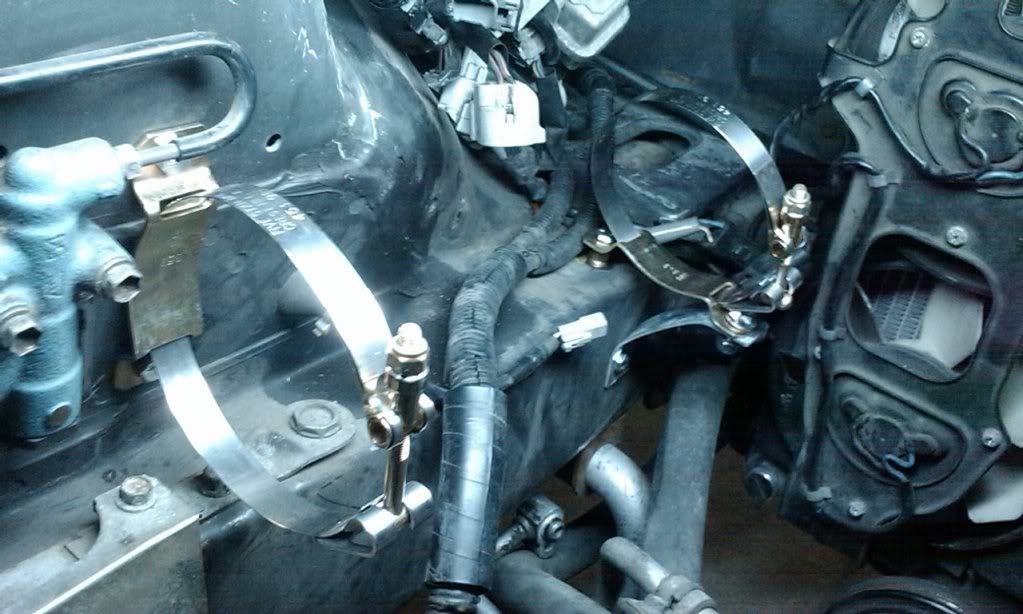
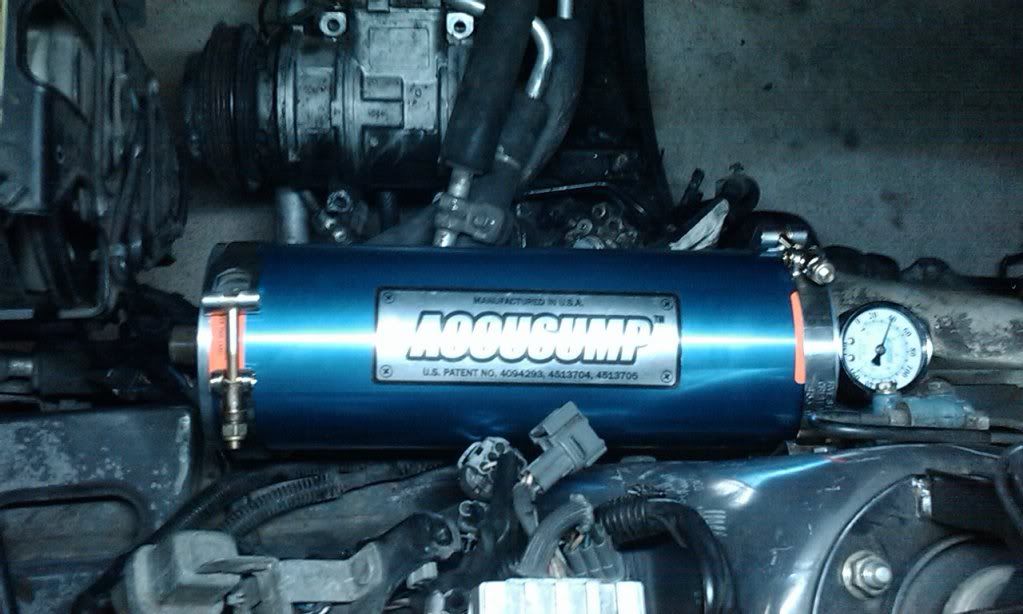
AN-10 oil system with 8x10x1.5 plate cooler, 2qt accusump
Lipp 3" turbo elbow
2.5" Turbo hotside to 2.5" spearco replica, reduced to OEM for fender pipe to TB
Maft-Pro
OEM fuel
etc

Every bolt gets loctite blue or red, or antiseize. Exhaust and EGR gaskets get Permatex copper silicone, all other gaskets/surfaces sealed with 'Right-Stuf' sealant
Important gaskets (EGR, exhaust, turbo, lower intake) are Toyota.
Main seals, oil pump drive seal are rock auto specials.
Freeze plugs are Toyota, sealed with Permatex #1a (hard-setting) and staked.

I'm dave. I haven't formerly introduced myself though some may know me from here and there when i do speak up.

THIS, my car experience, this thread, wouldn't have happened without Supramania.
I used to be the clothes horse dude that while ambitious, didn't get greasy beyond the easy cleaning of my hands basic maintenance involves.
There are dozens on here to thank for the advice and info, parts purchased, even life guidance from that couple whose intensity overshadows their muted input, the man who makes this site possible.

Enough with the heart felt speech, to the point

Working on these cars can be fun or a total bitch. At least they're old enough to be easily worked on.

Going custom, that is where you hurry up to make progress and wait for more parts when you get stuck.
Like anyone else, I get motivated and sick of working on the supra. The pay off is extraordinary and boost is addicting; finding a good settling point, that is the hard part.

I picked a goal several years back and have based this build on a bolt-on turbo I picked up from jbkmkiii
This is my progress over the years to now, fast forwarded and omitting some minor details.

But first, how I came across the Supra
History:
I was tired of hauling broke people around that didn't pitch in for gas and wanted something to show for my money instead of blowing all my cash on bills and partying.

The fix, get a 2 seater.
Not just any 2 seater. It had to be economical (*cough*Bullshit...), and have balls enough that hills didn't slow it down to 45mph.

At the time i was rolling to Santa Cruz a lot and Hwys 680-880-17 has long grades where if I wasn't doing 70+, i was stuck doing 45 with my 93 Ford AEROSTAR van.
That bucket was the shit, mind you. I've rolled 12 deep to parties and got them poppin!

So my trips to SC was usually 6-7 ppl, ice chest, a mix match of skin boards boogie boards surf boards, and 2 fosgate powered Alpine X 12s hammering out 800 watts, so many memories...

The Aerostar was a hand-me-down. I had to have my own.
Mustangs and camaros were everywhere. This called for picking something different.
Hopped on craigslist and looked for something reasonable, respectable, easy to work on, dependable.
Caddys, 240s, s10s.

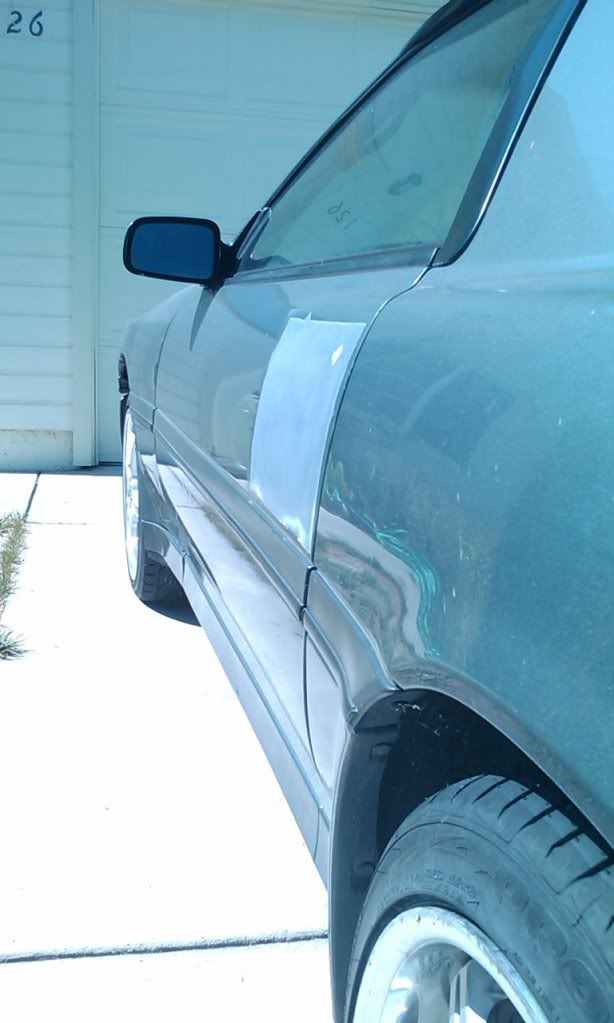
But the supra was love on first site. Dropped on H&R springs, HRE 5 spoke rims, the paint that don't tell the fuzz "here i am". Perfect.
Anyone remember CkAnderson? My car was his sister's for a brief moment. I believe I'm the fifth owner.

An example of what I saw on craigslist, though this pic is years later:
February 2nd, 2009
30 minutes north of Gorda Springs Resort, Hwy 1
p1591085_1.jpg

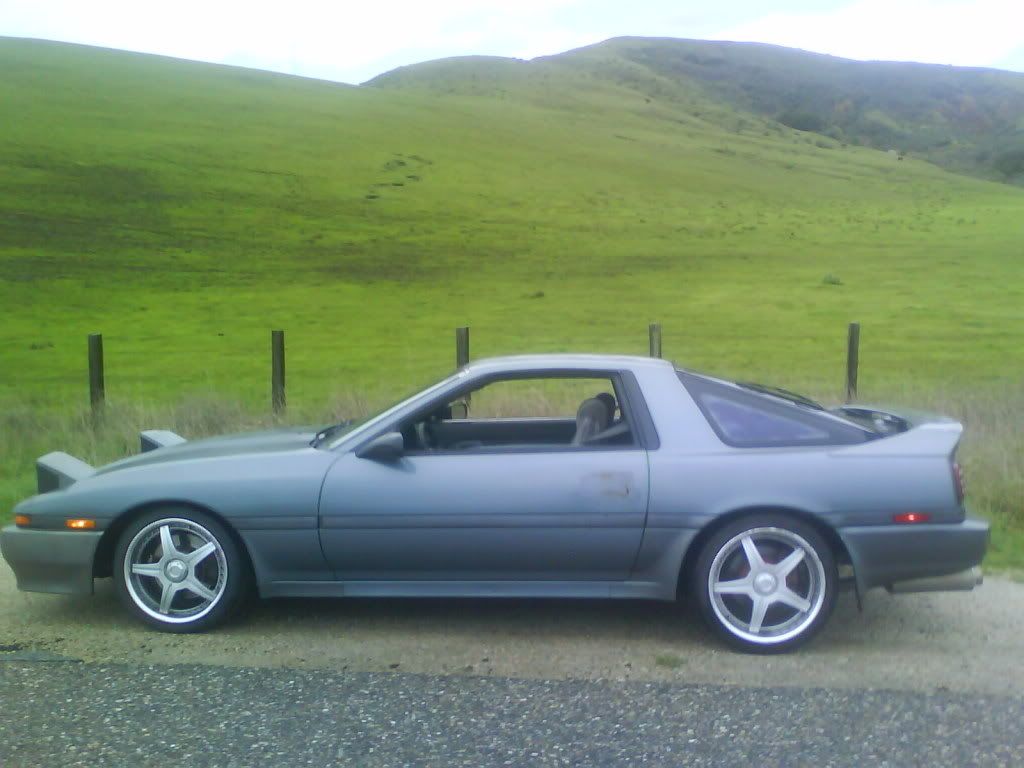
Minus the 'shaved' handles, of course.
It got stolen on May 10th, 2006 and I put out the word to some Supra buddies who helped me recover it a day later, intact.

Anyways, there was this joke on Sf years back that supras are on jack stands 9 months of the year.
With this build, I hope to alleviate myself of that issue with sheer will... err uh I mean pilesOcash :)
 
Last edited:

thedave925

Since 9/16/05
Nov 9, 2005
626
0
0
East Bay, Cali
The product of thieves: a sour taste in my mouth for the lazy spineless low lifes willing to take that which is not theirs, and a FUCKING HOLE IN MY CAR.
On to the pics

Nasty rust on a shit job of tacking on 16ga sheet metal after years of waiting
p1591090_1.jpg


Wrap it before you tap it
p1591090_2.jpg

p1591090_3.jpg


Take out the rust with a gel form of muriatic acid
p1591090_4.jpg


Self etching primer, prevents rust reoccuring
p1591090_5.jpg


Poly based body filler. Shit turns to plastic, don't wait longer than a couple hours before filing it down!
p1591090_6.jpg


Rage Gold body filler. The light smooth stuff for final imperfections
p1591090_7.jpg


Sand it down
p1591090_8.jpg


A few coats of self etching primer to seal it and prevent moisture from bubbling your work years later
p1591090_9.jpg


Block sand by hand to achieve body contour. Clean surface and sand block often with soapy water in a spray bottle
p1591090_10.jpg


Still ain't painted it 2 years later
p1591090_11.jpg


---------- Post added at 07:34 PM ---------- Previous post was at 07:24 PM ----------

NTRA08;1591089 said:
love your sig nice car. How did you do the shave

LOL Thanks for looking and the question, I'm happy to answer:

Removing the door handles, there is a lip you can tack a cut out of 16ga sheetmetal to.
If you tack it yourself, proceed like your going in torque sequence or when the metal cools, it'll pull tight and deform the contour of the door skin. Take your time or you'll burn through.

Let it cool, put on long sleeve shirt pants, shoes not sandals, gloves safety glasses. Take an angle grinder and smooth out the welds. Cool, clean, prep and apply bondo.

Notice on my job, the philosophy of not doing an entire bead as the finished product, is that since doors slam, body filler may fail over time so the gaps provide more to hold on to as it squeezes through then dries.

-Dave
 
Last edited:

thedave925

Since 9/16/05
Nov 9, 2005
626
0
0
East Bay, Cali
October of 08 my ct26 died. The shaft snapped BOOO! Thats what happens after 3 years at ~14psi...
Word of advise is don't "make it home" on a snapped shaft.
Oil is passed by the shaft and when it breaks, you smoke everyone behind you AND add oil to your intercooler.
Found that out at 11pm when I got bathed in oil popping off the lower end of the charge pipe :D

Excuse the crap phone pics, I had sold my out of focus camera at that point

I was in a hurry and with Suprasport and Driftmotion's help, I got to upgrade the intake while trying to make this bolt-on fit:
p1591105_1.jpg


2.5 IC charge pipe, DM spearco replica
p1591105_2.jpg


At the same time I went to full thermostatic oiling and tossed the oem spring based filter housing.
I moved the oil cooler over:
p1591105_3.jpg

It practically bolted up, just turn the hose connector tube a bit.

To fit the t70, I had to beat in the heat shield some. I yelled "Conform Bitch!!" all the while :D lol
p1591105_4.jpg


But now the PS reservoir had to move for the 4in intake to pass
2 days later Suprasport came through
p1591105_5.jpg


After some fabbing for the vacuum lines, I installed the new and improved super sucker K&N filter and modded 4" 45* bend with vac ports
p1591105_6.jpg

I moved the PS reservoir forward and bent a small bracket to bolt it in place.
I also retained the fender pipe during the IC because the time crunch and it simplified my install. Plus it's low key.

Edit: I have to give Adjuster the credit for placement of the PS reservoir
 
Last edited:

thedave925

Since 9/16/05
Nov 9, 2005
626
0
0
East Bay, Cali
^^I can't weld worth a damn, that angle grinder sure was handy ;)

Thanks for the compliment NTRA08
Most aftermarket alarms have at least 2 accessory channels to utilize for signaling additional relays to actuate the door solenoids. 3 channels for the hatch a plus :D
I didn't take pics of the in-door work but its rather tricky hooking up the solenoids to the factory rods and mounting them securely.
The 30amp units will unlock the door no matter how cold, but they are large and like 3lbs.

I'm off to a bbq and beer!!
 

thedave925

Since 9/16/05
Nov 9, 2005
626
0
0
East Bay, Cali
OneJArpus;1591178 said:
i like the look of it so far, but what is up with all the couplers and tbolt clamps. get that mess welded.

p1591213_1.jpg

Did you miss the 80s, man?
Remember all the leather biker jackets with tons of belts, zippers, and snaps?
Gotta accessorize :D


Fo sho, that crap will get sorted, soon as a find/hear of a competent place to go.
Right now its last on my list. Till the couplers start blowing off lol

More Catching up to date:
April 09 she started getting Rod Knock, poopy...
I forgot to check oil level and took her on a windy road, my bad.
I drove a few times throughout the year having fun on long drives until i saved up some cash, and pulled the engine late August 09.
I stripped it down to basically the head, gasked, block, pan and took it to a local machine shop.

Word of advice, never tell any business your dealing with to "take their time".
I visited every couple weeks to check progress, but didn't see my block being worked.
I come back to the machine shop middle of October and pushed them to actually do something.
Thing is, though an engine is an engine, if you see 85% domestics going through there, thats cuz it's their bread and butter and the simplicity makes good turn around while EDM and JDM stuff takes more precision and generally customers don't understand that more time to get things right cost bank.
It was the head guy who approached me and said he'll work the owner (block guy) to getting to my job.
He wanted to do the head because its not something they see everyday.
Cams, springs, valves, I supplied all the hardware since i bought it all before hand and let him at it :)

It was the block man holding things up. Things like undersizing the crank and getting undersized bearing were no longer excuses, he just takes his time getting things right.
More months and patience later, I gave the owner a deadline in March to git'r done.
2400 in labor later, the block guy dropped off a rotating assembly April 26th.
Time for me to have my cake and eat it :D

Gasket matched, seats cut for oversized valves and fresh out the hot tank
p1591213_2.jpg


Shimming for BC 272s
p1591213_3.jpg


.010 Undercut crank, Eagle rods, King bearing all .030 clearanced
p1591213_4.jpg


Arias pistons, .020 overbore
p1591213_5.jpg


Muriatic acid bath.
-4mil NITRILE (a Must!) gloves
-outdoors (fumes)
-running water to prevent cement etching
-a plastic container to hold the diluted acid
-rag to wipe on the acid.
Takes several passes to acheive perfection.
Rinse and blast with brake cleaner.
p1591213_6.jpg


Regular primer is all i had, white at that
p1591213_7.jpg


Some under coat to give it character. Weird, i know...
p1591213_8.jpg


Rotating assembly.
-Fidanza cam gears
-ATI dampener
-Gates timing belt
-HKS stopper, 2mm
Cherry picker, engine stand, load leveler from Harbor Freight.
Napa low profile jack in background, no more parking half on sidewalks!
p1591213_9.jpg


---------- Post added at 12:27 AM ---------- Previous post was at 12:15 AM ----------

Yup that shop, bunchOdomestic nuts that did the horse stare when it came to this engine.

Not only did they toss out the first HKS i brought them, they used a Rock brand head gasket, graphite POS despite my informing them the RA is low specifically because boosted engine DO NOT use composite gaskets.
So they milled again and used the Second MHG i brought them.

And they used the oil pan gasket from the Rock kit too. At least its rubber.
So I removed it and went to fit the pan but discovered a clearance issue:
p1591213_10.jpg


The ARZ oil pipe upgrade is larger. Using paint pens helped me figure out where the pan needed to be massaged
p1591213_11.jpg


The old and now disposed oem oil cooler banjo return had been plugged, but now hits the fitting to secure the oil cross pipe.
The bottom most rib of the pan baffle got beat down, and so did upper left of the pickup insertion point.
p1591213_12.jpg


Mild porting and gasket matching on intake.
Also, I minimize sealant used to prevent oozing into the runner and potentially hurt overall flow.
Sealant of choice is Permatex 'Right Stuff'
p1591213_13.jpg


Degreasing, prep and paint takes a real long time. Its not hours long but DAYS to do. Pays off though.
I brought it into the sun to see what parts were sprayed with Duplicolor's 'Metal Specks', similar to metallic flake in paint.
p1591213_14.jpg


Fabbed a bracket to hold the oem dipstick
p1591213_15.jpg


Braided stainless lines get heat shrinked to keep bling down and save my stuff from abrasion.
Also, front oil galley plug under water neck removed for 1/8 bsp to 1/8 npt adapter to tee, for oil pressure and temp gauges.
p1591213_16.jpg


EGT sensor tapped in an inconspicuous spot for a clean install
p1591213_17.jpg


AN-10 oil system.
-Summit remote filter mount
-Permacool thermostat 1070
-TRU-Cool 8x11x1.5 oil cooler
-OEM cooler repurposed as PS cooler
-Aeroquip fittings and line
p1591213_18.jpg


Location of 2qt accusump. 3qt MIGHT fit but placement of inline electric solenoid may vary
p1591213_19.jpg

p1591213_20.jpg
 

thedave925

Since 9/16/05
Nov 9, 2005
626
0
0
East Bay, Cali
NTRA08;1591221 said:
a spool gun is the way to go if your learning to weld aluminum.

When I'm in the market then, Excellent tip. 'Spool gun' really sounds intimidating lolz

For right now I have a sitting block
p1591236_1.jpg


and its time i move my ass on pulling apart and taping off the engine bay.
Yes I'm painting the car too, but I think I have enough reducer for my quart of stock color code paint so I can spray it myself. Its dark out or i'd go fetch the code...
 

87mk111

Metal Head
Sep 29, 2009
481
0
0
akron/canton, ohio
Nice looking project. Sucks u had to wait so long. I also have to wait, but because I'm a little low on funds since I'm a college student as well. Anywho, good luck on the Supra.
 

thedave925

Since 9/16/05
Nov 9, 2005
626
0
0
East Bay, Cali
87mk111;1591253 said:
Nice looking project. Sucks u had to wait so long. I also have to wait, but because I'm a little low on funds since I'm a college student as well. Anywho, good luck on the Supra.

Thanks!
Yup its a waiting game. Wait to save monies. Wait on parts. Wait on good weather. Wait, I'm almost DOOOONE :D
Stick to college, money you spend on yourself won't be a waste compared to trying to sell a car you'd almost have to part out to sell at all.
Then, with a good job you can buy 3 mk3s for the price of 1 n/a mk4 ;) just playin man, Git'r Done!
 

thedave925

Since 9/16/05
Nov 9, 2005
626
0
0
East Bay, Cali
NTRA08;1591393 said:
what kind of ngk plugs are you using
NGK Death to the cockroach! BKR7E
The neighbors finally got rid of a pile of trash that was sitting for months... and I now I'm finding the buggers in my garage :/
The plugs are from Driftmotion, Thanks Aaron! You know why I like DM? Cuz they call to make sure your order is correct and if you'll take a substitute if the color of something you want is missing :)

Thats right dub, throw it up for Cencal, represent!
What up with the v8 build, that vid was crackin. Open headers never sounded so good lol

The plan shifted a bit.
I decided I'll paint the engine bay myself. I've got all the stuff and a quart of 182, why not.
-Paint e-bay
-Slide in long-block
-Run in the engine
-Pass smog, get plate tags; I already gave the state its money
-Prep exterior for paint
-Get painted
-Enjoy

Current work bench status:
p1592054_1.jpg

-Bin full of engine bay parts, being stripped out for paint
-Fresher dash, Thank You Zumtizzle for the hook up!
-Plastic bags and note paper for my 'part labeling center'. Got sick of tossing all the bolts in a bucket and wasting time finding them again (I've got a good memory for how many of which goes where and how tight)
-Tool box on top of half dressed spare engine, also sitting on a furniture mover. No worries, it'll never topple.
-Engine harness waiting for my attention to apply the Knock Sensor Rewire Kit purchased from Shaeff. Man, thats good work he does!

Engine bay before engine bay wiring harness removal
p1592054_2.jpg


After harness removal:
p1592054_3.jpg

Those headlight plugs are a time consuming without power to bring them up.

I degreased the hood heat mat thing by 50/50 mix of pinesol stuff in a bucket and water.
Couple gallons of mix, let saturate.
Rinse well with hose.
Hang/prop up mat and let air dry
p1592054_4.jpg


I did that on Sunday. ~4 hours to remove the harness from the engine bay/driver kick panel.
I've gotta be up for work in 3.5hrs... Monday went wayyyy too fast.

And IJ.'s mishap is saddening. I'm going to miss looking forward to reading his build thread every day.
 
Last edited:

thedave925

Since 9/16/05
Nov 9, 2005
626
0
0
East Bay, Cali
Goal last night was to remove everything brake related.
Out went the clutch master, brake master, rear brake line bias dealio, ABS actuator unit, charcoal canister and bracket.
After that stuff, everything else should be quick.

Yesterday's progress:
p1592882_1.jpg
 

TweeT91109

New Member
Jan 7, 2010
738
0
0
Tampa, Florida, United States
thedave925;1592882 said:
Goal last night was to remove everything brake related.
Out went the clutch master, brake master, rear brake line bias dealio, ABS actuator unit, charcoal canister and bracket.
After that stuff, everything else should be quick.

Yesterday's progress:
p1592922_1.jpg

Sorry I may have missed it. but, with no ABS, what are ur plans?