alright. i know lots of people know this already and lots of people dont so i'm writing of how i did my cams. please give remarks as to do something better or if i did something incorrect. this was my first time working on a jz motor.
must have items (imo, unless recently replaced)
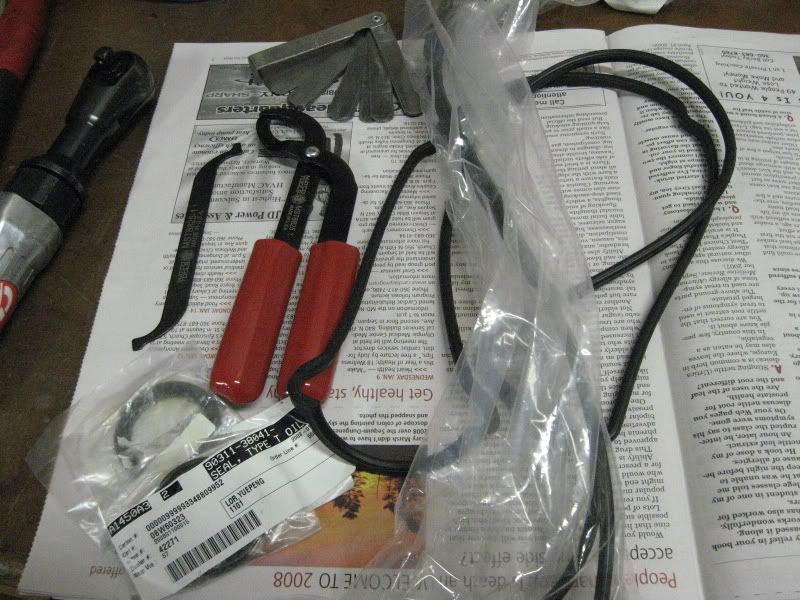
1. cams (duh)- i personally bough the 272 small cores
2. cam seals x2- 90311-38041
3. cam cover seals x 2- same as 2jzgte
recommended tools and materials
1. flat head/ mini mini flat head.
2. phillips long and a shorty
3. 3/8ths ratchet with 10/12/13/14/17/19mm socket. 6" extension/ 15ft lbs torque wrench or something that can read that
4. 1/2" breaker bar/ratchet/ 22mm socket/ 3" extension/ 250ft lbs torque wrench/
5. toyota fipg is a must!
6. same oil you have in your engine..buy 1 quart.
7. coolant 1 gallon
8. 1/2" or 3/8th cordless impact is VERY helpful. i used a 14volt one and they are so cheap now and days its always good to have one anyway.
9. FEELER GAUGES
10. micrometer that reads in detail .001 increments.
11. plastic or soft face hammer
12. lots of cloth/rags unless you want to be messy
13. 5mm allen socket and 10mm allen socket
14. crank pulley puller...cheap. like $18.00 from schucks/auto zone
15. black sharpie OR white out
note: i do not have a 1jz tensioner/i just pivot my p/s pump up and down for tension and i do not have a upper timing cover, but i'm sure you are smart enough to take off the belt and the upper cover by yourself.
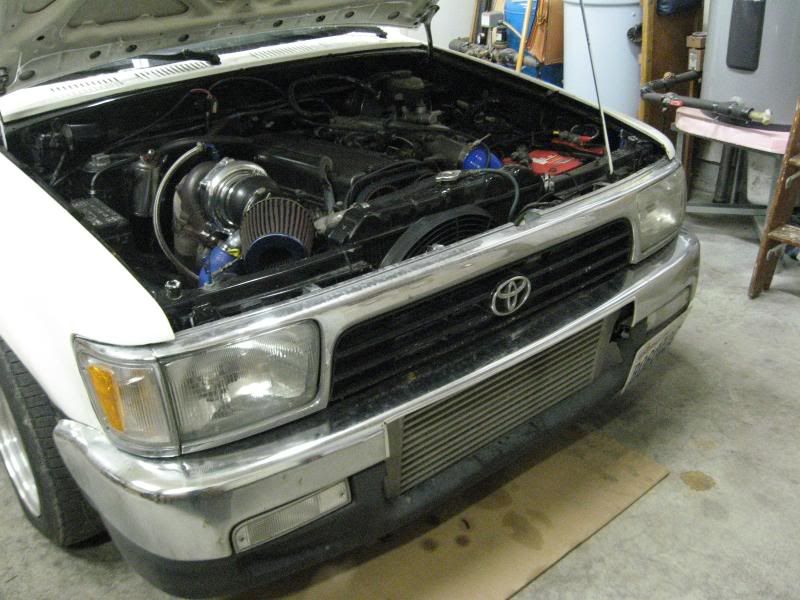
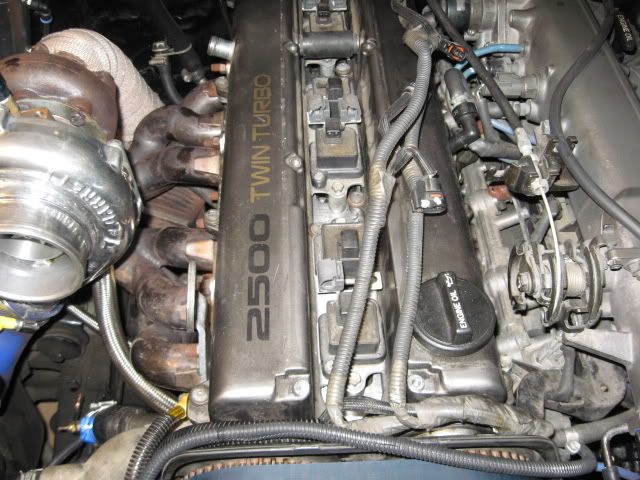
start out with a vehicle equipped 1j. my example
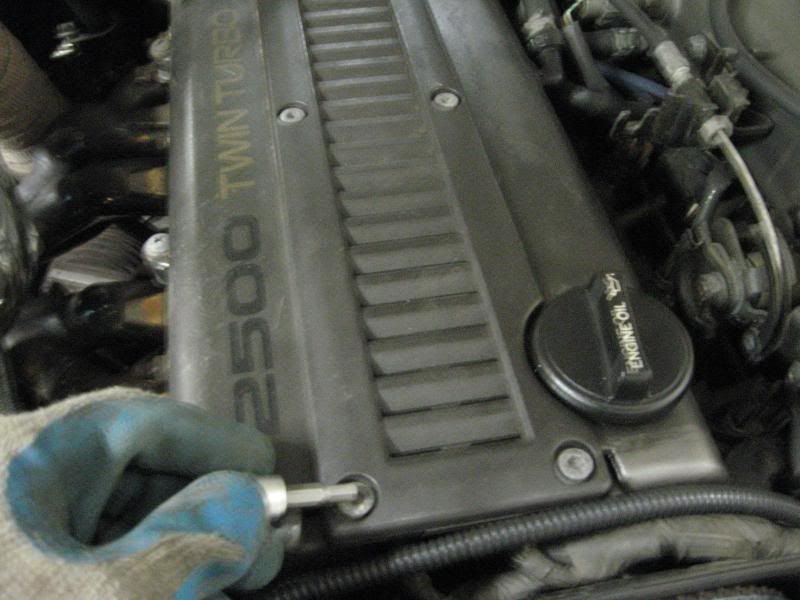
make sure the vehicle is cool and drain the coolant. using a 5mm allen socket...remove the coil cover bolts.
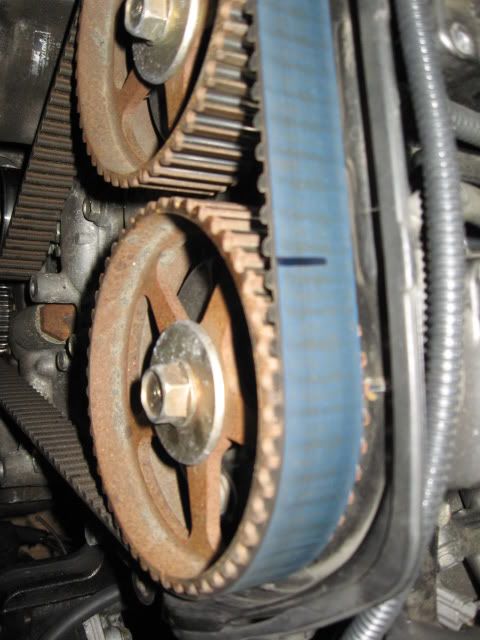
remove your radiator and upper radiator hose. remove upper timing belt cover exposing the belt. take your 22mm socket and put it on the crank pulley bolt. turn CLOCK WISE until your timing marks are lined up..like this. you can see that in the backing plate of the cam gears there is a verticle line dead center. align with that line.
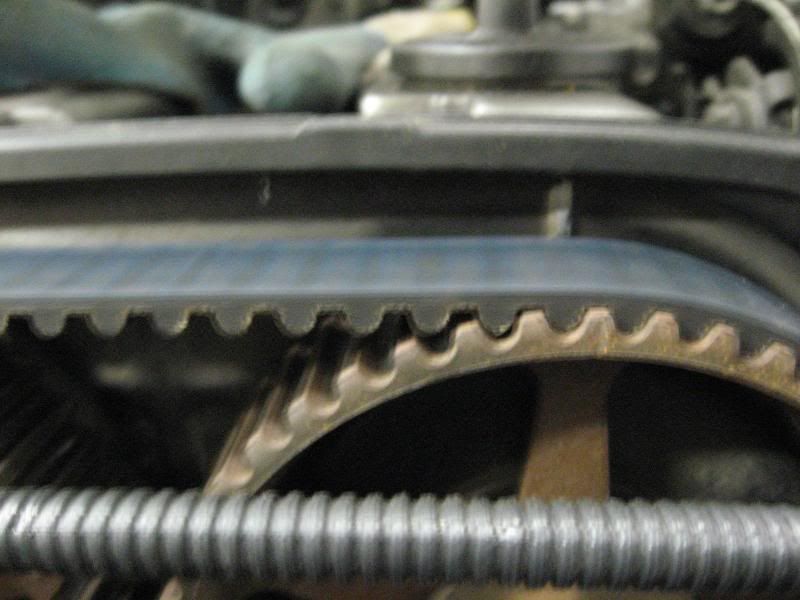
on each cam gear there is a little notch as you can see in the picture. right on top of the notch...use white out or a black sharpie and mark the belt. be very VERY accurate. this is vital. i took this picture a little late..after i already turned the crank again..but you can see the marking on the belt.
take off your serpentine belt
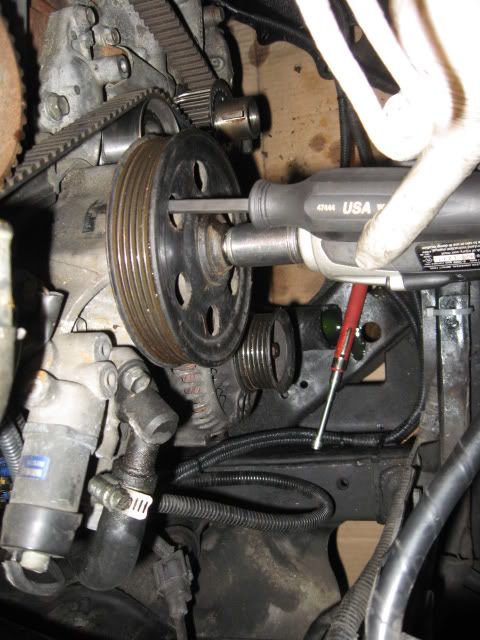
take off your water pump/hydro pump pulley. this is where the cordless $40.00 impact gun came in MUCH handy. i tried w/o it and i was lifting the whole front end sleightly up...it needs something to hit it constantly..fast and hard. i guess you can call it the pamela anderson nut. this is how it looked. i jammed a screw driver in one of the wholes of the pulley to prevent it from spinning and took a 17mm with the impact and knocked it loose.
after that you can now proceed to undo the crank pulley bolt. get a breaker bar. you MUST use a breaker bar. if you use a ratchet you can possibly break the head components of the ratchet. it should be a 22mm socket..put the breaker bar resting against the DRIVERS SIDE frame or ground like this.

now pull your efi fuse out in the fuse box engine compartment..and give it a very quick .5 second click. that SHOULD be enough to break the bolt loose. it did on my engine. if not try it again...if it still doesnt i feel sorry for you. you might have to find someone with a very strong impact. you should not proceed the starter method because you can damage the starter teeth if its that tight.
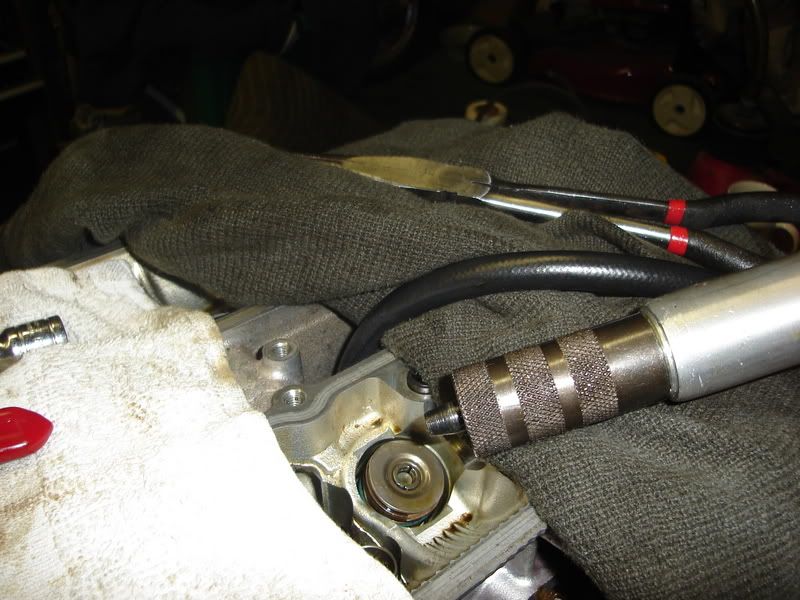
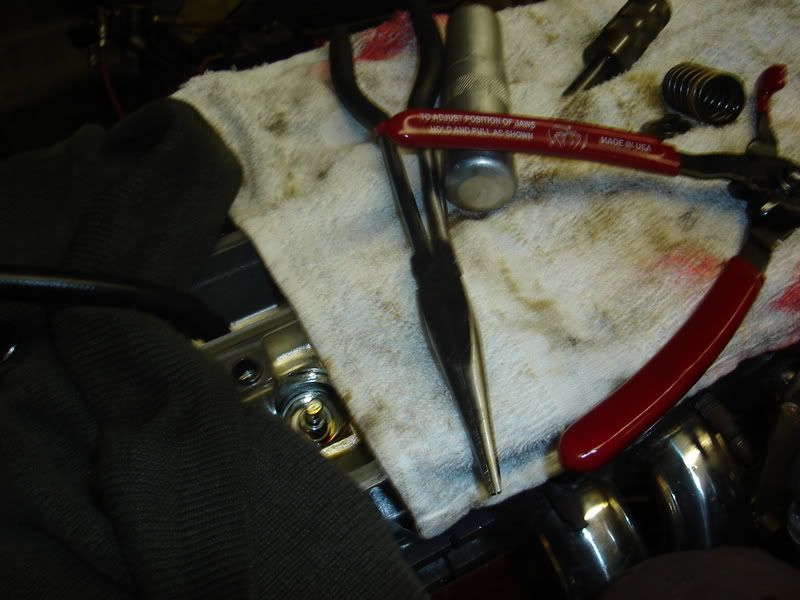
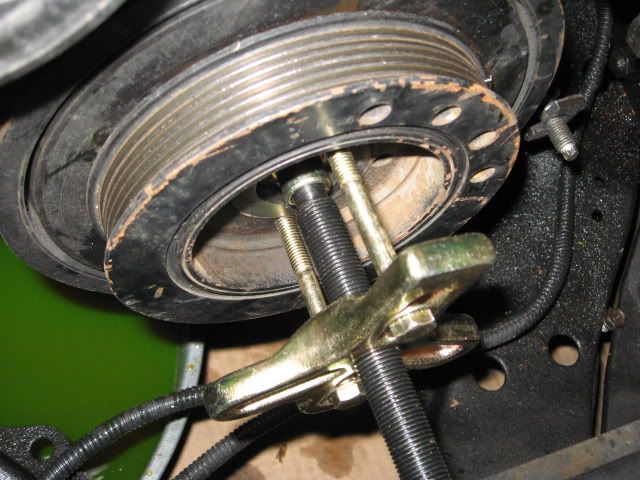
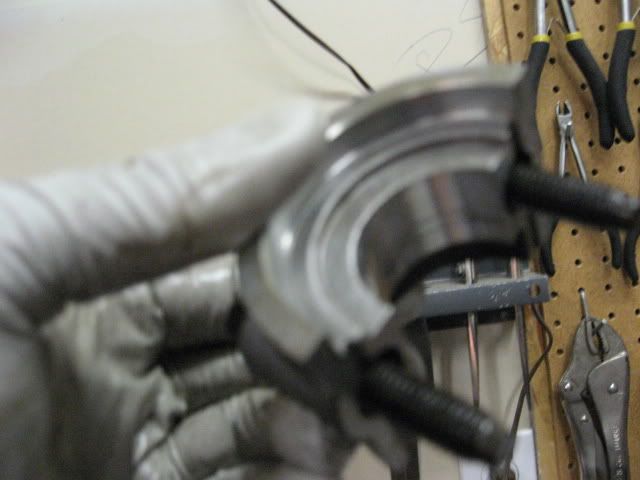
now that you have your pita crank bolt off...grab your crank pulley puller. it looks similar to a steering wheel puller. some has have success using long bars/ flat heads going from underneath but i do not advise this. you can damage the the pulley or other vital things. there is 2 bolt holes on the crank pulley that you can put bolts in. this is why i love toyota and this is where you are going to insert the bolts from the pulley. my pulley came with the bolts needed. looks like this. you can rent tools like this too for dirt cheap.
a ratcheting wrench is very helpful for this part.
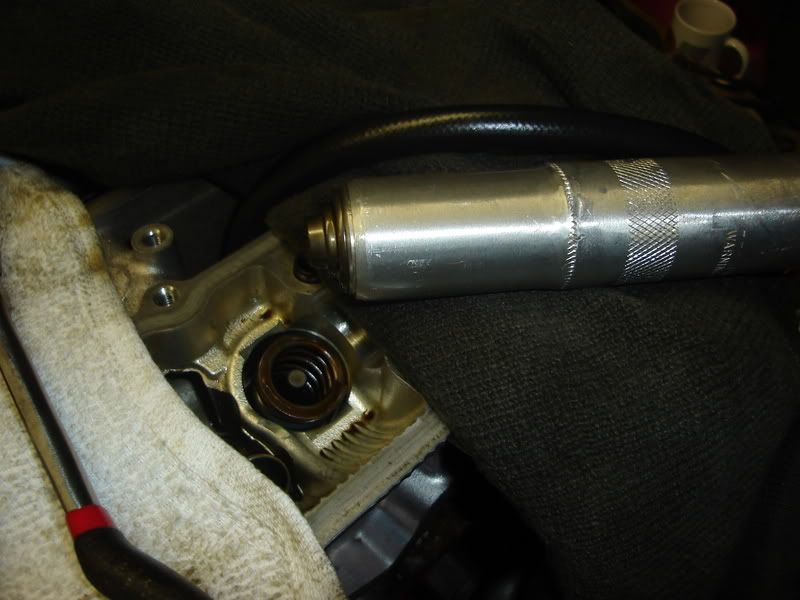
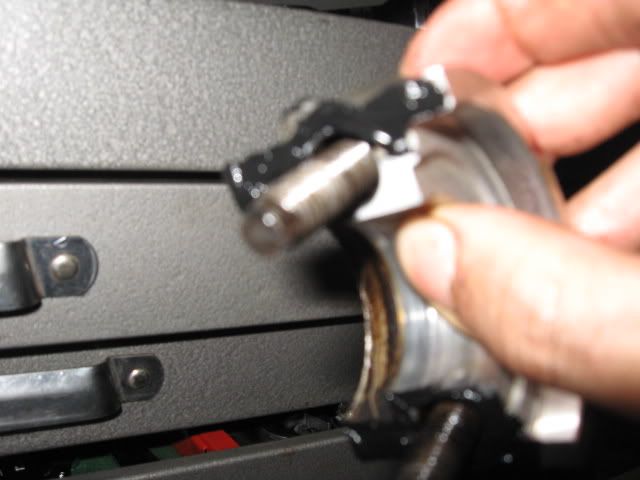
after you successfully loosen the crank pulley and the dampner together...undo the 10mm bolts for the lower timing belt cover. to loosen the tension from the timing belt there is a hydraulic looking thing holding tension against the device which holds the timing belt pulley. looks like this.
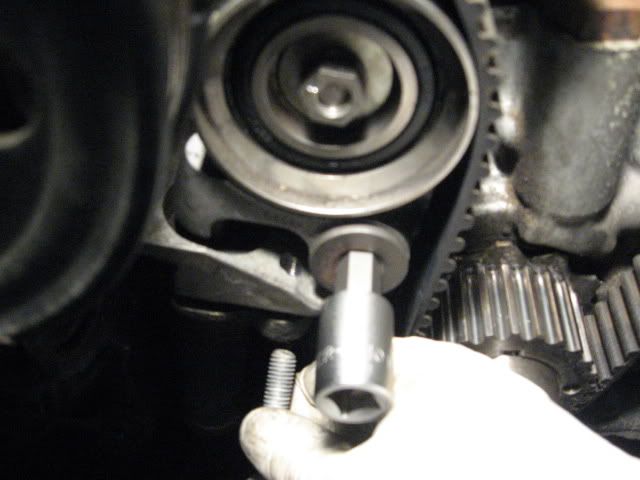
the allen is a 10mm for the idler...crack that loose, and you can see where the bolt is for the tensioner. there is two...one on each side of it. you will need like a 6" extension to get to the left side bolt. take those two out 12mm bolts. and you will lose the tension on the timing belt. take off the belt and set it somewhere dry and away from fluid. now take off the cam gear bolt. i believe its 17mm. after taking the gears off take off the back black plate behind the cam gears with a few 10mm bolts.
now undo the wiring for the coils.
move those wire aside and take out the coils. after that undo the stupid phillip screws for the cam covers. it would not be a bad idea to switch over to regular 10mm bolts to replace those stupid phillip head at this time also. the phillip head tends to strip..esp the far back ones.
because of the center cam cover connector..move both of the covers as one and set it aside.
this is the order in how to install the caps...so i also use this order to remove them. from the furthest cap to the main cap housing the cam seal is:
2
5
3
4
1
6
7
write that on a paper next to the engine and just look at the paper. w/in 2 times of doing it you should remember the sequence...trust me.
okay so now you have the caps off and KEEP THEM IN ORDER..caps should go exactly where they came from. put them aside on a cloth and move those puiny little cams out. i will miss the mpg though
now the fun mathmatical part. on a paper mark it something like this:
I1- E1-
I2- E2-
All the way down to I12 and E12. if you want the last shim to be 1 thats fine..thats what i did..if you want the first one to be..thats fine to..as long as you remember. this is how to take the shim out. on each bucket there is 2 notches..use your super mini flat head and or magnet..something like this:
just pop it out of there. wipe it off nice and clean....take them all off and keep them IN ORDER. after they are all off..measure the thickness with the micrometer and record them. example for me...i take off the shim from the last bucket on the exhaust side..measure it. it came out to be .113" so on my chart i will write.......E1-.113. as soon as you measure it..put it back in the bucket it belongs to so you dont mix them up.
after they are all measured and put back...open your black crower boxs and do not get blinded from the light escaping.
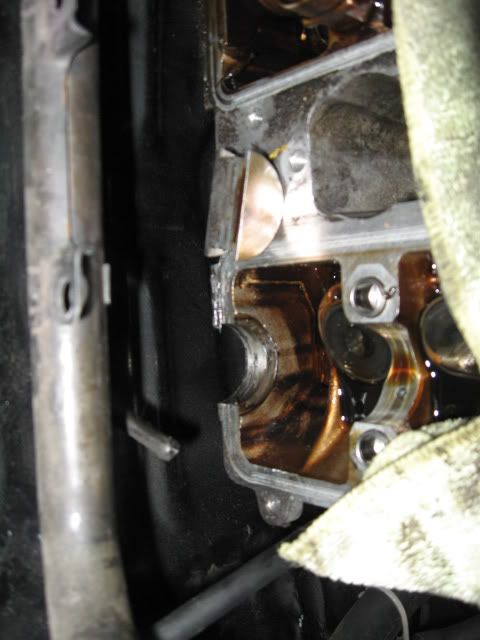
this step is option but i recommend it. there are 2 half moons..as i call it..in the back valve covers. they can be knocked out with a flat head. just pry on them....cleaned..and put fipg on the bottom surface. just a thing layer across the whole bottom. clean all your surfaces very well. this is the half moon thing.
put your cams in. they ARE MARKED. it'll say 2jz e...2jz i..e for exhaust side. exhaust side is on your left hand. i for intake...right side..duh. anywho..put them in..it might seem like it doesnt want to go in right but it will once you tighten it down. do not install the new cam seals at this time. put the caps on in the sequence i told you earlier.front to back 7614352. put them on using three stages. first stage a little tight...second stage tighter..and then torque then in that same order. i went 15ft lbs. you might need a different torque wrench as much 250ft lbs torque wrench does not go as low as 15.
now for where most people get confused. throw your cam gears on and put the cam bolts in. remember this is temporary only. which ever side you do first, turn the cam until the first set of lobes are facing up. pointy side up like so:
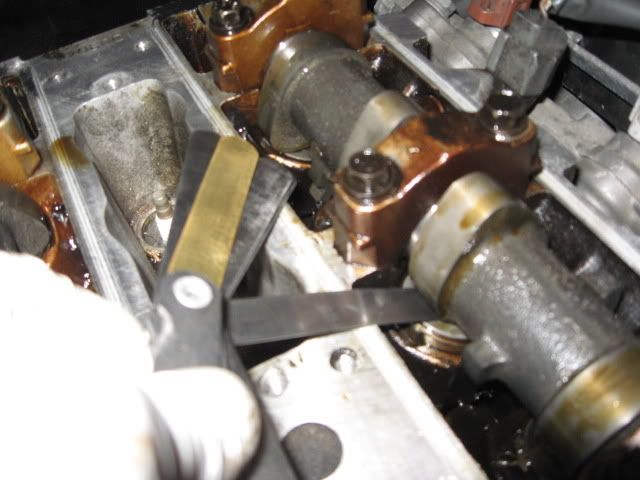
now the specs that are used are
intake .006-.010 and exhaust is .010-.014"
remember...that spec is in inches. so for example you turned the cam, lobe you're doing is facing up, its on the intake side. so it should not fit any gauges HIGHER then .010 BUT should fit at least a .006. and same deal for the exhaust side. it SHOULD NOT fit any guages higher then .014 but SHOULD fit at least a .010. just stick your gauge in there but be careful because if you force you might bend the gauges. now what i did on the sheet of paper is next to where i did the readings for each shim..i will scribble it out completely if its good..IF NOT...this is an example of what i'd do:
shim/cam lobe 1 intake side measured earlier w/ micrometer at .114. you just put the feeler gauge in and you could fit a .014 in between the lobe and shim. you should not be over .010 according to specs. so that means that there is too much slack. which means you need to find a shim at least .004 bigger. .114-.004 equals .110. write that next to the spec/cam number to indicate that this is what you need in that bucket. measure all of them...when you are done..find out which ones need to come out...find out if you can swap some out. when you order them make sure to bring the micrometer with you to measure them infront of the persons face unless you order phone/online.
be smart about switching them out. i honestly cheated because stupid toyota parts person (shoulda dealt with champion) ordered wrong shim. it was for the intake side and i could only clear a .005(too tight). it was .006 to be within spec. but i said "what the hell"..i coudlnt wait a few more days and went for it. i'm not saying its write, but i am saying i got away with it. was using fiance's parents garage so had to get it out of there.
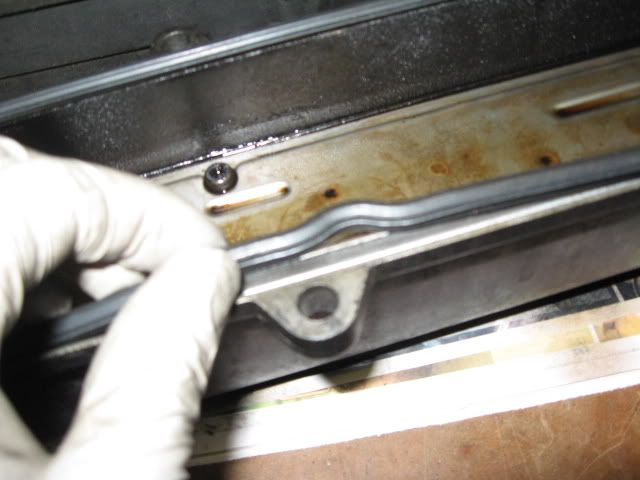
now. after you swap them around and what not...call toyota (champion for best price) i think its $6.60 each. thats the price jeff quoted me. tell them what you need. take the caps off...replace the shim...now that all the caps are on you can proceed to finally finish this all up because everything is w/in spec. with all the caps properly torque..take off the cam gear bolt/cam gears/ and the cap which houses the cam seal (very first caps). clean the caps real nice like so :
and put fipg on the little cannels on the bottom surface..thin layer like so:
that stuff dries up pretty quick so be fast about it. put those caps on with fipg/ and but the bolts loosely on. why loose? because you have to put the cam seals in. take the cam seals..put some oil around the cam seals. some say this isnt nec because it comes prelubed..but i still like to. now put them on CAREFULLY!..the reason why i wanted youto put the caps on loose is because the spring in and behind the seal will pop out of place if you do it wrong. sleighly put the seal on and look behind it...spin the seal around gently so you can make sure the spring is w/in place ALL around. slide the seal all the way in...tighten and torque your caps.
now put the new cam cover seals on. you might notice it looks like this:
its okay because it will straighten out as you rest it in place. put the covers on as one and be careful that the seals do not fall out of place. it can and you probably wont even notice..so after they are resting on the head i take a flash light and small flat head and poke the seals to make sure they are still there and in place.
like i said, not a bad idea to replace these phillip bolt with regular bolts. it will be a lot easier to tighten down.
after they are tighten put in your pcv thing on the intake side or however you have it hooked up.
install the black back plate that goes behind your cam gears. install the cam gears and bolt. i didnt torque these..i just went at it sleightly with my cordless impact.
with that in place put in your coils and put the wires back in them. its pretty much impossible to screw up which plugs goes where. put the coil cover on with the allen 5mm and its allen bolt.
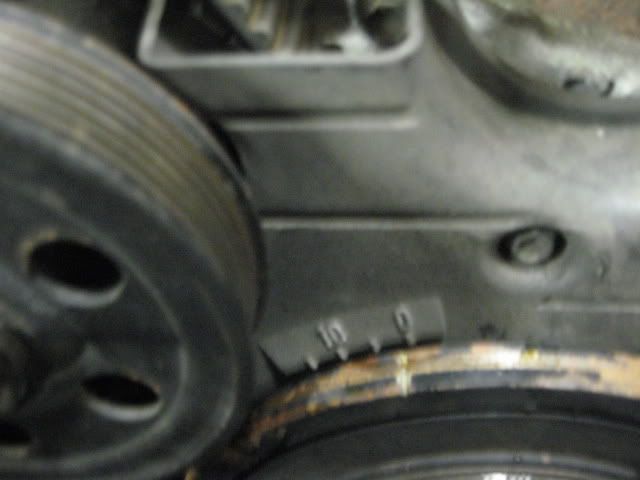
now proceed to the timing belt. place the cam gear marks directly UP to line with the back marks. put the BOTTOM cover in place and just hold it there with the center bolt. this is temporary. with the cover in place, put your crank pulley back on and then the bolt. do not tighten the bolt down..just put it in place till the crank starts turning. turn the crank till the notch on it lines up with the 0 mark on the cover like:
http://i118.photobucket.com/albums/o96/yuepeng05/cams install/Picture037.jpg
take the bolt and the crank back off so you can put the belt on. now find the timing marks you marked earlier and match them to the notch on the cams. hold the belt down with your left hand and with your right hand tighten it down from the right and around the crank shaft. there should be NO SLACK ON THE RIGHT SIDE. put it over the pulley and let it rest there...tighten the bolts on the tensioner and it should slowly create tension. now that the tension is on it tighten the 10mm allen...put the lower timing cover on. if you removed the weird washer thing remember to put that on before putting the cover on. now the crank and bolt. tighten it enough to turn it around 2 times. reason is to make sure the the belt doesnt loosen up.
check the tension to make sure it didnt loosen up. now throw the trans in 5th gear. i put the torque at 235ft lbs because even at 240ft lbs the whole vehicle started moving. make sure you use are either sleightly strong, have a friend, use a long ass bar on top of the torque wrench, or know the hulk, magneto (x-men), or rose (x-men...women)
put the water pump pulley back on/ upper timing cover back (i'm cool so i dont have upper cover)/ and the belt tensioner and the belt. now radiator goes back and coolant. make sure everything is in place and start her up.
on my part, it was VERY hard to start up and DID NOT want to idle at all. i had to drive around for awhile for it to want to idle and then i had to adjust the fuel. it might be because i had a cold start up issue at first anyways.
i had to remove a bit of fuel on low throttle
VIDEO COMING SOON! the aftermath is AWESOME. It is so different. sounds like a v8 and the power is undescribable. i swear i was laughing and smiling the whole test drive. i think i shed a tear.
please chime in for experienced people and tell what you would do different or could do different or shouldnt do or do. thanks! enjoy the cams.
NOTES: i did not and do not advise using the toyota sst tool or buying it from matco. it was a waste of my money and if its your first time using it, you will prob spend 10minutes on 1 shim with that stupid tool. i think its easier and faster taking the caps off. i just dont have the skills like some.
must have items (imo, unless recently replaced)
1. cams (duh)- i personally bough the 272 small cores
2. cam seals x2- 90311-38041
3. cam cover seals x 2- same as 2jzgte
recommended tools and materials
1. flat head/ mini mini flat head.
2. phillips long and a shorty
3. 3/8ths ratchet with 10/12/13/14/17/19mm socket. 6" extension/ 15ft lbs torque wrench or something that can read that
4. 1/2" breaker bar/ratchet/ 22mm socket/ 3" extension/ 250ft lbs torque wrench/
5. toyota fipg is a must!
6. same oil you have in your engine..buy 1 quart.
7. coolant 1 gallon
8. 1/2" or 3/8th cordless impact is VERY helpful. i used a 14volt one and they are so cheap now and days its always good to have one anyway.
9. FEELER GAUGES
10. micrometer that reads in detail .001 increments.
11. plastic or soft face hammer
12. lots of cloth/rags unless you want to be messy
13. 5mm allen socket and 10mm allen socket
14. crank pulley puller...cheap. like $18.00 from schucks/auto zone
15. black sharpie OR white out
note: i do not have a 1jz tensioner/i just pivot my p/s pump up and down for tension and i do not have a upper timing cover, but i'm sure you are smart enough to take off the belt and the upper cover by yourself.
start out with a vehicle equipped 1j. my example
make sure the vehicle is cool and drain the coolant. using a 5mm allen socket...remove the coil cover bolts.
remove your radiator and upper radiator hose. remove upper timing belt cover exposing the belt. take your 22mm socket and put it on the crank pulley bolt. turn CLOCK WISE until your timing marks are lined up..like this. you can see that in the backing plate of the cam gears there is a verticle line dead center. align with that line.
on each cam gear there is a little notch as you can see in the picture. right on top of the notch...use white out or a black sharpie and mark the belt. be very VERY accurate. this is vital. i took this picture a little late..after i already turned the crank again..but you can see the marking on the belt.
take off your serpentine belt
take off your water pump/hydro pump pulley. this is where the cordless $40.00 impact gun came in MUCH handy. i tried w/o it and i was lifting the whole front end sleightly up...it needs something to hit it constantly..fast and hard. i guess you can call it the pamela anderson nut. this is how it looked. i jammed a screw driver in one of the wholes of the pulley to prevent it from spinning and took a 17mm with the impact and knocked it loose.
after that you can now proceed to undo the crank pulley bolt. get a breaker bar. you MUST use a breaker bar. if you use a ratchet you can possibly break the head components of the ratchet. it should be a 22mm socket..put the breaker bar resting against the DRIVERS SIDE frame or ground like this.
now pull your efi fuse out in the fuse box engine compartment..and give it a very quick .5 second click. that SHOULD be enough to break the bolt loose. it did on my engine. if not try it again...if it still doesnt i feel sorry for you. you might have to find someone with a very strong impact. you should not proceed the starter method because you can damage the starter teeth if its that tight.
now that you have your pita crank bolt off...grab your crank pulley puller. it looks similar to a steering wheel puller. some has have success using long bars/ flat heads going from underneath but i do not advise this. you can damage the the pulley or other vital things. there is 2 bolt holes on the crank pulley that you can put bolts in. this is why i love toyota and this is where you are going to insert the bolts from the pulley. my pulley came with the bolts needed. looks like this. you can rent tools like this too for dirt cheap.
a ratcheting wrench is very helpful for this part.
after you successfully loosen the crank pulley and the dampner together...undo the 10mm bolts for the lower timing belt cover. to loosen the tension from the timing belt there is a hydraulic looking thing holding tension against the device which holds the timing belt pulley. looks like this.
the allen is a 10mm for the idler...crack that loose, and you can see where the bolt is for the tensioner. there is two...one on each side of it. you will need like a 6" extension to get to the left side bolt. take those two out 12mm bolts. and you will lose the tension on the timing belt. take off the belt and set it somewhere dry and away from fluid. now take off the cam gear bolt. i believe its 17mm. after taking the gears off take off the back black plate behind the cam gears with a few 10mm bolts.
now undo the wiring for the coils.
move those wire aside and take out the coils. after that undo the stupid phillip screws for the cam covers. it would not be a bad idea to switch over to regular 10mm bolts to replace those stupid phillip head at this time also. the phillip head tends to strip..esp the far back ones.
because of the center cam cover connector..move both of the covers as one and set it aside.
this is the order in how to install the caps...so i also use this order to remove them. from the furthest cap to the main cap housing the cam seal is:
2
5
3
4
1
6
7
write that on a paper next to the engine and just look at the paper. w/in 2 times of doing it you should remember the sequence...trust me.
okay so now you have the caps off and KEEP THEM IN ORDER..caps should go exactly where they came from. put them aside on a cloth and move those puiny little cams out. i will miss the mpg though
now the fun mathmatical part. on a paper mark it something like this:
I1- E1-
I2- E2-
All the way down to I12 and E12. if you want the last shim to be 1 thats fine..thats what i did..if you want the first one to be..thats fine to..as long as you remember. this is how to take the shim out. on each bucket there is 2 notches..use your super mini flat head and or magnet..something like this:
just pop it out of there. wipe it off nice and clean....take them all off and keep them IN ORDER. after they are all off..measure the thickness with the micrometer and record them. example for me...i take off the shim from the last bucket on the exhaust side..measure it. it came out to be .113" so on my chart i will write.......E1-.113. as soon as you measure it..put it back in the bucket it belongs to so you dont mix them up.
after they are all measured and put back...open your black crower boxs and do not get blinded from the light escaping.
this step is option but i recommend it. there are 2 half moons..as i call it..in the back valve covers. they can be knocked out with a flat head. just pry on them....cleaned..and put fipg on the bottom surface. just a thing layer across the whole bottom. clean all your surfaces very well. this is the half moon thing.
put your cams in. they ARE MARKED. it'll say 2jz e...2jz i..e for exhaust side. exhaust side is on your left hand. i for intake...right side..duh. anywho..put them in..it might seem like it doesnt want to go in right but it will once you tighten it down. do not install the new cam seals at this time. put the caps on in the sequence i told you earlier.front to back 7614352. put them on using three stages. first stage a little tight...second stage tighter..and then torque then in that same order. i went 15ft lbs. you might need a different torque wrench as much 250ft lbs torque wrench does not go as low as 15.
now for where most people get confused. throw your cam gears on and put the cam bolts in. remember this is temporary only. which ever side you do first, turn the cam until the first set of lobes are facing up. pointy side up like so:
now the specs that are used are
intake .006-.010 and exhaust is .010-.014"
remember...that spec is in inches. so for example you turned the cam, lobe you're doing is facing up, its on the intake side. so it should not fit any gauges HIGHER then .010 BUT should fit at least a .006. and same deal for the exhaust side. it SHOULD NOT fit any guages higher then .014 but SHOULD fit at least a .010. just stick your gauge in there but be careful because if you force you might bend the gauges. now what i did on the sheet of paper is next to where i did the readings for each shim..i will scribble it out completely if its good..IF NOT...this is an example of what i'd do:
shim/cam lobe 1 intake side measured earlier w/ micrometer at .114. you just put the feeler gauge in and you could fit a .014 in between the lobe and shim. you should not be over .010 according to specs. so that means that there is too much slack. which means you need to find a shim at least .004 bigger. .114-.004 equals .110. write that next to the spec/cam number to indicate that this is what you need in that bucket. measure all of them...when you are done..find out which ones need to come out...find out if you can swap some out. when you order them make sure to bring the micrometer with you to measure them infront of the persons face unless you order phone/online.
be smart about switching them out. i honestly cheated because stupid toyota parts person (shoulda dealt with champion) ordered wrong shim. it was for the intake side and i could only clear a .005(too tight). it was .006 to be within spec. but i said "what the hell"..i coudlnt wait a few more days and went for it. i'm not saying its write, but i am saying i got away with it. was using fiance's parents garage so had to get it out of there.
now. after you swap them around and what not...call toyota (champion for best price) i think its $6.60 each. thats the price jeff quoted me. tell them what you need. take the caps off...replace the shim...now that all the caps are on you can proceed to finally finish this all up because everything is w/in spec. with all the caps properly torque..take off the cam gear bolt/cam gears/ and the cap which houses the cam seal (very first caps). clean the caps real nice like so :
and put fipg on the little cannels on the bottom surface..thin layer like so:
that stuff dries up pretty quick so be fast about it. put those caps on with fipg/ and but the bolts loosely on. why loose? because you have to put the cam seals in. take the cam seals..put some oil around the cam seals. some say this isnt nec because it comes prelubed..but i still like to. now put them on CAREFULLY!..the reason why i wanted youto put the caps on loose is because the spring in and behind the seal will pop out of place if you do it wrong. sleighly put the seal on and look behind it...spin the seal around gently so you can make sure the spring is w/in place ALL around. slide the seal all the way in...tighten and torque your caps.
now put the new cam cover seals on. you might notice it looks like this:
its okay because it will straighten out as you rest it in place. put the covers on as one and be careful that the seals do not fall out of place. it can and you probably wont even notice..so after they are resting on the head i take a flash light and small flat head and poke the seals to make sure they are still there and in place.
like i said, not a bad idea to replace these phillip bolt with regular bolts. it will be a lot easier to tighten down.
after they are tighten put in your pcv thing on the intake side or however you have it hooked up.
install the black back plate that goes behind your cam gears. install the cam gears and bolt. i didnt torque these..i just went at it sleightly with my cordless impact.
with that in place put in your coils and put the wires back in them. its pretty much impossible to screw up which plugs goes where. put the coil cover on with the allen 5mm and its allen bolt.
now proceed to the timing belt. place the cam gear marks directly UP to line with the back marks. put the BOTTOM cover in place and just hold it there with the center bolt. this is temporary. with the cover in place, put your crank pulley back on and then the bolt. do not tighten the bolt down..just put it in place till the crank starts turning. turn the crank till the notch on it lines up with the 0 mark on the cover like:
http://i118.photobucket.com/albums/o96/yuepeng05/cams install/Picture037.jpg
take the bolt and the crank back off so you can put the belt on. now find the timing marks you marked earlier and match them to the notch on the cams. hold the belt down with your left hand and with your right hand tighten it down from the right and around the crank shaft. there should be NO SLACK ON THE RIGHT SIDE. put it over the pulley and let it rest there...tighten the bolts on the tensioner and it should slowly create tension. now that the tension is on it tighten the 10mm allen...put the lower timing cover on. if you removed the weird washer thing remember to put that on before putting the cover on. now the crank and bolt. tighten it enough to turn it around 2 times. reason is to make sure the the belt doesnt loosen up.
check the tension to make sure it didnt loosen up. now throw the trans in 5th gear. i put the torque at 235ft lbs because even at 240ft lbs the whole vehicle started moving. make sure you use are either sleightly strong, have a friend, use a long ass bar on top of the torque wrench, or know the hulk, magneto (x-men), or rose (x-men...women)
put the water pump pulley back on/ upper timing cover back (i'm cool so i dont have upper cover)/ and the belt tensioner and the belt. now radiator goes back and coolant. make sure everything is in place and start her up.
on my part, it was VERY hard to start up and DID NOT want to idle at all. i had to drive around for awhile for it to want to idle and then i had to adjust the fuel. it might be because i had a cold start up issue at first anyways.
i had to remove a bit of fuel on low throttle
VIDEO COMING SOON! the aftermath is AWESOME. It is so different. sounds like a v8 and the power is undescribable. i swear i was laughing and smiling the whole test drive. i think i shed a tear.
please chime in for experienced people and tell what you would do different or could do different or shouldnt do or do. thanks! enjoy the cams.
NOTES: i did not and do not advise using the toyota sst tool or buying it from matco. it was a waste of my money and if its your first time using it, you will prob spend 10minutes on 1 shim with that stupid tool. i think its easier and faster taking the caps off. i just dont have the skills like some.