GUIDE : Removing a turbo

JSeaman

SM Official Expert: Guide Author
SM Expert
May 26, 2009
216
0
0
Derbyshire, UK
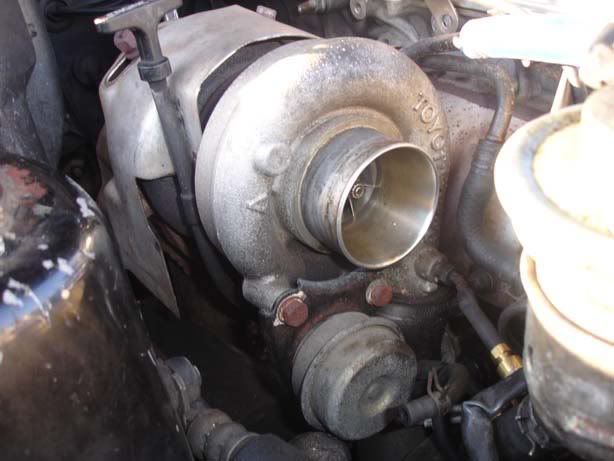
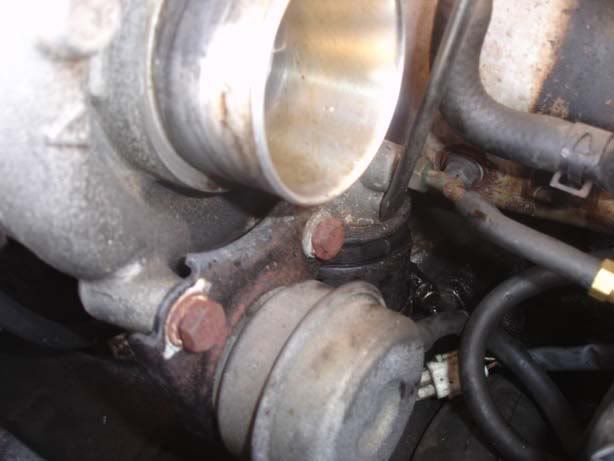
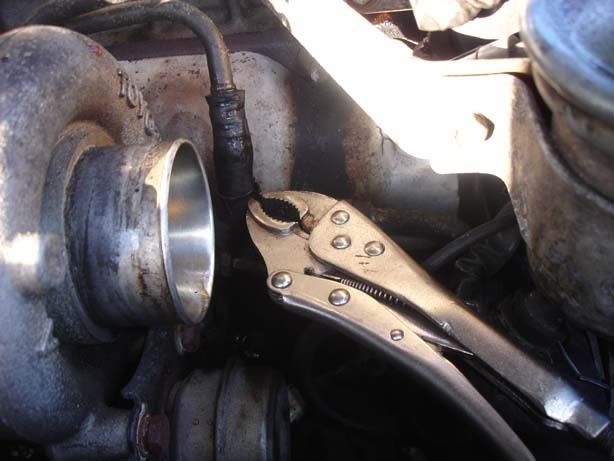
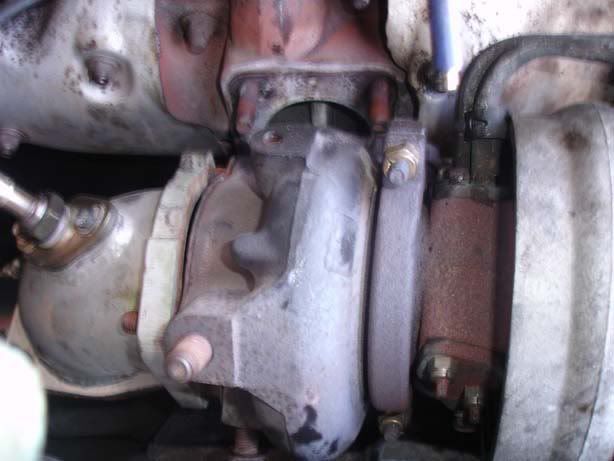
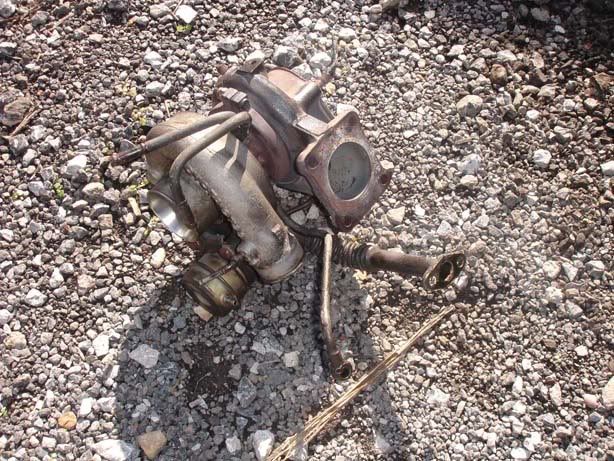
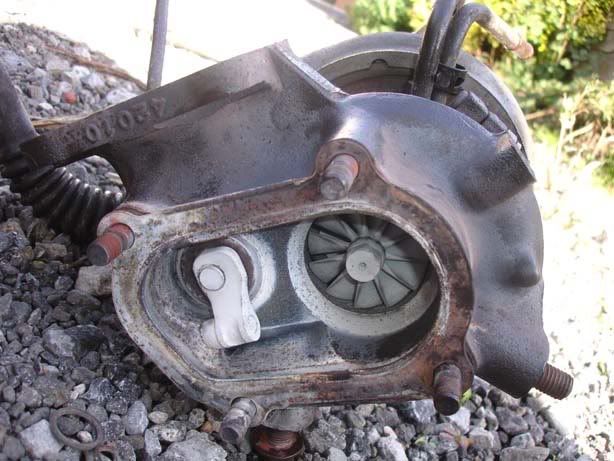
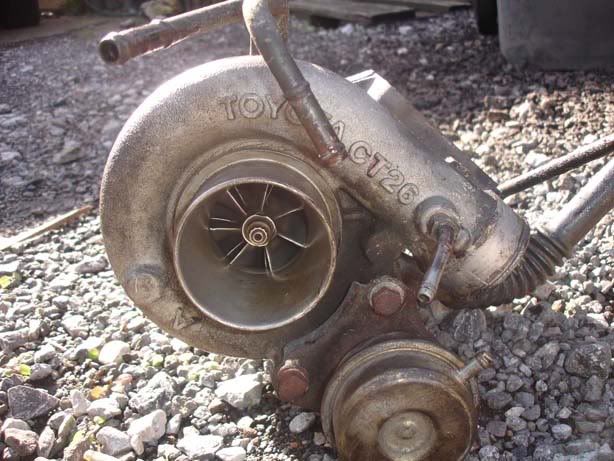
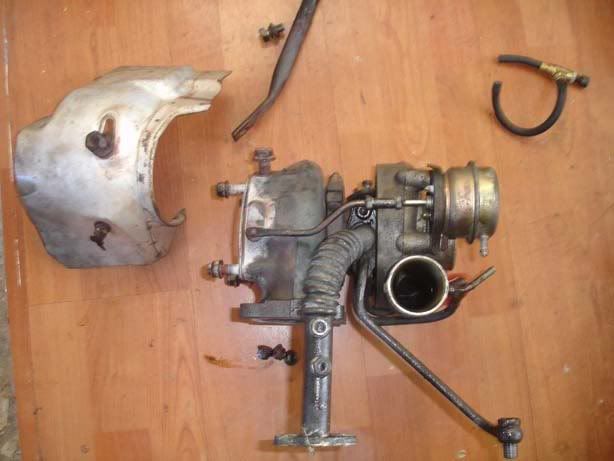
In case you don't know, the turbo consists of 4 connections

1. You have a feed of clean fresh air from the air filter that goes to the inlet side
2. There is an outlet to the intercooler which will send (compressed) air towards the engine
3. There is a feed from the exhaust manifold which makes the turbine spin
4. There is an outlet to the exhaust pipe for the waste gas

Basically, the exhaust gas leaves the manifold and hits the turbo causing a shaft to spin. The gas then exits the turbo into the exhaust pipe via the turbo elbow. When you hit full boost and the wategate opens, some of the gases bypass the turbine wheel and go straight to the exhaust. At the other end of the turbo, the spinning shaft drives a compressor wheel which is sucking in clean air and squishing it down before forcing it out to the intercooler.


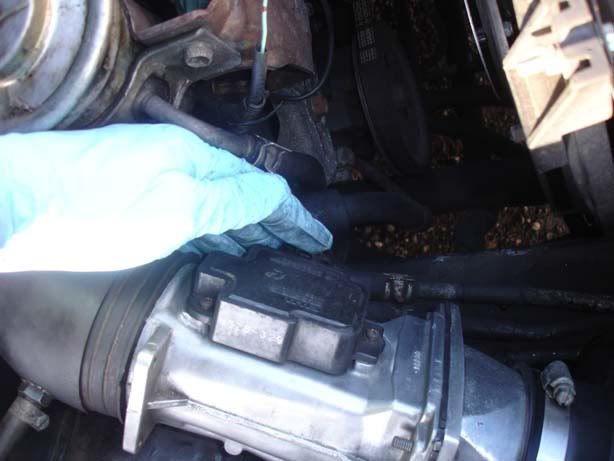
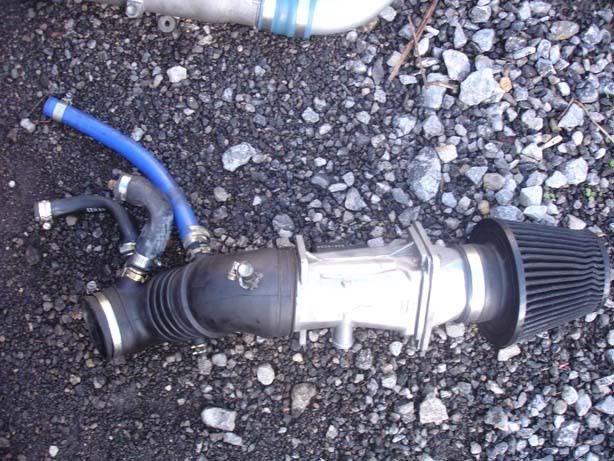
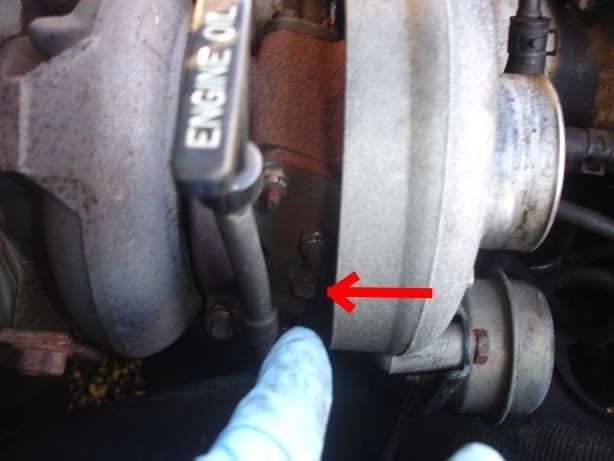
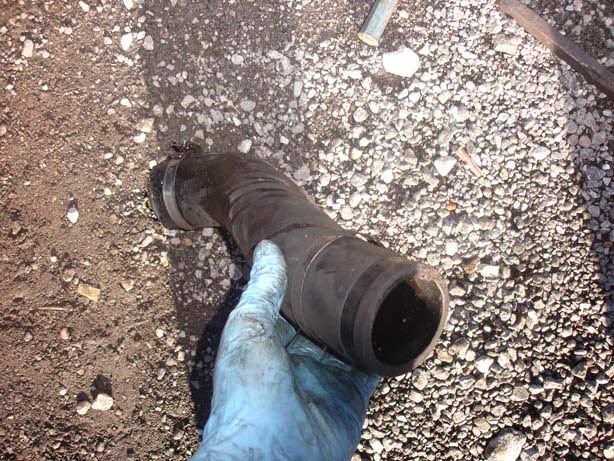
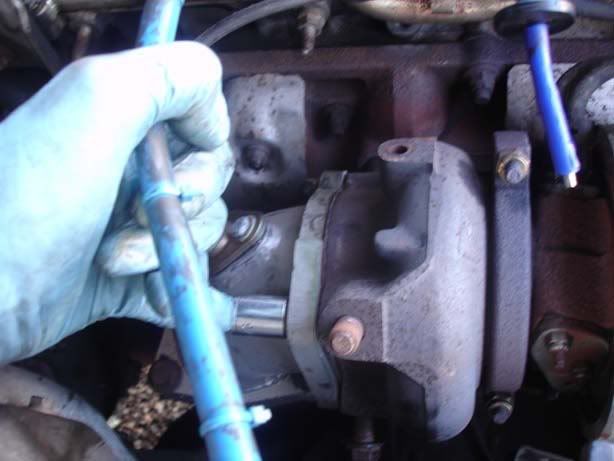
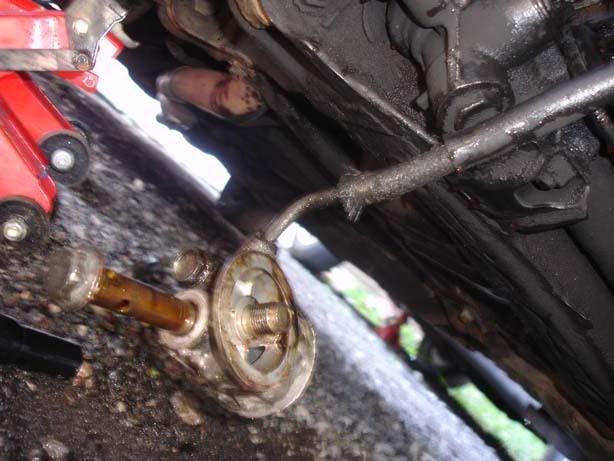
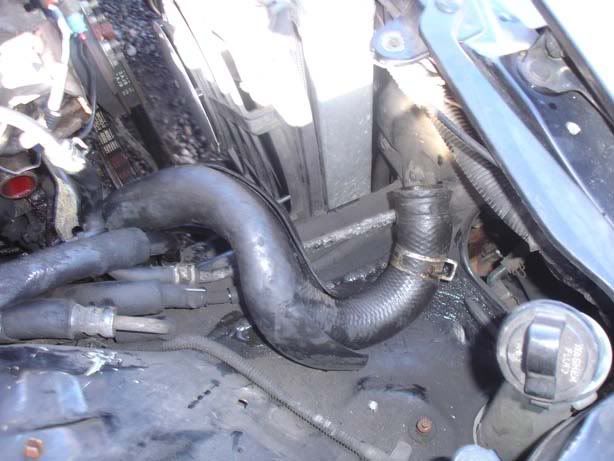
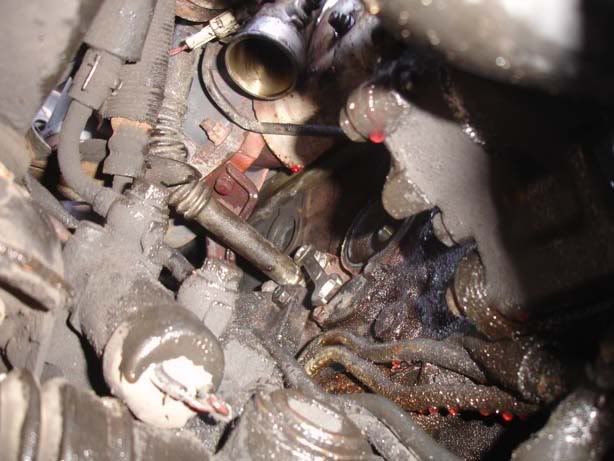
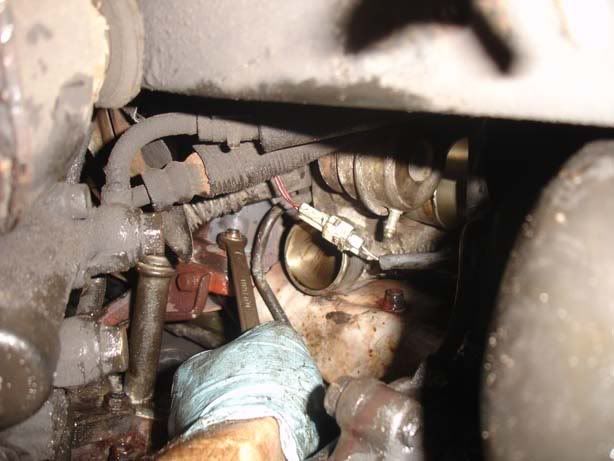
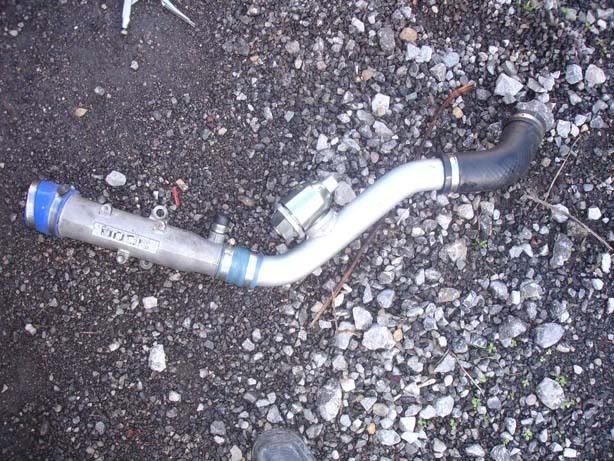
Step 1 - Follow the guide to remove the 3000 pipe

p1329355_1.jpg


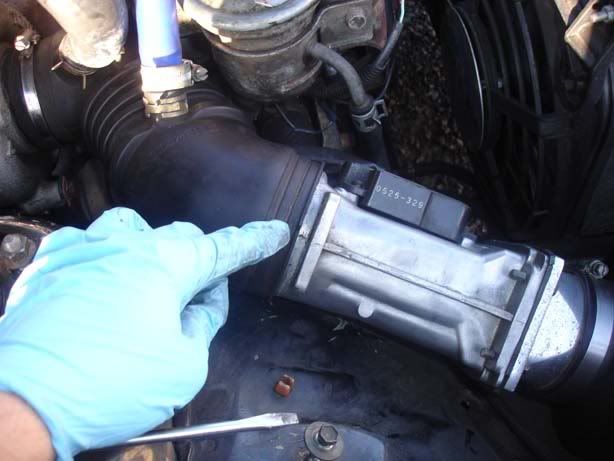
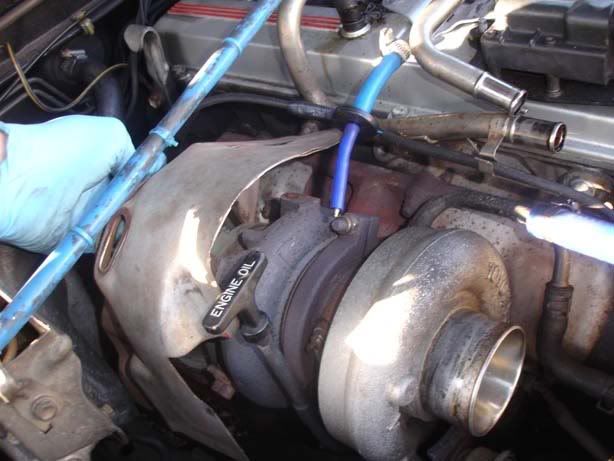
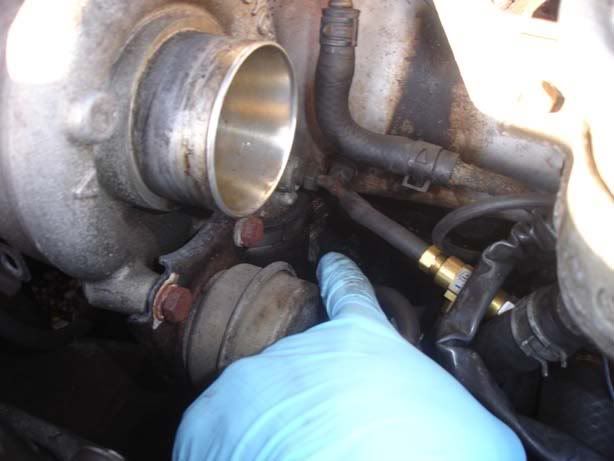
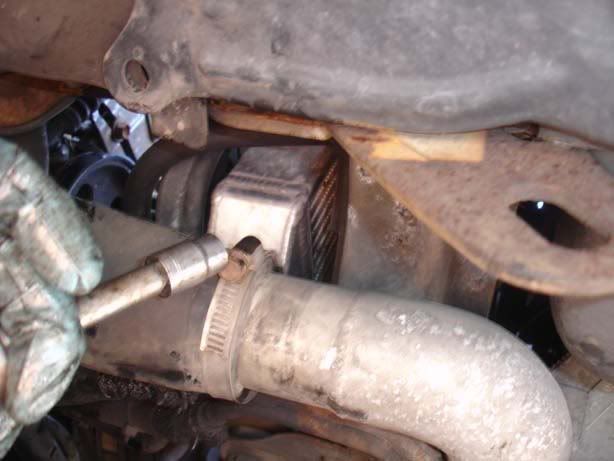
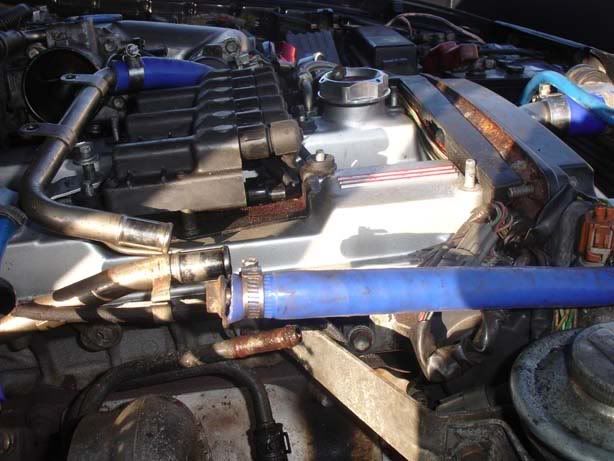
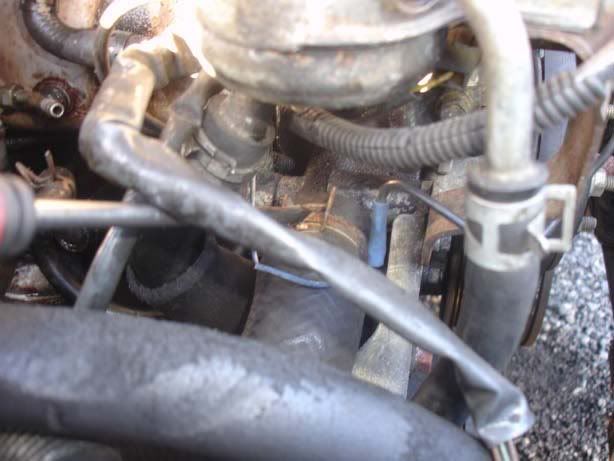
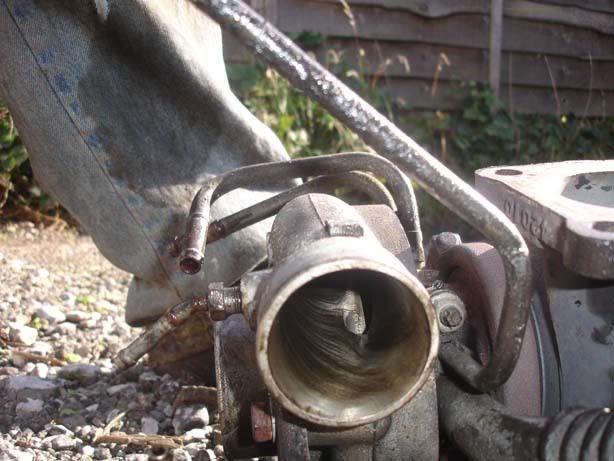
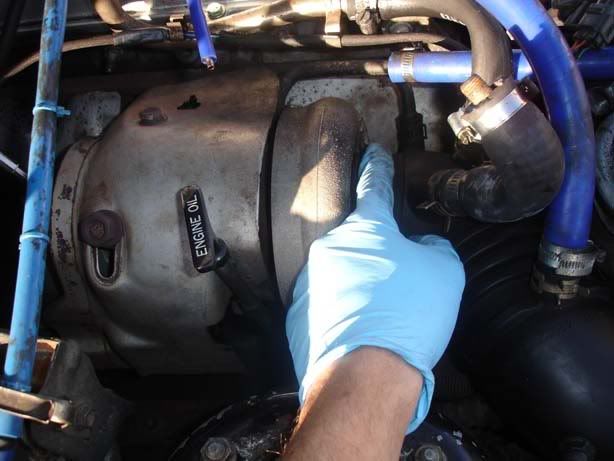
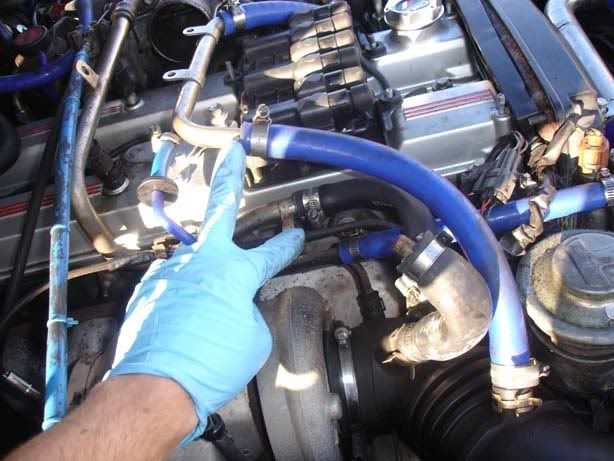
Step 2 - Undo the large clip attaching the accordion hose to the turbo inlet

p1329355_2.jpg


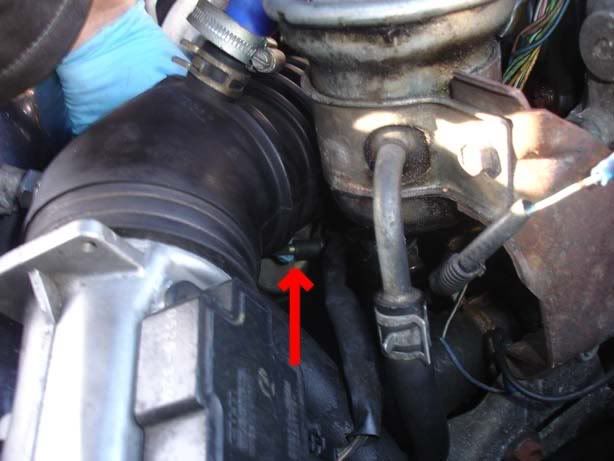
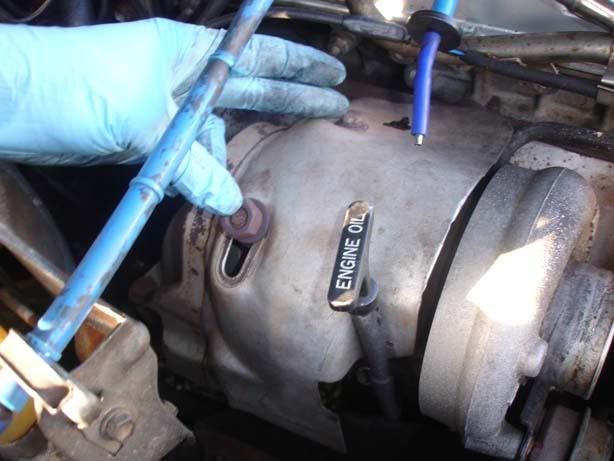
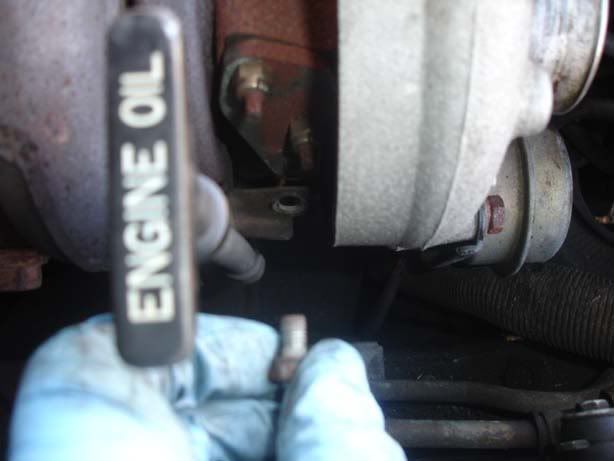
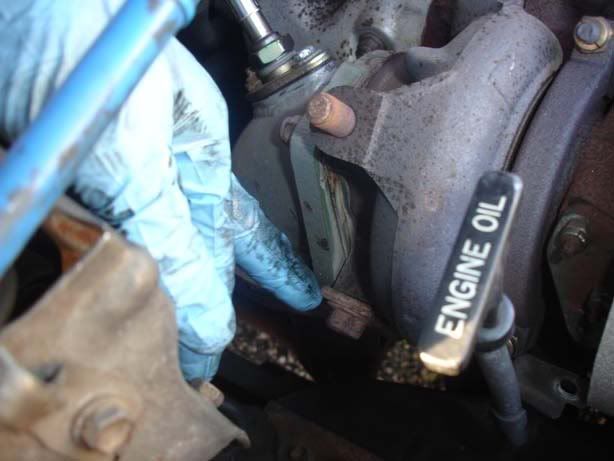
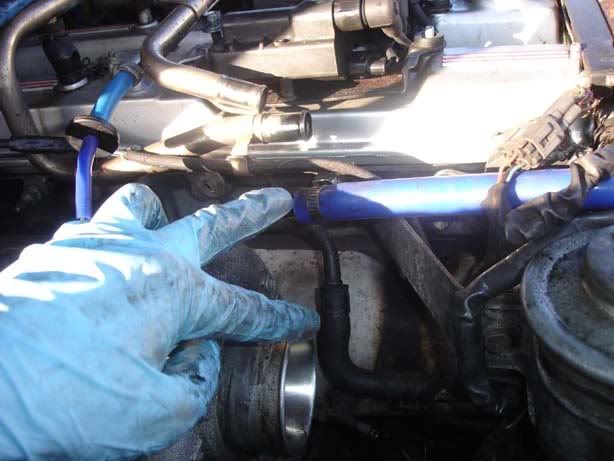
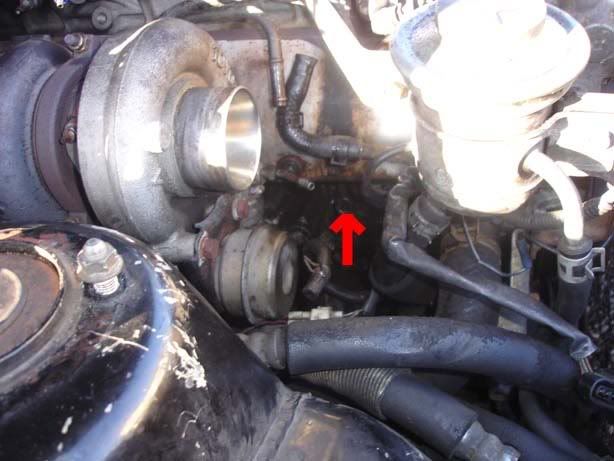
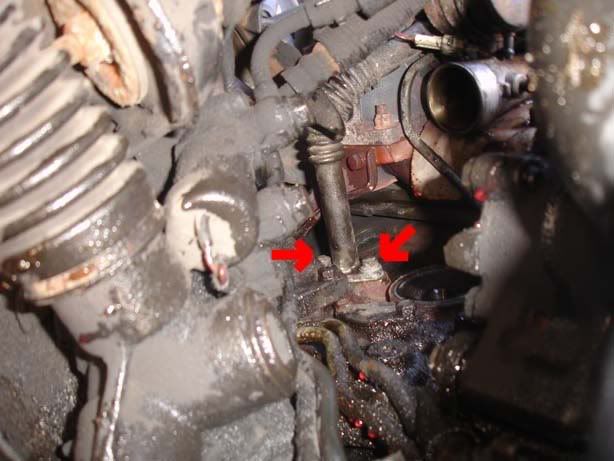
Step 3 - Undo the two clips shown for the ISC (idle speed control) valve (top one) and PCV system

p1329355_3.jpg
 

JSeaman

SM Official Expert: Guide Author
SM Expert
May 26, 2009
216
0
0
Derbyshire, UK
Step 4 - Unplug the small hose under the accordion hose for the power steering

p1329356_1.jpg


Step 5 - Remove the clip at the other end of the accordion hose connecting it to the AFM (airflow meter)

p1329356_2.jpg


Step 6 - Disconnect the black box connector from the AFM

p1329356_3.jpg


Step 7 - Remove th AFM and inlet from the car. If you have the stock air box (big black plastic surround for your air filter) then you will have a few 10mm bolts to undo as well

p1329356_4.jpg


Step 8 - Now you have a good view of the turbo impellor wheel. You can check for play in the wheel at this stage if you are just inspecting your turbo

p1329356_5.jpg


Step 9 - Undo the 2 bolts shown that are holding on the turbo heat shield

p1329356_6.jpg


Step 10 - Remove the heatshield from the car. Watch you don't catch any hoses or plugs on the way out

p1329356_7.jpg


Step 11 - Remove the 10mm bolt holding the dipstick to the turbo. The second picture shows the slack allows the bracket to pull away from the turbo without the bolt in. The third picture shows the dipstick being removed from the car (it just pulls straight up out of the engine)

p1329356_8.jpg

p1329356_9.jpg


Step 12 - Undo the jubilee clip holding the turbo outlet to the intercooler in place. When undoing jubilee clips, make sure you really slacken them off. You should be able to move the clip so it is completely clear of the end of the pipe (See second picture) or you haven't done it properly.

p1329356_10.jpg

p1329356_11.jpg


Step 13 - Carefully slide a screwdriver down to break the seal between the rubber hose and turbo (watch you don't slip and crack the rubber - if you are a bit ham fisted then just give the pipe a tug)

p1329356_12.jpg
 

JSeaman

SM Official Expert: Guide Author
SM Expert
May 26, 2009
216
0
0
Derbyshire, UK
Step 14 - Jack the car up (get it nice and high because you've got a bit of work to do from underneath)

p1329357_1.jpg


Step 15 - Locate the other end of the pipe you were detaching from the turbo and undo the 10mm jubilee clip (top arrow) then remove the pipe (second picture) by pulling it downwards through the underside of the engine bay. While you are down here you may as well undo the 10mm bolt holding the connector on (middle arrow) and also the pipe to the IC (bottom arrow). Also undo the other end of the pipe (third picture) where it connects to the intercooler

p1329357_2.jpg

p1329357_3.jpg

p1329357_4.jpg


Step 16 - Back up top and you should remove the turbo 'stay' which is to brace the turbo and prevent movement. 17mm bolt and should be quite easy once cracked off.

p1329357_5.jpg


Step 17 - Jump under the car and undo the bolt at the other end of the stay so you can remove it completely

p1329357_6.jpg


Step 18 - Disconnect either end of the pipe to the wastegate actuator

p1329357_7.jpg


Step 19 - You can now remove the two water hoses shown - be aware that coolant will leak out and you are supposed to drain the coolant before you do this. I blocked the pipe as shown in the second picture because you don't loose much coolant at all. Third picture shows you how to tackle the stock Toyota finger slicing clips

p1329357_8.jpg

p1329357_9.jpg

p1329357_10.jpg


Step 20 - Now you have a choice, you can undo the 3 bolts holding the turbo elbow to the exhaust (remember to unplug the lambda sensor if you do this) or the 4 bolts (14mm) holding the turbo to the elbow. Either way they're awkward and I wanted the turbo separated from the elbow so went for the four

p1329357_11.jpg


Step 21 - Once you've got those PITA nuts off you can move on to the worst bit of the job! First the easy oil line, this is next to the oil pressure sender (the mucky black circular thing) below the CPS (crank position sensor) but further towards the back of the engine. If you can't find it then just follow the metal pipe from the turbo, it's a 17mm bolt and shouldn't be too hard. I've added a second picture to help you locate it

p1329357_12.jpg

p1329357_13.jpg


Step 22 - Remove the banjo bolt completely (took a picture for those of you who don't know what a banjo bolt looks like). The line from the turbo is hard and will stay in place. There should be a copper washer behind this too

p1329357_14.jpg

p1329357_15.jpg


Step 23 - The bad bit is the main oil line to the block, I took of loads of additional bits to make it easier. Start with the oil filter (You don't need to drain the oil)

p1329357_16.jpg


Step 24 - Looking up from where you removed the intercooler hose to the turbo you should be able to see the oil filter housing. Undo the huge 24 mm nut with a breaker bar if you have one - very tight but easy once you've cracked it off. Picture 2 shows it removed

p1329357_17.jpg

p1329357_18.jpg
 

JSeaman

SM Official Expert: Guide Author
SM Expert
May 26, 2009
216
0
0
Derbyshire, UK
Step 25 - The bottom rad hose was in the way too so I decided to sacrifice some coolant (I'm pulling the engine out anyway) and undid the connection to the engine and re-routed it as shown in the second picture

p1329358_1.jpg

p1329358_2.jpg


Step 26 - With that lot off you can see the awkward nuts finally as shown in this picture. The second picture shows that you can easily get a spanner in there now and get the 13mm or 14mm nuts off (I say 13 or 14 because I had one of each so don't know what they should be!)

p1329358_3.jpg

p1329358_4.jpg


Step 27 - That's the worst bit in my opinion although the next 4 bolts can be a swine too. These are the ones that hold the turbo on to the manifold and you have got very little room to move. Take your time and if you can get a ratchet spanner on them then you're laughing - 14mm for these.

Second picture shows me attacking the bottom 2 from underneath - all this clearance you made earlier comes in handy

p1329358_5.jpg

p1329358_6.jpg


Step 28 - Now slide the turbo directly away from the exhaust manifold.

Important Note : Be very careful when moving the turbo around, ensure you don't bent or distort the oil lines on removal because you'll have big problems refitting it.

p1329358_7.jpg


Step 29 - Then towards the front of the car so it comes off the turbo elbow

p1329358_8.jpg
 

JSeaman

SM Official Expert: Guide Author
SM Expert
May 26, 2009
216
0
0
Derbyshire, UK
Step 30 - You're done, remove it from the car. When moving the turbo around, don't carry it by any of the pipes-support it by the fat metal casing it has, here are some pics :

Full turbo
p1329359_1.jpg


Exhaust (hot) side (The poppet valve on the left is the wastegate)
p1329359_2.jpg


Inlet (cold) side of the turbo, the circle is the wastegate actuator
p1329359_3.jpg


Exhaust manifold connection
p1329359_4.jpg


Outlet to the intercooler
p1329359_5.jpg


Underside of the turbo - you can see the arm that connects the wastegate actuator to the wastegate itself and also the oil feed/return lines
p1329359_6.jpg


Final shot of everything
p1329359_7.jpg
 

JSeaman

SM Official Expert: Guide Author
SM Expert
May 26, 2009
216
0
0
Derbyshire, UK
Feedback from member

When you separate the turbo from the elbow you then can remove the strut underneath the car with the 2 17" bolts. Once the rest of the exhaust has dropped to the floor or thereabouts you can actually undo the 2 12 ml nuts using an extension bar and a 3/8 drive ratchet, preferably a deep socket, Using the flexi pipe as a guide, follow it to the block and locate the 2 nuts (ahem), which can then be undone.

Another member

Having recently had to remove and refit the same turbo twice (dont ask) I have found an easier way round refitting the flexy oil supply pipe.

Remove the supply pipes completely from the turbo. Attach them to the block on their own. Do not tighten the connections at this stage, to allow some movement. There is then room to fit the turbo over the manifold studs and drop onto the oil line connection. Nuts for oil line to underside of turbo are a bit fiddly, but with 1/4" drive are not to bad. Once turbo is in place you can then tighten up the oil line connections to the block.