
OK this isn't exactly rocket science but it's a little different to the norm so for any newbies out there here's how:
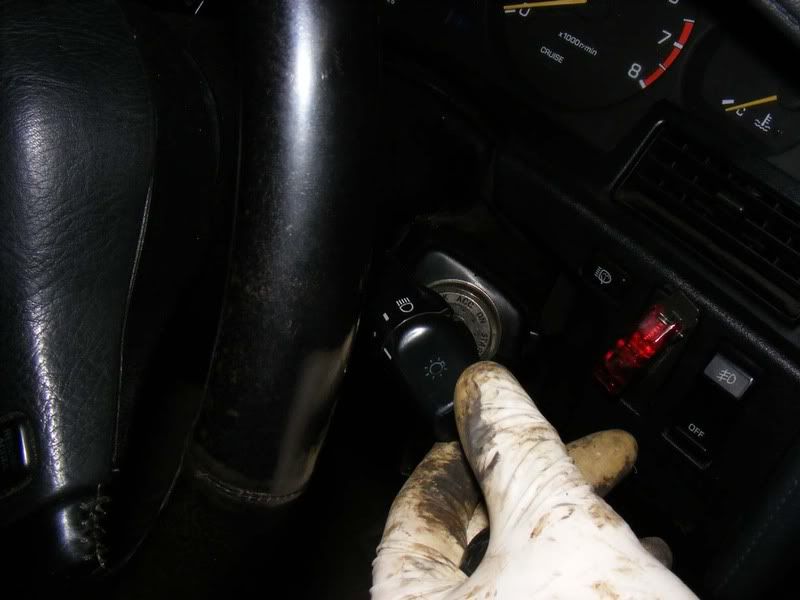
Step 1 - Switch your headlights to the on position and wait for them to pop up. Once they're fully up rotate back to position one (the one that doesn't seem to do anything). Your lights will turn off but they remain popped up so you can work on them
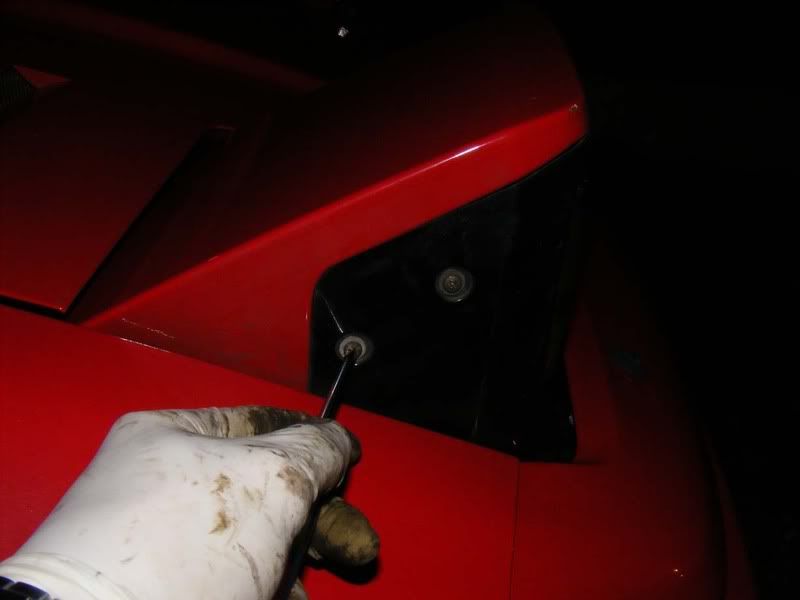
Step 2 - Remove the four screws holding the outer cover in place (2 on either side)
Step 3 - The black outer plastic cover should now pull away easily
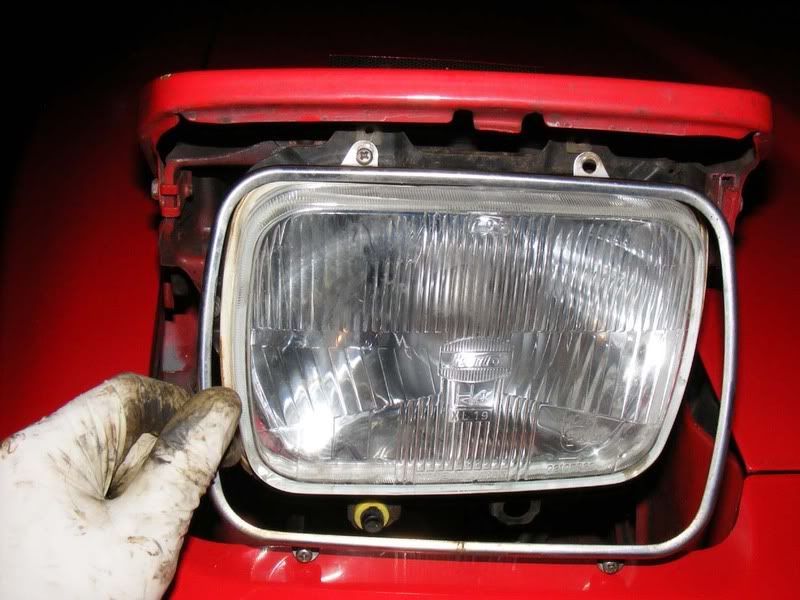
Step 4 - Now remove the 4 philips screws holding the metal trim in place, two at the top and two at the bottom
Step 5 - The cover should pull away freely and hopefully the screws should stay in it but watch out they might escape
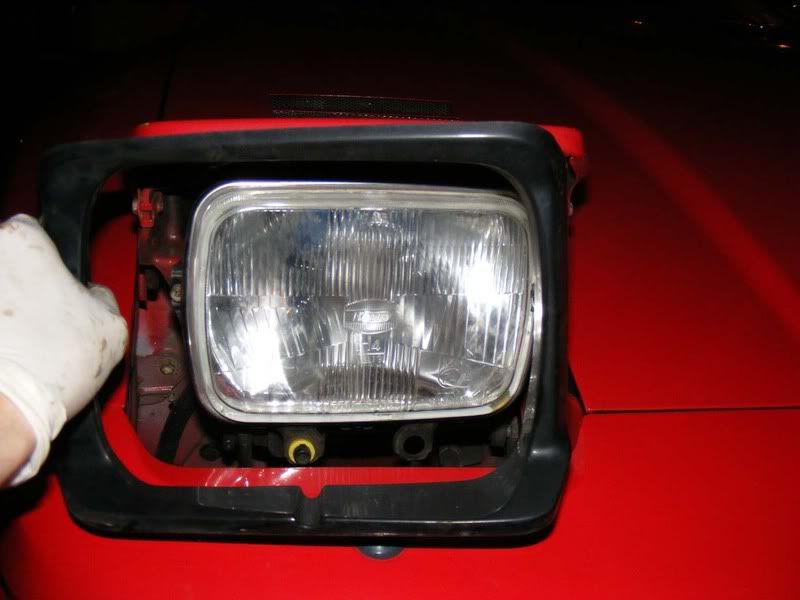
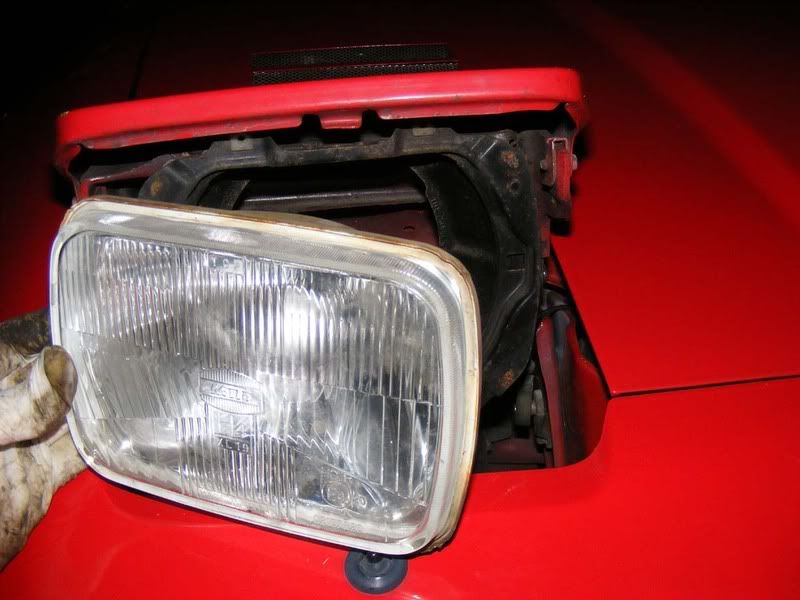
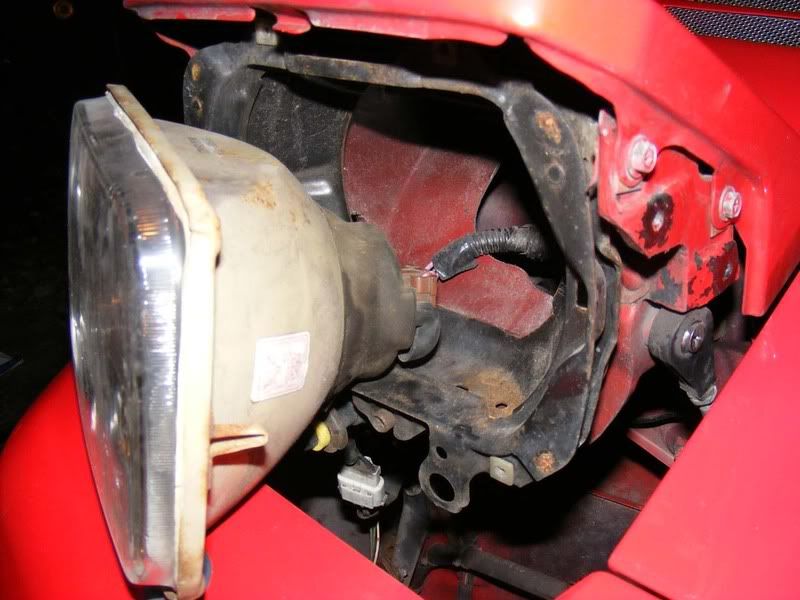
Step 6 - The headlight can now be pulled out of the unit
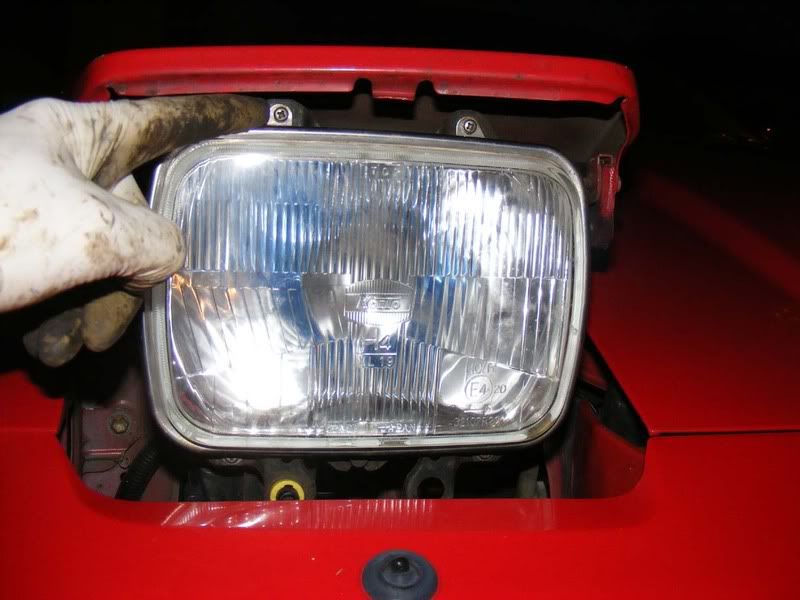
Step 7 - Remove the 3 pin multiplug, it will be stiff but wriggle it a little whilst applying stong pulling force and it will come off cleanly
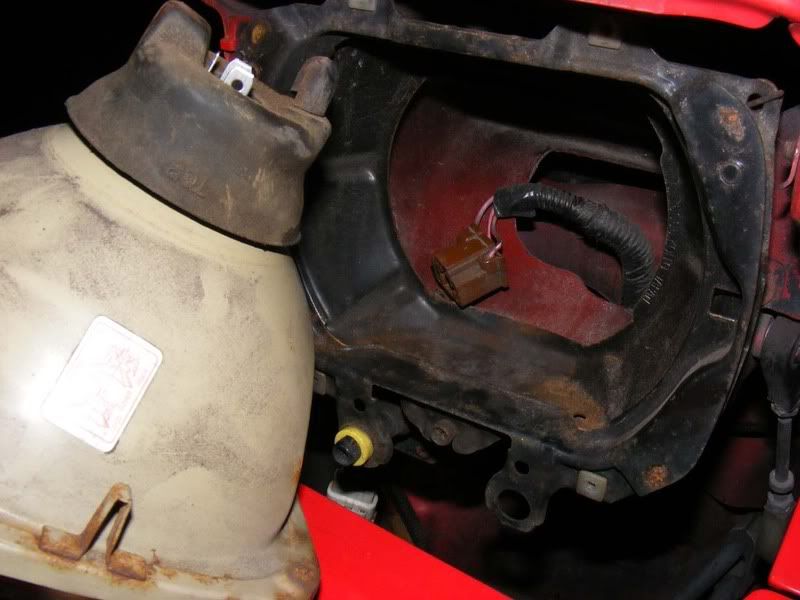
Step 8 - Now pull the rubber boot off the back of the lamp unit
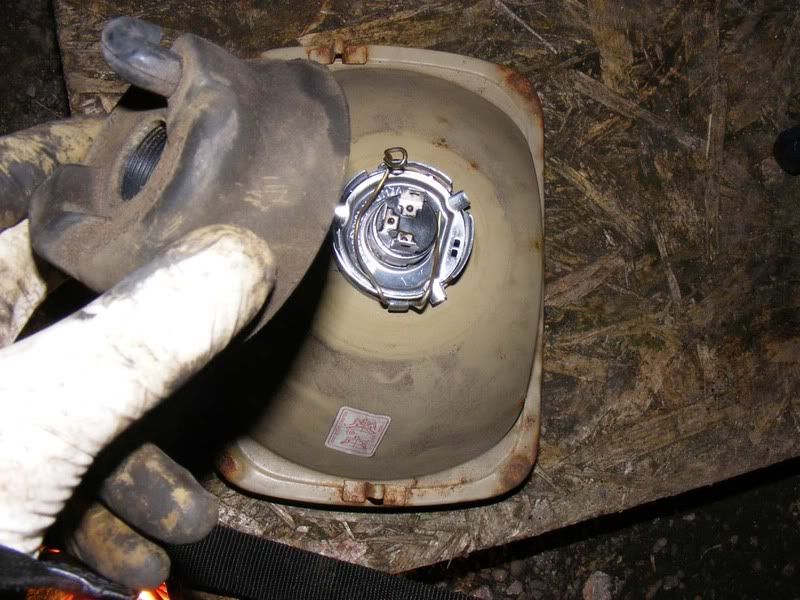
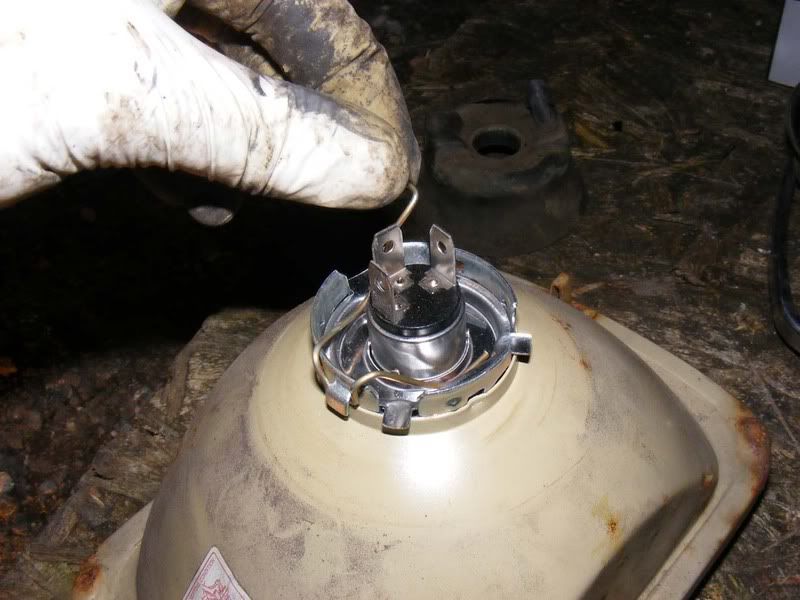
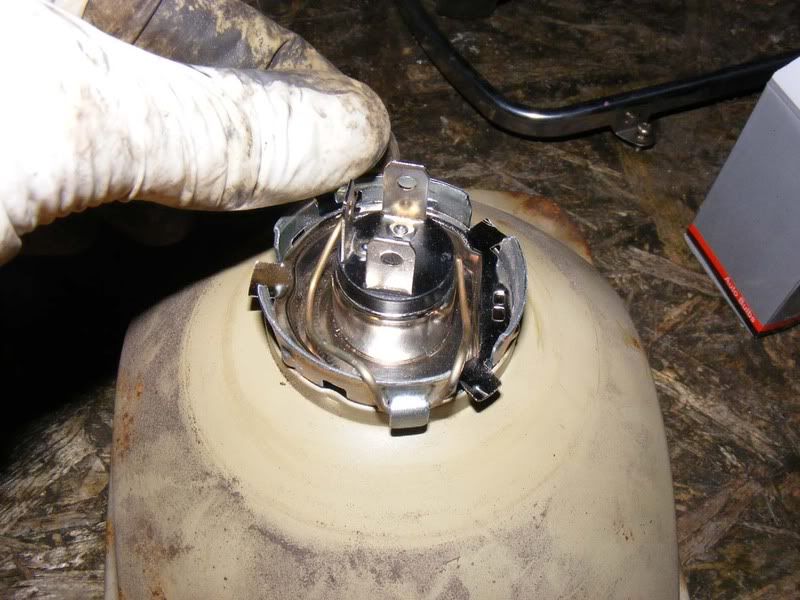
Step 9 - Press down the metal clip and unhook it so it can be retracted to expose the bulb
Step 10 - Now remove your bulb, note it probably won't be blue - you just want a standard H4, 55 watt
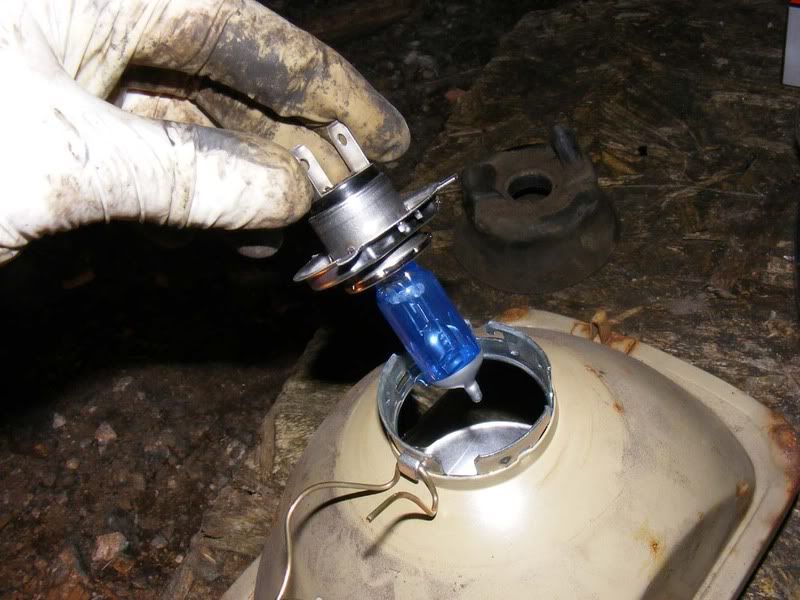
Step 11 - Drop the new bulb in then fasten the metal spring clip down again
Step 12 - Pop the rubber boot on, note that it says 'top' on the side which should face the bonnet
Step 13 - Reattach the multiplug
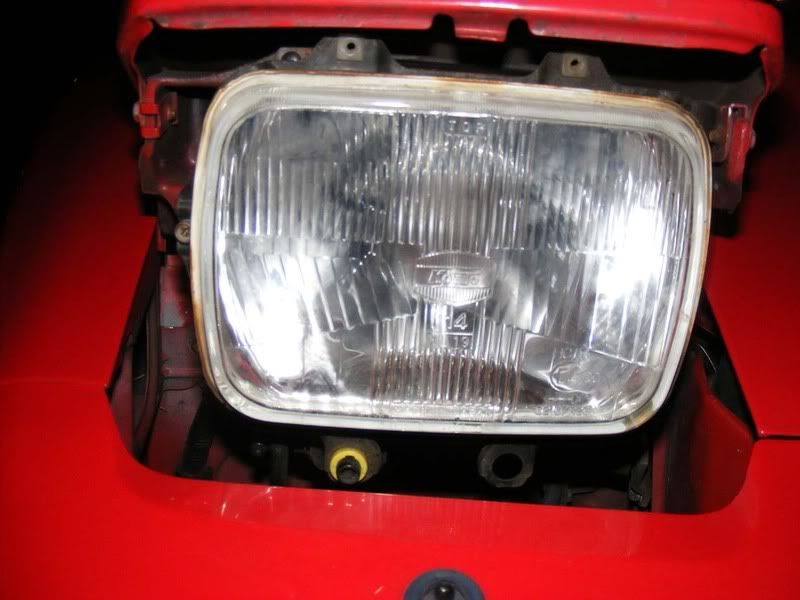
Step 14 - Slide the light back into the housing
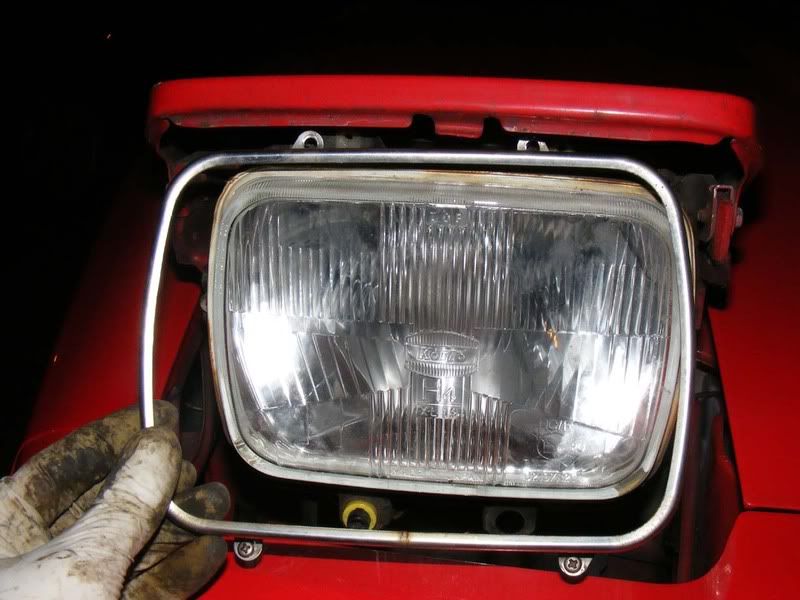
Stpe 15 - Now fit the metal surround back on, note that the two holes at the top are closer together so it only goes on the right way round
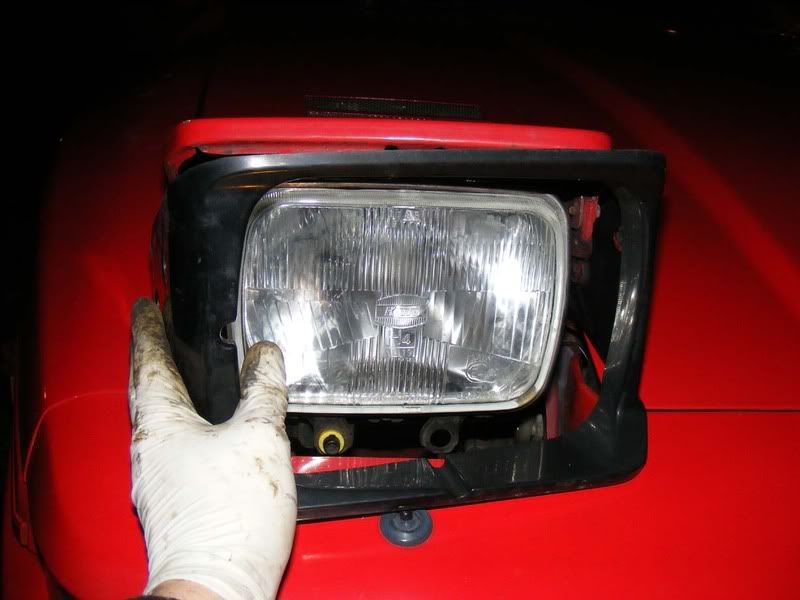
step 16 - Slide the black plastic cowl on and fasten the 4 screws
Note: Make sure nobody messes with the controls while you're working on the lights, these motors have a lot of torque to them and you don't want to trap your hands in a closing headlight believe me!
Also, I'm sure all the previous models I've had use a spring arrangement that you unhook to remove the light but it has been a while!
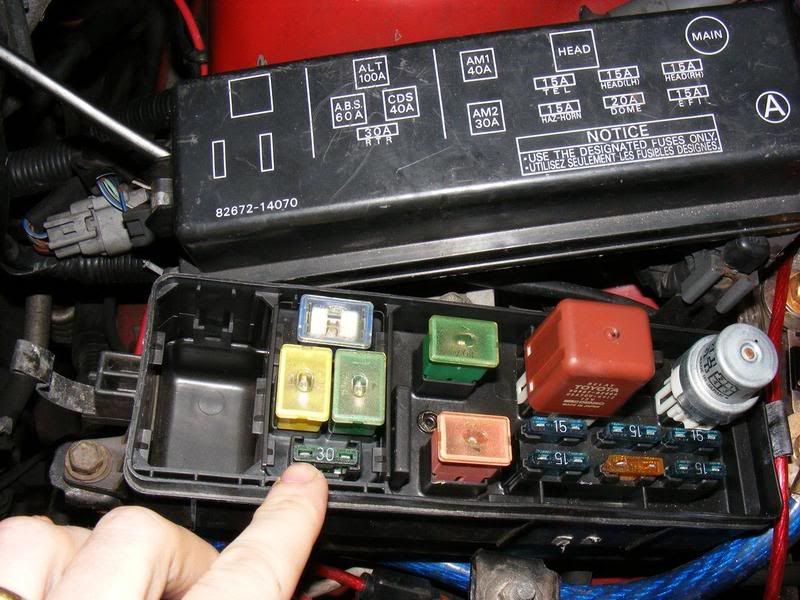
I would strongly advise removing the 30A "RTR" fuse in the engine fuse box once you have raised the headlights - this will stop the headlight motors working while you are fiddling about and save your fingers!
Step 1 - Switch your headlights to the on position and wait for them to pop up. Once they're fully up rotate back to position one (the one that doesn't seem to do anything). Your lights will turn off but they remain popped up so you can work on them
Step 2 - Remove the four screws holding the outer cover in place (2 on either side)
Step 3 - The black outer plastic cover should now pull away easily
Step 4 - Now remove the 4 philips screws holding the metal trim in place, two at the top and two at the bottom
Step 5 - The cover should pull away freely and hopefully the screws should stay in it but watch out they might escape
Step 6 - The headlight can now be pulled out of the unit
Step 7 - Remove the 3 pin multiplug, it will be stiff but wriggle it a little whilst applying stong pulling force and it will come off cleanly
Step 8 - Now pull the rubber boot off the back of the lamp unit
Step 9 - Press down the metal clip and unhook it so it can be retracted to expose the bulb
Step 10 - Now remove your bulb, note it probably won't be blue - you just want a standard H4, 55 watt
Step 11 - Drop the new bulb in then fasten the metal spring clip down again
Step 12 - Pop the rubber boot on, note that it says 'top' on the side which should face the bonnet
Step 13 - Reattach the multiplug
Step 14 - Slide the light back into the housing
Stpe 15 - Now fit the metal surround back on, note that the two holes at the top are closer together so it only goes on the right way round
step 16 - Slide the black plastic cowl on and fasten the 4 screws
Note: Make sure nobody messes with the controls while you're working on the lights, these motors have a lot of torque to them and you don't want to trap your hands in a closing headlight believe me!
Also, I'm sure all the previous models I've had use a spring arrangement that you unhook to remove the light but it has been a while!
I would strongly advise removing the 30A "RTR" fuse in the engine fuse box once you have raised the headlights - this will stop the headlight motors working while you are fiddling about and save your fingers!