Cluster dimming led needle problem

G_Péji

New Member
Mar 9, 2022
17
0
1
34
Hello,

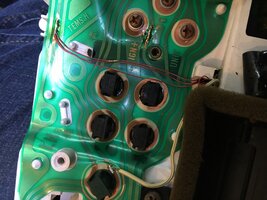
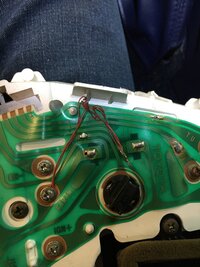
got a trouble I don’t understand and I never saw this modification before.

when I dim the light, all of the background lettering and number dim to nothing as well as the turbo / oil / gas needle.
The rpm / speedo / temp stay light up

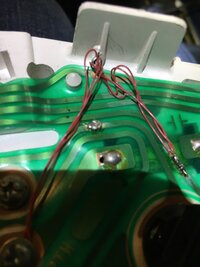
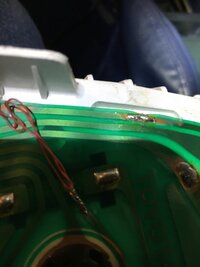
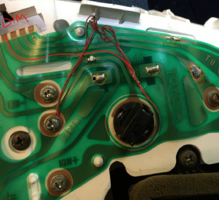
i have verified and I do have a power variation as I play with the reosthat.0A874D5C-045D-406D-8193-97E06B1A2D67.jpeg5BFA420B-5E81-4696-A35E-BC4392AB2221.jpeg1B566BAB-DB2D-4461-8918-0C3981FB040E.jpegB24BD9DE-9EFC-402C-B73B-3C61047EB30B.jpeg
 
Oct 11, 2005
3,814
13
38
Thousand Oaks, CA
The mod to the non-dimming lamps is because the dim circuit has been replaced with a direct ground. That keeps the lights at full brightness. This one shows it clearly. Delete the jumper to ground and repair the trace as shown in red if you want dimming.

1647971510892.png
 

G_Péji

New Member
Mar 9, 2022
17
0
1
34
Yes I don’t know guys. Seriously that piss me off discovering shitty job like that :(

I bought the car like that in last October.
 

G_Péji

New Member
Mar 9, 2022
17
0
1
34
The mod to the non-dimming lamps is because the dim circuit has been replaced with a direct ground. That keeps the lights at full brightness. This one shows it clearly. Delete the jumper to ground and repair the trace as shown in red if you want dimming.

View attachment 80494
Ok,

But the one you show it’s not the dimming ?

My white / green that dim is the 5th pin in the connector.

And you suggest that I remove the ground and put it where ?


For the gas / turbo and oil that are working properly I let everything as is ?

I am hunting a new cluster back print to replace this scrap one. I am think of soldering / shirking extension wire on this tiny red one and go tap directly on the cluster harness. It would do a much cleaner job. What do you think ?


Thanks for the help.
 
Oct 11, 2005
3,814
13
38
Thousand Oaks, CA
Its not dimming because the ground side of the illumination bulb is directly connected to ground which is the equivalent of full brightness. Remove the grounded jumper and reconnect the ground side to the trace I called "dim".
 

G_Péji

New Member
Mar 9, 2022
17
0
1
34
OK so if i understand correctly, I remove the wire connect to the ground screw and connect it to the circuit show by your red line. But What I do with the red wire already connected to this line ?

Thank you for helping!
 

G_Péji

New Member
Mar 9, 2022
17
0
1
34
Ok so I worked on this today

I made the speedo / rpm and temp needle dime by using 1 pair of 3 wire on the 4th pin and the other pair of the 3 wire on the 5th pin wich is the dimming wire white / green.
 
Oct 11, 2005
3,814
13
38
Thousand Oaks, CA
Your circuit board traces have been butchered so getting it back to factory will take some effort. Deleting the jumpers is the first step. Then patching over the trace cuts and other damage the next step. Sounds like you are making progress. Since the traces are big, its pretty easy to figure out and fix the damage. You probably figured out you can scrape off the green insulator on top of the the traces to expose the copper so you can solder a wire to it.
 

G_Péji

New Member
Mar 9, 2022
17
0
1
34
Yes i did figure it out. thank you for the help i really appreciate. I did found and bought a new back print and i wil trash the old out.

i have made a custom pigtail connections with connector directly on the good wire. Solder and heat shrink everything. Look perfect for my ocd. :)