1987 MK3 Resto

Smartparts

New Member
Dec 14, 2010
146
0
0
CT
BlackDevilSupra;1654704 said:
Seems like you've got the means to properly evaluate the car and remedy the obvious mechanical maladies. I think it's best to just yank the engine, remove oil pan to inspect and R&R the bearing, then replace every gasket. Also, clean engine bay. Since the engine is out, then you can easily evaluate the situation with the steering rack.. You'll then have a good foundation and familiarity with the vehicle going forward.

Thought about what you said all day. I did a lot of reading, and I think I can handle it. I'm going to make room in the garage this weekend and start the pull next weekend. I'm going to try to get 4-500 hp out of it long term. I'm going to replace:

Oil Pump
NPR pistons
ARP headstuds, Main studs, rod bolts
Metal headgasket
bearings
new gaskets and seals

If I replaced those parts would it be able to handle the power I'm looking to eventually make?

Also I got tired of my crusty old 1987 shifter boot. I made a new for it with some special order fabric some of you may recognize.
GEDC0099.JPG


New and improved. Not bad for the first time sewing. I took the stitching out of the original, and made a direct copy. The fabric was expensive, I'm going to redo the ebrake too so that they match. Might be interested in making them for people if theres any interest. It was fairly time consuming though.
GEDC0104.JPG
 

Greek

New Member
May 20, 2010
513
0
0
Ohio
Ah, the infamous shit brown paint that I've heard about. I do like that interior though, would have been better with a different exterior color.

Can't wait to see where you go with this.
 

CTsupra

Supramania Contributor
I really like the tan interior supras! Please, properly restore this car. It is pretty rare, and I'd love to see it in showroom condition.

Edit: Btw, where are you in CT? I'm an hour away from Enfield as well. You can send me a PM if you don't want to declare that over a public forum.
 

Smartparts

New Member
Dec 14, 2010
146
0
0
CT
CTsupra;1655206 said:
I really like the tan interior supras! Please, properly restore this car. It is pretty rare, and I'd love to see it in showroom condition.

Edit: Btw, where are you in CT? I'm an hour away from Enfield as well. You can send me a PM if you don't want to declare that over a public forum.

Yes, I love the tan interior. Its a shame the seats are in the condition they are in, but the rest of the interior is nice. No cracks in the dash or molding, the rear seats are fine. Shifter boot has been replaced, going to see if the job I did will match, If not I have some black leather I might use. I'm in the New Haven area BTW.
 

Smartparts

New Member
Dec 14, 2010
146
0
0
CT
Did a semi-mock up of what the shifter and e-brake covers look like installed. I just plopped the shifter boot on and didn't bother with fiddling with the creases or anything. You guys may think its a bit much, I think it looks ok, but its far too early to tell.
GEDC0001.JPG


GEDC0002.JPG


Also have some cleaning to do if I am going to pull the engine.
GEDC0004.JPG
 

Smartparts

New Member
Dec 14, 2010
146
0
0
CT
So I wanted to check why my coolant overflows into the reservoir and fills it up and dumps it onto my driveway. I was looking for bubbles in the radiator. I took this short video 20 seconds after cold starting it. It was 45 degrees outside. Should I be concerned? lol
[video=youtube;ZoZDnRmIzQY]http://www.youtube.com/watch?v=ZoZDnRmIzQY[/video]
 

spencyg

New Member
Oct 7, 2010
141
0
0
Maine, USA
Seriously blown head gasket or just a bad radiator cap. I'd get a new cap with the factory correct pressure rating first. If that doesn't work than I'd suspect the coolant circuit is being pressurized from an outside source...i.e...head gasket leak. Oil in the coolant at all, or coolant in the oil?
 

ask92

That guy.
Nov 17, 2008
357
0
0
Rocklin, CA
I agree^ Take off the oil fill cap and look for the famous milky white substance of coolant in the oil. There is also a dye you can buy,you put it in your coolant and it changes to a certain color is oil is present. How does the car run?Any white smoke? Looks like its a great car to start off with!!!!
 

Smartparts

New Member
Dec 14, 2010
146
0
0
CT
ask92;1655961 said:
I agree^ Take off the oil fill cap and look for the famous milky white substance of coolant in the oil. There is also a dye you can buy,you put it in your coolant and it changes to a certain color is oil is present. How does the car run?Any white smoke? Looks like its a great car to start off with!!!!

I've taken off the fill cap and the oil appears fine. My dad said the coolant felt oily, but I couldn't be sure. I'm going to pull the engine regardless and do a rebuild. 230k miles on it. I think it should be time.
 

ask92

That guy.
Nov 17, 2008
357
0
0
Rocklin, CA
Yea good idea, especially if you plan to mod, just some good reassurance. Just make sure to do it right, torque everything down properly!!
 

Smartparts

New Member
Dec 14, 2010
146
0
0
CT
Bit of an update here, not sure if anyone is interested or not haha.

I'm thinking the head gasket isn't blown, and that its more of a blockage issue. Before looking at the pictures since I started taking the engine apart this weekend. I started the car again one last time, and went to show my friend the radiator cap thing. It had been running for 5 mins or so, and was not hot, I took off the radiator cap and the coolant came out with enough force to about blast me with piss...

Im thinking theres some kind of blockage. Also when I removed the radiator, I had the rad cap on, I took off the top coolant return line, the thick one at the top of the radiator. I cleaned it off, and put it up to my mouth and formed a seal. Then I blew hard and could blow air and could hear bubbles and it sounded like it forced some liquid from somewhere into the radiator. It started pissing out coolant slowly from the drain plug in the bottom of the radiator. Is that normal? I should probably look for a diagram to see the flow path.

My coolant problem wasn't getting solved. This engine is so high miles that I should just do a complete rebuild and make sure its done correctly from the ground up.
GEDC0013.JPG

So this is what I'm starting out with. Supra is parked in the garage so I have a flat surface to work on. The rear tires are backed up onto ramps, and the front was lifted and rests on jack stands. A friend was kind enough to let me borrow these tools.
GEDC0016.JPG

We weren't really sure to get started. The guide I was following said to put a 19mm 6 point socket onto the crank pulley bolt and click it over and it would bust right off. Well needless to say it didn't bust at all. I may have to find an impact wrench once I get the engine out.
GEDC0014.JPG

Here's the crank pulley with a 19mm 6 point socket on a wrench with a breaker bar slid over it connected to the ground. Maybe I didn't do it right. The guide wasn't clear.
GEDC0018.JPG

Since I didn't have a 24 mm socket to drain the transmission fluid and the drain plug looked like it was in there pretty damn good there was no way I'd be able to get it off without stripping it. I decided to skip the step. Hey I had 2/3 drained with no mess might I add. I got inside and took out the glove box and kick panels to get to the ECU and ABS computers. These big ass boxes control the cars electronics and engine. I wonder if a smaller arduino could be programmed to control it. Now that would be pretty cool. I disconnected these connectors, and pulled the computers out.
GEDC0024.JPG

Here you can see the wire harness pulled from the firewall. I'm glad I had an extra set of hands to do this because if i didn't have someone pushing while i was pulling and vice versa it would have been a nightmare. I think the grommet holding the wires was the hardest thing to get off so far. I also took off the charcoal canister in this picture to get to the wire grommet. It gave a lot more room and was less hassle.
GEDC0028.JPG

Still frustrated about the tranny situation I decided to skip some more steps and pull off the intake and 3000 pipe connectors. Some of these hoses were so old and cracked I couldnt tell if they were busted before I started pulling or not. The thicker hoses cracked, the ones that attach to the intake going to the turbo. I'm hoping they won't be expensive to replace and regular old thick rubber hoses will work alright.
GEDC0022.JPG

Intakes are now off. Gave me the opportunity to look at the turbo. I took off the heatshield to the turbo.
GEDC0021.JPG

Compressor turbine doesn't look great, but the good thing is there is no shaft play. At least that's what everyone on the forum seems to care about. Not that I care I'm going to swap this for a borg warner turbo.
 

spencyg

New Member
Oct 7, 2010
141
0
0
Maine, USA
Just as a side note, antifreeze is incredably poisonous to the point where ingesting just one teaspoon will mean you need a blood transfusion ASAP. No joke. I know you cleaned off the hose real good before putting it near your mouth, but honestly that wasn't safe. Just want to make sure peeps understand that the danger with cars goes beyond busting up yo knuckles.
 

Smartparts

New Member
Dec 14, 2010
146
0
0
CT
I took it off first and washed it in my sink. Not worried about the antifreeze so much as how grimey the pipe was haha. On a side note I regularly wash paint chips down with antifreeze
 

Smartparts

New Member
Dec 14, 2010
146
0
0
CT
The engine is finally out. The instructions I was following while alright for the most part, were not complete and could include a lot more details. For instance it says to remove the 2 engine mount bolts. I did that, but turns out there was something else that held the engine to the frame, and I didn’t learn of this until it was too late. I may have broken an engine mount because of it. Also there were quite a few connections that were still attached I had to take off that weren’t listed in the instructions. I'm not taking any shots at the author of the guide. Common sense says before you start jacking the engine out make 100% sure everything is disconnected. Had too many things going on. But now I have some notes for the future, and hopefully some pictures for people and maybe do my own guide.

The last few steps I had to do took the longest time. Before it was ready to pull I had to drain the gas tank. It was practically full of 93 octane gas. With gas costing what it does, there is no way I would let that go to waste. I siphoned out probably 12-14 gallons. The fuel line had to be disconnected still, and with the rear of the car so high it would drip gas everywhere. Getting the fuel line off took almost an hour or more. What the guide didn’t say that it would drip gas until the tank was empty. There are 2 different sized nuts holding it together. Once it’s broken it starts leaking immediately. Now once its broken you think it would be easy to disconnect. It never got easier, in fact it got much much harder to get off. I had 30 degree gasoline pouring down my left arm for 45 mins. Once I got it detached I went inside to wash my arm. It felt sunburned and I was a little worried. I pressed on anyway.

Because of all the snow and ice we had, and my driveway being at the bottom of a hill there was a fair amount of water in the garage. Walking around in that made my feet wet and by the end of the day I was quite miserable. With only a few steps to do it took close to an hour per step. After the fuel line was disconnected I had to leave a bucket underneath it as it leaked gas the entire time.

I undid the transmission mount and put the jack under it to take the weight. Next I disconnected the 2 motor mount bolts and the cross member. Thank god for the breaker bar extension as it took a lot of torque to get it off.

Now the engine is just resting on the tranny jack and the mount bolts. The next step was rigging the crane to the lift hooks on the engine. This took a lot of thinking. We wanted to be extra safe as this engine weighs quite a bit and didn’t want the chain to slip off. We ended up putting the last link of the chain onto each hook. The load leveler helped out a lot. but it is very very hard to use when its actually under load.

Now it was ready to jack up. I put some tension on the chain and lowered the tranny jack. I gave a few pumps and saw it lift up a little bit. I head a crack, and lowered it back down. I checked the drivers side for more connections and saw that the alternator has to be disconnected at the alternator for both ground and positive. I went back to the jack and cranked some more. More cranking, tugging, and lowering. It was a constant trade off of lifting the engine, pulling it out, and lowering it because it would hit the firewall. Then I would adjust the load leveler to raise the front of the engine and lower the tranny. The drive shaft was still connected to the tranny so it had to come out. It just slides into the end of the transmission so first the engine has to be lifted out of the mount bolt guides. Then it has to be pulled forward so the driveshaft can “fall” out. Once the shaft falls out its more or less easy sailing. You can pull it forward and if your load leveler is close to the front, get the engine crank pulley as far out of the car as you can. As you pull forward you have to jack higher to make sure the transmission clears. The crane will only go so high, so crank the load leveler to the rear to raise the transmission. Once it was close to clearing I had a friend muscle the transmission out and made sure that it cleared the hood and bumper.

The pictures were taken at “breaks”. Between jacking the crane, tugging the engine off the driveshaft, and working the load leveler I was dead tired afterward and sore as hell on sunday.

GEDC0055-1024x768.jpg

GEDC0056-1024x768.jpg

GEDC0057-1024x768.jpg

GEDC0058-1024x768.jpg

GEDC0058-1024x768.jpg

GEDC0060-1024x768.jpg

GEDC0061-1024x768.jpg

GEDC0062-1024x768.jpg

GEDC0063-2-1024x768.jpg

GEDC0064-2-1024x768.jpg

GEDC0067-2-1024x768.jpg

GEDC0068-2-1024x768.jpg
 

Smartparts

New Member
Dec 14, 2010
146
0
0
CT
I really don't like the brown haha. Id love to paint/have it painted midnight blue or black. That may be out of the budget though.
 

Smartparts

New Member
Dec 14, 2010
146
0
0
CT
I spent Sunday changing the oil in my a4 and cleaning the garage. I skipped a step and the drivers side window was down. I risked it and hooked up the jumpers and thankfully the window went up. I pushed the car outside and parked it. This opened a lot of space in the garage and I could get to work on the engine.

After I got the engine out Saturday I didn't touch it again. My goal today was to get the transmission off and mount the engine to the engine stand rather than the shop crane.

The first thing you want to do when removing the transmission is take both clutch covers off the bell housing. You should already have the slave cylinder side off from when removing the clutch slave cylinder. Reach in and pull out the clutch fork. It should pop right off, use a screwdriver to help pull it out.

GEDC0076-2.jpg

With the clutch side off you can see the pressure plate on the clutch housing. There are 6 bolts like this. Take one off at a time, and then rotate the crankshaft 60 degrees using a 19mm socket to the next bolt. These 6 bolts are size 14.

Transbolts.jpg


Now the that clutch can be released from the flywheel, unbolt the bellhousing. Start with the starter. The bolts are highlighted in yellow. Then move on to the bolts in purple. I may have missed a few here. There should be at least 8 bolts that come off, and 2 nut/bolt combinations.

transbolts3.jpg


There are 4 bolts like this facing the transmission. They attach the bracket on the block to the bell housing.

With all the bolts removed the transmission should slide right off without much force at all. I used a flat head screw driver for a little persuasion.
 

Smartparts

New Member
Dec 14, 2010
146
0
0
CT
With the transmission and flywheel/clutch off I was able to mount the engine to the stand. With the head still mounted to the crane I slowly let it down, and it looked like the stand was sagging a big. I didn’t want to risk it so I left it on the crane supporting most of the weight of the engine.

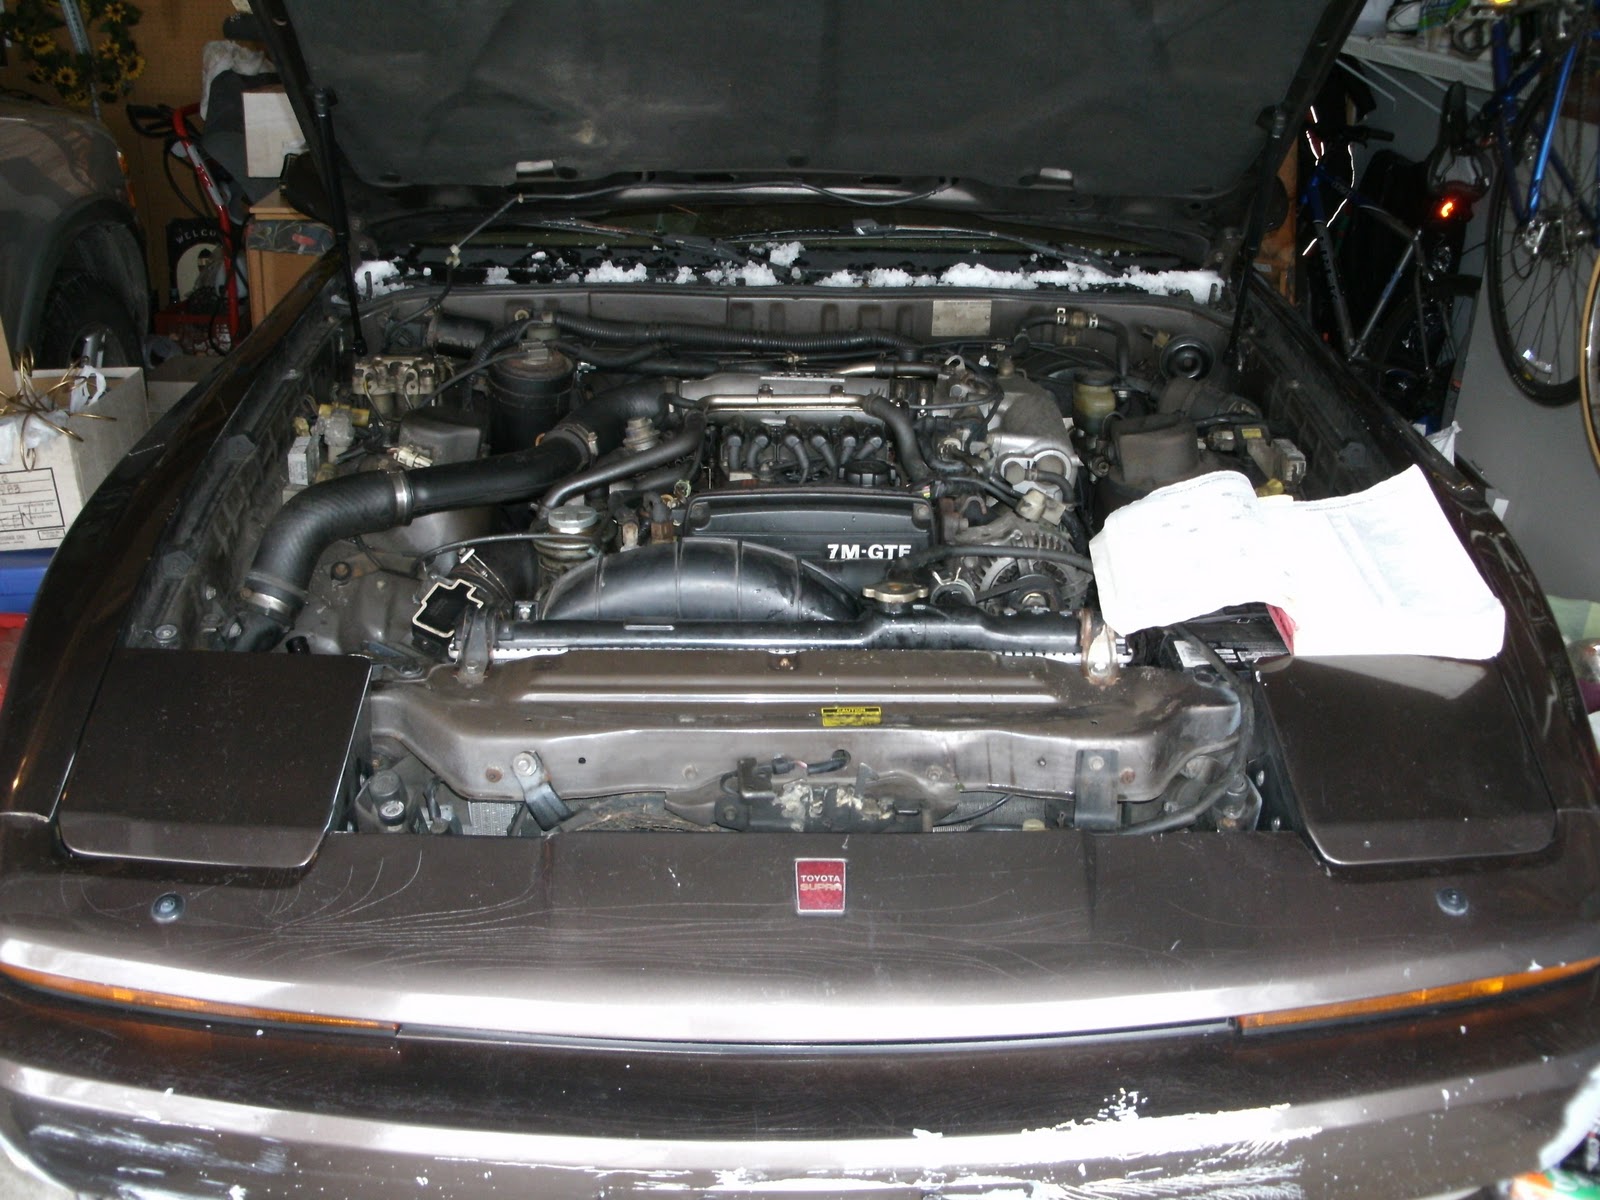
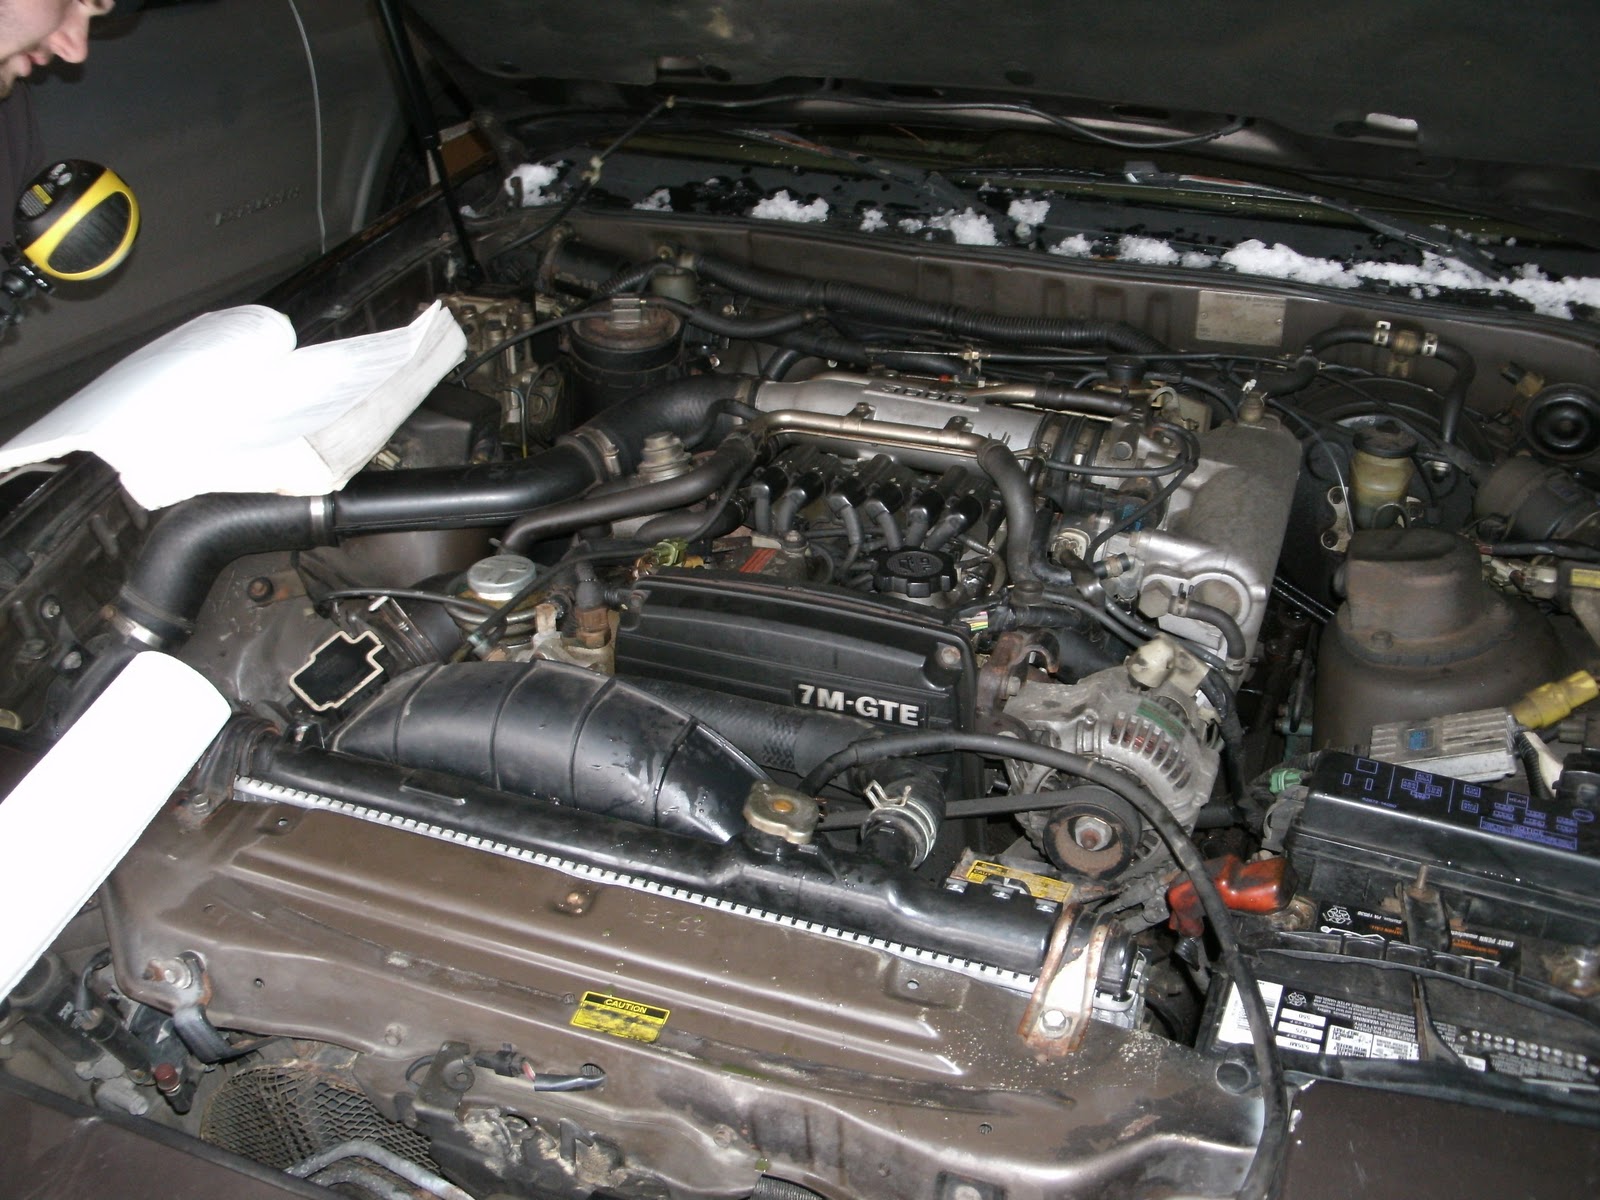
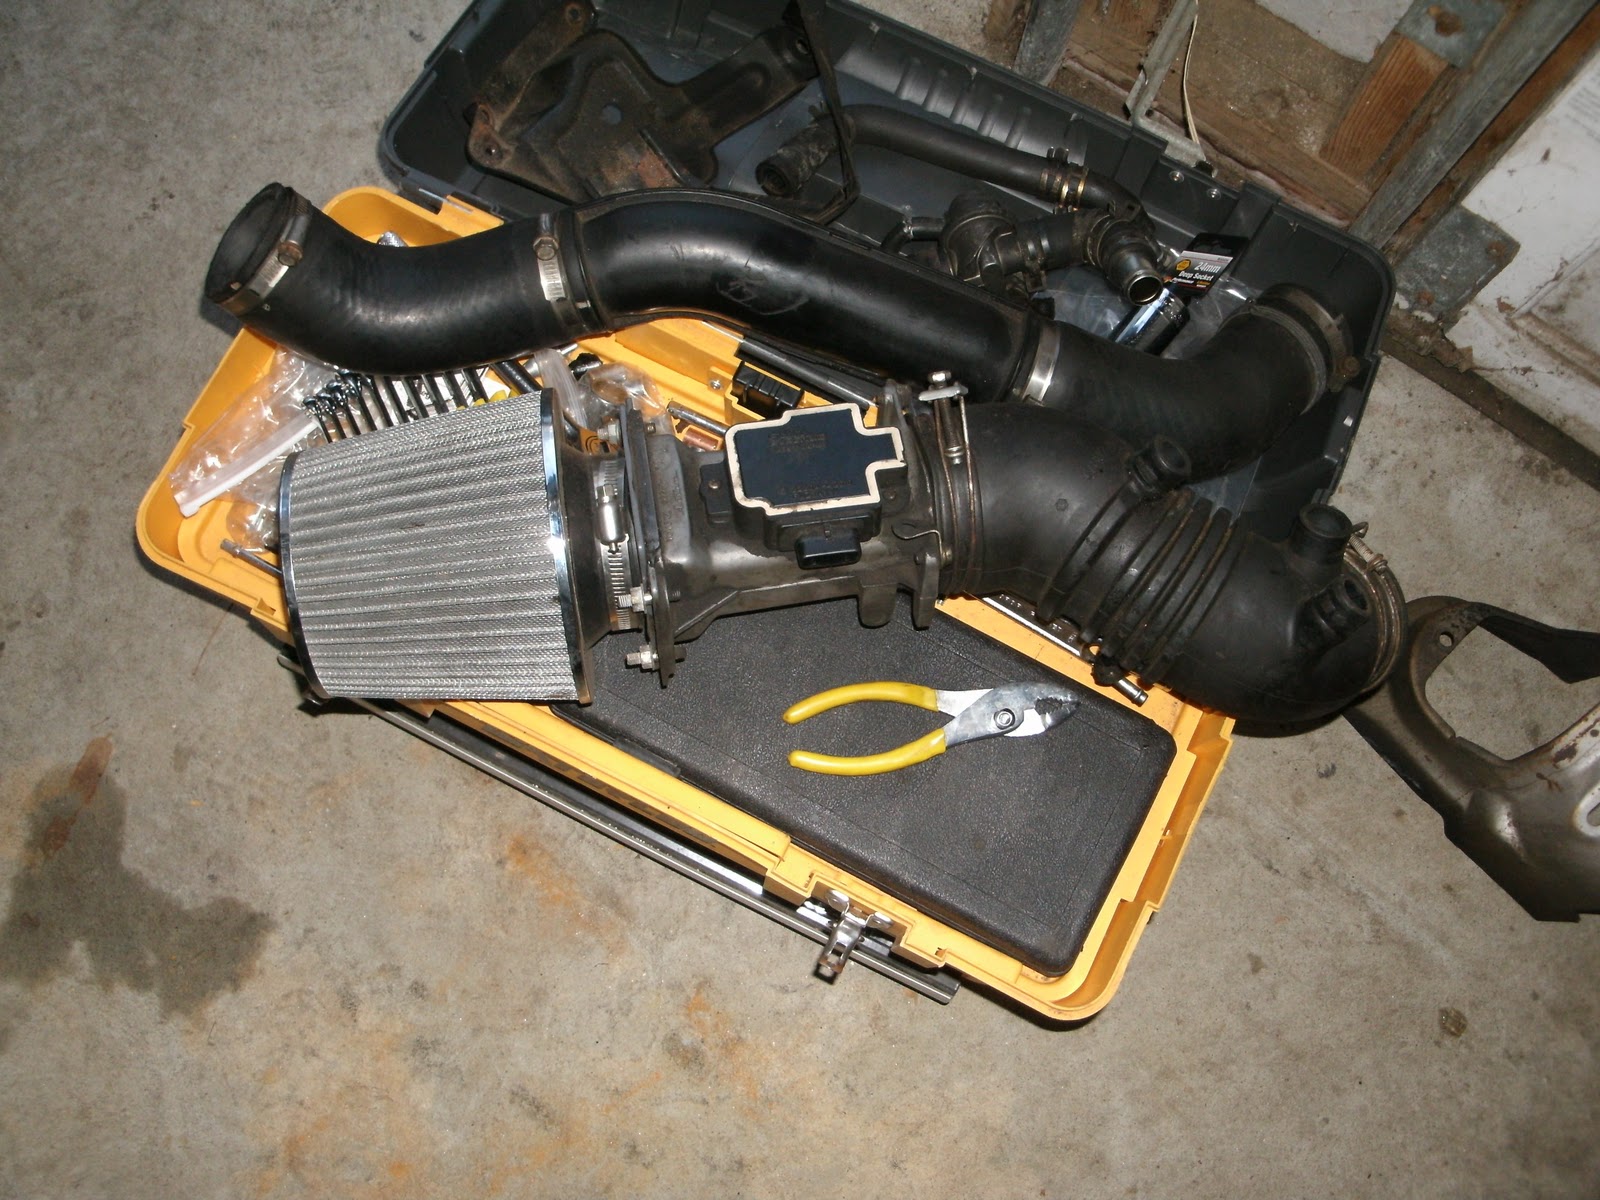
I started by taking off the 3000 pipe. I took as many pictures as I could to make reassembly easier. Vac diagrams can be confusing and finding what goes where and how will help when it comes time to put this back together. After the 3000 pipe I took off the throttle body. That thing was incredibly dirty on the inside. I am going to spend as much time cleaning the components as I will taking it apart and rebuilding it. The back side of the butterfly valve were covered in thick black residue. It’s going to take a wirebrush to get it down to the bare metal again. Various hoses and tubes had to be disconnected to get it off. The throttle position sensor just disconnected easily. It took a few light taps with the persuader to knock the upper manifold loose, but the seal broke and off it came.
GEDC0085-2.jpg

GEDC0086-2.jpg

GEDC0087-2.jpg

GEDC0088-2.jpg

GEDC0090-2.jpg

GEDC0103-2.jpg

GEDC0102-2.jpg

GEDC0111.jpg


GEDC0114.jpg

GEDC0115.jpg

GEDC0119.jpg

GEDC0120.jpg


I guess I got a lot of cleaning to do

---------- Post added at 05:49 PM ---------- Previous post was at 05:47 PM ----------

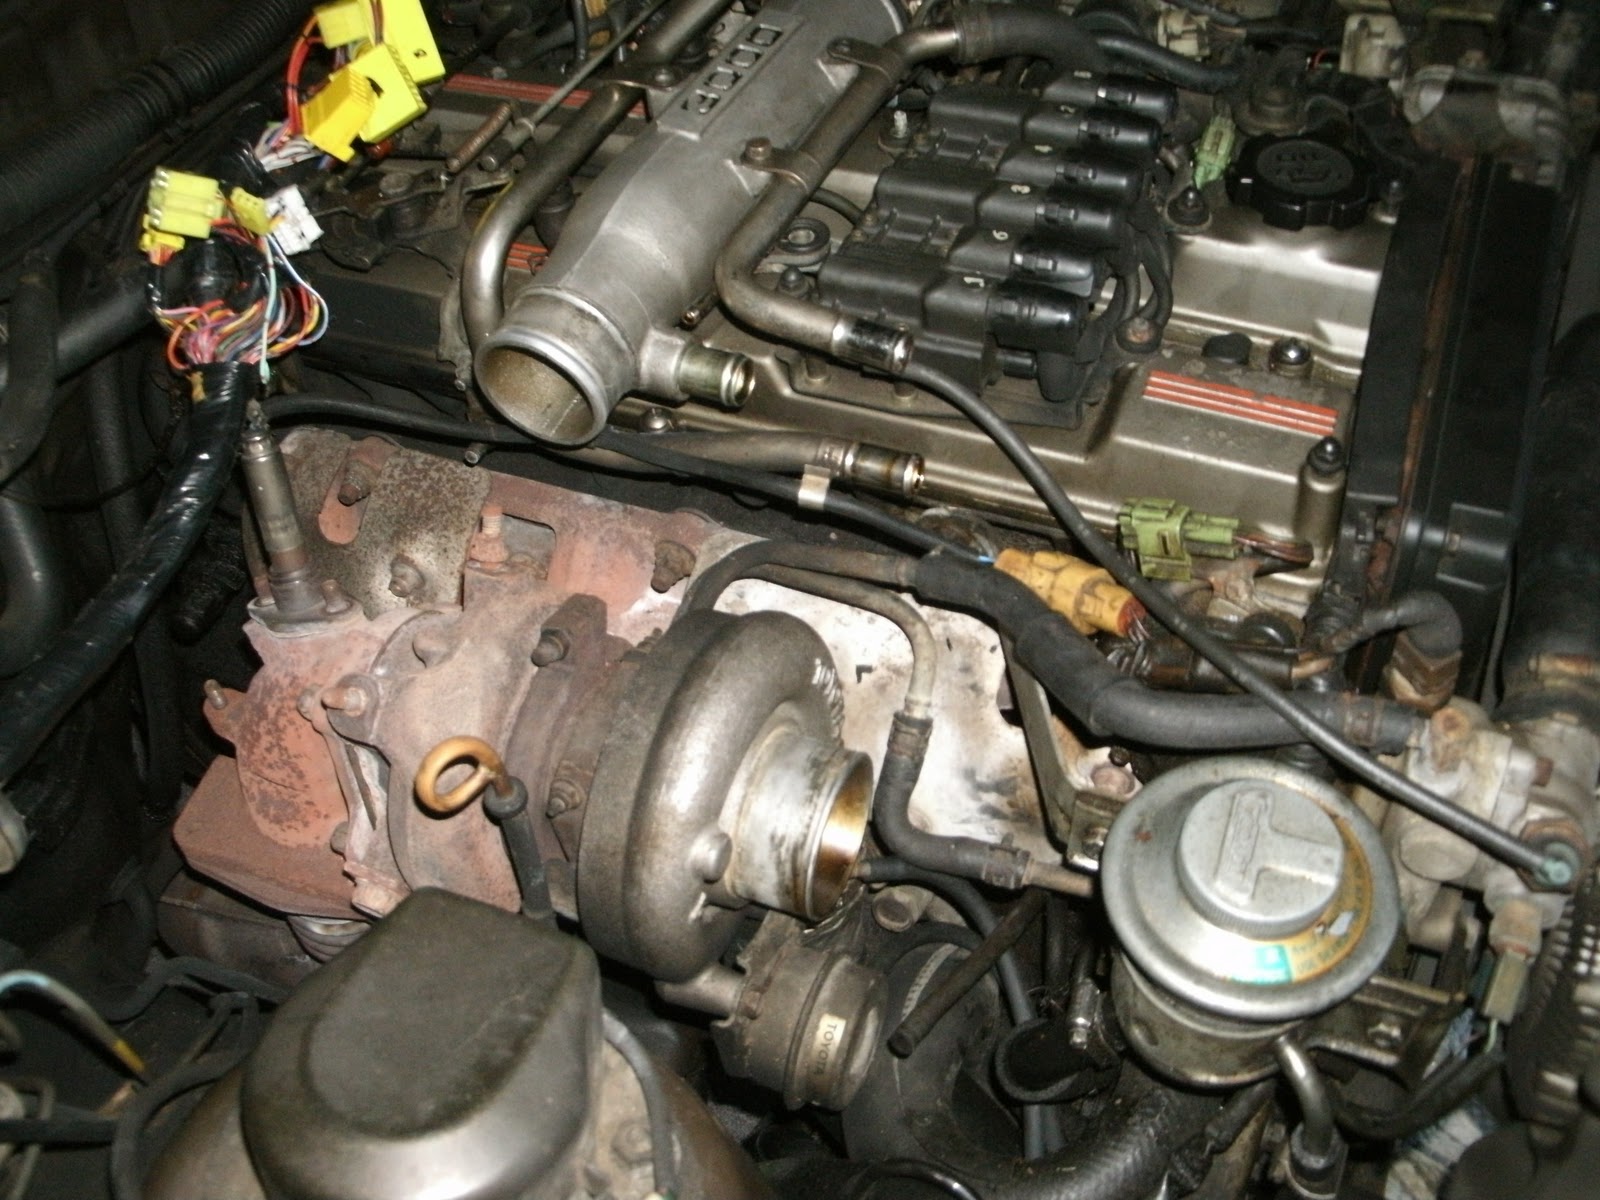
Today was warm out. I worked in the garage without my jacket, it had to be around 55 degrees. I can't say that I mind it at all. I started taking off the exhaust side manifold. I started with the turbo. I know the bolts on this side can be very difficult to remove. Luckily I didn't have any trouble whatsoever with the turbo. In this picture the heatshield has been removed from the manifold and I began testing the 4 bolts holding the turbo on. They all broke free easily. Three came off using the ratchet, but there was one hidden that had to use a small wrench for. Annoying.
GEDC0121.jpg


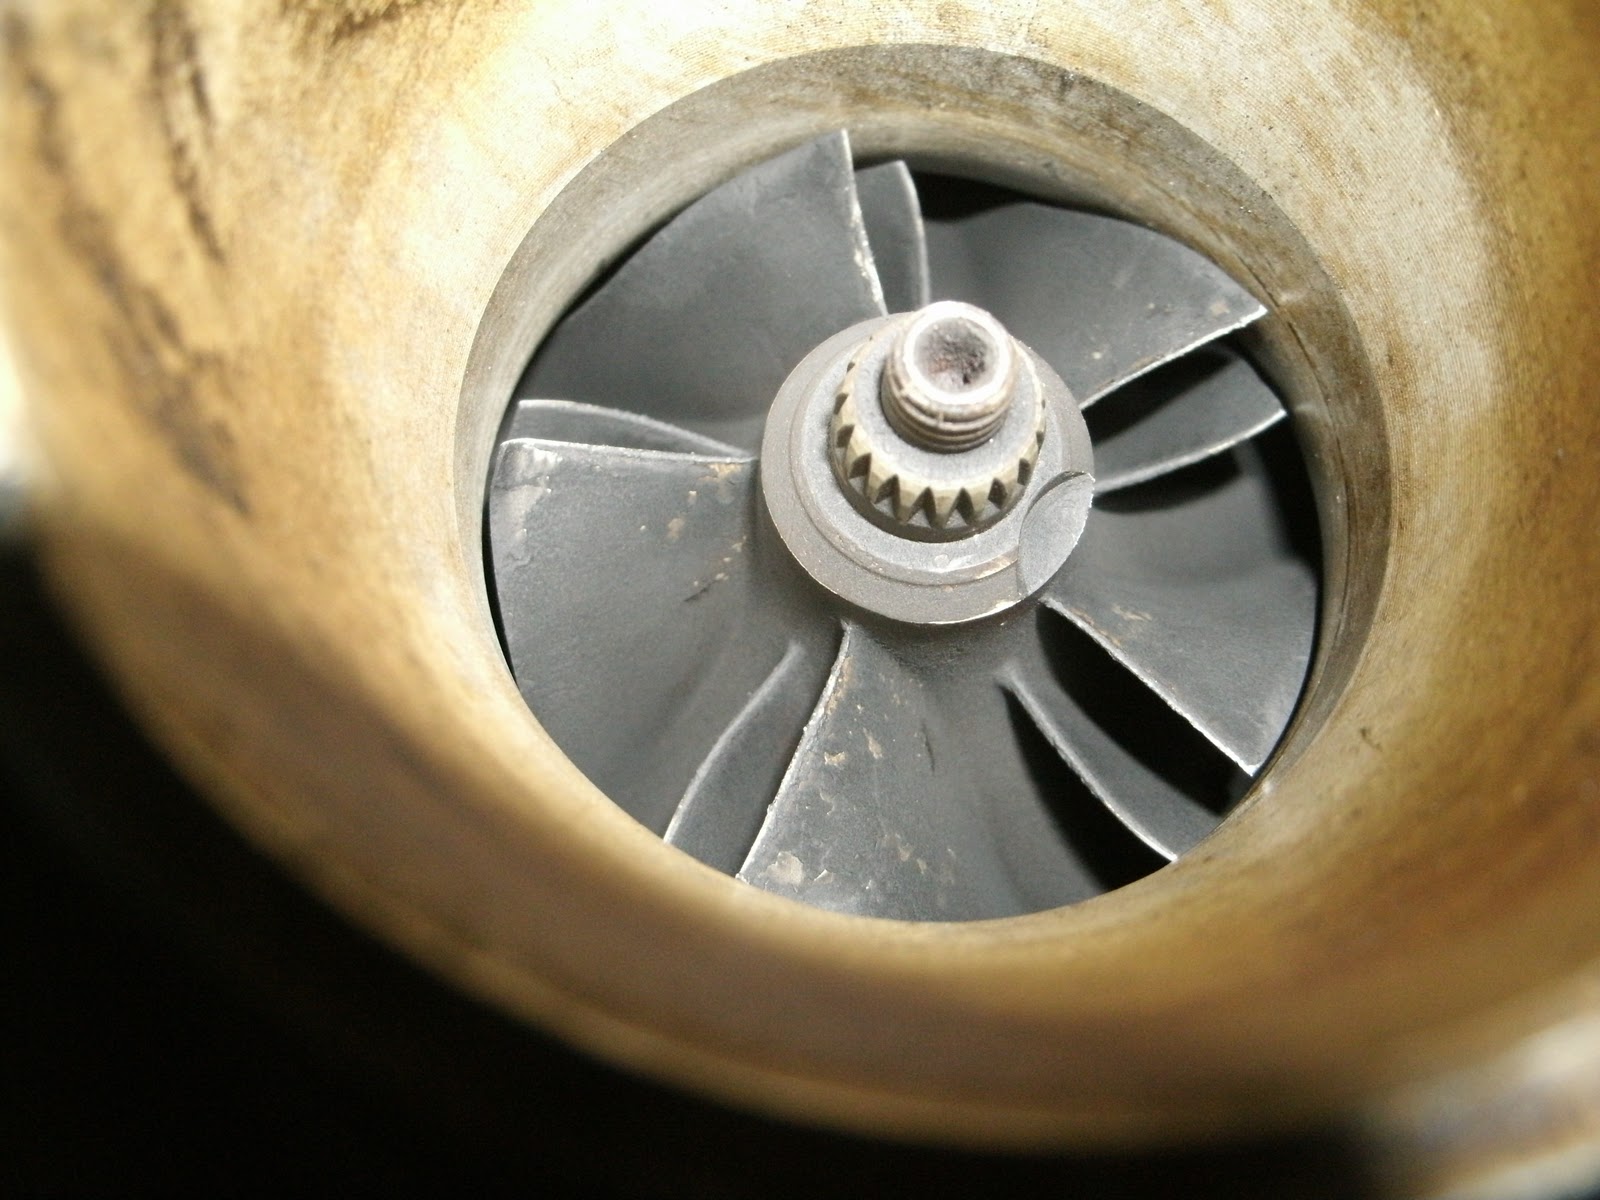
The underside of the turbo. You can see the oil return line bolted to the center housing rotating assembly. It looks like it would be some kind of flex material but I assure you it is hard as metal. This return line needs to be unbolted from the CHRA and the block.

GEDC0122.jpg


Top view of the turbo. These are the water cooling lines. At first I thought I could just disconnect them and be OK, but once everything was off and I couldn't get the turbo off the studs I caved and removed the water line block as well. It came right off after that. Do the job right the first time and you save time.
GEDC0123.jpg


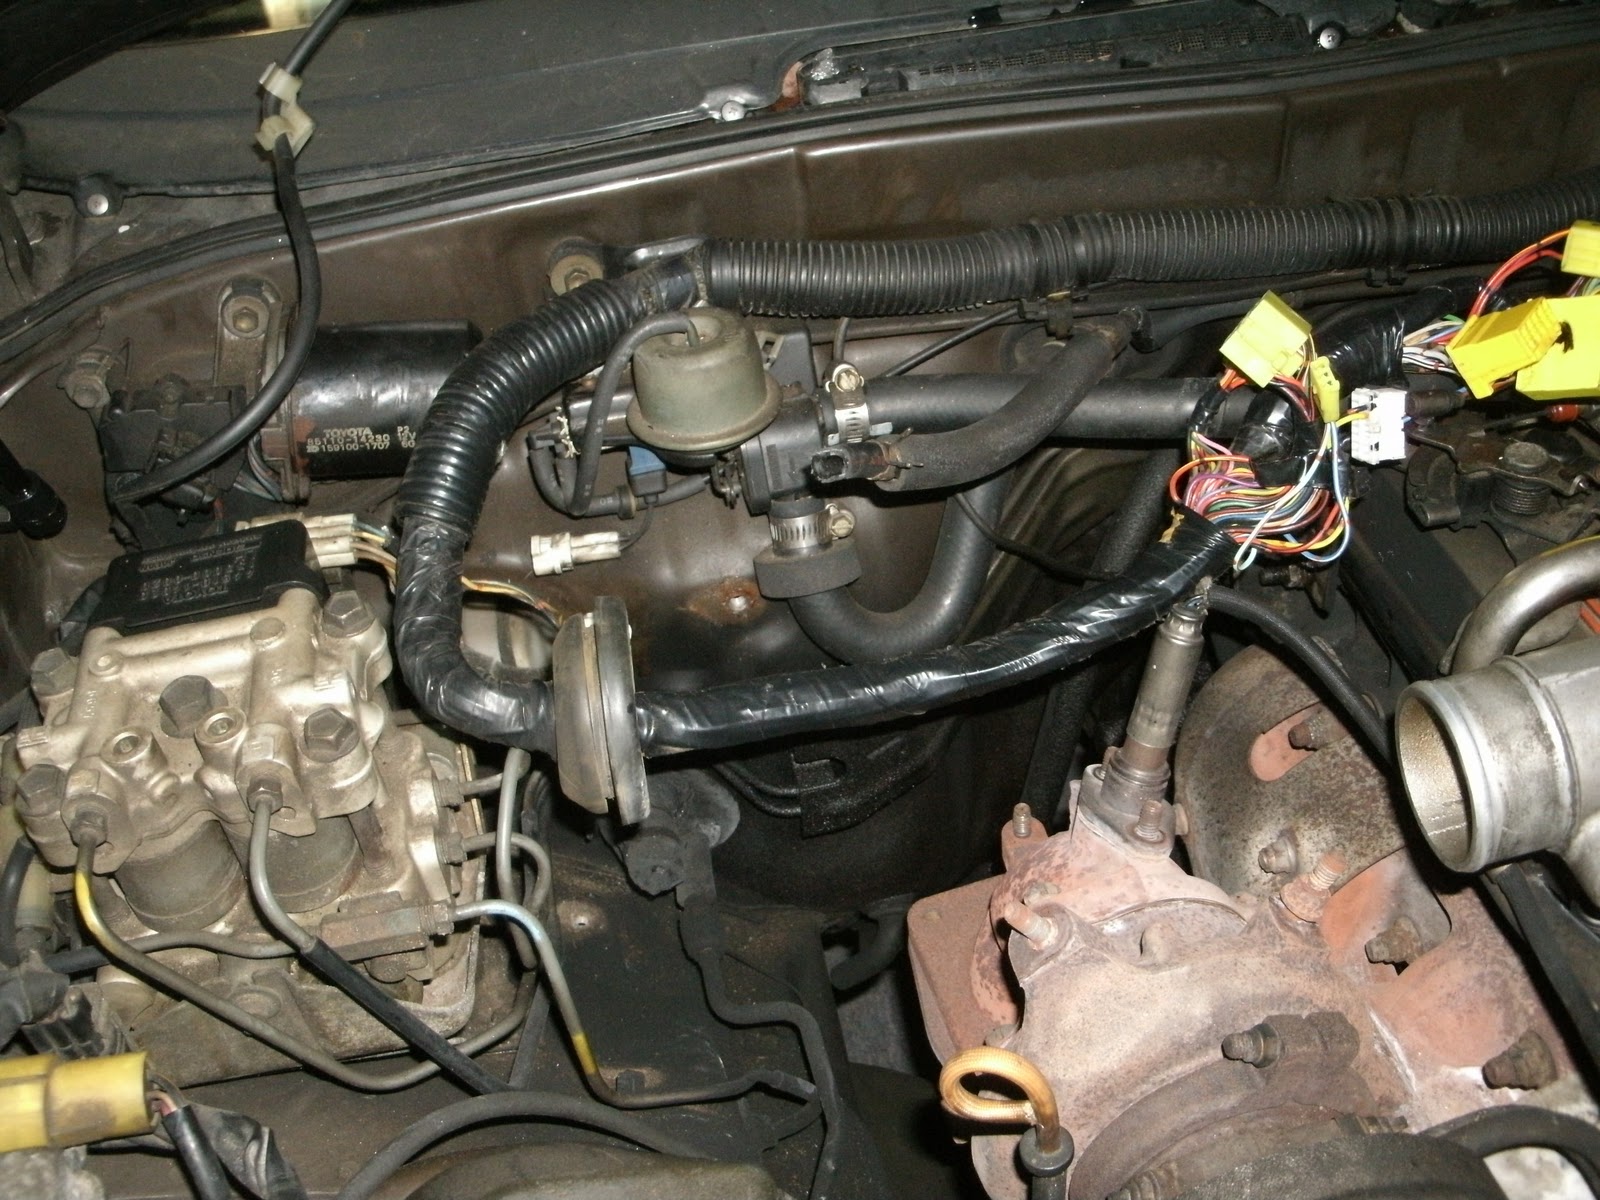
Turbo is now off, you can see the water lines still attached to the pump and disconnected from the thermostat. I needed to get the turbo off before I could get to the second heat shield closest to the crank pulley. The oil return line is still hanging because I didn't remove it from the block. It is still bolted to what I assume is the oil pressure sending unit.

GEDC0124.jpg


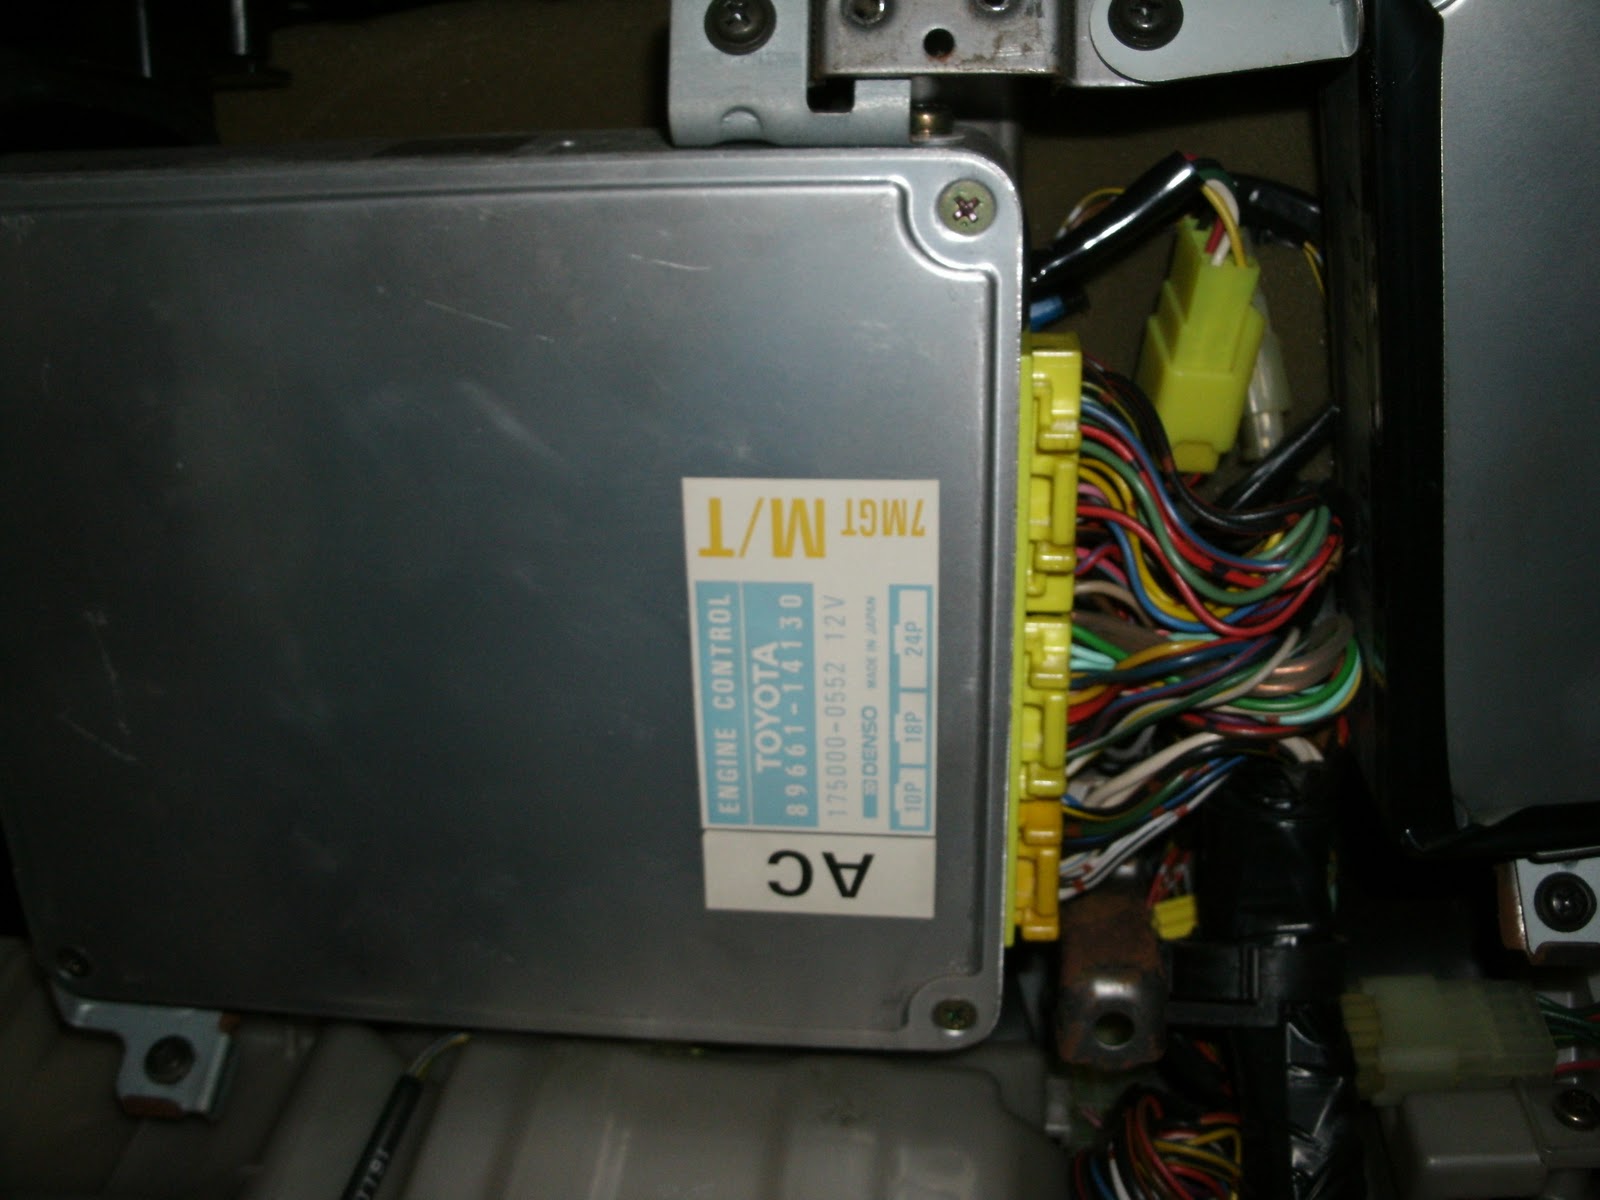
Side view of the manifold sans turbo. Oil and water lines visible, and a nice close up of some connector. The harness had to get removed too.
GEDC0125.jpg


I was on a roll and just removed the manifold. If you look closely you can see the studs came out in a few places. I think 2-3 came out, and it looked like they still had the threads attached. It's going to be a pain in the ass to have those rethreaded. I will most likely have to get them in a larger size. Close up of the thermostat and throttle position sensor. I had just removed the bracket that covered up the thermostat. The wiring harness has also been removed in this picture.

GEDC0127.jpg


Next were the coils. Four little screws hold it down, and they each go to a separate cylinder. When I pulled them out, they were covered in oil. Upon closer inspection the spark plugs were sitting in a river of oil. I have no idea how thick or where it was from. My guess is the cam cover gasket?

GEDC0128.jpg


Cam cover off on the exhaust side. I didn't want to take the cam out because I had no way to keep these retainers organized. I think I can still remove the head with the cams in but I should do some more reading.

GEDC0130.jpg


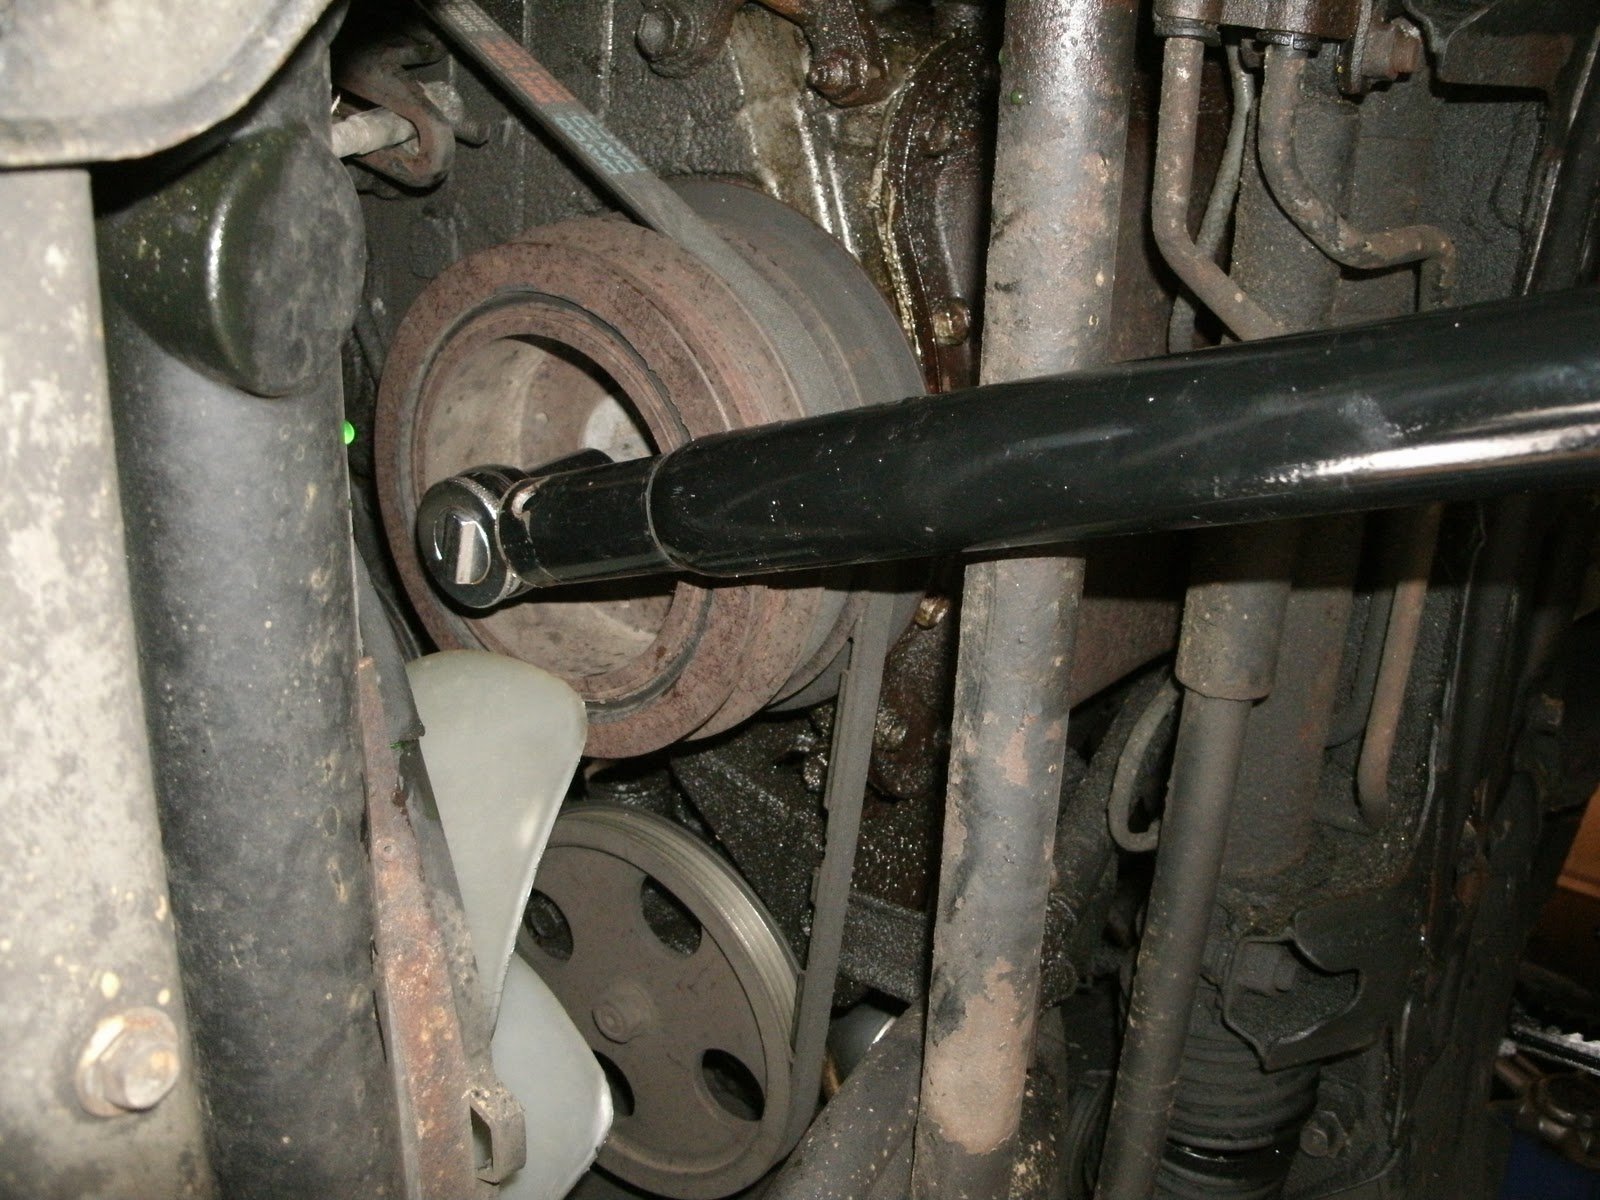
Front timing cover off. I need to get the crank pulley off next. My dad is going to bring home his impact wrench and I hope I can just pop that on and break the crank pulley off. Need to do some reading on that too.

GEDC0134.jpg


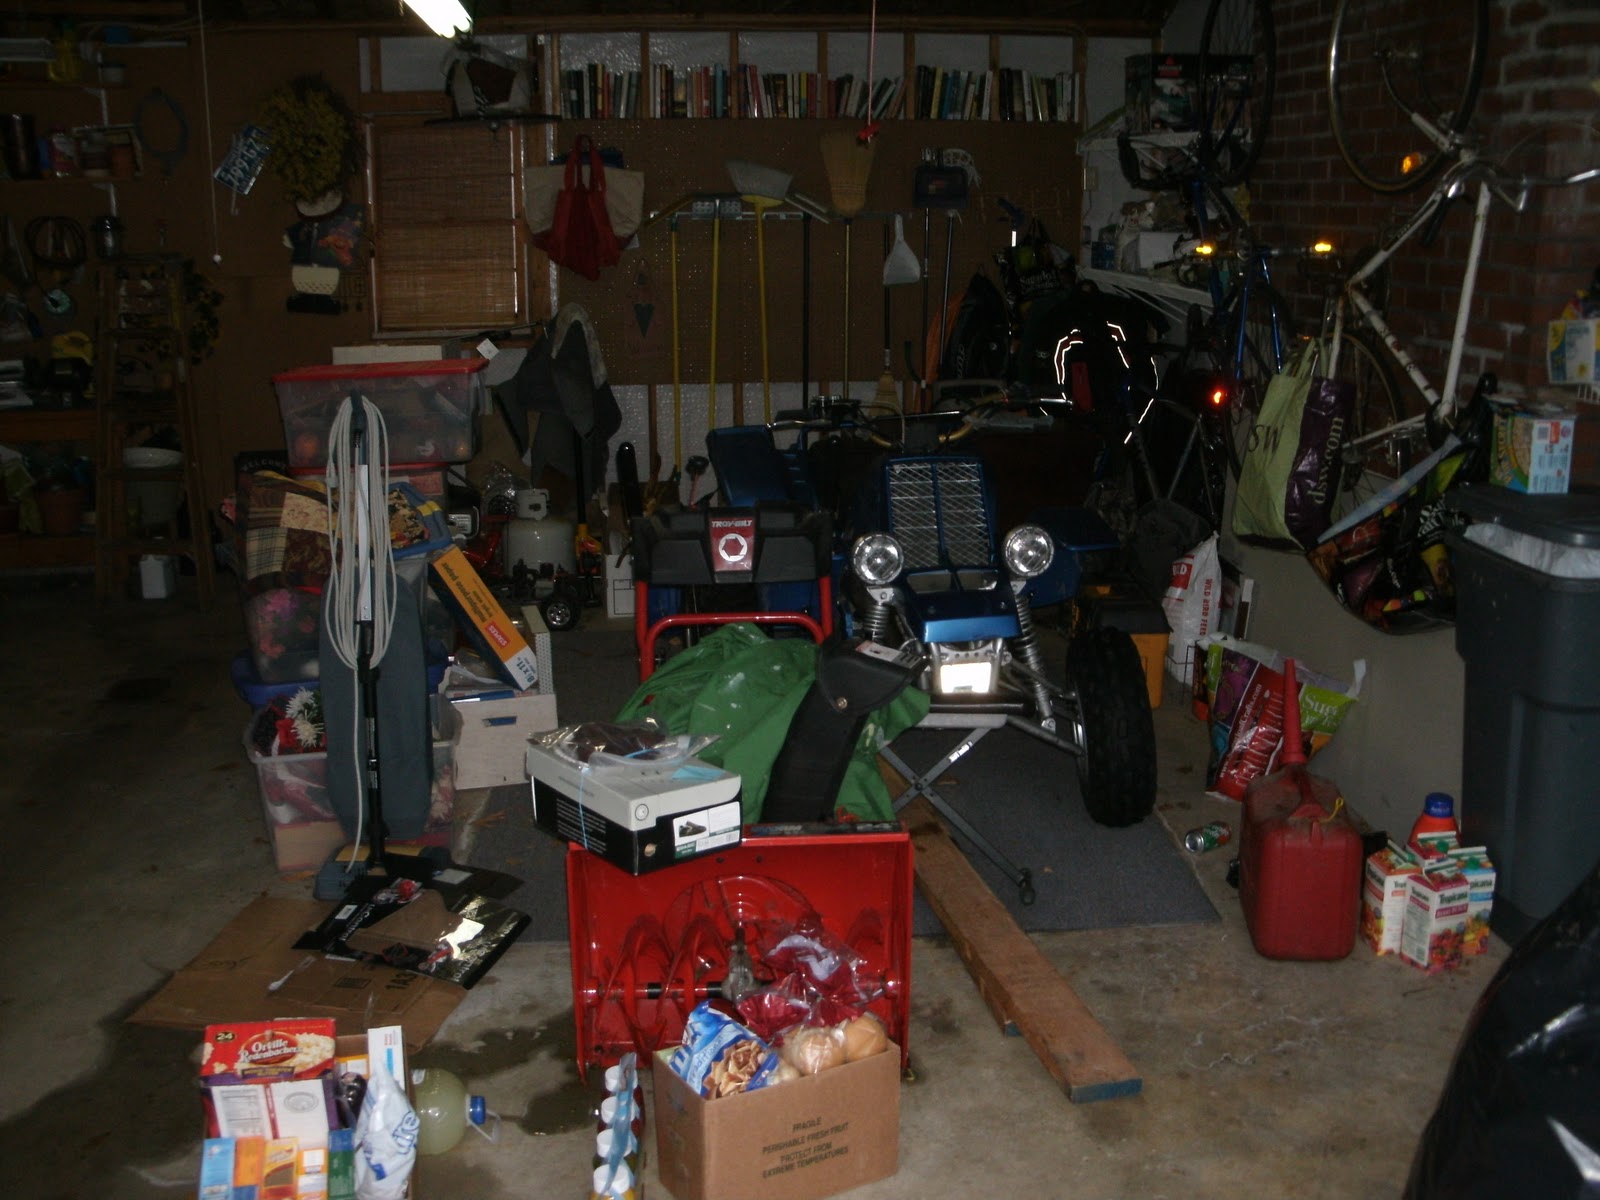
By the end of this week I'd like to have the head off and maybe start looking at the internals of the block. At some point I need to wash this thing.
 

Riaff1

New Member
Sep 1, 2010
4
0
0
Victoria, BC
Nice job on the engine removal and all the pics you've taken. I'm currently re-installing the entire power steering system on my 87 supra as the fellow that i bought the car from took it all out for a couple more HP. Still trying to find brackets and a return line that doesn't cost a fortune.

The entire interior of the car was also that old Toyota leather that didn't last long and cracked and fell to pieces over time. I was lucky enough to call my local wreckers that where they had received an 87 with a brown exterior/tan interior and replaced all the interior trim pieces with new ones as well as the front bucket seats and rear seat with practically new cloth ones. :icon_bigg

Hopefully you can find what you need to restore it to new looking. keep us posted!