
Credit for this goes to Mark3 for this guide.
Firstly jack car and as always support with axle stands, don't risk your legs for a few little rubber seals....
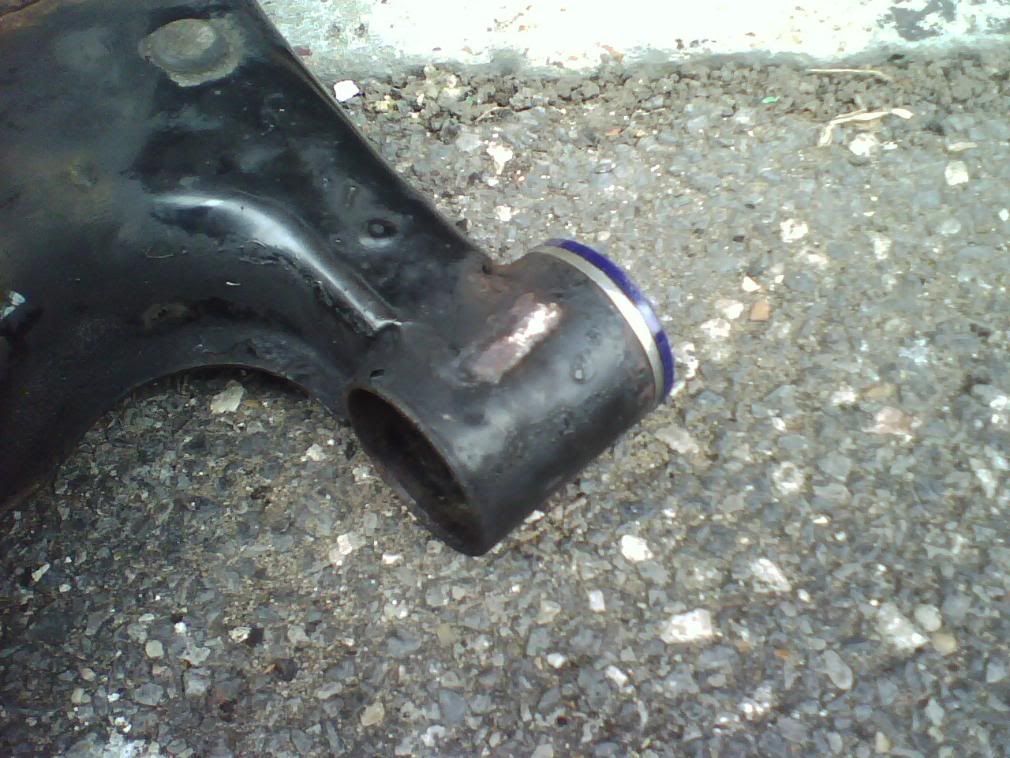
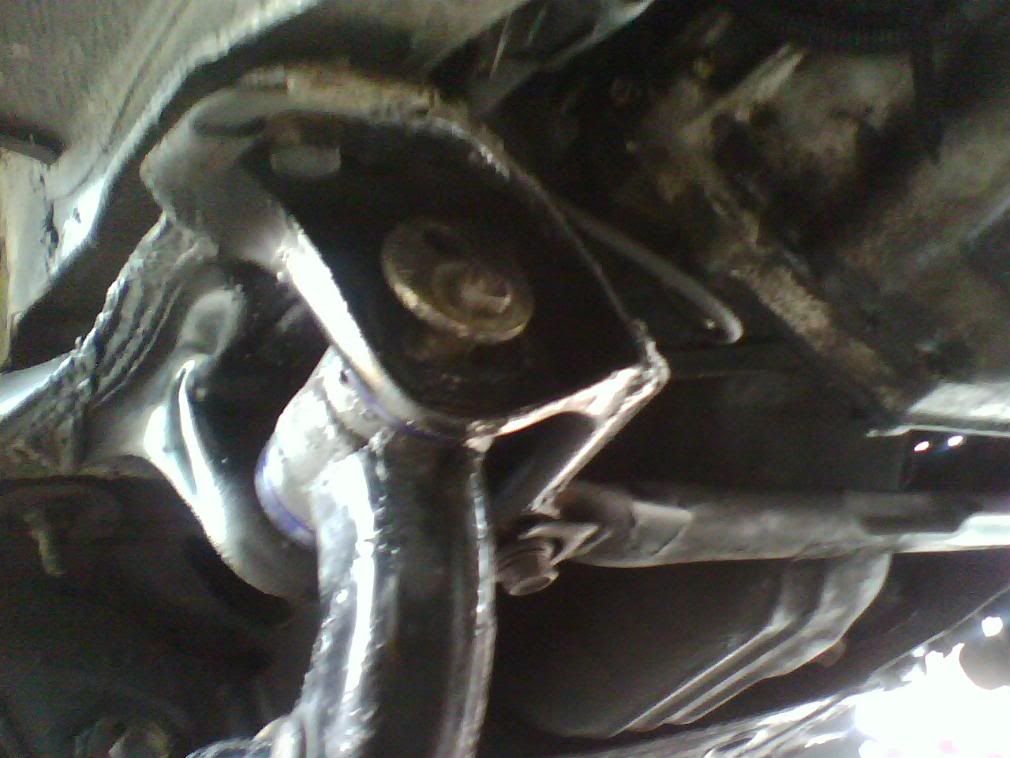
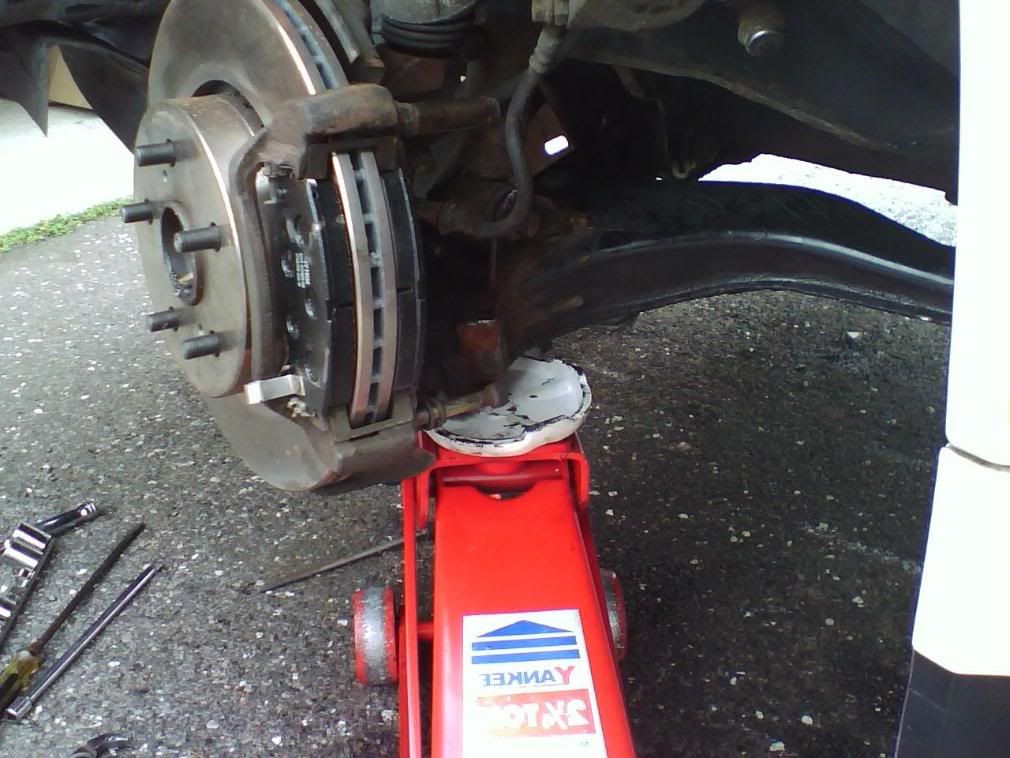
the lower wishbone is the bit to remove, the n/s one looks like this;
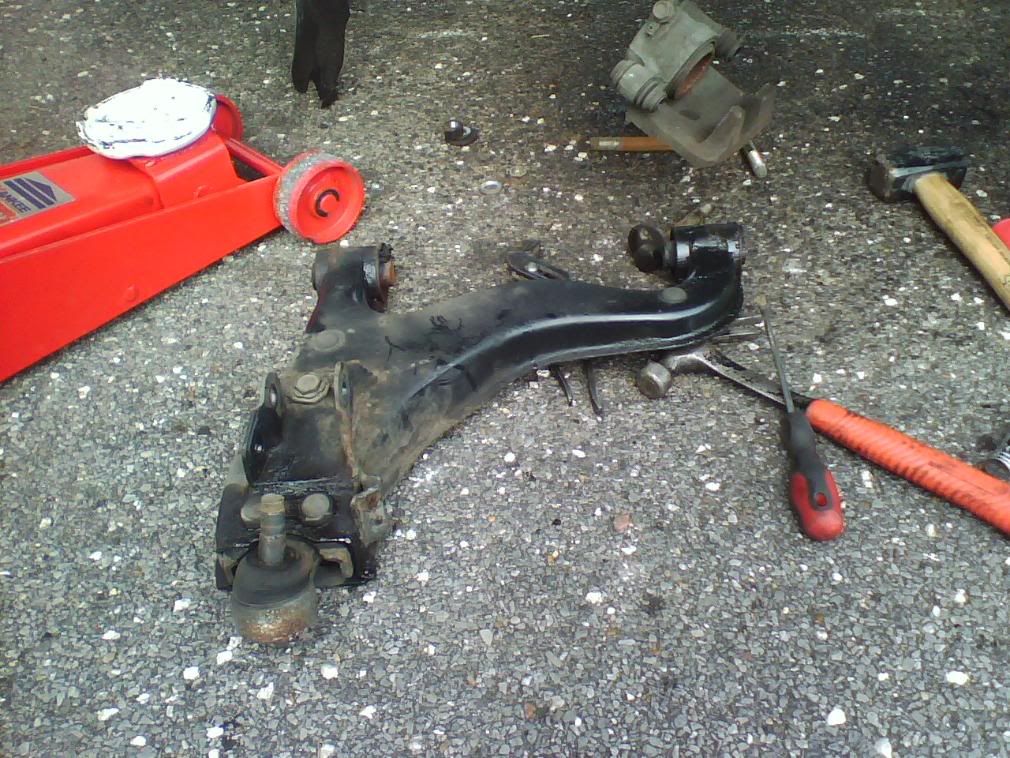
its held onto the suspension members via the shock absorber lower nut and bolt (just visible top right) lower ball joint nut and anti loose spring clip and the drop link from anti roll bar,

the drop link nut is 14mm and there is a hole for an allen key in the end of the thread to stop the hole thing turning, i don't bother with this method as the allen key usually snaps if its tight, i have my own methods!
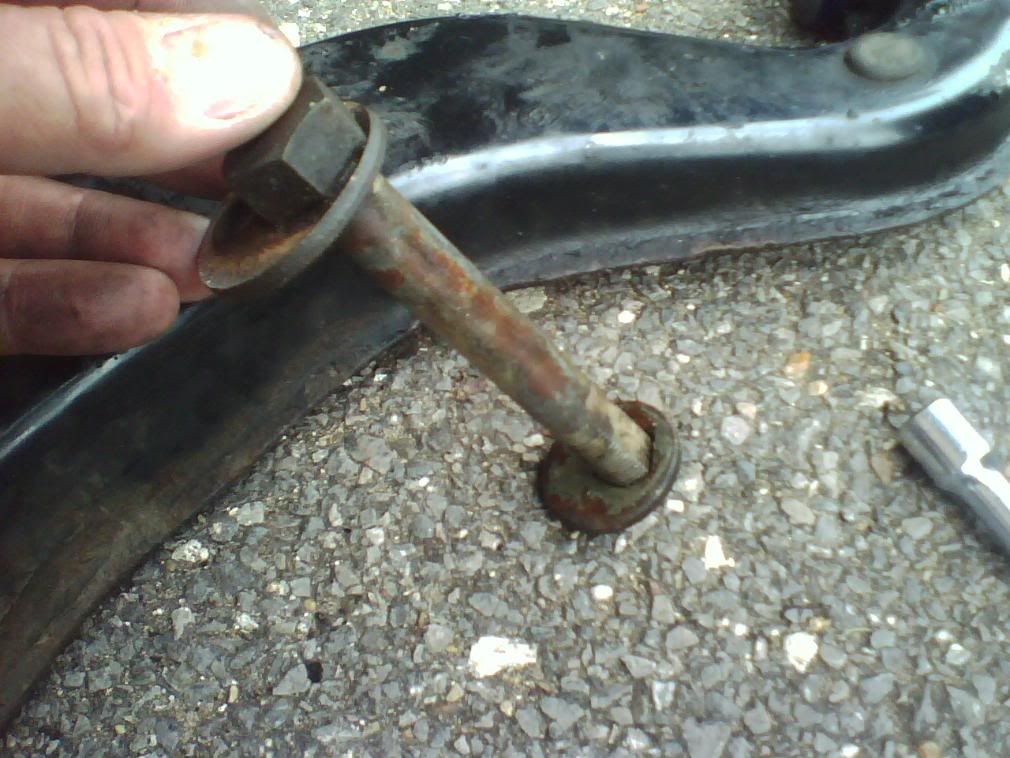
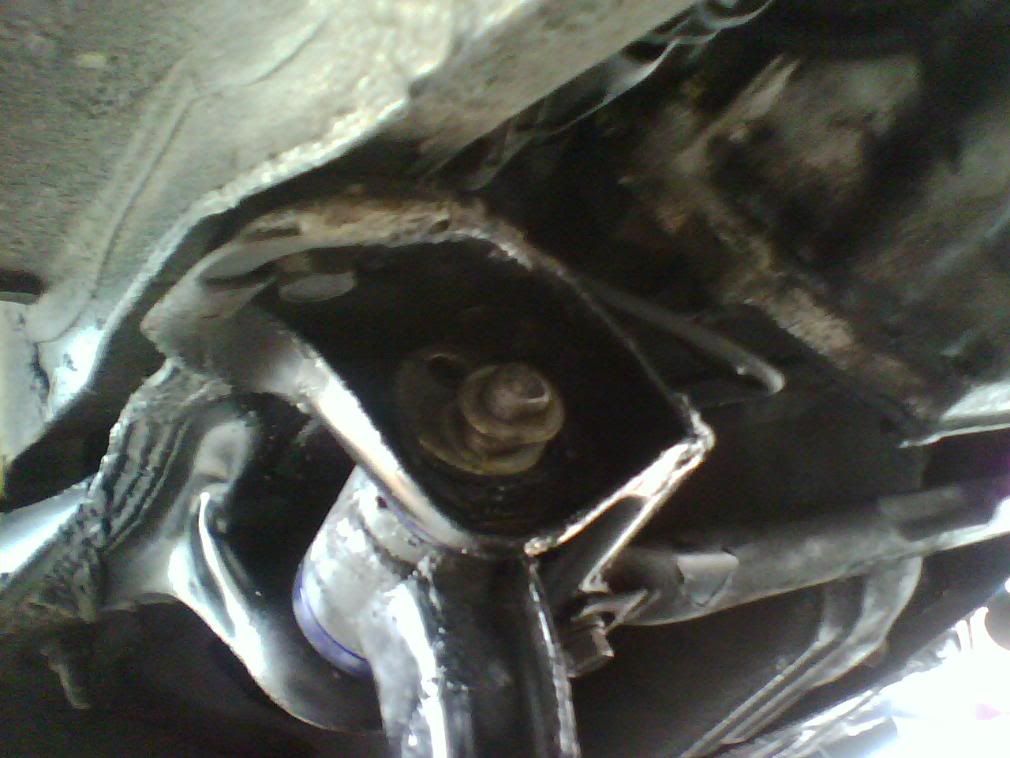
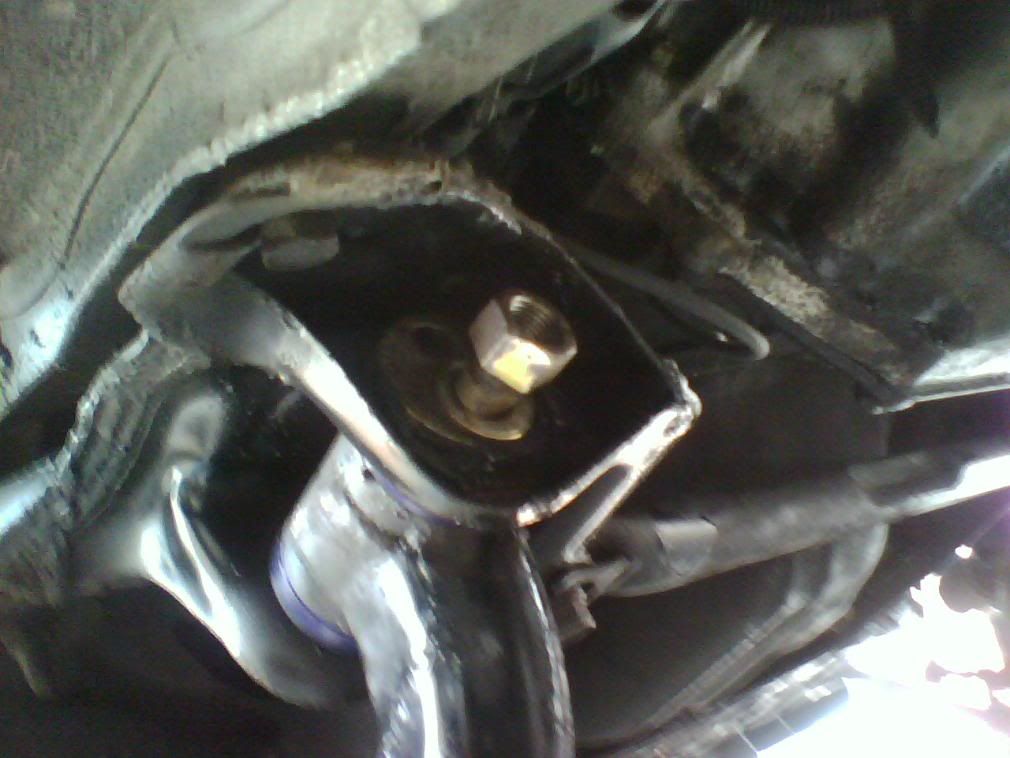
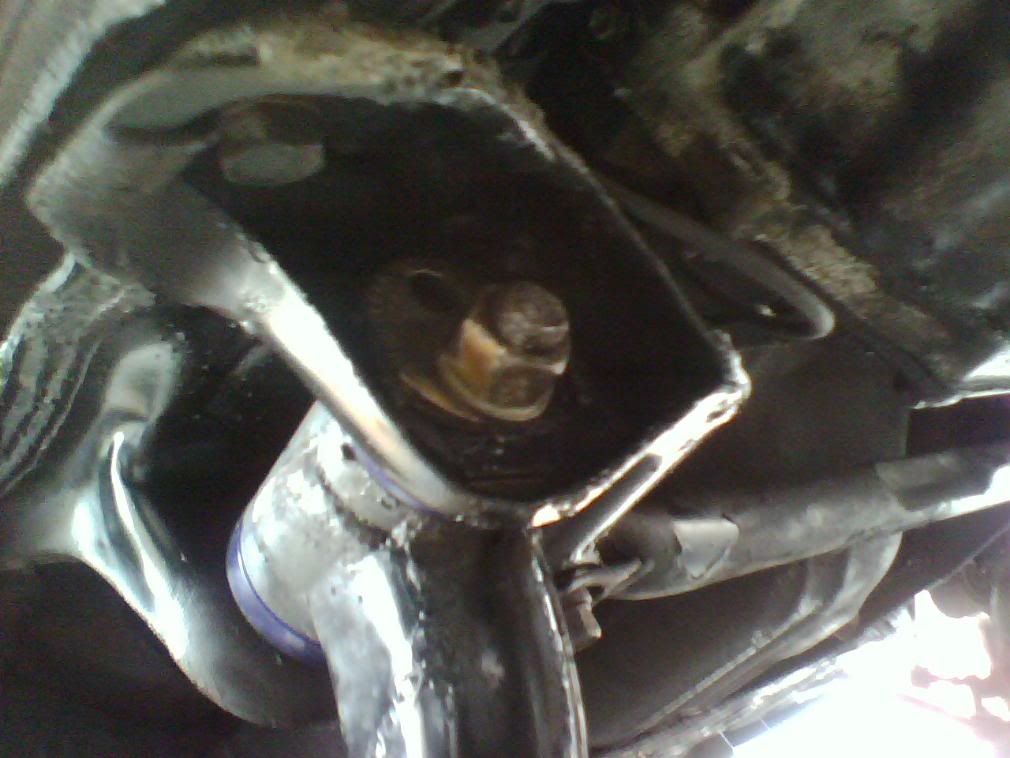
The wishbone is also held to the sub frame by the 2 camber/caster angle adjustment bolts which you can see here partially removed, the nuts are 22mm in size, i used an adjustable wrench on the bolt heads. these bolts sometimes prove difficult to remove as they seize into the sleeves in the bushes, i had to administer some very healthy blows from a club hammer to get them to move but once they move a little they will come out fine, make sure the nut is level with the end of the bolt when its walloped or you will damage the thread!
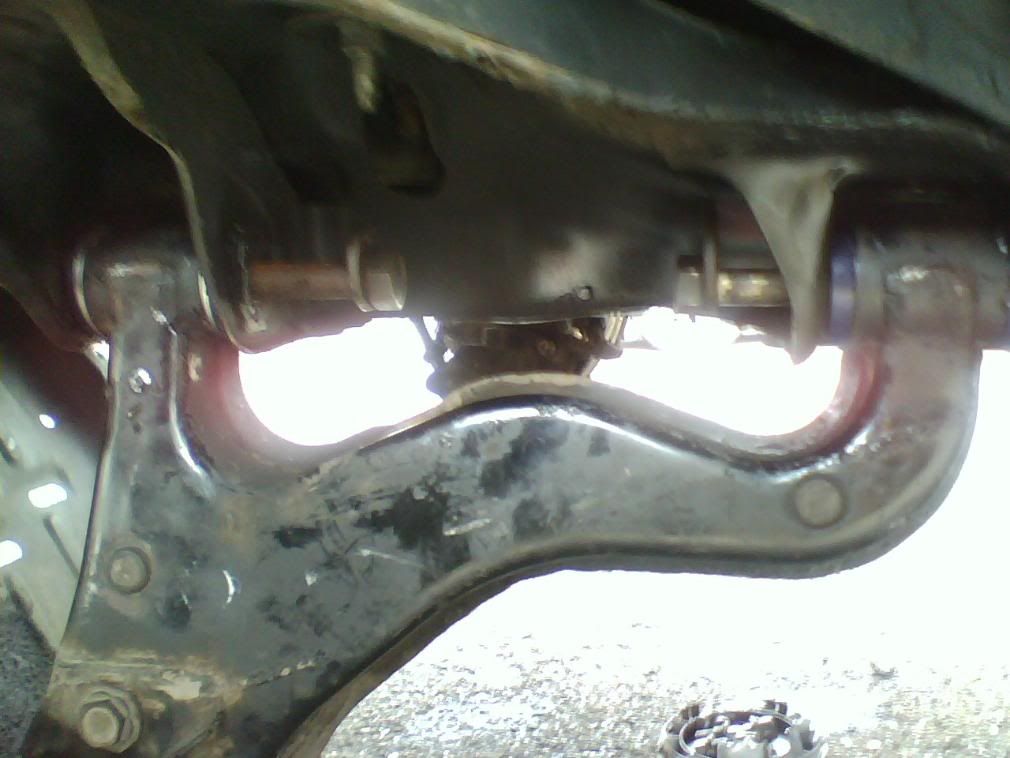
remember where these bolts are positioned, as the bolt is turned it alters camber/castor angles.....see here, i filed the surface rust from one so you can see the marks on them...remember where these where when refitting,
AND DO always have the geometry and tracking set up by someone with the correct equipment after doing this even though you put it back in the same place
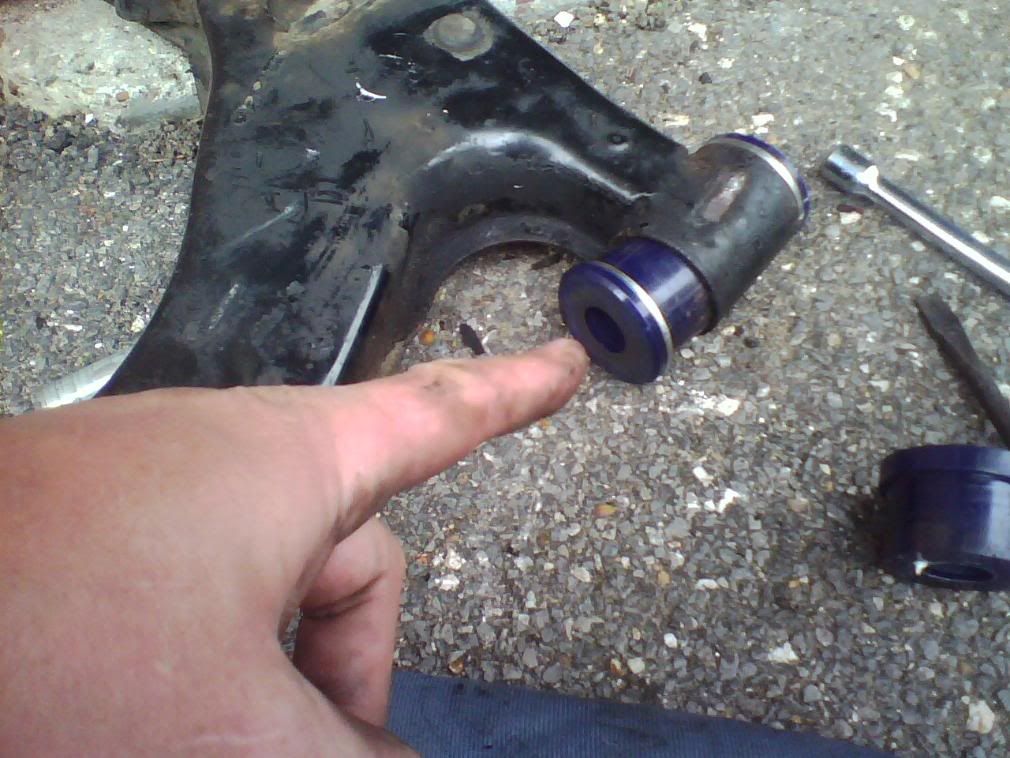
once the wishbone is removed from the car you can see how worn the bushes actually are, these where really quite bad indeed!
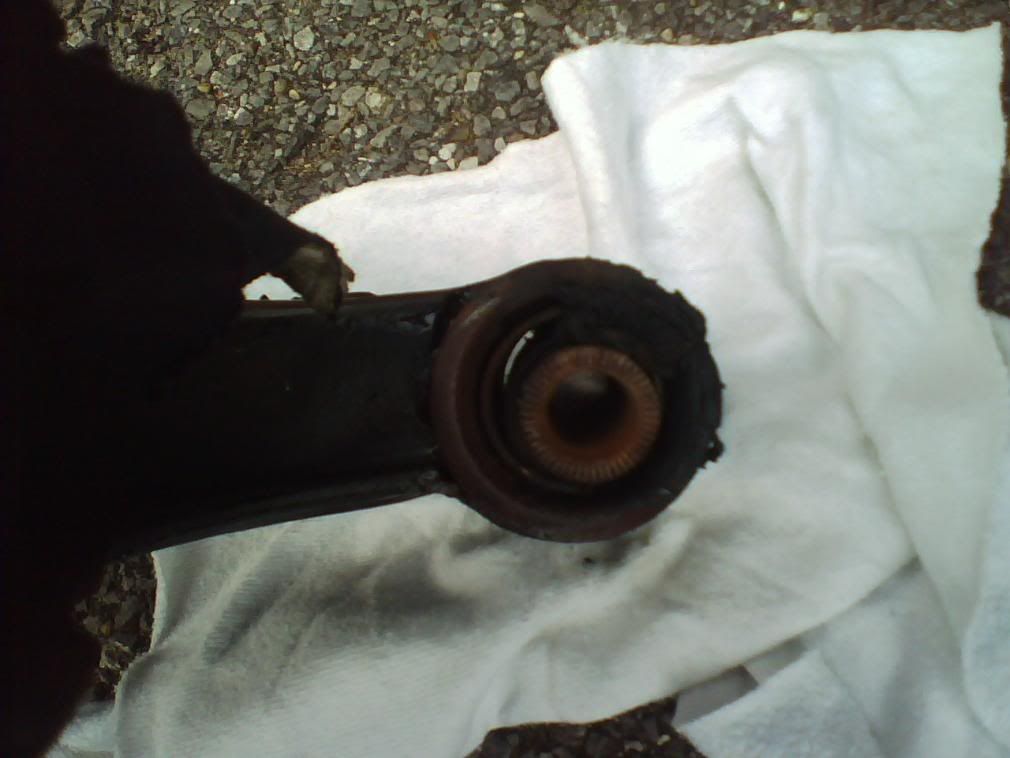
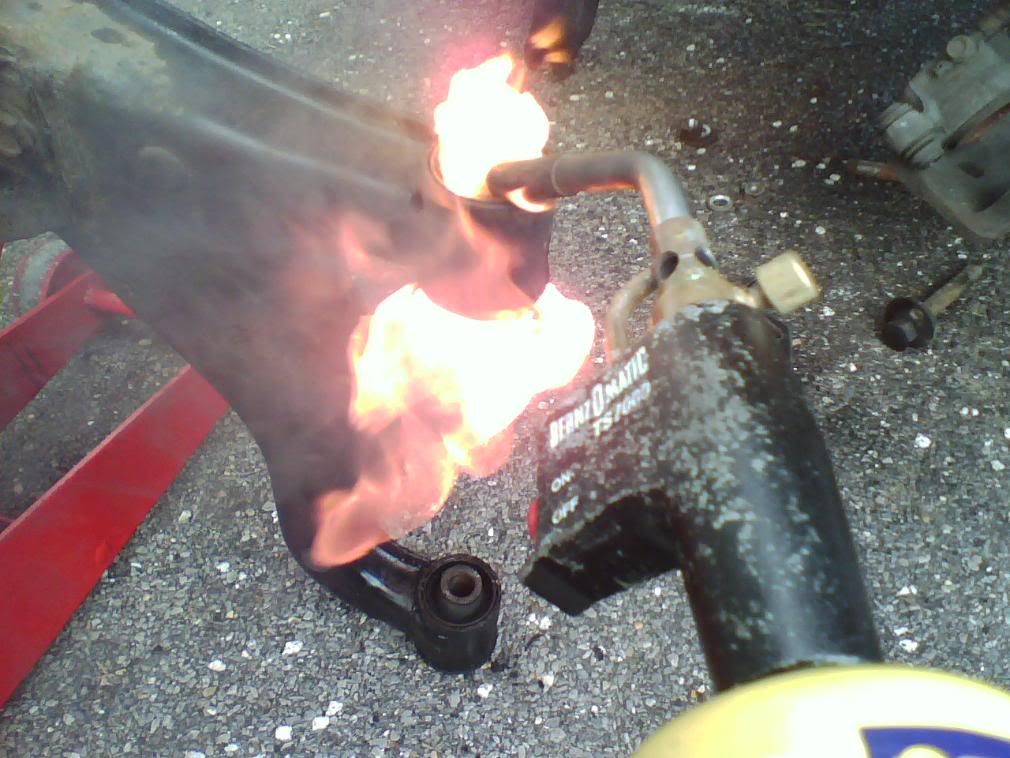
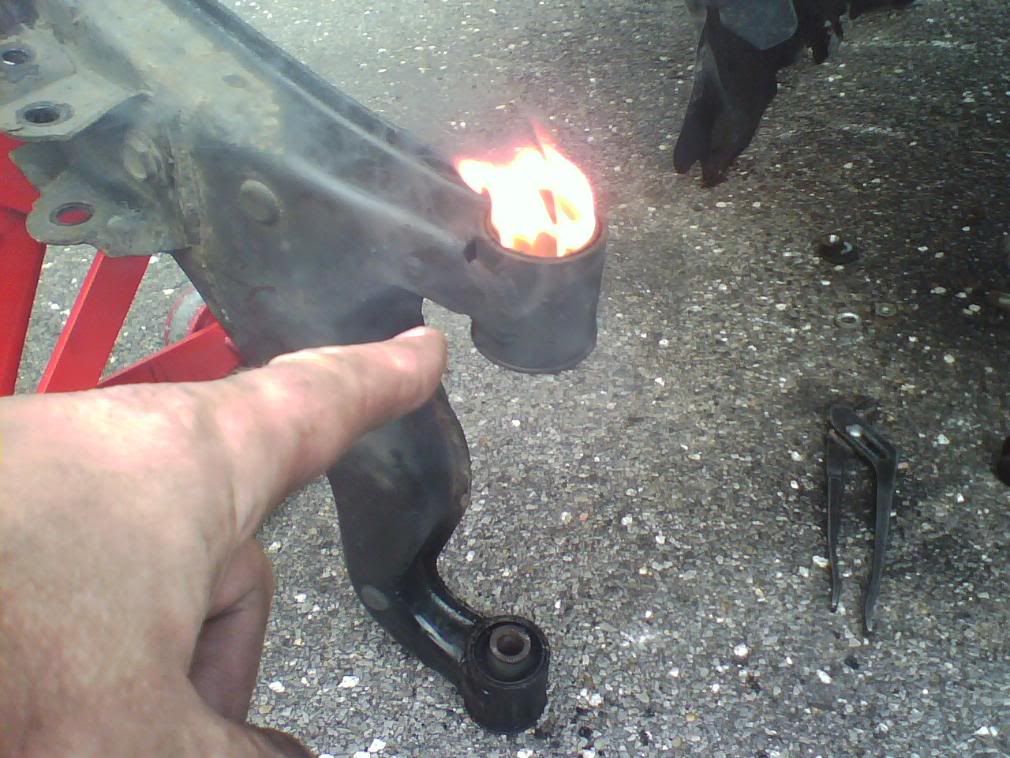
the rubber needs to be removed from the old bush to get access to the metal sleeve, burn out the old rubber inner from the metal sleeve of the bush like so,
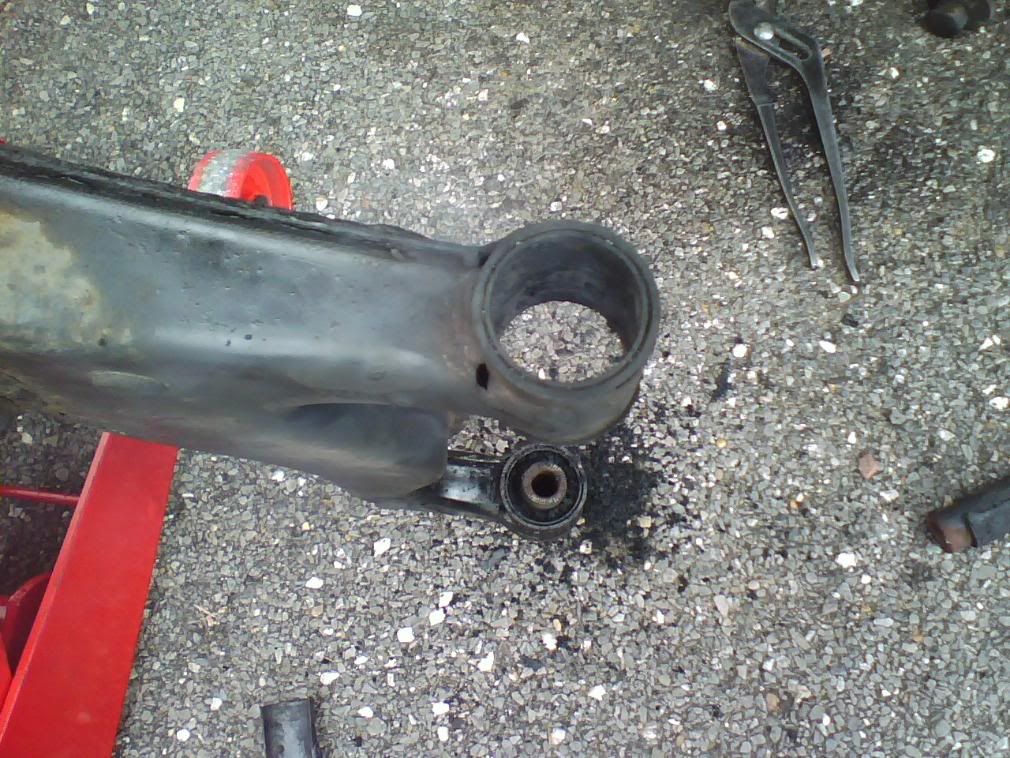
this should leave you with this, a nice hole in the sleeve thats still in the wishbone
i have heard of some poly bushes that fit into this sleeve, mine didn't so the sleeve had to come out,
this was done by some one else so i have no pics of this, but the best way is to put your hacksaw thorough the hole and cut a slot into the sleeve then use a combination of pointed and plain cold chisels to knock them out. i Will be doing this myself in the future as leaving it to someone else was a pain in and it took ages for them to do it....
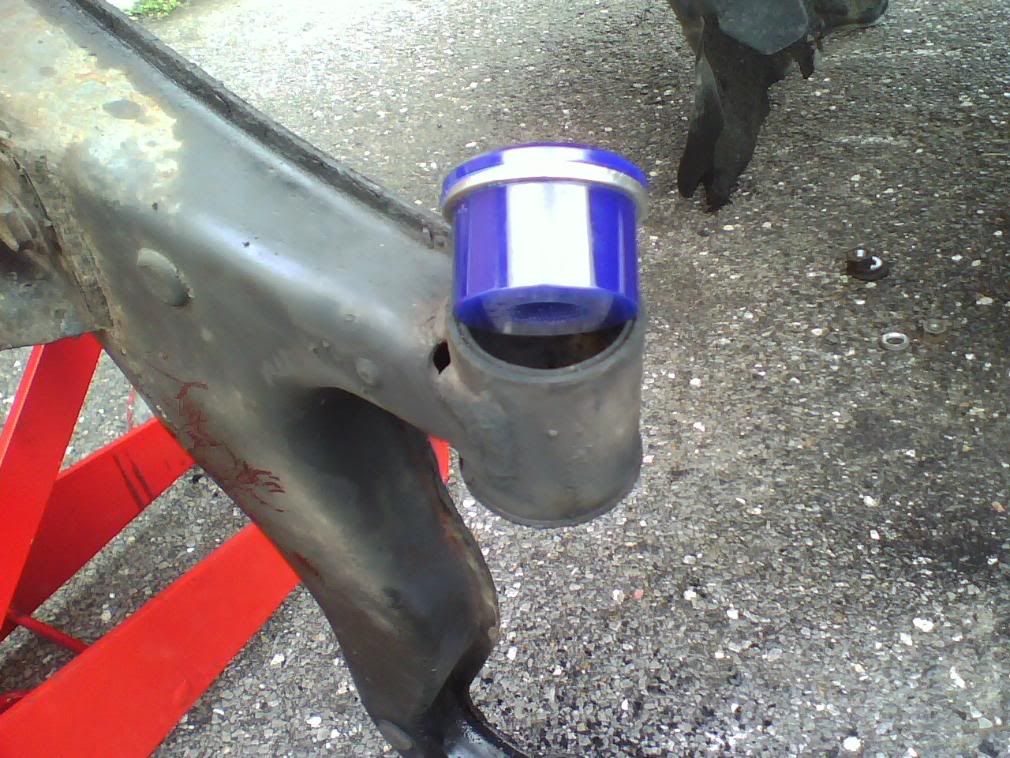
anyhow this is what you will have once sleeve removed, ready to accept new bushes, yeh!
they are actually quite easy to put in by gentle use of the average hammer, don't forget to use the lubrication supplied with them.
once in you need to insert the sleeves, and again make sure you use the lubrication supplied
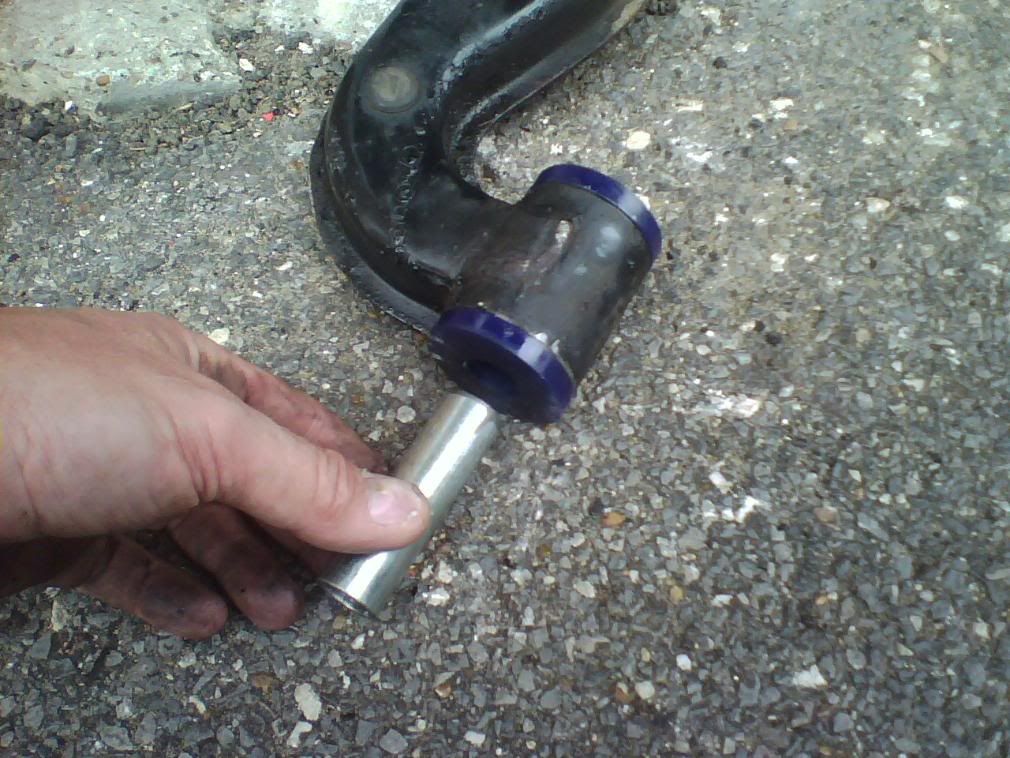
i used a soft faced hammer to fit the new sleeves into the new bushes, a plain hammer may damage the end of the sleeves, a stepped drift is ideal if you have one exact size, if using a plain hammer make sure the bolts still fit through the sleeves, a small round file is useful in case the sleeve hole is reduced in size slightly....
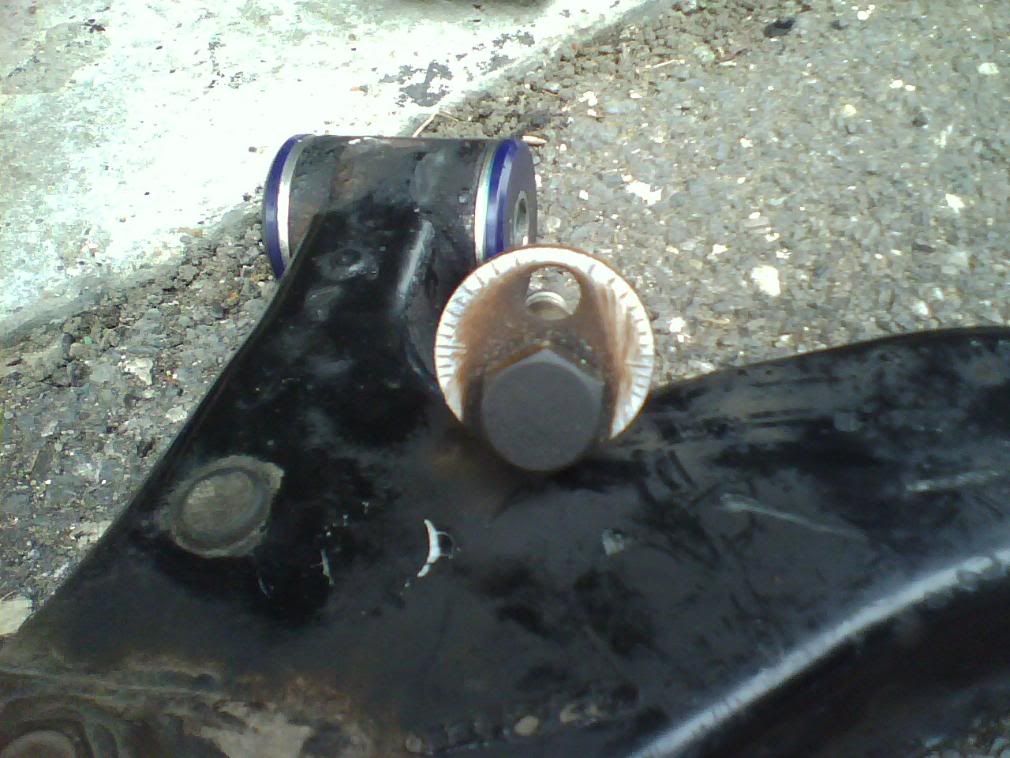
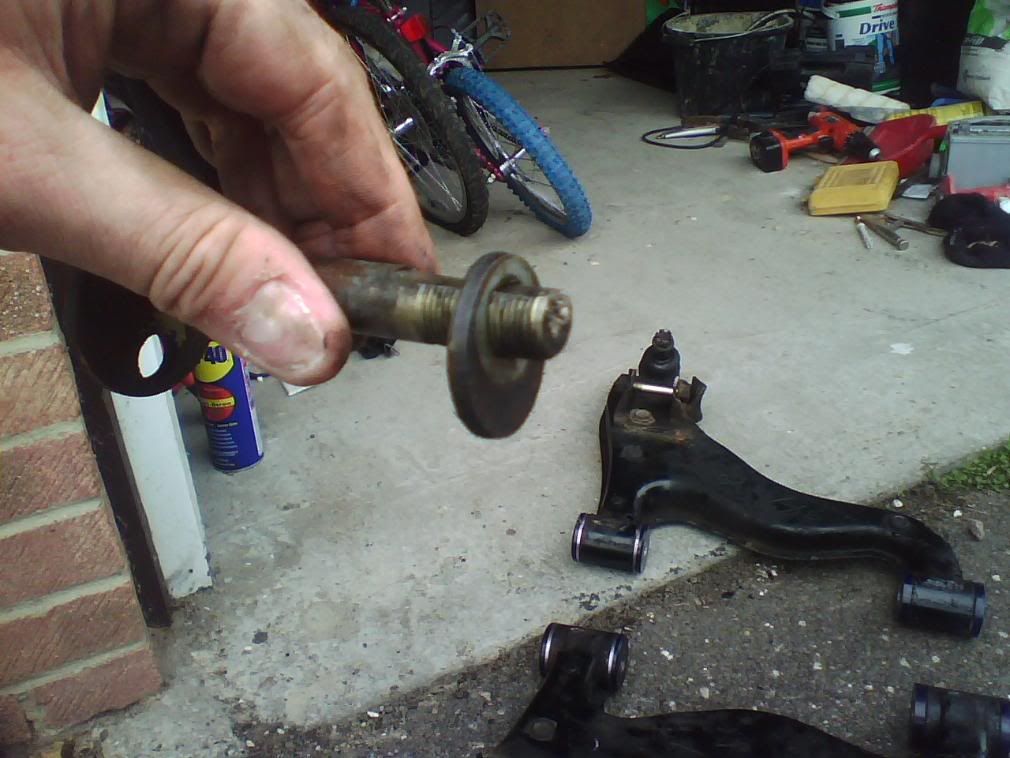
while we playing with these adjustments bolts lets have a closer look at them, there are the bolts and also washers that fit on them with a flat so they wont spin on the bolt, the fact there off centre makes them act like a cam so when the nut is loosened and the bolt heads are turned it alters the geometry of the suspension, when the front bolt it turned it alters the camber angle, the angle of how much the wheels lean in to wards the vehicle, and the rear bolts when turned will alter the castor angle, the castor angle is what makes the steering turn back to centre when you let go of the steering wheel when moving. these 2 angles may also be know as KPI, king pin inclination, its certainly altered when these bolts are adjusted, (though some people may disagree)
So as you can see this has to be spot on as it will make the world of difference to the handling of the car
so as with the tracking get it set up properly by professionals with the right equipment!
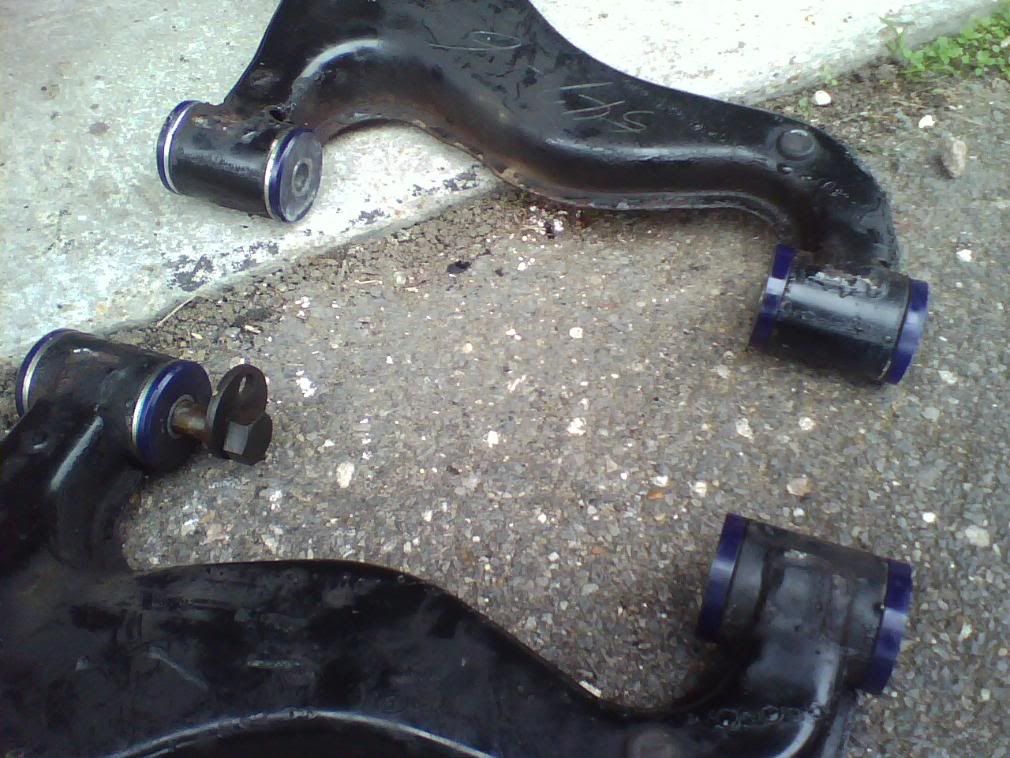
so now we have these all ready to be refitted, the bushes i used stated that the ones with the inbuilt metal washers went into the front legs of the wishbones, best check your own instruction just in case.
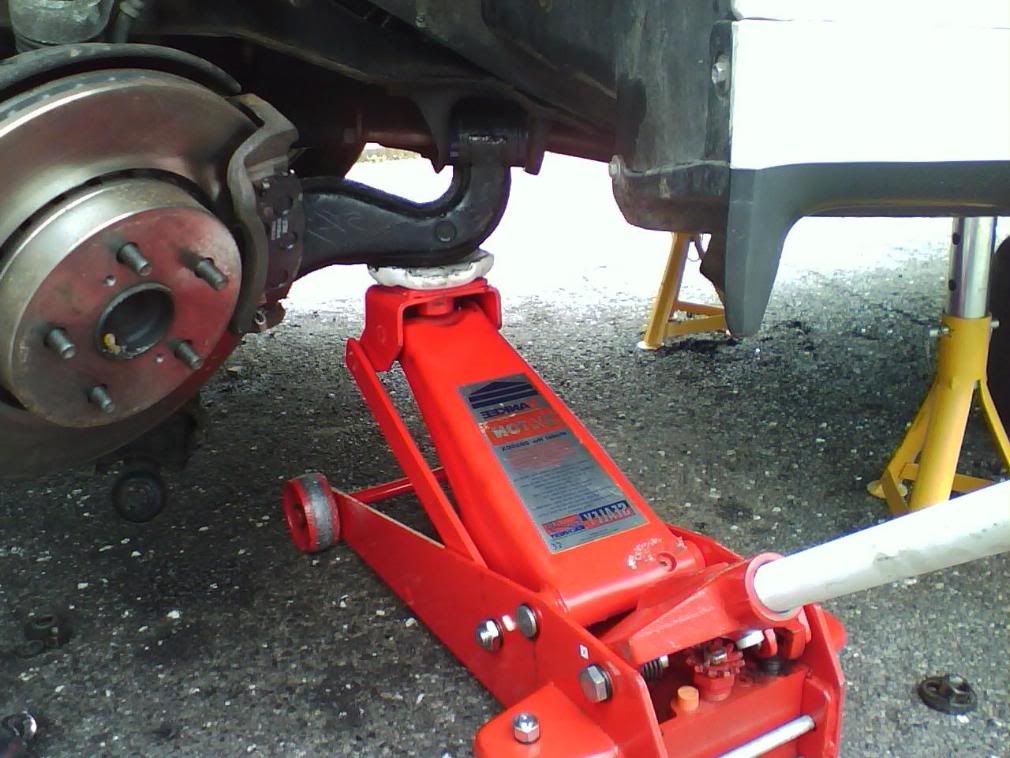
offer the wishbone back into place in the sub frame and slide in the bolts, (from the inside) if it proves difficult slide them in do one bolt first then use a jack to push the other side into place then slide that bolt in.
make sure the fixed cam on the bolt head is between the guides then fit the cam washer like so
then the plain washer
then the nut
and tighten it, but not all the way, just take up the slack...then when the wishbone is up out the way turn the bolt heads back to there origonal possitions and tighten the 22mm nuts nice and tight!
next is the suspension components to refit to the wishbone, you may want to use a jack again to hold it in place while sliding the shock absorber lower bolt into place
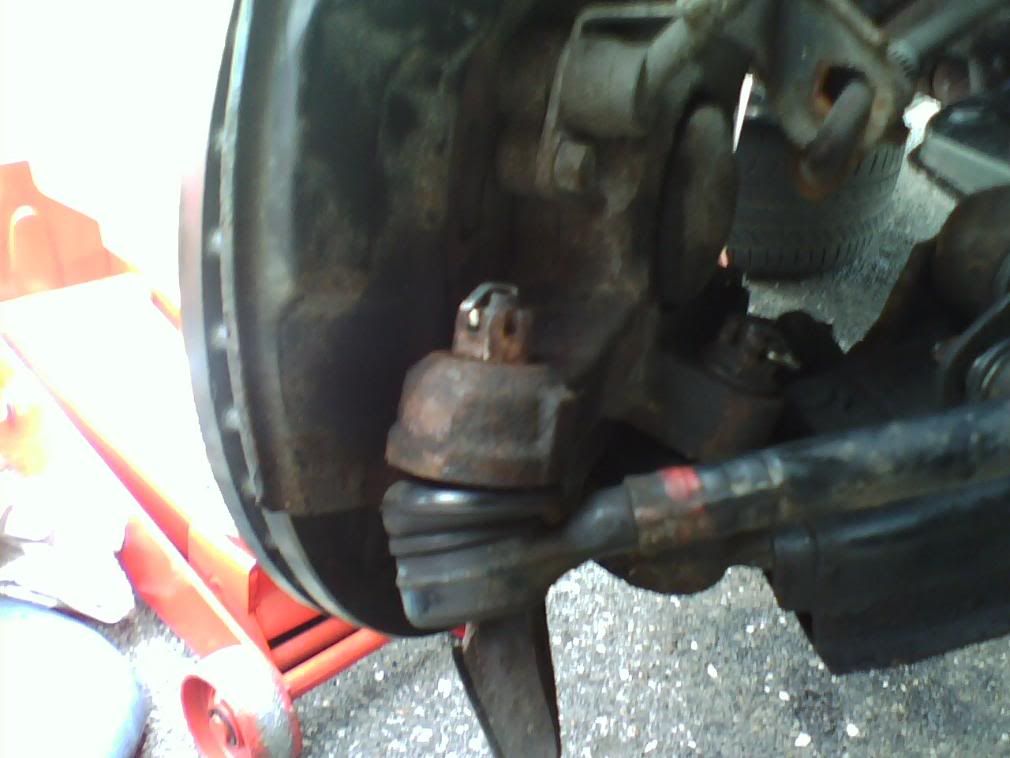
don't forget to locate the lower ball joint pin into the hub, think ahead and turn the ball joint pin so the safety clip hole is accessible when it tightened, also tighten the lower shock bolt and the roll bar drop link
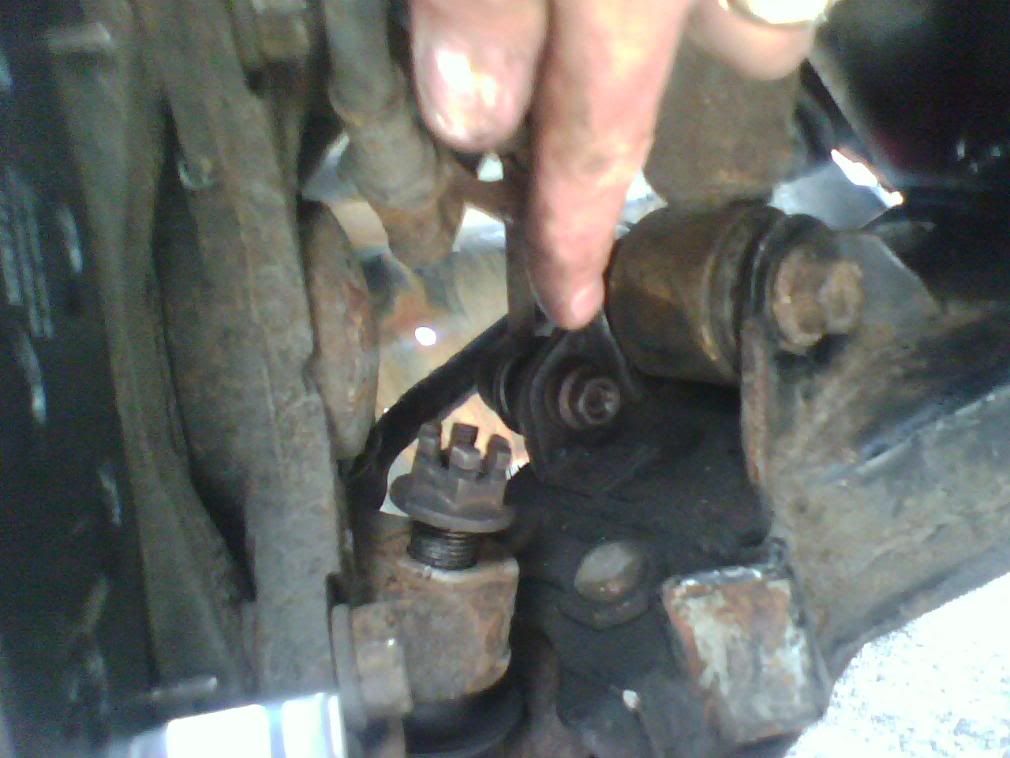
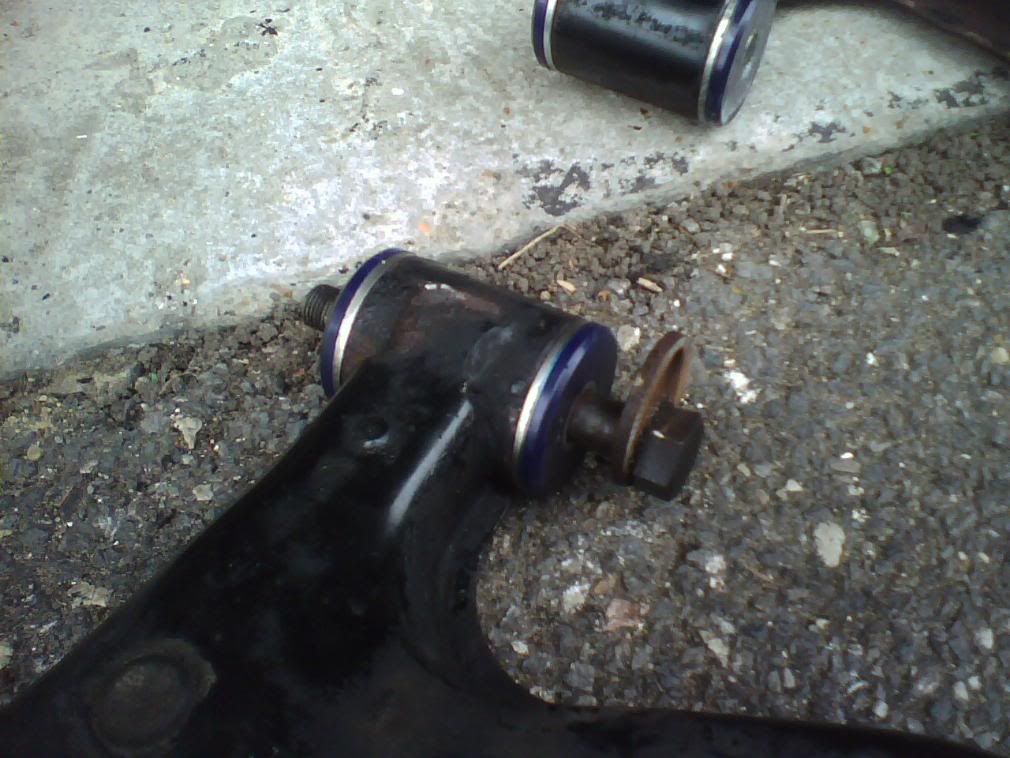
here is the safety clip inserted into the ball joint nut, you may have to turn the bolt a little once tight to line up the hole with the castle nut, always go tighter!
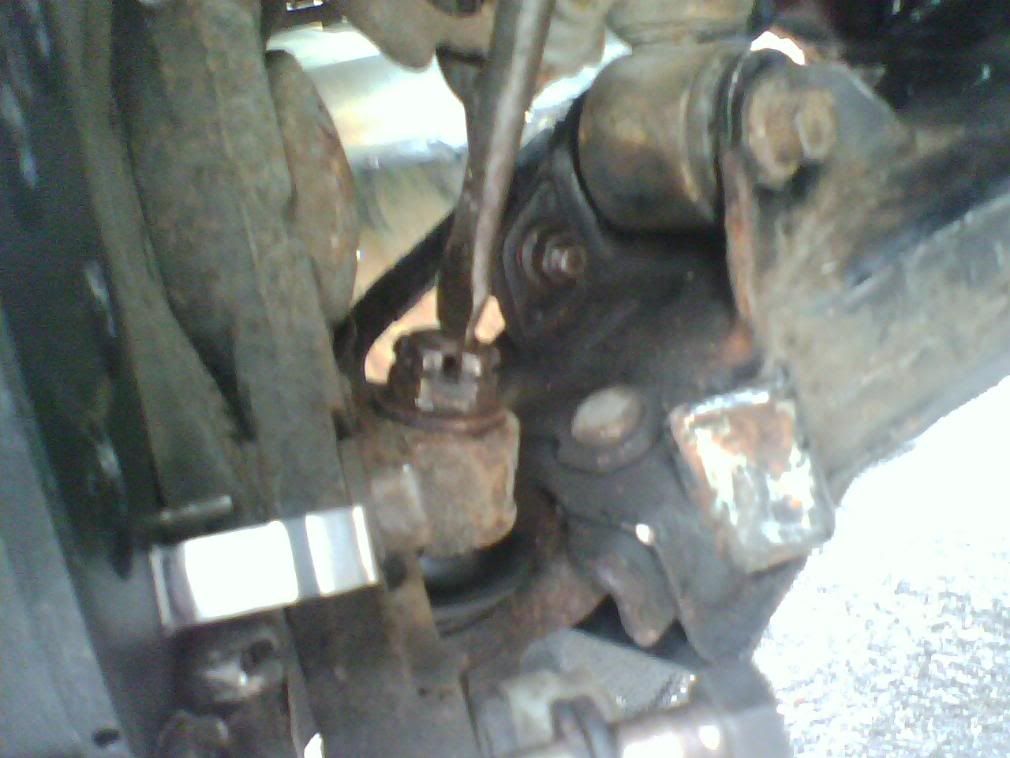
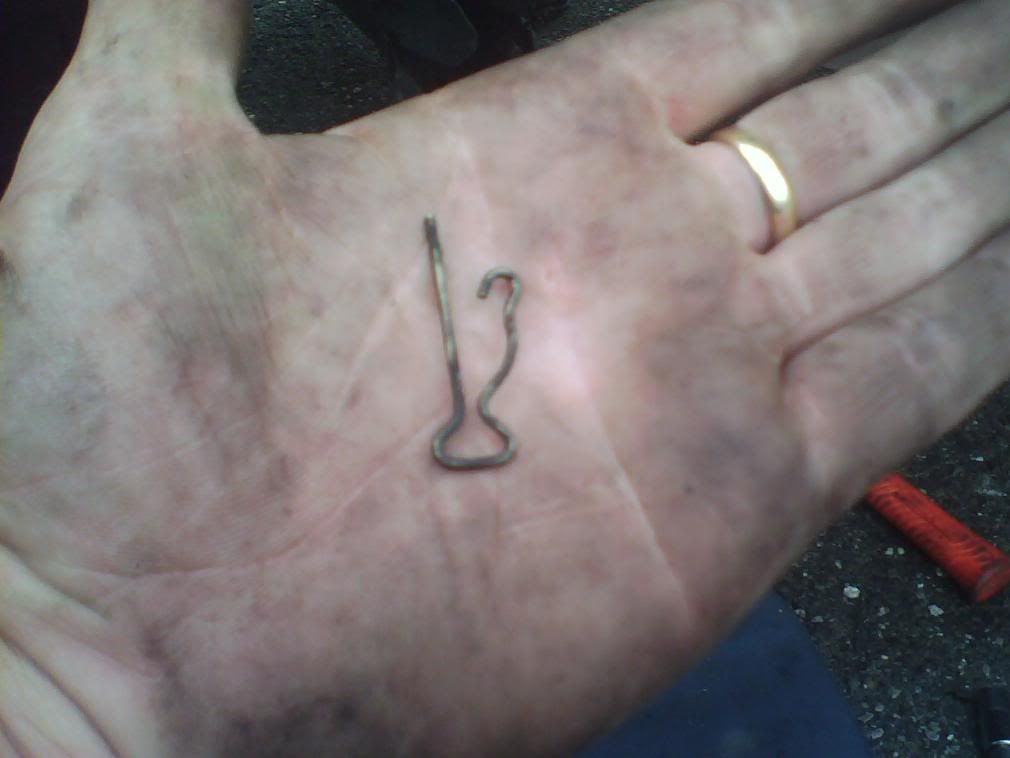
on the o/s i had to remove the rack rod end to get a good swing at breaking the lower ball joint, when refitting don't forget to use a new split pin and turn the pin before hand to make fitting the pin easier
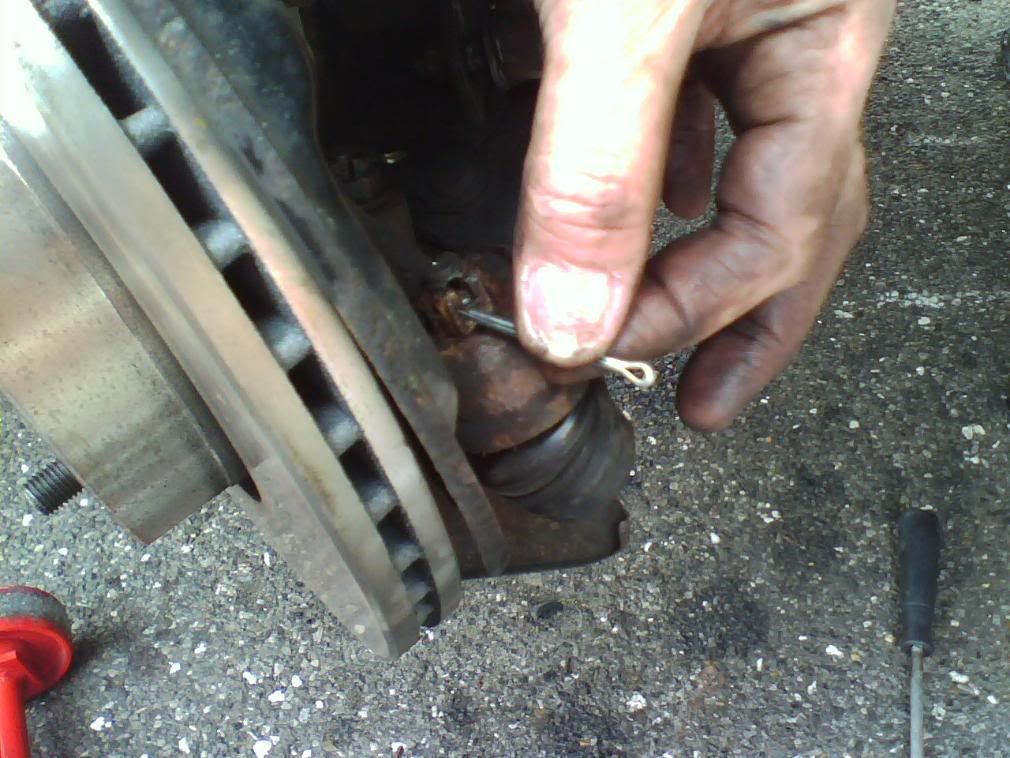
split pin fitted
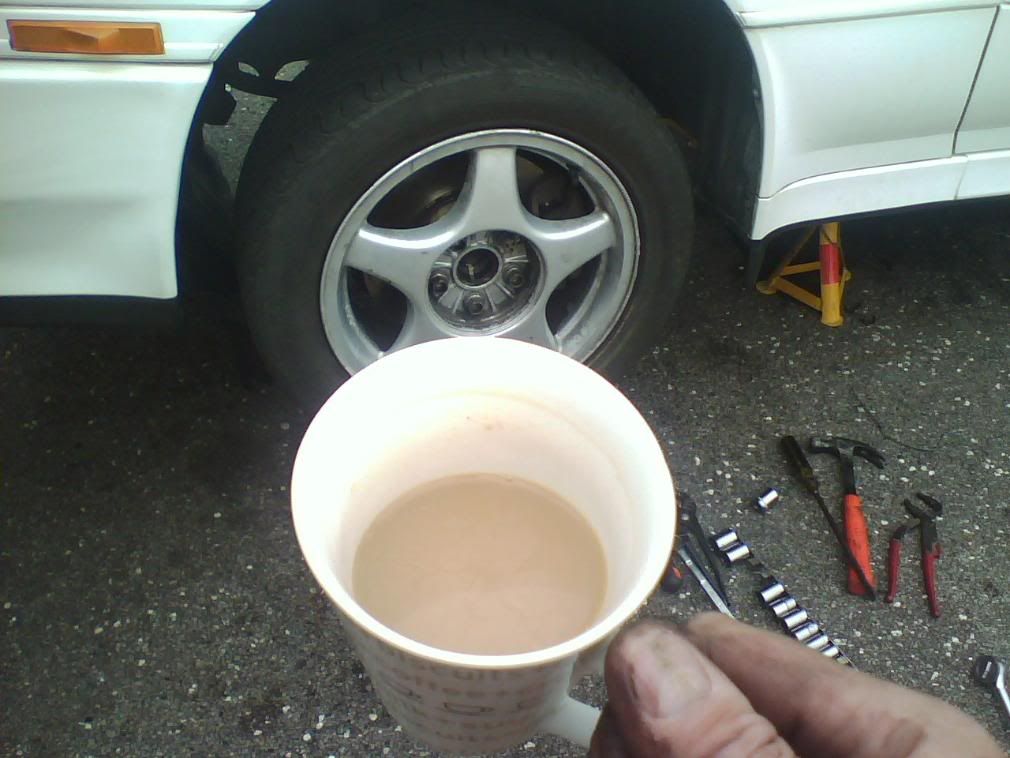
and its all done before me tea went cold too.....
thats it really, i could go on about refitting the callipers but i ran out of text and theres probably a guide on that on here for fitting new pads anyway!!
i hope this helps anyone who is thinking of doing there own bushes.
Firstly jack car and as always support with axle stands, don't risk your legs for a few little rubber seals....
the lower wishbone is the bit to remove, the n/s one looks like this;
its held onto the suspension members via the shock absorber lower nut and bolt (just visible top right) lower ball joint nut and anti loose spring clip and the drop link from anti roll bar,
the drop link nut is 14mm and there is a hole for an allen key in the end of the thread to stop the hole thing turning, i don't bother with this method as the allen key usually snaps if its tight, i have my own methods!
The wishbone is also held to the sub frame by the 2 camber/caster angle adjustment bolts which you can see here partially removed, the nuts are 22mm in size, i used an adjustable wrench on the bolt heads. these bolts sometimes prove difficult to remove as they seize into the sleeves in the bushes, i had to administer some very healthy blows from a club hammer to get them to move but once they move a little they will come out fine, make sure the nut is level with the end of the bolt when its walloped or you will damage the thread!
remember where these bolts are positioned, as the bolt is turned it alters camber/castor angles.....see here, i filed the surface rust from one so you can see the marks on them...remember where these where when refitting,
AND DO always have the geometry and tracking set up by someone with the correct equipment after doing this even though you put it back in the same place
once the wishbone is removed from the car you can see how worn the bushes actually are, these where really quite bad indeed!
the rubber needs to be removed from the old bush to get access to the metal sleeve, burn out the old rubber inner from the metal sleeve of the bush like so,
this should leave you with this, a nice hole in the sleeve thats still in the wishbone
i have heard of some poly bushes that fit into this sleeve, mine didn't so the sleeve had to come out,
this was done by some one else so i have no pics of this, but the best way is to put your hacksaw thorough the hole and cut a slot into the sleeve then use a combination of pointed and plain cold chisels to knock them out. i Will be doing this myself in the future as leaving it to someone else was a pain in and it took ages for them to do it....
anyhow this is what you will have once sleeve removed, ready to accept new bushes, yeh!
they are actually quite easy to put in by gentle use of the average hammer, don't forget to use the lubrication supplied with them.
once in you need to insert the sleeves, and again make sure you use the lubrication supplied
i used a soft faced hammer to fit the new sleeves into the new bushes, a plain hammer may damage the end of the sleeves, a stepped drift is ideal if you have one exact size, if using a plain hammer make sure the bolts still fit through the sleeves, a small round file is useful in case the sleeve hole is reduced in size slightly....
while we playing with these adjustments bolts lets have a closer look at them, there are the bolts and also washers that fit on them with a flat so they wont spin on the bolt, the fact there off centre makes them act like a cam so when the nut is loosened and the bolt heads are turned it alters the geometry of the suspension, when the front bolt it turned it alters the camber angle, the angle of how much the wheels lean in to wards the vehicle, and the rear bolts when turned will alter the castor angle, the castor angle is what makes the steering turn back to centre when you let go of the steering wheel when moving. these 2 angles may also be know as KPI, king pin inclination, its certainly altered when these bolts are adjusted, (though some people may disagree)
So as you can see this has to be spot on as it will make the world of difference to the handling of the car
so as with the tracking get it set up properly by professionals with the right equipment!
so now we have these all ready to be refitted, the bushes i used stated that the ones with the inbuilt metal washers went into the front legs of the wishbones, best check your own instruction just in case.
offer the wishbone back into place in the sub frame and slide in the bolts, (from the inside) if it proves difficult slide them in do one bolt first then use a jack to push the other side into place then slide that bolt in.
make sure the fixed cam on the bolt head is between the guides then fit the cam washer like so
then the plain washer
then the nut
and tighten it, but not all the way, just take up the slack...then when the wishbone is up out the way turn the bolt heads back to there origonal possitions and tighten the 22mm nuts nice and tight!
next is the suspension components to refit to the wishbone, you may want to use a jack again to hold it in place while sliding the shock absorber lower bolt into place
don't forget to locate the lower ball joint pin into the hub, think ahead and turn the ball joint pin so the safety clip hole is accessible when it tightened, also tighten the lower shock bolt and the roll bar drop link
here is the safety clip inserted into the ball joint nut, you may have to turn the bolt a little once tight to line up the hole with the castle nut, always go tighter!
on the o/s i had to remove the rack rod end to get a good swing at breaking the lower ball joint, when refitting don't forget to use a new split pin and turn the pin before hand to make fitting the pin easier
split pin fitted
and its all done before me tea went cold too.....
thats it really, i could go on about refitting the callipers but i ran out of text and theres probably a guide on that on here for fitting new pads anyway!!
i hope this helps anyone who is thinking of doing there own bushes.