
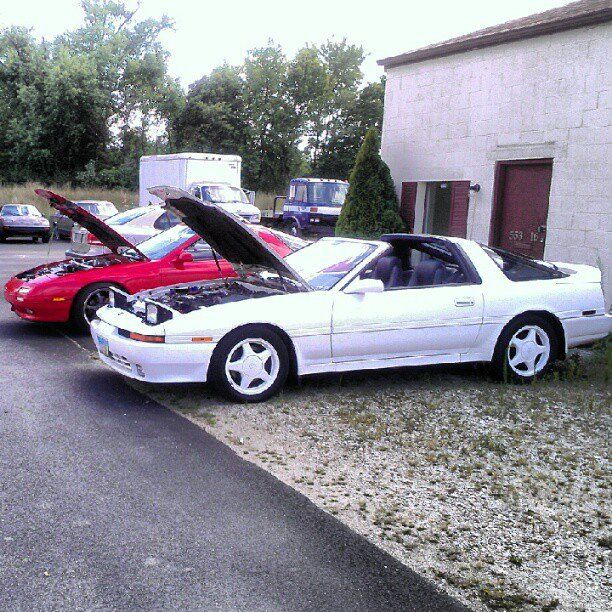
Jonah 91 white package
- Thread starter jonahs_supra
- Start date
You are using an out of date browser. It may not display this or other websites correctly.
You should upgrade or use an alternative browser.
You should upgrade or use an alternative browser.
UPDATE:
havent done much but i have made more progress on tuning
still playing around with my user tune low and user tune mid
i have been driving to work all week with a 15.0-15.8 afr
40 miles 1 way made my fuel mileage go up to 25 mpg lol i love it
but unfortunetly the TCCS isnt happy
so this weekend i will get into finer tuning to make the VF signal happier
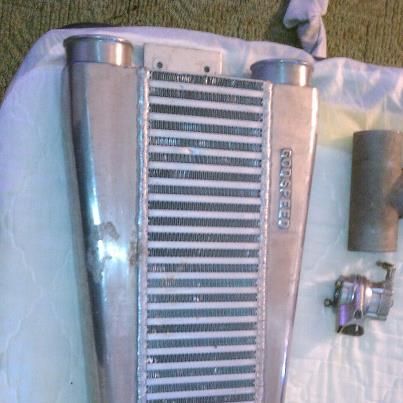
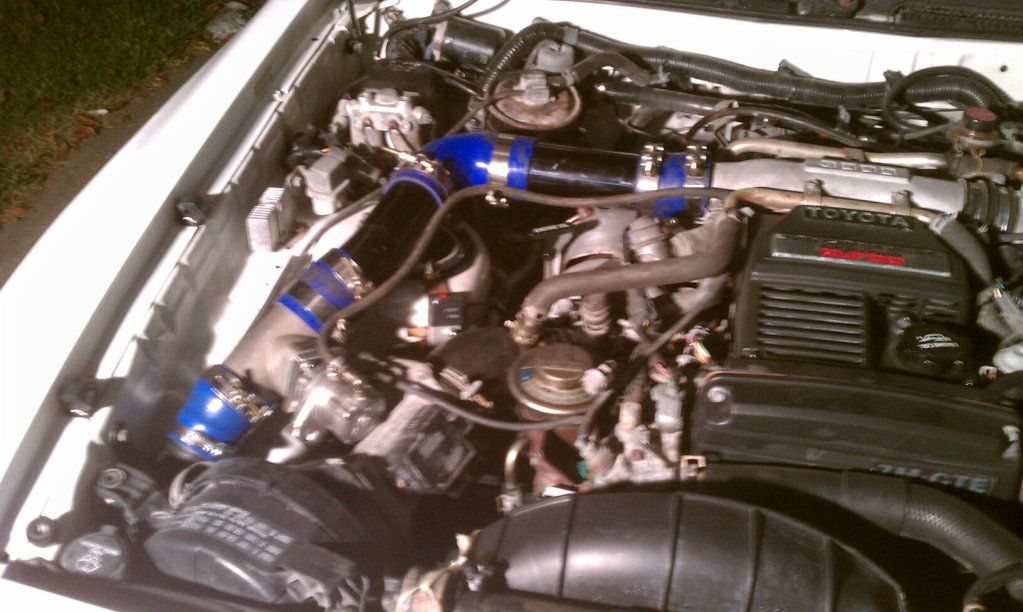
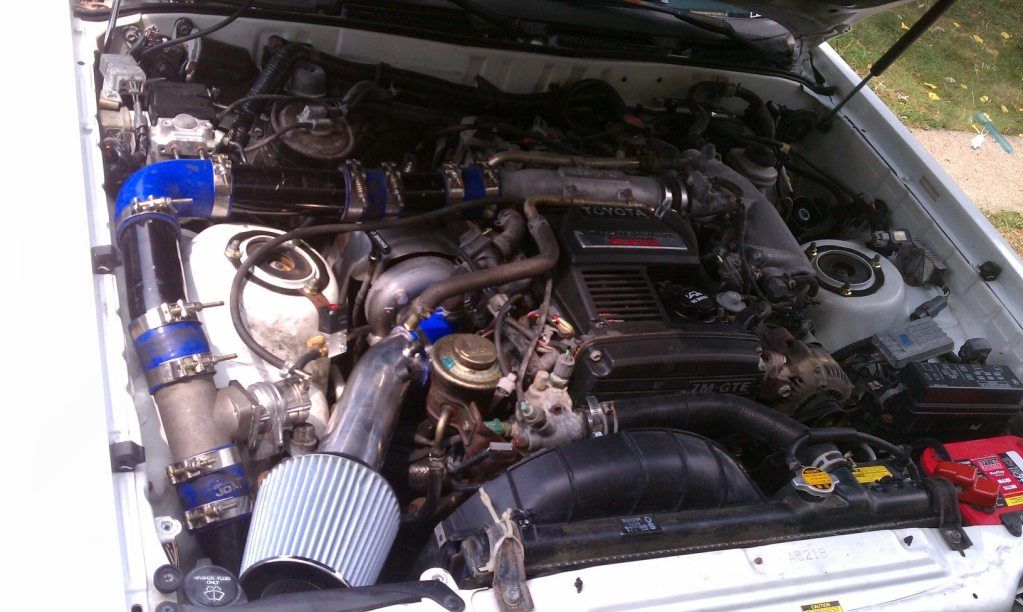
also have a spearco replica fmic, 2.5ic pipes and blitz bov on the way
once the kit arrives i will bit moving my IAT sensor down to the IC area to prevent it from heatsoaking
right now at cruising speeds in 80-90 degree weather my IAT sensor is showing 125-135...which is making tuning a little bit hard lol
im thinking about a custom a/c setup
pretty much ill add a 2nd evaporator infront of my IC for when i want to put her through her paces
or may just go with a co2 spray bar...probably a better choice with less plumbing
havent done much but i have made more progress on tuning
still playing around with my user tune low and user tune mid
i have been driving to work all week with a 15.0-15.8 afr
40 miles 1 way made my fuel mileage go up to 25 mpg lol i love it
but unfortunetly the TCCS isnt happy
so this weekend i will get into finer tuning to make the VF signal happier
also have a spearco replica fmic, 2.5ic pipes and blitz bov on the way
once the kit arrives i will bit moving my IAT sensor down to the IC area to prevent it from heatsoaking
right now at cruising speeds in 80-90 degree weather my IAT sensor is showing 125-135...which is making tuning a little bit hard lol
im thinking about a custom a/c setup
pretty much ill add a 2nd evaporator infront of my IC for when i want to put her through her paces
or may just go with a co2 spray bar...probably a better choice with less plumbing
Your long trip mpg will go up with cruise control. Long trip doing something like driving from the Buckeye state to SILV. Keep it 70-75 and you will hit close to 30 mpg. If you stay out of boost. Fuel trim will hit you if you can't control yourself.
thanks
havent done much with tuning...been kinda lazy
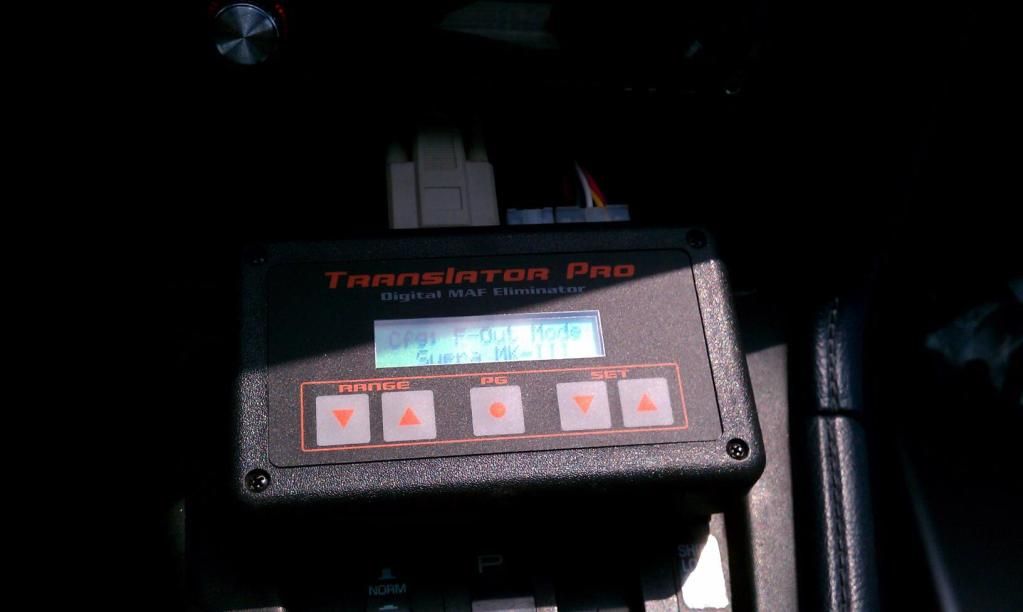
still need to figure out why tuner pro doesnt record afr, vf or rpm when datalogging
tried to uninstall then reinstall but no change
updated maft pro to 5.27 and no change
until i figure out that issue my cruise tuning will just go by drive and adjust user tune for a good afr
things i hope to accomplish this weekend:
install spearco fmic...as long as my used kit comes with all the couplers and clamps
replaced turbo to downpipe gasket
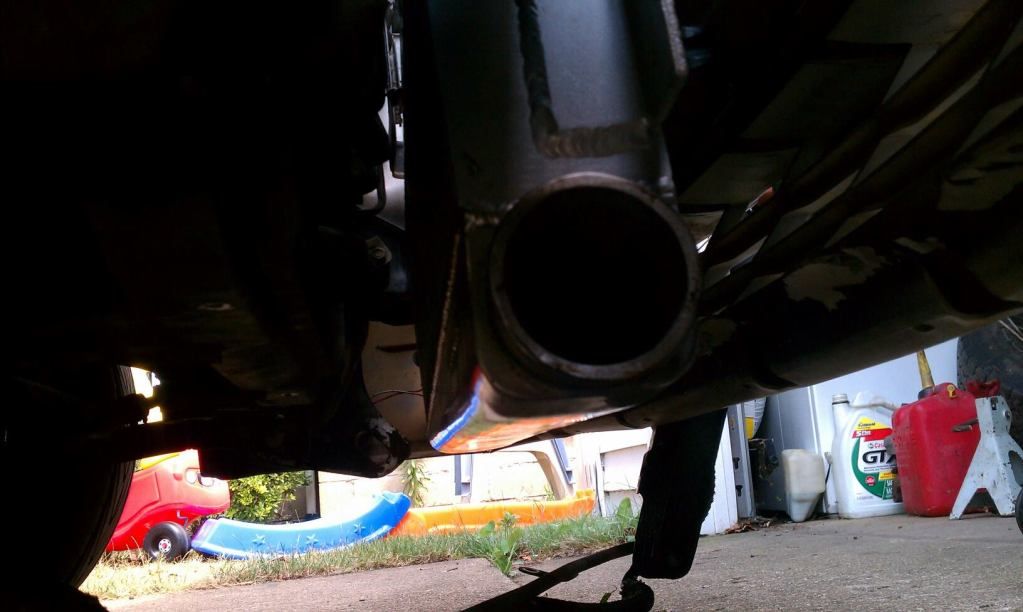
make and install test pipe to remove 2nd cat
move IAT sensor down near passenger fenderwell...currently mounted in 3000 pipe and will show 160-170degrees idling")
read, read, read and read some more on my issue with datalogging
havent done much with tuning...been kinda lazy
still need to figure out why tuner pro doesnt record afr, vf or rpm when datalogging
tried to uninstall then reinstall but no change
updated maft pro to 5.27 and no change
until i figure out that issue my cruise tuning will just go by drive and adjust user tune for a good afr
things i hope to accomplish this weekend:
install spearco fmic...as long as my used kit comes with all the couplers and clamps
replaced turbo to downpipe gasket
make and install test pipe to remove 2nd cat
move IAT sensor down near passenger fenderwell...currently mounted in 3000 pipe and will show 160-170degrees idling
read, read, read and read some more on my issue with datalogging
Decided to do a small pull in 3rd gear today
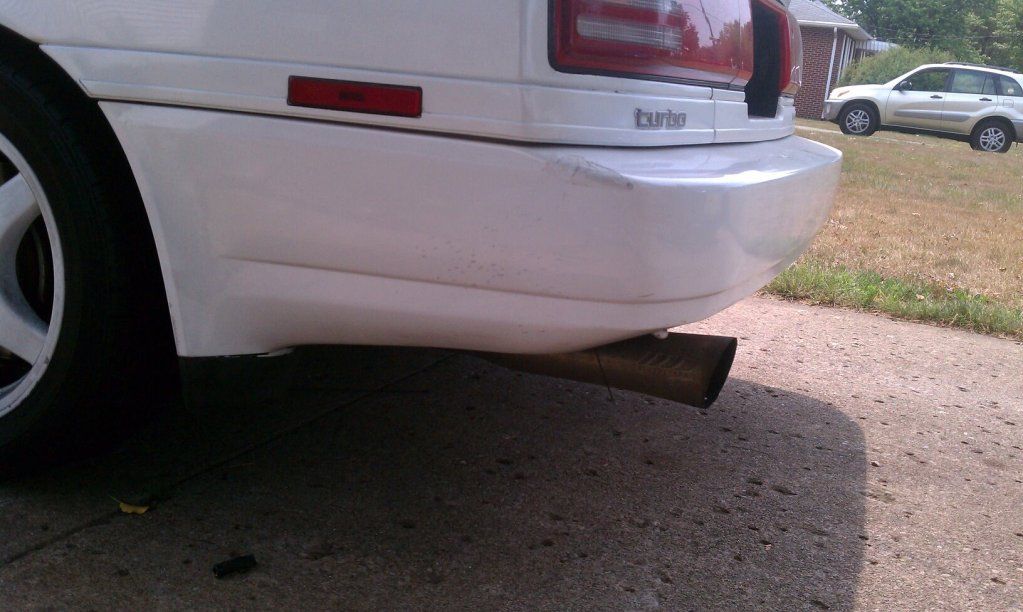
only mods are boost set to 14, 3in downpipe, walbro 255 and tuned on maft pro(well moderate tune)...still has a stock cat and stock cat back exhaust
Sorry for the video being upside down but it makes it interesting lol
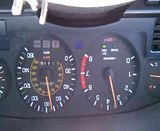
only mods are boost set to 14, 3in downpipe, walbro 255 and tuned on maft pro(well moderate tune)...still has a stock cat and stock cat back exhaust
Sorry for the video being upside down but it makes it interesting lol
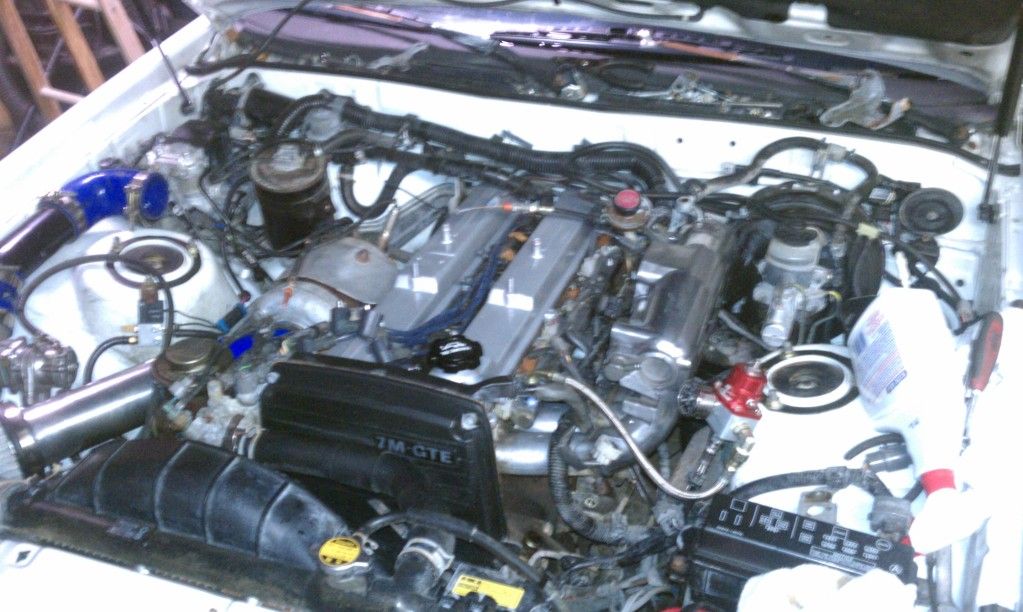
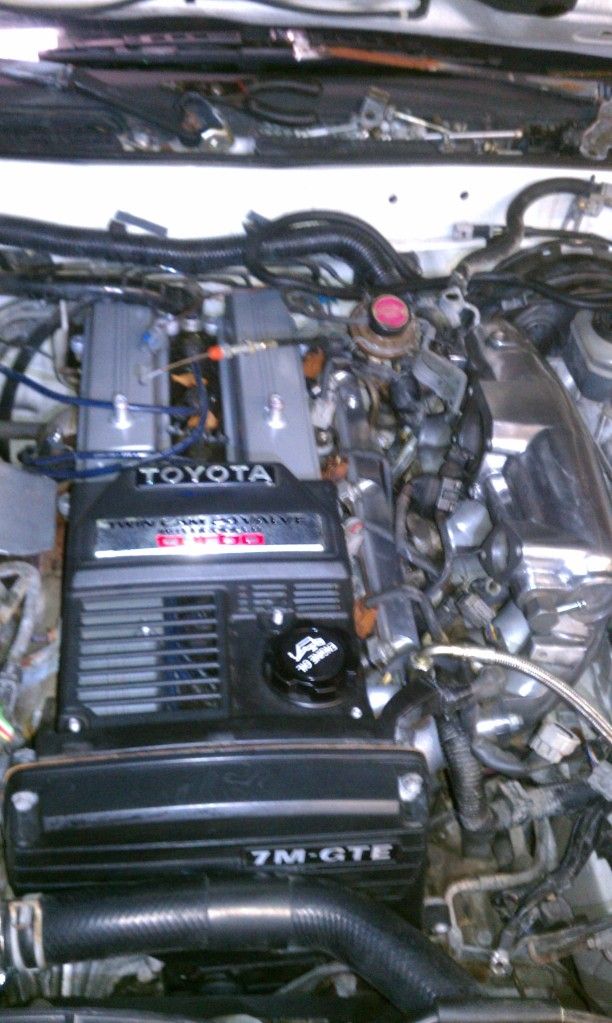
update over fathers day weekend:
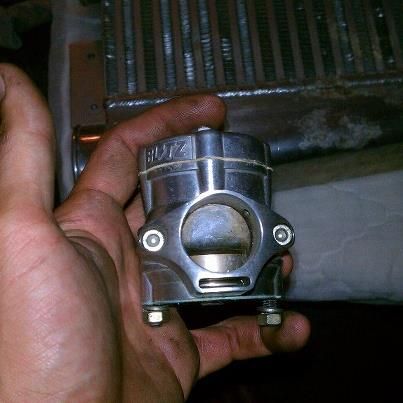
fabricated a adaptor plate to mate my blitz bov to a ebay rs flange
used some pipes and couplers i had laying around to install it
i still need to remove the afm and order a hks filter
MAFT pro resting place
for shits and giggles here are some pics of my 87 supra after the part out

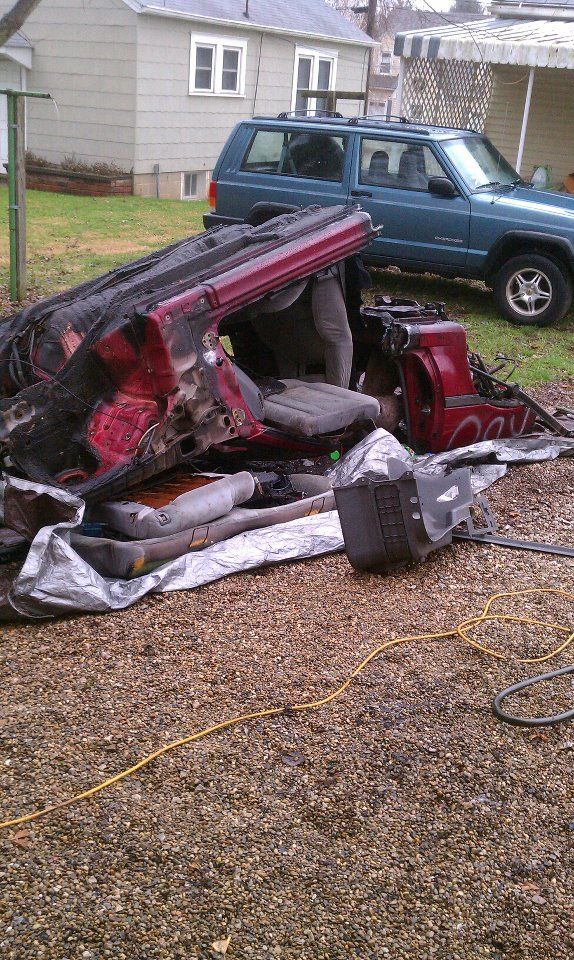
reason for cutting it up was well...i just got a new torch set and needed to do some testing lol
dont worry the shell was a rust bucket lol
fabricated a adaptor plate to mate my blitz bov to a ebay rs flange
used some pipes and couplers i had laying around to install it
i still need to remove the afm and order a hks filter
MAFT pro resting place
for shits and giggles here are some pics of my 87 supra after the part out
reason for cutting it up was well...i just got a new torch set and needed to do some testing lol
dont worry the shell was a rust bucket lol
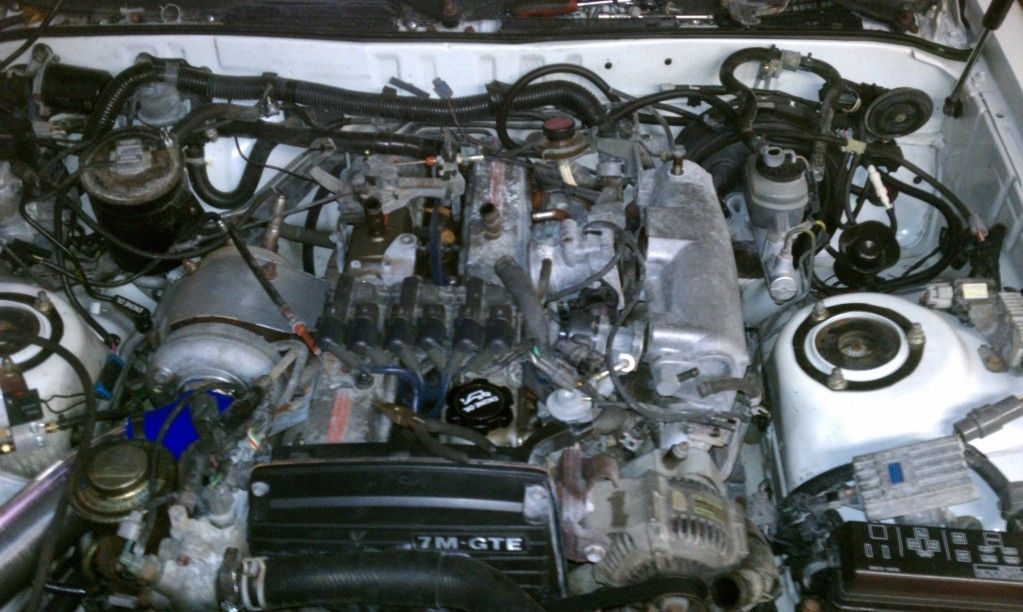
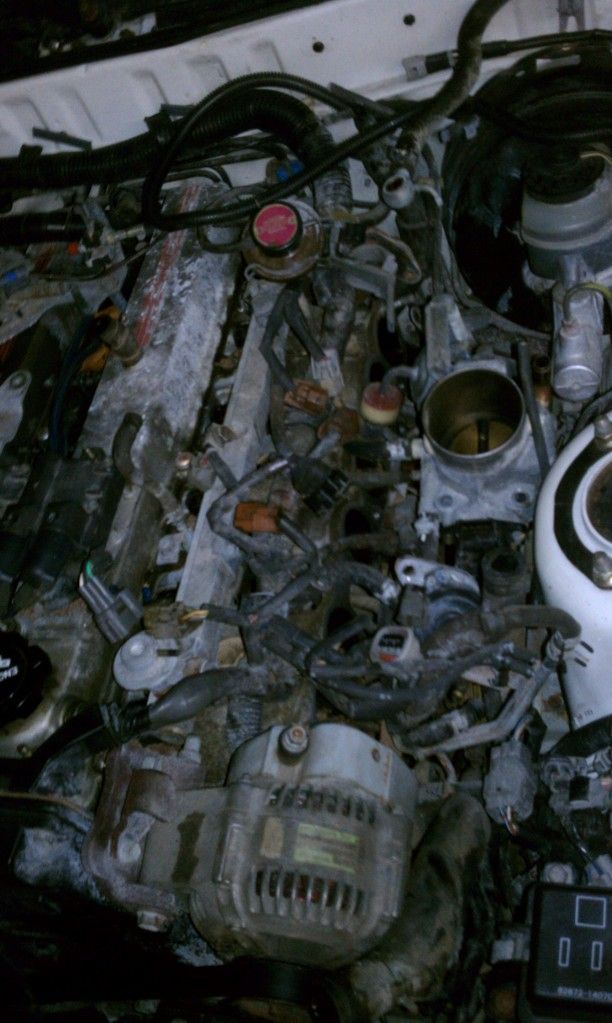
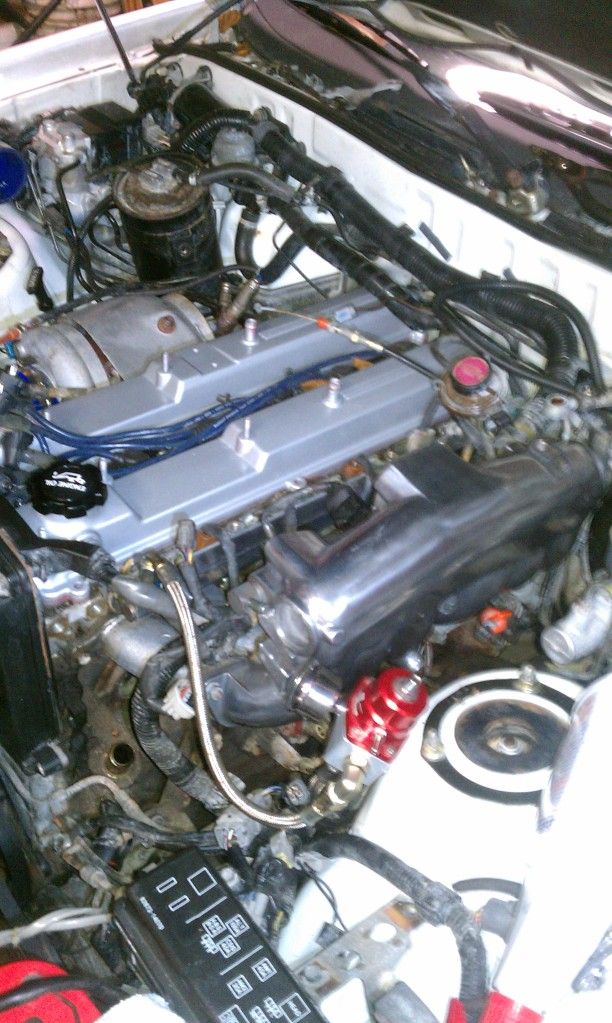
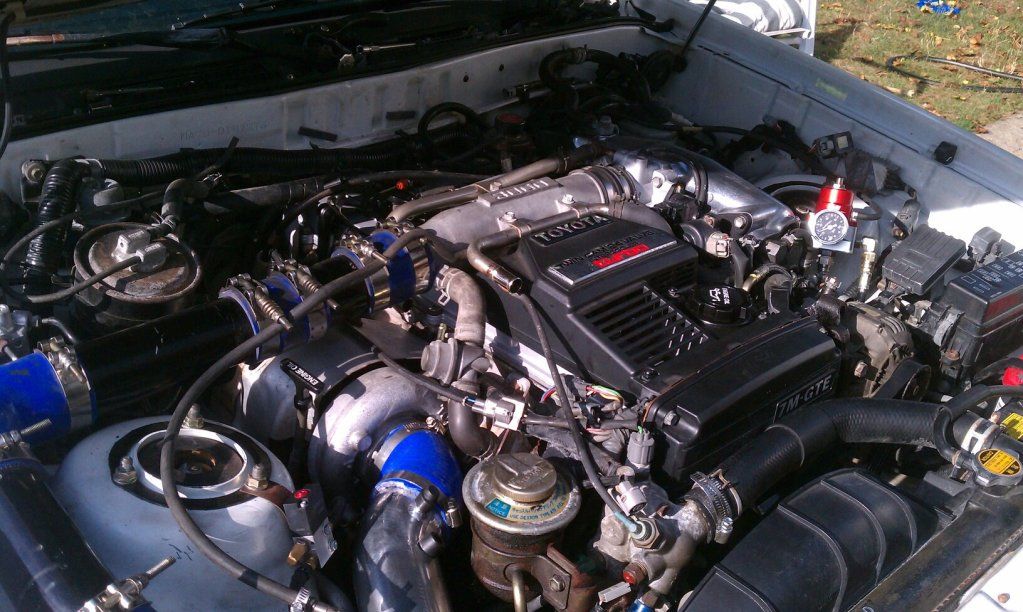
update...
did a little work to the old girl
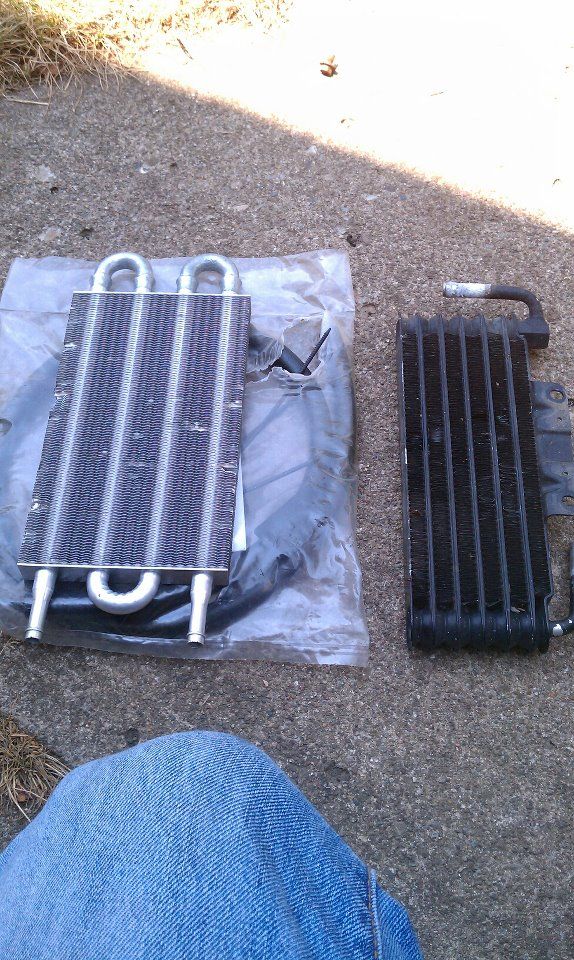
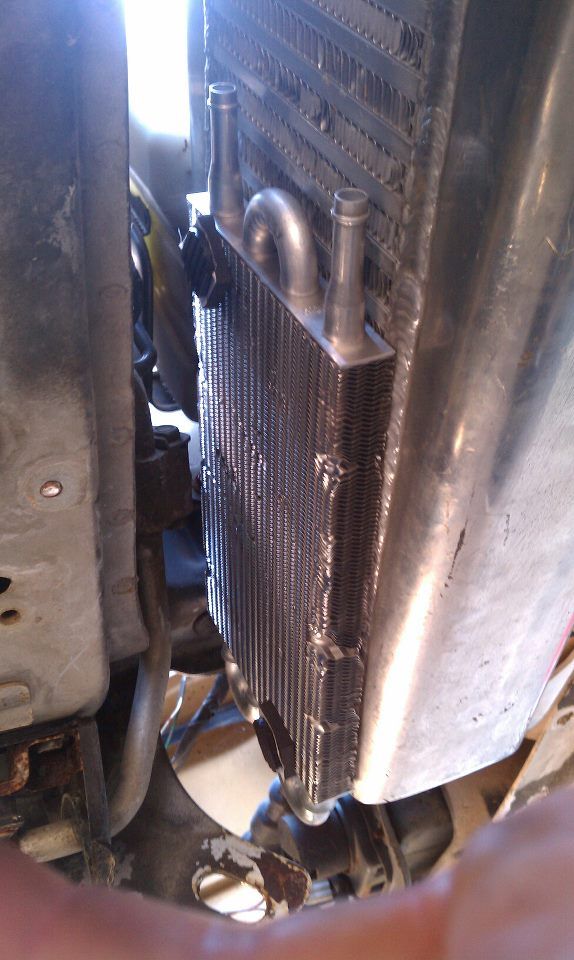
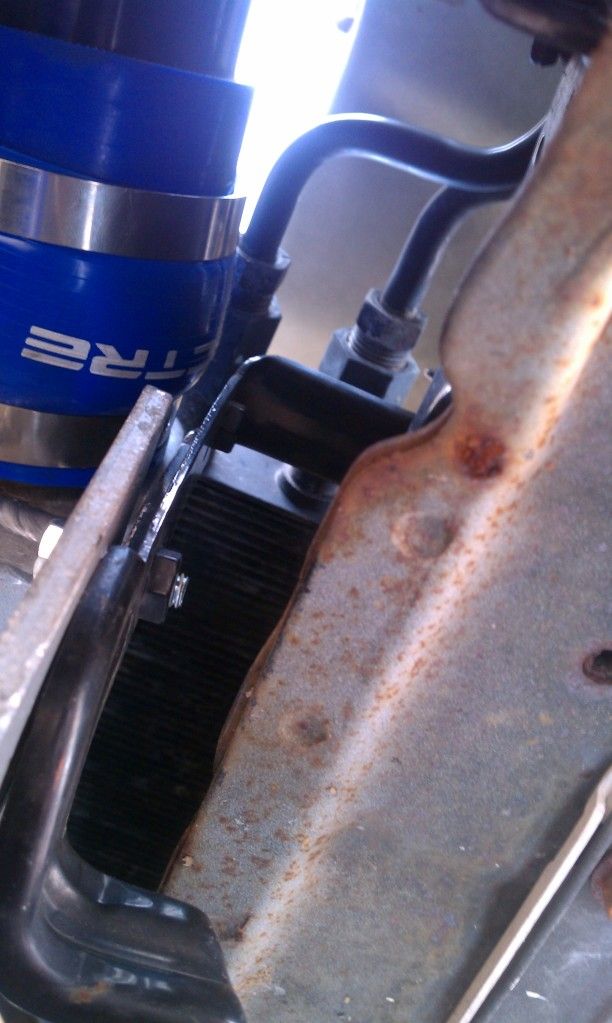
install godspeed fmic, rerouted IC piping a little, removed afm, replaced accordian hose with 3in piping, cone filter, install 2.5 in straight pipe exhaust from cat back, repaired a small coolant leak at upper radiator hose, replaced burnt out downpipe gasket at turbo, installed slightly bigger oil cooler, managed to bring my AIT temps down 15 degrees with new setup
Godspeed fmic mounted
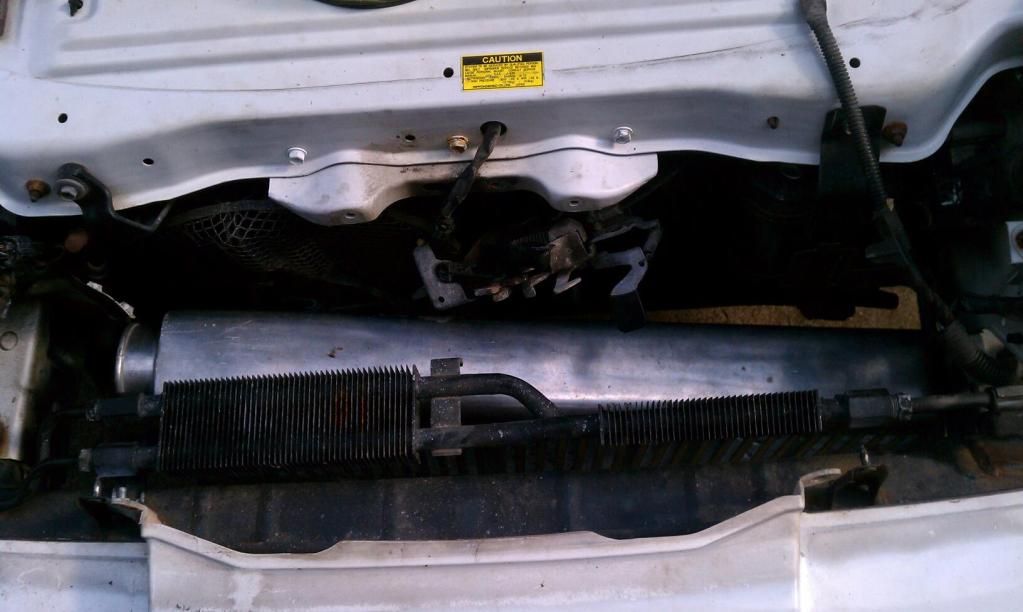
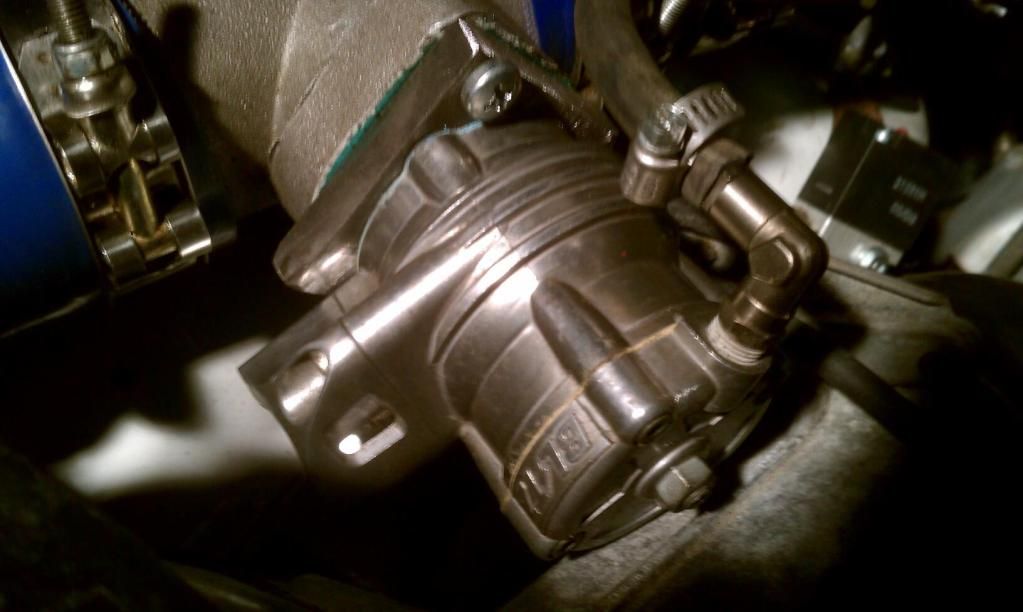
New slightly bigger oil cooler
How it sits today
Plans for later in the month are to make a box or snorkle system to help feed colder air to air filter
Also made some progress of maft pro....upgraded tuner pro to V5 and maft pro to 5.27...all datalogging is working fine
As far as fuel cut goes i need to purchased an AFPR to raise fuel cut...so that will happen later on this year
pretty happy how everything is turning out
did a little work to the old girl
install godspeed fmic, rerouted IC piping a little, removed afm, replaced accordian hose with 3in piping, cone filter, install 2.5 in straight pipe exhaust from cat back, repaired a small coolant leak at upper radiator hose, replaced burnt out downpipe gasket at turbo, installed slightly bigger oil cooler, managed to bring my AIT temps down 15 degrees with new setup
Godspeed fmic mounted
New slightly bigger oil cooler
How it sits today
Plans for later in the month are to make a box or snorkle system to help feed colder air to air filter
Also made some progress of maft pro....upgraded tuner pro to V5 and maft pro to 5.27...all datalogging is working fine
As far as fuel cut goes i need to purchased an AFPR to raise fuel cut...so that will happen later on this year
pretty happy how everything is turning out
**THIS IS JUST FOR AN IDEA...IM NOT RESPONSIBLE FOR ANY MECHANICAL OR PERSONAL DAMAGE
get ready for a fight lol
i found it easier to remove nose panel to gain all the access you need
with stock intercooler and afm setup my AIT was at 120 cruising down the highway...today driving to work with my new setup was a nice 105...so it definetly is cooling the air down better
what youll need to do to mount it like mine:
remove stock intercooler and oil cooler
remove brace from nose panel to panel above radiator(sorry brain fart) and it has 1 bolt that runs down infront of radiator
remove both horns that are mounted to above^^ bracket
you will need to cut the above bracket off...it must be reinstalled and bolt to nose otherwise your hood latch bracket is way to flimsy and may cause hood to open at high speeds
remove stock intercooler and oil cooler brackets
pop over flow tank out of your bracket
now the easy part is over with...its time to get custom ghetto
for the passenger side of intercooler i used a bracket that points up ontop of the crash bar...simply bent a piece of flat metal into where i want it(i used the stock intercooler/oil cooler brackets lol)
cut to fit...makes it easier if you have the car jacked up high...then use jack stands to hold the intercooler up
i pushed the intercooler as far up as i could...it still hangs about 1/2-1" below bumper with no stock lip..but im happy with how it turned out
^^this is where i mounted my bracket to on the crash bar
now onto the driver side of the intercooler bracket
again i went custom ghetto and used a piece of flat metal bent into shape and bolted to the long bolt that holds the crash bar to the front of car
so with the mounted out of the way i originally want to run my IC piping like stock
i purchased 2 3-2 1/2" 90 degree couplers off ebay...heres the link to the 4 layer couplers
http://www.ebay.com/itm/330433179506?ssPageName=STRK:MEWNX:IT&_trksid=p3984.m1439.l2649
i had some issues with the upper coupler hitting the frame and not fitting correctly...i was worried about vibrations and coupler wearing a hole in itself
so what i did next was cut a section of the headlight bracket for a piece of intercooler pipe to run up and through the hole behind headlight(running it this way keeps you from closing your headlight )
for the turbo to intercooler i kept the stock outlet pipe in place and the small pipe thats bolted to the frame rail
you'll need a 2 1/4-2 1/2" reducer coupler
have fun and i did this in a 3 day period...im sure its do able in a day but i took my time
get ready for a fight lol
i found it easier to remove nose panel to gain all the access you need
with stock intercooler and afm setup my AIT was at 120 cruising down the highway...today driving to work with my new setup was a nice 105...so it definetly is cooling the air down better
what youll need to do to mount it like mine:
remove stock intercooler and oil cooler
remove brace from nose panel to panel above radiator(sorry brain fart) and it has 1 bolt that runs down infront of radiator
remove both horns that are mounted to above^^ bracket
you will need to cut the above bracket off...it must be reinstalled and bolt to nose otherwise your hood latch bracket is way to flimsy and may cause hood to open at high speeds
remove stock intercooler and oil cooler brackets
pop over flow tank out of your bracket
now the easy part is over with...its time to get custom ghetto
for the passenger side of intercooler i used a bracket that points up ontop of the crash bar...simply bent a piece of flat metal into where i want it(i used the stock intercooler/oil cooler brackets lol)
cut to fit...makes it easier if you have the car jacked up high...then use jack stands to hold the intercooler up
i pushed the intercooler as far up as i could...it still hangs about 1/2-1" below bumper with no stock lip..but im happy with how it turned out
^^this is where i mounted my bracket to on the crash bar
now onto the driver side of the intercooler bracket
again i went custom ghetto and used a piece of flat metal bent into shape and bolted to the long bolt that holds the crash bar to the front of car
so with the mounted out of the way i originally want to run my IC piping like stock
i purchased 2 3-2 1/2" 90 degree couplers off ebay...heres the link to the 4 layer couplers
http://www.ebay.com/itm/330433179506?ssPageName=STRK:MEWNX:IT&_trksid=p3984.m1439.l2649
i had some issues with the upper coupler hitting the frame and not fitting correctly...i was worried about vibrations and coupler wearing a hole in itself
so what i did next was cut a section of the headlight bracket for a piece of intercooler pipe to run up and through the hole behind headlight(running it this way keeps you from closing your headlight
)for the turbo to intercooler i kept the stock outlet pipe in place and the small pipe thats bolted to the frame rail
you'll need a 2 1/4-2 1/2" reducer coupler
have fun and i did this in a 3 day period...im sure its do able in a day but i took my time
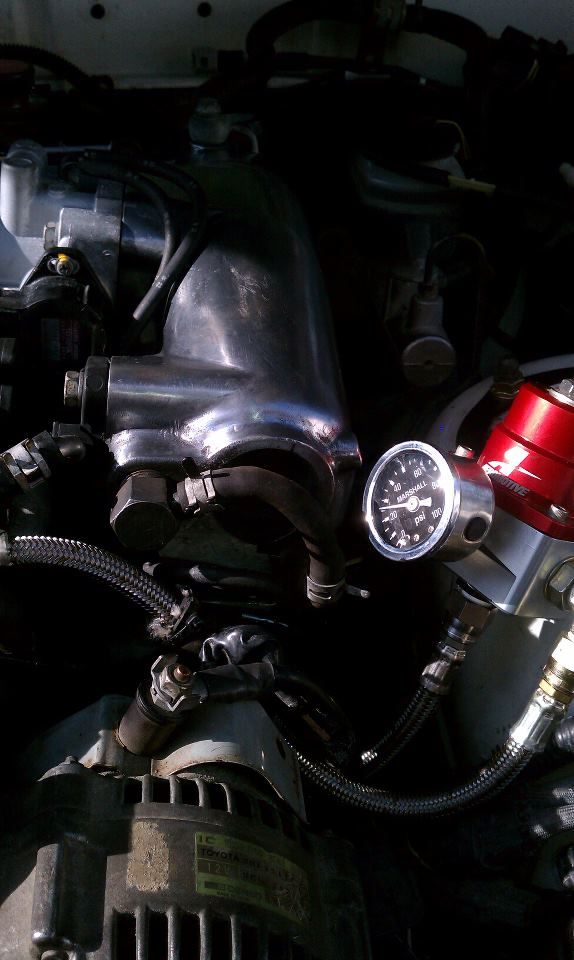
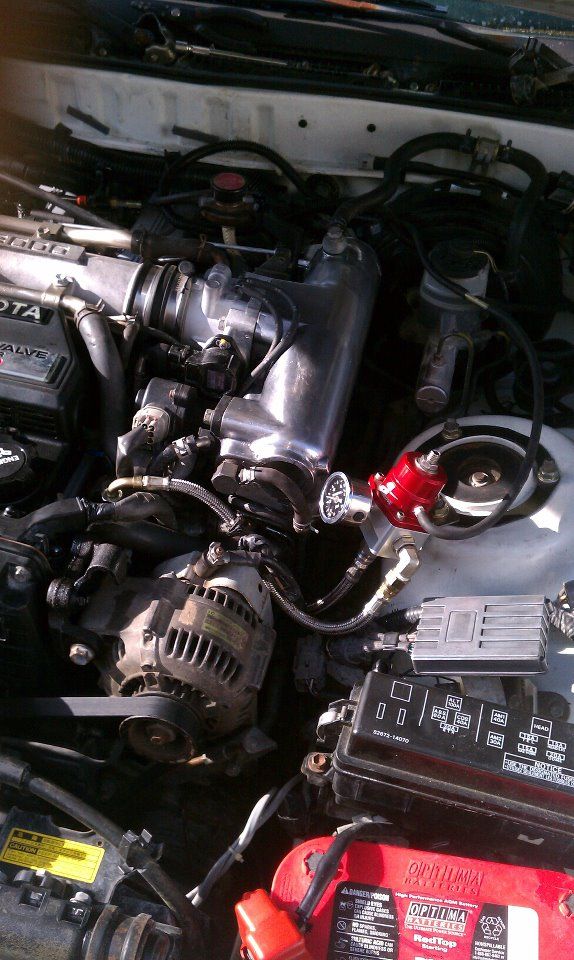
my aeromotive afpr should be in today
going to install, up pressure 1-2psi and retune this weekend
going to install, up pressure 1-2psi and retune this weekend
did some more work on the ole girl
mainly cleaning up the engine bay
sanded and polished intake manfiold, sand and spray paint valve covers, sand and polish fuel rail, install aeromotive afpr
plus more cleaning and retorque head bolts
and yes i did spend 15hrs sanding and polishing the intake lol
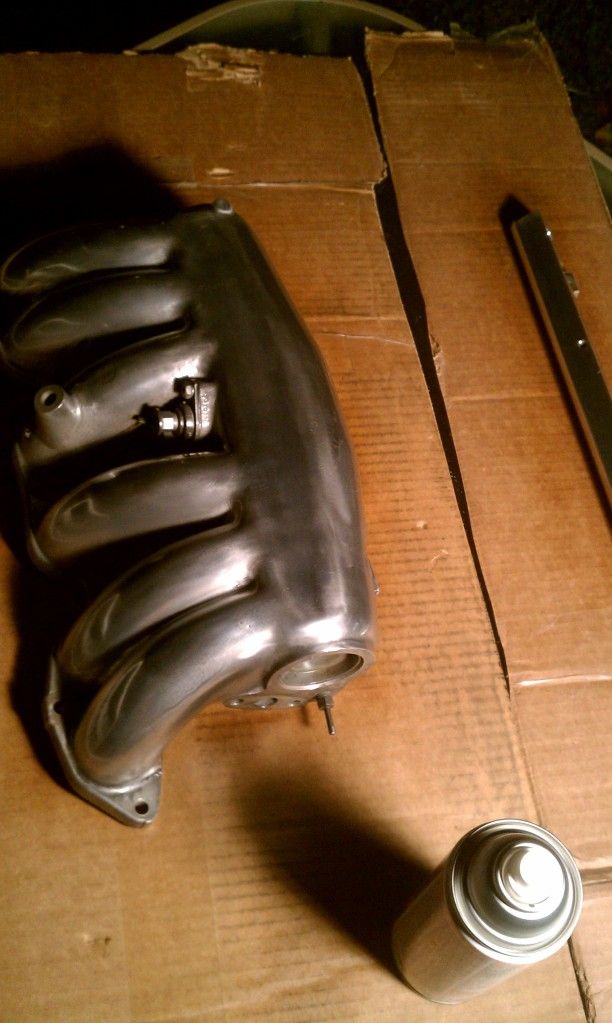

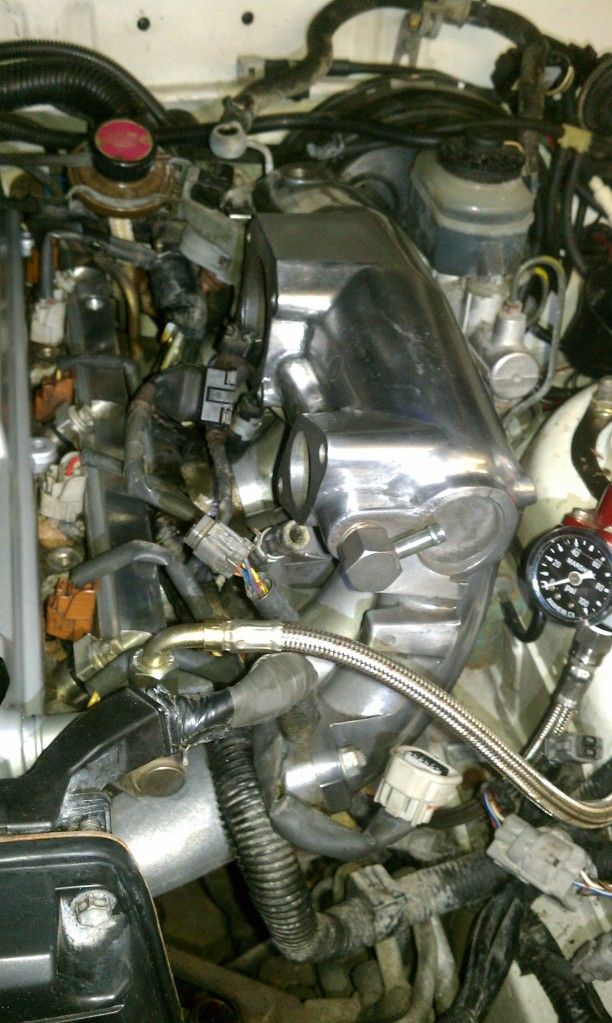

still need to finish assembly and leak test
spare valve covers up next to be polished
mainly cleaning up the engine bay
sanded and polished intake manfiold, sand and spray paint valve covers, sand and polish fuel rail, install aeromotive afpr
plus more cleaning and retorque head bolts
and yes i did spend 15hrs sanding and polishing the intake lol
still need to finish assembly and leak test
spare valve covers up next to be polished
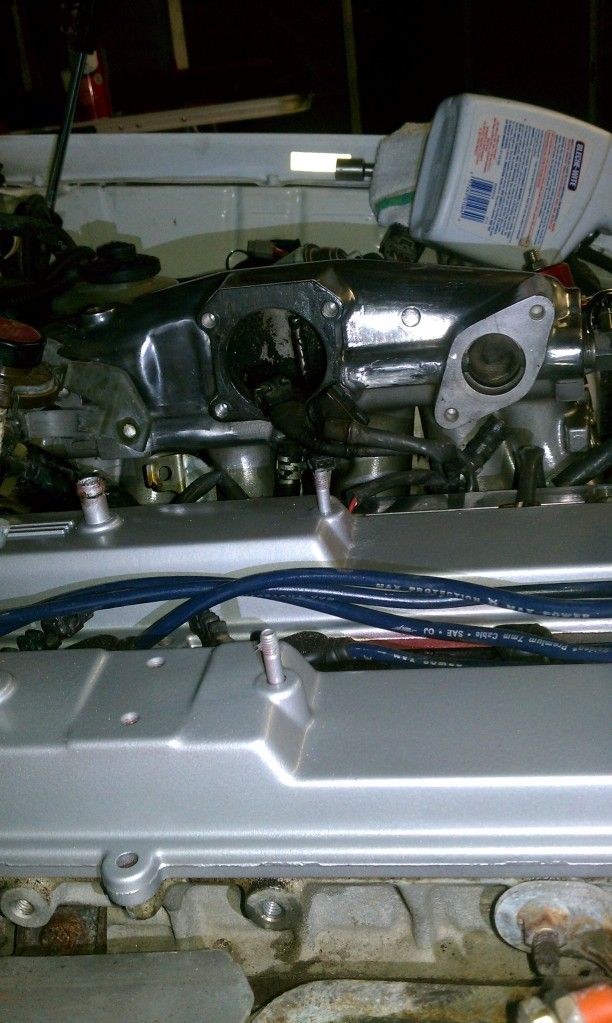
finished assembling the motor today
replaced all gaskets on driver side of motor, cleaned tb, cleaned iac, removed fuel pressure up vsv, set fuel pressure to 35
coated polished parts in 2000degree clear coat...hoping this will keep the polish looking nice
up next will be polishing valve covers and alternator housing
went to a mazda meet and parked beside a very clean rx7...i believe it was a turbo II
thanks
this weekend i will more focused on raising fuel cut and getting a decent base tune
going to start sanding my spare valve covers down to polish them as well
im thinking about grinding off the 3 raised lines on top valve covers for a cleaner look
then hopefull coil over plug within the next few months
so all week i have been busting my ass in hopes of getting my polished valve covers on
so far this is how they looks with the ruff cut polish
finer polish and new polishing wheels tomorrow and saturday
hope to have everything install by sunday
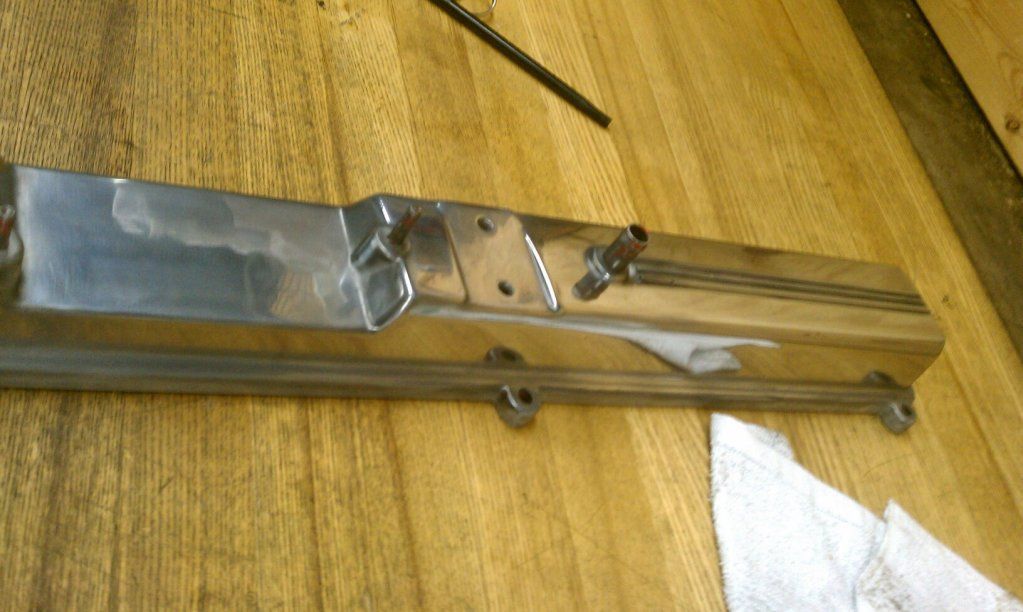
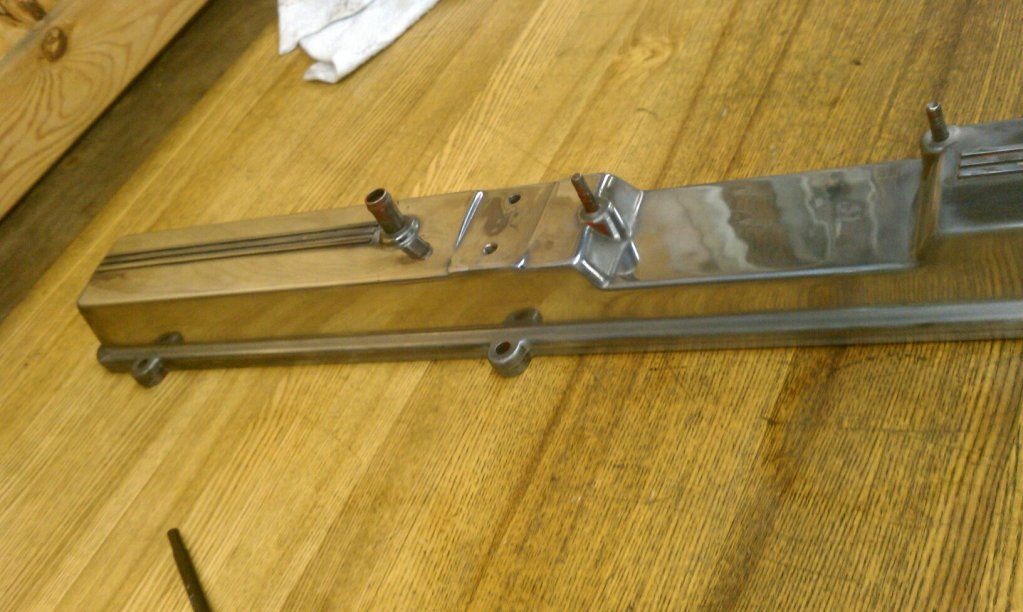

next few weeks i plan on polishing my spare waterneck and tstat cover
then alternator is next lol
so far this is how they looks with the ruff cut polish
finer polish and new polishing wheels tomorrow and saturday
hope to have everything install by sunday
next few weeks i plan on polishing my spare waterneck and tstat cover
then alternator is next lol
Lol thanks
If I wasn't an idiot in the beginning with my buffer wheel at work to sand old paint off
Then it would have a nice straight look
Took a few hrs to remove the low spots that I created with the buffer
Same with the intake lol
Now the old intake and valve covers that r on the car will be getting polished cause they still straight lol
damn!! them covers look so shiny!!!!! Good job! i love seeing little details that add so much value and changes the whole car completely