
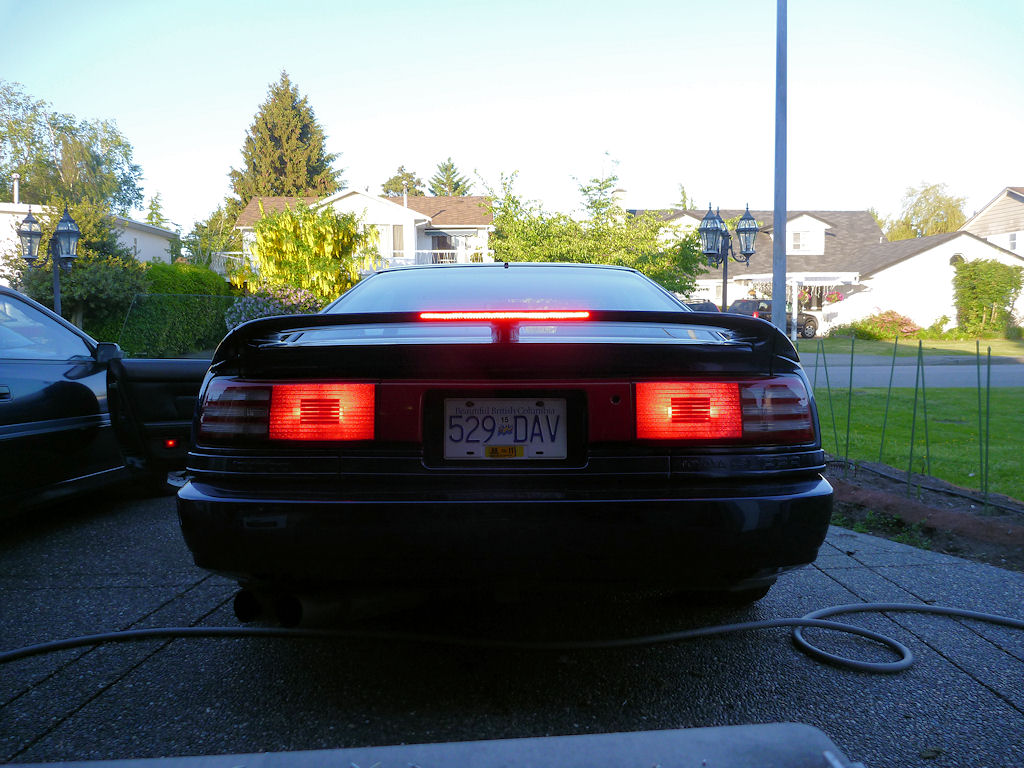
Does your 3rd brake light look like this?
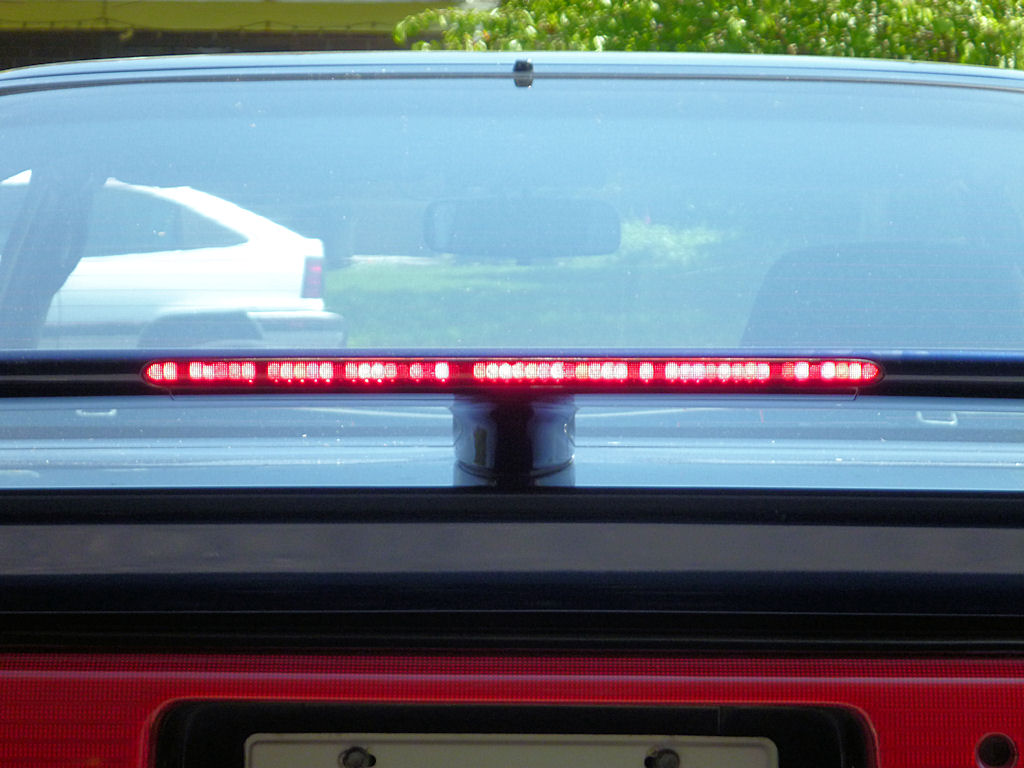
If so, you can fix it with some basic skills and about 9 hours of spare time.
Needed:
- 10mm socket
- Philips screwdriver
- Soldering iron
- De-soldering tool or tape
- Side cutters
- Dremel
- Silicone glue
- Replacement LEDs - 56 of them
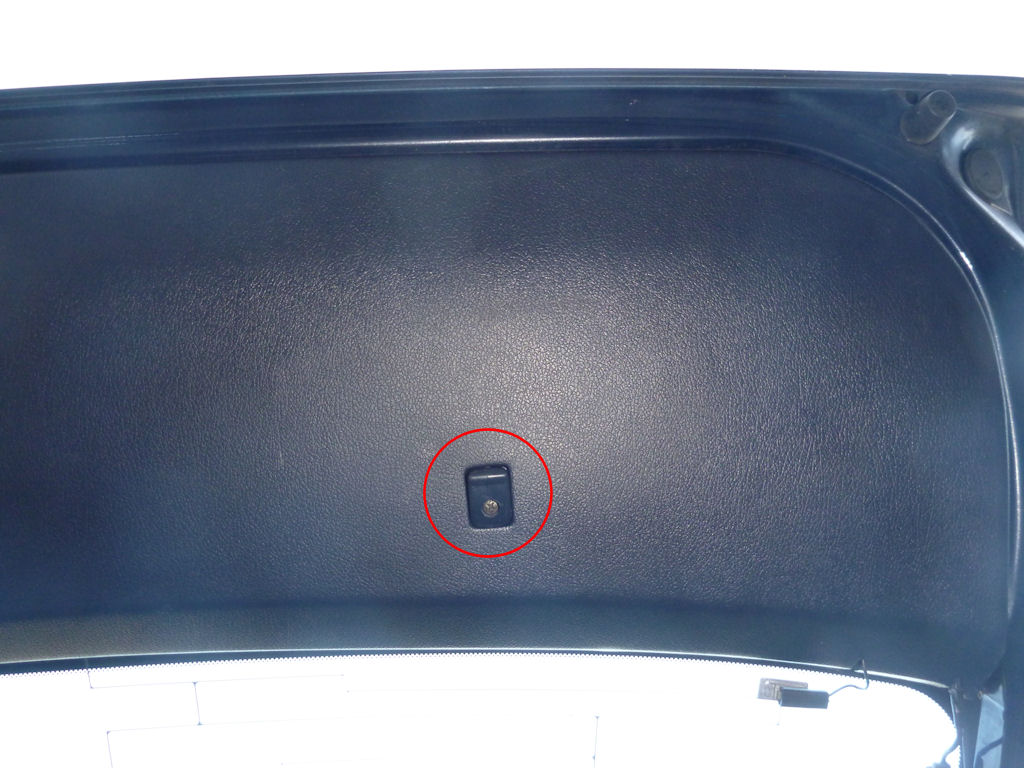
Remove the interior cover from the bottom of the hatch. It's two screws that hold on the roll cover and several clips.
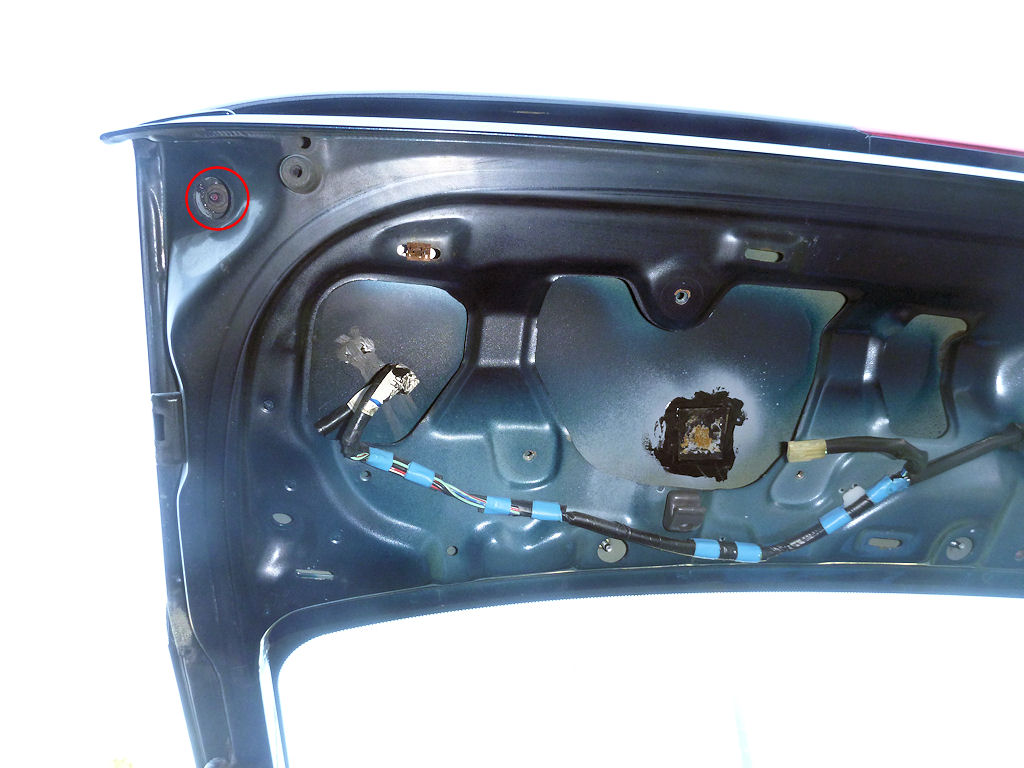
Screws - there's one of these on each side:
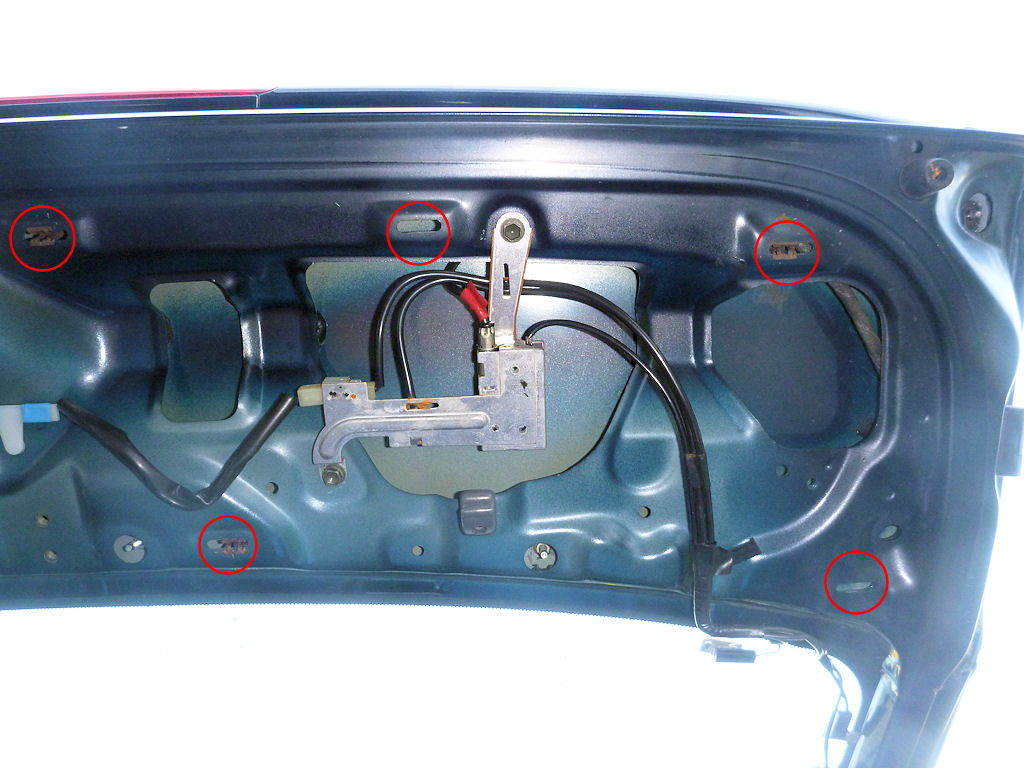
Clips:
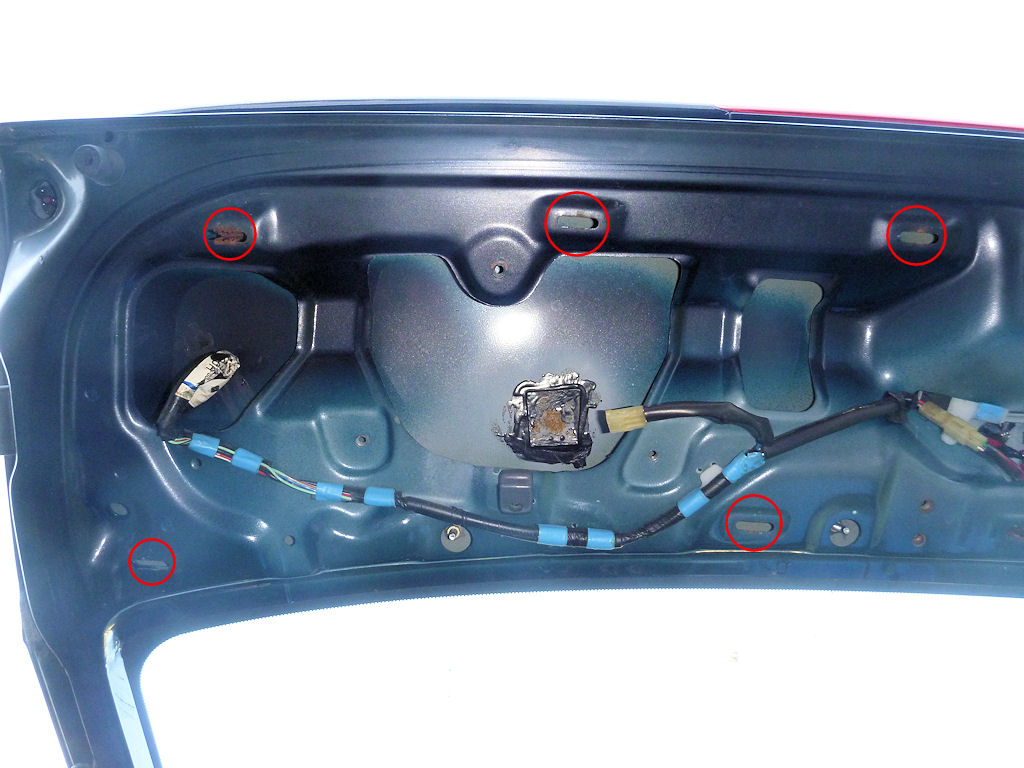
The spoiler is held on with 4x10mm nuts and two philips screws. There is a screw and a nut on each side, and two additional nuts in the center.
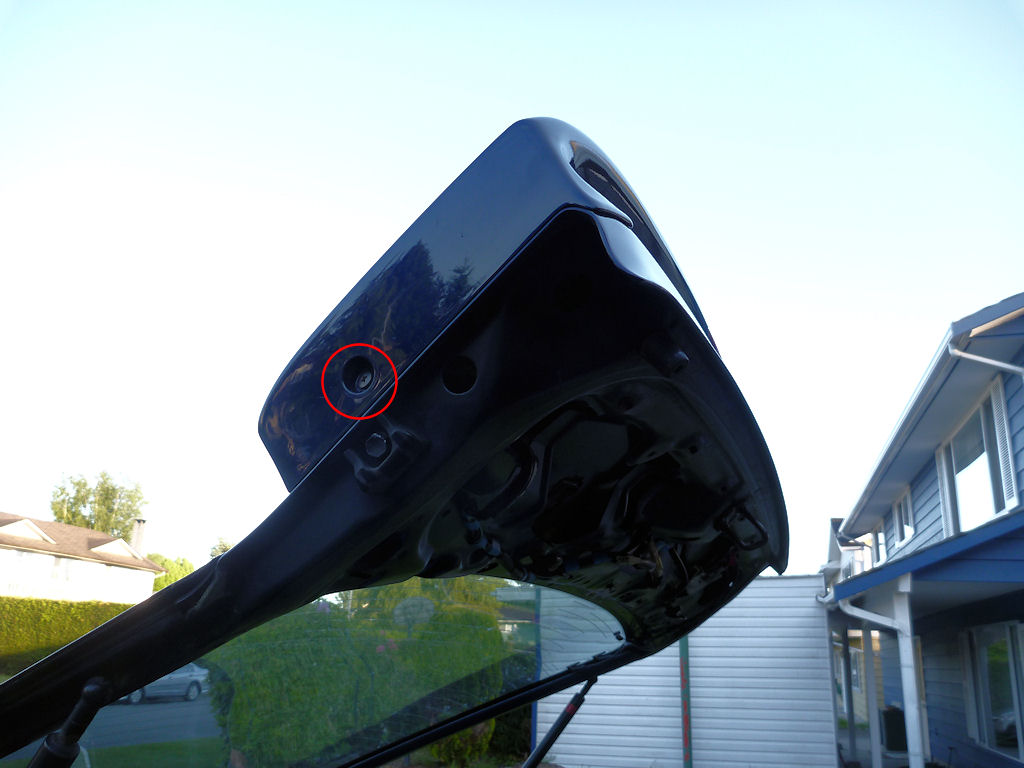
Screws:
Side nuts:

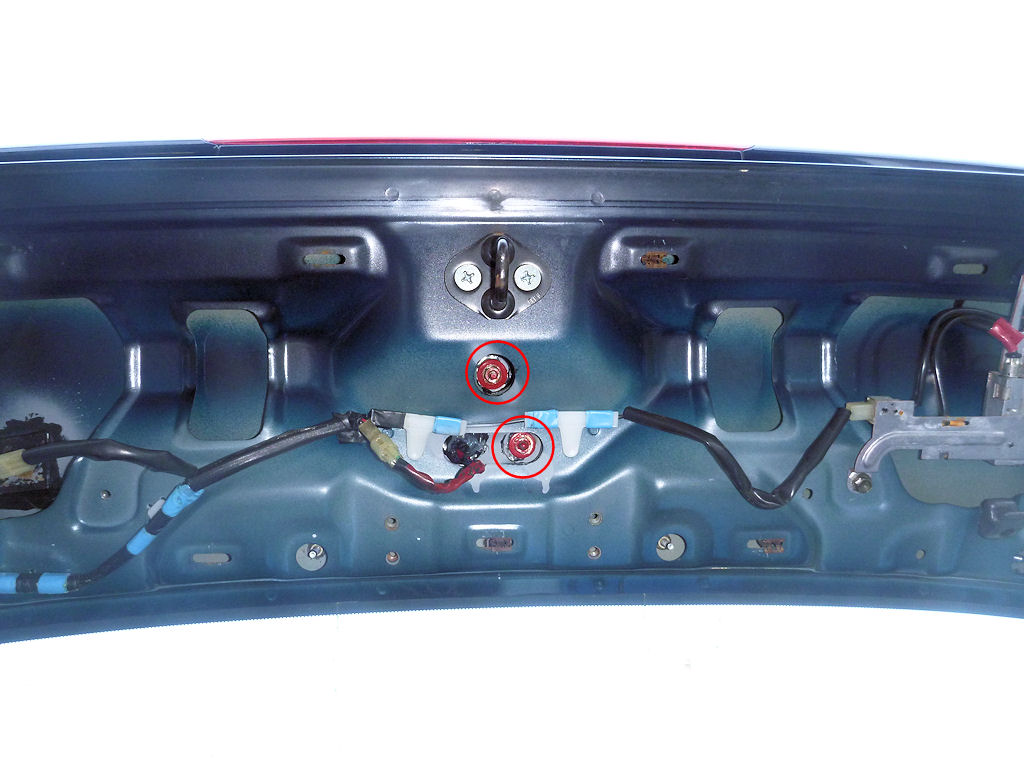
Center nuts:
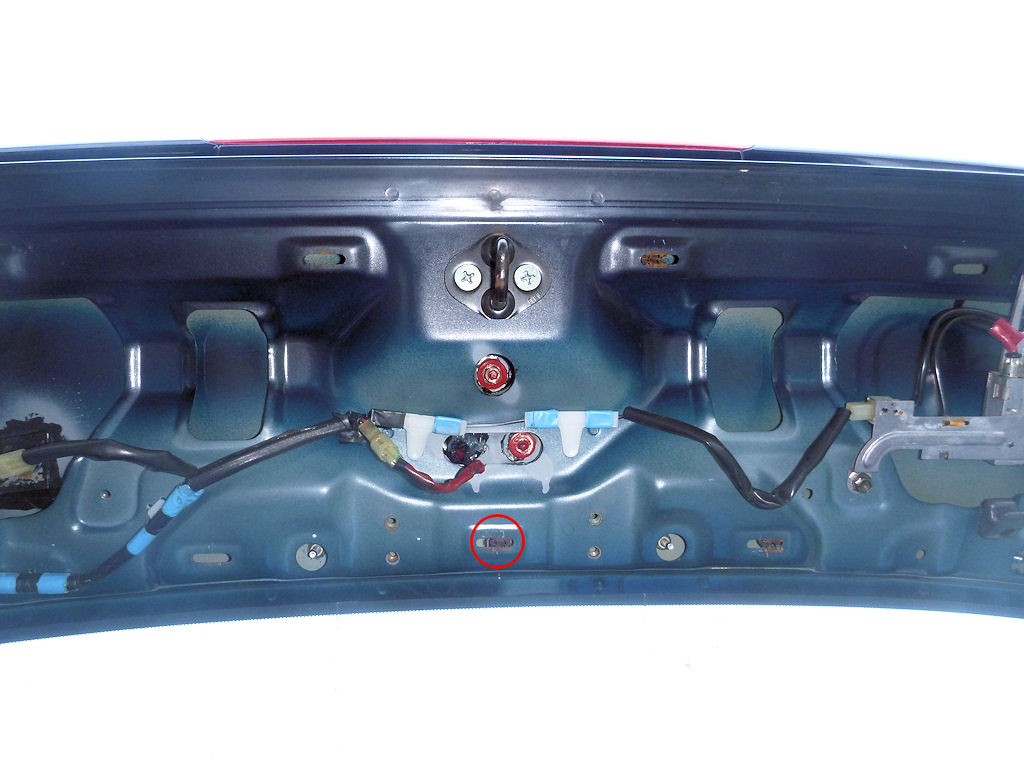
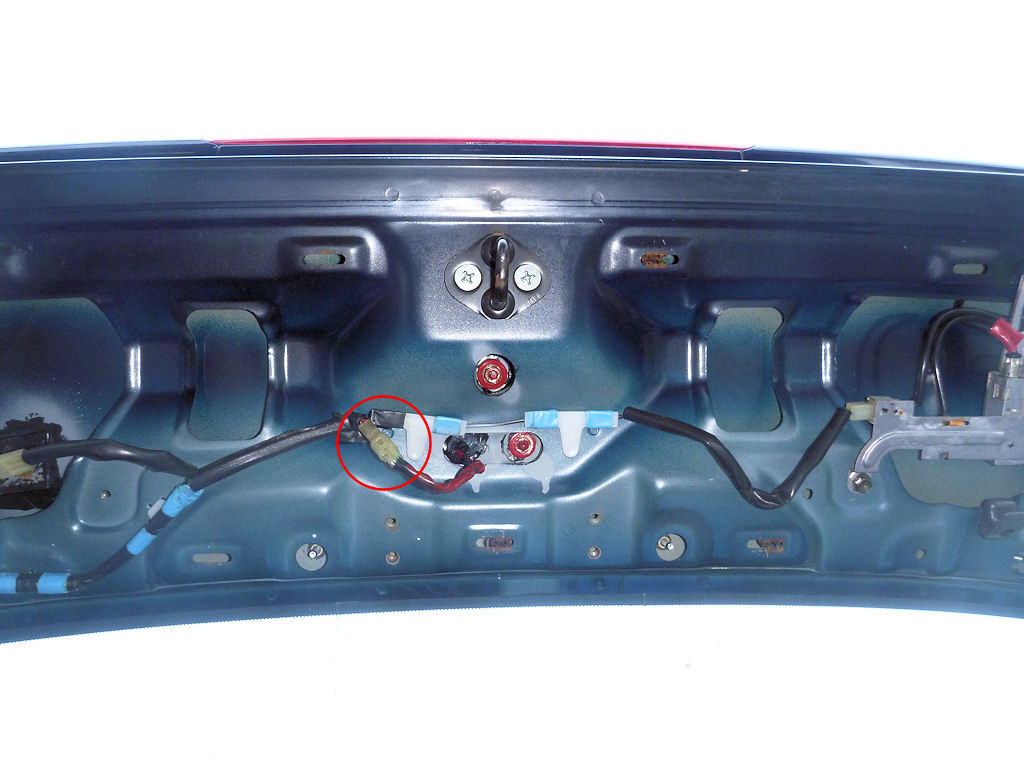
Disconnect the electrical plug to the 3rd brake light:
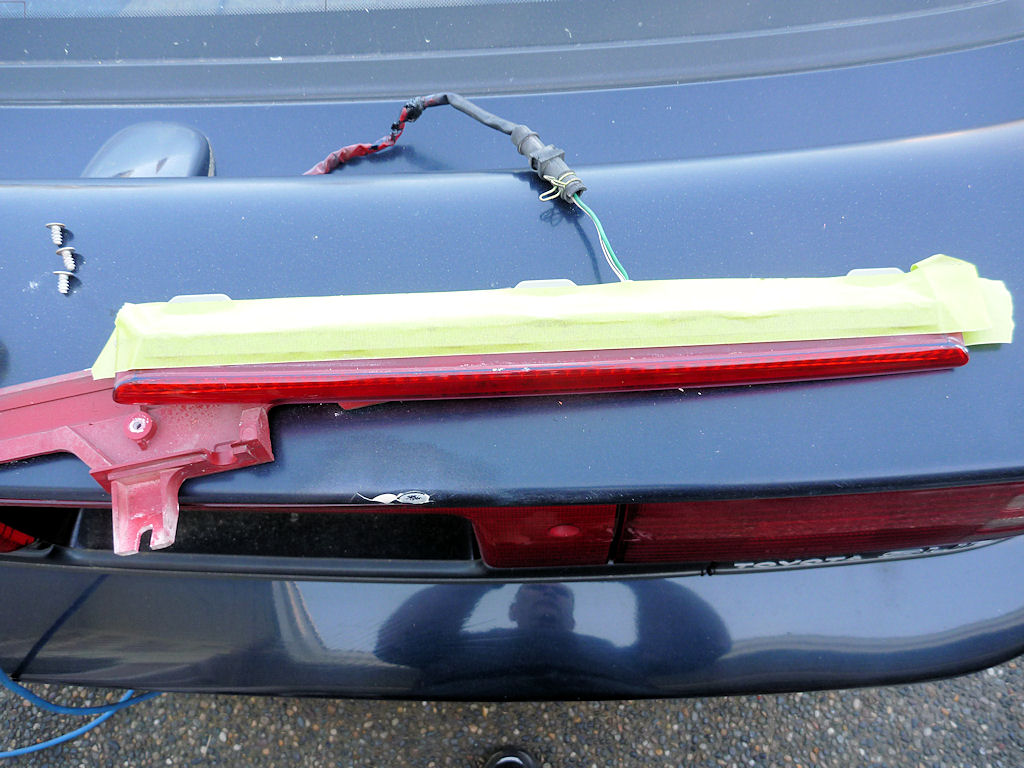
Remove the center spoiler section from the car. Turn it over, peel back the gasket on the center pillar, shine a flashlight inside and remove the screw that holds in the light.
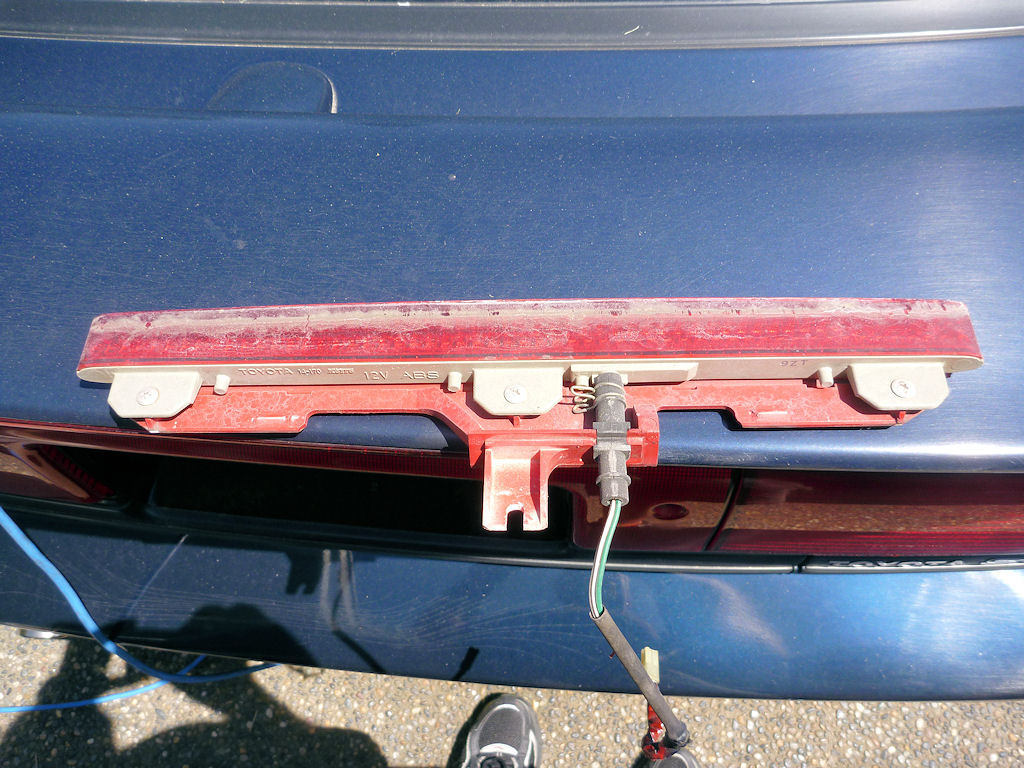
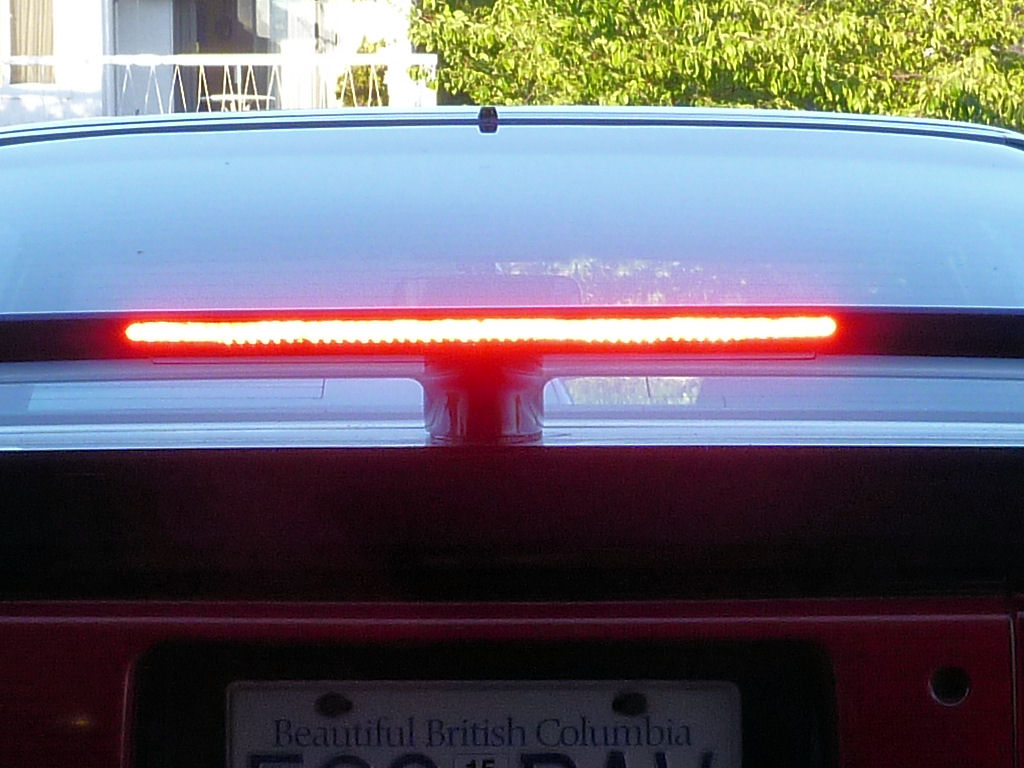
Carefully pry the light out of the spoiler. Mine slid out pretty easily, if you need to pry at it with a screwdriver, remember to tape it first. When you get it out, it looks like this:
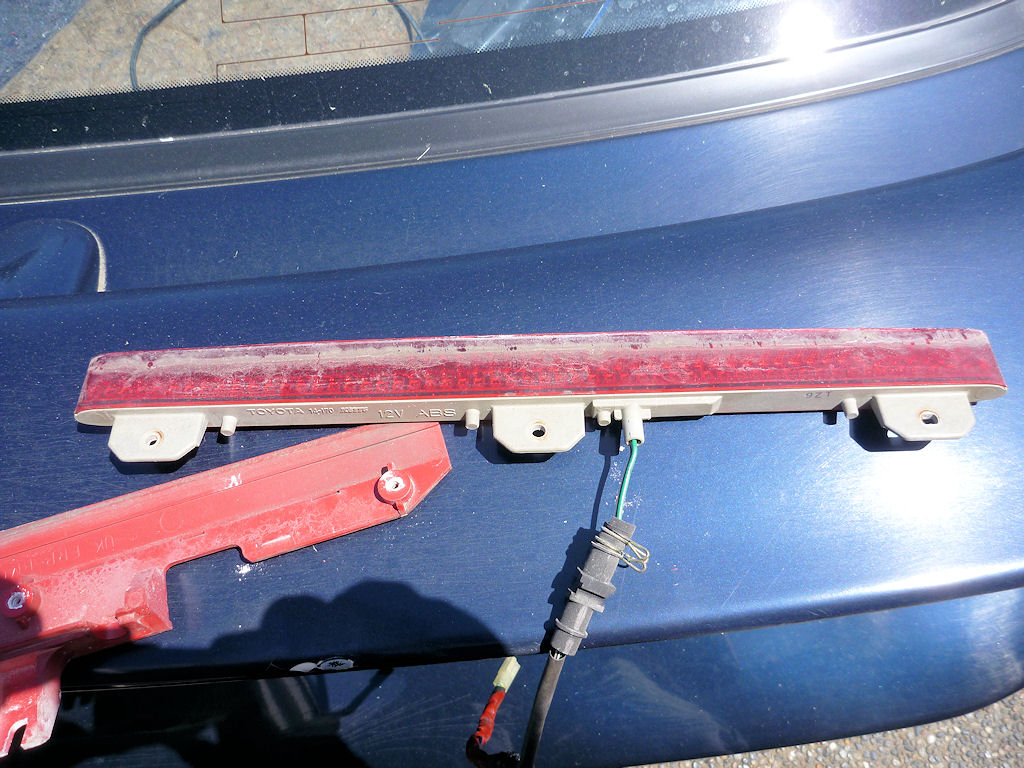
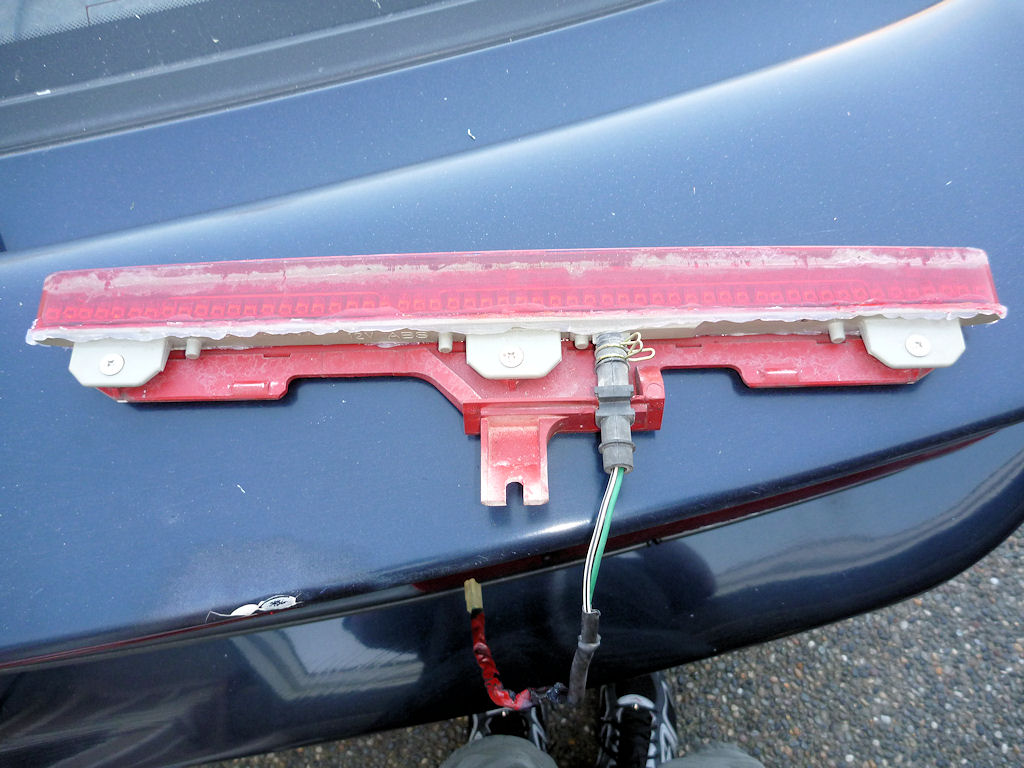
Remove it from the mounting bracket by removing the three screws:
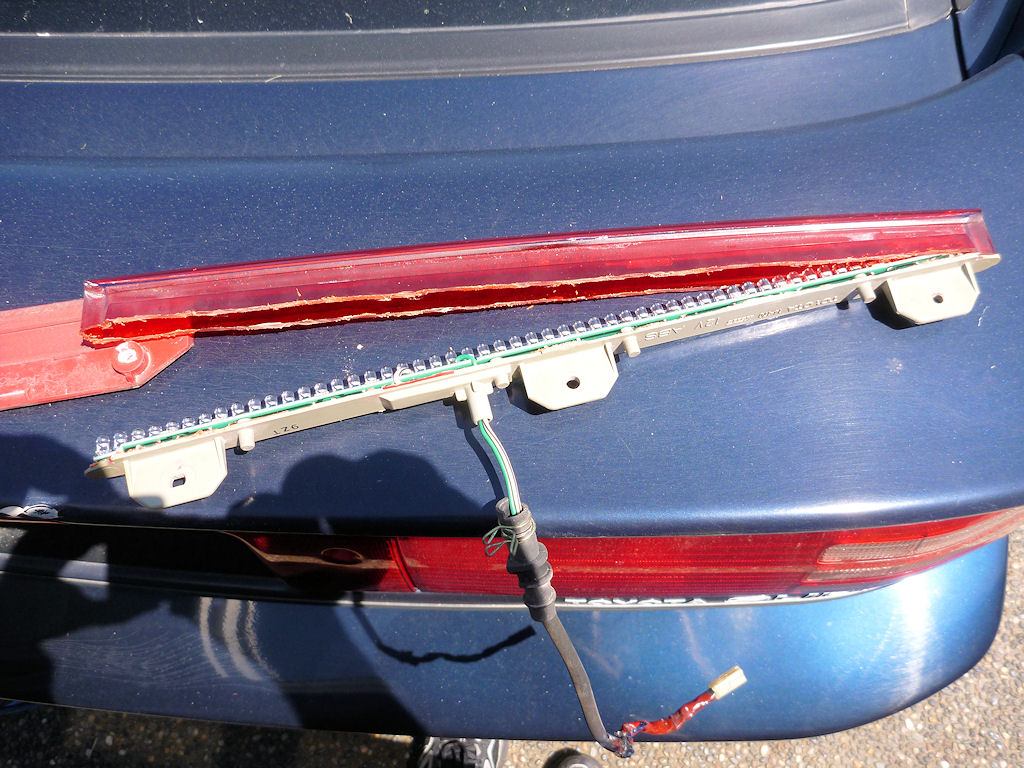
The red lens appears to be heat welded to the backing... so break out the dremel and make a bit of a mess. Use the narrowest cutting blade you can, so that you don't leave too much of a gap that will need to be refilled with silicone later.
The circuit board is held onto the grey back with 4 screws. Pull those off, and you can slide the circuit board out enough to work on the back. Use a solder sucker, or solder tape, or whatever your favorite method of desoldering components happens to be. Remove the LEDs a few at a time, and solder in new ones. Make sure you get the polarity right when putting the new ones back in.
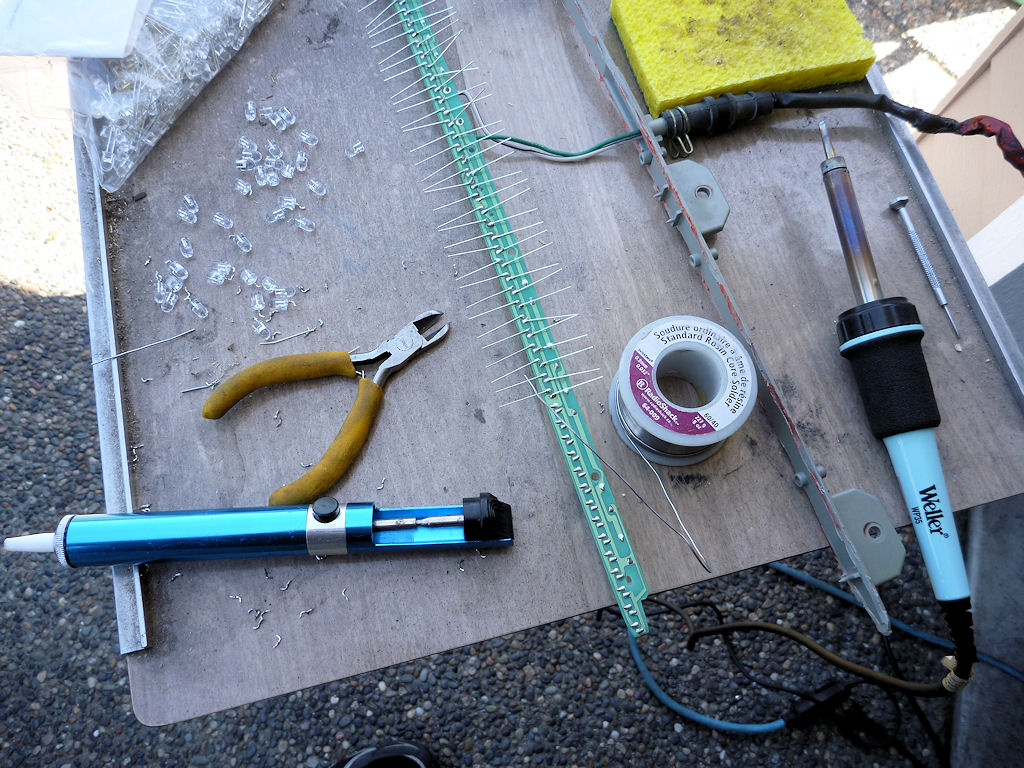
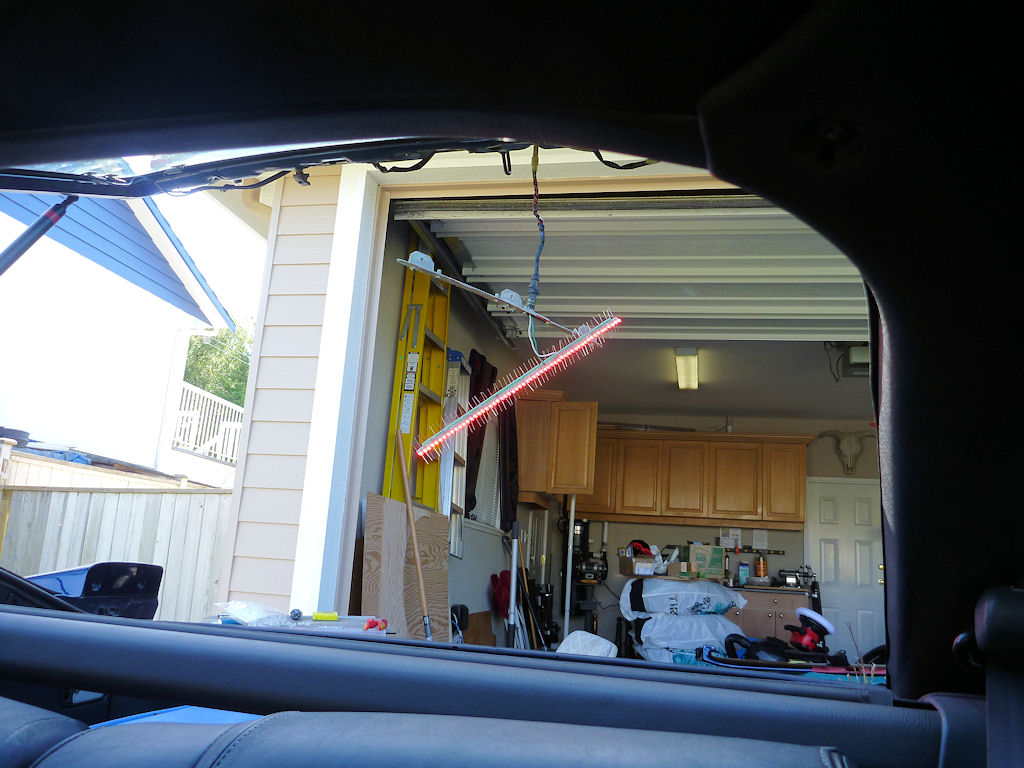
I suggest plugging it back in a few times to test the new LEDs. I leave the new LEDs untrimmed so that I can tell which ones I've already replaced... once they all pass, then I go through and trim the ends.
After testing to make sure they all work, screw the circuit board back down and use silicone to glue the lens to the backing plate. I use painters tape to smooth out the silicone.
Remount the light to it's mounting bracket:
Replace everything in reverse order from how you pulled it apart, and enjoy the brand new 3rd brake light!
If so, you can fix it with some basic skills and about 9 hours of spare time.
Needed:
- 10mm socket
- Philips screwdriver
- Soldering iron
- De-soldering tool or tape
- Side cutters
- Dremel
- Silicone glue
- Replacement LEDs - 56 of them
Remove the interior cover from the bottom of the hatch. It's two screws that hold on the roll cover and several clips.
Screws - there's one of these on each side:
Clips:
The spoiler is held on with 4x10mm nuts and two philips screws. There is a screw and a nut on each side, and two additional nuts in the center.
Screws:
Side nuts:
Center nuts:
Disconnect the electrical plug to the 3rd brake light:
Remove the center spoiler section from the car. Turn it over, peel back the gasket on the center pillar, shine a flashlight inside and remove the screw that holds in the light.
Carefully pry the light out of the spoiler. Mine slid out pretty easily, if you need to pry at it with a screwdriver, remember to tape it first. When you get it out, it looks like this:
Remove it from the mounting bracket by removing the three screws:
The red lens appears to be heat welded to the backing... so break out the dremel and make a bit of a mess. Use the narrowest cutting blade you can, so that you don't leave too much of a gap that will need to be refilled with silicone later.
The circuit board is held onto the grey back with 4 screws. Pull those off, and you can slide the circuit board out enough to work on the back. Use a solder sucker, or solder tape, or whatever your favorite method of desoldering components happens to be. Remove the LEDs a few at a time, and solder in new ones. Make sure you get the polarity right when putting the new ones back in.
I suggest plugging it back in a few times to test the new LEDs. I leave the new LEDs untrimmed so that I can tell which ones I've already replaced... once they all pass, then I go through and trim the ends.
After testing to make sure they all work, screw the circuit board back down and use silicone to glue the lens to the backing plate. I use painters tape to smooth out the silicone.
Remount the light to it's mounting bracket:
Replace everything in reverse order from how you pulled it apart, and enjoy the brand new 3rd brake light!
")
![20120315_212446 [1600x1200].jpg](https://www.supramania.com/data/attachments/33/33298-a28f509dce4235ab3624b0a5f64c3f7e.jpg "20120315_212446 [1600x1200].jpg")