
Anyway, I felt like trying my hand at welding on the old subframe before I go welding on the AKG sway reinforcements and the bushing reinforcements, etc... I got it dialed in pretty well at the end. This is my first time using this welder with shielding gas (C25) and solid core wire (.35 wire, would have been better w/ .30 but the .35 will work fine at the settings I dialed in) Welder is a Hobart Handler 210.
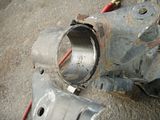
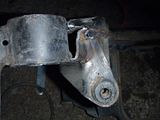
I do NOT plan to use this subframe, this was just practice. So what did I do? First, I pulled the bushing out that bordered the torn differential mount, again using the MIS RTAB puller:
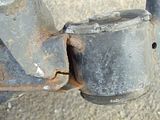
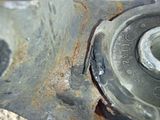
Once it was out (note I wasn't exactly being careful with this because I'm not using it again), I used the grinder to clean up the edges as much as possible. Then a BFH to pound it back as close as I could get it. Then clamped in place, tacked, removed clamp, and welded. It took me a few tries to get the heat close to where I wanted it, but here are the results:
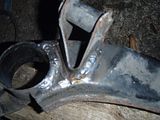
Voila, fixed differential mount. I'm fairly certain that if I braced it up like I plan to do the new one that it would hold just fine. I beat the piss out of the welds and nothing broke, no porosity that I could find. Anyway, it's going in the scrap pile for practice metal. LOL:
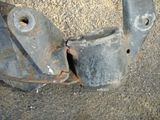
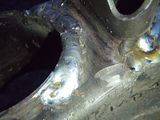
This is the same picture from one of the previous posts. Just to show how I pieced it back together, the picture immediately above used to look like this:
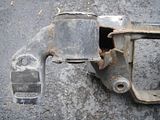
I do NOT plan to use this subframe, this was just practice. So what did I do? First, I pulled the bushing out that bordered the torn differential mount, again using the MIS RTAB puller:


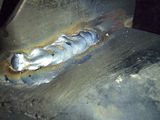
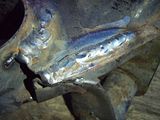
Once it was out (note I wasn't exactly being careful with this because I'm not using it again), I used the grinder to clean up the edges as much as possible. Then a BFH to pound it back as close as I could get it. Then clamped in place, tacked, removed clamp, and welded. It took me a few tries to get the heat close to where I wanted it, but here are the results:


Voila, fixed differential mount. I'm fairly certain that if I braced it up like I plan to do the new one that it would hold just fine. I beat the piss out of the welds and nothing broke, no porosity that I could find. Anyway, it's going in the scrap pile for practice metal. LOL:

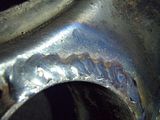
This is the same picture from one of the previous posts. Just to show how I pieced it back together, the picture immediately above used to look like this:


")


