
Well, as an active member of a Supra community while not actually owning a Supra personally (nor have I ever, technically, as all of the Supras I am intimate with are either joint projects (like the one with my Dad), or owned by other people (like my brother's JZA80 and John's (Stanzaspeed) JZA70) I figured I should post my project. This is what it takes to bring a relatively well-kept, but normally used 26 year old car in Canada to (what I would consider) be "good condition". I've owned this car since the end of 2004 when I was 18, and since starting to "restore it" in 2005 I've become even more anal about how I want things done. In 2010 I started an engine swap that ended up halting progress on the car for a long time, especially as I did significantly less work on the car in 2011 as I'd liked to, basically just out of pure laziness, and because I was enjoying/modifying my new Lexus IS250, but I finally have (after years) got some progress happening now.
Important: I've pieced this thread together from various posts I've made in various forums over the years, so it might not be as cohesive as I'd like, but just look at the pretty pictures!
I just started posting here, so not a lot of people know me yet, but I thought I'd post my AE86 up for now. Maybe I'll post some Supra stuff in a while") . Here it goes...
. Here it goes...
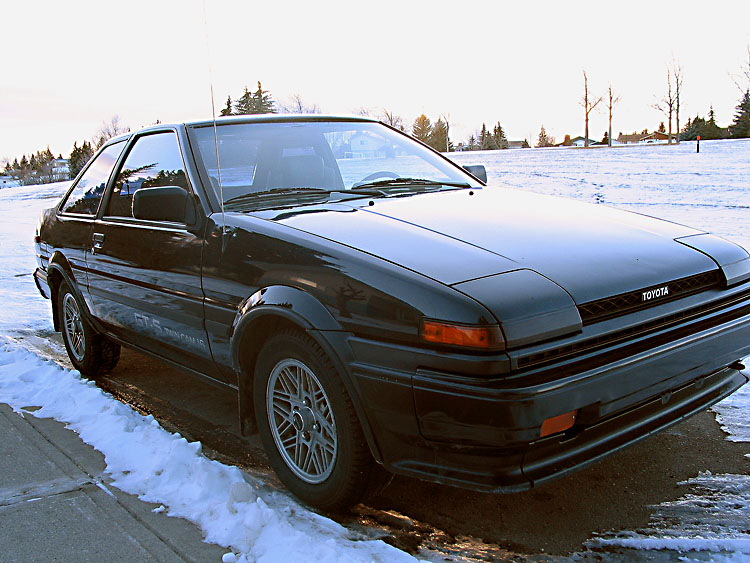
I bought the car from my uncle who owned it since new, he bought it in April 1986 from Stampede Toyota (where I now work in parts), from Todd Brown (who was the General Manager up until around 2008 I think). I paid $1800 for the car, and drove it for 2005.
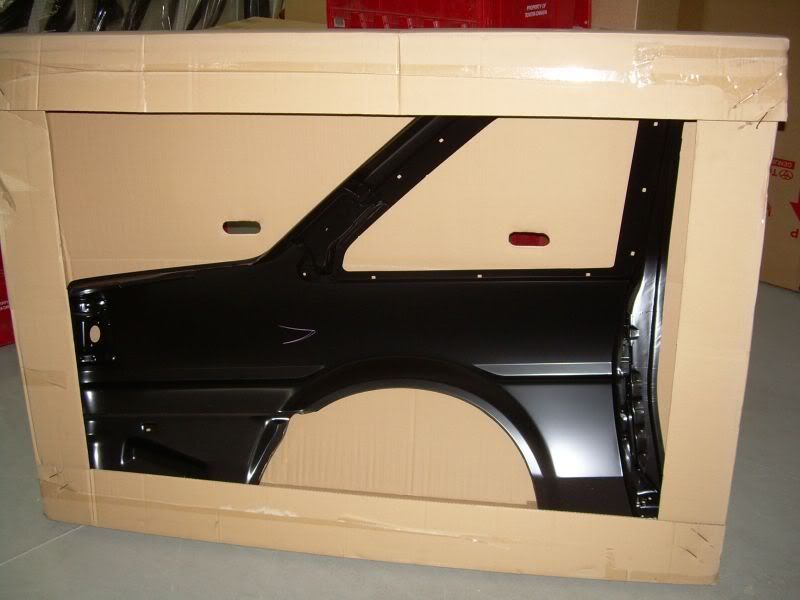
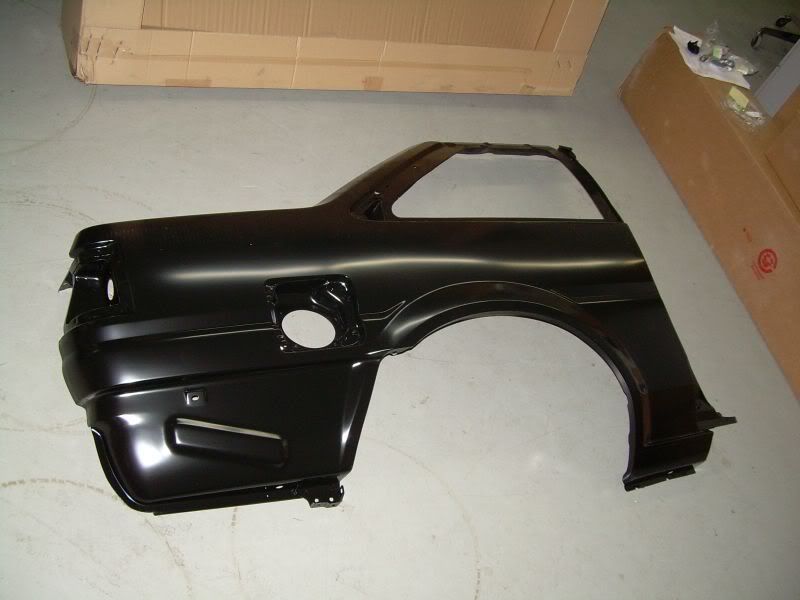
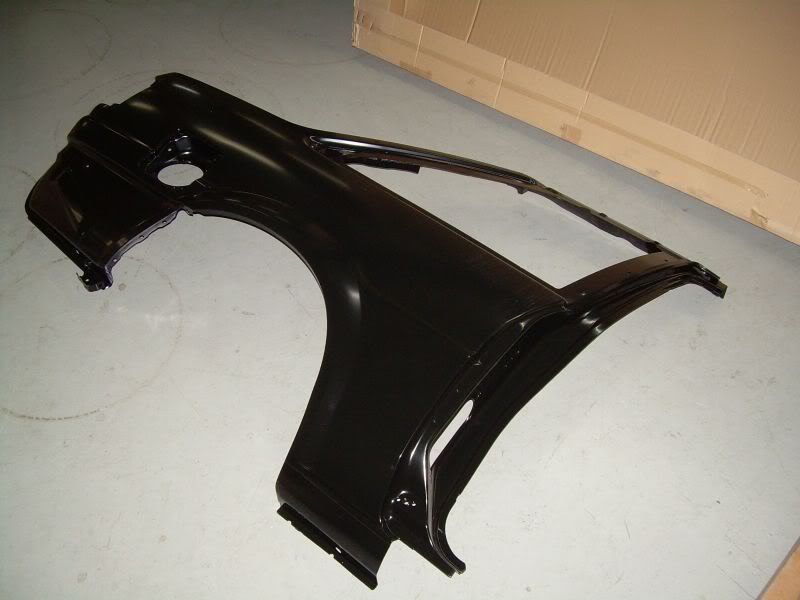
I don't have pictures of everything, and it's all random, but it's worth taking a look through I think anyways. I don't have my custom "stock" exhaust (stock exhaust with the piping replaced with mandrel bent and with a flex section -- will be ceramic coated). Or things like my new OEM fenders, replacement rust-free AE86 JDM Levin doors (no side impact beam), etc.
Enjoy!
I'll start from the beginning. The day the car came home from the dealership, May 2, 1986:
Couple more pics from the late 80's/early 90's:
Car had hail damage in around 1991'ish. Was repainted locally:
After the repaint they put the door decals back on in the wrong spot at the front of the door.:
MAD nostalgic picture of myself and my uncle in 1992 (I was 6 years old in this photo):
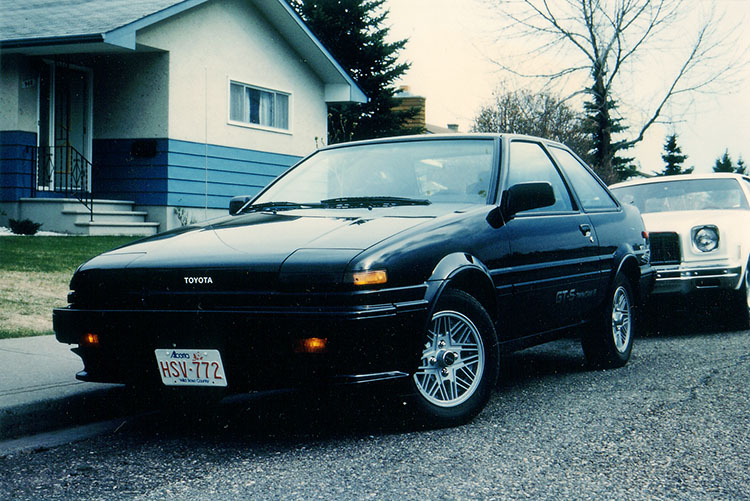
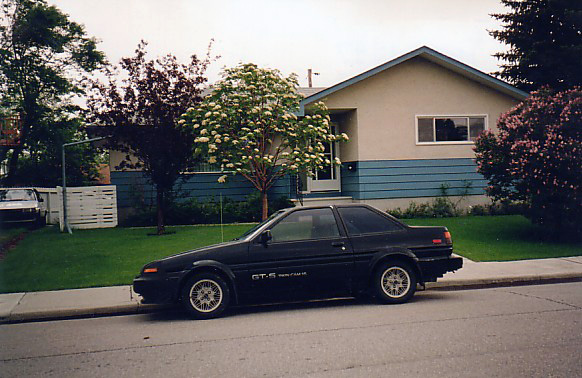
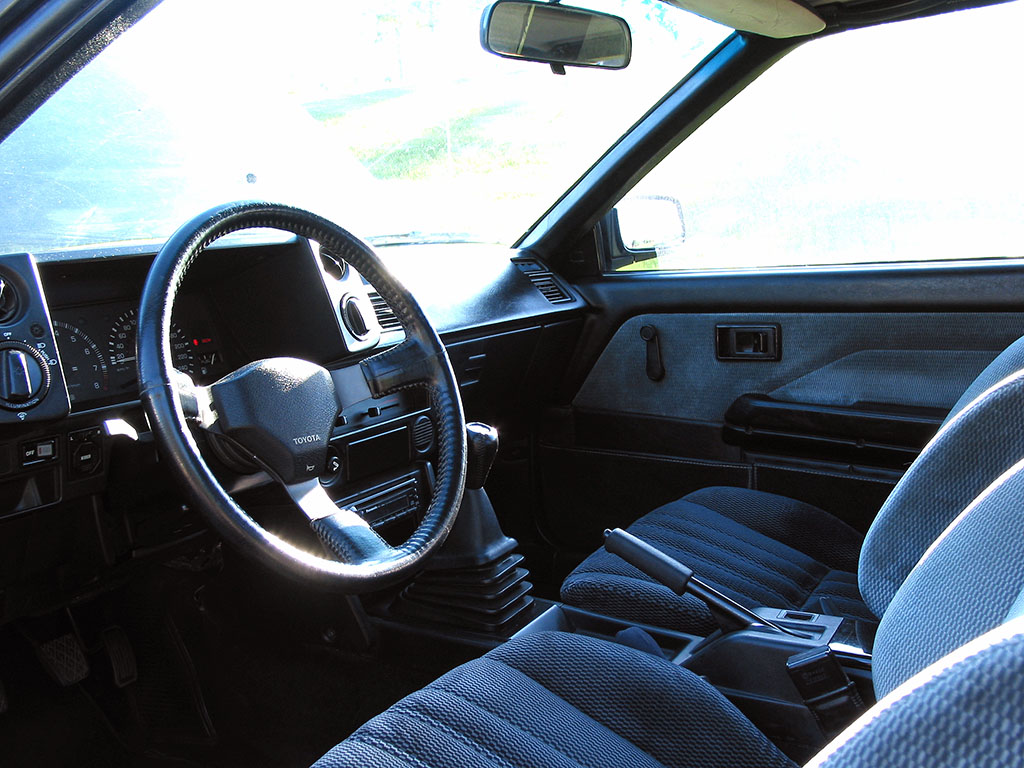
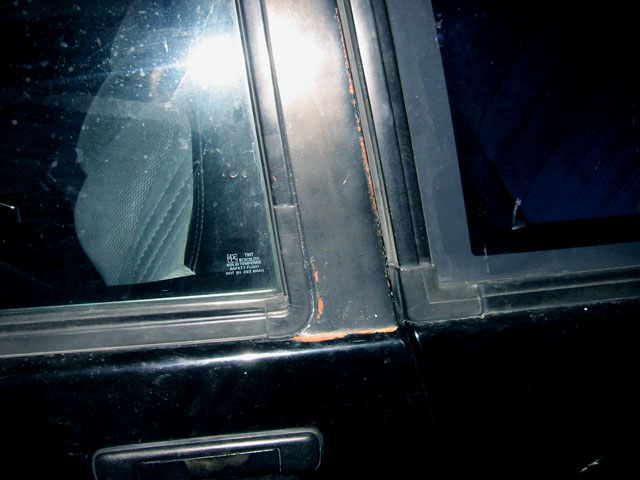
Now, onto my ownership of the car, these are the "before" shots. These are from 2004, when the car had 122,000 miles.
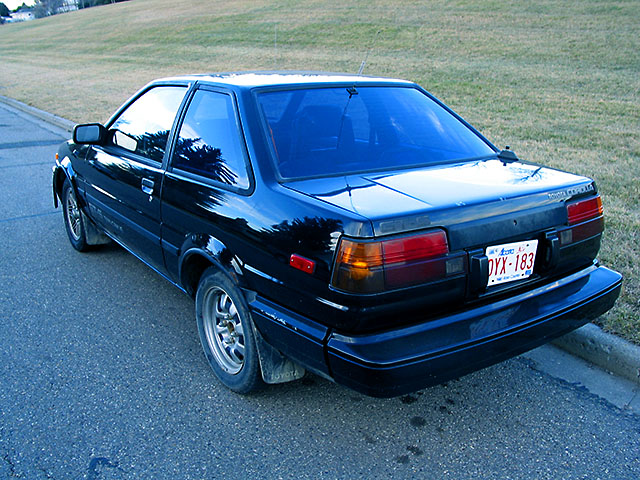
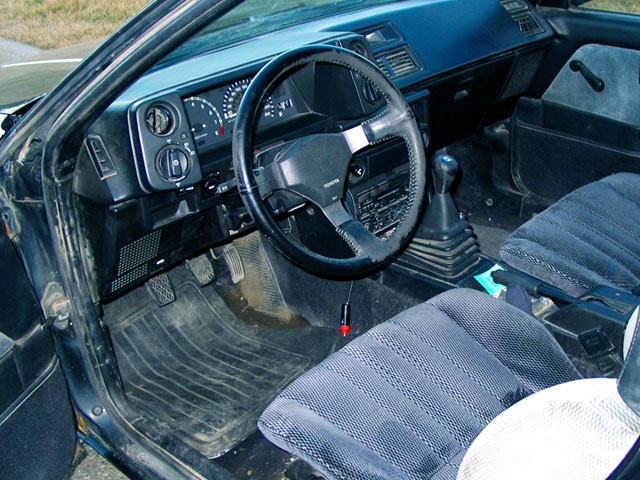
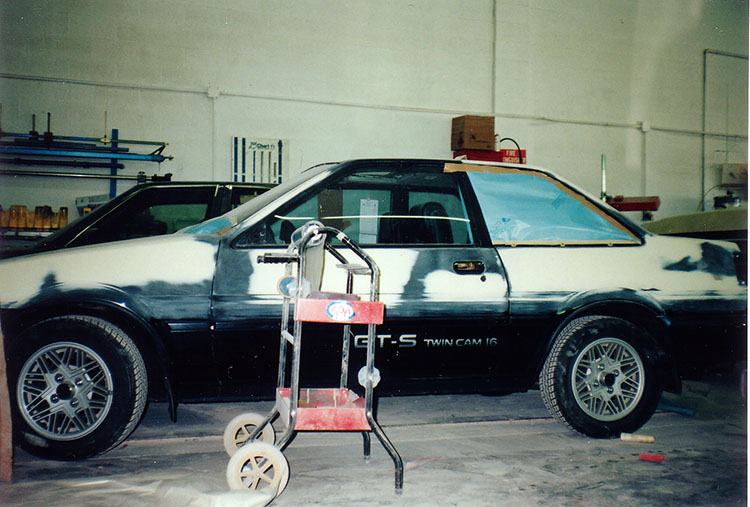
I cleaned it up real nice during 2005, but the rust still got worse during that one half winter I drove it (04-05). I took it off the road at the end of 05, looking like this:
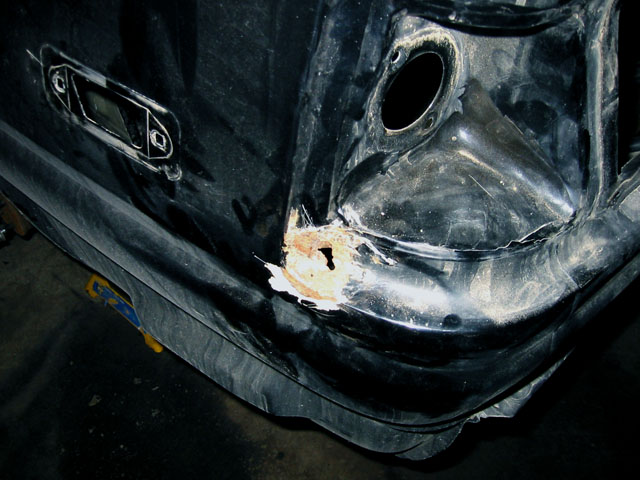
I stripped the car down to begin rebuilding it, after the strip down, it looked something like this:
I worked on it for a bit, doing some repair here and there, the bug for ordering brand new EVERYTHING was in the works at this point.
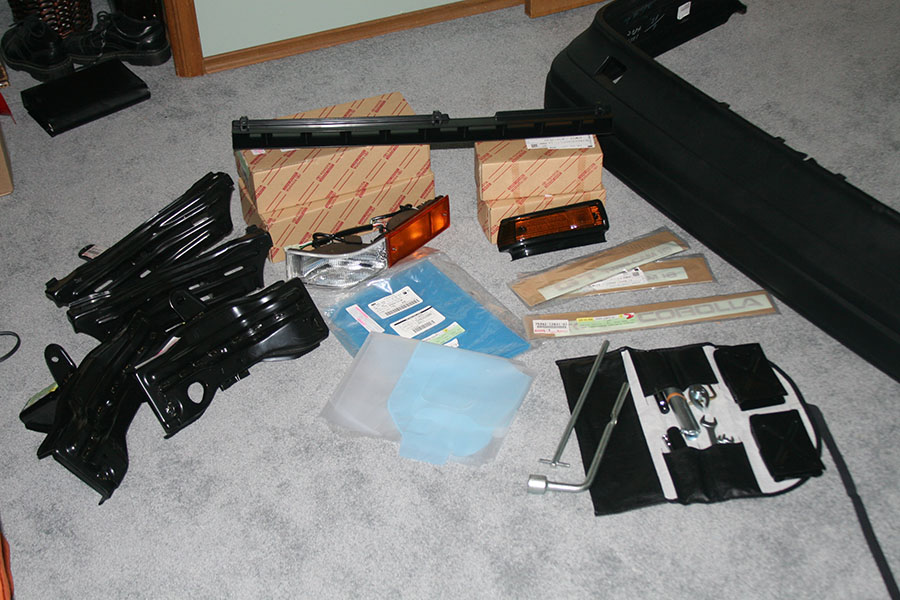
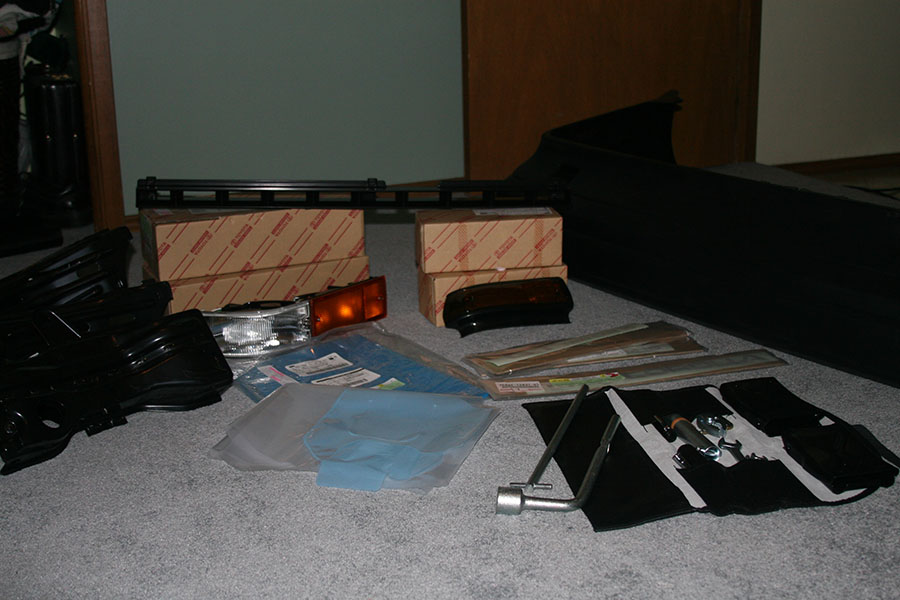
Now it was time to start ordering more and more and more and more parts. Eventually leading to myself getting a job at Toyota, getting a mad discount, and ordering more and more and more parts.
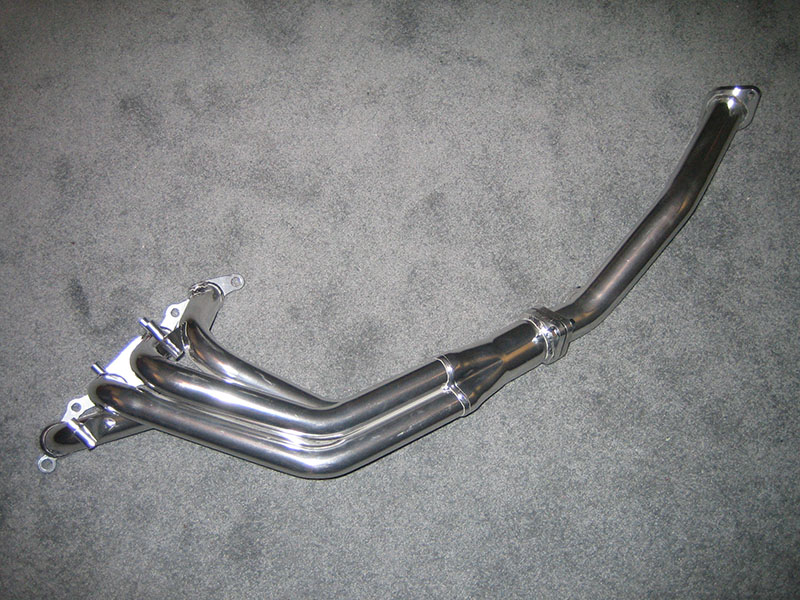
My TRD header:

My new side trim:
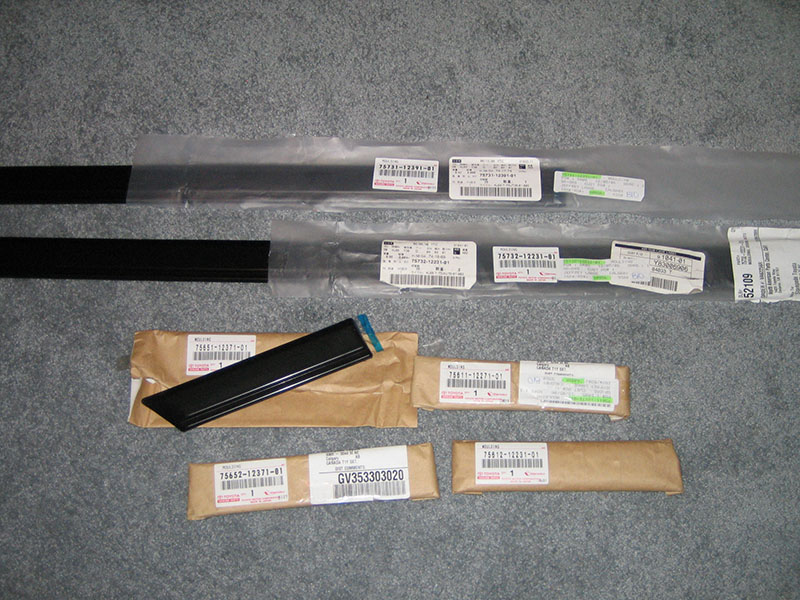
Next, my new trunk trim, upper windshield trim, new wipers (500mm and 425mm), and my new rad shroud, and don't forget that sweet 4A-GE sticker:
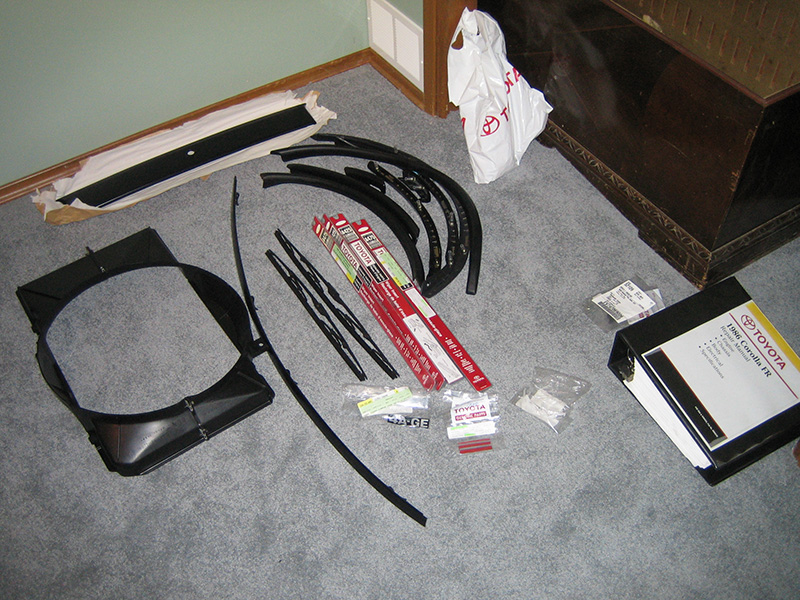
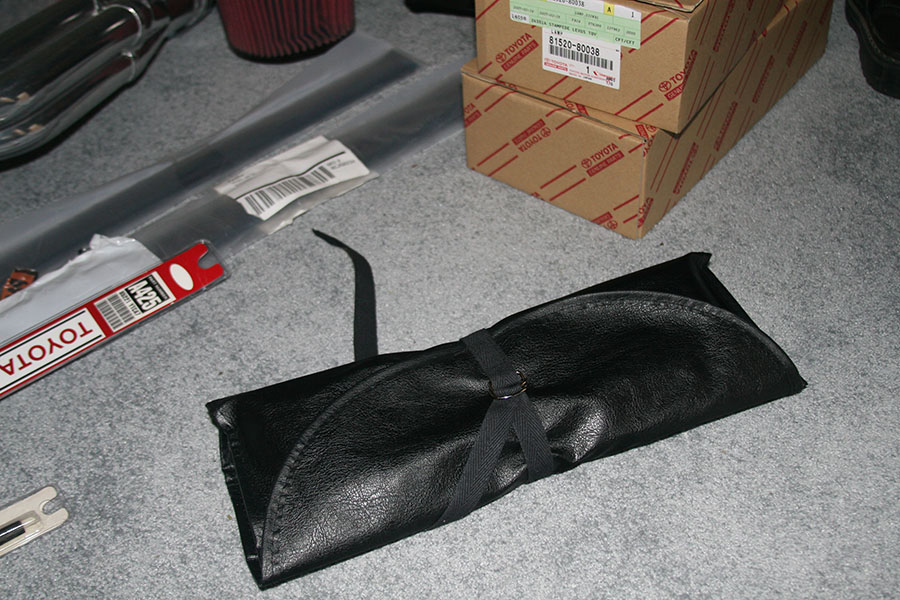
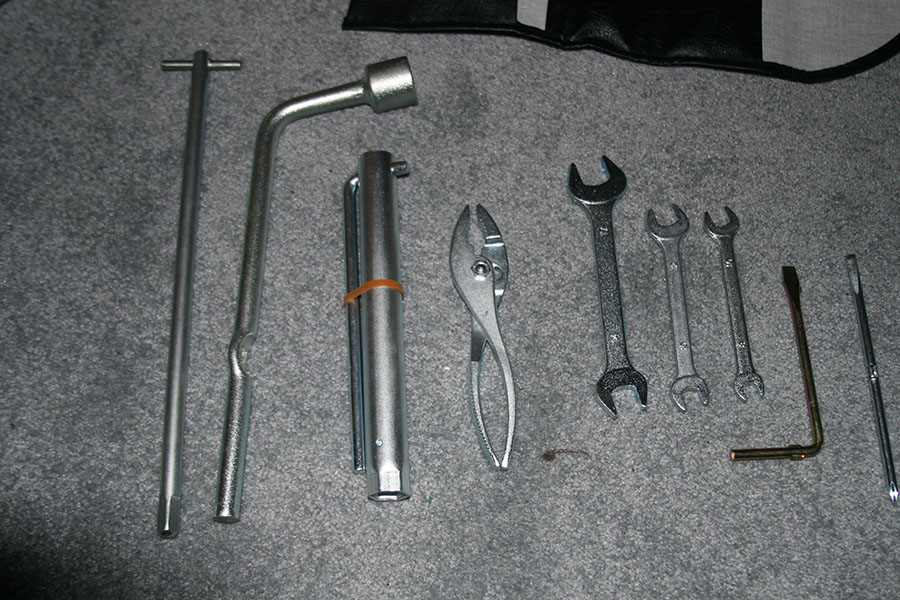
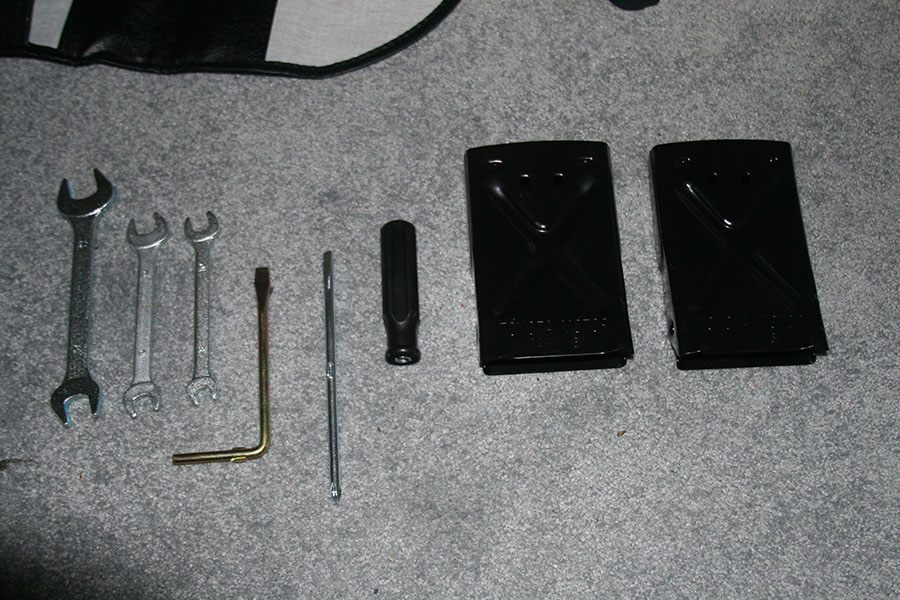
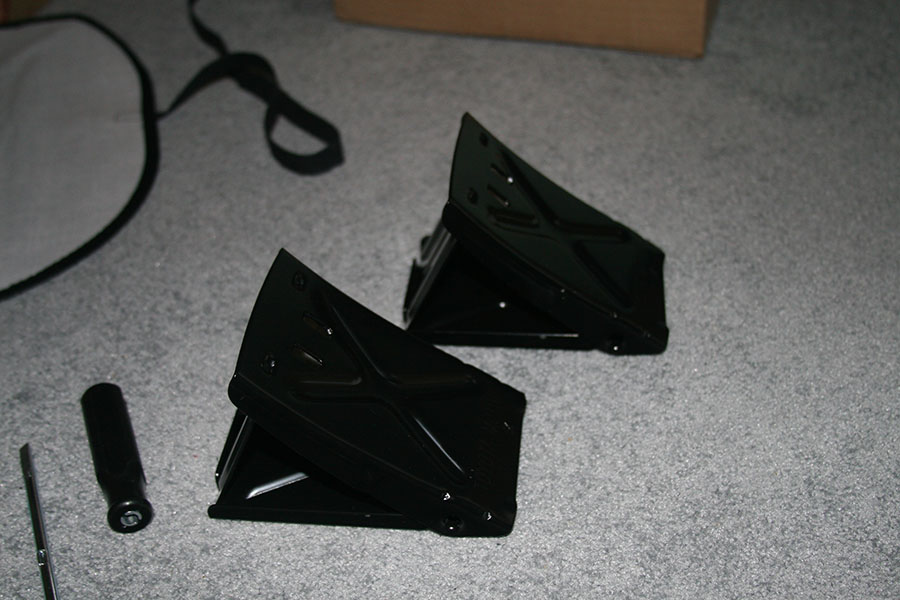
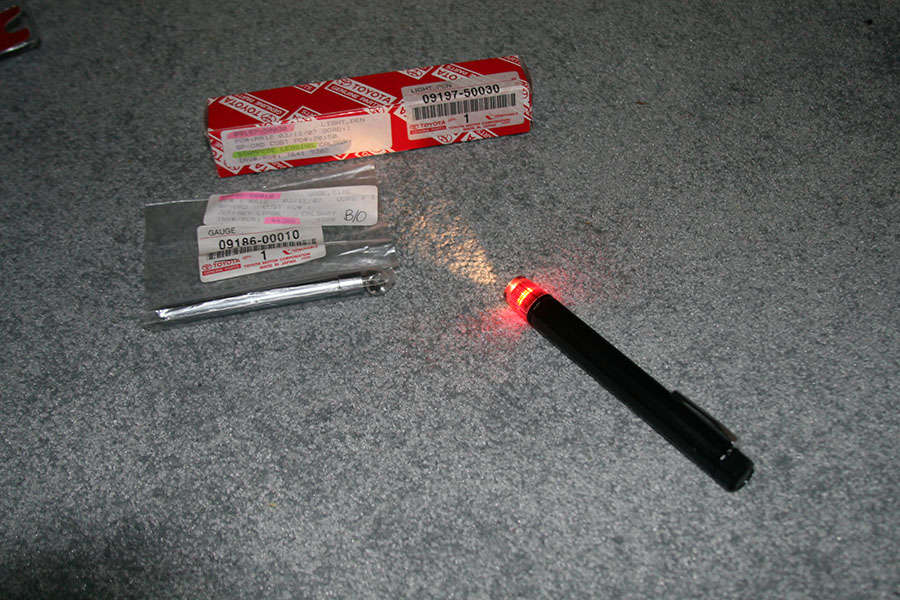
My Japanese OEM toolkit, all of these parts came standard on Japanese AE86's (except the flashlight (Celsior) and the pressure gauge (Celica)):
From DoriKaze.com:
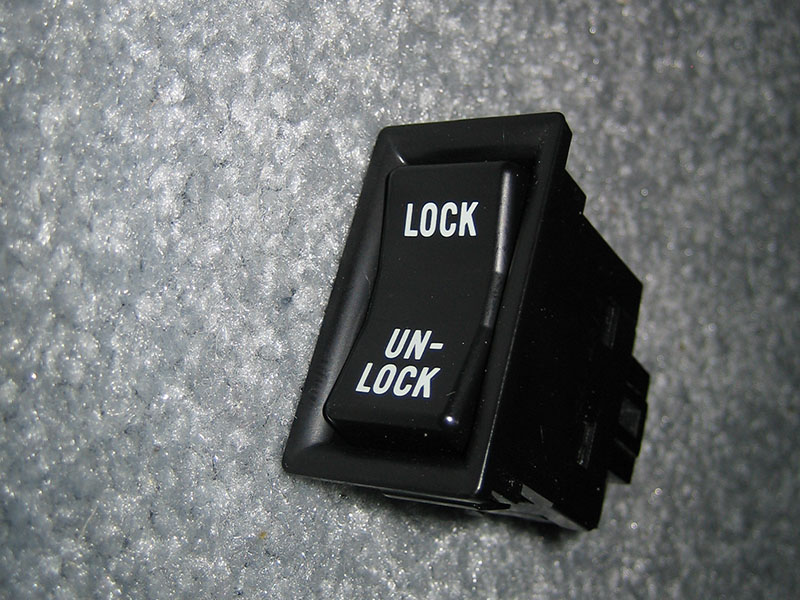
Factory 82-83 Celica power door lock switch:
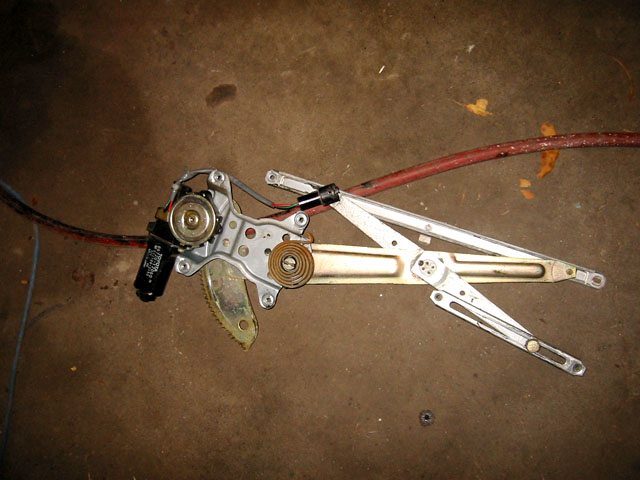
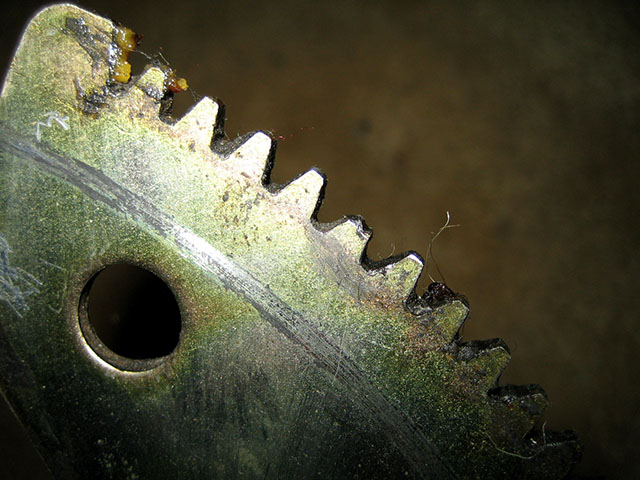
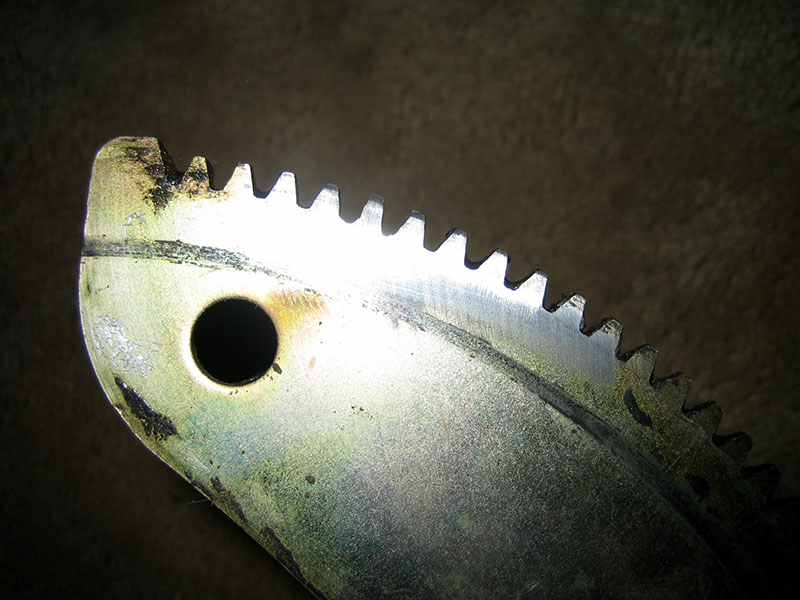
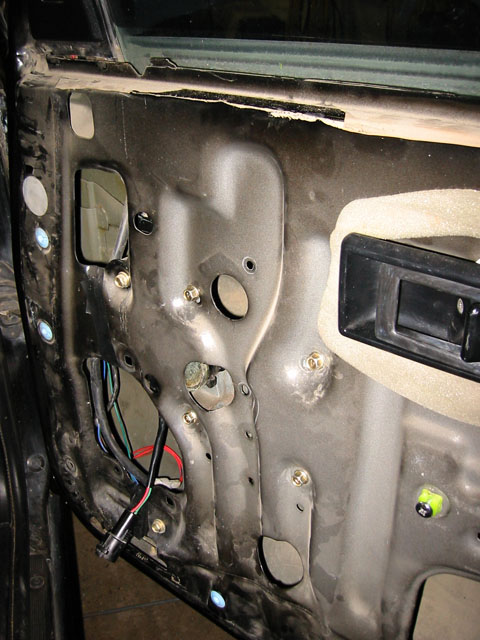
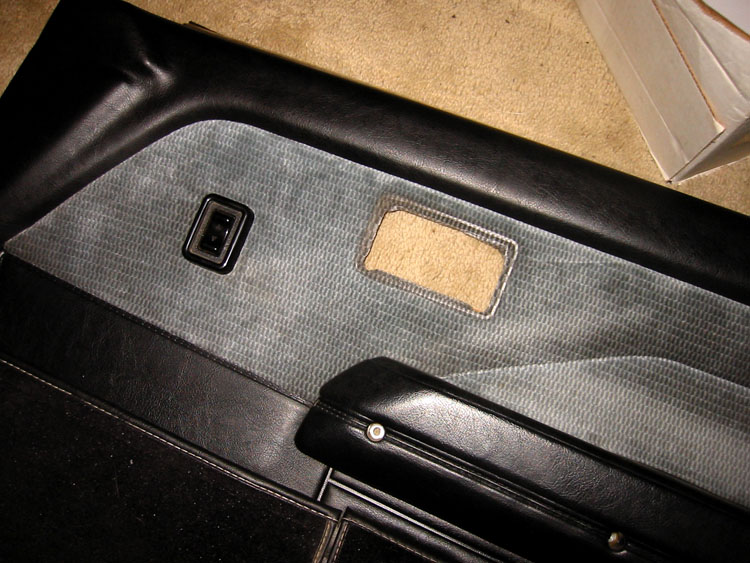
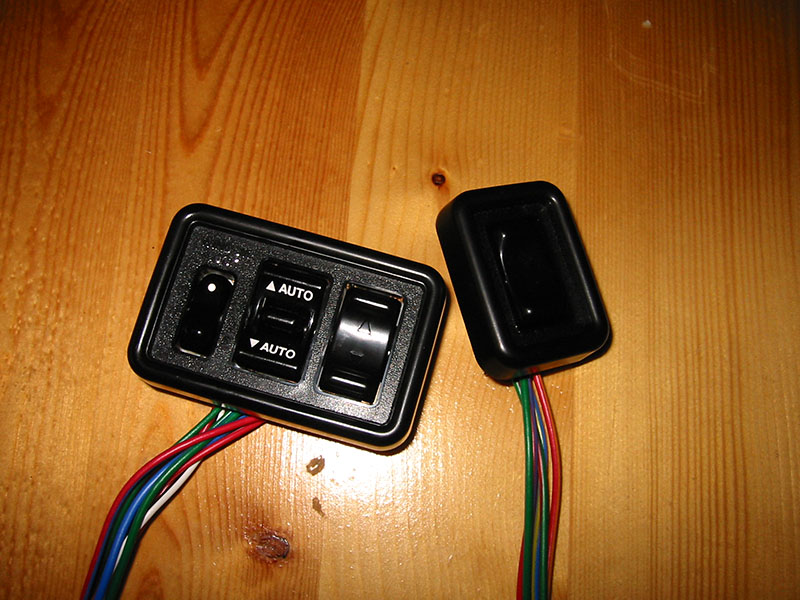
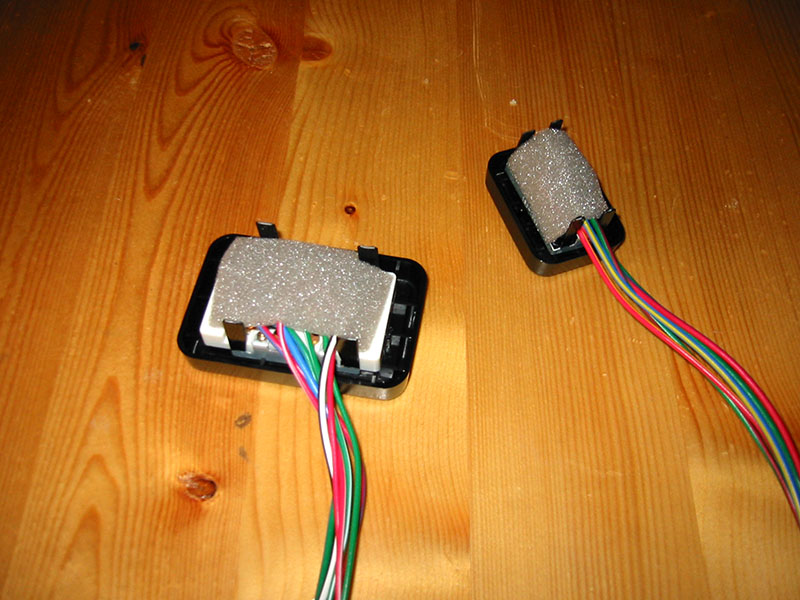
I also added power windows, which was a process as well...
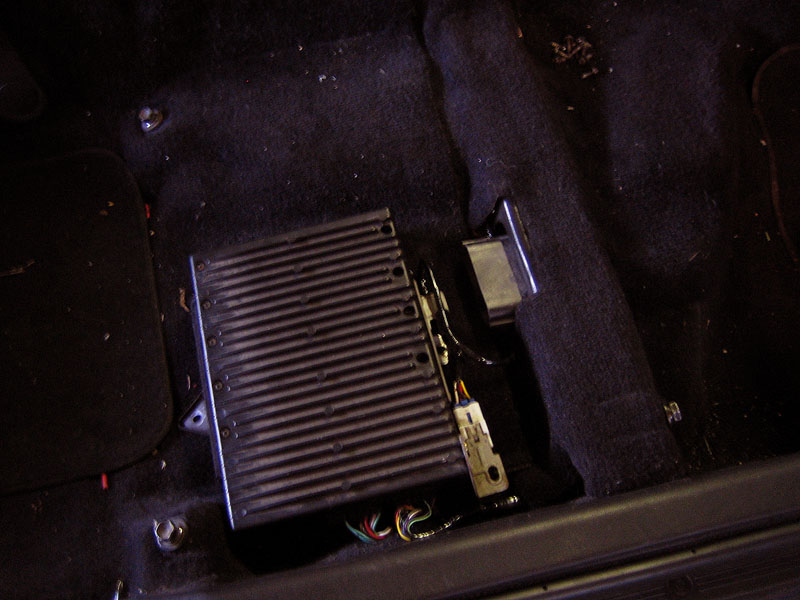
I've also added a complete JZA80 stereo/amp setup to the car:

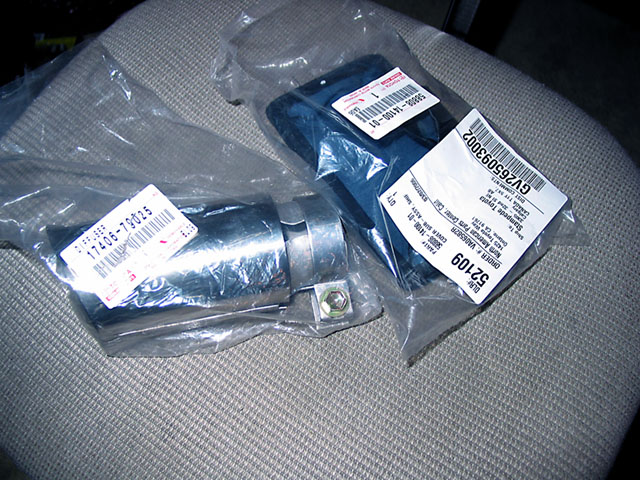
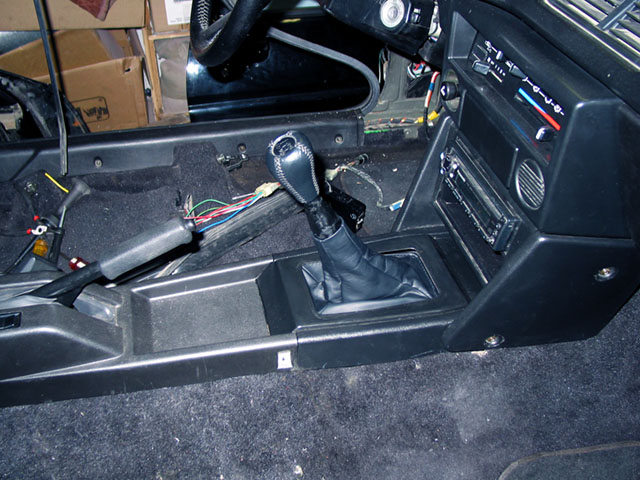
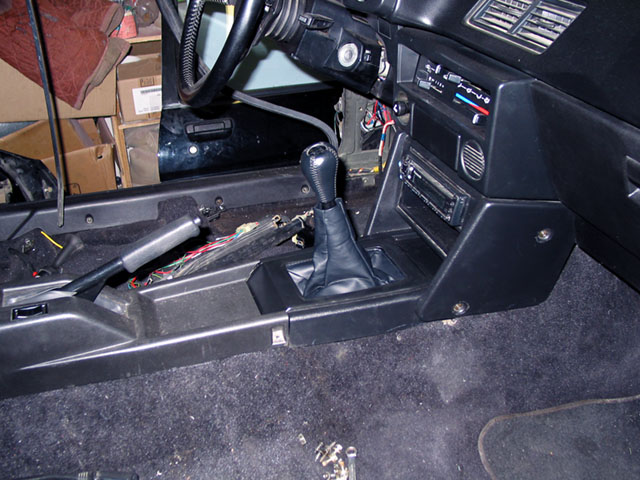
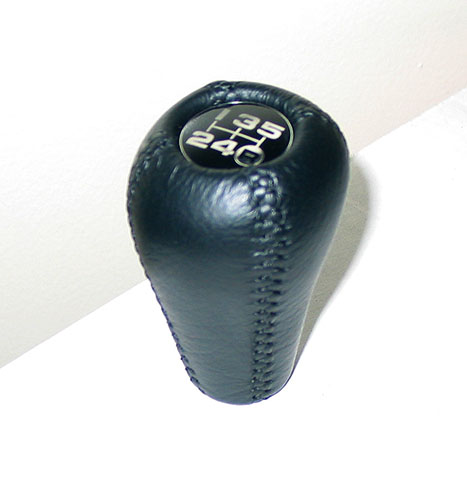
Someone shown in the last post was the new shift boot I got, which was for an MA61 Supra, I modified my shifter to fit it correctly as well.
I also ordered a factory exhaust tip:
I've also added the Japanese variable intermittant wiper switch:
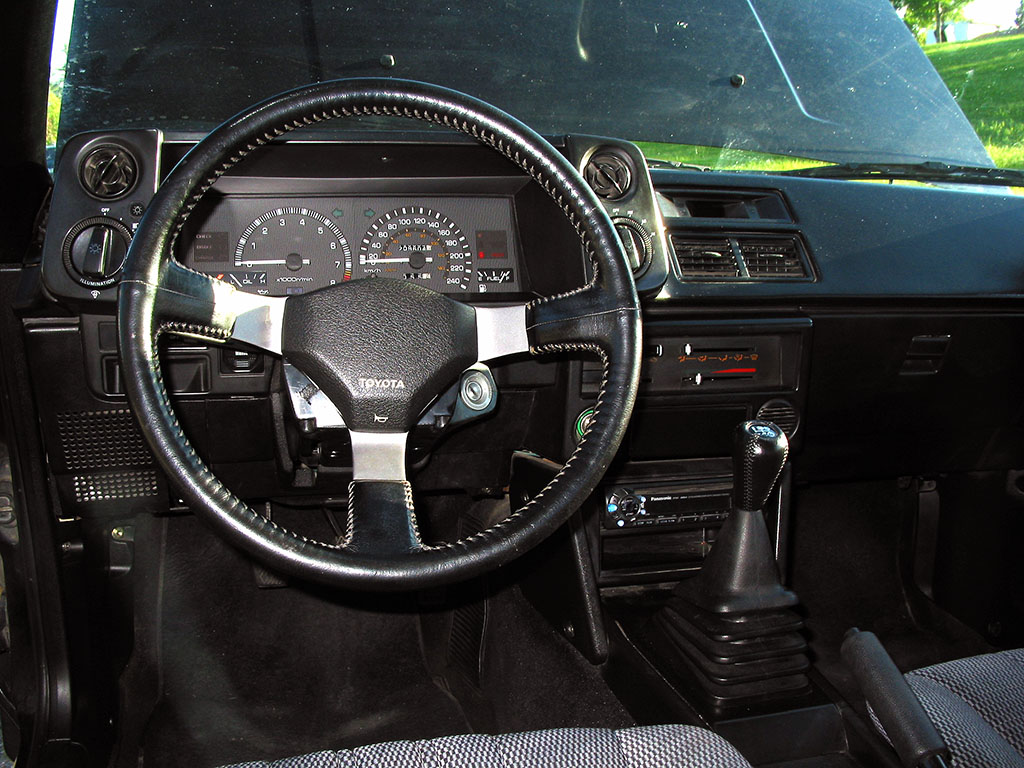
Random new stuff (horn button, brakes, etc):
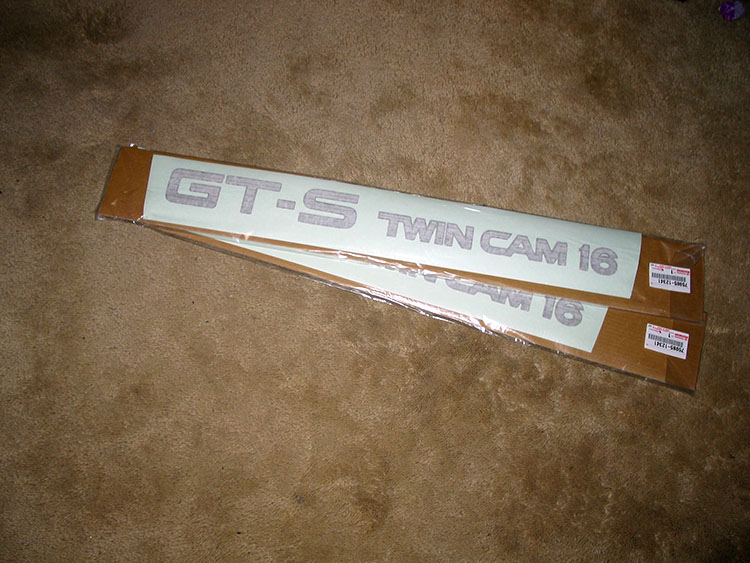
New decals for the car:
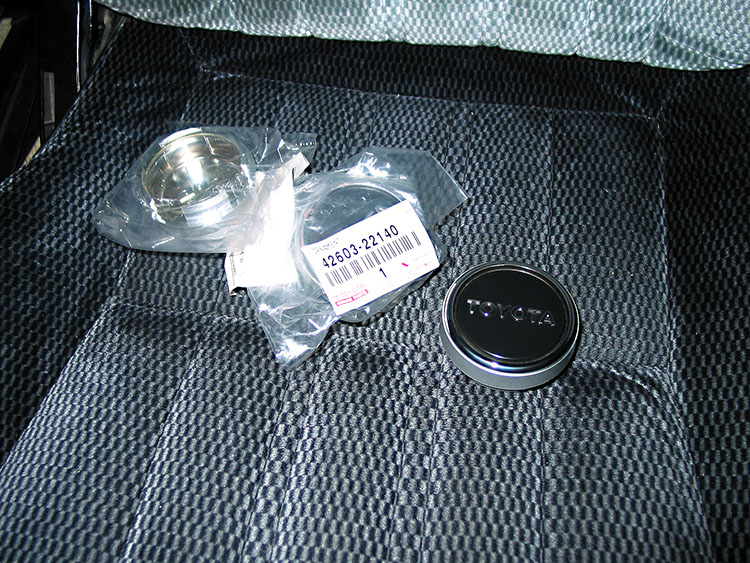
New wheel centre caps:
I also decided I needed to be a bit more JDM...
(Yes that is new door plastic -- the stuff that goes between the door panel and the door frame):
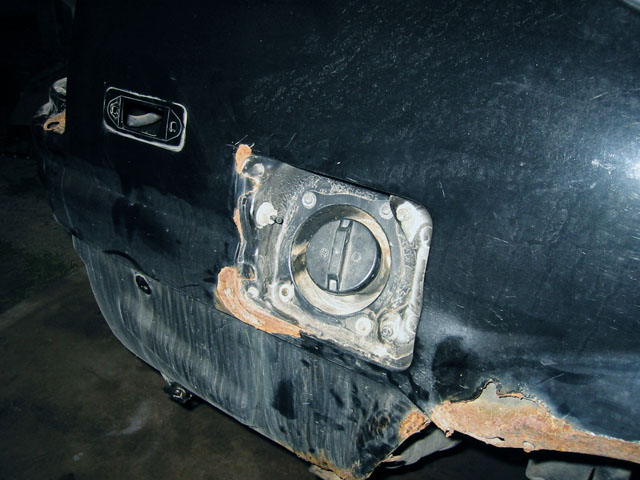
Now... onto that pesky rust...
Onto those quarter panels... I was told over and over again, no new quarter panels. I wouldn't take no for an answer!
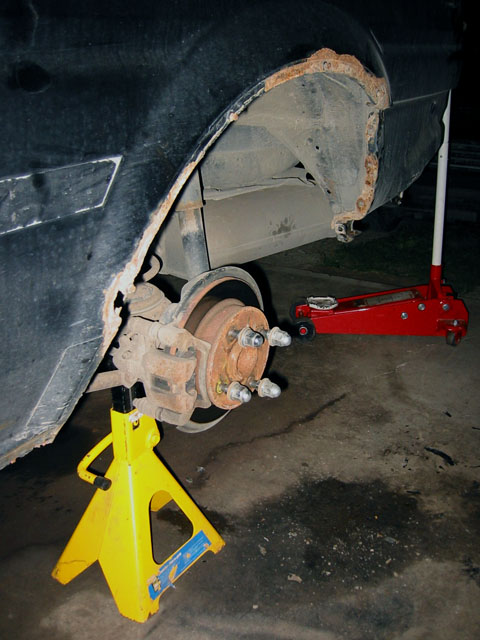
Outer wheel housings:
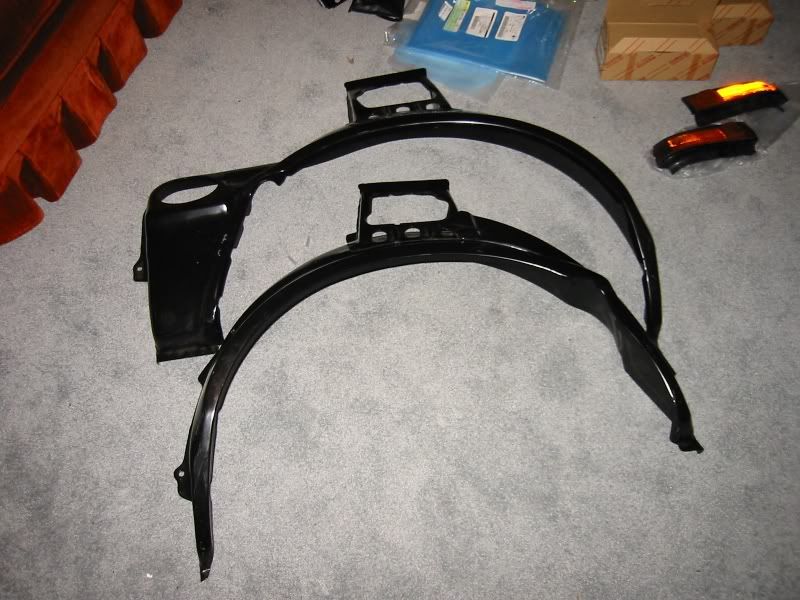
Quarter panels:
This is worth posting:
Yes... I also added cruise control:
Knowing that I am the OEM guy that I am, doing some of these things was difficult for me. I've tried to stay as OEM as possible, doing things as I think Toyota would (albeit without the research dollars and casting abilities, lol). Everything on the car is either Toyota OE, TRD, or custom made to make things work.
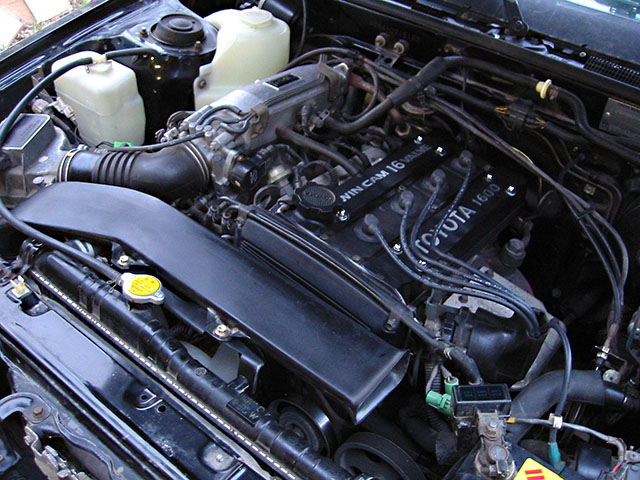
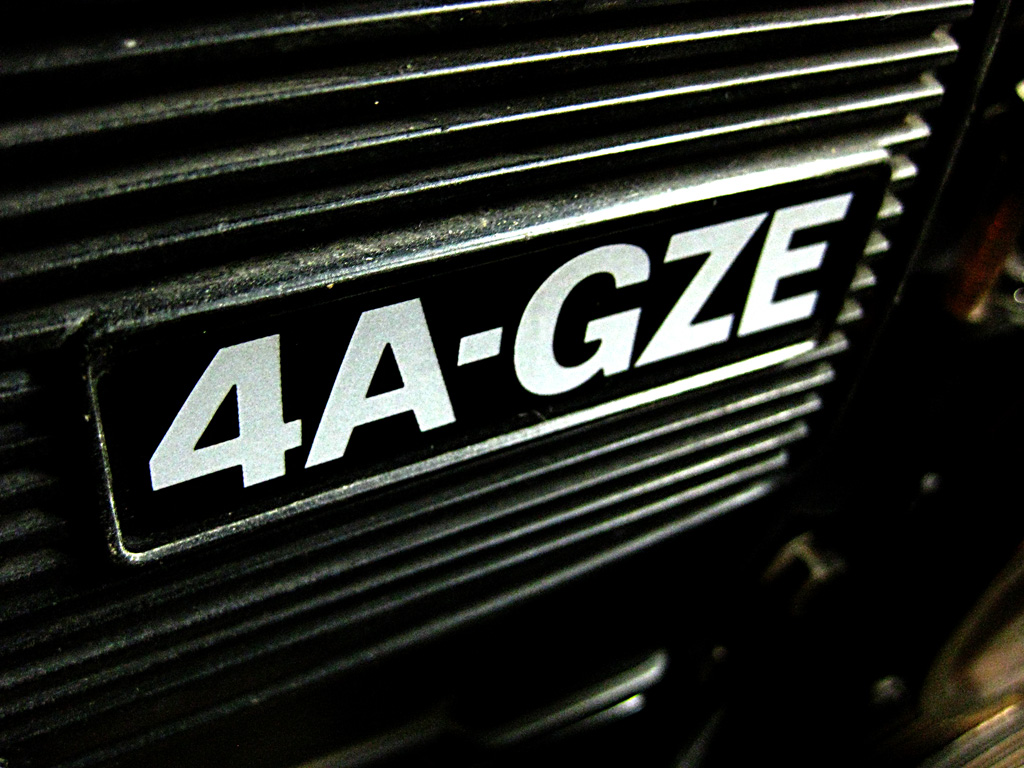
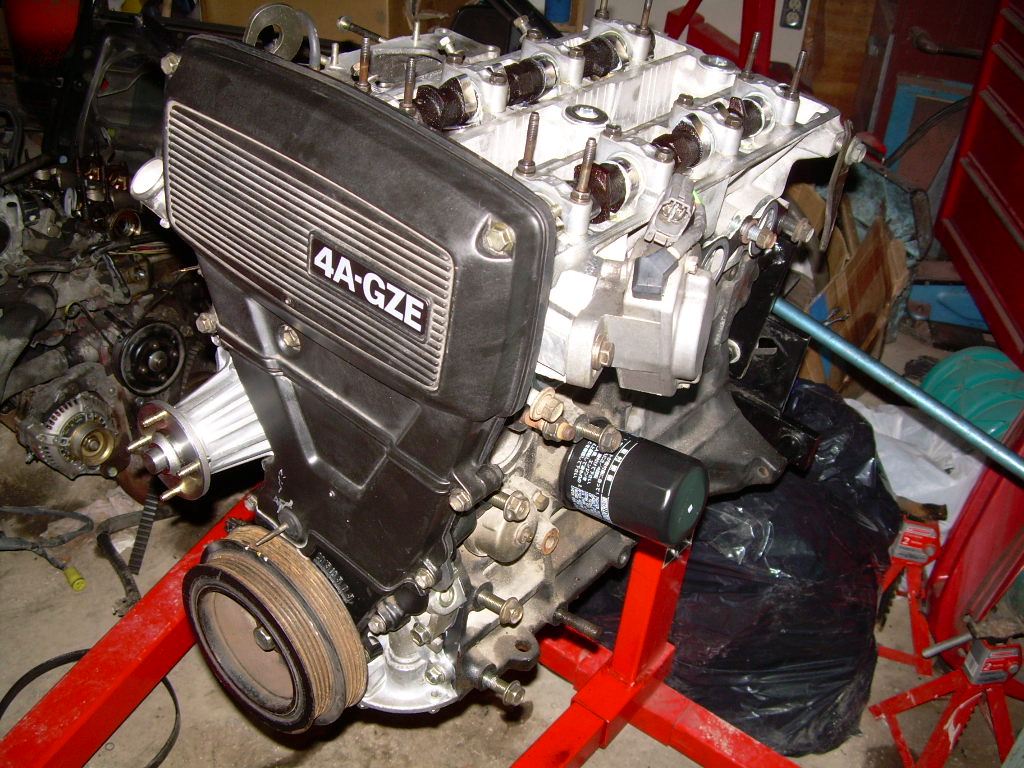
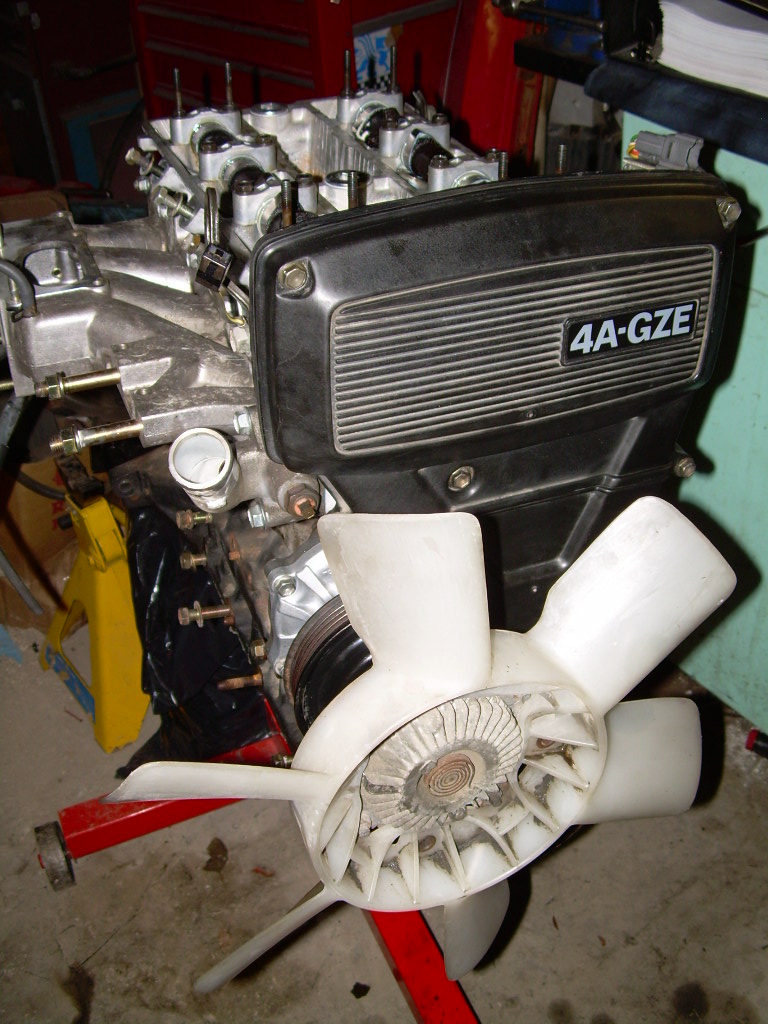
Engine is an smallport MAP-DLI type 4A-GZE from a 90-91 AE92 GT-Z (has the nice oil drain hose and the piston squirters with the coated pistons). Came with a transmission and all the engine accessories on it, but no harness, ECU, igniter, SC relay or VSV's. Bought it here in town from someone who was going to swap it into their AE86, but decided to go KA24 (I think) instead.
Came with coils, MAP sensor, injectors, and all that good stuff, but not some of the stuff I really needed. Lucked into finding a harness on eBay that came with the ECU, igniter, VSV's, relays, resistors, everything. Beautiful! Got it shipped here.
Pulled apart the 4A-GZE, found some rust inside cylinder #1, not excessive, but it was clear that the engine had been sitting for a long period of time!
Ordered myself a new set of piston rings for the smallport, and a gasket set for an AW11 4A-GZE, plus an intake manifold gasket for the smallport 4A-GE. I honed the cylinders to clean them out and get some nice crosshatching back. Cleaned the head up and changed all the valve seals.
I'm using the RWD water pump front half with the FWD rear half. This gives me the extra strength of the larger bearing in the RWD water pump to use the clutch fan, as well as the appropriate rear housing to clear the SC12 supercharger.
I will be keeping all accessories on this engine, the car will be modified to accept the complete GZE assembly with A/C and Power Steering. Chances are I will need to lower the front sway bar and perhaps change the end links, we'll cross that bridge when I can lower the engine into the car and check clearances. Cruise control will also be functional as well.
On to the pictures.
Original largeport T-VIS 4A-GE removed:
Started cleaning up the engine bay (more cleaning/painting to come):
And it begins:
Getting the longblock assembled, with RWD water pump, and the cams from my original largeport 4A-GE:
Clutch/fan test installed just to make sure everything was fitting, other stuff needs to be installed first obviously:
Test fitting the 2JZ VVT-i ignition coils in the 4A-G head. The fit is fantastic, still need to make some holding brackets for them, but it will come:
Test fitting the spark plug wires to the ignition coils, to make sure it's all kosher:
The valve covers will be powder coated silver and repainted with the stock bluetop colours. I much prefer this look to any other (including my own black valve covers). The ones on the engine in these pics are in rough shape, but give me an idea of how it will look. I love it:
Ordered myself a new smallport 4A-GE spark plug wire cover. It fits with quite a bit of room over top of the coils and wires I've installed:
In this shot you can see the TRD header, which was installed to get positioning for the O2 sensor on the wiring harness. Also apparent is the vacuum valve on top of the power steering pump. On the AE86 this valve is mounted on the power steering pump itself, on the AE92, it is mounted on the steering rack. While using the AE92 PS pump with an AE86 rack, I had nowhere to mount the valve, so I ordered a banjo bolt for the power steering pressure line on a 1MZ-FE. It allows me to mount the valve on the top of the PS pump, retaining factory idle-up on the 4A-GZE. It later turned out that this probably wouldn't work, as the lines won't quite reach. I have since ordered the 1JZ-GTE factory setup from Japan. Don't have any pics of it right now though.:
Coolant piping modified to mount the remote thermostat housing on the side of the engine. In the AE92, this housing sits on top of the transmission. That won't work for a RWD mounting setup. In this first picture, you can see the two pipes bolted to the water pump and water neck, they used to extend to the back of the block:
Holding the thermostat housing in place you can see where it will sit. The heater core pipe was modified so that stock AE86 heater hoses can be used without modification. I had new ones installed a while back, there was no way I wasn't using them, haha:
You can see in this picture the nice welding my brother did to get these pipes to fit properly. Mad props:
Hoses in place on the piping going to the heater core and the ISV (idle speed valve). Need to make sure everything works like from the factory:
Now came the (what I thought was going to be) hard part: modifying the wiring harness to fit the AE86. I expected to spend at least a couple of weeks on this, however when actually diving into it, I realized it would probably be easier than I thought. Spent a couple nights mapping the connectors on the AE86 harness and removing extra connectors from the GZE harness (battery terminal, alternator wiring, etc). I came up with this abortion as the staring point for the GZE harness:
Positioning things on the engine and so on, I organized the new harness into this:
Finally, I loomed everything up and extended a couple wires going to the starter and body harness power source near the battery:
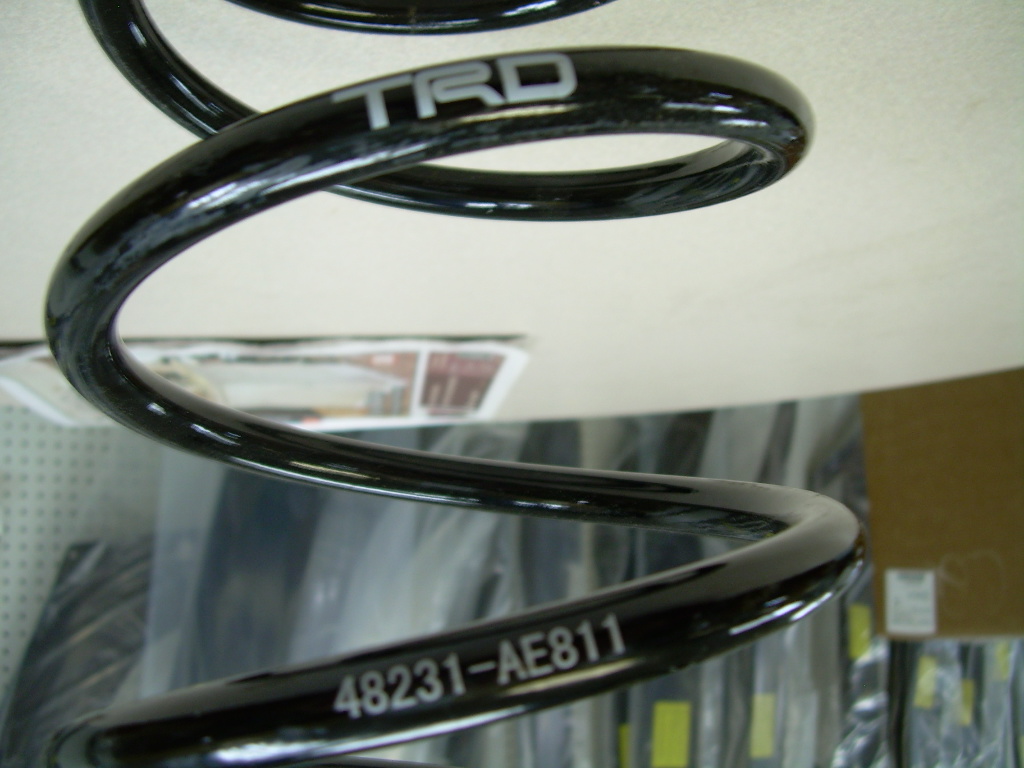
For suspension, I've gone with TRD Japan sport springs, shocks, struts, front sway bar, and the complete bushing set. I have only installed the front sway bar so far, but will be installing the rest soon.
For the rear end, I've gone with a TRD 2-way Limited Slip Differential, as well as a TRD solid pinion spacer.
I am keeping cruise control, so I needed to find a throttle cable that would work for that (from the cruise bracket to the throttle body - stock AE86 is too long). I found that the SV21 and VZV21 cables seem to work not too badly. The SV21 is about 28-inches or so, while the VZV21 is about 29-30'ish. I grabbed the VZV21 one, but I think the SV21 would be fine as well.
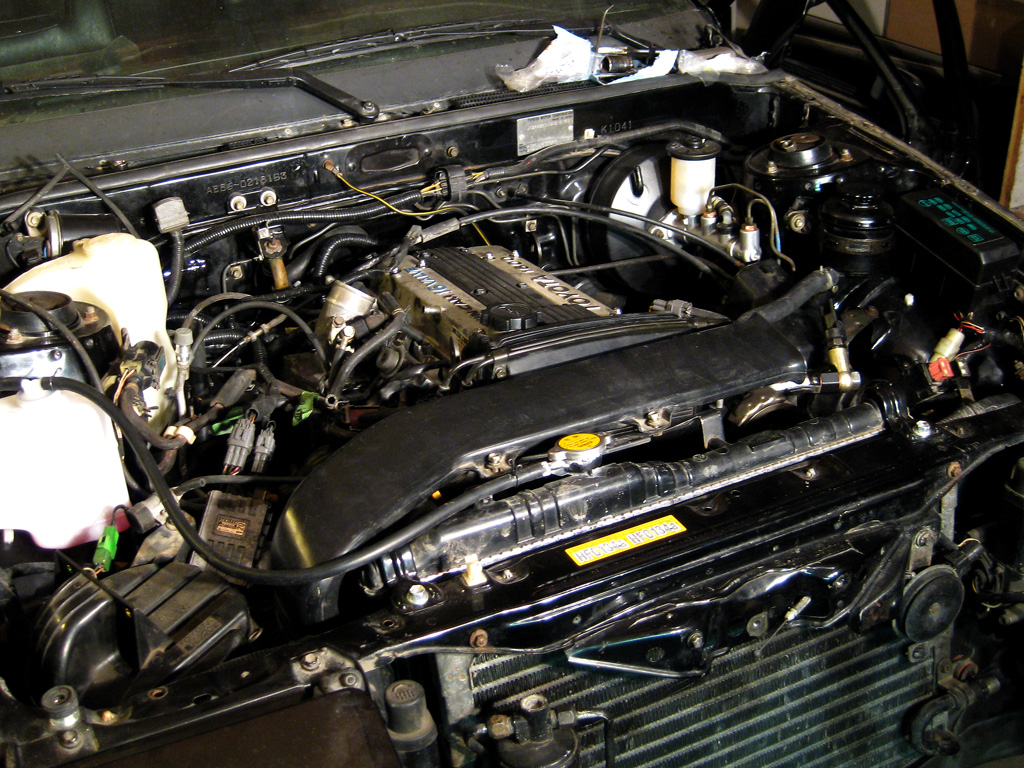
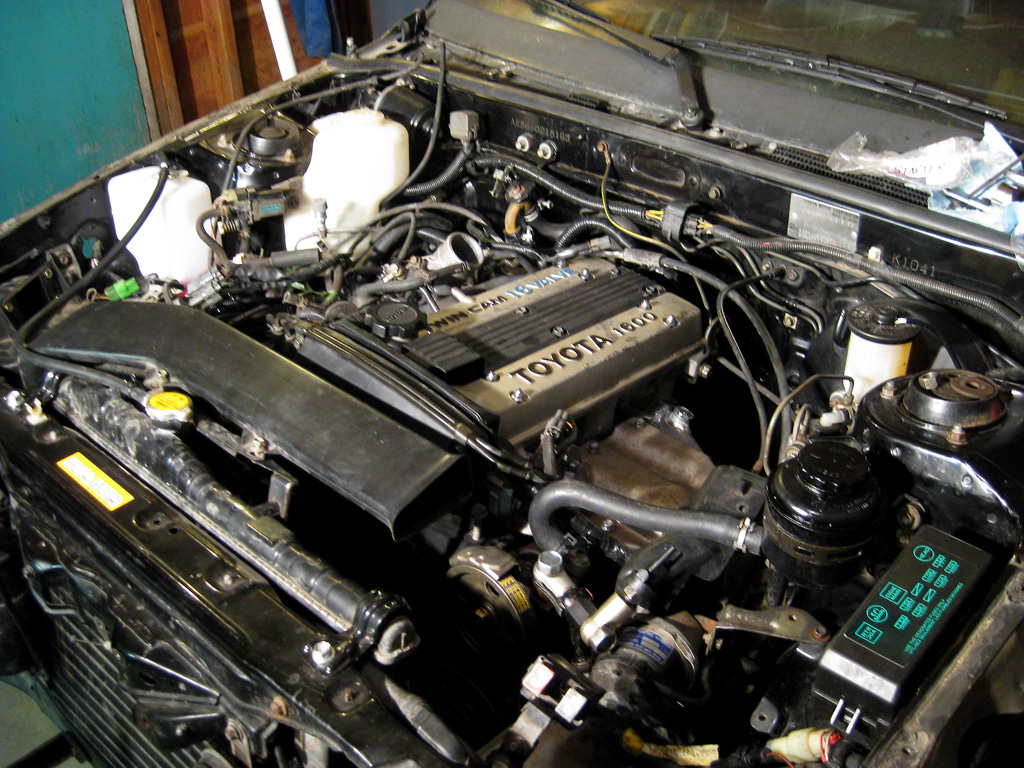
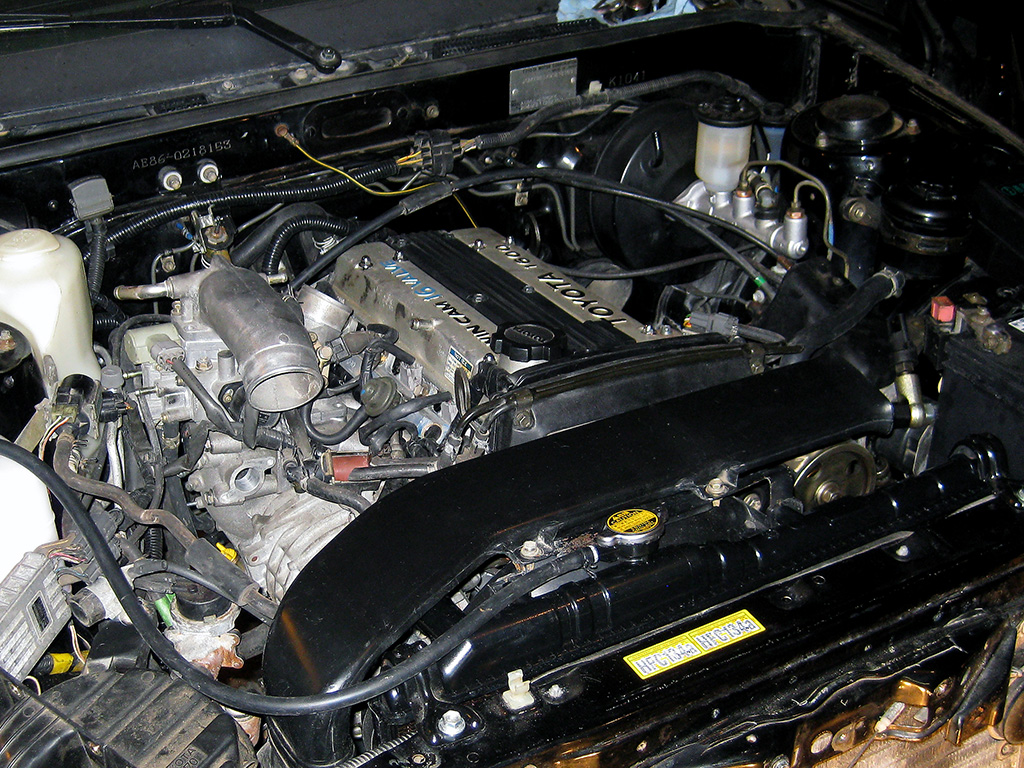
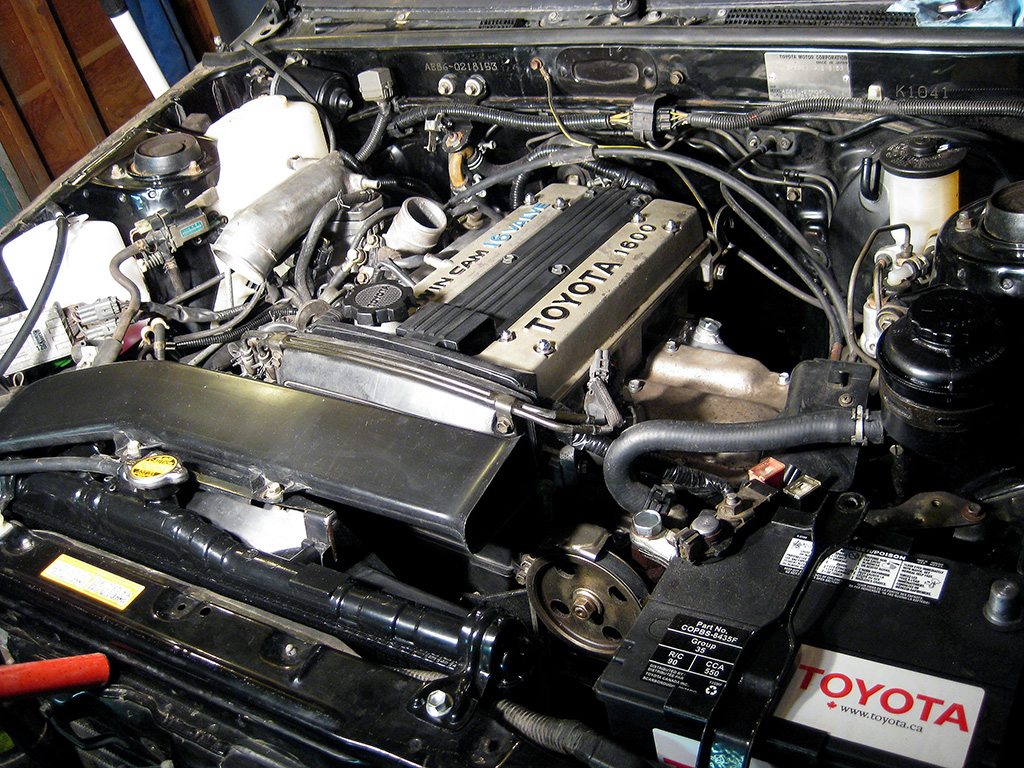
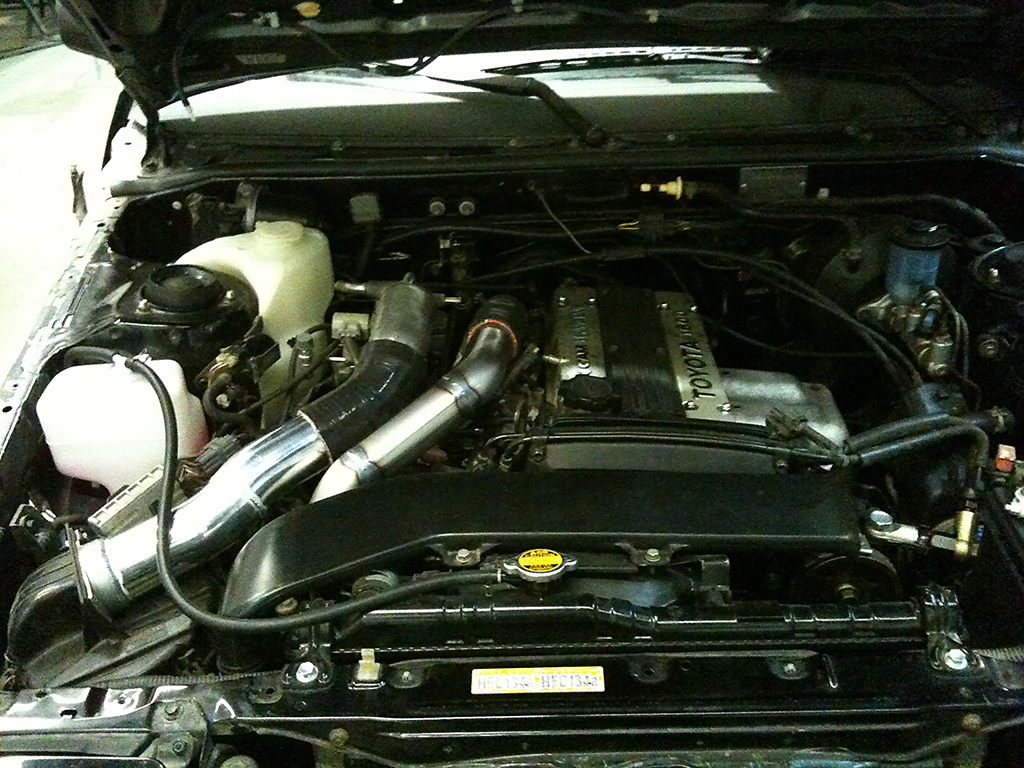
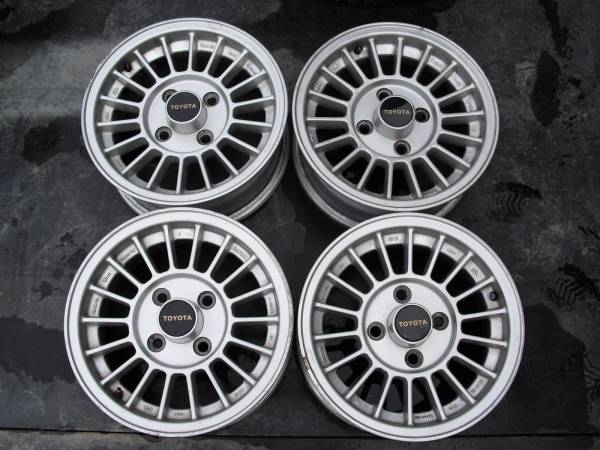
Photo from Japan of wheels I ordered:
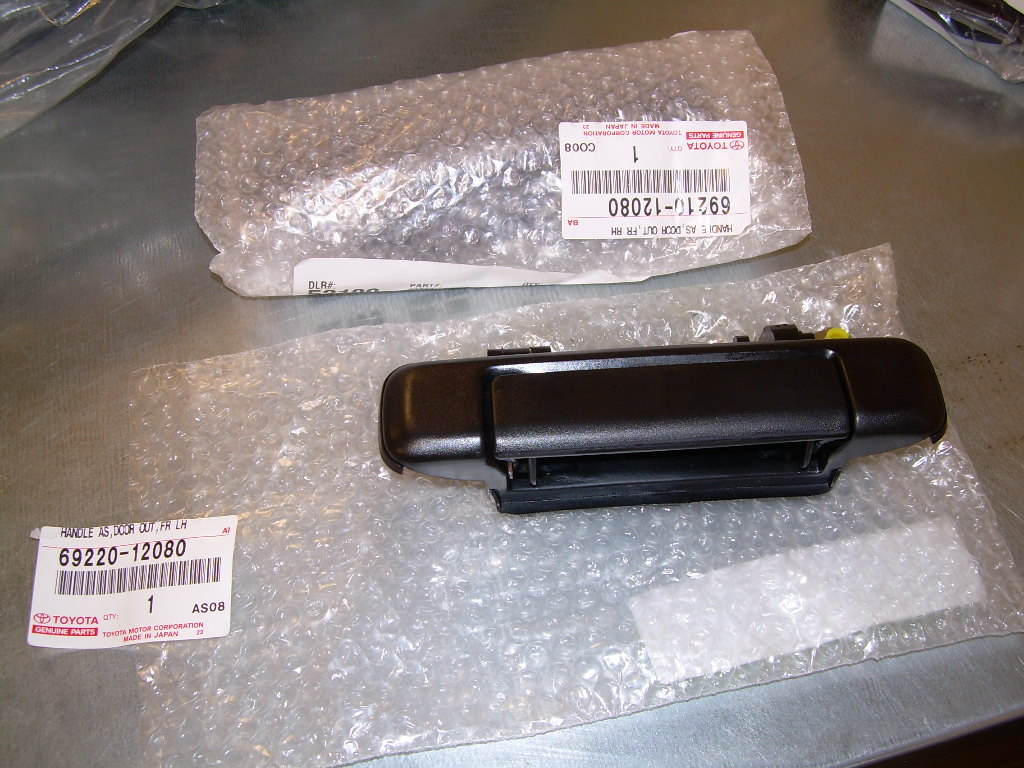
New outside door handles (already replaced the inners and all the foam, etc.):
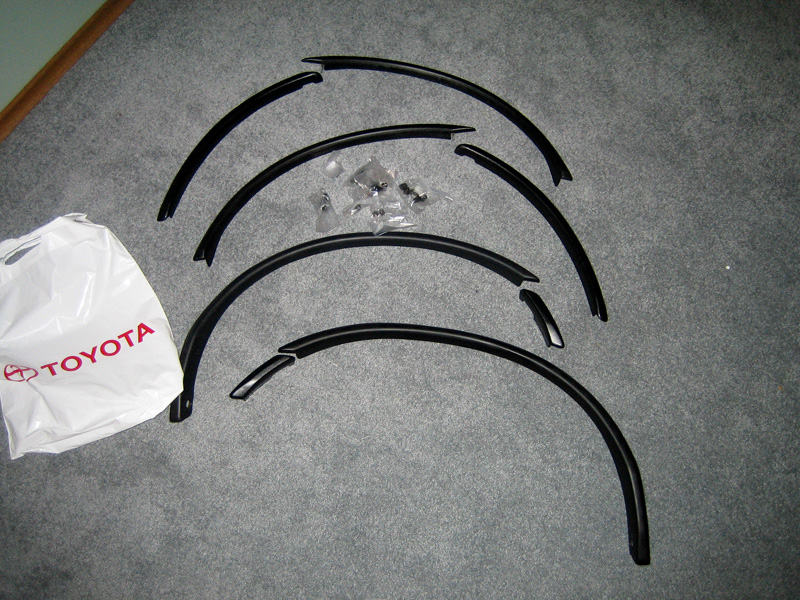
Headlight "eyebrows" and buckets/retainer rings:

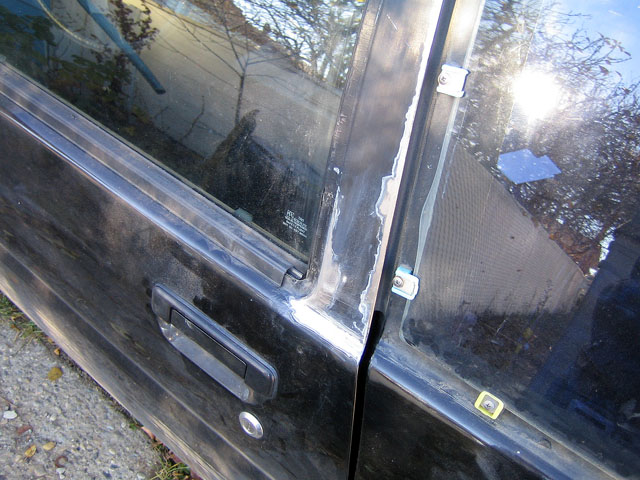
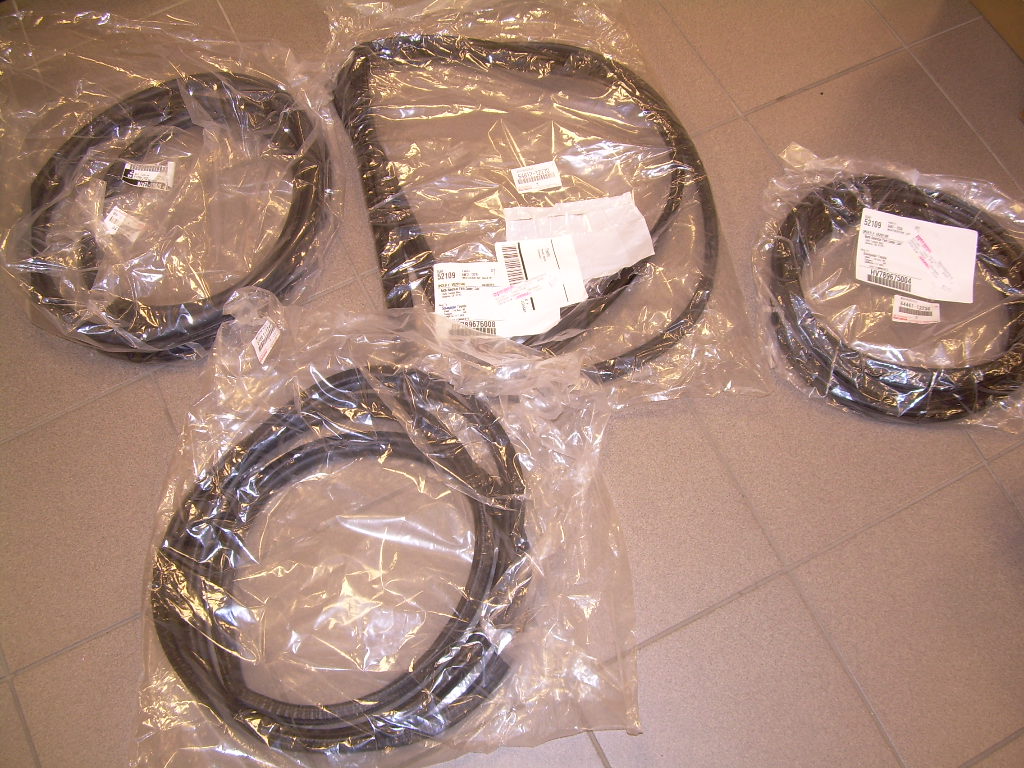
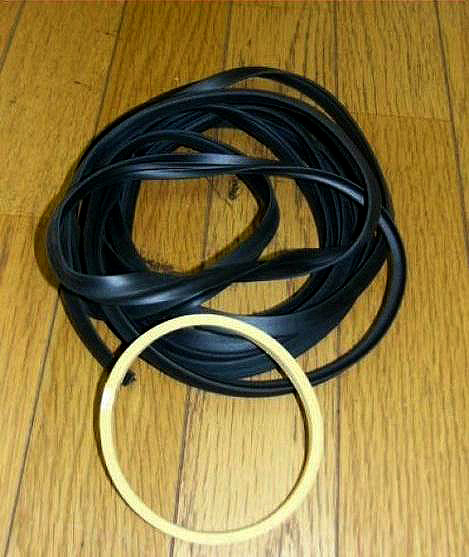
Door, trunk and rear window weatherstripping:
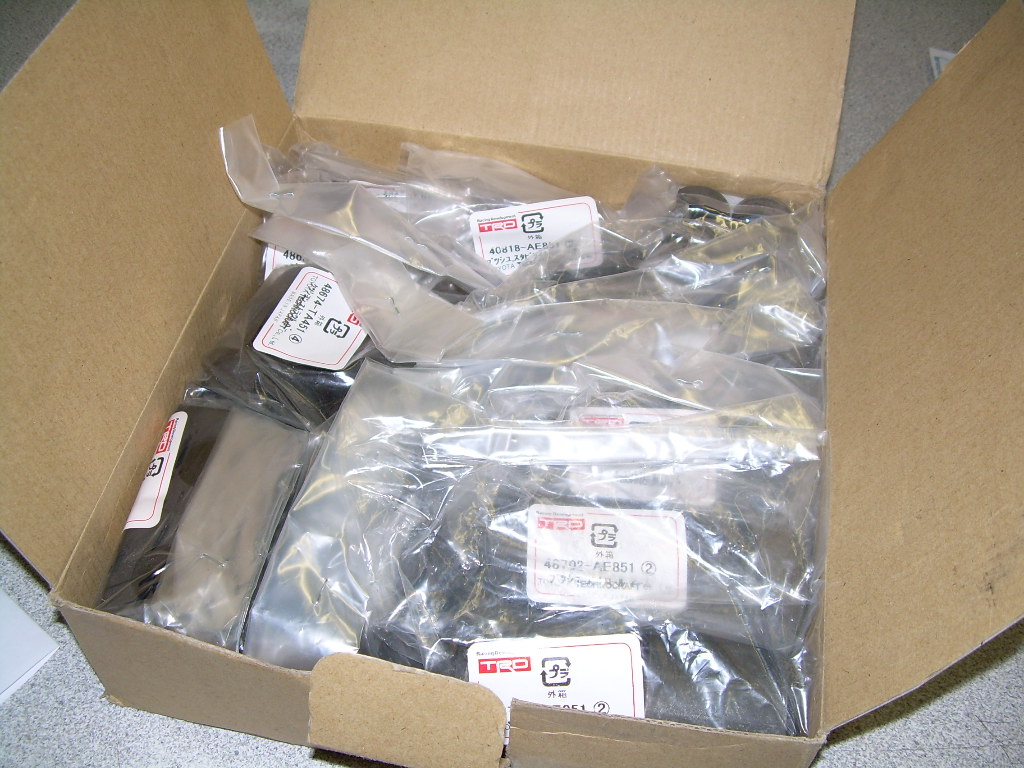
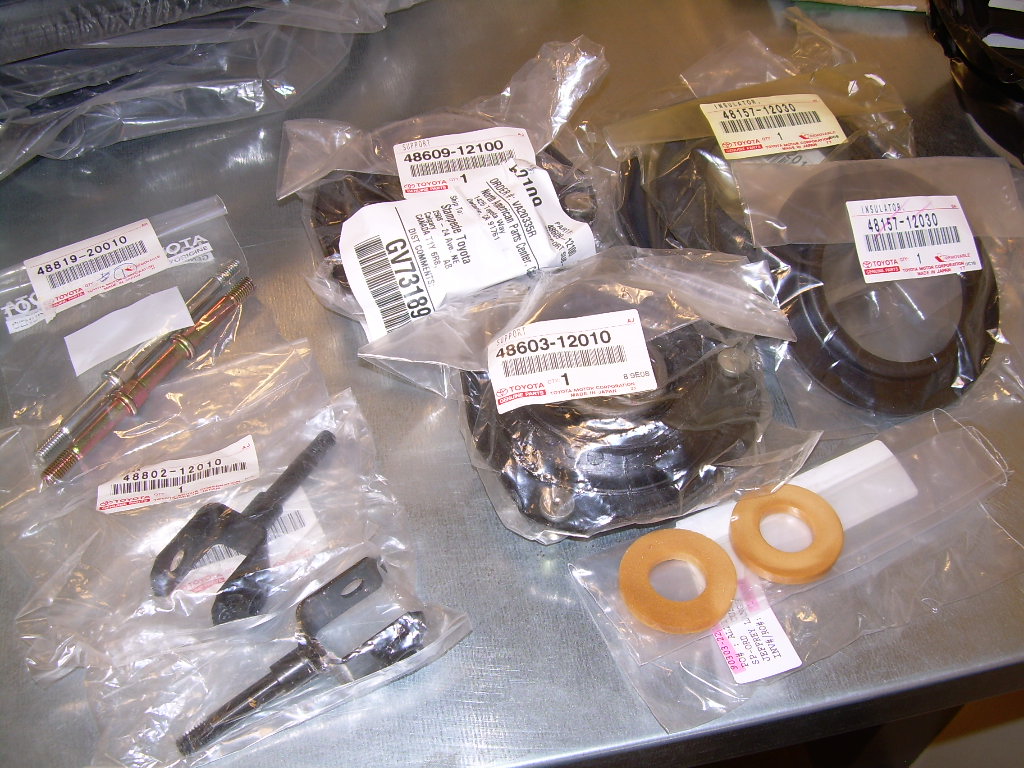
Some of my new suspension parts:
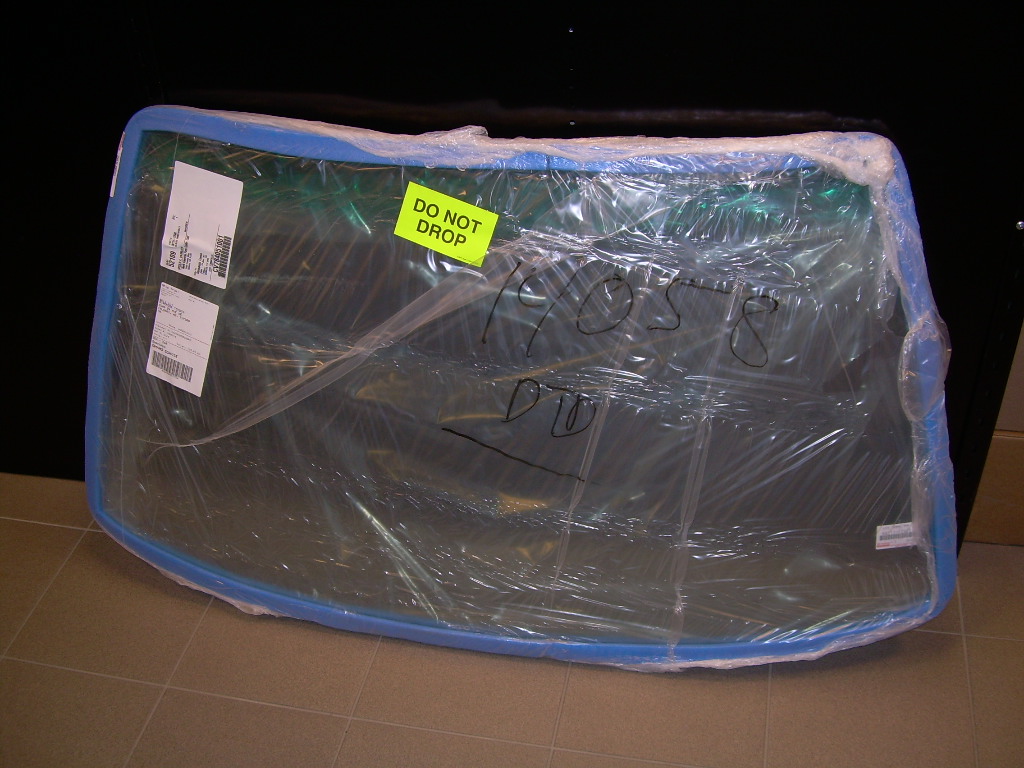
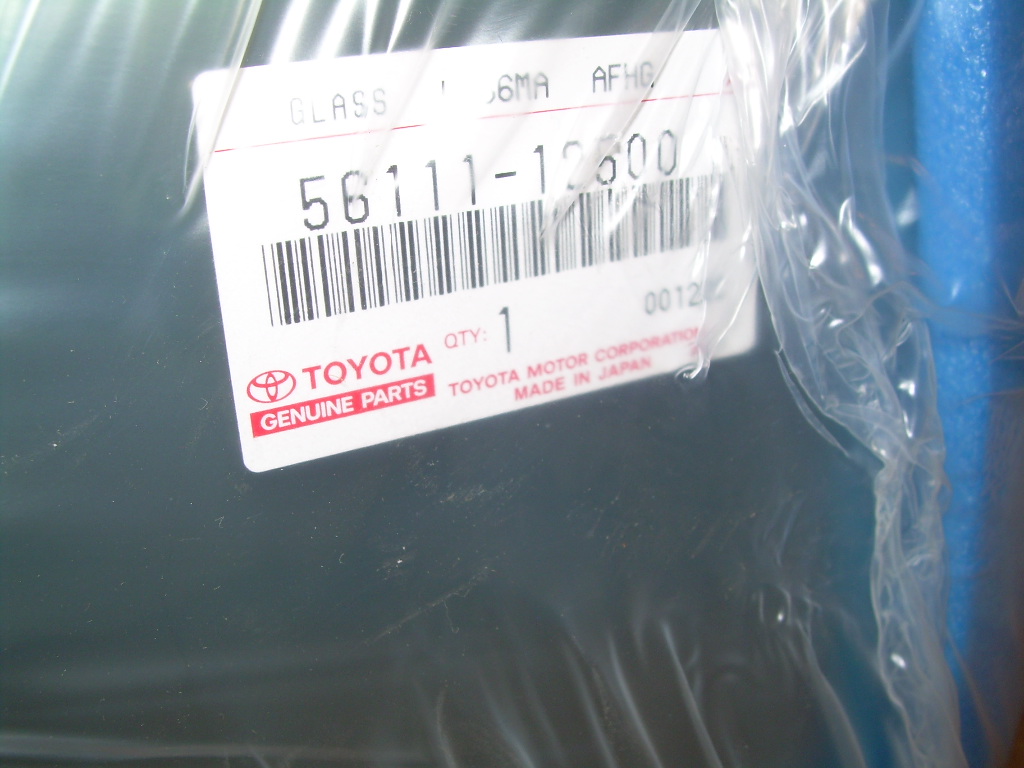
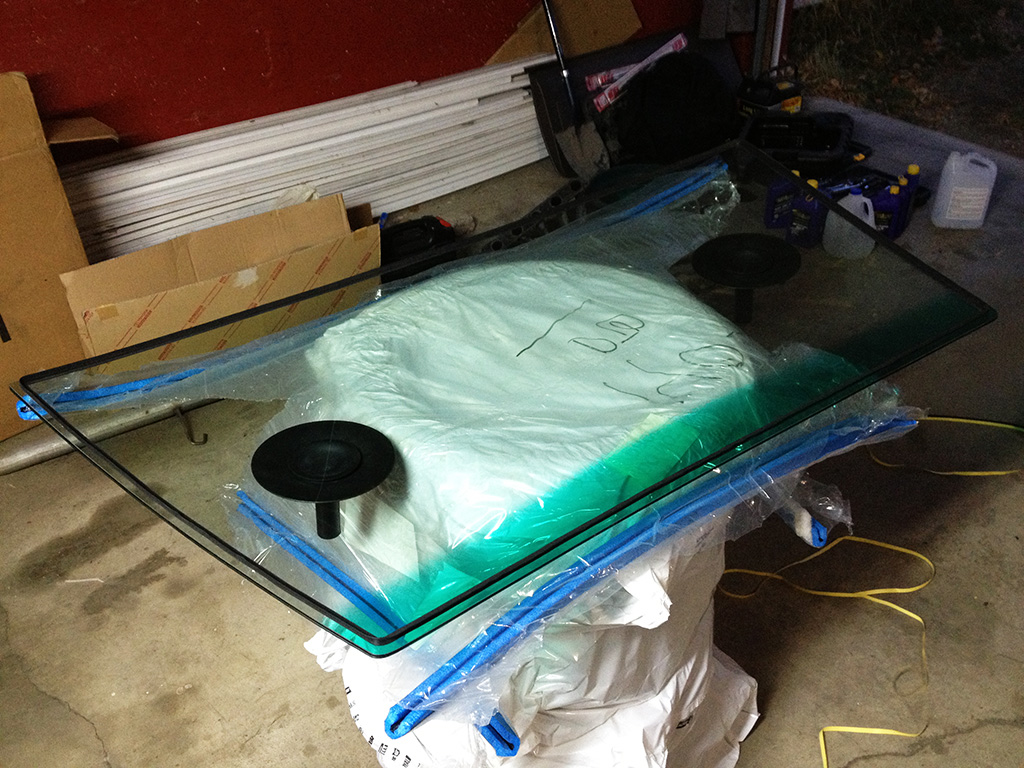
New OEM windshield:
Installed my TRD shocks, struts and springs, along with the TRD sway bars (front and rear) and the new end links and TRD end link bushings. Also installed my new Goodridge stainless brake lines with some ATE Super Blue Racing DOT4 brake fluid.
Sorry for the crappy pics:
Crappy cell phone photo of the wheels installed on the car. Sorry for the poor quality, though it actually hides all the rust still on the quarter so it looks not too bad, haha.
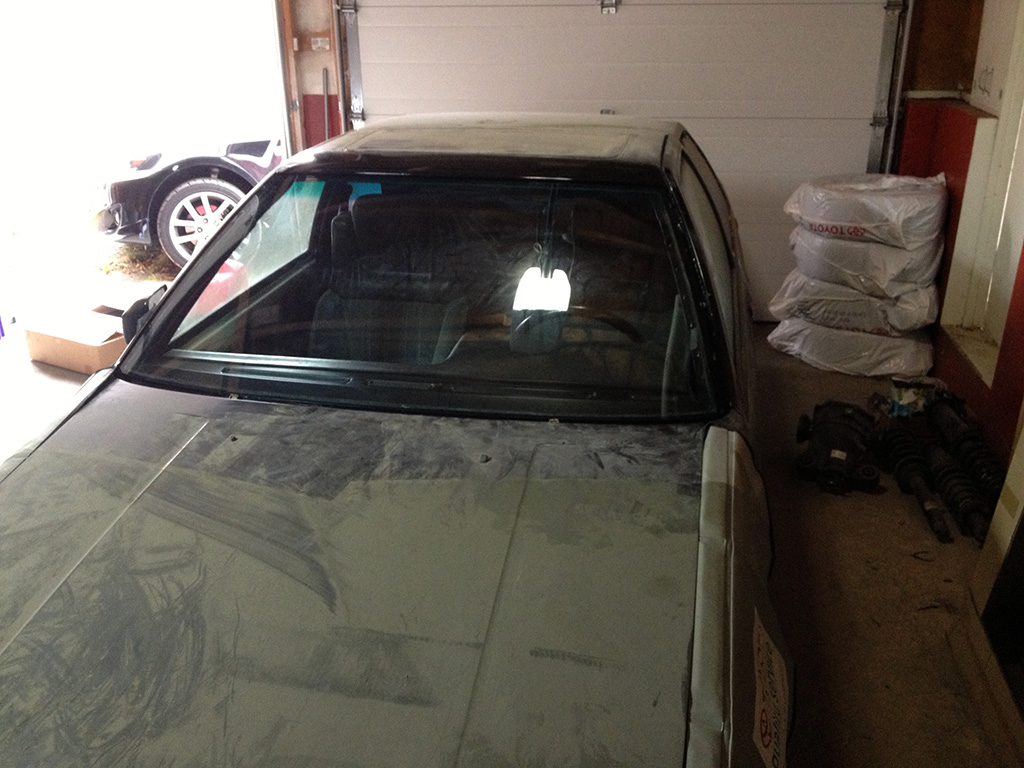
Got my windshield adhesive set in from Japan. After various experiences I no longer really trust anyone to install windshields, so I'm going to be doing it myself. Kit comes with piano wire, body and glass primer as well as the adhesive. I've got a pair of suction cups on order to help install the glass.
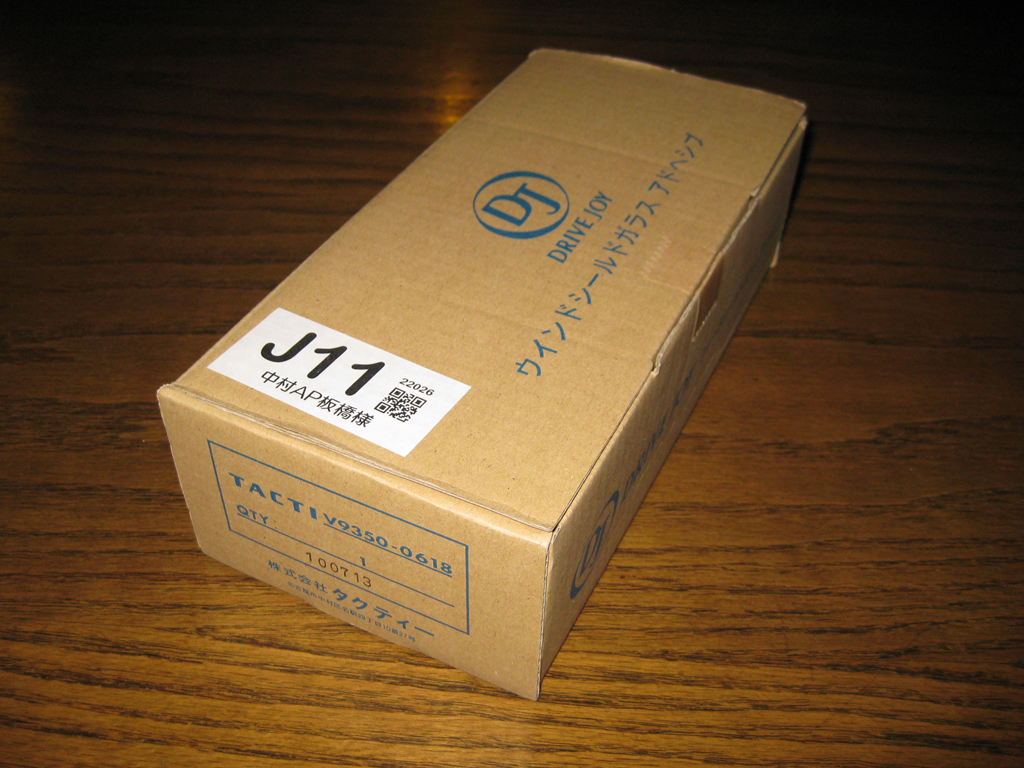
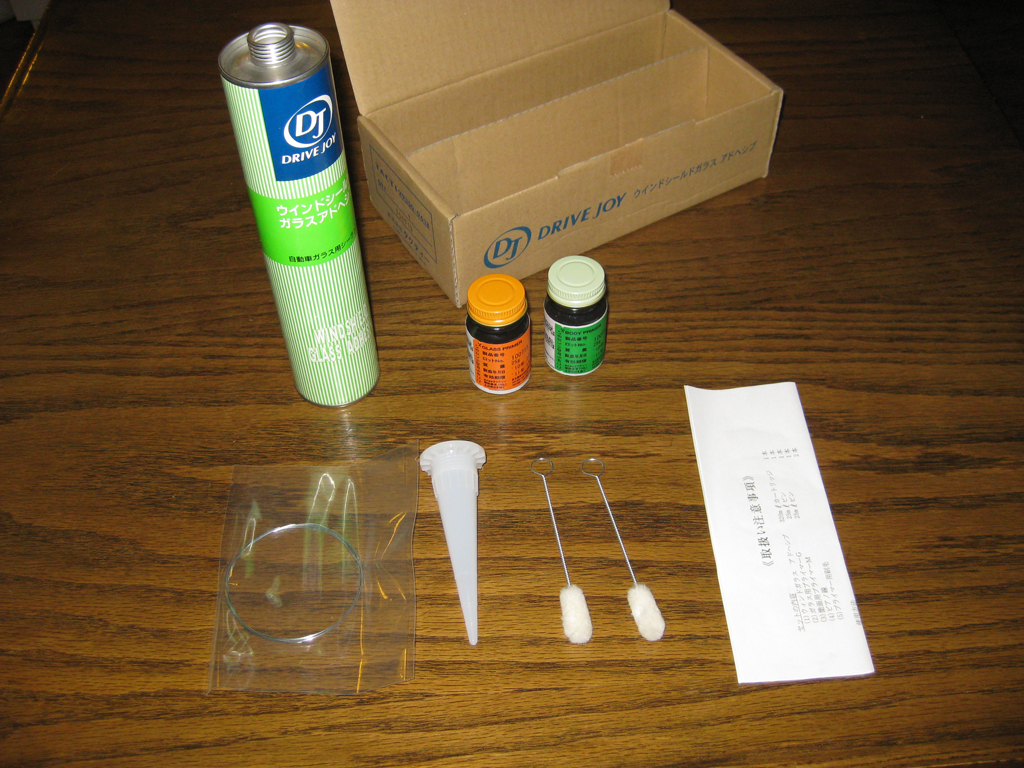
It's really the only way I can ensure my factory glass gets installed the factory way using OE adhesive. I don't want a ton of extra urethane stuck all over my mouldings, or the clips not positioned correctly, etc, etc, etc, whatever else glass guys like to screw up.
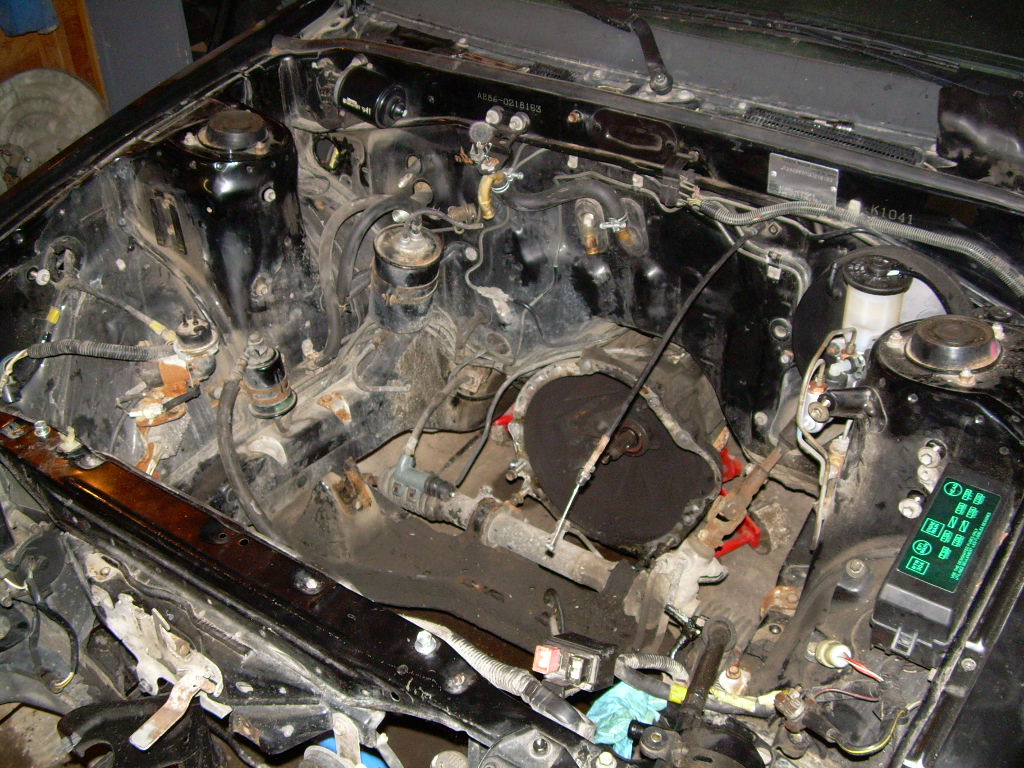
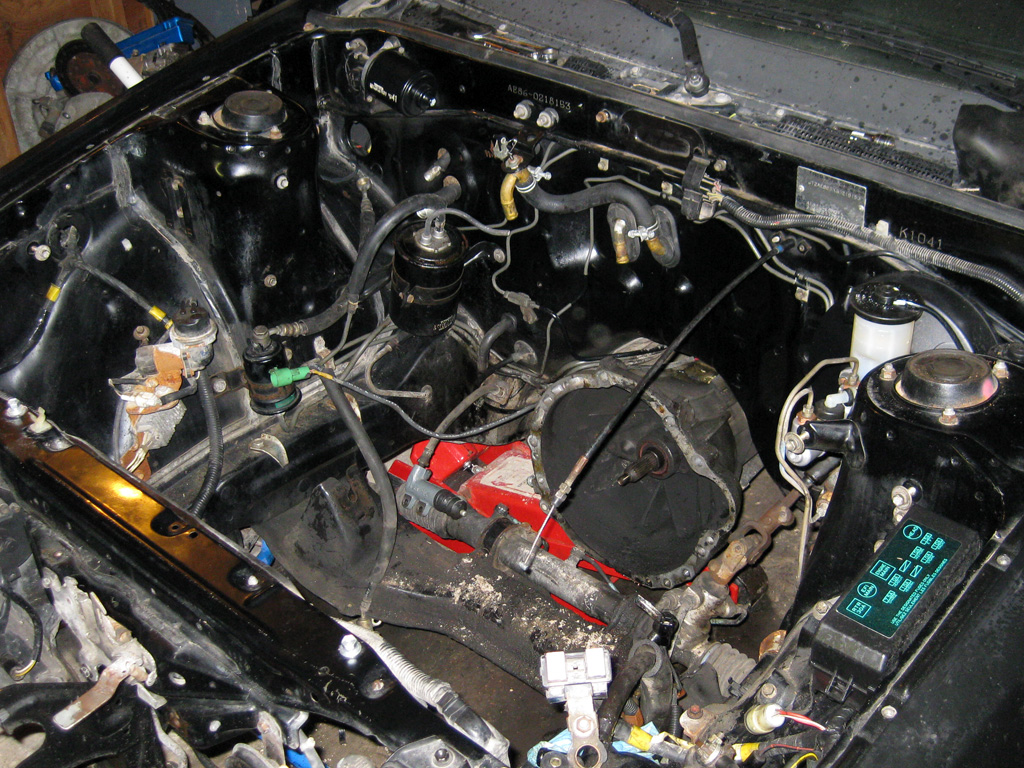
It's hard to believe how long it's actually been since I dropped this engine in. Over 2 years ago. Madness. Inside the engine bay is basically done now. Couple small things need to be done (aside from coating/painting parts), but I finally got everything mounted properly and some hose clamps and vacuum routing done.
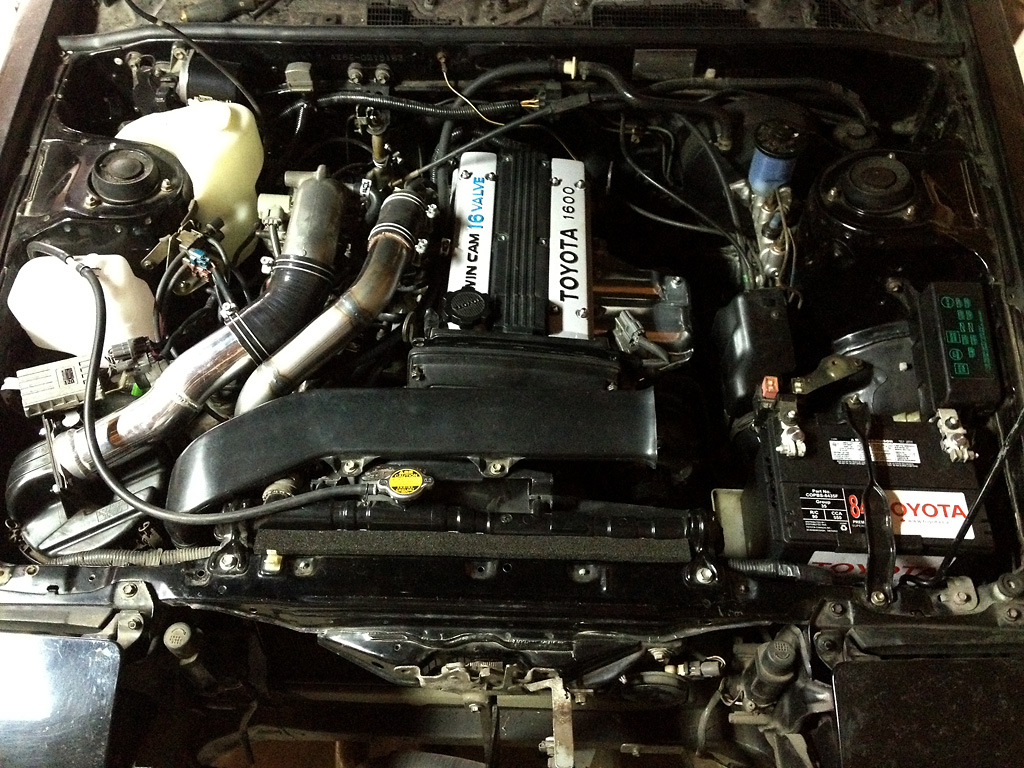
The intercooler piping and air box pipe will both be powder coated satin black along with the intercooler brackets. The valve covers have been powder coated silver and the exhaust header heat sheild was ceramic coated. Crucially important also is that the throttle cable has been connected. With cruise control. I win.
Might make a new bracket to hold the igniter so it doesn't need to be removed to change the air filter. Future project after I get the piping coated.
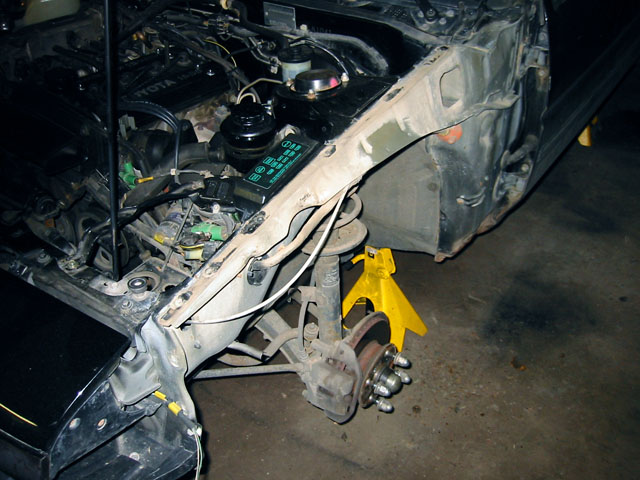
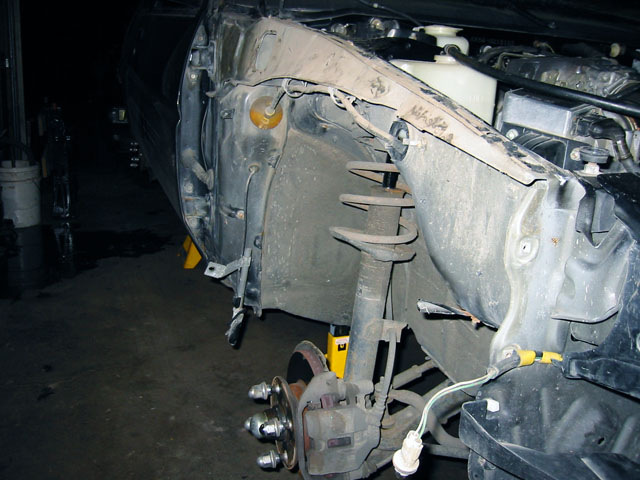
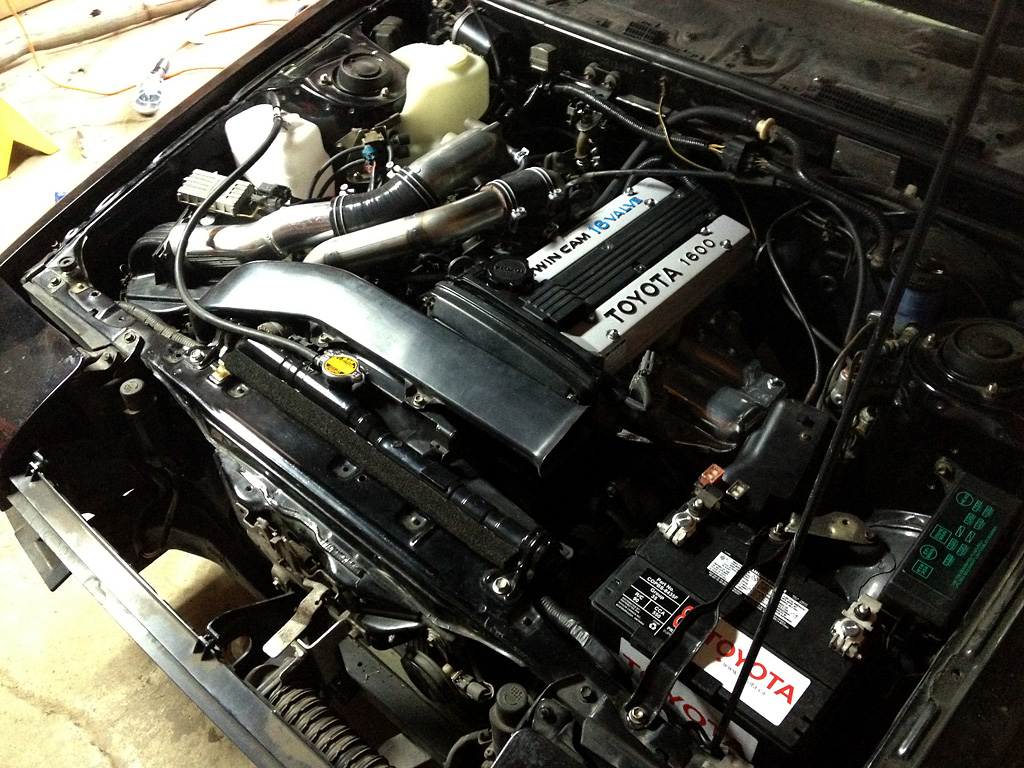
I still need to wire up the bumper lights. It really does need the pipes coated, it will look so much nicer when that is done, IMO. You can see that the windshield has been removed. There was some rust under it that has been taken care of. I will be prepping it to be installed in the next little bit.
Did some adjustments and finally got the engine running and idling semi-smoothly. I need to get the exhaust gasket in there from the header to the catalytic converter. The intercooler pipe to the intake manifold seems to be hitting my sway bar sometimes when the engine is running. Need to replace that (really) old gas in the tank with some fresh stuff and I'm going to swap out the spark plugs. We'll see how it runs after that. Covers are back on since this video.

Put in some fresh 94 Octane gas (half a tank worth), and it is running pretty smoothly now. My silicone couplers to the intercooler are too long/weak to hold up to vacuum though, so they are collapsing when not boosting. My brother is coming next weekend to make the hardpipe sections longer so I don't need the couplers like that, can also fix the sway bar issue as well, maybe even get my exhaust positioned correctly? That would be a delight.
I am excited to hear how it will sound once the exhaust isn't leaking all over the place. Hopefully similar to how it did before. I don't want to lose that 4A-G sound that I loved so much with the bluetop. It is a very different setup, but I hope it is still at least mostly similar. Plus the whine from the supercharger of course.
I finally got the windshield installed, which means once I get my IC piping fixed I can take it for an actual test drive with the new engine. Looking forward to that!
Top and bottom of windshield had some rust build up (see previous posts), so I took care of that and painted under where the glass will be mounted in preparation of the glass install:
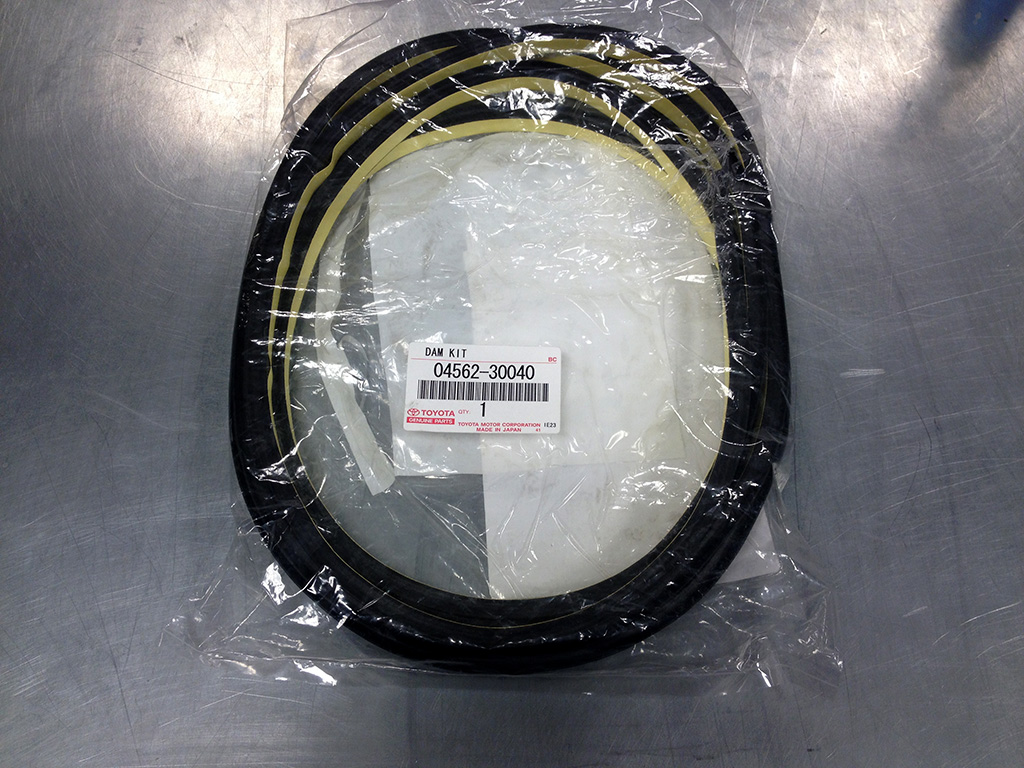
Windshield adhesive dam kit. Adhesive strip didn't come attached from Toyota. First time I've ever seen it separate. I guess the 80's were tough times:
Adhesive backing applied to the dam kit before applying to the glass:
Preparing the windshield before installation. Adhesive dam kit applied, about to apply glass primer:
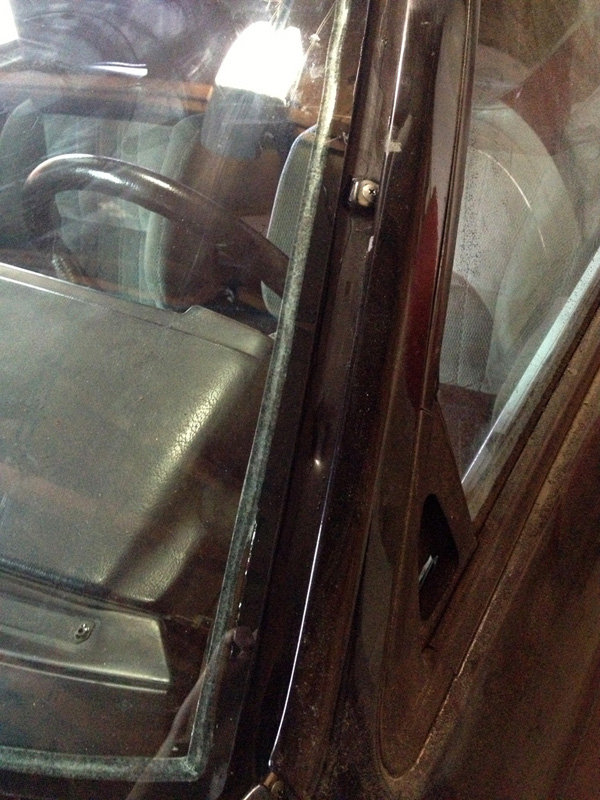
Glass installed in the car. The bottom seal isn't as clean as I'd like, but it is installed well, just a bit messy. The temperature was quite cool so the adhesive was acting differently than I am used to (I've only installed a few windshields):
Still worked out pretty cleanly. No excess urethane to speak of really:
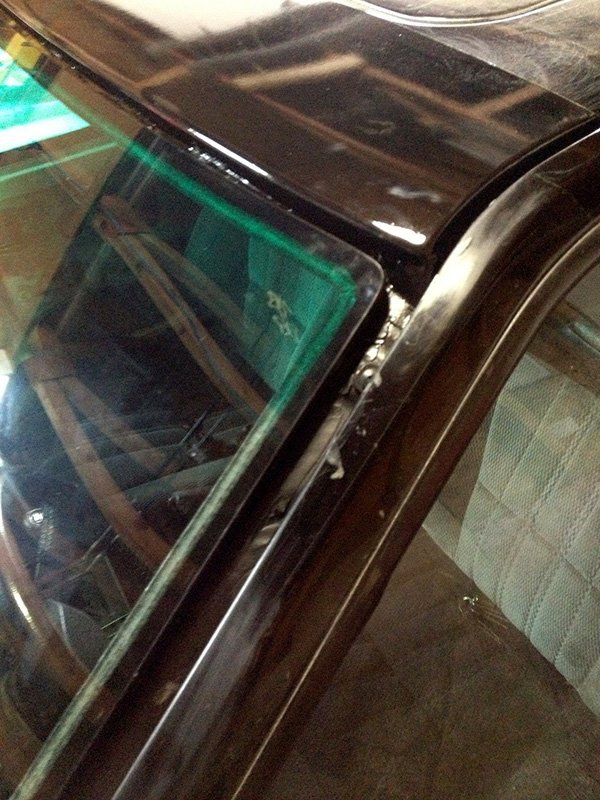
AE86 alignment is easy with lower glass stoppers, however when installing the glass it is best to not rest it at the bottom before dropping the top, as it also caused some of the messy urethane at the bottom:
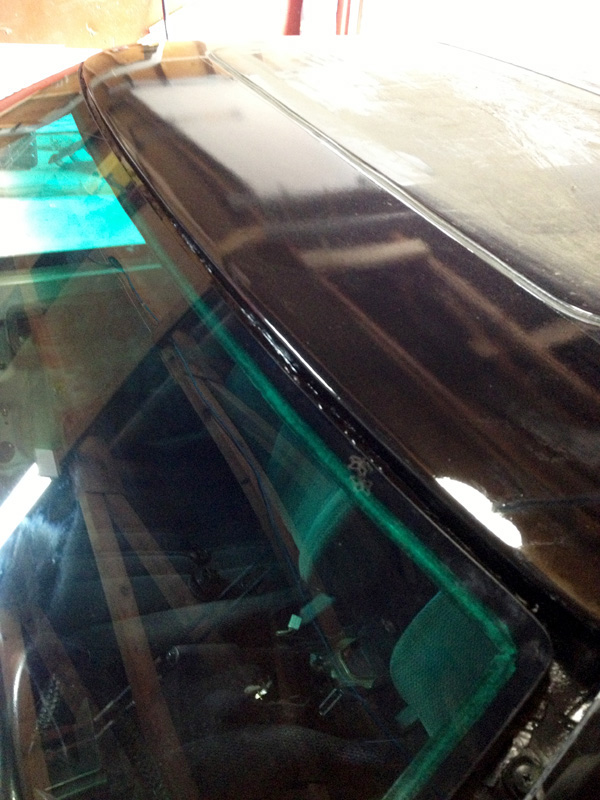
Clean top area. Nothing prepped for moulding installation yet, as that will wait until entire car is painted:
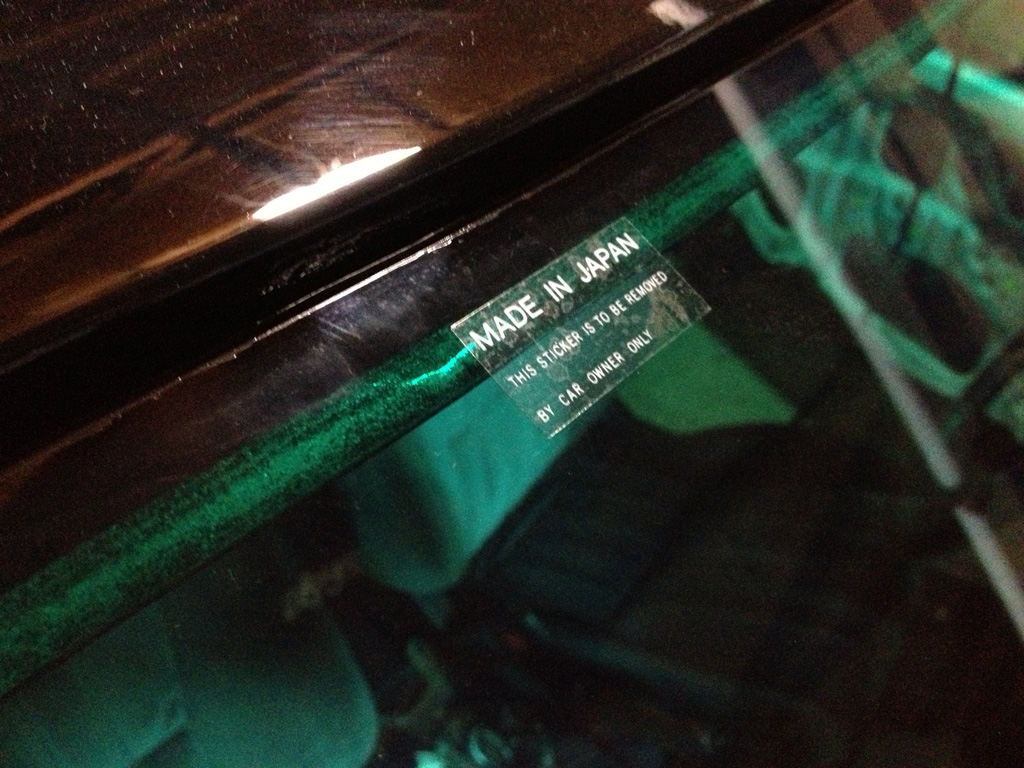
JDM yo! I guess I can remove it now:
Jeff
Important: I've pieced this thread together from various posts I've made in various forums over the years, so it might not be as cohesive as I'd like, but just look at the pretty pictures!
I just started posting here, so not a lot of people know me yet, but I thought I'd post my AE86 up for now. Maybe I'll post some Supra stuff in a while
. Here it goes...I bought the car from my uncle who owned it since new, he bought it in April 1986 from Stampede Toyota (where I now work in parts), from Todd Brown (who was the General Manager up until around 2008 I think). I paid $1800 for the car, and drove it for 2005.
I don't have pictures of everything, and it's all random, but it's worth taking a look through I think anyways
. I don't have my custom "stock" exhaust (stock exhaust with the piping replaced with mandrel bent and with a flex section -- will be ceramic coated). Or things like my new OEM fenders, replacement rust-free AE86 JDM Levin doors (no side impact beam), etc.Enjoy!
I'll start from the beginning. The day the car came home from the dealership, May 2, 1986:
Couple more pics from the late 80's/early 90's:
Car had hail damage in around 1991'ish. Was repainted locally:
After the repaint they put the door decals back on in the wrong spot at the front of the door.
:
MAD nostalgic picture of myself and my uncle in 1992 (I was 6 years old in this photo):
Now, onto my ownership of the car, these are the "before" shots. These are from 2004, when the car had 122,000 miles.
I cleaned it up real nice during 2005, but the rust still got worse during that one half winter I drove it (04-05). I took it off the road at the end of 05, looking like this:
I stripped the car down to begin rebuilding it, after the strip down, it looked something like this:
I worked on it for a bit, doing some repair here and there, the bug for ordering brand new EVERYTHING was in the works at this point.
Now it was time to start ordering more and more and more and more parts. Eventually leading to myself getting a job at Toyota, getting a mad discount, and ordering more and more and more parts.
My TRD header:
My new side trim:
Next, my new trunk trim, upper windshield trim, new wipers (500mm and 425mm), and my new rad shroud, and don't forget that sweet 4A-GE sticker:
My Japanese OEM toolkit, all of these parts came standard on Japanese AE86's (except the flashlight (Celsior) and the pressure gauge (Celica)):
From DoriKaze.com:
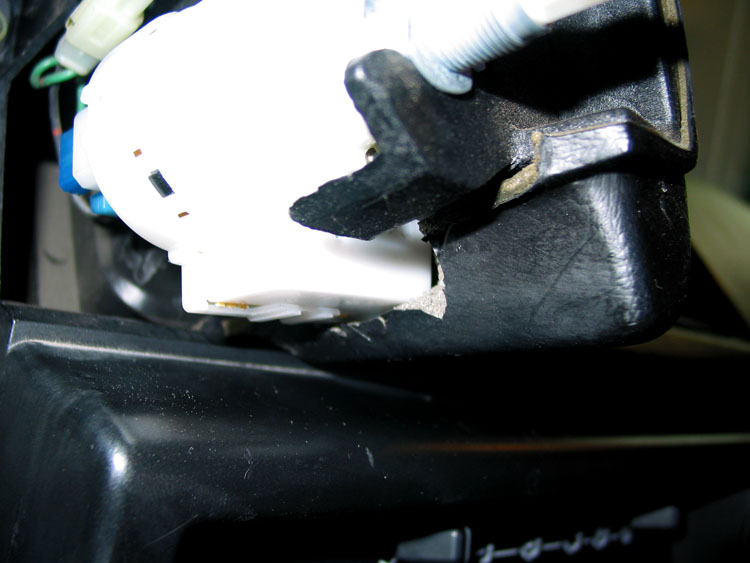
Well, I finally installed the cable tonight in my AE86, and I must say, the difference is amazing. I went from a brand new stock cable to this brand new 4Runner cable, so they were both new, and the heat slider is much easier to slide, I'm very impressed! If anyone wants any installed pics let me know, but there's really not much to see.
If any of you have ever had to do any sort of diagnostic or repair work on a climate control in an older Toyota (namely: AE86), you'll know that there are always cables routed in funky ways that bind up over time, eventually failing to move at all, and then something usually breaks (like the climate control itself).
In the AE86 the main culprit that I've seen for this problem is the airmix cable, which does a complete, tight loop right out of the climate control, and over a relatively short period of time, binds up and causes the heat slider to get harder and harder to move.
In about 1993-1994 or so, Toyota started using a new type of cable for the climate controllers, instead of a solid wire inside a plastic sheath, they have a plastic-coated braided metal cable inside a plastic sheath. What this does is allow a much smoother sliding motion of the cable, and helps prevent binding. Since we had a few of these newer cables sitting in our return bin at work, I pulled the cable out of my car and brought it in to compare.
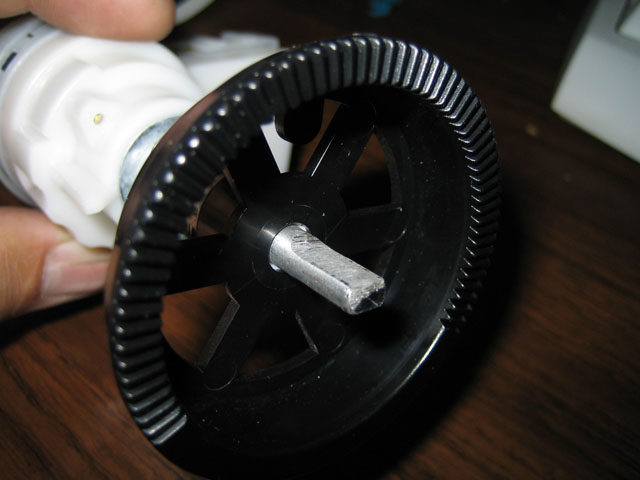
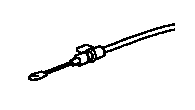
I found one out of an early 90's 4Runner/Truck that is about 4 inches longer than the AE86 cable (allowing a loop that is not as tight), that I thought would work. The main problem with the cable is that the mounting in the climate control is setup differently, so it wouldn't clamp into the AE86 climate control. (See Diagram 1).
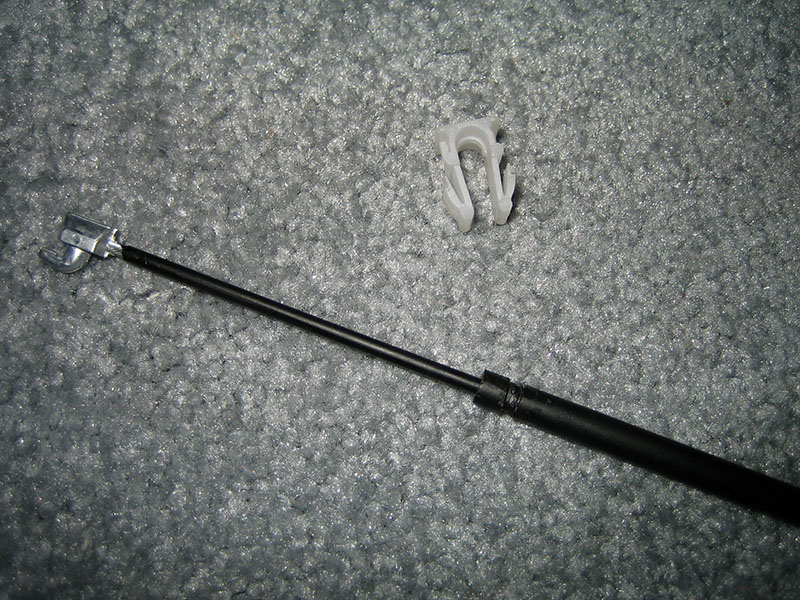
What I did was used a knife to cut off the extra white plastic piece on the cable and made a groove in the cable that would allow the AE86 clamp to secure the cable into the AE86 climate control. You will need to drill the hole in the heat slider larger with a 5/32 inch drill bit to accommodate the larger end of the new cable. (See Picture 1).
The other end of the cable should work fine with the AE86 airmix controller. (See Picture 2). It doesn't have markings on it for where it will get clamped in, but that's fine, since they likely would be in the wrong spot anyways. What needs to be done is the cable needs to be mounted in the climate control, then once that is done, you can move the climate control and airmix flap both all the way to hot. You can now mount the other end of the cable onto the airmix controller and make sure it gets clamped in so that when the slider is all the way on hot, the airmix vent is all the way on hot as well.
Diagram 1:
Picture 1:
Picture 2:

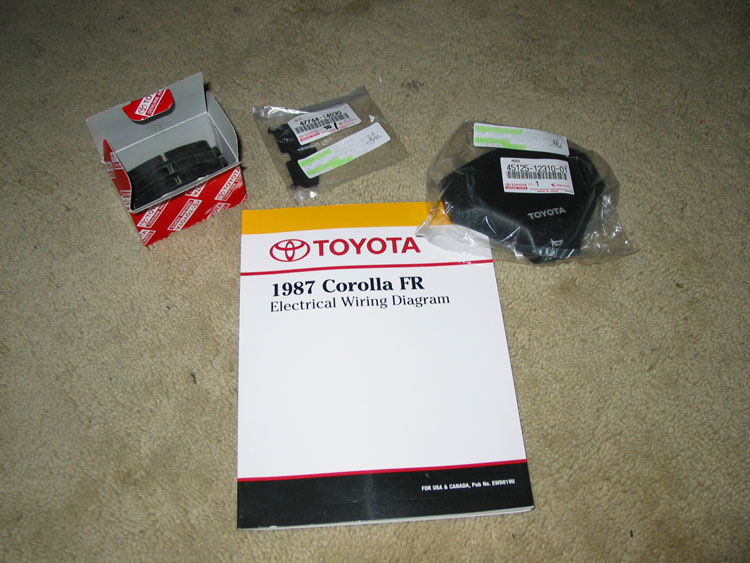
Part Numbers:
55909-35030 - 4Runner Airmix Damper Control Cable
55933-10010 - Climate Control Cable Clamp
NOTE: The blue water valve cable also has a tendency to seize up over time as well, but I haven't had much trouble at all with these, mainly just the airmix cable and the water valve itself. I replaced all the cables in my car last year, so everything is new and nice, but you may want to consider changing the water valve cable at the same time.
Factory 82-83 Celica power door lock switch:
I also added power windows, which was a process as well...
I've also added a complete JZA80 stereo/amp setup to the car:
Someone shown in the last post was the new shift boot I got, which was for an MA61 Supra, I modified my shifter to fit it correctly as well.
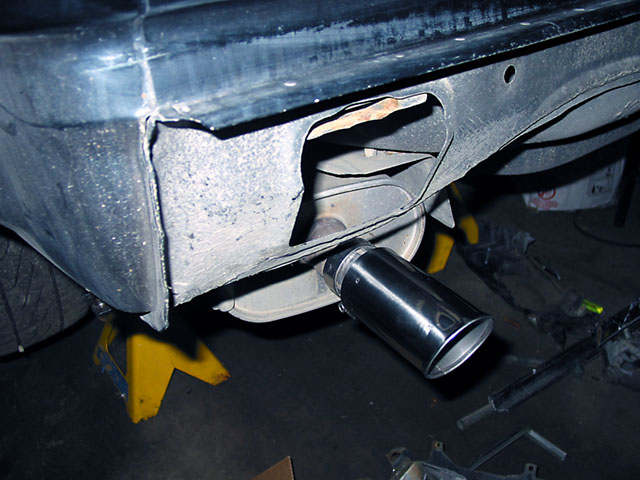
I also ordered a factory exhaust tip:
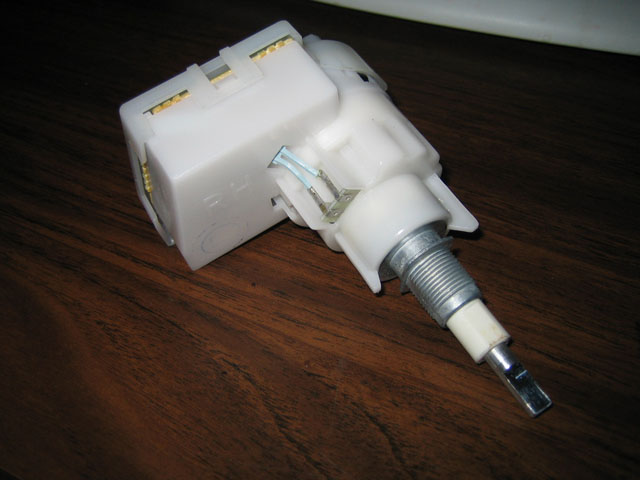
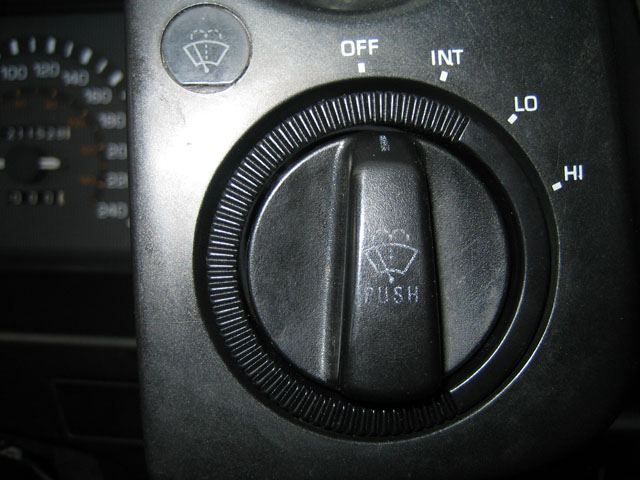
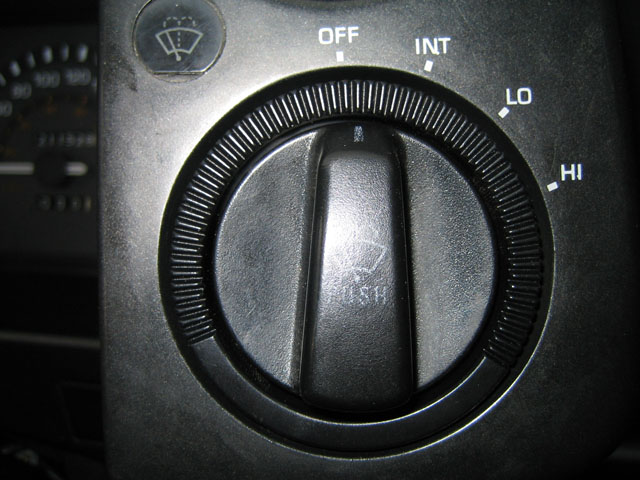
I've also added the Japanese variable intermittant wiper switch:
Random new stuff (horn button, brakes, etc):
New decals for the car:
New wheel centre caps:
I also decided I needed to be a bit more JDM...
(Yes that is new door plastic -- the stuff that goes between the door panel and the door frame):
Now... onto that pesky rust...
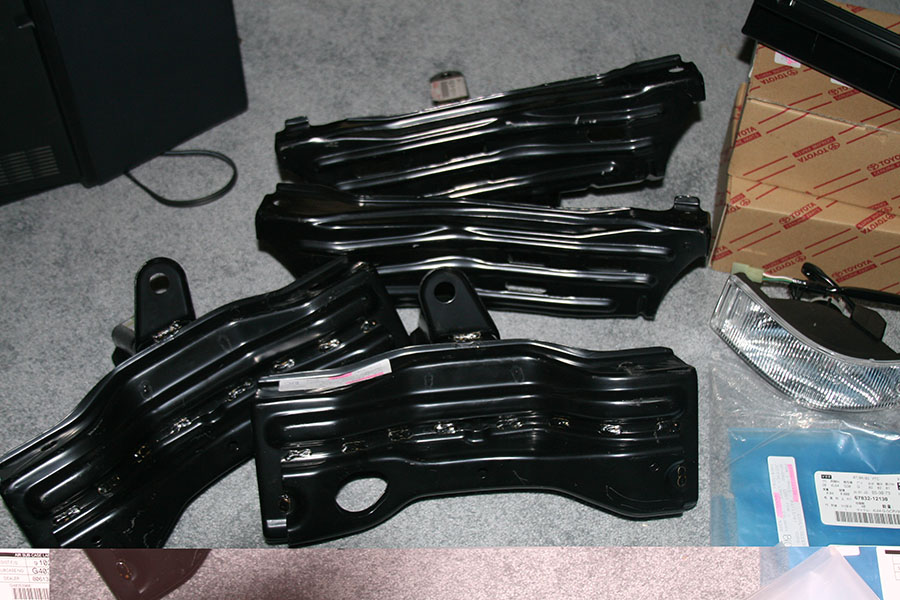
Onto those quarter panels... I was told over and over again, no new quarter panels. I wouldn't take no for an answer!
Outer wheel housings:
Quarter panels:
This is worth posting:
Yes... I also added cruise control:
Knowing that I am the OEM guy that I am, doing some of these things was difficult for me. I've tried to stay as OEM as possible, doing things as I think Toyota would (albeit without the research dollars and casting abilities, lol). Everything on the car is either Toyota OE, TRD, or custom made to make things work.
Engine is an smallport MAP-DLI type 4A-GZE from a 90-91 AE92 GT-Z (has the nice oil drain hose and the piston squirters with the coated pistons). Came with a transmission and all the engine accessories on it, but no harness, ECU, igniter, SC relay or VSV's. Bought it here in town from someone who was going to swap it into their AE86, but decided to go KA24 (I think) instead.
Came with coils, MAP sensor, injectors, and all that good stuff, but not some of the stuff I really needed. Lucked into finding a harness on eBay that came with the ECU, igniter, VSV's, relays, resistors, everything. Beautiful! Got it shipped here.
Pulled apart the 4A-GZE, found some rust inside cylinder #1, not excessive, but it was clear that the engine had been sitting for a long period of time!
Ordered myself a new set of piston rings for the smallport, and a gasket set for an AW11 4A-GZE, plus an intake manifold gasket for the smallport 4A-GE. I honed the cylinders to clean them out and get some nice crosshatching back. Cleaned the head up and changed all the valve seals.
I'm using the RWD water pump front half with the FWD rear half. This gives me the extra strength of the larger bearing in the RWD water pump to use the clutch fan, as well as the appropriate rear housing to clear the SC12 supercharger.
I will be keeping all accessories on this engine, the car will be modified to accept the complete GZE assembly with A/C and Power Steering. Chances are I will need to lower the front sway bar and perhaps change the end links, we'll cross that bridge when I can lower the engine into the car and check clearances. Cruise control will also be functional as well.
On to the pictures.
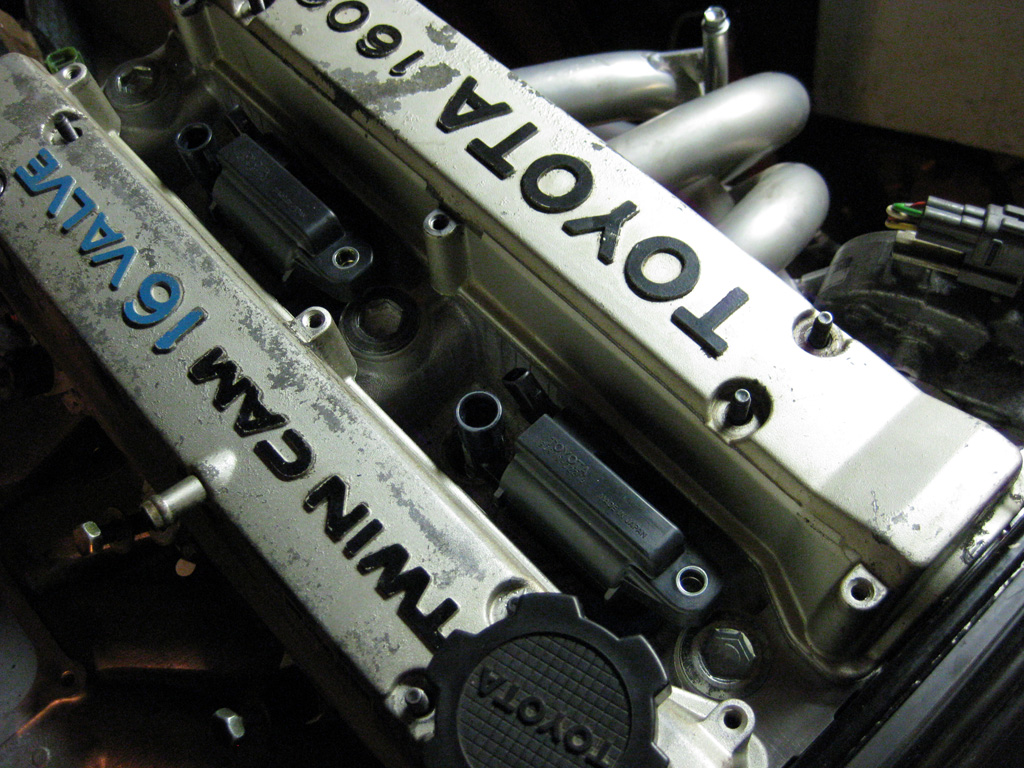
Original largeport T-VIS 4A-GE removed:
Started cleaning up the engine bay (more cleaning/painting to come):
And it begins:
Getting the longblock assembled, with RWD water pump, and the cams from my original largeport 4A-GE:
Clutch/fan test installed just to make sure everything was fitting, other stuff needs to be installed first obviously:
Test fitting the 2JZ VVT-i ignition coils in the 4A-G head. The fit is fantastic, still need to make some holding brackets for them, but it will come:
Test fitting the spark plug wires to the ignition coils, to make sure it's all kosher:
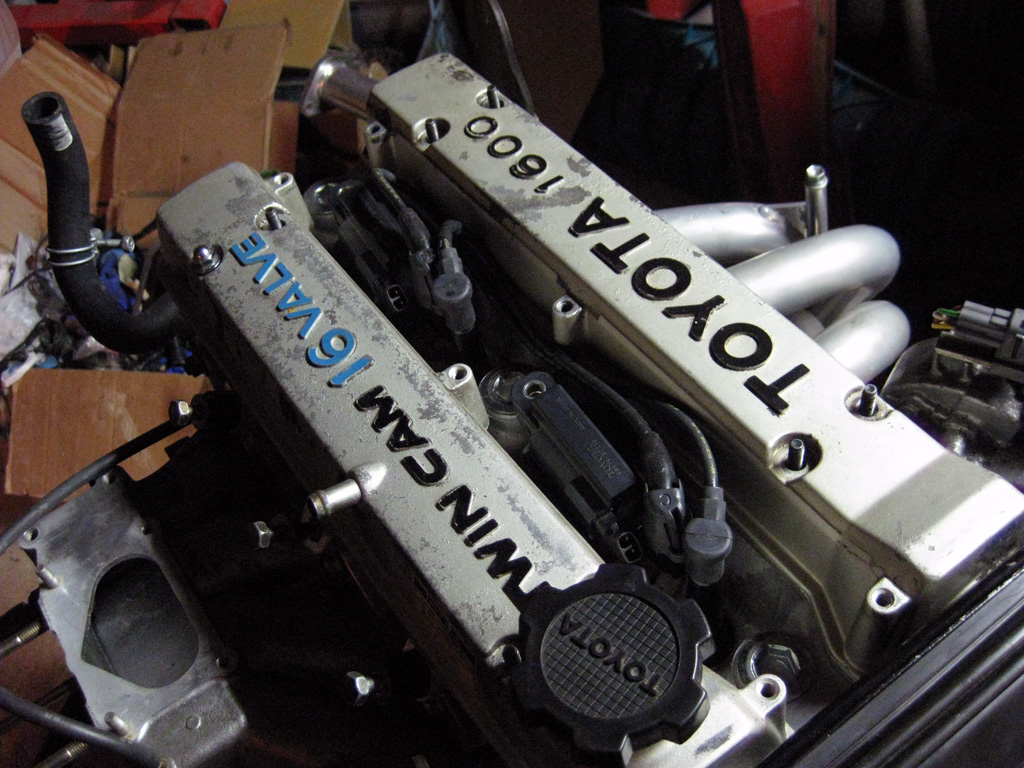
The valve covers will be powder coated silver and repainted with the stock bluetop colours. I much prefer this look to any other (including my own black valve covers). The ones on the engine in these pics are in rough shape, but give me an idea of how it will look. I love it:
Ordered myself a new smallport 4A-GE spark plug wire cover. It fits with quite a bit of room over top of the coils and wires I've installed:
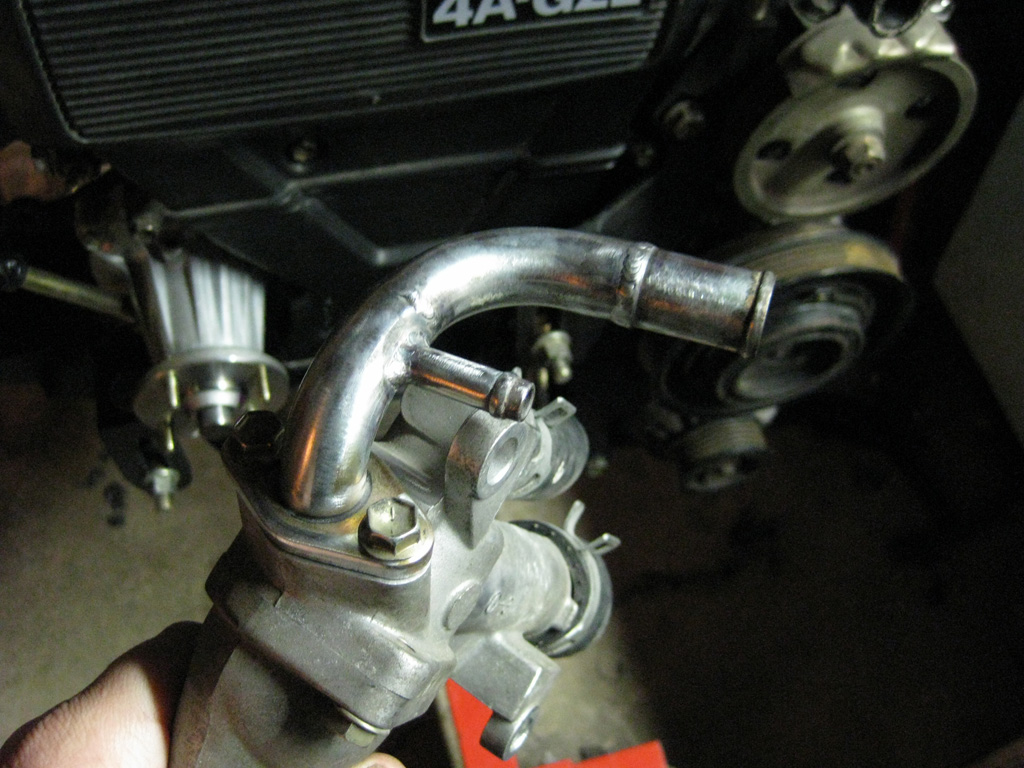
In this shot you can see the TRD header, which was installed to get positioning for the O2 sensor on the wiring harness. Also apparent is the vacuum valve on top of the power steering pump. On the AE86 this valve is mounted on the power steering pump itself, on the AE92, it is mounted on the steering rack. While using the AE92 PS pump with an AE86 rack, I had nowhere to mount the valve, so I ordered a banjo bolt for the power steering pressure line on a 1MZ-FE. It allows me to mount the valve on the top of the PS pump, retaining factory idle-up on the 4A-GZE. It later turned out that this probably wouldn't work, as the lines won't quite reach. I have since ordered the 1JZ-GTE factory setup from Japan. Don't have any pics of it right now though.
:
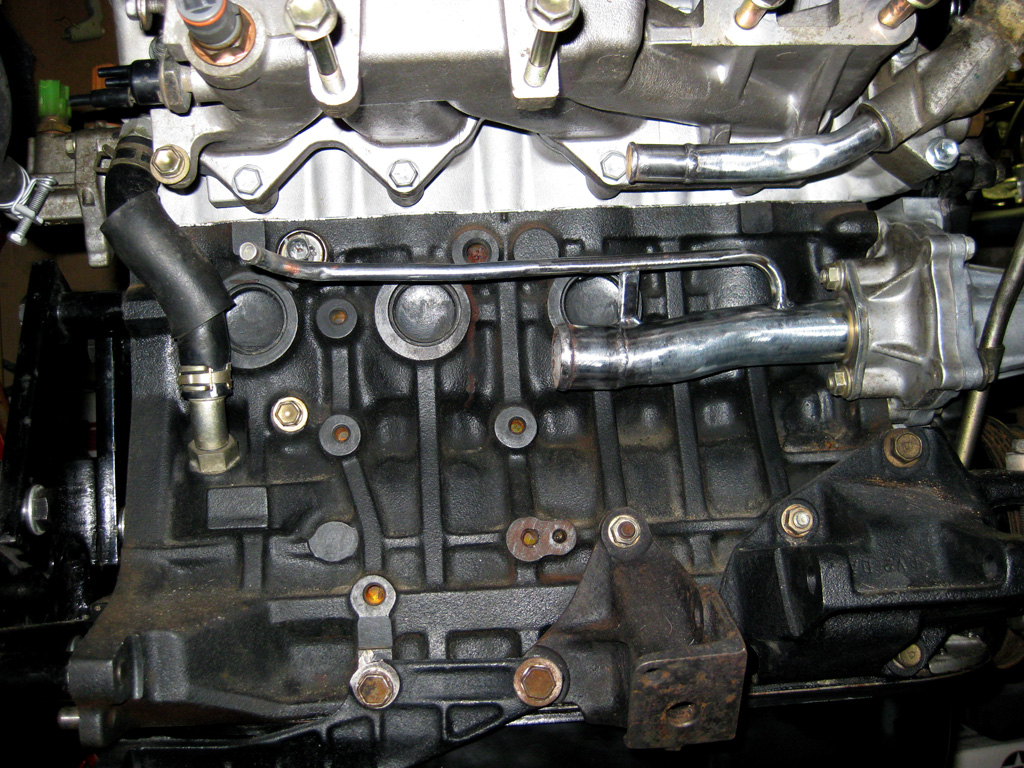
Coolant piping modified to mount the remote thermostat housing on the side of the engine. In the AE92, this housing sits on top of the transmission. That won't work for a RWD mounting setup. In this first picture, you can see the two pipes bolted to the water pump and water neck, they used to extend to the back of the block:
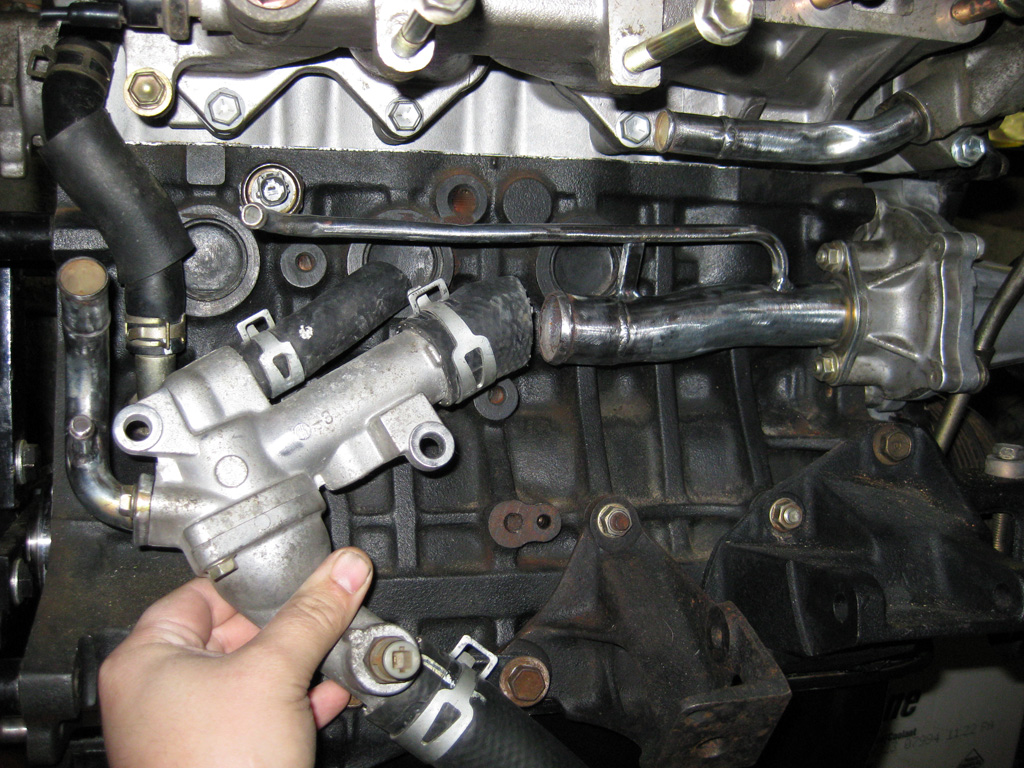
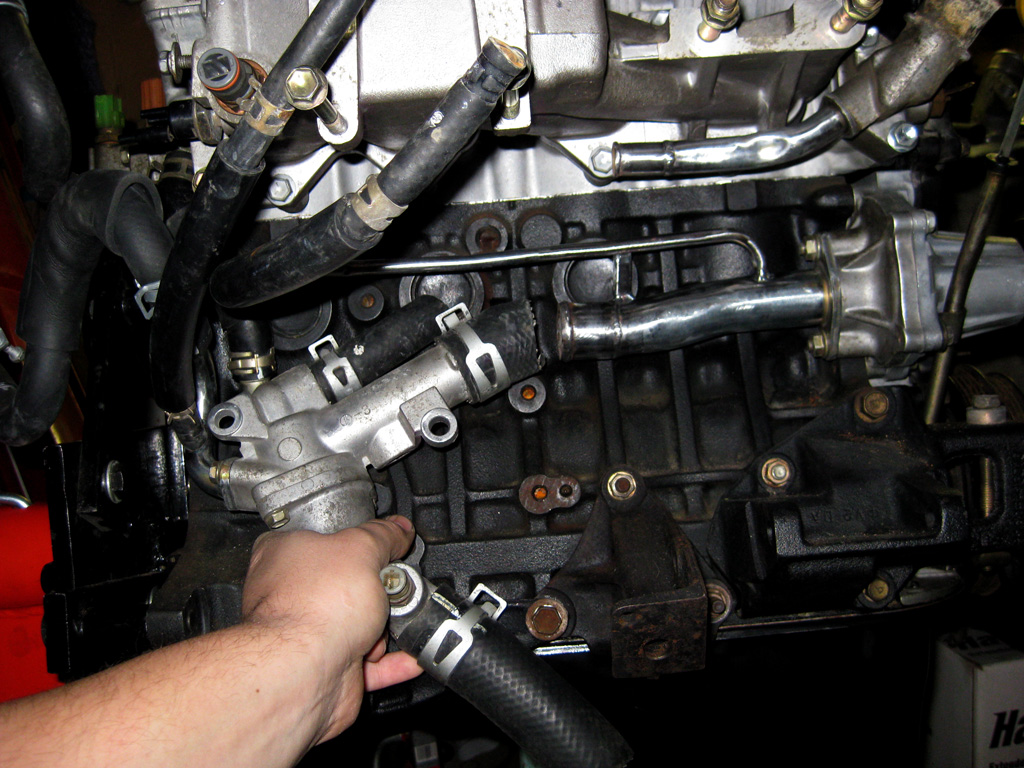
Holding the thermostat housing in place you can see where it will sit. The heater core pipe was modified so that stock AE86 heater hoses can be used without modification. I had new ones installed a while back, there was no way I wasn't using them, haha:
You can see in this picture the nice welding my brother did to get these pipes to fit properly. Mad props
:
Hoses in place on the piping going to the heater core and the ISV (idle speed valve). Need to make sure everything works like from the factory
:
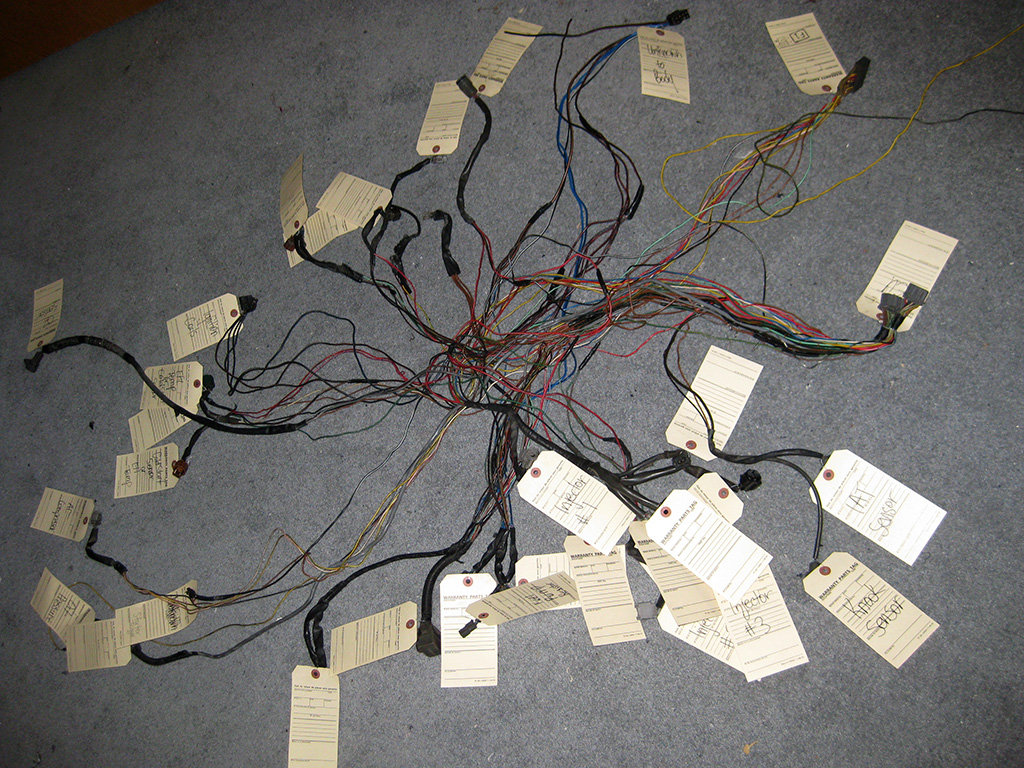
Now came the (what I thought was going to be) hard part: modifying the wiring harness to fit the AE86. I expected to spend at least a couple of weeks on this, however when actually diving into it, I realized it would probably be easier than I thought. Spent a couple nights mapping the connectors on the AE86 harness and removing extra connectors from the GZE harness (battery terminal, alternator wiring, etc). I came up with this abortion as the staring point for the GZE harness:
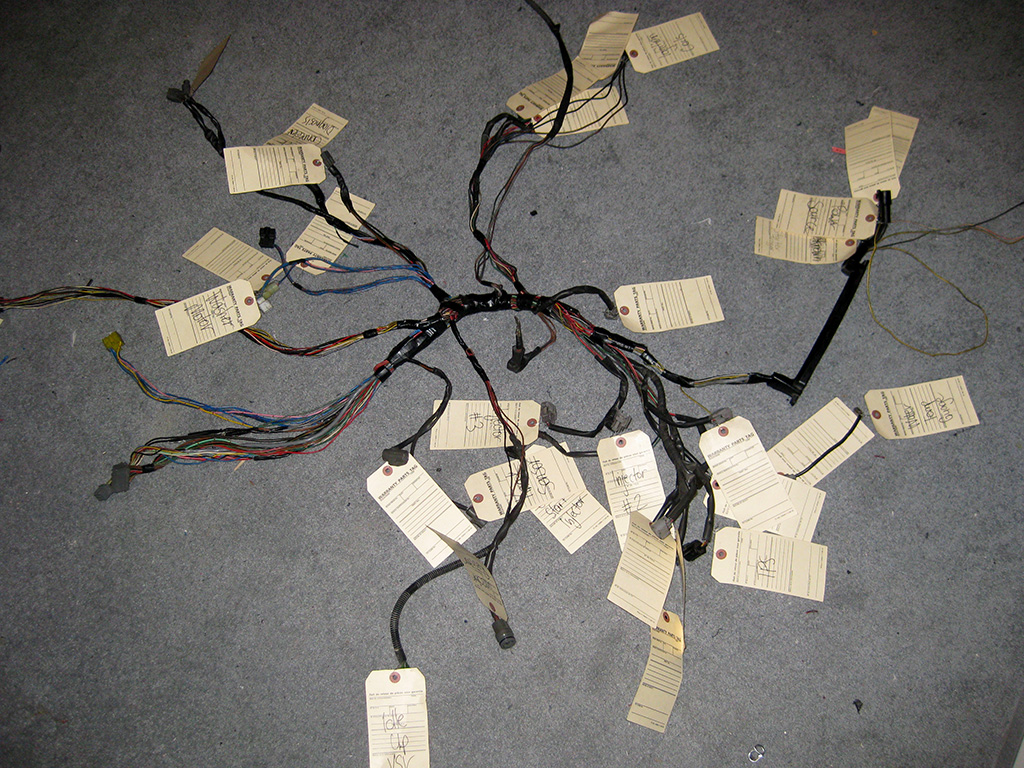
Positioning things on the engine and so on, I organized the new harness into this:
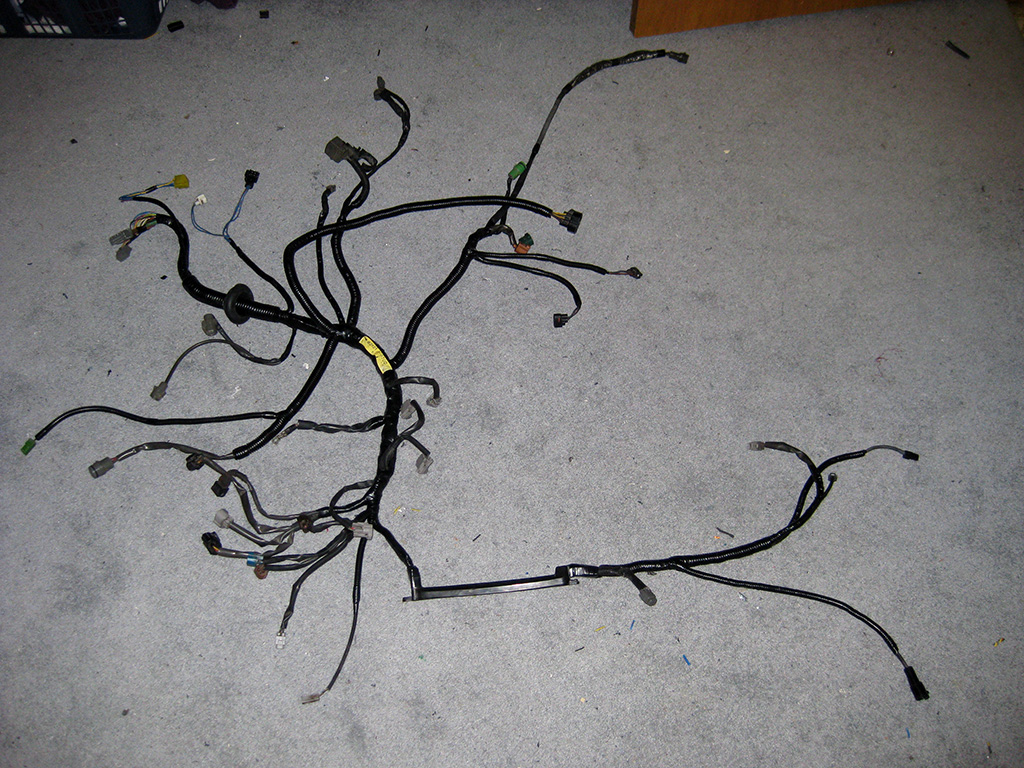
Finally, I loomed everything up and extended a couple wires going to the starter and body harness power source near the battery:
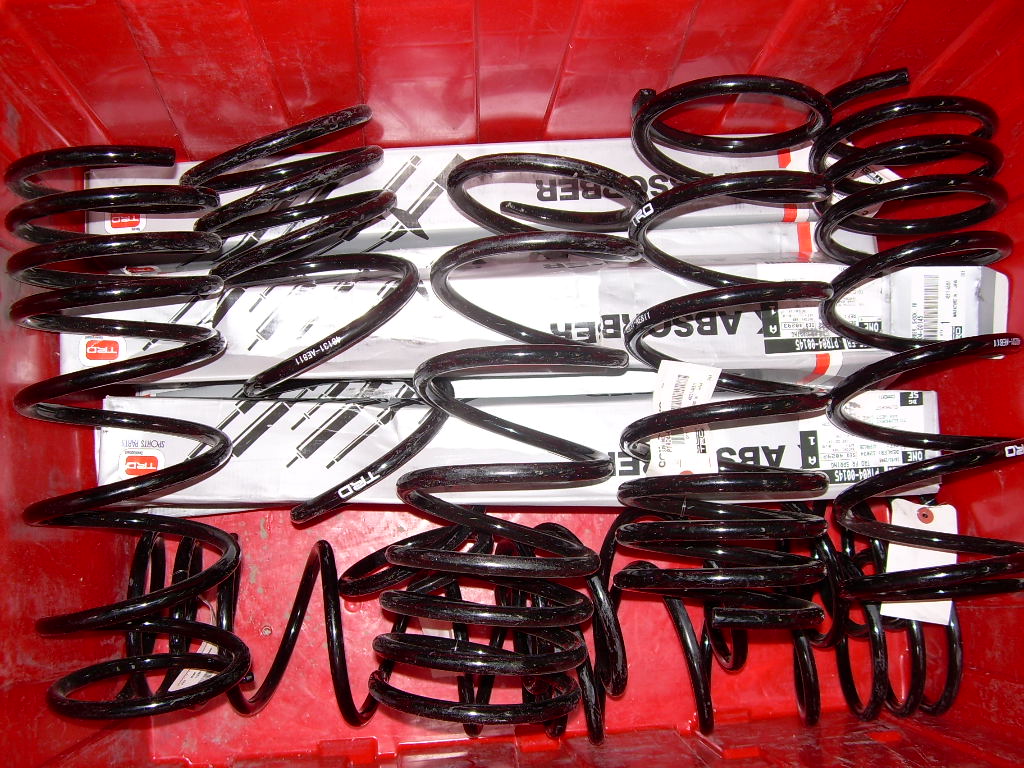
For suspension, I've gone with TRD Japan sport springs, shocks, struts, front sway bar, and the complete bushing set. I have only installed the front sway bar so far, but will be installing the rest soon.
For the rear end, I've gone with a TRD 2-way Limited Slip Differential, as well as a TRD solid pinion spacer.
I am keeping cruise control, so I needed to find a throttle cable that would work for that (from the cruise bracket to the throttle body - stock AE86 is too long). I found that the SV21 and VZV21 cables seem to work not too badly. The SV21 is about 28-inches or so, while the VZV21 is about 29-30'ish. I grabbed the VZV21 one, but I think the SV21 would be fine as well.
Photo from Japan of wheels I ordered:
New outside door handles (already replaced the inners and all the foam, etc.):
Headlight "eyebrows" and buckets/retainer rings:
Door, trunk and rear window weatherstripping:
Some of my new suspension parts:
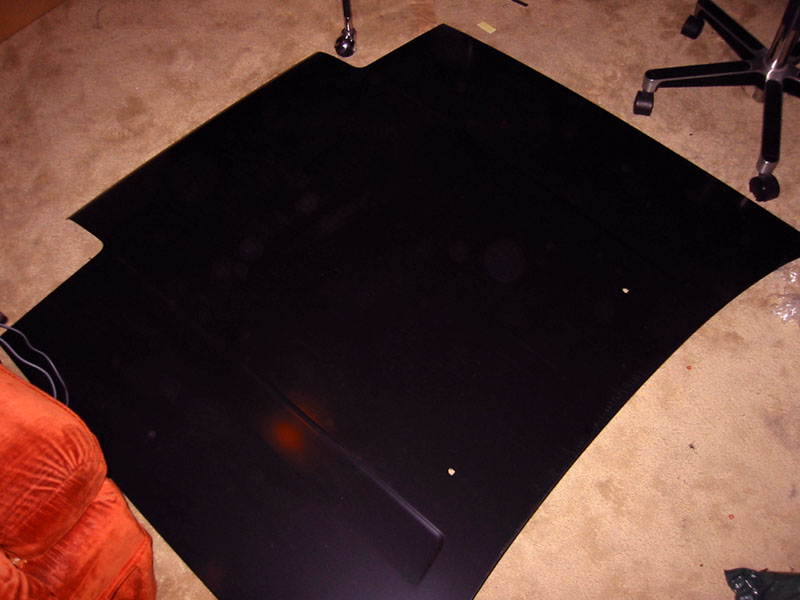
New OEM windshield:
Installed my TRD shocks, struts and springs, along with the TRD sway bars (front and rear) and the new end links and TRD end link bushings. Also installed my new Goodridge stainless brake lines with some ATE Super Blue Racing DOT4 brake fluid.
Sorry for the crappy pics:
Crappy cell phone photo of the wheels installed on the car. Sorry for the poor quality, though it actually hides all the rust still on the quarter so it looks not too bad, haha.
Got my windshield adhesive set in from Japan. After various experiences I no longer really trust anyone to install windshields, so I'm going to be doing it myself. Kit comes with piano wire, body and glass primer as well as the adhesive. I've got a pair of suction cups on order to help install the glass.
It's really the only way I can ensure my factory glass gets installed the factory way using OE adhesive. I don't want a ton of extra urethane stuck all over my mouldings, or the clips not positioned correctly, etc, etc, etc, whatever else glass guys like to screw up.
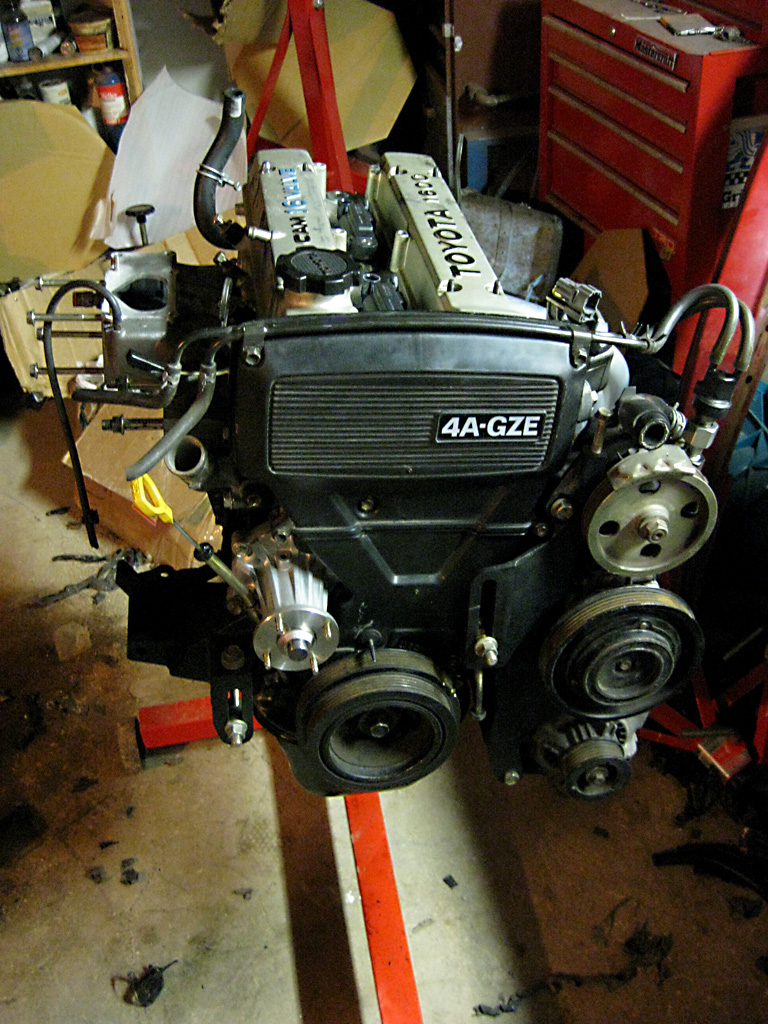
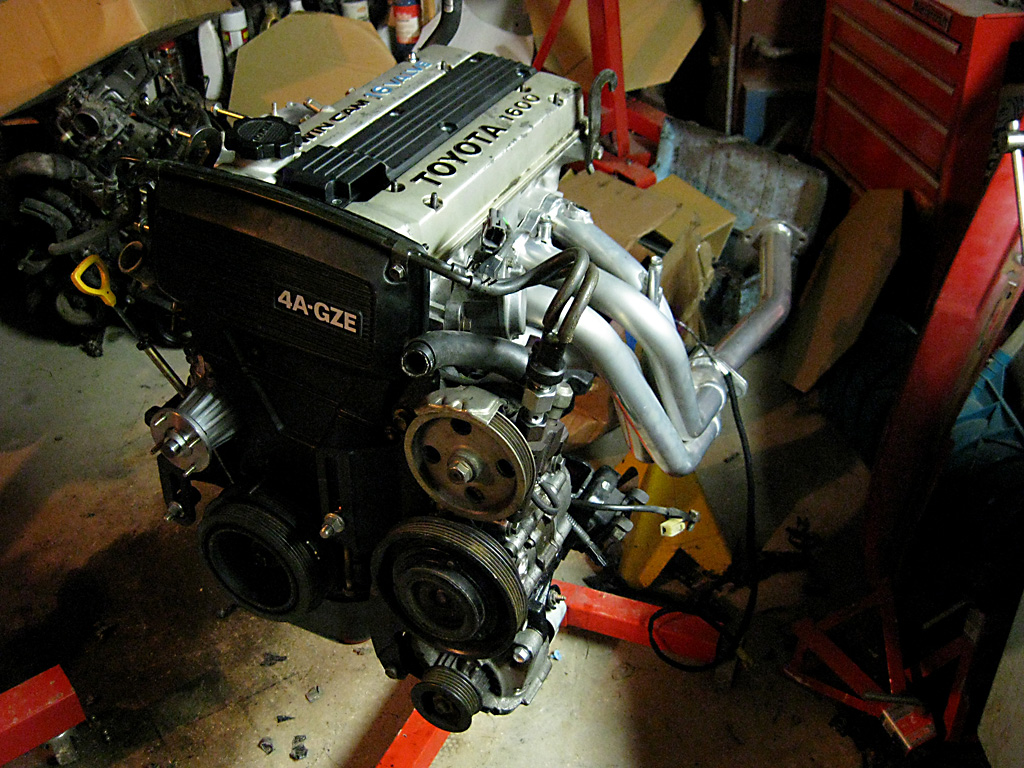
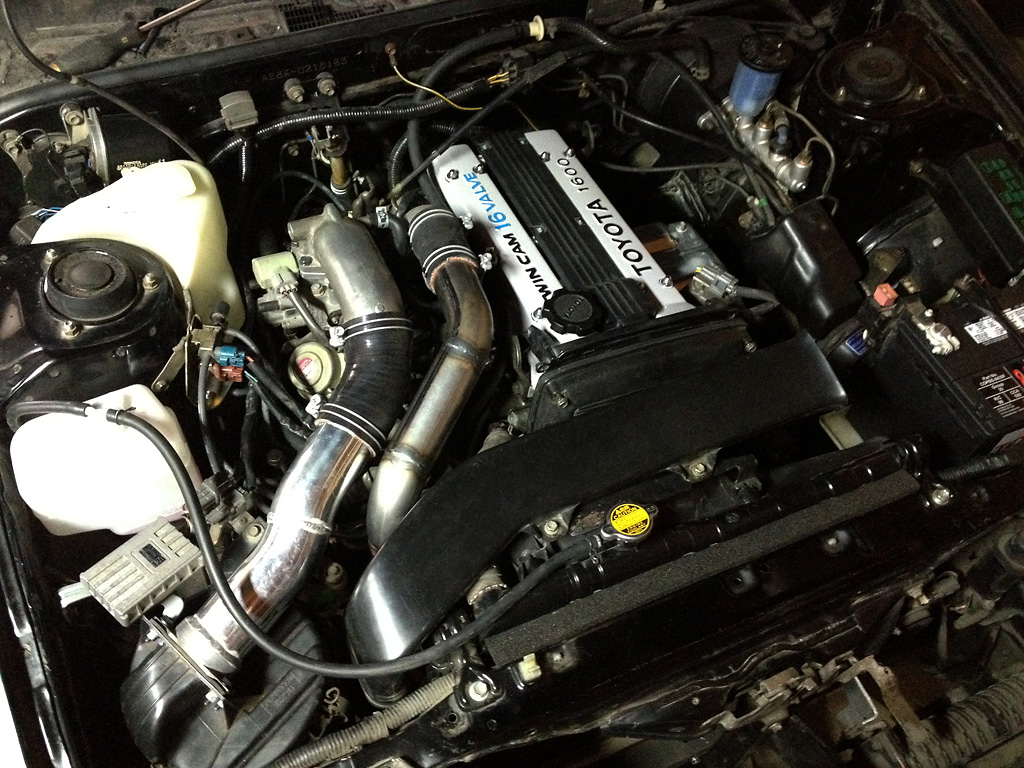
It's hard to believe how long it's actually been since I dropped this engine in. Over 2 years ago. Madness. Inside the engine bay is basically done now. Couple small things need to be done (aside from coating/painting parts), but I finally got everything mounted properly and some hose clamps and vacuum routing done.
The intercooler piping and air box pipe will both be powder coated satin black along with the intercooler brackets. The valve covers have been powder coated silver and the exhaust header heat sheild was ceramic coated. Crucially important also is that the throttle cable has been connected. With cruise control. I win.
Might make a new bracket to hold the igniter so it doesn't need to be removed to change the air filter. Future project after I get the piping coated.
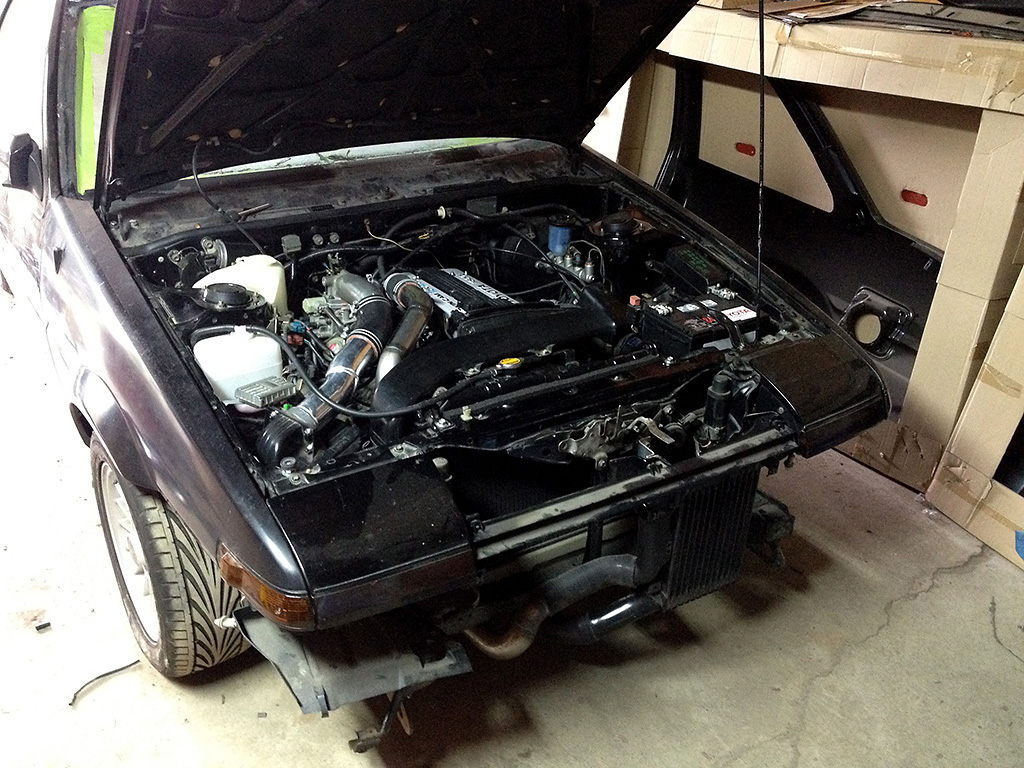
I still need to wire up the bumper lights. It really does need the pipes coated, it will look so much nicer when that is done, IMO. You can see that the windshield has been removed. There was some rust under it that has been taken care of. I will be prepping it to be installed in the next little bit.
Did some adjustments and finally got the engine running and idling semi-smoothly. I need to get the exhaust gasket in there from the header to the catalytic converter. The intercooler pipe to the intake manifold seems to be hitting my sway bar sometimes when the engine is running. Need to replace that (really) old gas in the tank with some fresh stuff and I'm going to swap out the spark plugs. We'll see how it runs after that. Covers are back on since this video.
Put in some fresh 94 Octane gas (half a tank worth), and it is running pretty smoothly now. My silicone couplers to the intercooler are too long/weak to hold up to vacuum though, so they are collapsing when not boosting. My brother is coming next weekend to make the hardpipe sections longer so I don't need the couplers like that, can also fix the sway bar issue as well, maybe even get my exhaust positioned correctly? That would be a delight.
I am excited to hear how it will sound once the exhaust isn't leaking all over the place. Hopefully similar to how it did before. I don't want to lose that 4A-G sound that I loved so much with the bluetop. It is a very different setup, but I hope it is still at least mostly similar. Plus the whine from the supercharger of course.
I finally got the windshield installed, which means once I get my IC piping fixed I can take it for an actual test drive with the new engine. Looking forward to that!
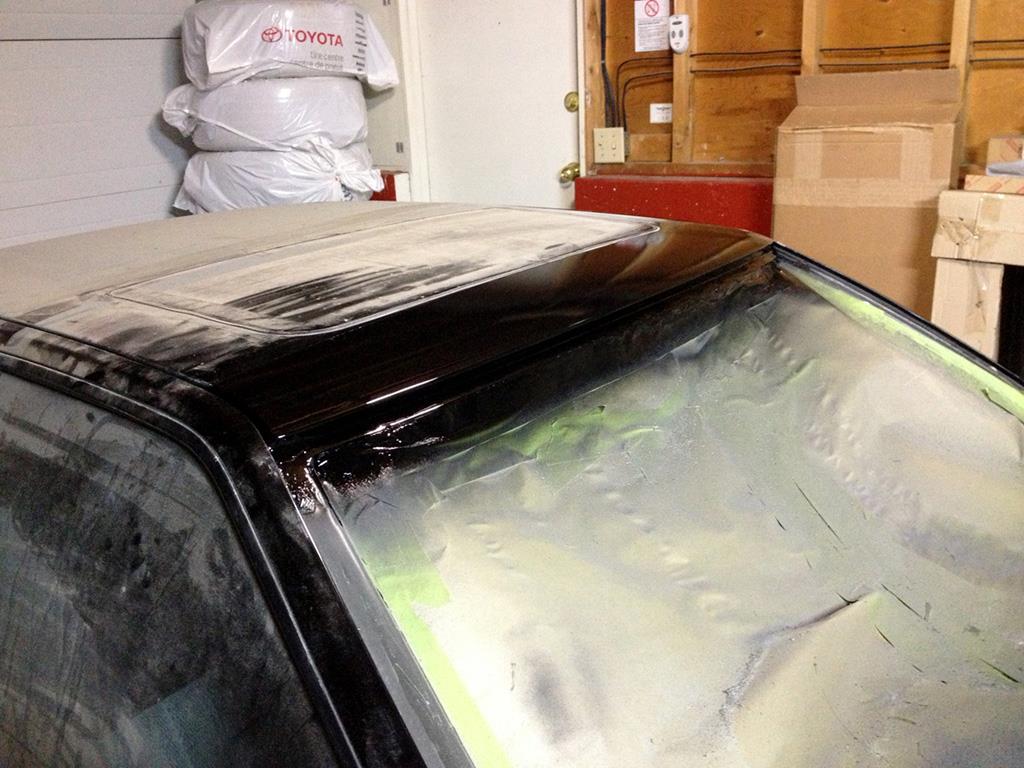
Top and bottom of windshield had some rust build up (see previous posts), so I took care of that and painted under where the glass will be mounted in preparation of the glass install:
Windshield adhesive dam kit. Adhesive strip didn't come attached from Toyota. First time I've ever seen it separate. I guess the 80's were tough times:
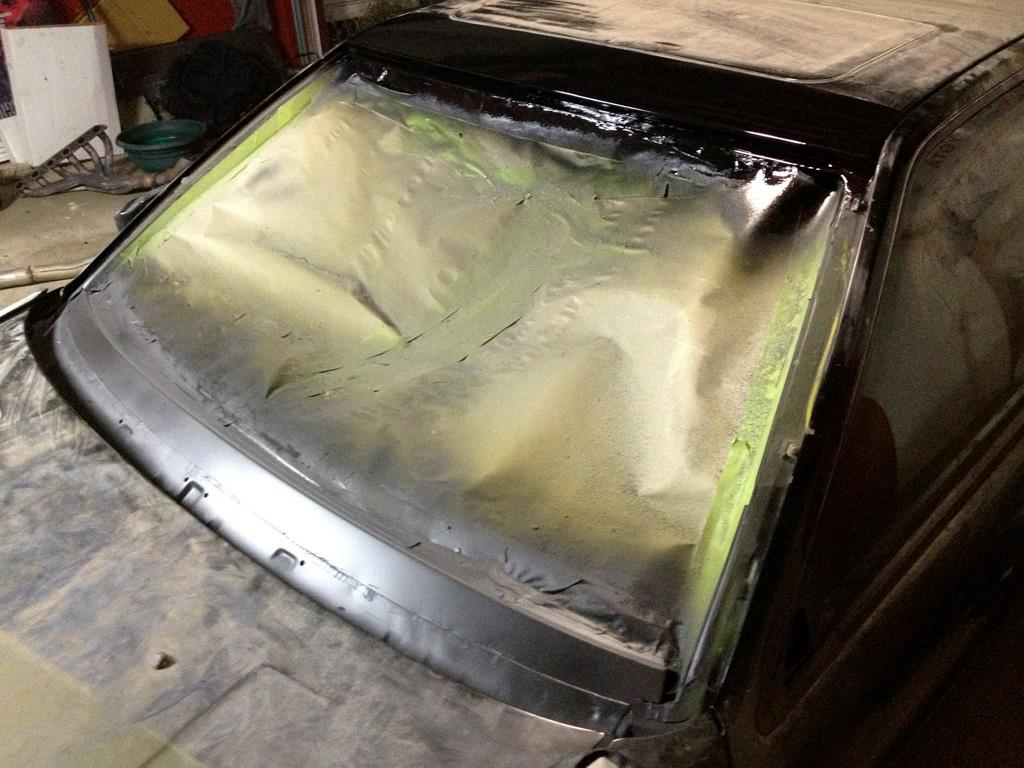
Adhesive backing applied to the dam kit before applying to the glass:
Preparing the windshield before installation. Adhesive dam kit applied, about to apply glass primer:
Glass installed in the car. The bottom seal isn't as clean as I'd like, but it is installed well, just a bit messy. The temperature was quite cool so the adhesive was acting differently than I am used to (I've only installed a few windshields):
Still worked out pretty cleanly. No excess urethane to speak of really:
AE86 alignment is easy with lower glass stoppers, however when installing the glass it is best to not rest it at the bottom before dropping the top, as it also caused some of the messy urethane at the bottom:
Clean top area. Nothing prepped for moulding installation yet, as that will wait until entire car is painted:
JDM yo! I guess I can remove it now:
Jeff
