GUIDE : How to Change Your Coolant

JSeaman

SM Official Expert: Guide Author
SM Expert
May 26, 2009
216
0
0
Derbyshire, UK
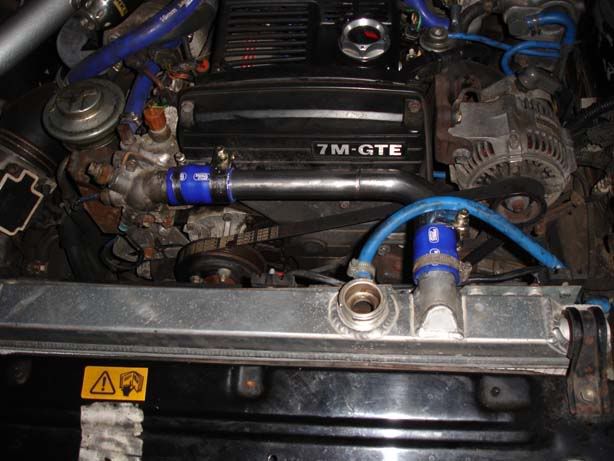
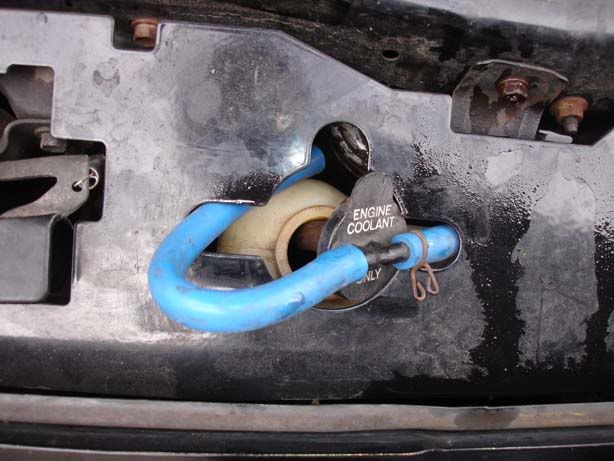
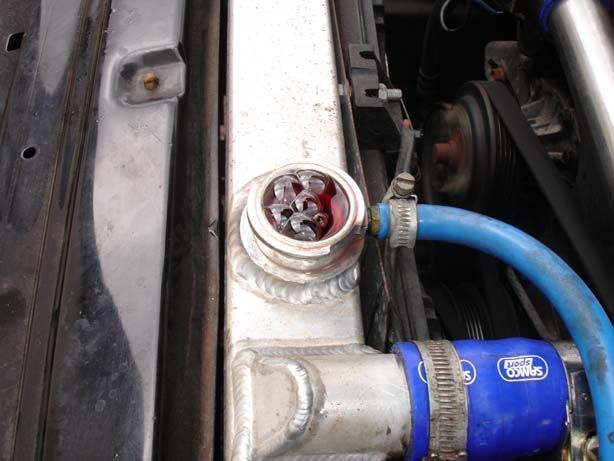
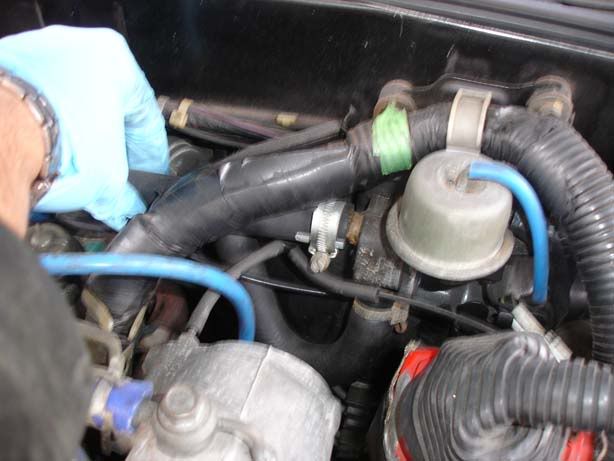
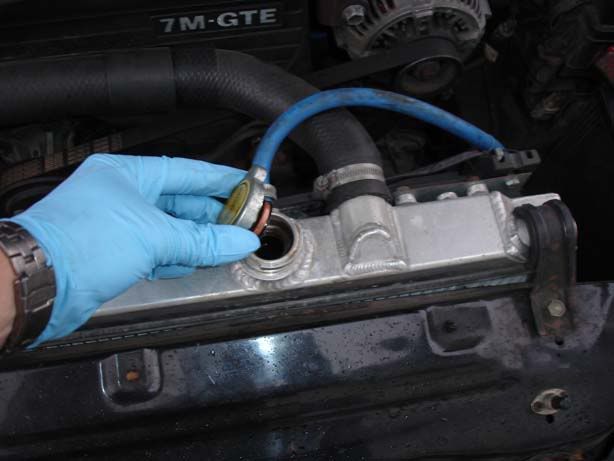
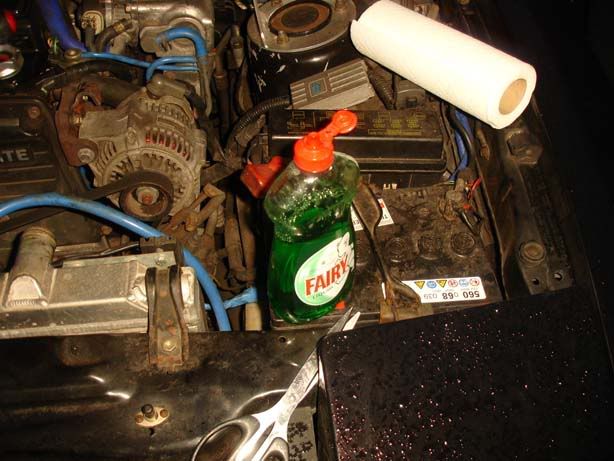
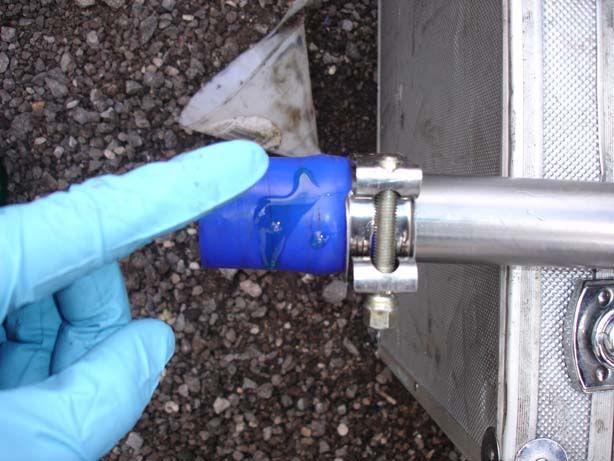
The coolant system on the 7M is a POTENTIAL weak point. If properly maintained, you have far less chance of having problems which may lead to a blown head gasket. You should inspect hoses regularly and any that show signs of cracking or have become brittle should be replaced immediately. Silicone is a good choice for those looking to uprate.

Things you'll need:

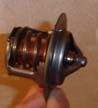
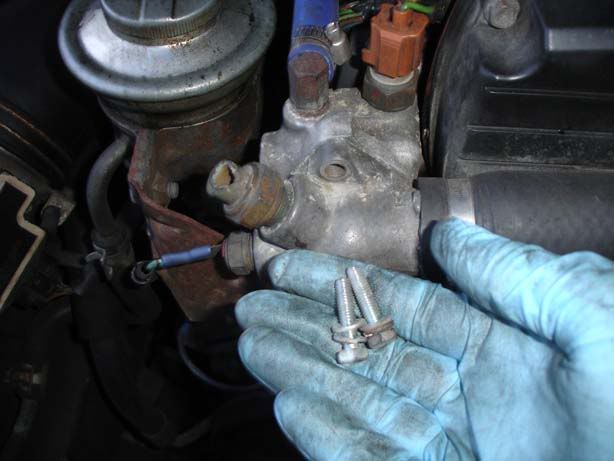
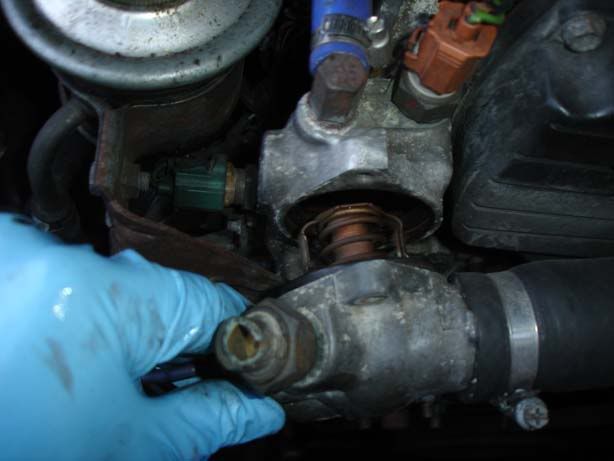
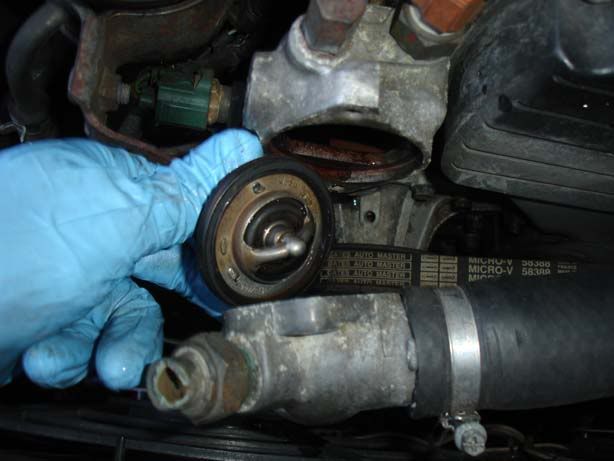
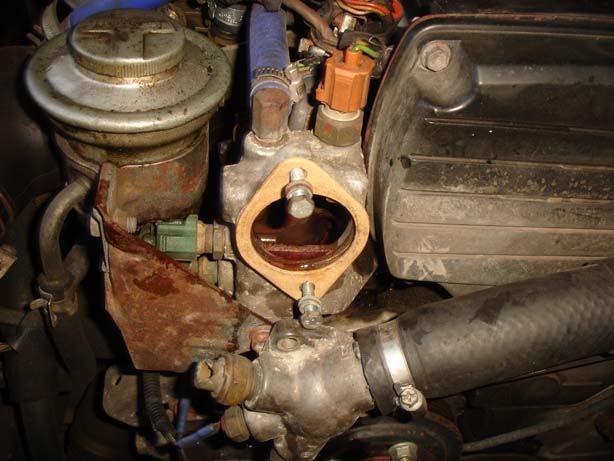
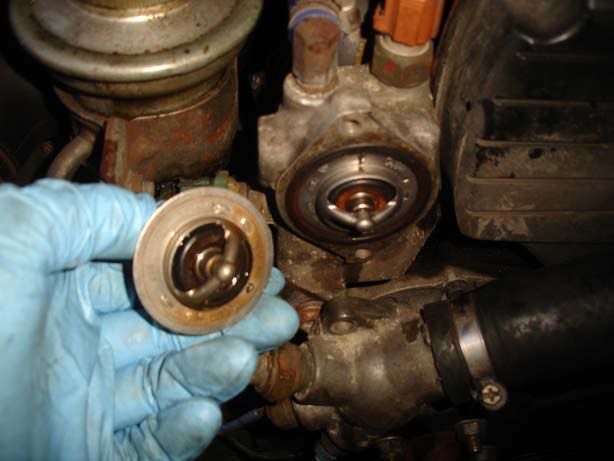
1. Thermostat - I recommend genuine Toyota (picture 1) - costs about £10, ensure it had the 'jiggle pin'/'jiggle valve' shown at the top of the stat (picture 2)

p1329301_1.jpg


p1329301_2.jpg


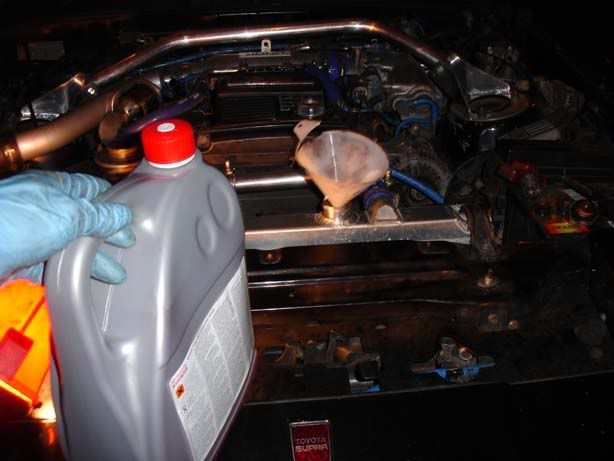
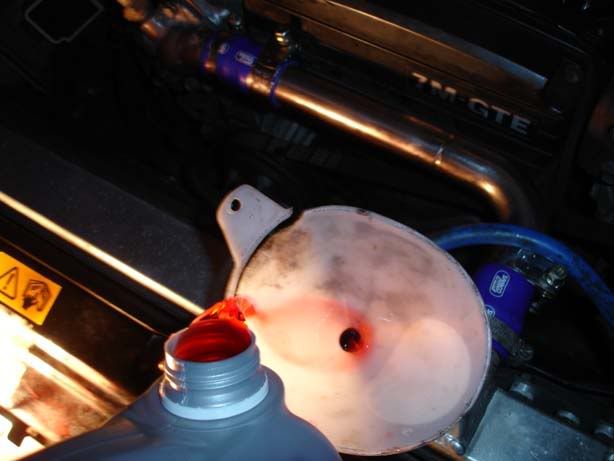
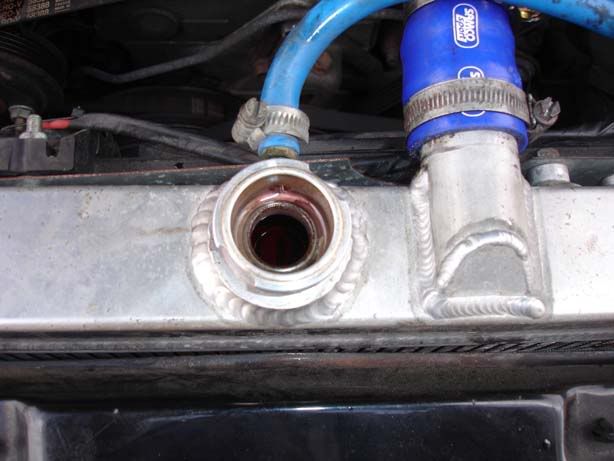
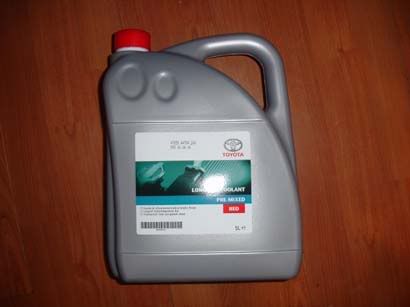
2. Coolant - Ethylene Glycol based, I recommend Toyota's pre-mixed 4life red. You'll need about 7.5-8 litres on a stock system and more if you have a bigger rad so get two lots of coolant (about £15 each)

p1329301_3.jpg


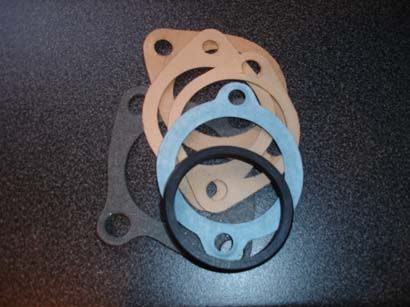
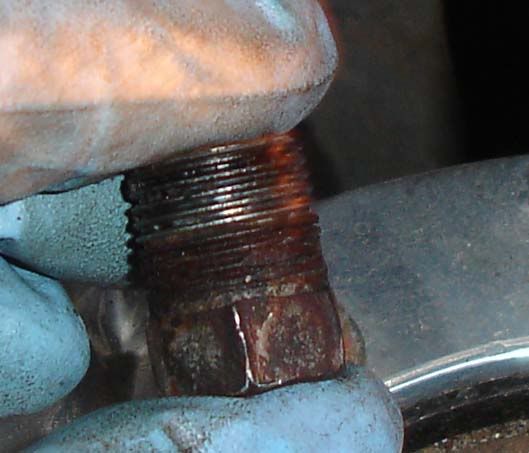
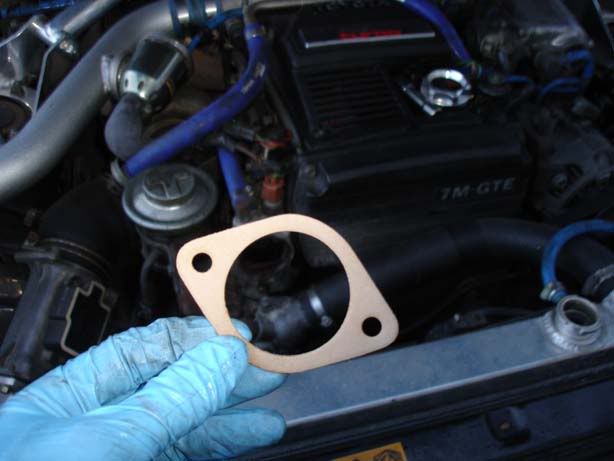
3. O ring for stat - You can get universal kits (shown in the picture), my experience was not good, go to Toyota to get the right fit

p1329301_4.jpg
 

JSeaman

SM Official Expert: Guide Author
SM Expert
May 26, 2009
216
0
0
Derbyshire, UK
Step 1 - Remove the rad cap. Note I have a Fluidyne rad so don't worry if yours is thinner and black, that's a stock radiator

IMPORTANT : Never remove the rad cap on a hot engine, the coolant is kept under pressure so that it can reach temperatures in excess of normal boiling point, if you open it hot then you will be greeted by a lot of spray, steam, jets of water and burns. Do this on a cold engine.

p1329302_1.jpg


Step 2 - Get a ratchet with an extension bar (Picture 1), and set to work on undoing the block drain plug. This may be very stubborn if it hasn't been done for a while (people sometimes cheat and just drain from the stat). Persist and you will get it. Picture 2 shows the location, it's a 17mm bolt that goes directly into the block and you'll be able to feel it below the rear of the exhaust manifold.

The third picture (sorry it's blurred) was taken from underneath the car so you could see the location of the bolt in situ. This shows that it stands quite proud of the block so you should be able to find it quite easily. Note it is right next to a circular recess (A core plug) so you can hunt around for one of those next to it. You won't be able to see the bolt so do it by feel.

Once removed, lots of coolant will come out so have a bucket underneath to catch it and dispose of it properly. The fourth picture shows the nut removed

p1329302_2.jpg

p1329302_3.jpg

p1329302_4.jpg

p1329302_5.jpg
 

JSeaman

SM Official Expert: Guide Author
SM Expert
May 26, 2009
216
0
0
Derbyshire, UK
Step 3 - This picture is taken from underneath the car and shows the drain tap for a Fluidyne rad, the stock rad has a similar tap. Undo this and coolant will come out the centre as shown in the second picture

p1329304_1.jpg

p1329304_2.jpg


Step 4 - Whilst the coolant drains, head back up to the thermostat housing. You have two 10mm bolts, one at the top and one that the ratchet is on (picture 1). Crack them both off then undo them both (The housing will probably stay in place even without the bolts), the bolts are quite long (picture 2). You can see a broken piece of plastic on the top left of the stat, you may have the two plastic fittings in tact on yours, don't worry, nothing should be connected - they are not used on UK cars.

p1329304_3.jpg

p1329304_4.jpg
 

JSeaman

SM Official Expert: Guide Author
SM Expert
May 26, 2009
216
0
0
Derbyshire, UK
Step 5 - Pull the housing forwards (there should be little resistance), and you reveal the thermostat. Note the recess that the stat sits in with an o ring seal around it.

While we're on the subject of thermostats - Don't run without a thermostat, it is there for good reason. It is important to get the coolant to an appropriate operating temperature as soon as possible and the thermostat plays a big part in this by preventing the flow through your radiator. The stat usually opens when the car reaches operating temperature and stays open but it is capable of closing again if required (i.e. the coolant temperature drops).

If you suscept your stat is faulty then put it in a saucepan of water and bring it to the boil, the wax inside should expand and overpower the force of the spring at 88 degrees celcius (so before the water boils).

p1329305_1.jpg


Step 6 - Remove the stat. Pay attention to the position of the jiggle pin (the piece of metal that dangles about through the hole in the stat), if this isn't at the top then it has been fitted incorrectly. You should also see the temperature range engraved onto the stat (88 degrees C), check this is correct

p1329305_2.jpg


Step 7 - Get yourself a new gasket for the stat housing such as that shown in the picture. I find it easiest to place the gasket in position with the two bolts loosely fitted (picture 2) and then pop the stat in, it all seems to stay in place easily that way

p1329305_3.jpg

p1329305_4.jpg
 

JSeaman

SM Official Expert: Guide Author
SM Expert
May 26, 2009
216
0
0
Derbyshire, UK
Step 8 - After a lot of cursing and fiddling, I gave up with the universal O ring set I had and re-used the o ring off the old stat. This is not ideal although won't really do any harm. I recommend you get a new one. The o ring fits around the outside of the stat (you can see the ring where it sat on the old one), and allows the stat to sit in the recess of the housing as shown in the pictrue. Make sure the jiggle pin is at the top - this allows air to bleed out through the system and also a small exchange of coolant either side of the stat which prevents coolant spike that would occur due to the hot coolant on one side and cold coolant on the other

p1329306_1.jpg


Step 9 - If you are wanting to give the system a good cleaning out (or in my case fit an aftermarket rad pipe), you will need to undo the top rad hose (shown in the pictures) and the bottom hose. Then you can 'back flush' the radiator by putting a hose pipe in the bottom of the rad and flushing water out of the top hose (this is the opposite direction to normal coolant flow and will allow you to dislodge and sludge/dirt that has built up). You can also run the hose through the head/block before you put the stat in if you choose

The trick to removing coolant hoses (because they heat up they can be quite stubborn), is to give them quite a vigorous shaking movement. Pull upwards then push downwards (third picture) to crack off the crust of dried coolant that can build up, then they can be slid off easily.

p1329306_2.jpg

p1329306_3.jpg

p1329306_4.jpg


Step 10 - If you do remove the top hose (or any other pipe), take some kitchen towel and clean up the recepticle where the hose seals, this will reduce the chance of sprouting leaks)

p1329306_5.jpg
 

JSeaman

SM Official Expert: Guide Author
SM Expert
May 26, 2009
216
0
0
Derbyshire, UK
Step 11 - When fitting pipes/clips back on, a small dash of fairy liquid can help - especially if they are a tight fit. Don't go overboard and try to ensure you don't get much/any in the coolant system. Second picture shows me smearing some on the silicone hose before fitting the clamps

p1329307_1.jpg

p1329307_2.jpg


Step 12 - Chance to show off my new top hose :)

p1329307_3.jpg


Step 13 - Tighten up the rad tap and reinsert the drain plug for the block. Don't forget this or you'll throw your new coolant on the floor!

p1329307_4.jpg


Step 14 - Jack the front of the car up. The heater matrix sits at a higher point than the rad cap so you want to change this to allow air bubble to naturally migrate to the highest point in the system. Get the front of the car up nice and high (I used the cross member shown to raise the car but you can do this by parking on a steep hill if it's easier for you)

The second picture shows you how high I put the car

p1329307_5.jpg

p1329307_6.jpg
 

JSeaman

SM Official Expert: Guide Author
SM Expert
May 26, 2009
216
0
0
Derbyshire, UK
Step 15 - Pop a funnel in the rad neck (picture 1) and prepare to add your 4life. The second picture shows the rate at which I poured the coolant in - nice and slowly and pause regularly so any trapped bubbles escape. The less you introduce now, the less you have to disperse later so nice and easy

p1329308_1.jpg

p1329308_2.jpg


Step 16 - Fill the rad until the coolant is almost at the neck. I don't fill right to the top at this stage so as to reduce the spillage when you start the car, have about 1/4" gap

p1329308_3.jpg


Step 17 - Put your heaters on full and hot (no need for ECON or recirculated in the car as shown in the pic!!)

p1329308_4.jpg


Step 18 - Ensure your overflow bottle is between the min and max markers

p1329308_5.jpg


Step 19 - Check for leaks around any hoses/seals you've been near then fire her up! Once you've started the car, constantly monitor the level in the rad (you haven't put the rad cap on by the way), and ensure it is full with coolant. After any initial ejections of coolant in the first 30 seconds or so, top up that level so the 1/4" gape disappears. You should see the bubbles working their way out as shown in the picture - note that some coolant spillage is inevitable so put some cloths or towels around to catch this

p1329308_6.jpg


Step 20 - Squeeze the pipes going to the heater matrix to encourage all air to leave the system - you will see more bubbles out the rad cap and you'll probably need to top up after each few squeezes. It also helps to increase the revs and hold it at, say 1500-200 rpm, for 10 seconds or so to move the coolant round and heat it up sooner.

p1329308_7.jpg


Step 21 - Keep the engine running with the rad cap off until you feel heat in the top rad hose (this occurs when the stat opens) and the bubbles cease. Once you have done this, pop the rad cap back on and take her out for a spin. Keep your eye on the coolant for at least 2-3 days to ensure you don't need to top any up (pop it straight in through the rad cap when cold or use the overflow when warm)

Finally, if you do find you have a gurgling behind the dash after doing this, burp the system again (i.e. jack the front end up, run it with the heaters on and rad cap off whilst squeezing pipes & topping up coolant until the bubble stop)

Now see the heater matrix bypass valve mod - well worth doing!
 

JSeaman

SM Official Expert: Guide Author
SM Expert
May 26, 2009
216
0
0
Derbyshire, UK
Comment

The paper gasket you show being fitted to the thermostat housing isn't for use on a supra .. the rubber seal is the only gasket that should be fitted

Response

Part of that awful universal kit I was given - skip that stage then guys, thanks Ed