I think this would be a good thread, and anyone who has good ideas, or has found out the hard way should share the knowlege with everyone.
First, clean your parts and then clean them a few more times.") Can't assemble an engine too clean, but you sure can screw up a nice engine with some dirty parts. (Dirt just causes instant wear and tear, and can clog up vital oil passeges too.)
Can't assemble an engine too clean, but you sure can screw up a nice engine with some dirty parts. (Dirt just causes instant wear and tear, and can clog up vital oil passeges too.)
Do not hot tank engine blocks if you can avoid it. Sonic clean them, or use a large washing machine with hot water and soap. (Machine shops have these.) The hot tanks with acid in them eat up softer metals like the freeze plugs and your oil pump drive bearings. If you hot tank, you MUST replace all your freeze plugs and the oil pump drive bearings. These take a skilled hand and a special tool to install, and must be aligned right or the oil holes don't line up and you fry them in short order. This is an excellent place for dirt to hide, so make sure this area of the block is nice and clean.
Use gun bore cleaning brushes to clean all oil passeges. Remove all oil plugs in the block and the crank, and clean them after your machine work is done. You will be shocked at the metal chips hiding in these drilled out oil passeges, and keep in mind any dirt/metal here is going to be pushed right to your bearings when you start up the motor. (I learned this the hard way, a motor that was well built, and had correct tolerances lasted about 15 min due to sandblasting media trapped in these passeges AFTER they were pressurewashed 3 times.)
When you replace the plugs, use new ones if there was any damage to the old ones when you removed them. (I used easy outs on the crank plugs, and just put new ones in there with locktite to make sure they never come out again.) I also used the right stuff sealant on all block plugs to make sure they never leak.
Second, machine work needs to be done by a shop with the right tools, and attitude. If they do not have a tourqe plate for the 7M keep looking. If they tell you a rough surface is fine, and look like cows in a field when you ask about RA values and MHG's keep looking. If they argue with you, keep looking.
I have found that ROSS pistons slap if you use the 6k clearance they reccomend. I'm running 4k clearance right now, and it only makes noise when it's cold. I'd go with 3 or 3.5k clearance if I did it over again. OR I'd go with a piston design with longer skirts like the Weisco ones, and the 4k clearance.
The block deck should be cut only to clean it up for the MHG. And make sure the shop only cuts the deck with the front cover in place. If you don't your looking at problems later on. (Oil leaks, BHG's and warped heads come to mind.)
After your block is bored and honed for the pistons with the tourqe plate used, you want to de-burr the bottem of the bores. This is done by hand with some emory paper. Wear gloves as is area is tight, and you will get cut by the sharp edges without them. Wrap the emory paper around a deep 1/2" socket. Then carefully sand/deburr the sharp machined edge at the bottem of the piston bore. You can feel the sharp edge before you deburr it, and it's gone when your done. DO NOT sand the insides of the bore. You just want to smooth this edge so it does not cut into your piston skirts at the bottem of the stroke. (I found out the hard way on motor #3. What the hell are these scratches on the skirts? Then I felt the bores, and dang if there was not a sharp edge down there, and as the pistons rock at the bottem of the stroke, the skirts catch this edge. It might only be a problem on the stroker motors, but why not do this on ALL 7M's?)
Do nothing to the crank if the journals are not worn machine wise. Just pull the plugs, clean the passeges and replace the plugs. Make sure your thrust washer surface is nice and burr free. A few seconds here with some fine emory cloth to polish it up is not a bad idea. (By hand, not on a machine.) This surface just keeps the crank from being pushed forward or backwards, and it is only lubricated by oil splashing out from the main bearing. A crosshatch pattern on the surface will pull oil off the bearings, and could lead to early wear. A smooth surface will let the oil stay better and cause less wear. I champferd (Spelling) the oil holes on my crank. This takes a steady hand, and lots of electrical tape, a small round ball stone, and a die grinder. You will also want a sharp knife. First wrap all your crank journals with two or more layers of electrical tape. Then carefully cut out the tap at each oil hole. Then while being VERY careful, use the round ball grinding stone to smooth the edge of each oil hole. Make the tapers longer towards the middle of the bearing. This helps to ease the flow of oil feeding each bearing, and removes a sharp edge that is bad for fluid flow. Besides, it looks cool This is a good time to hand polish the thrust surfaces too. When your done, remove the tape, and clean up the crank. Remove the plugs and clean the passges with gun bore brushes. (Easy to do this if the crank is laying in a solvent tank. You can flush out the passges with the solvent.)
If you have the time, debur the block with a die grinder. This is a good time to remove any casting sand, flash or other crap that has been riding along with your engine for many years. It also removes possible stress risers and you get some time to look closely at every angle on the block. Stay away from any machined surface, but do spend some time on casting marks on the inside and out of the block. Clean the engine again
I coated my final engine inside and out with a thermal dispersant. I would not reccomend this unless your very good with a spray gun, and have an oven that the block can fit into. (400f for two hours.) If your going to paint the outside, I'd do it BEFORE you start to assemble the engine. Just use blue painters tape and mask off areas you don't want paint to go, and ONLY paint the outside of the motor. You will want the freeze plugs and other oil and coolant plugs installed. You don't want the front cover installed yet however.
I found a few light coats of self etching primer, then light coats of the final color you want are best. I like a glossy engine, so coating it with a final few coats of clear coat are excellent, and make for a very nice looking motor.
Before the paint cures/dries, you want to de-mask the block, and then wipe any overspray off with a cotton rag and a can of brake cleaner or carb cleaner. Just spray the cleaner onto the rag, and then carefully wipe off any areas you do not want paint on. If your careful, it leaves a nice sharp edge from the cast iron that is painted to the bare metal machined areas you don't want paint on like the deck surface or oil filter gasket mating area.
Second part is assembly of the motor. I like to have all the bearings arranged on clean rags next to the engine stand. I like to use assembly lube in a tube as it's easy to apply that way.
Start with your painted, machined motor. (Assuming your have checked the bearings for clearance at this point. Also you have gapped your rings, and have them installed on the pistons, and have them numbered for each cyc. (I gap rings to each cyc and piston. I number each rod/piston, and note that they HAVE to be facing the right direction when you assemble them. The smaller valve cutout goes to the exhaust side. The rods only fit one way, so make sure your pistons AND rods are facing the right way when you put them together AND when you slide them down onto the crank.)
With the crank side up. clean the bearing locations one more time. Then lay each main bearing into place, and dab some lube on the thrust washers and put them in too. A small squirt of lube in each bearing does the trick for the crank which is next. Carefully lay the crank onto the mains, be careful not to damage, or displace your thrust washers.
Make sure your main caps are clean. Put the main bearings in place on each cap, lube them, and then place the caps down. Remember some lube will hold the thurst bearings in place on the center main. If your using studs, install them AFTER you place the caps. A soft tap with a plastic dead blow hammer can be helpfull here, but DO NOT BEAT THEM DOWN. Lube the bolts/studs and tourqe to TSRM or ARP specs in the right pattern. Stop now and check to make sure your crank spins freely in the engine. There should be little drag, and you should be able to turn it by hand with NO wrench on the crank. Avoid the temptation to spin this crank for too long.. LOL
Next are the pistons and rods. Lay them out in order and direction. Inspect to make sure no rings are out of place. Use 30wt to lube the rings/pistons. I've heard that lucas oil treatment is a good idea here, but have never tried it myself. (Just put it straight from the bottle, no oil mixed in?)
Before you get lube happy, have two short pieces of hose ready if your using stock rods. Slip the hose over the ends of the rod bolts. My forged rods just have bolts that go through the caps into the rods, so no need for hoses here.) Be carefull you DO NOT SCRATCH the bores, or the crank journals with the rods/bolts. Install your rod bearing, and a lube it. Then lube the piston/ring lands. Then compress with your installing tool. (Did I forget to say you turned the engine over at this point? LOL) Be carefull and don't scratch the block deck while your putting the pistons in. Make sure you do not compress a ring out of the land, especially the oil rings and scrapers, they are very flimsy and will be ruined if you compress them out of place. Align and then check the alignment of the pistons again before you gently push/tap them into the bores. It should just go in with minimal force. If not, check to see that a ring has not escaped. Force here will ruin a ring or other expensive parts.
As you slip the piston/rod down into place, I found it was best to have the crank all the way down so you can put the rod caps on easy. Flip the motor back over, and put the rod caps in place with the bearings in them. Lube the bearings, then place the cap/bearing, and put the bolts/nuts finger tight. Snug them, but do not tourqe them yet. Your going to notice that the crank is going to get harder to turn at this point, so use a pully bolt in the end of the crank to hang a closed end wrench off of. I like a wrench better than a socket drive as you can move the crank either direction w/o flipping any levers. It makes aligning it for the next piston/rod easy.
Install each piston/rod combo the same way, and then tourqe them all to specs.
Rotate the crank, noting it should turn, but will have some drag due to the piston rings and other friciton parts your dealing with. (Again, I'm assuming you have checked out all beaings for clearance already, and have hung the pistons in the motor w/o rings to make sure everything fits right? I did this 3 or 4 times on each motor to make sure it all goes together w/o any problems.) Besides, you can't plasti gauge with lube in there, and you have to tourqe each journal to check the clearance, then take it appart and clean out the plasti gauge.)
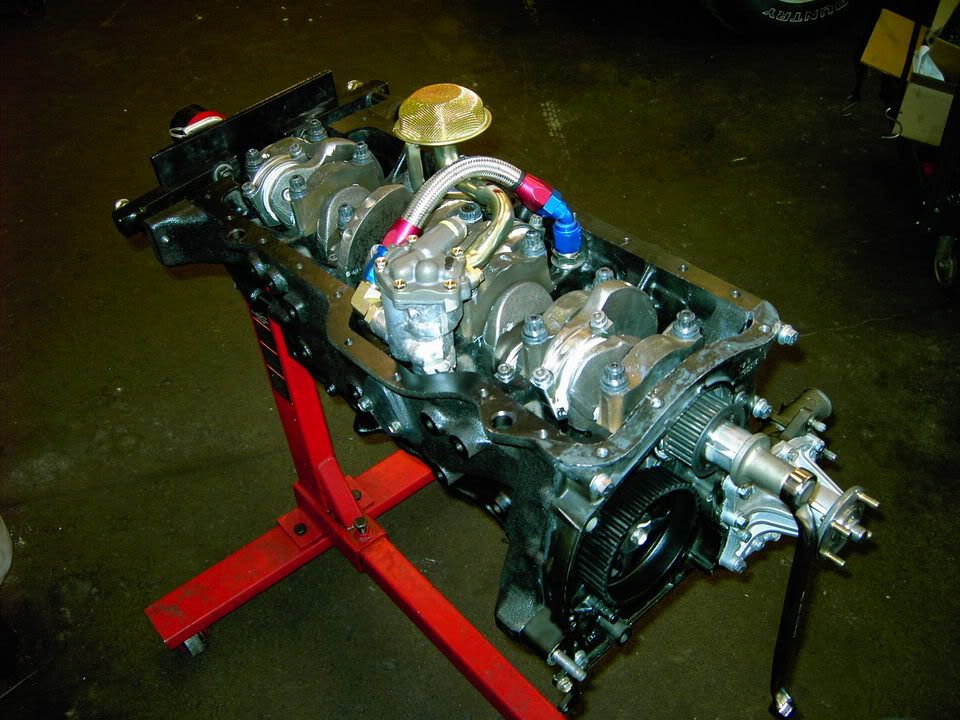
With the bottem end rotating assembly now done, next is the oil pump and drive. Make sure your oil pump bearings are in right, and the oil holes are in place. If not, they don't get oil, and your engine will die.
Lube the pump drive bearings, and the pump drive journals, and then carefully slip it into place. It is held with just one bolt. Check the clearance/play per the TSRM. Excessive play here is a bad deal. Lube on the pump drive gear is a good idea.
Your oil pump should be shimmed, and cleaned at this point. You need to have packed it with some assembly lube. (I reccomend shimming the bypass while you have the cover off the pump. Also clean the pump, I was supprised to find some machine debris inside of my new pump, right out of the box.) Packing the pump with some lube helps to prime it as well.
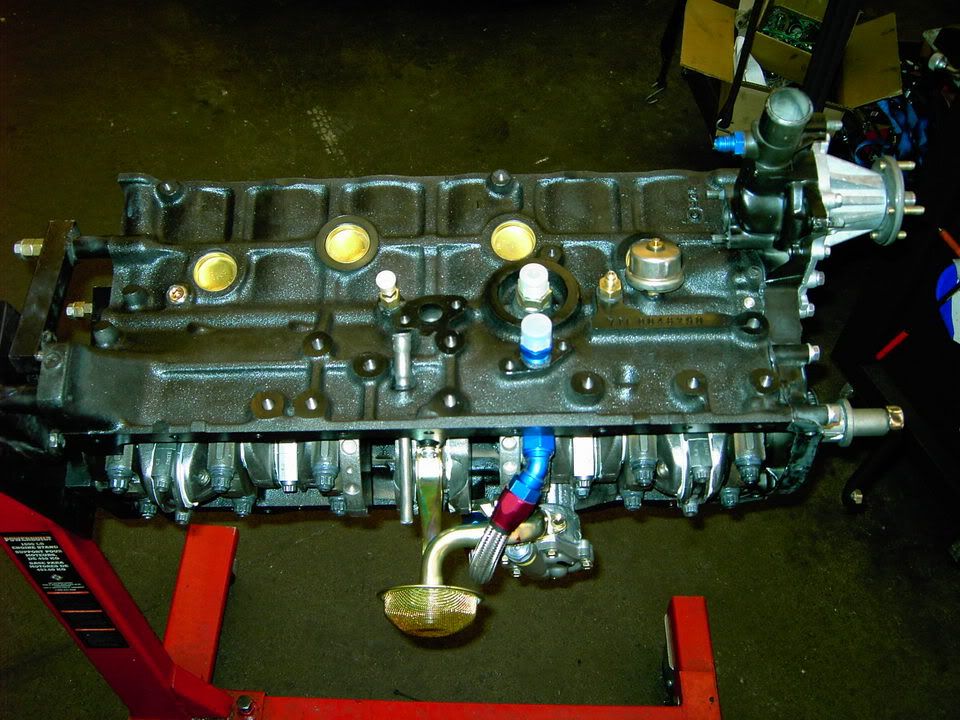
Lube the bronze drive gear, and slip the pump down into the block. Secure with one bolt. Secure the crossover tube and other fittings. Now you can set the depth of the pickup if you want. Measure the depth of the pan with a straight edge and tape measure. (Pan rails to sump depth.) Then measure up from the block rails and see how "low" your sump sits. With a careful hand and a pry bar, you can gently bend the sump "down" up so it's sitting lower in the pan when everything is together. This might make the sump slightly crooked, but who cares, it's now lower into the oil that will keep the engine alive longer. If you go too low, it will starve the motor however, so about 1/2" or 1.5mm is a good call. Keep in mind the screen is not the bottem of the sump pickup, so if the screen is almost touching, it's about right.
You need to put the front and rear covers on before you place the oil pan. this can be a PITA on the rear cover due to the engine stand. Be patient and make sure you seal everything up well. Leaks at the rear seal retainer would be even worse than taking your time now. so do it right.
With the front and rear covers in place, you can put the oil pan on if you want. If you choose not to, it makes dropped nut/bolts easy to get. (They fall to the floor v/s falling to the inside of a freshly sealed up oil pan.) I personally like to wait to put the pan on untill I have the head in place at a minimum.
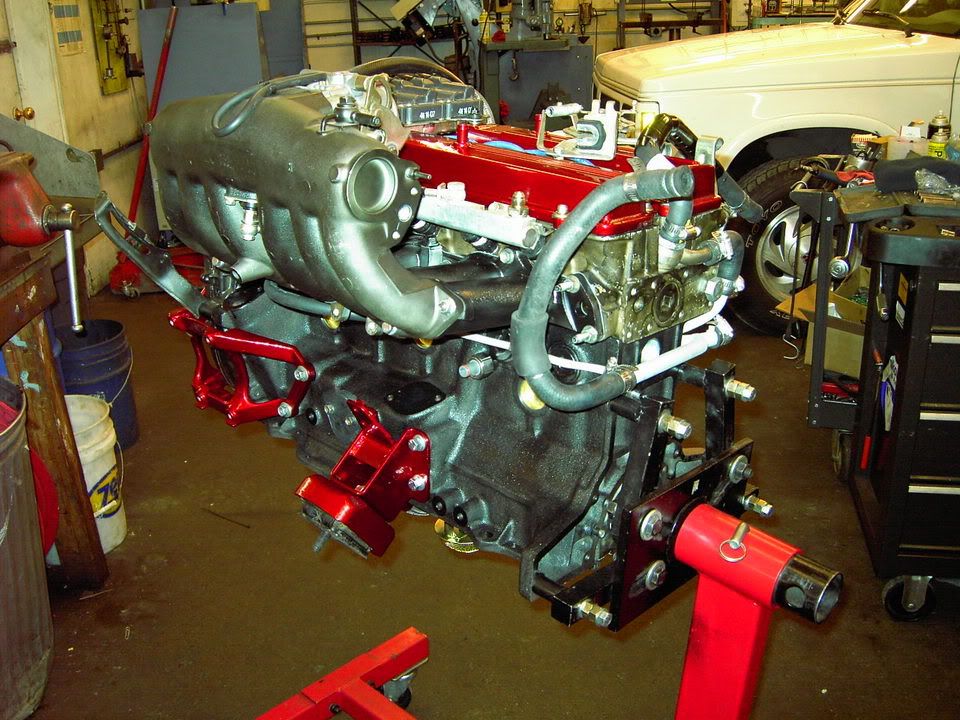
With the 7M, you want to put the pipe on before you place the head. Use new hoses and worm clamps. Use sealer where any metal to metal gasket would go. The paper gaskets from the kits are WORTHLESS.
Put your knock sensors in place. Put your oil pressure sensor in place, and lightly coat the threads with sealant. Put the oil pump drive sprocket on. (Easy to do as you can hold the drive shaft since you don't have an oil pan on yet...)
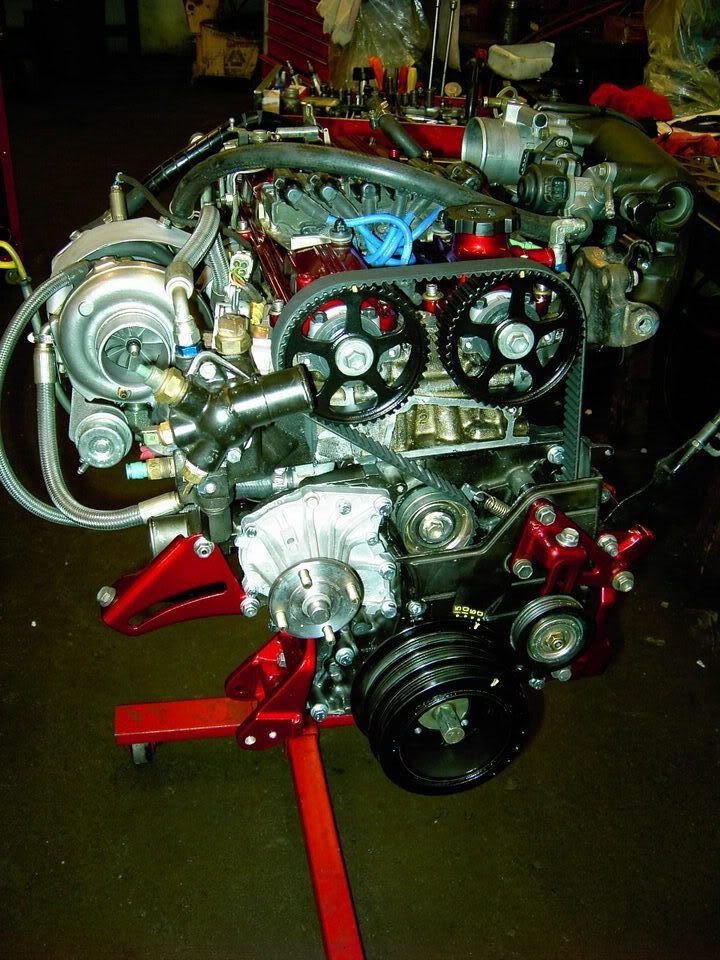
Put the cam belt drive in place. Lube all seal surfaces so you don't tear a seal.
BTW, before you put the front cover on, clean both surfaces and run beads of right stuff where the cheapo paper gaskets would have leaked. Then place the cover and tourqe it down per TSRM. There are a few studs, and bolts, and I used new everything here possible. No leaks is the goal. Care around the studs/bolts that go into the block cooling passges will result in NO leaks. No care and sealant here will result in the mystery leak of huge proportions and much swearing and cursing will not fix it. (Only tear down and use of sealant v/s the shitty paper gaskets will resolve this.) Same goes for the water pump. You can put the pump on while it's on the front cover. There are a few shared bolts/studs, but no need to take the pump loose if you do not need to. (Oh, like on engine #4 for example on the same pump inside of the same 18 month period of time...)
Now comes the head.
And I'll finish this later.
First, clean your parts and then clean them a few more times.
Can't assemble an engine too clean, but you sure can screw up a nice engine with some dirty parts. (Dirt just causes instant wear and tear, and can clog up vital oil passeges too.)Do not hot tank engine blocks if you can avoid it. Sonic clean them, or use a large washing machine with hot water and soap. (Machine shops have these.) The hot tanks with acid in them eat up softer metals like the freeze plugs and your oil pump drive bearings. If you hot tank, you MUST replace all your freeze plugs and the oil pump drive bearings. These take a skilled hand and a special tool to install, and must be aligned right or the oil holes don't line up and you fry them in short order. This is an excellent place for dirt to hide, so make sure this area of the block is nice and clean.
Use gun bore cleaning brushes to clean all oil passeges. Remove all oil plugs in the block and the crank, and clean them after your machine work is done. You will be shocked at the metal chips hiding in these drilled out oil passeges, and keep in mind any dirt/metal here is going to be pushed right to your bearings when you start up the motor. (I learned this the hard way, a motor that was well built, and had correct tolerances lasted about 15 min due to sandblasting media trapped in these passeges AFTER they were pressurewashed 3 times.)
When you replace the plugs, use new ones if there was any damage to the old ones when you removed them. (I used easy outs on the crank plugs, and just put new ones in there with locktite to make sure they never come out again.) I also used the right stuff sealant on all block plugs to make sure they never leak.
Second, machine work needs to be done by a shop with the right tools, and attitude. If they do not have a tourqe plate for the 7M keep looking. If they tell you a rough surface is fine, and look like cows in a field when you ask about RA values and MHG's keep looking. If they argue with you, keep looking.
I have found that ROSS pistons slap if you use the 6k clearance they reccomend. I'm running 4k clearance right now, and it only makes noise when it's cold. I'd go with 3 or 3.5k clearance if I did it over again. OR I'd go with a piston design with longer skirts like the Weisco ones, and the 4k clearance.
The block deck should be cut only to clean it up for the MHG. And make sure the shop only cuts the deck with the front cover in place. If you don't your looking at problems later on. (Oil leaks, BHG's and warped heads come to mind.)
After your block is bored and honed for the pistons with the tourqe plate used, you want to de-burr the bottem of the bores. This is done by hand with some emory paper. Wear gloves as is area is tight, and you will get cut by the sharp edges without them. Wrap the emory paper around a deep 1/2" socket. Then carefully sand/deburr the sharp machined edge at the bottem of the piston bore. You can feel the sharp edge before you deburr it, and it's gone when your done. DO NOT sand the insides of the bore. You just want to smooth this edge so it does not cut into your piston skirts at the bottem of the stroke. (I found out the hard way on motor #3. What the hell are these scratches on the skirts? Then I felt the bores, and dang if there was not a sharp edge down there, and as the pistons rock at the bottem of the stroke, the skirts catch this edge. It might only be a problem on the stroker motors, but why not do this on ALL 7M's?)
Do nothing to the crank if the journals are not worn machine wise. Just pull the plugs, clean the passeges and replace the plugs. Make sure your thrust washer surface is nice and burr free. A few seconds here with some fine emory cloth to polish it up is not a bad idea. (By hand, not on a machine.) This surface just keeps the crank from being pushed forward or backwards, and it is only lubricated by oil splashing out from the main bearing. A crosshatch pattern on the surface will pull oil off the bearings, and could lead to early wear. A smooth surface will let the oil stay better and cause less wear. I champferd (Spelling) the oil holes on my crank. This takes a steady hand, and lots of electrical tape, a small round ball stone, and a die grinder. You will also want a sharp knife. First wrap all your crank journals with two or more layers of electrical tape. Then carefully cut out the tap at each oil hole. Then while being VERY careful, use the round ball grinding stone to smooth the edge of each oil hole. Make the tapers longer towards the middle of the bearing. This helps to ease the flow of oil feeding each bearing, and removes a sharp edge that is bad for fluid flow. Besides, it looks cool
This is a good time to hand polish the thrust surfaces too. When your done, remove the tape, and clean up the crank. Remove the plugs and clean the passges with gun bore brushes. (Easy to do this if the crank is laying in a solvent tank. You can flush out the passges with the solvent.) If you have the time, debur the block with a die grinder. This is a good time to remove any casting sand, flash or other crap that has been riding along with your engine for many years. It also removes possible stress risers and you get some time to look closely at every angle on the block. Stay away from any machined surface, but do spend some time on casting marks on the inside and out of the block. Clean the engine again
I coated my final engine inside and out with a thermal dispersant. I would not reccomend this unless your very good with a spray gun, and have an oven that the block can fit into. (400f for two hours.) If your going to paint the outside, I'd do it BEFORE you start to assemble the engine. Just use blue painters tape and mask off areas you don't want paint to go, and ONLY paint the outside of the motor. You will want the freeze plugs and other oil and coolant plugs installed. You don't want the front cover installed yet however.
I found a few light coats of self etching primer, then light coats of the final color you want are best. I like a glossy engine, so coating it with a final few coats of clear coat are excellent, and make for a very nice looking motor.
Before the paint cures/dries, you want to de-mask the block, and then wipe any overspray off with a cotton rag and a can of brake cleaner or carb cleaner. Just spray the cleaner onto the rag, and then carefully wipe off any areas you do not want paint on. If your careful, it leaves a nice sharp edge from the cast iron that is painted to the bare metal machined areas you don't want paint on like the deck surface or oil filter gasket mating area.
Second part is assembly of the motor. I like to have all the bearings arranged on clean rags next to the engine stand. I like to use assembly lube in a tube as it's easy to apply that way.
Start with your painted, machined motor. (Assuming your have checked the bearings for clearance at this point. Also you have gapped your rings, and have them installed on the pistons, and have them numbered for each cyc. (I gap rings to each cyc and piston. I number each rod/piston, and note that they HAVE to be facing the right direction when you assemble them. The smaller valve cutout goes to the exhaust side. The rods only fit one way, so make sure your pistons AND rods are facing the right way when you put them together AND when you slide them down onto the crank.)
With the crank side up. clean the bearing locations one more time. Then lay each main bearing into place, and dab some lube on the thrust washers and put them in too. A small squirt of lube in each bearing does the trick for the crank which is next. Carefully lay the crank onto the mains, be careful not to damage, or displace your thrust washers.
Make sure your main caps are clean. Put the main bearings in place on each cap, lube them, and then place the caps down. Remember some lube will hold the thurst bearings in place on the center main. If your using studs, install them AFTER you place the caps. A soft tap with a plastic dead blow hammer can be helpfull here, but DO NOT BEAT THEM DOWN. Lube the bolts/studs and tourqe to TSRM or ARP specs in the right pattern. Stop now and check to make sure your crank spins freely in the engine. There should be little drag, and you should be able to turn it by hand with NO wrench on the crank. Avoid the temptation to spin this crank for too long.. LOL
Next are the pistons and rods. Lay them out in order and direction. Inspect to make sure no rings are out of place. Use 30wt to lube the rings/pistons. I've heard that lucas oil treatment is a good idea here, but have never tried it myself. (Just put it straight from the bottle, no oil mixed in?)
Before you get lube happy, have two short pieces of hose ready if your using stock rods. Slip the hose over the ends of the rod bolts. My forged rods just have bolts that go through the caps into the rods, so no need for hoses here.) Be carefull you DO NOT SCRATCH the bores, or the crank journals with the rods/bolts. Install your rod bearing, and a lube it. Then lube the piston/ring lands. Then compress with your installing tool. (Did I forget to say you turned the engine over at this point? LOL) Be carefull and don't scratch the block deck while your putting the pistons in. Make sure you do not compress a ring out of the land, especially the oil rings and scrapers, they are very flimsy and will be ruined if you compress them out of place. Align and then check the alignment of the pistons again before you gently push/tap them into the bores. It should just go in with minimal force. If not, check to see that a ring has not escaped. Force here will ruin a ring or other expensive parts.
As you slip the piston/rod down into place, I found it was best to have the crank all the way down so you can put the rod caps on easy. Flip the motor back over, and put the rod caps in place with the bearings in them. Lube the bearings, then place the cap/bearing, and put the bolts/nuts finger tight. Snug them, but do not tourqe them yet. Your going to notice that the crank is going to get harder to turn at this point, so use a pully bolt in the end of the crank to hang a closed end wrench off of. I like a wrench better than a socket drive as you can move the crank either direction w/o flipping any levers. It makes aligning it for the next piston/rod easy.
Install each piston/rod combo the same way, and then tourqe them all to specs.
Rotate the crank, noting it should turn, but will have some drag due to the piston rings and other friciton parts your dealing with. (Again, I'm assuming you have checked out all beaings for clearance already, and have hung the pistons in the motor w/o rings to make sure everything fits right? I did this 3 or 4 times on each motor to make sure it all goes together w/o any problems.) Besides, you can't plasti gauge with lube in there, and you have to tourqe each journal to check the clearance, then take it appart and clean out the plasti gauge.)
With the bottem end rotating assembly now done, next is the oil pump and drive. Make sure your oil pump bearings are in right, and the oil holes are in place. If not, they don't get oil, and your engine will die.
Lube the pump drive bearings, and the pump drive journals, and then carefully slip it into place. It is held with just one bolt. Check the clearance/play per the TSRM. Excessive play here is a bad deal. Lube on the pump drive gear is a good idea.
Your oil pump should be shimmed, and cleaned at this point. You need to have packed it with some assembly lube. (I reccomend shimming the bypass while you have the cover off the pump. Also clean the pump, I was supprised to find some machine debris inside of my new pump, right out of the box.) Packing the pump with some lube helps to prime it as well.
Lube the bronze drive gear, and slip the pump down into the block. Secure with one bolt. Secure the crossover tube and other fittings. Now you can set the depth of the pickup if you want. Measure the depth of the pan with a straight edge and tape measure. (Pan rails to sump depth.) Then measure up from the block rails and see how "low" your sump sits. With a careful hand and a pry bar, you can gently bend the sump "down" up so it's sitting lower in the pan when everything is together. This might make the sump slightly crooked, but who cares, it's now lower into the oil that will keep the engine alive longer. If you go too low, it will starve the motor however, so about 1/2" or 1.5mm is a good call. Keep in mind the screen is not the bottem of the sump pickup, so if the screen is almost touching, it's about right.
You need to put the front and rear covers on before you place the oil pan. this can be a PITA on the rear cover due to the engine stand. Be patient and make sure you seal everything up well. Leaks at the rear seal retainer would be even worse than taking your time now. so do it right.
With the front and rear covers in place, you can put the oil pan on if you want. If you choose not to, it makes dropped nut/bolts easy to get. (They fall to the floor v/s falling to the inside of a freshly sealed up oil pan.) I personally like to wait to put the pan on untill I have the head in place at a minimum.
With the 7M, you want to put the pipe on before you place the head. Use new hoses and worm clamps. Use sealer where any metal to metal gasket would go. The paper gaskets from the kits are WORTHLESS.
Put your knock sensors in place. Put your oil pressure sensor in place, and lightly coat the threads with sealant. Put the oil pump drive sprocket on. (Easy to do as you can hold the drive shaft since you don't have an oil pan on yet...)
Put the cam belt drive in place. Lube all seal surfaces so you don't tear a seal.
BTW, before you put the front cover on, clean both surfaces and run beads of right stuff where the cheapo paper gaskets would have leaked. Then place the cover and tourqe it down per TSRM. There are a few studs, and bolts, and I used new everything here possible. No leaks is the goal. Care around the studs/bolts that go into the block cooling passges will result in NO leaks. No care and sealant here will result in the mystery leak of huge proportions and much swearing and cursing will not fix it. (Only tear down and use of sealant v/s the shitty paper gaskets will resolve this.) Same goes for the water pump. You can put the pump on while it's on the front cover. There are a few shared bolts/studs, but no need to take the pump loose if you do not need to. (Oh, like on engine #4 for example on the same pump inside of the same 18 month period of time...)
Now comes the head.
And I'll finish this later.